I. Intro
BotBuilder features a visual tool for building bot apps, enabling users with no coding experience to create bots and design flows based on their needs.
With BotBuilder, a wide variety of messages—such as organization announcements, event registrations, sale strategies, and data reports—can be sent to individuals or groups based on their identities. There's no need to switch between systems because it can all be done in one place. You can also connect BotBuilder with other Lark functions—such as Base, Contacts, Approvals, and Group—to automate daily tasks such as onboarding new employees, work anniversary reminders, and work order submissions.
Note: A bot is a type of app running on Lark. To learn more about bots and other app types, see App types in Lark.
II. Steps
- Create an app
From a template
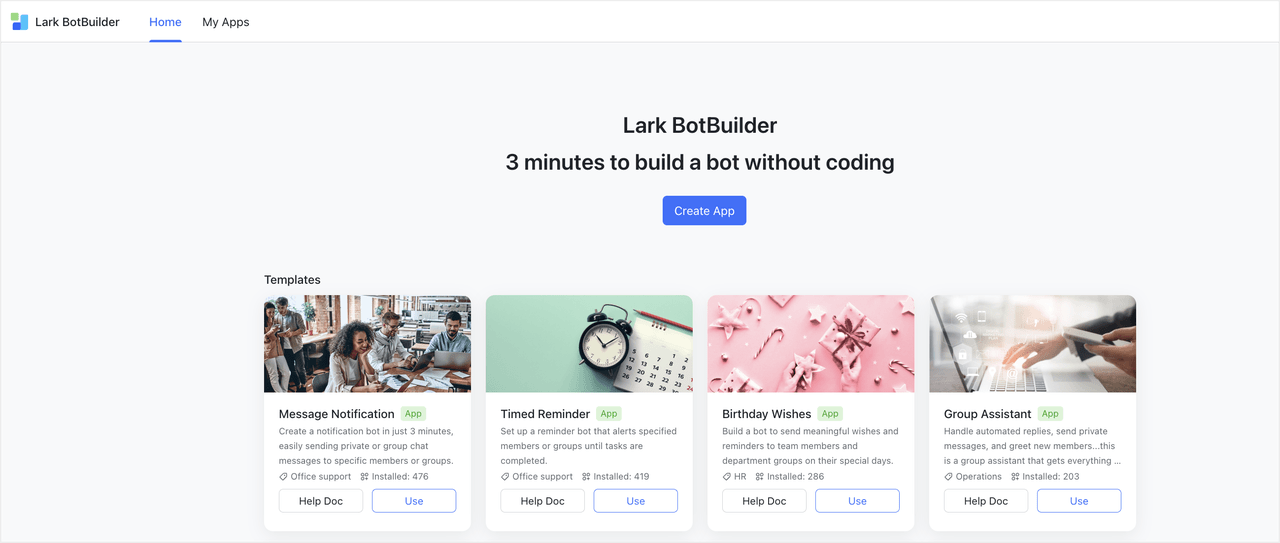
Go to My apps, click Use on the template you need, and configure the settings according to your needs.
250px|700px|reset

From scratch
You need to provide the following:
- App name: the name of the app
- App description: information displayed beneath the app name.
- App icon: choose one of the default icons or use a custom icon.
- Configure flow design
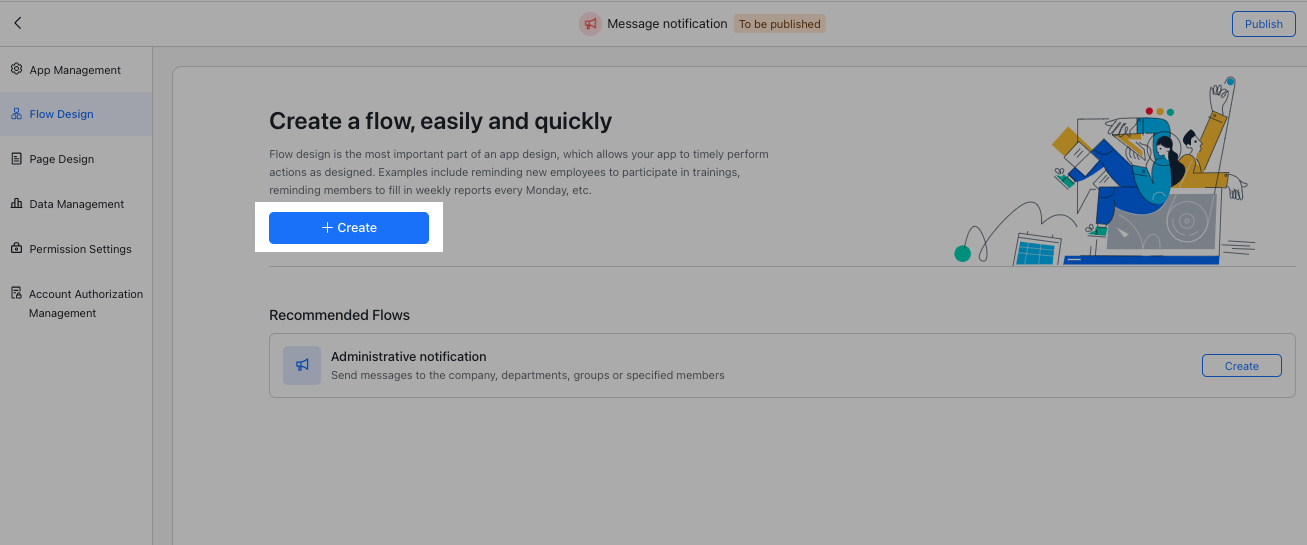
After creating an app, you will be automatically redirected to the Flow Design page. Users can create one or more flows, where each workflow should include at least one trigger node and one action node.
Note: If you are creating the app from a template, related flows are automatically created, which can be directly edited and enabled.
2.1 Select trigger
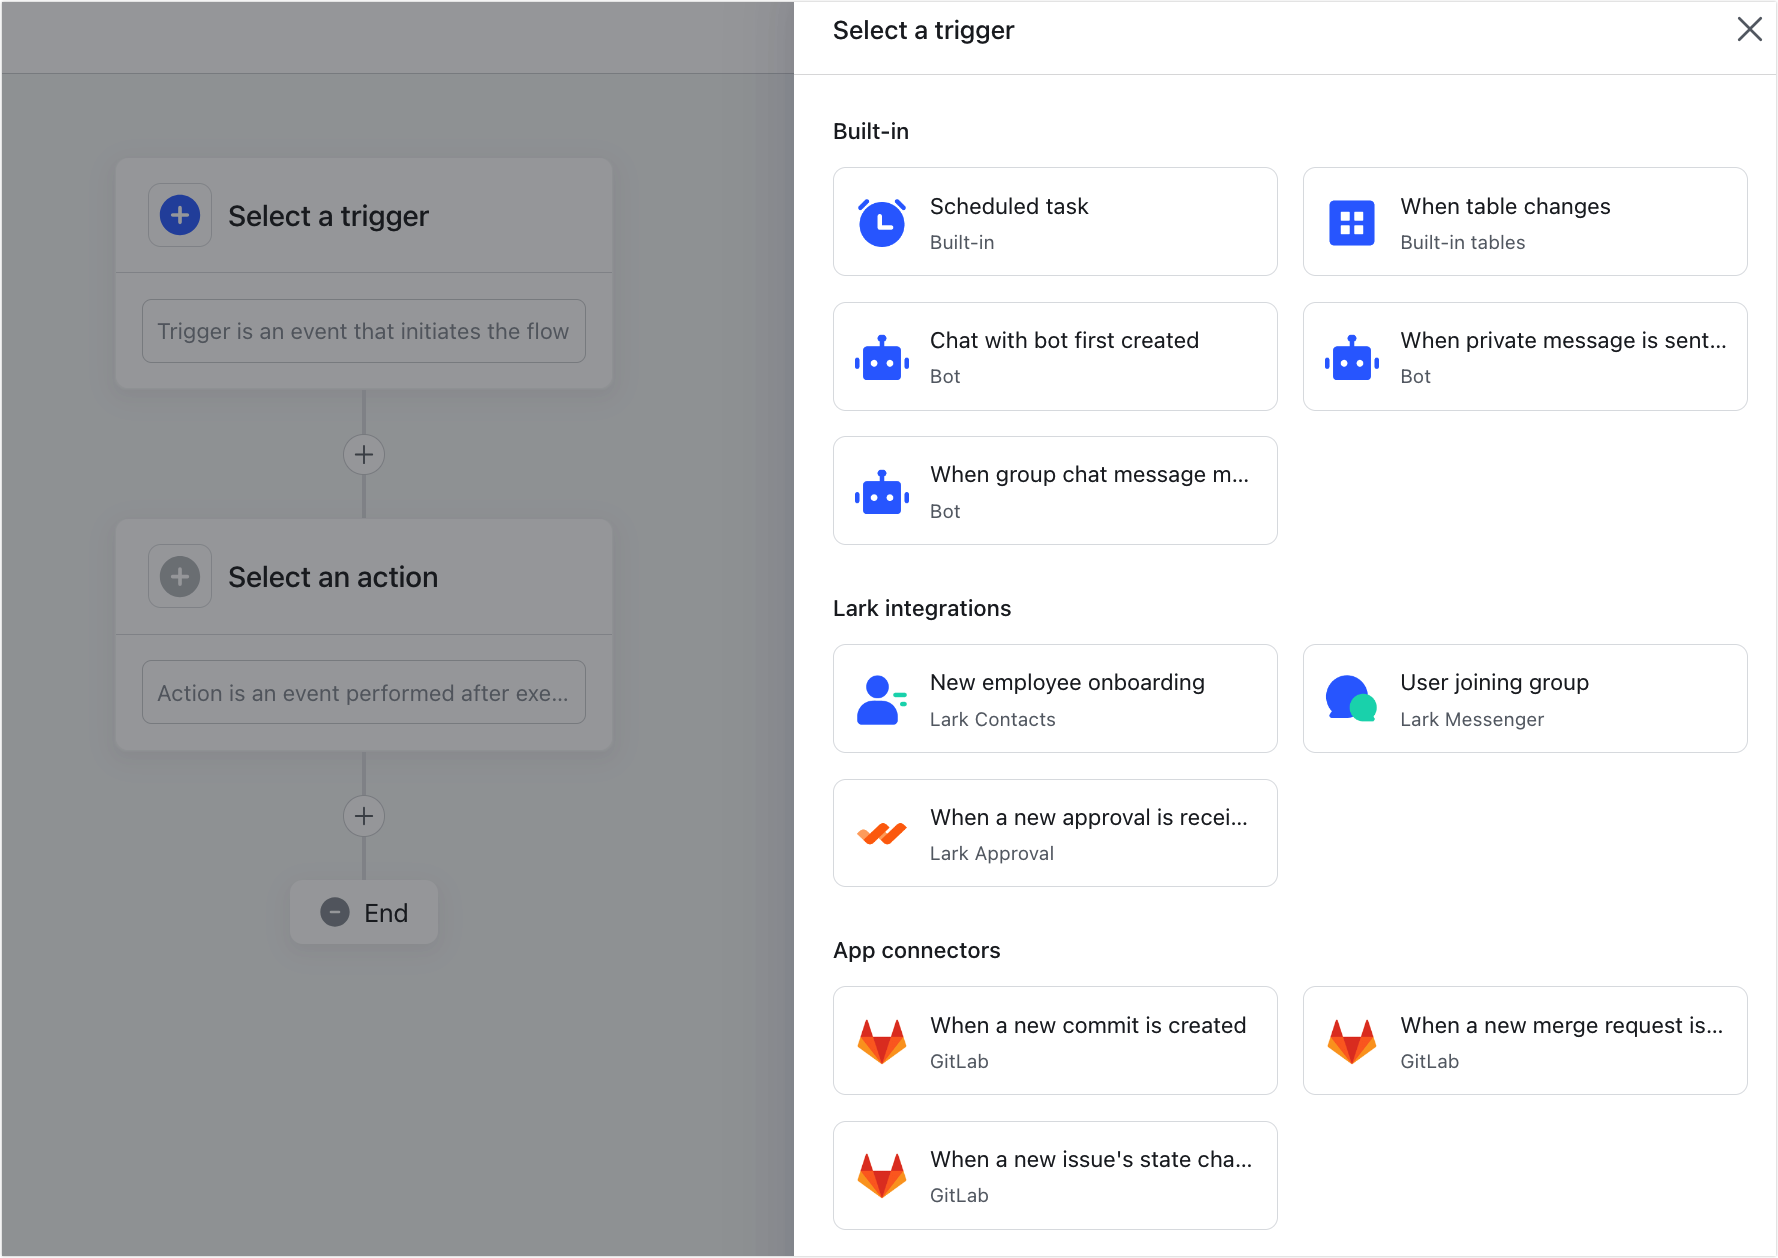
On the Flow Design page, click Create to create a flow. When creating a flow, you must first determine a trigger. Three trigger types are available: Built-in, Lark integrations, and App connectors.
250px|700px|reset
250px|700px|reset
2.2 Configure actions
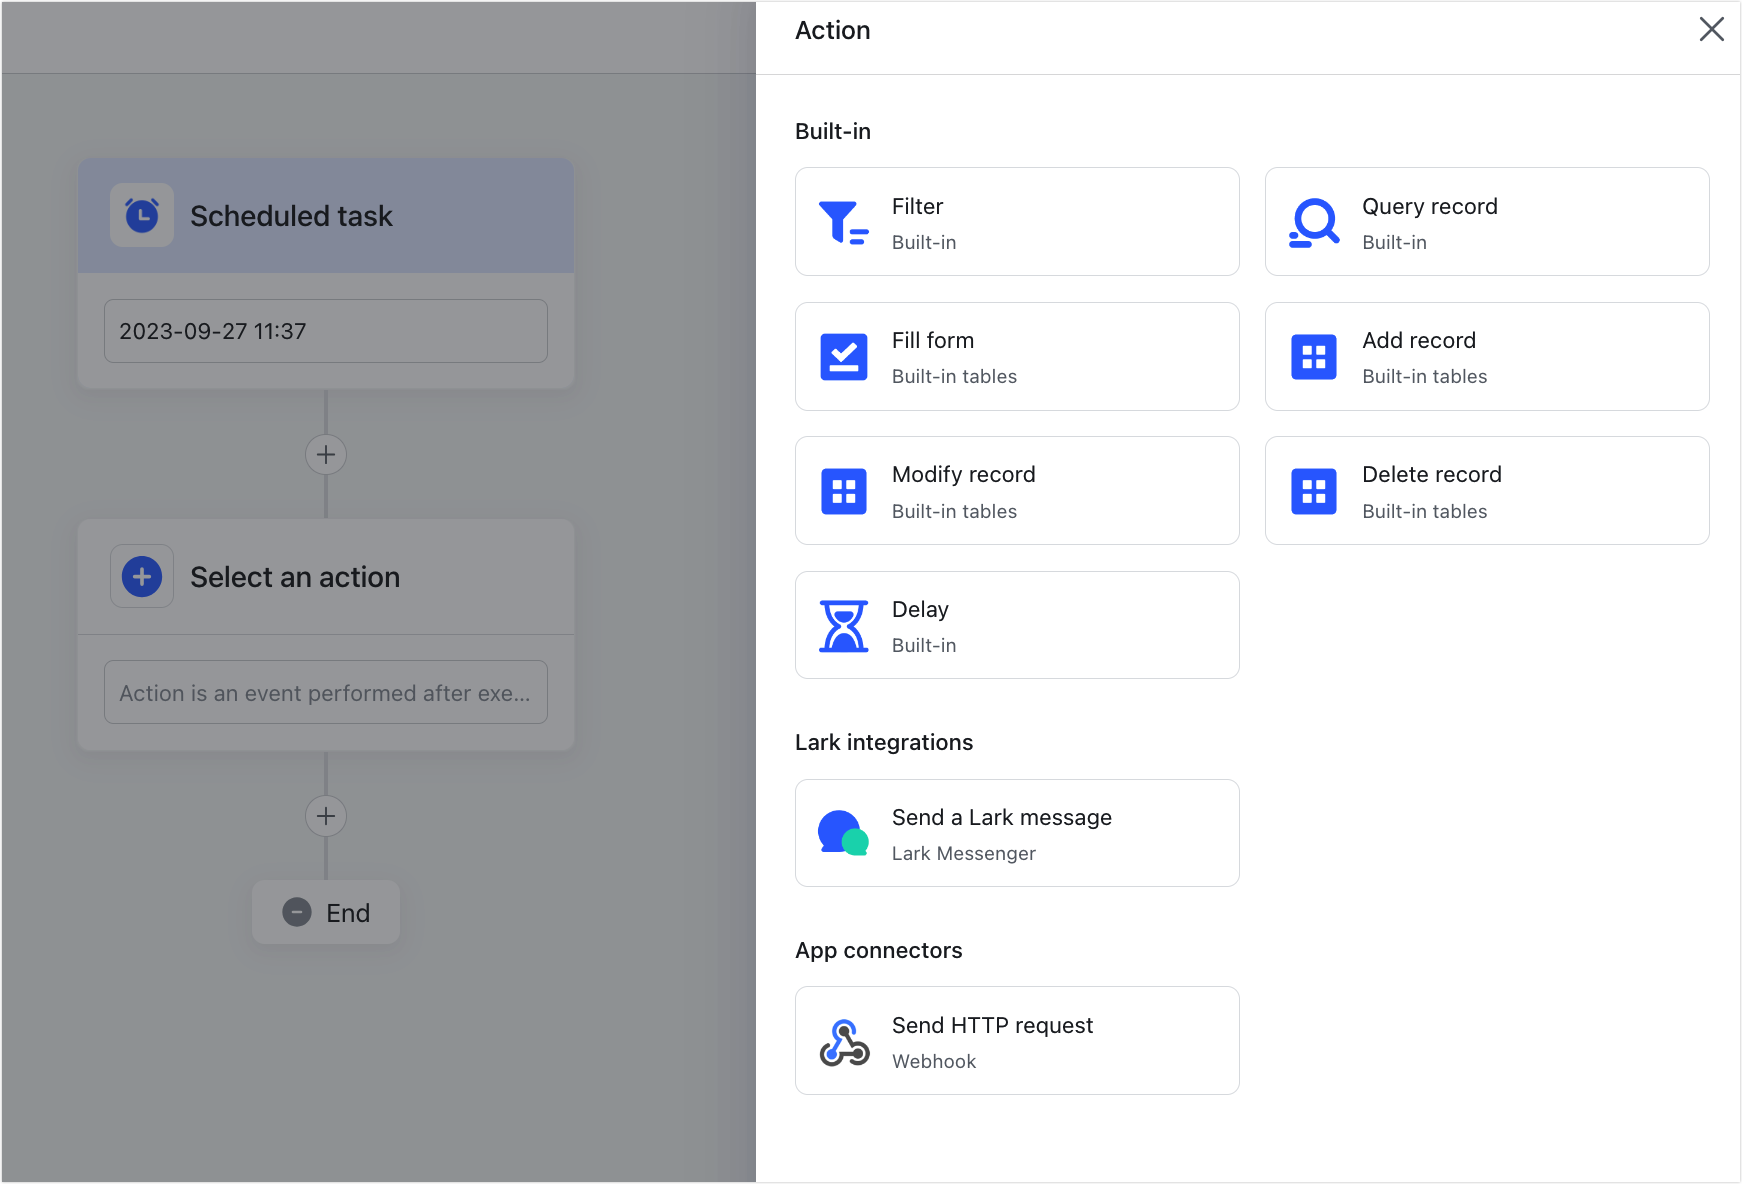
Action nodes determine the action taken when a trigger fulfills certain conditions. Three action node types are available: Built-in, Lark integrations, and App connectors.
250px|700px|reset
- Managing apps
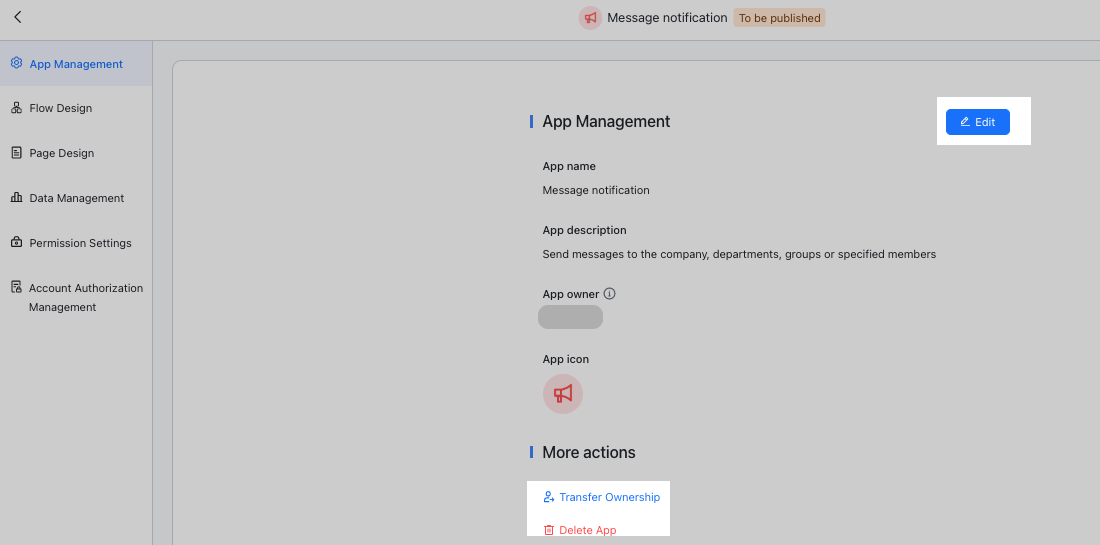
On the App Management page, you can edit the app's basic information, permission settings, and availability scope. You can also transfer the app's ownership or delete the app.
250px|700px|reset
- App information
Click Edit next to App Information to customize the app's name, description, and icon.
- Permissions and Subscriptions
This section shows the permissions that the app has already been approved for along with its subscription information.
- Availability scope
Click Edit next to Availability Scope to set who can receive messages from the bot.
Note: If a message is meant to be sent to a specific member, please make sure that they are within the app's availability scope. If the recipient is a group, go to the group and click the ... icon > Settings > Group Settings > Posting permission settings to make sure that everyone in the group can send messages, otherwise the flow will fail.
- Transfer app ownership
- Transfer ownership by app owner: Click Transfer App Ownership, search for a member and click Transfer to transfer ownership of the app. After you transfer ownership, you become an ordinary app administrator.
- Automatic transfer by system: App ownership will transfer to a direct supervisor when an app owner leaves the organization. Organization administrators can also manually specify who receives ownership of an app.
- Delete an app: Click Delete App. Confirm the action in the confirmation window. Only app owners can delete apps (each app has one owner, which is the app creator by default). Apps cannot be deleted by other administrators. Deleted apps will disappear from Bot App, Admin Console, and Lark.
Note: You can only delete unpublished or disabled apps. If an app is still enabled, you must ask an administrator to disable the app before deleting it.
- Flow Design
Flow Design lets users design flows and every flow must include at least one trigger and one action.
Page design
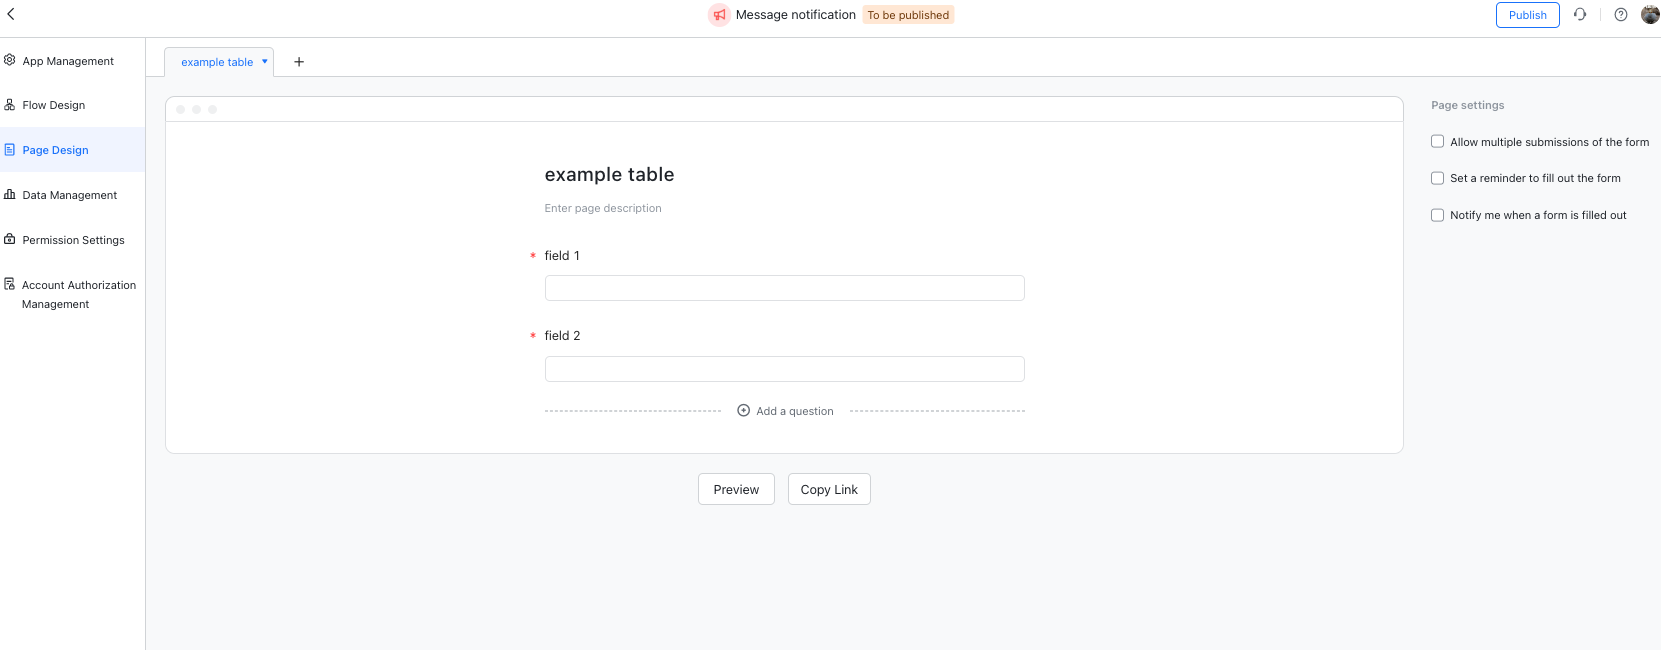
Pages are the front-end input interface used by end users and can be used to gather information and feedback.
250px|700px|reset
Add a question: Click Add a question at the bottom of the page. Use the drop-down list to select the question type you need. The question type determines the type of information someone can submit.
Question design: Click a question to edit its design. The actions you can take include:
- Selecting a question type.
- Determining whether or not a question is required.
- Deleting a question.
- Dragging a question to another position.
Note: Each page must contain a minimum of one question. If there are multiple questions, you can not delete the first question.
Page settings: On the right-hand side, you can configure the following:
- Allow multiple submissions of the form
- When selected, the same member can submit the form multiple times.
- Set a reminder for members to fill out the form
- When selected, the recipient will receive a notification at a set time reminding them to complete the form.
- Notify me when a form is filled out
- When selected, recipients receive a notification when someone submits a form.
- Data Management
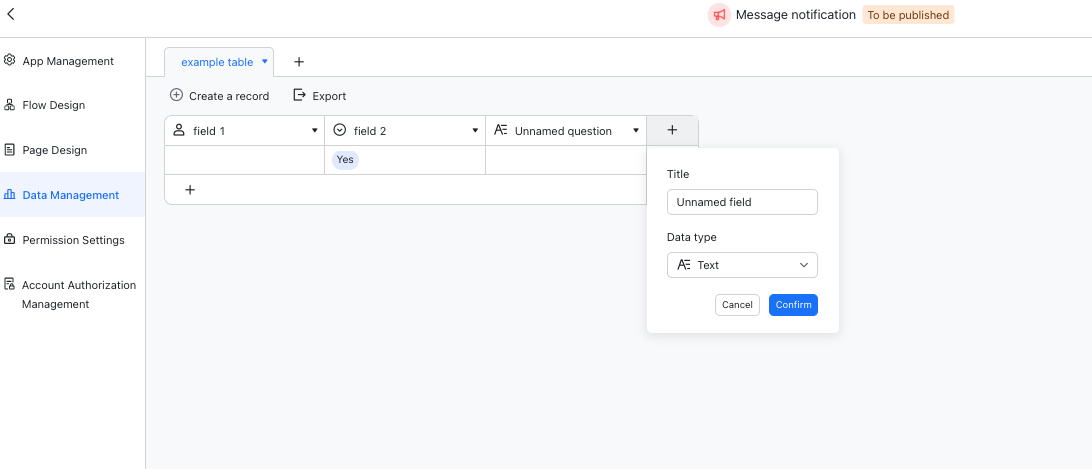
The Data Management page is the data center of the app and is where all of the app's data is stored and managed. Here you will find all data related to the app. All data submitted is recorded and displayed in the data table.
250px|700px|reset
Fields are the columns of the data table. Click the + icon in the upper-right corner of the data table to add a new field. You can set the field name and type. You can also decide whether or not to sync the new field to the relevant page in Page Design.
Note:
- Only users with data editing permission can enter and modify records. You can change permissions in Permission Settings.
- When a field type is modified, all record values which do not conform to the new field type will be reformatted or cleared.
- Permission Settings
Permission settings allow you to grant App Design and Data Management permissions to different users as needed.

250px|700px|reset
Role management
The app creator is the app administrator by default. This role has all permissions and cannot be modified.
Click New role in the upper-right corner to create a new role. You can determine the app design and data management permissions for a new role when you create it. Available data permissions include read-only or edit permissions for a single table. If a role only has app design permissions, the role will be able to view the field settings in a table but not the actual data.
Member management
Members can be added to and removed from each role. You will need approval when you add members outside the app's availability scope.
Note: Each administrator role must have at least one member.
- Account Authorization Management
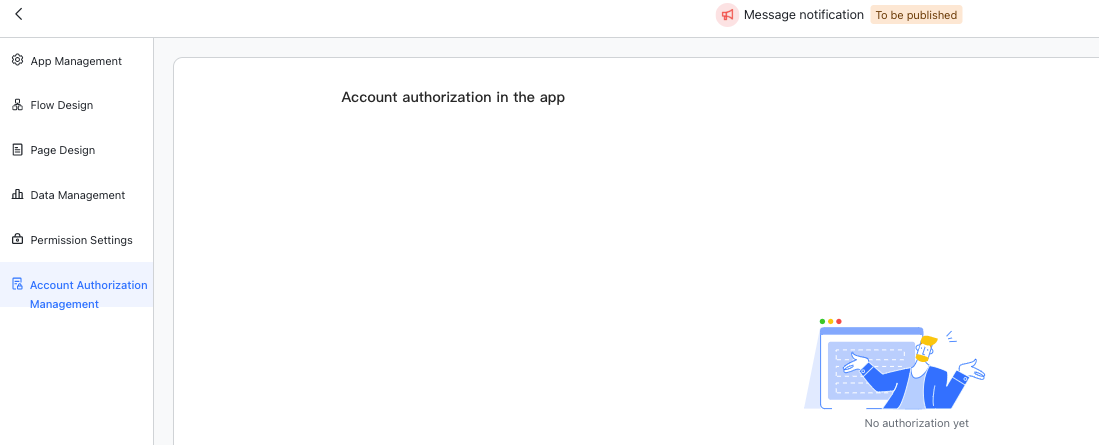
On the Account Authorization Management page, you can view all the third-party apps integrated with the bot flows, including the app name, account, authorization time and all flows integrated with each third-party app.
Only the third-party app account owner can deactivate an app. Once an app is deactivated, all relevant flow nodes will be invalid.
250px|700px|reset
- App Publication
After completing the configurations above, you can click Publish in the upper-right corner to proceed to the app Publication page.
On the App Publication page, you can view your organization's App review rules and the review process for the current app release. You need to provide detailed reasons under Reason for application for all newly applied permission scopes and availability. This can assist administrators in making judgments and boost review efficiency.
Clicking the Publish button will automatically release the app if no approval is required. If approval is required, the app will be published after it is approved by an administrator.
Bot Apps created on BotBuilder are essentially self-built applications on Lark. Like other self-built applications, the availability scope and permissions of bot apps need to be approved by administrators.
8.1 Permission scopes
Some apps need permission to function as intended. Permissions and scopes are added as the user configures the app, and shows the permissions that require approval。
You can check which permissions require review, along with the corresponding flows. You can also customize the permission settings, where recommended permissions are enabled by default. Users will be able to manually disable these permissions. Optional permissions are disabled by default, and users can manually enable them.
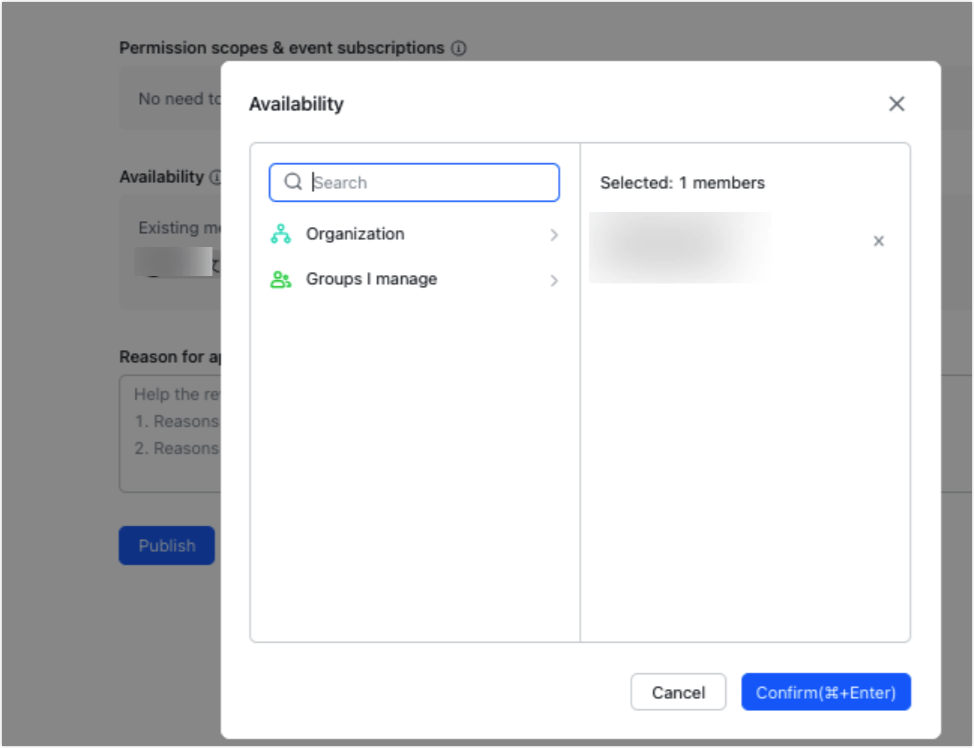
8.2 Availability
Availability refers to the users that can use the app. Users added here can perform the following actions:
- View and search for the app.
- Receive messages sent from the app.
The app creator can configure the app's availability. We recommend adding all departments and members who may need to view the app. You also add departments and members at a later time.
250px|700px|reset
Note: In most companies, adding members and departments must be approved by the organization administrator. After approval, the app will function normally.
8.3 App approval
When you submit an app that requires approval, the app's status changes to App under review. Permissions that require approval are marked as pending. You can also click Revoke Publication at the bottom to cancel your request. You can view the review process along with its current progress. You can also click Revoke Publication at the bottom to withdraw the publication request.
Note: To avoid multiple approval requests due to triggering the organization's app approval rules, we recommend changes are completed and published together.
III. FAQs
