I. Intro
Who can perform these steps: Primary administrators or administrators with Meeting Rooms permissions.
Lark Rooms integrates meeting software, hardware support, and worry-free services into one, providing a comprehensive solution that brings efficient and enjoyable meeting experiences to your organization.
II. Steps
To get Lark Rooms to work, you need to deploy Lark Rooms, bind the Lark Rooms app with a physical meeting room, and pair it with the Lark Rooms Room Controller app.
- Prepare for deployment
1.1 Add meeting rooms in the Lark Admin Console
- Open the Lark Admin Console and go to Meeting Rooms > Room Management.
- Do either of the following:
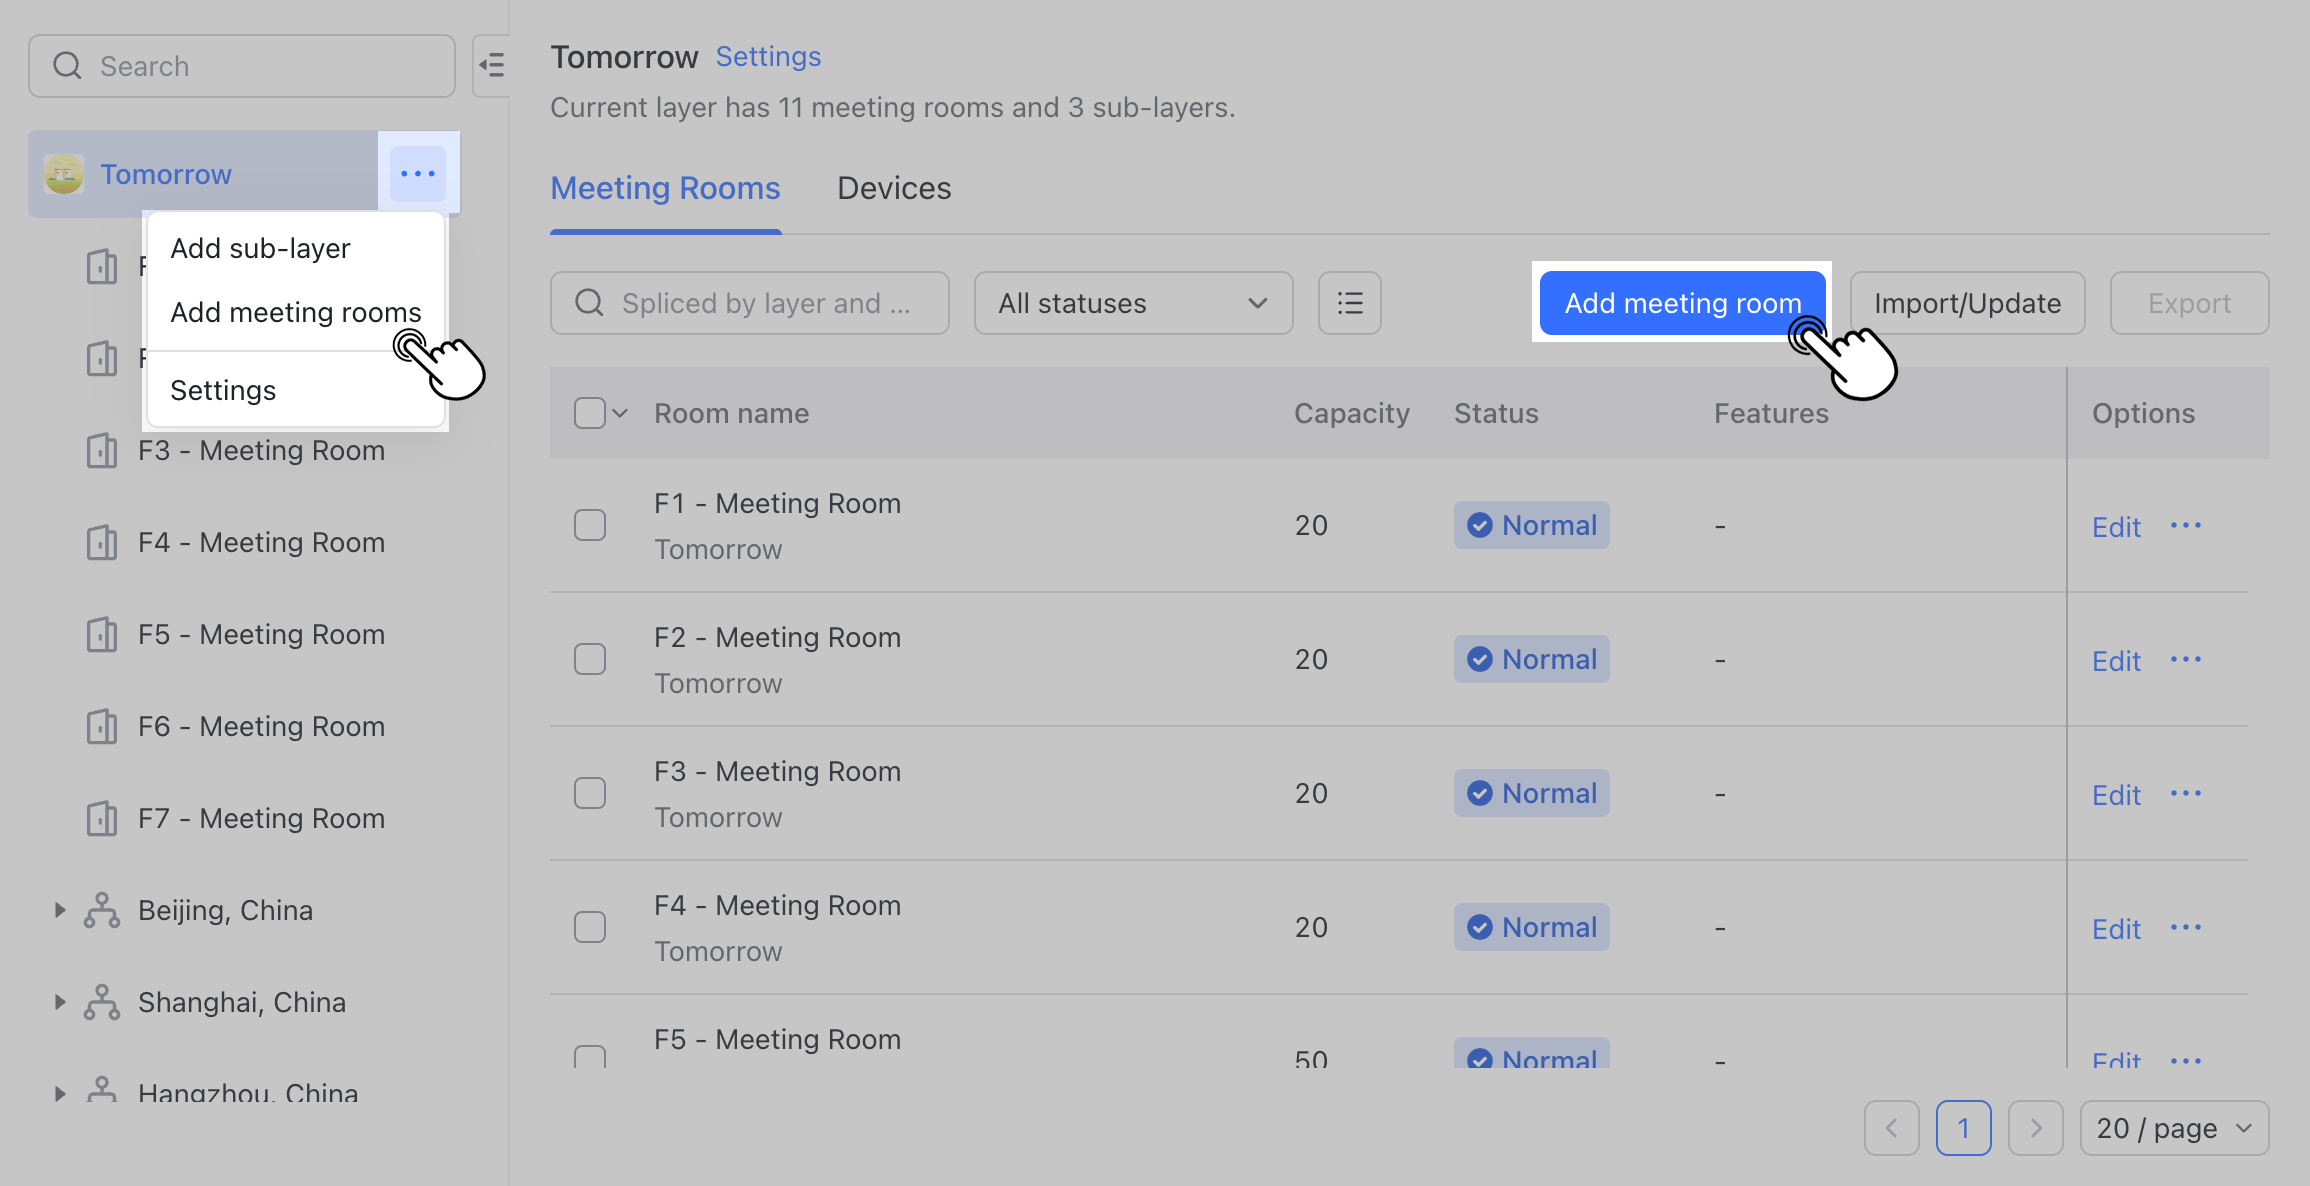
- In the meeting room hierarchy list, click the ··· More icon next to the organization or layer name > Add meeting room.
- Click a layer to show its details, then click Add Meeting Room.
- Enter the meeting room information accordingly in the pop-up window to create a new meeting room, which should correspond to the offline meeting room.
250px|700px|reset
1.2 Configure Rooms deployment permissions
Organization primary administrators and meeting room administrators automatically have meeting room deployment permissions, and can also assign deployment permissions to other members of the organization.
As an administrator, you can choose to assign long-term deployment permissions to deployers or generate an access code used for temporary deployment as needed.
- Open the relevant meeting room details page in the Lark Admin Console.
- Click Deployment permissions > Settings to add a deployer. To learn more, see Admin | Configure deployment permissions.

250px|700px|reset
1.3 Prepare the hardware
To guarantee your Lark Rooms user experience is smooth, please ensure your meeting rooms are equipped with the following hardware devices before deployment:
- Meeting room host computer (with internet connection)
- Screen, tablet, speaker, microphone, and other devices.
Besides, pay attention to the following tips:
- Make sure all peripheral devices are connected and powered.
- Prepare a USB wired keyboard and mouse for the deployment process.
- Make sure that the host computer and tablet have the same time zone, date and time, and language settings.
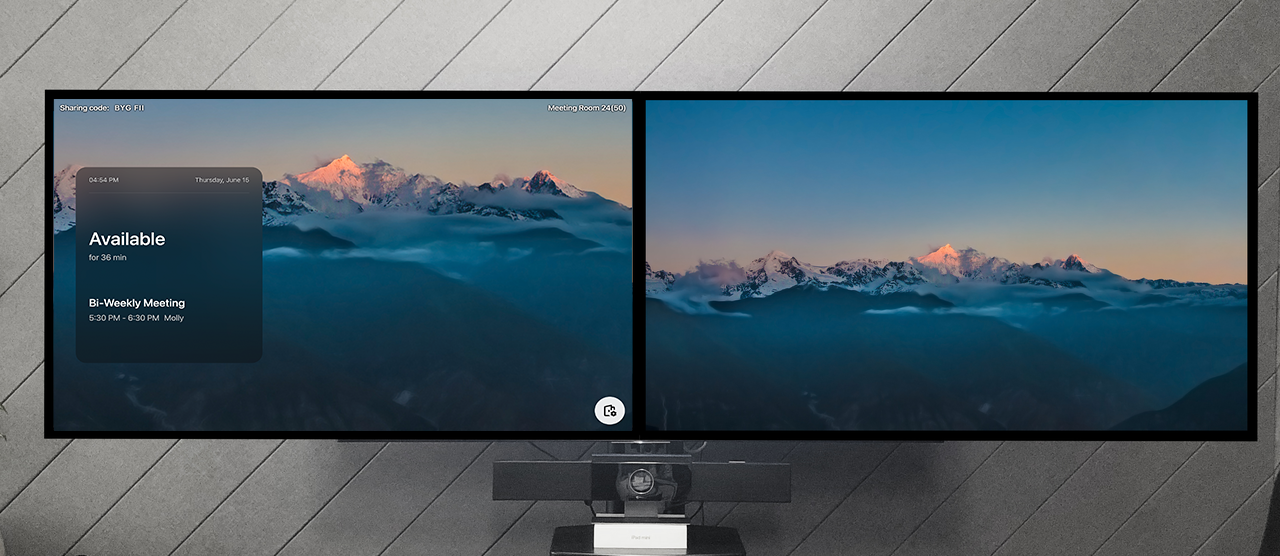
- If the meeting room has two screens, check if they are in extended mode, where one screen shows the schedule, and the other screen shows only the background image.
250px|700px|reset
1.4 Install the app
Download and install the Lark Rooms app on the meeting room host computer, and download the Lark Rooms Controller app on the tablet.
2. Associate online rooms with physical rooms
On the meeting room host computer
Use either QR code or access code to associate a meeting room with a physical room.
Method 1: Scan the QR code
Open the Lark Rooms app. You'll see the administrator verification page. Scan the QR code using your Lark mobile app logged in to an account with deployment permissions. Select the meeting room you want to associate in your Lark mobile app and tap Associate. After the meeting room is associated, the monitor in the room will show a 6-letter pairing code.
Method 2: Enter the access code
Open the Lark Rooms app. You'll see the administrator verification page. Click Enter access code and enter your access code to verify your identity. Select the meeting room you want to associate with and click Associate. After the meeting room is associated, the monitor in the room will show a 6-letter pairing code.
On the meeting room controller
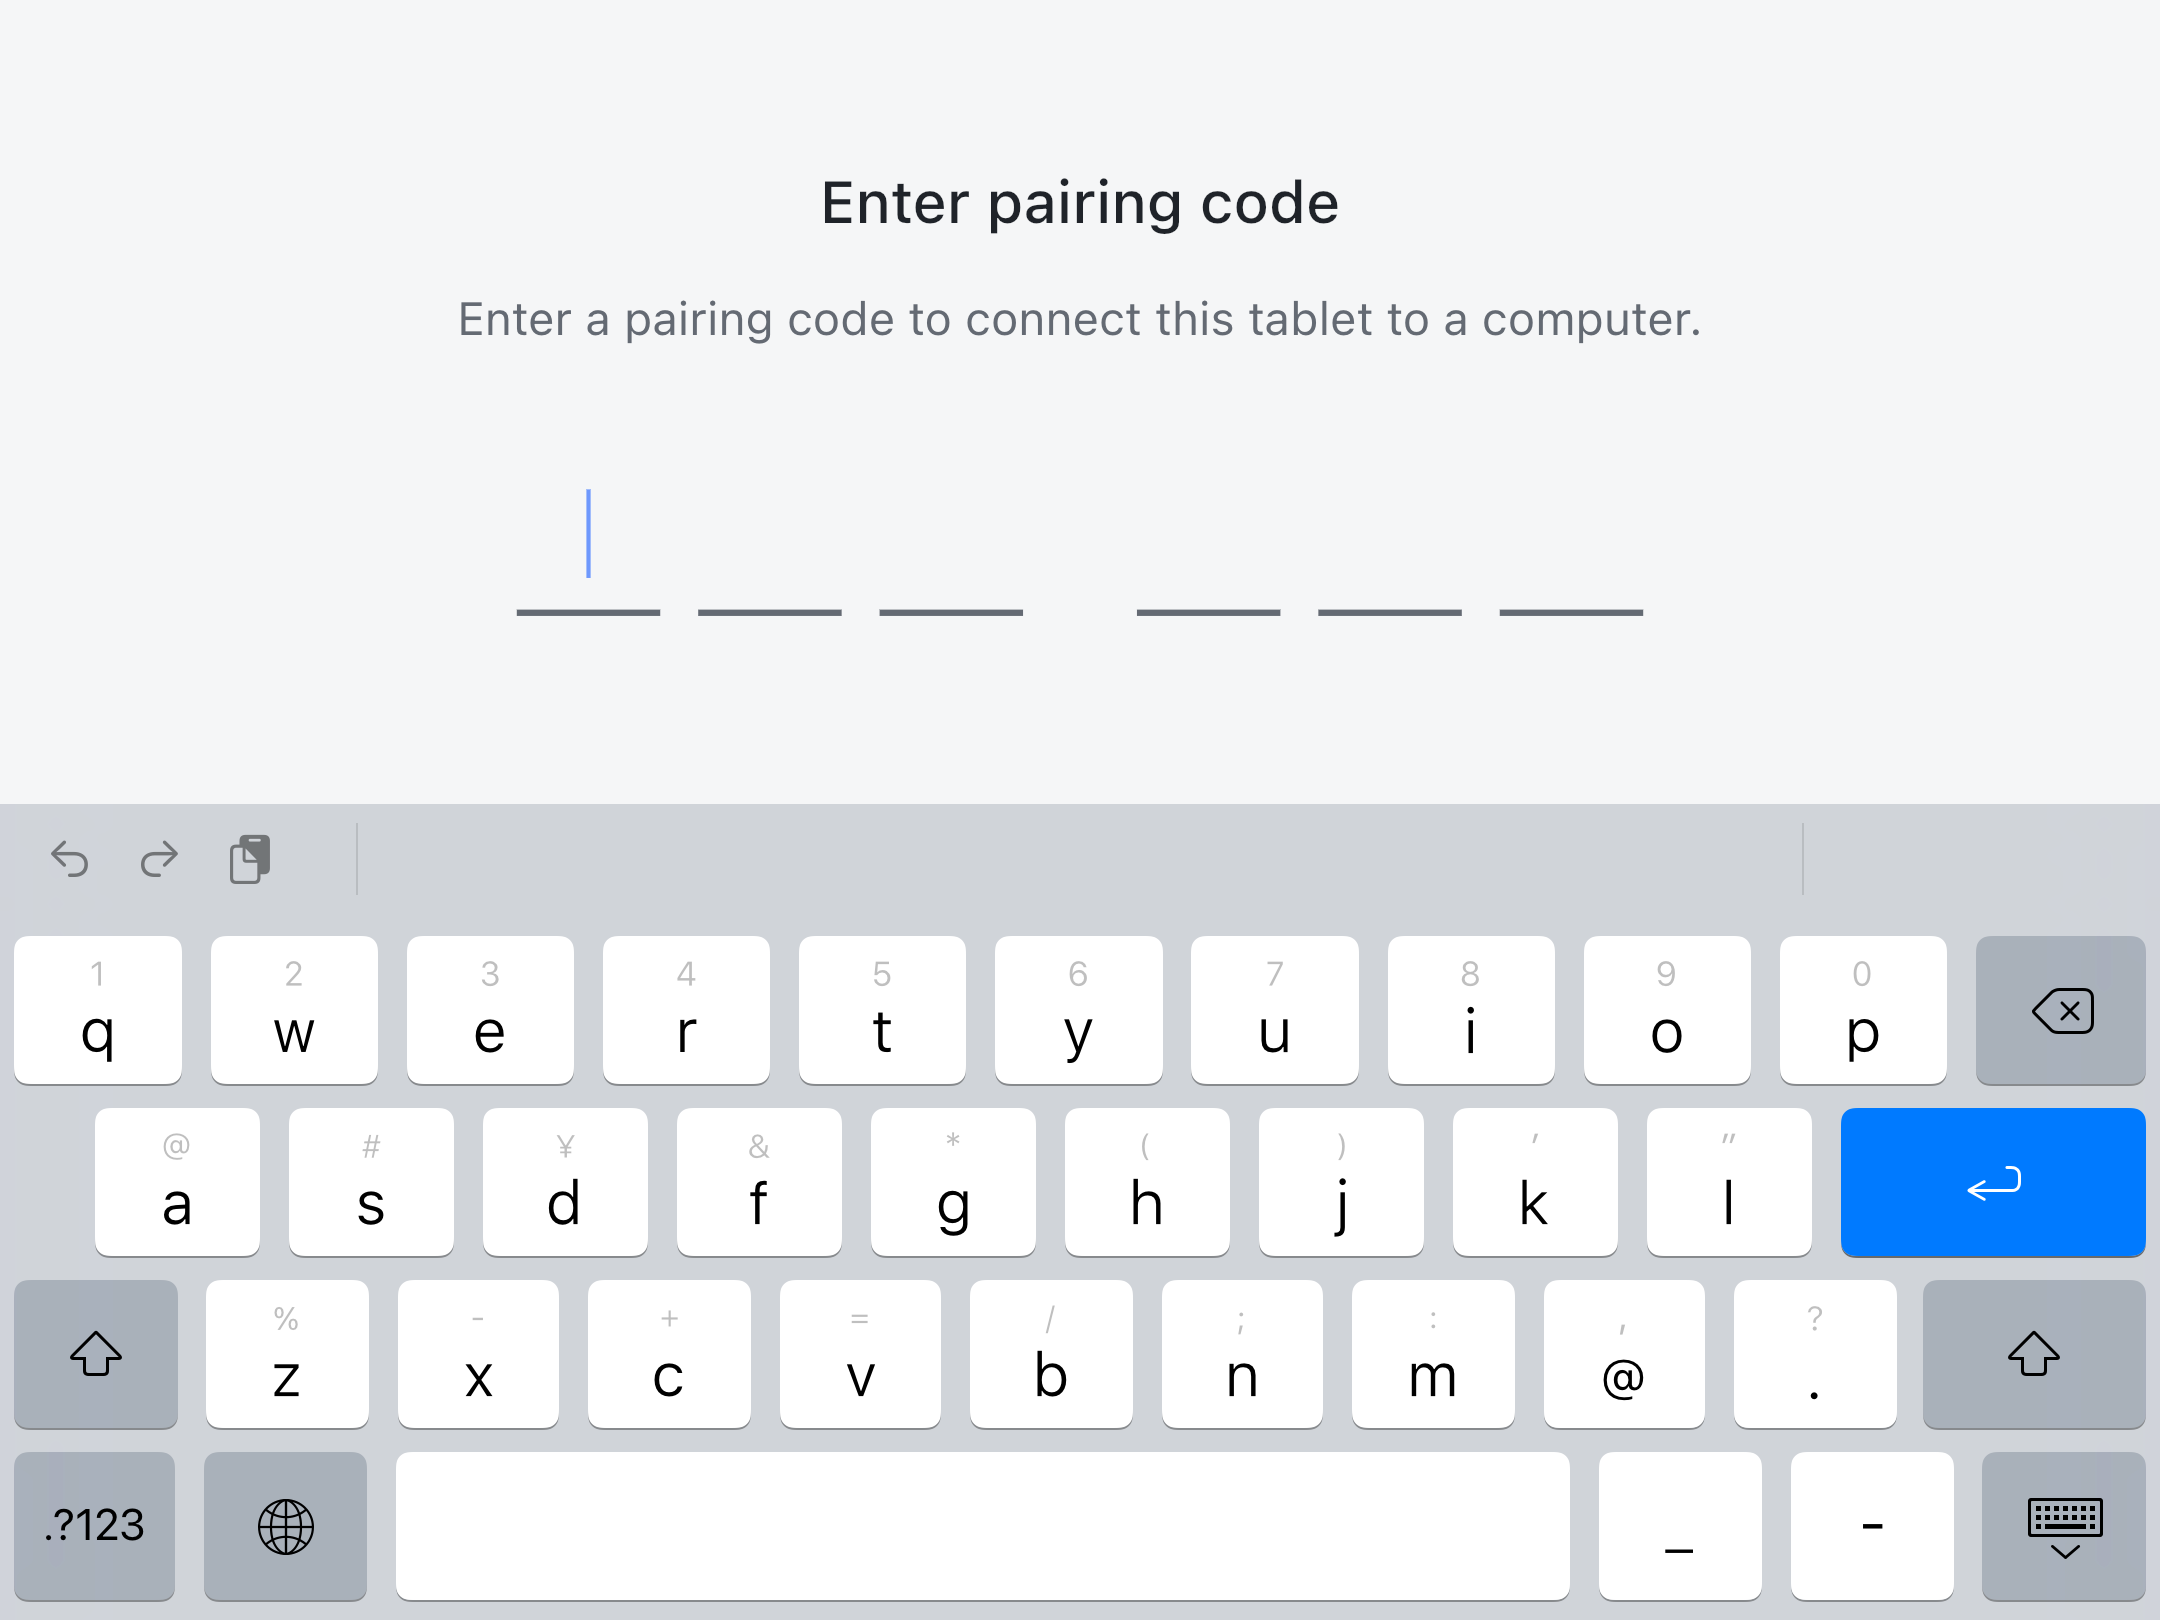
Open the Lark Rooms Controller app on the controller. Enter the 6-letter pairing code shown on the offline meeting room monitor.
250px|700px|reset
Note: If the pop-up message "Controller" would like to find and connect to devices on your local network appears on the controller, tap OK to complete the pairing process.
- Authorize meeting room devices
Once a meeting room has been deployed, you must authorize devices in Lark Admin Console to enable them.
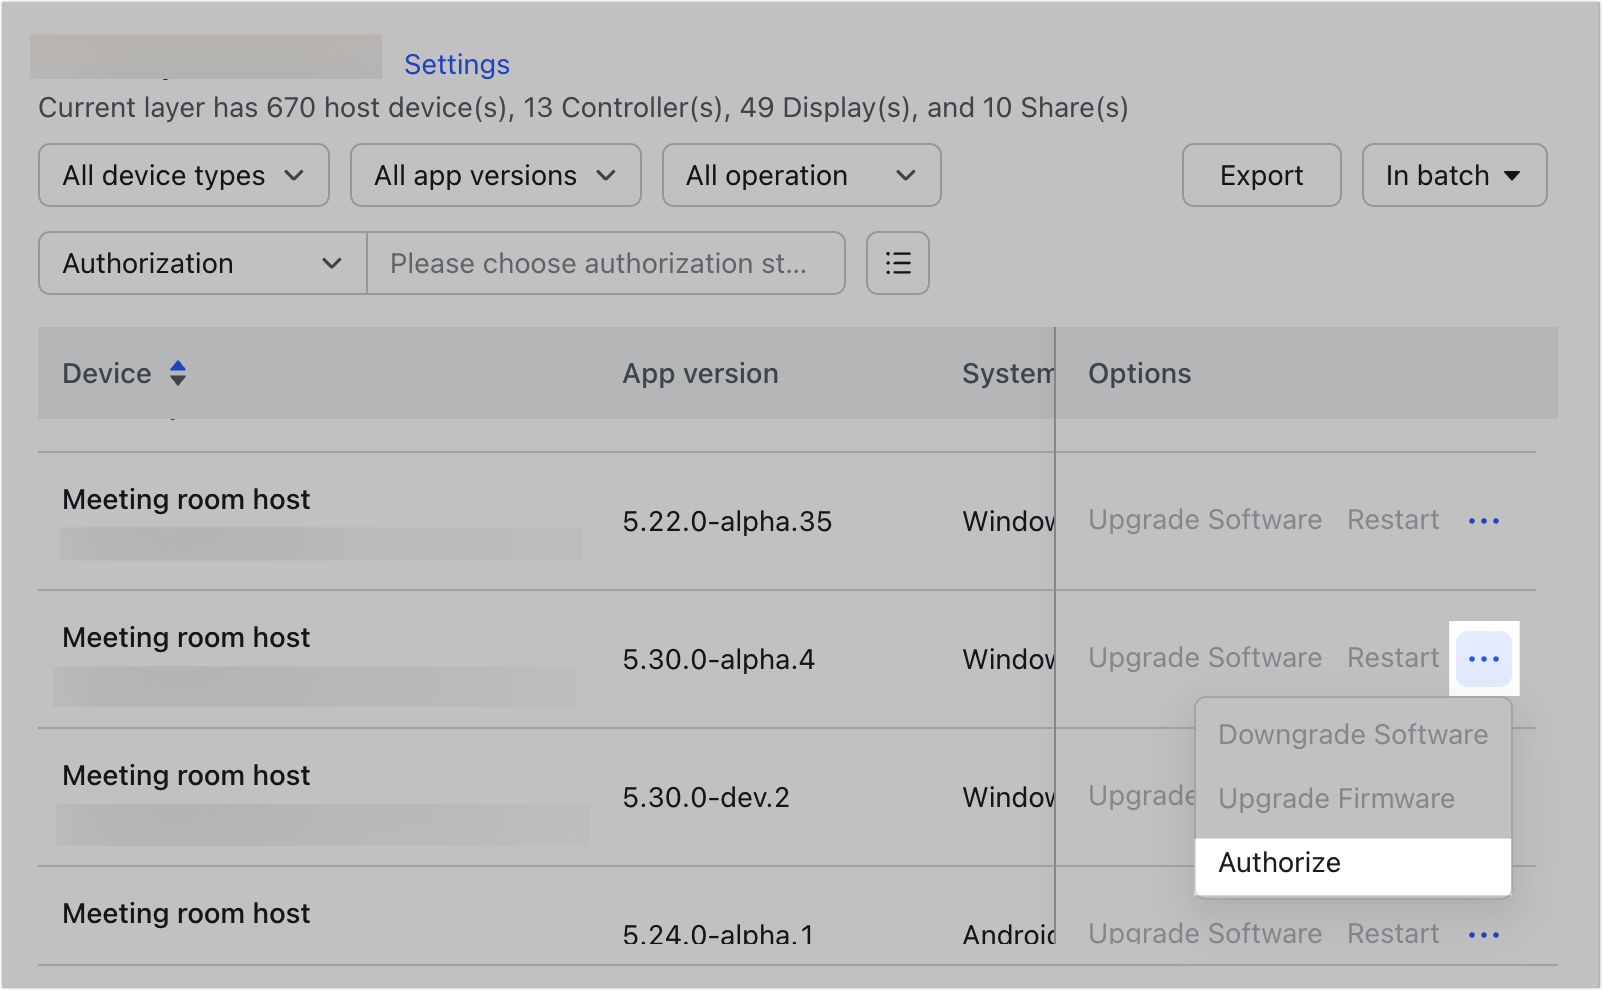
- Open the Lark Admin Console and go to Meeting Rooms > Device & Operation > Device List.
- Click the ··· More icon > Authorize on the right side of the corresponding device
- Select the corresponding license attribution under Authorized.
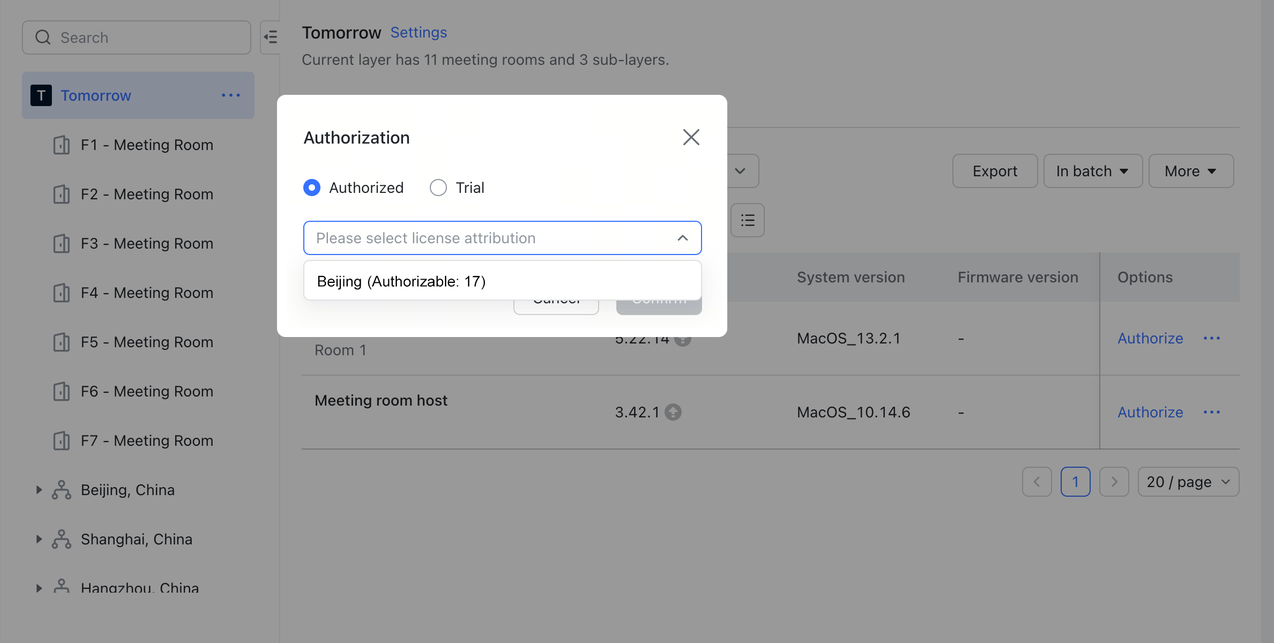
250px|700px|reset
250px|700px|reset
- Settings after association
Check information displayed
After pairing is complete, the room controller should display the date and time, meeting room name, schedule for the day, and the buttons of New meeting, Join Meeting, and Share Screen. The meeting room monitor should display the meeting room name, date and time, a sharing code, and the schedule for the day. Make sure that the information displayed on the room screen and room controller is the same.
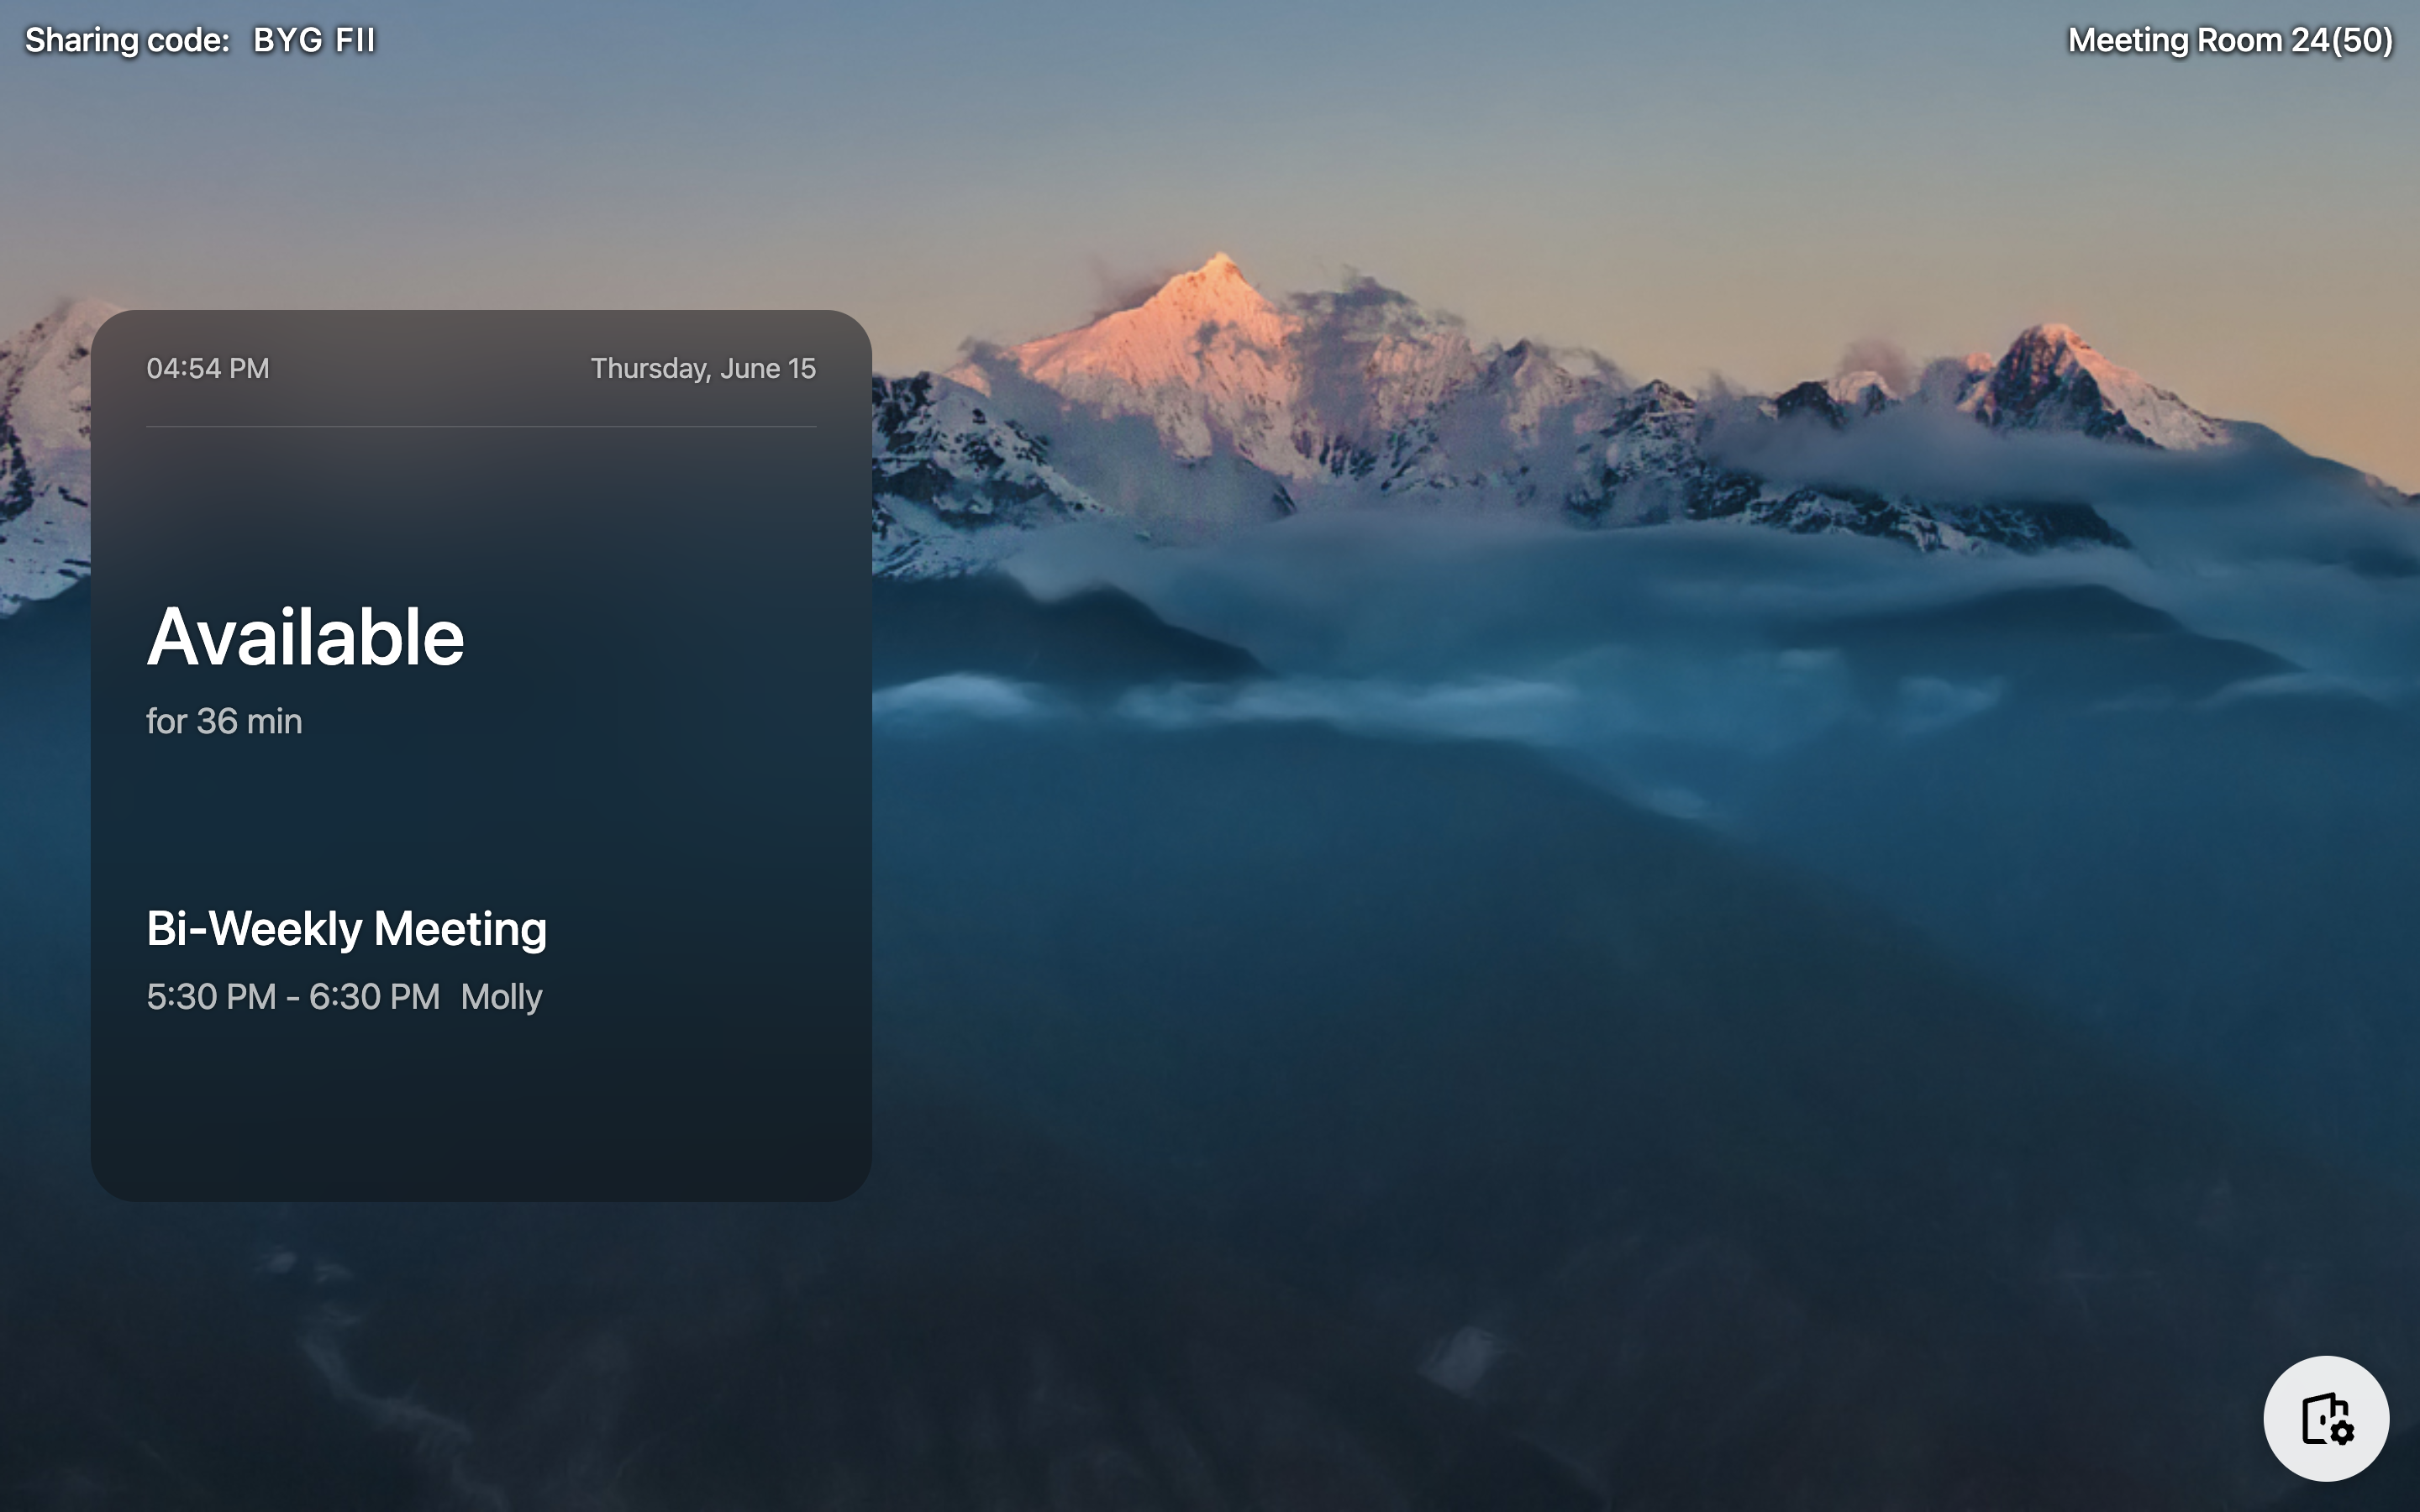
250px|700px|reset
Check the app version
On the controller, tap the Settings icon in the upper-right corner > About. Check if the correct version of the Lark Rooms app and the Lark Rooms Controller app were installed. If the version is incorrect, delete the app and install the correct version.
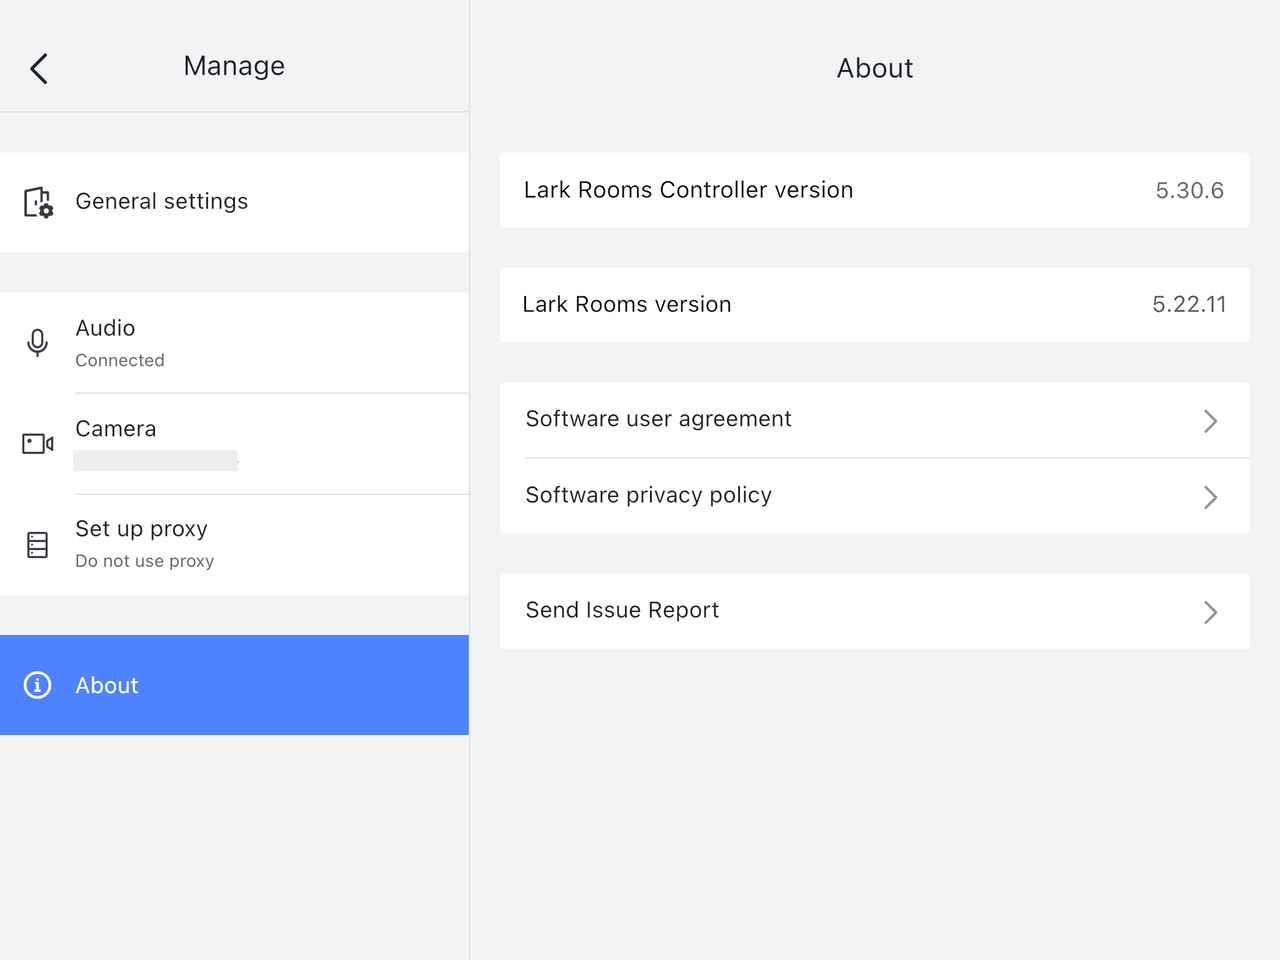
250px|700px|reset
Audio and video settings
You can modify the audio and video device settings on either the controller or host computer. The settings at both ends will be synchronized in real time, and the most recent changes will overwrite the previous settings.
On the controller
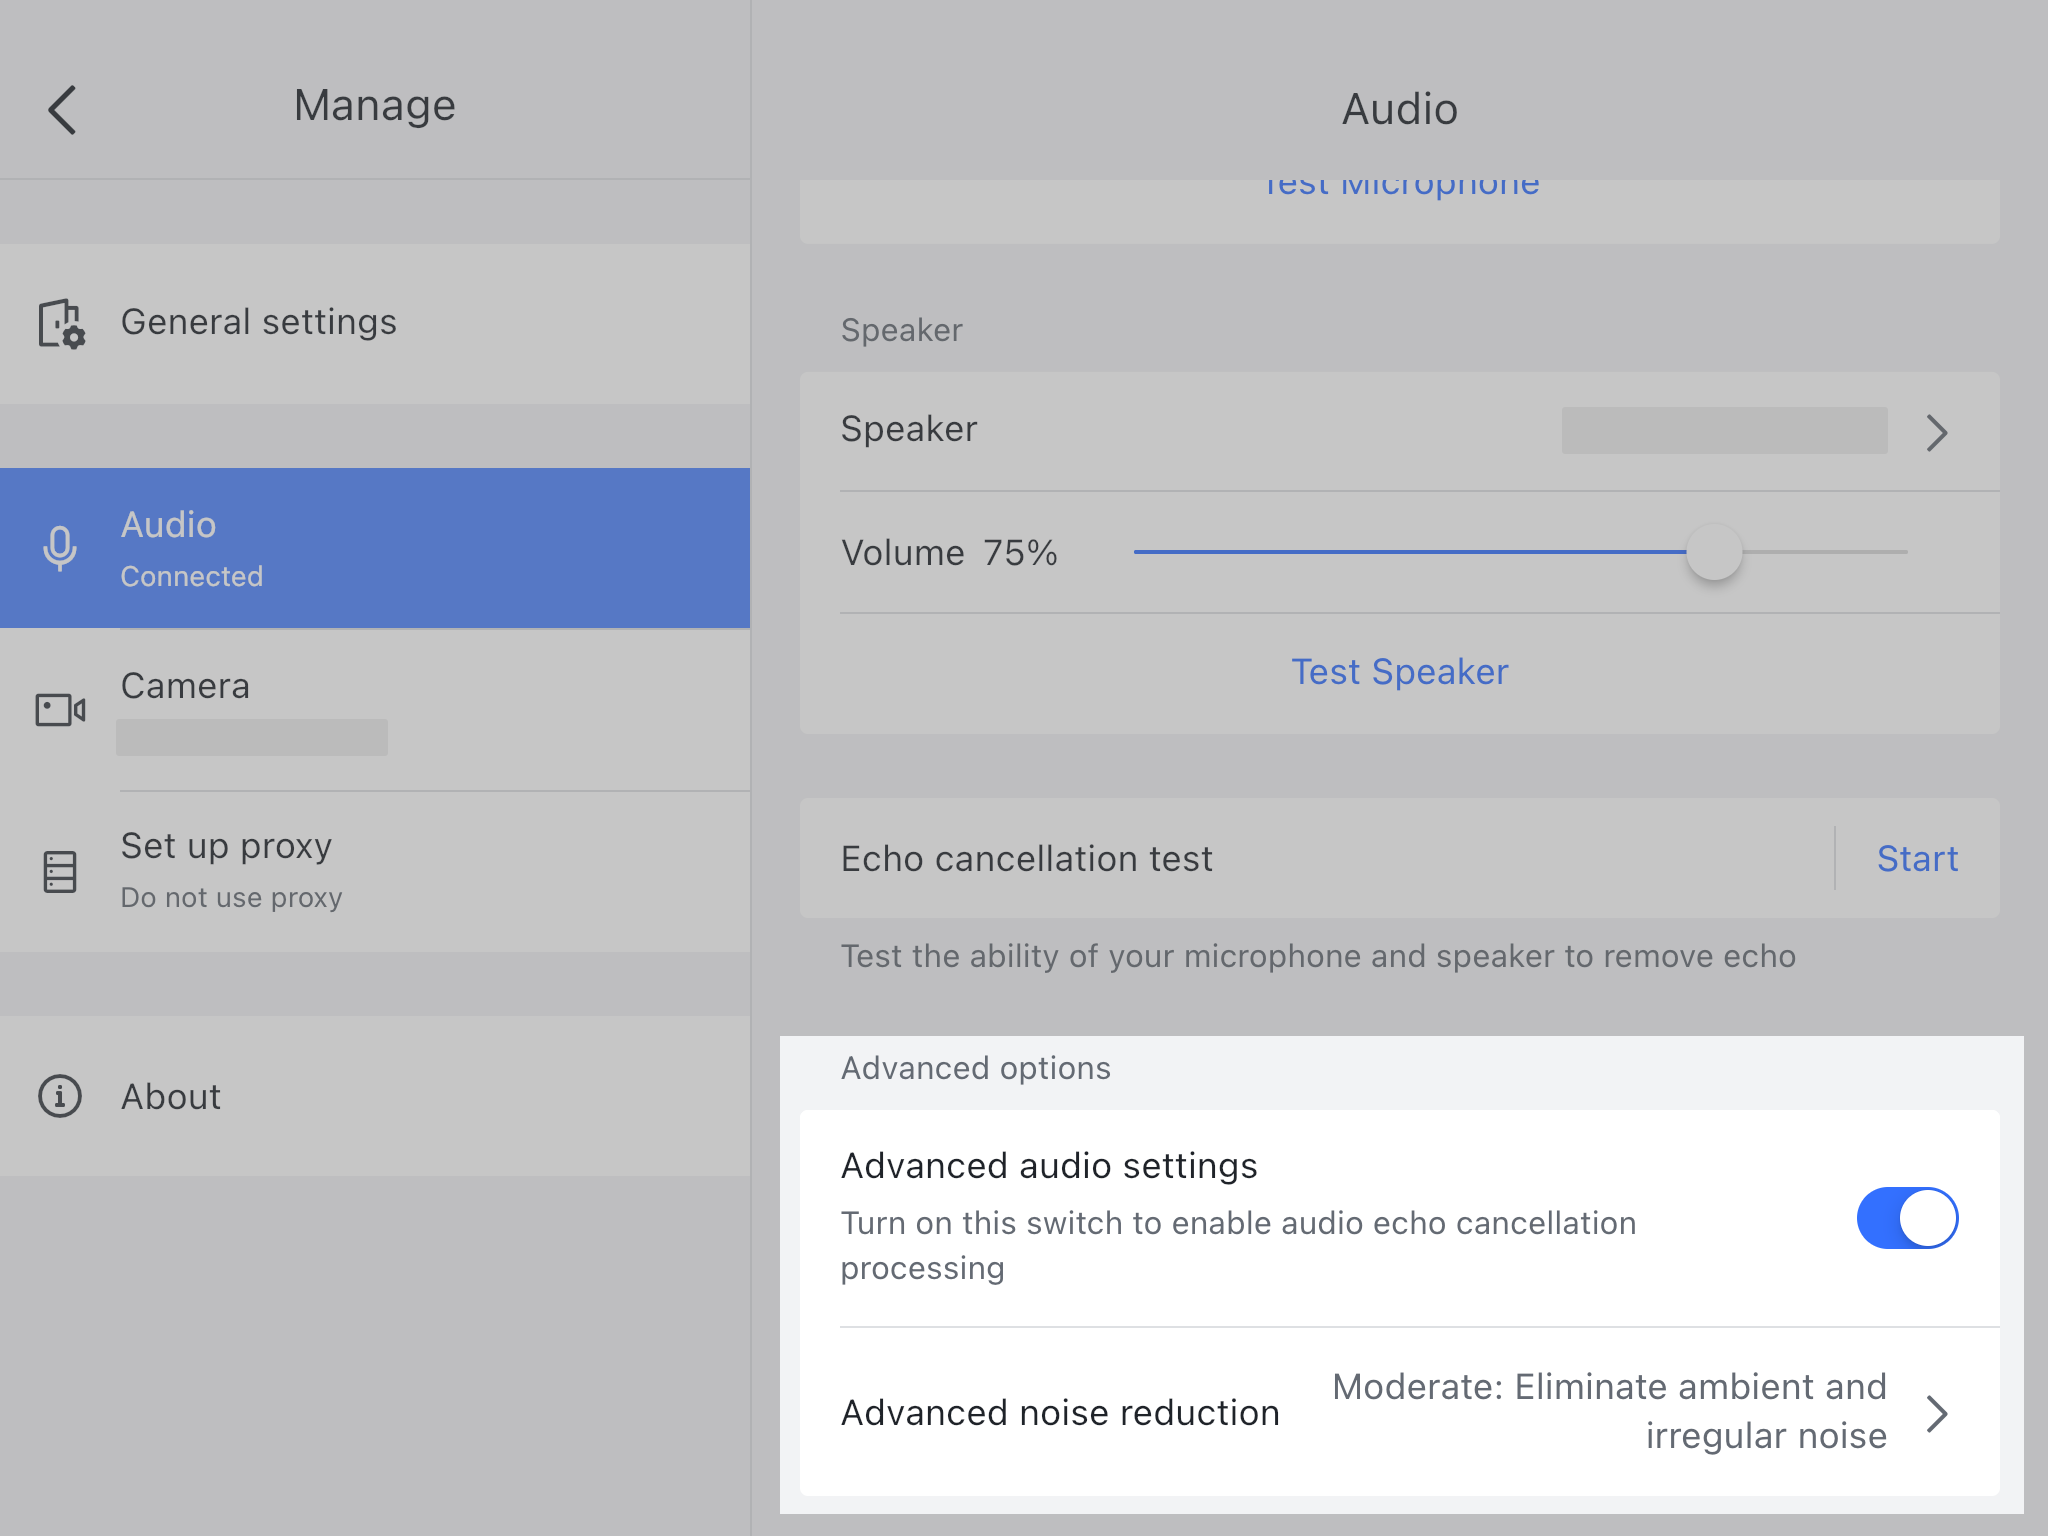
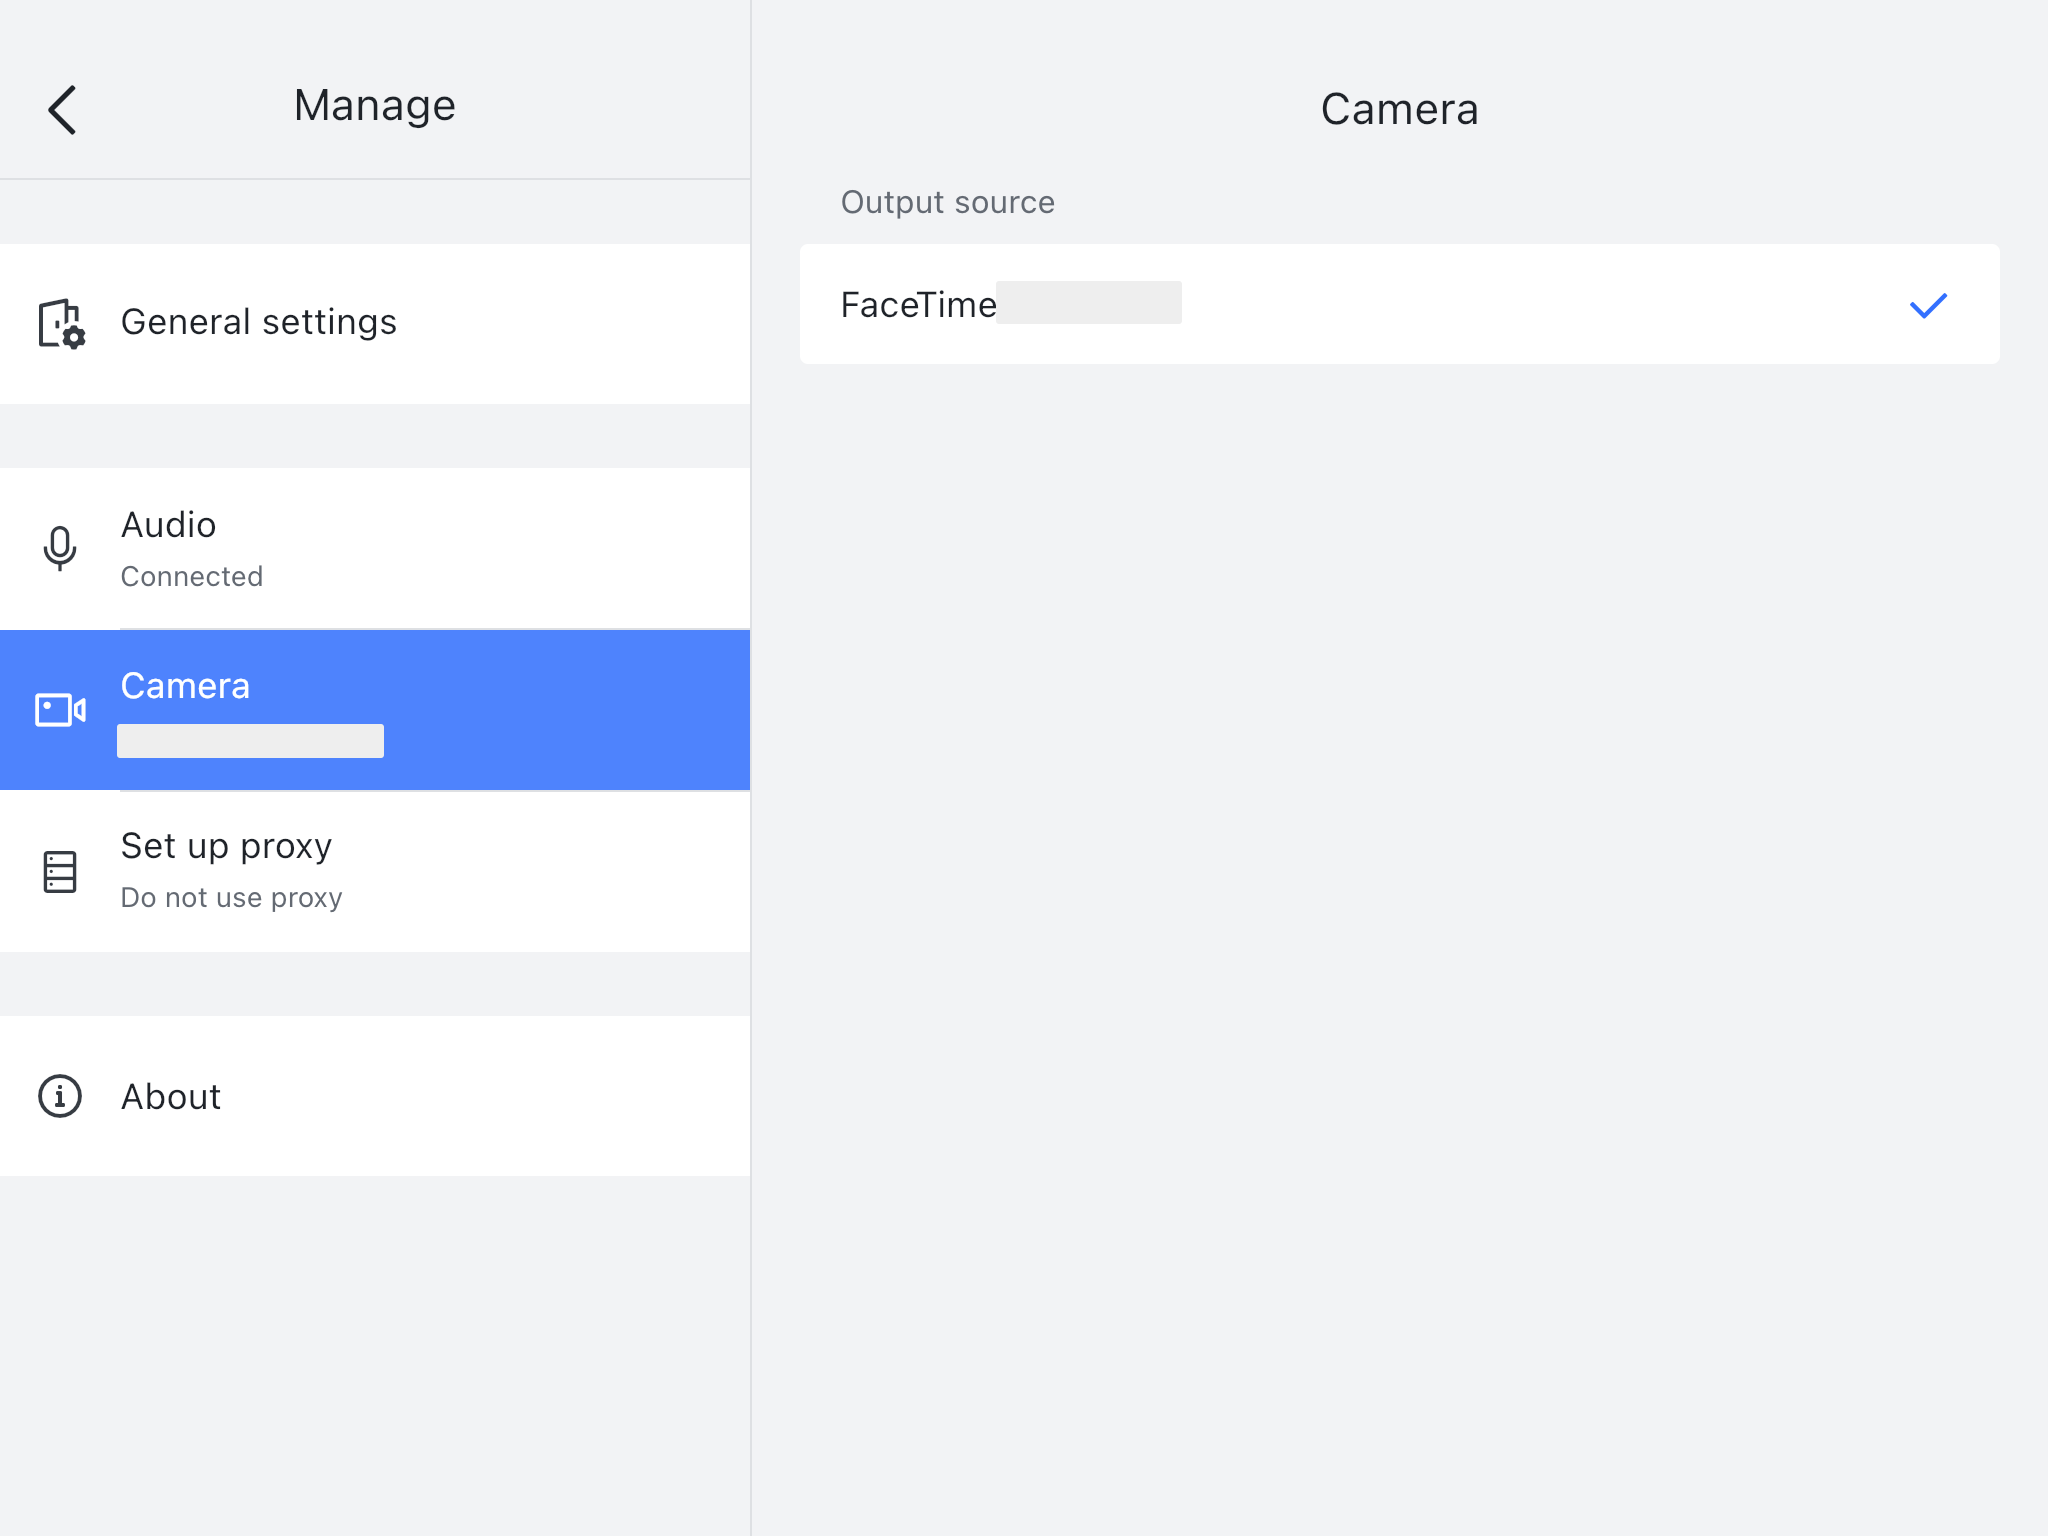
On the controller, tap the Settings icon in the upper-right corner. You can manually select and confirm the microphone, speaker, and camera deployed in the meeting room.
- Tap Audio to configure the microphone and speaker settings, including setting the volume, testing, and selecting the microphone or speaker device.
- You can also turn on Advanced audio settings to enable echo cancellation.
- Tap Camera to select the camera device.
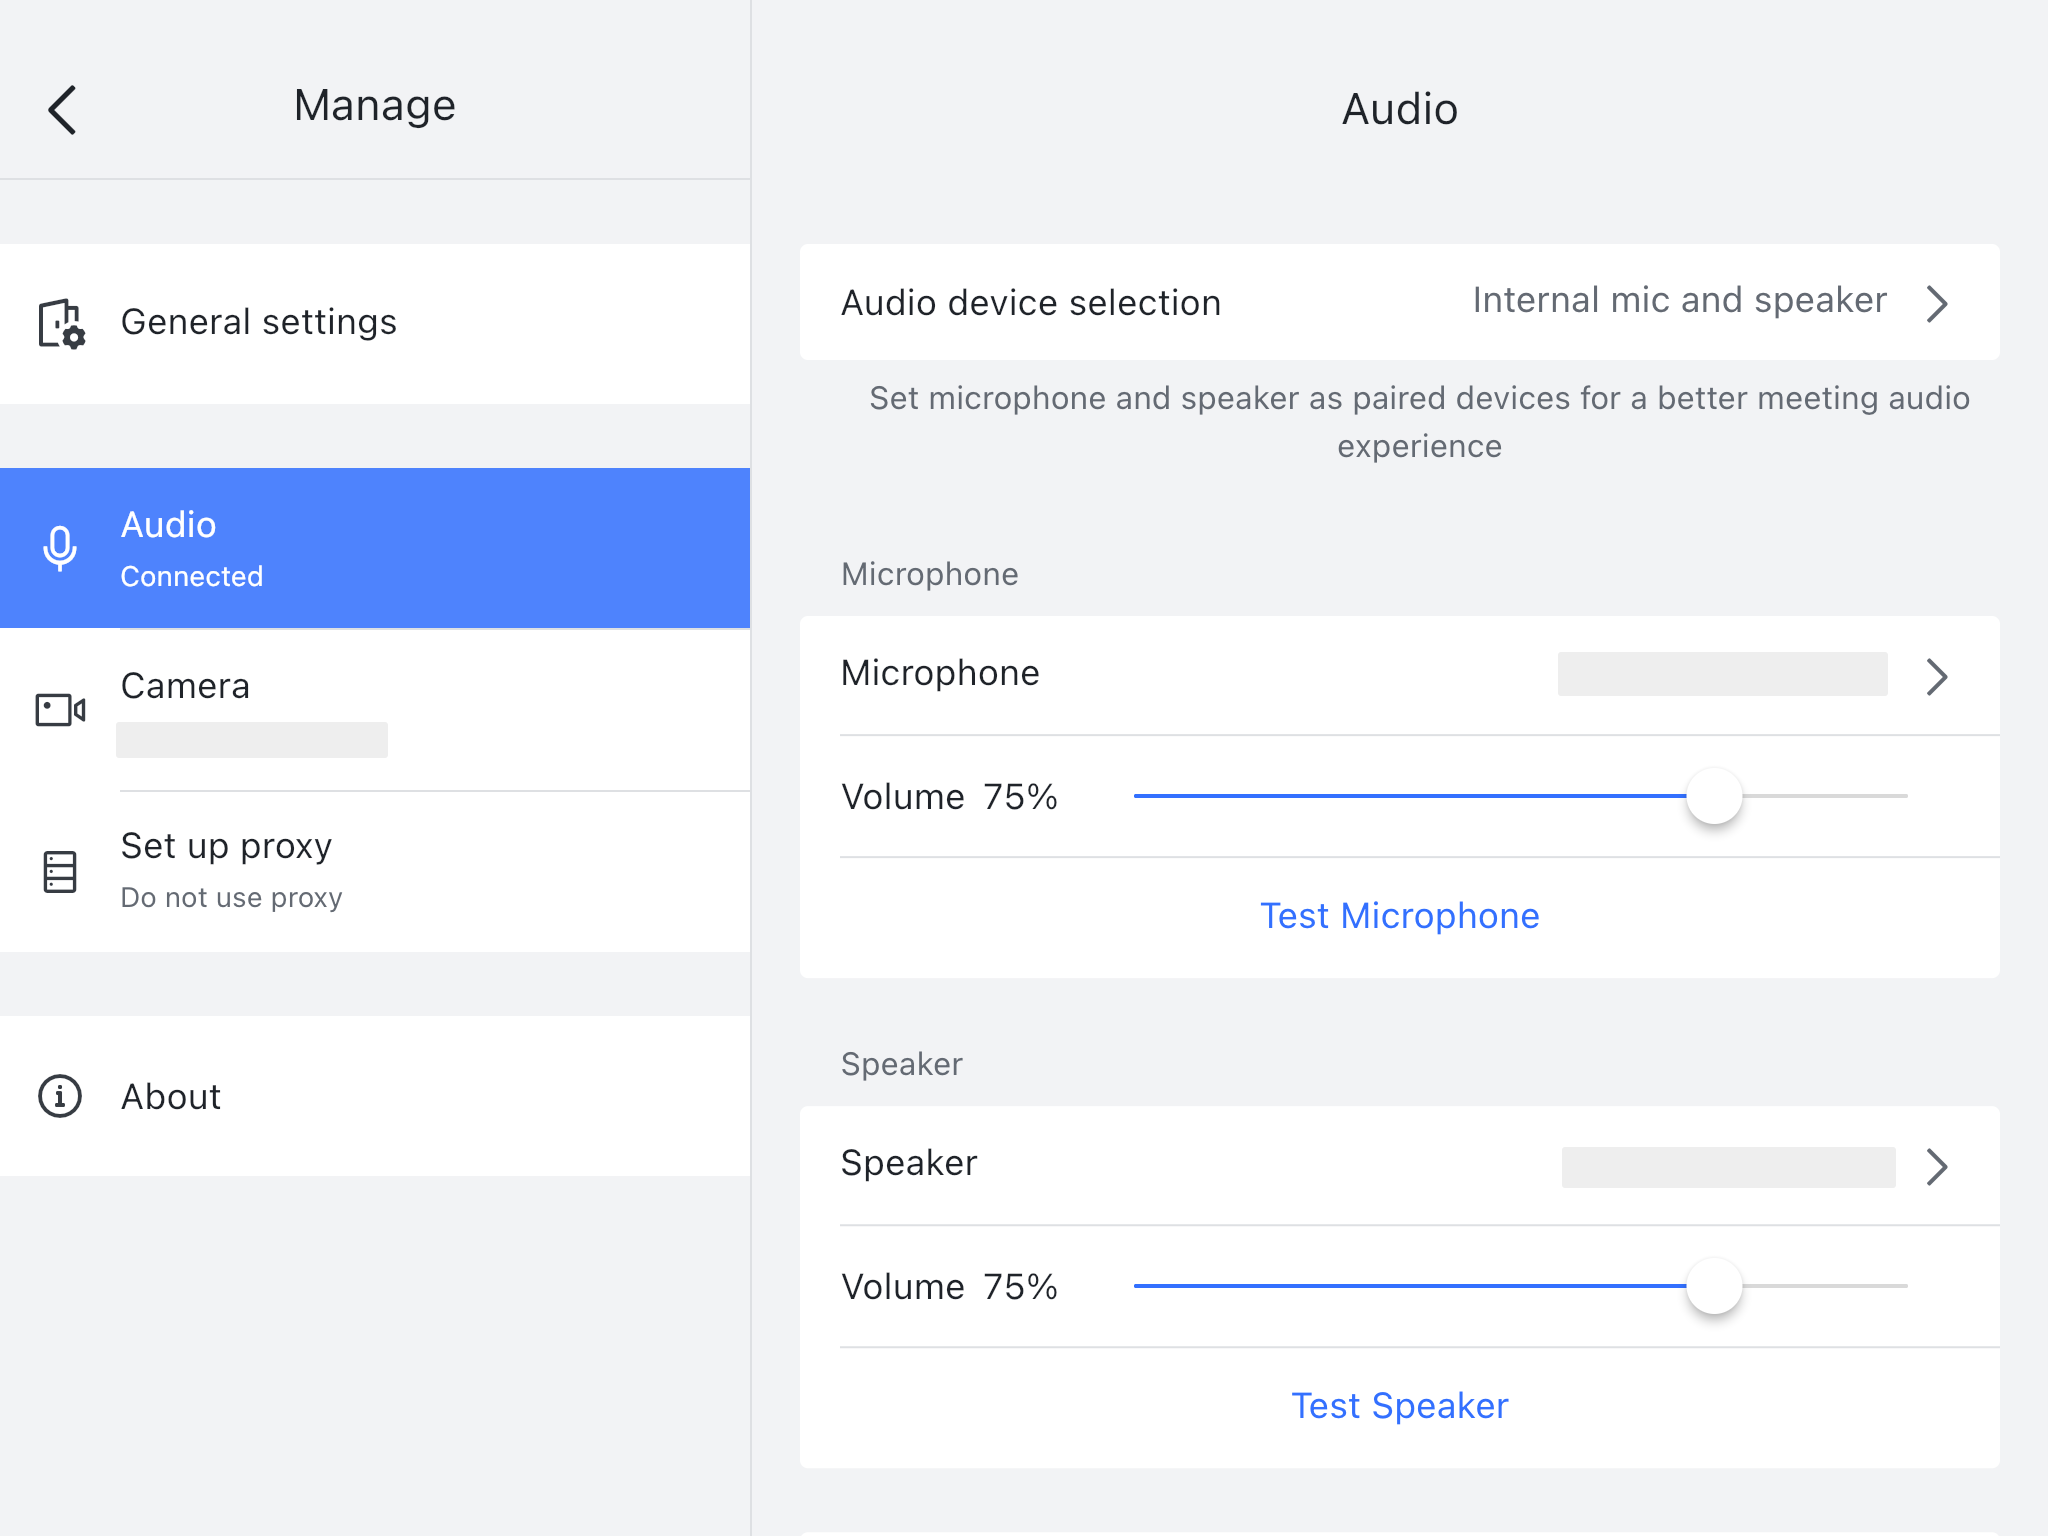
250px|700px|reset
250px|700px|reset
250px|700px|reset
On the room host computer
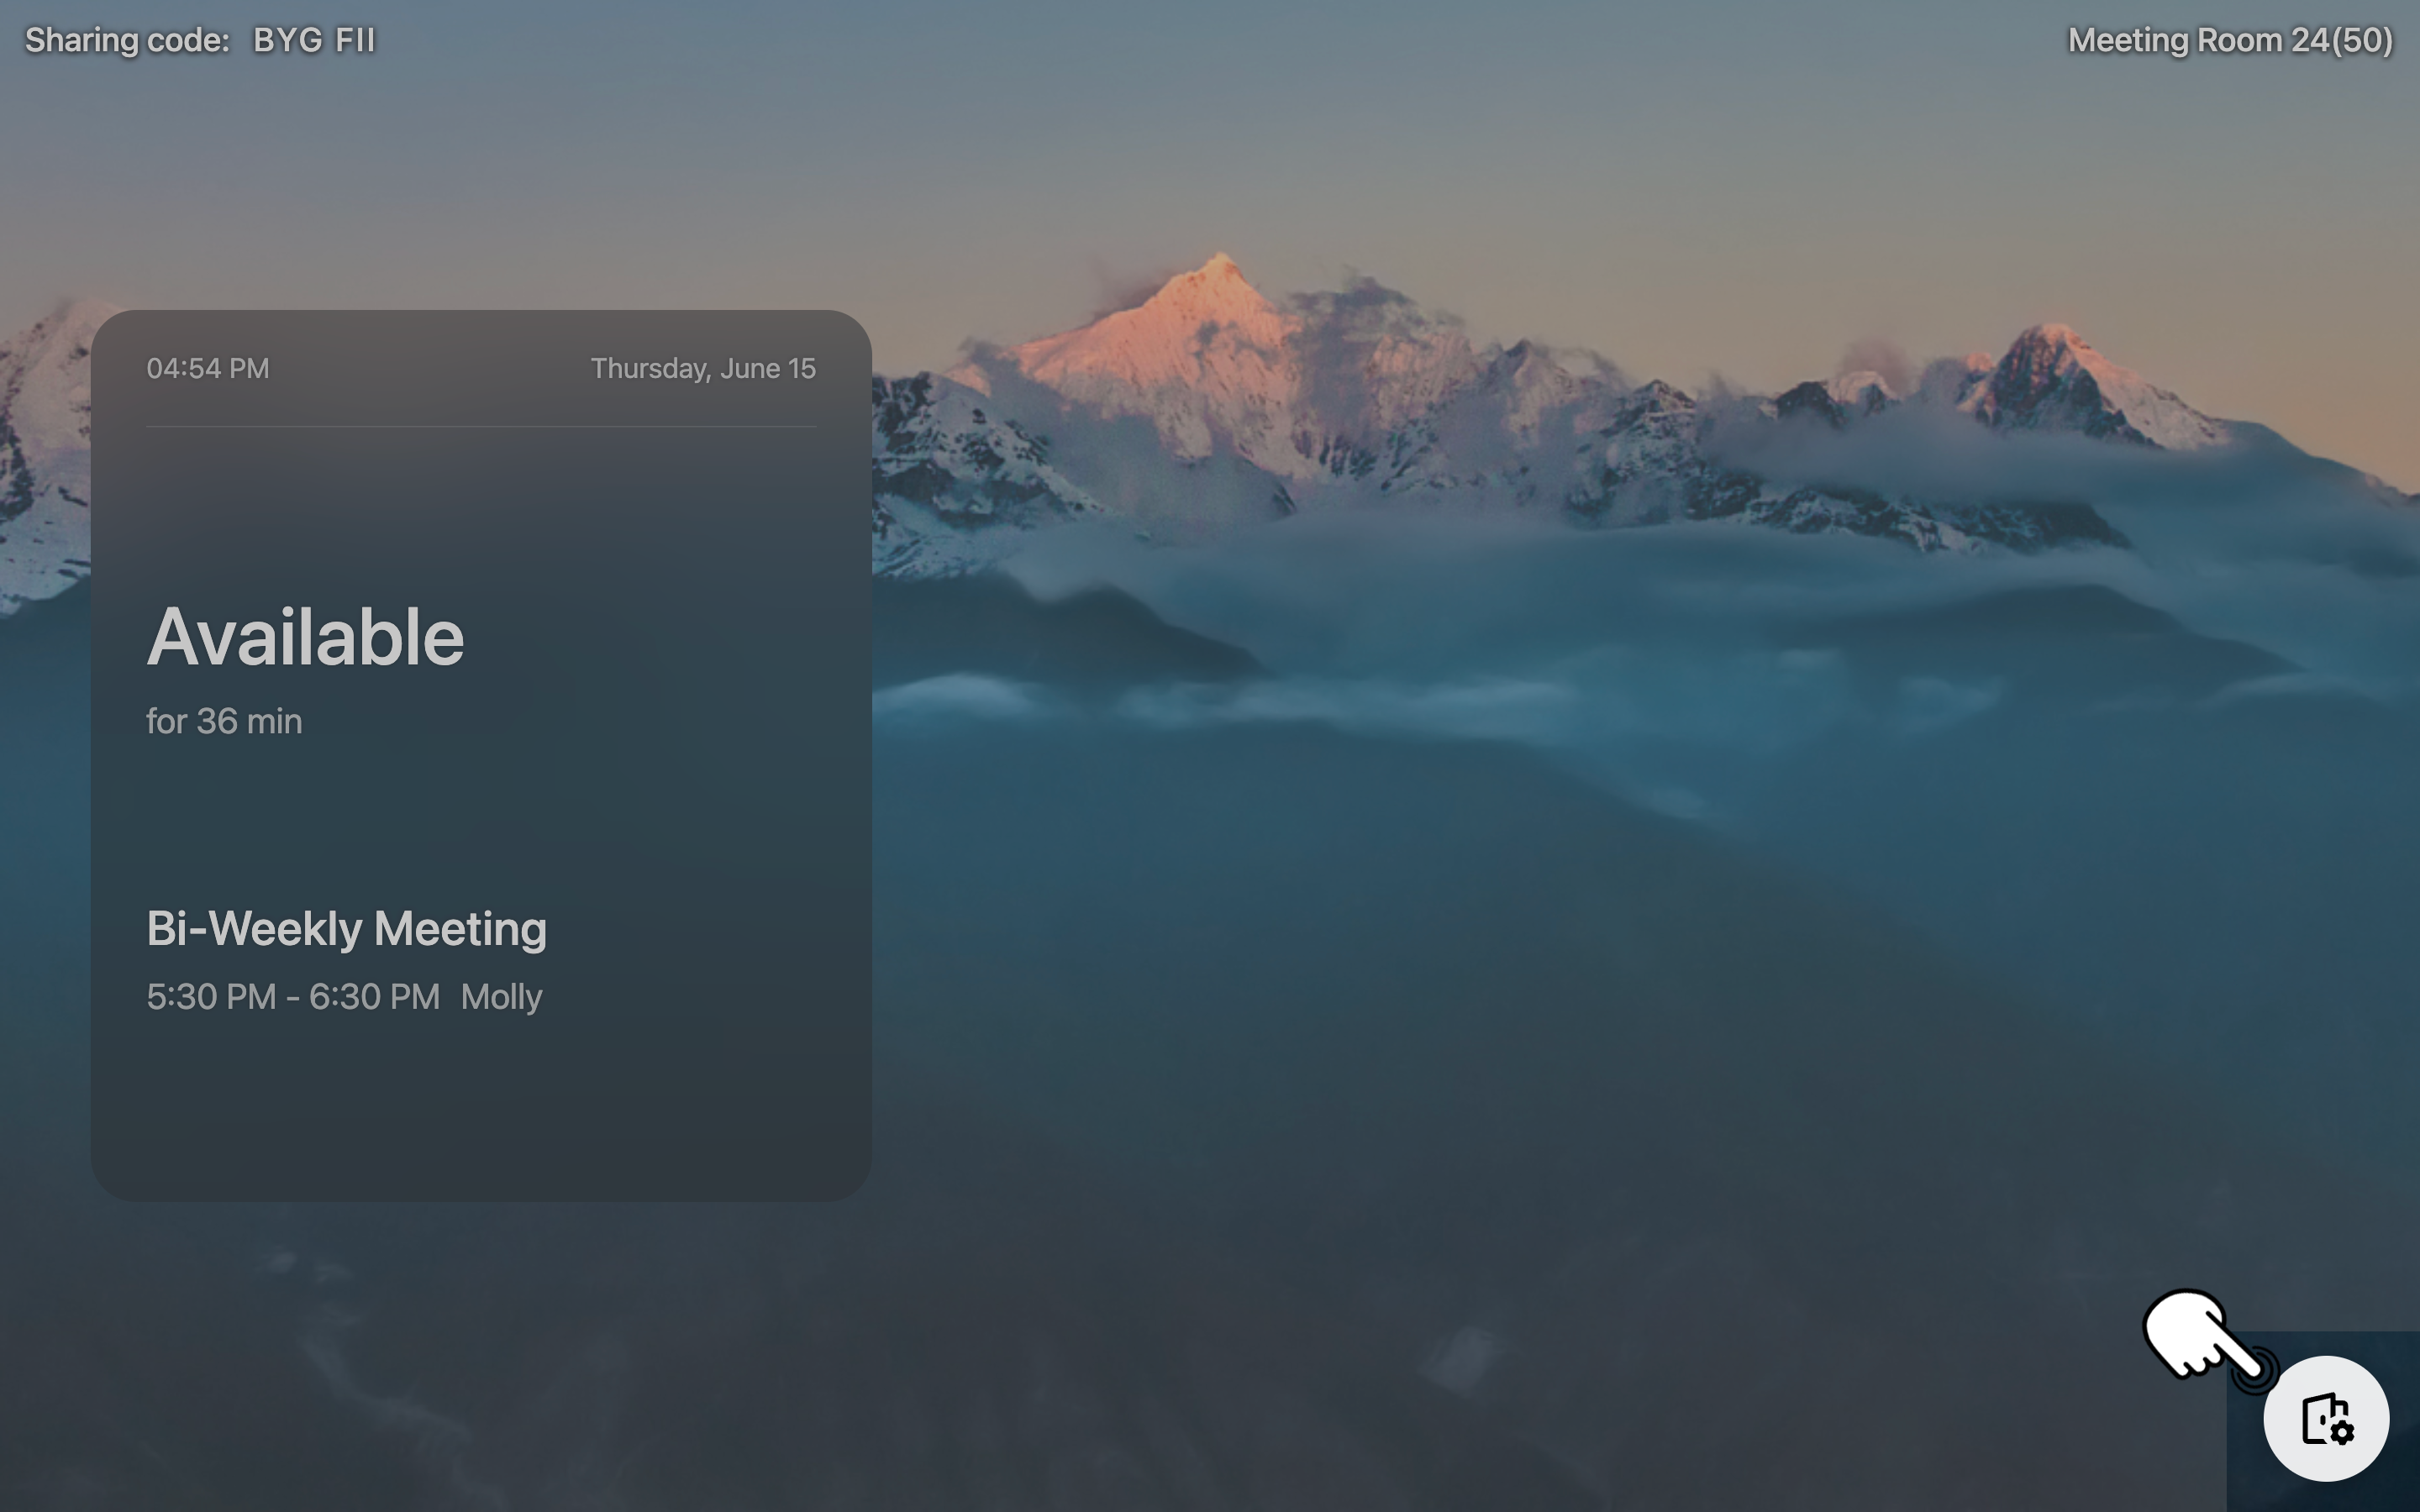
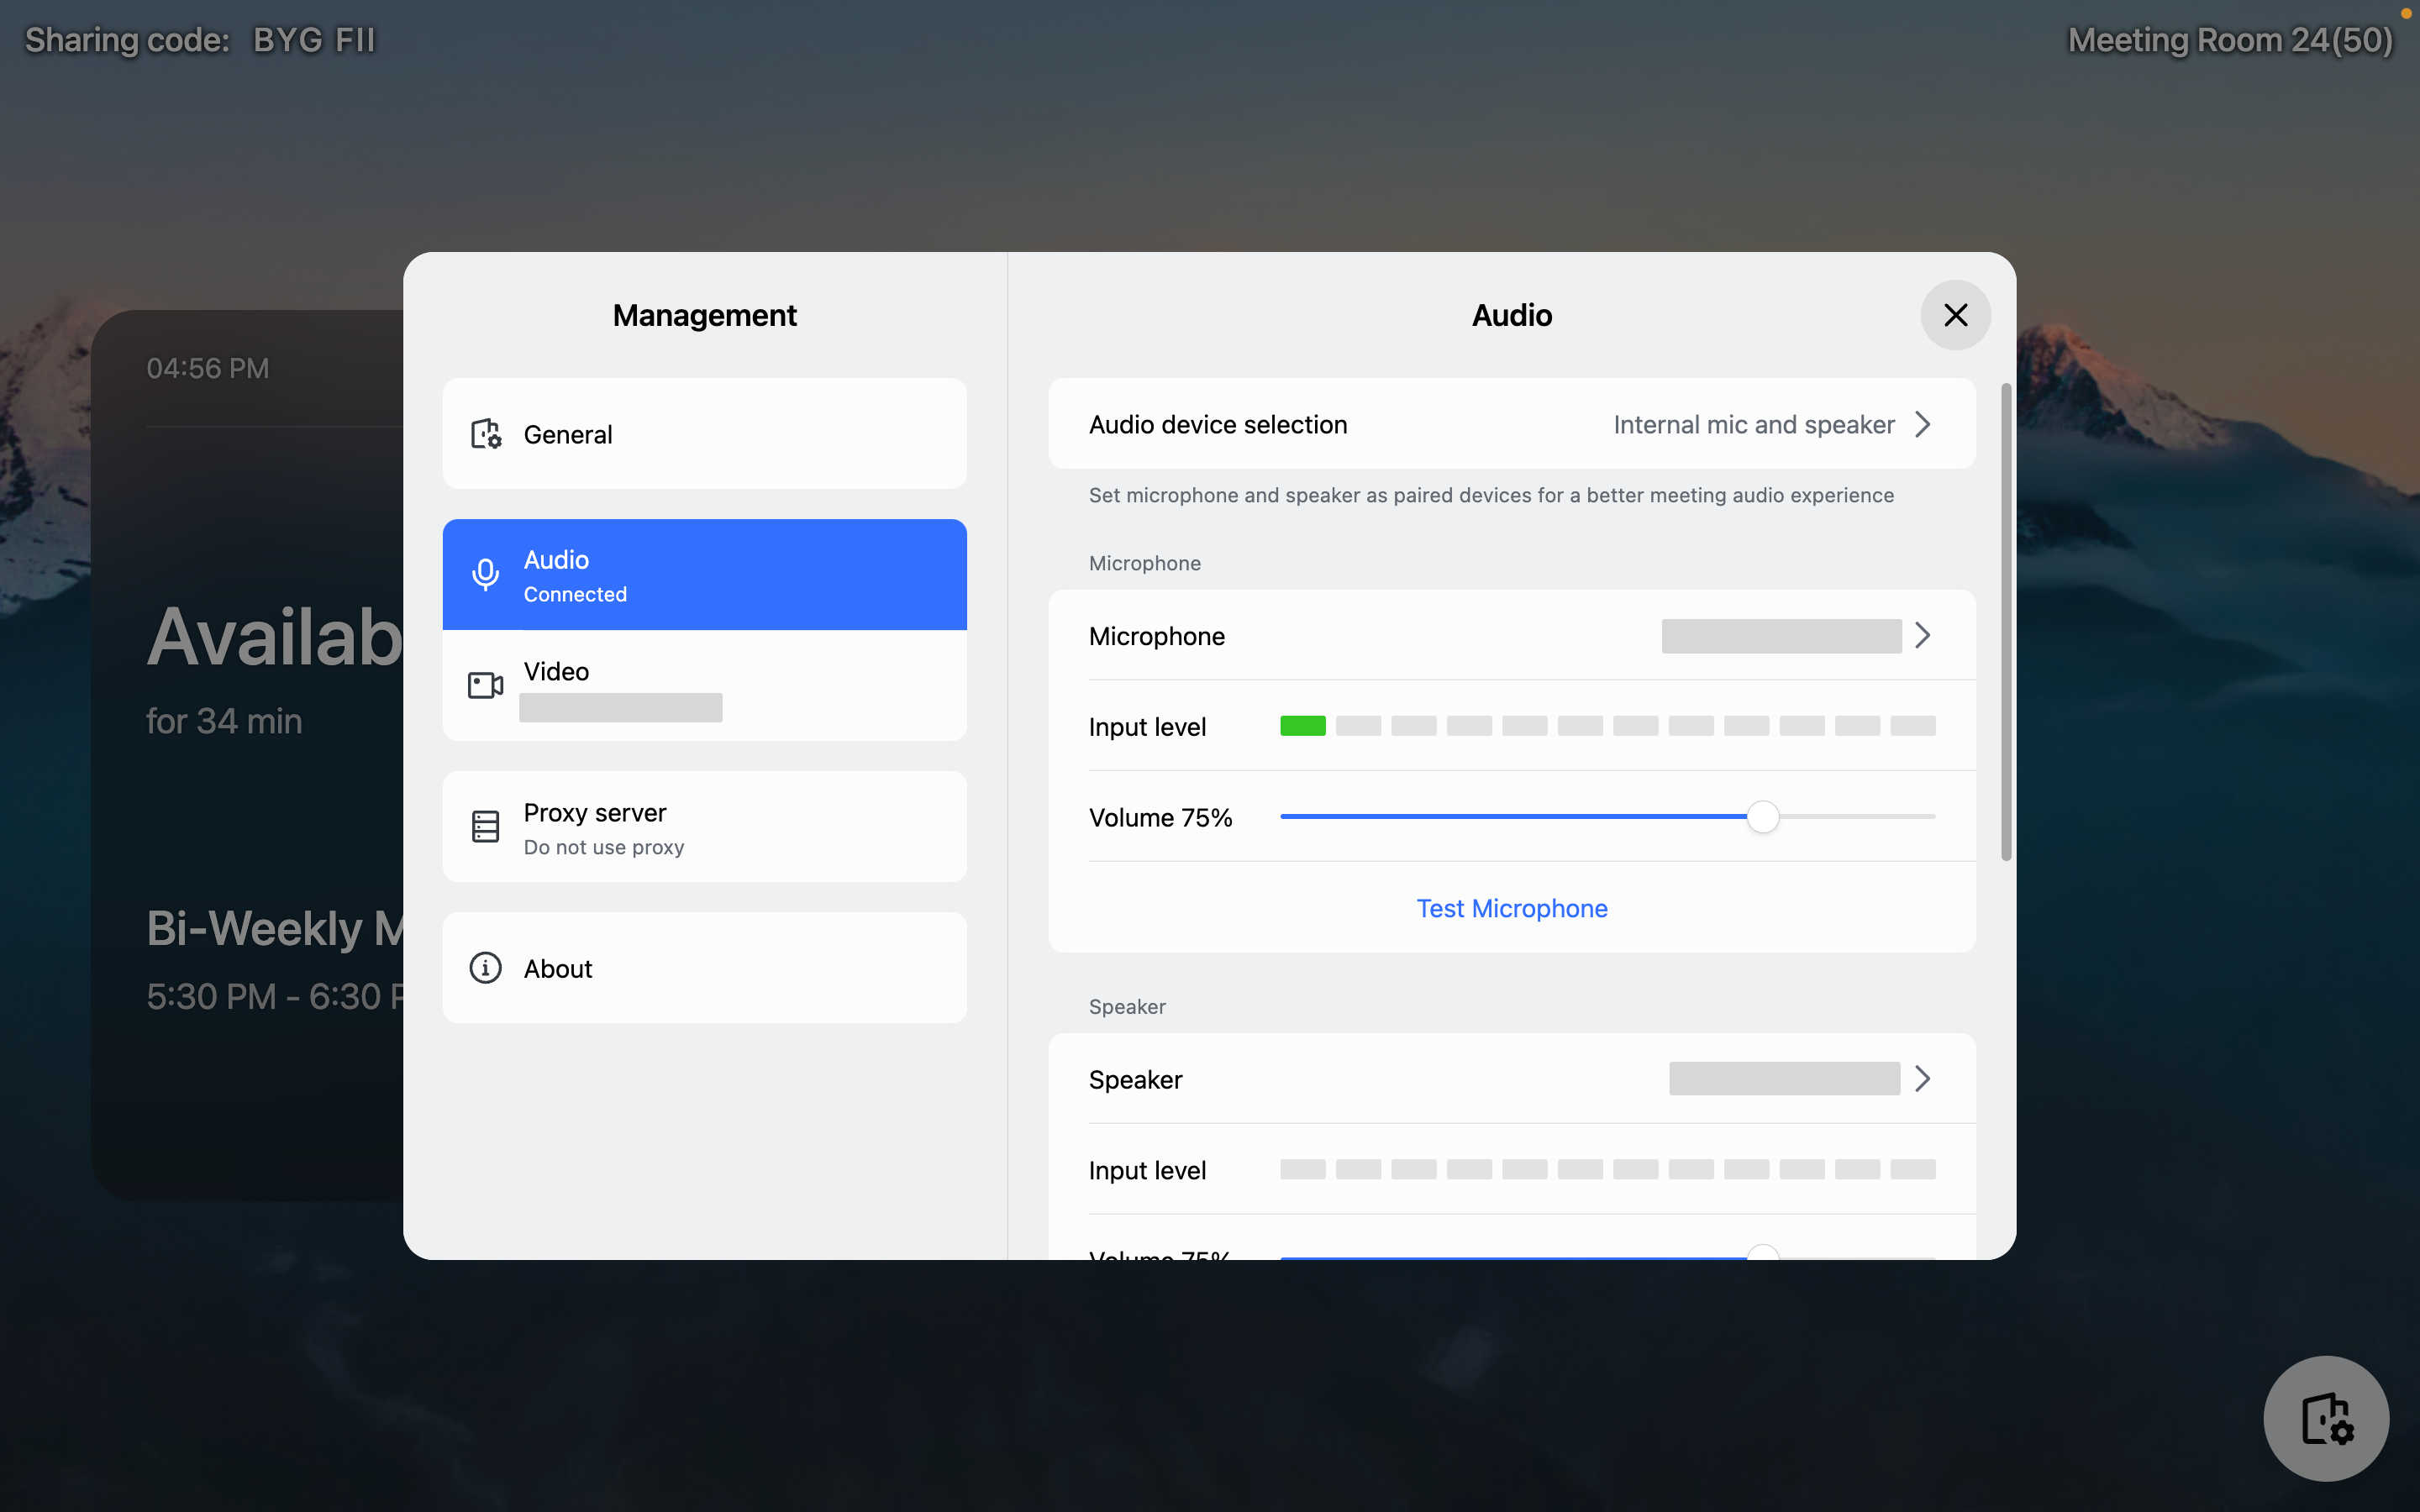
On the host computer, tap the Settings icon in the lower-right corner. You can manually select and confirm the microphone, speaker, and camera deployed in the meeting room.
250px|700px|reset
250px|700px|reset
Turn on Guided Access
We recommend turning on Guided Access on the iPad to keep the Lark Rooms Controller app open and prevent people from accidentally quitting the app.
- To set up Guided Access, go to Settings > Accessibility > Guided Access, then turn on Guided Access. Tap Passcode Settings > Set Guided Access Passcode.
- To start a Guided Access session, triple-tap the Home button and tap Start.
- To end a Guided Access session, triple-tap the Home button, then enter the Guided Access passcode.
Set the screen to stay on
We recommend setting the screen to stay on to ensure the stability of meeting room controller operations.
For devices with iOS 12 or earlier:
- For devices with iOS 12 or earlier:
- Tap Settings > Display & Brightness > Auto-Lock > Never.
- Tap Settings > Accessibility > Guided Access and turn on Guided Access and Mirror Display Auto-Lock.
- For devices with iPadOS 13 or later
- Tap Settings > Accessibility and turn on Guided Access, then set Auto-Lock to Never.
Dissociate the meeting room
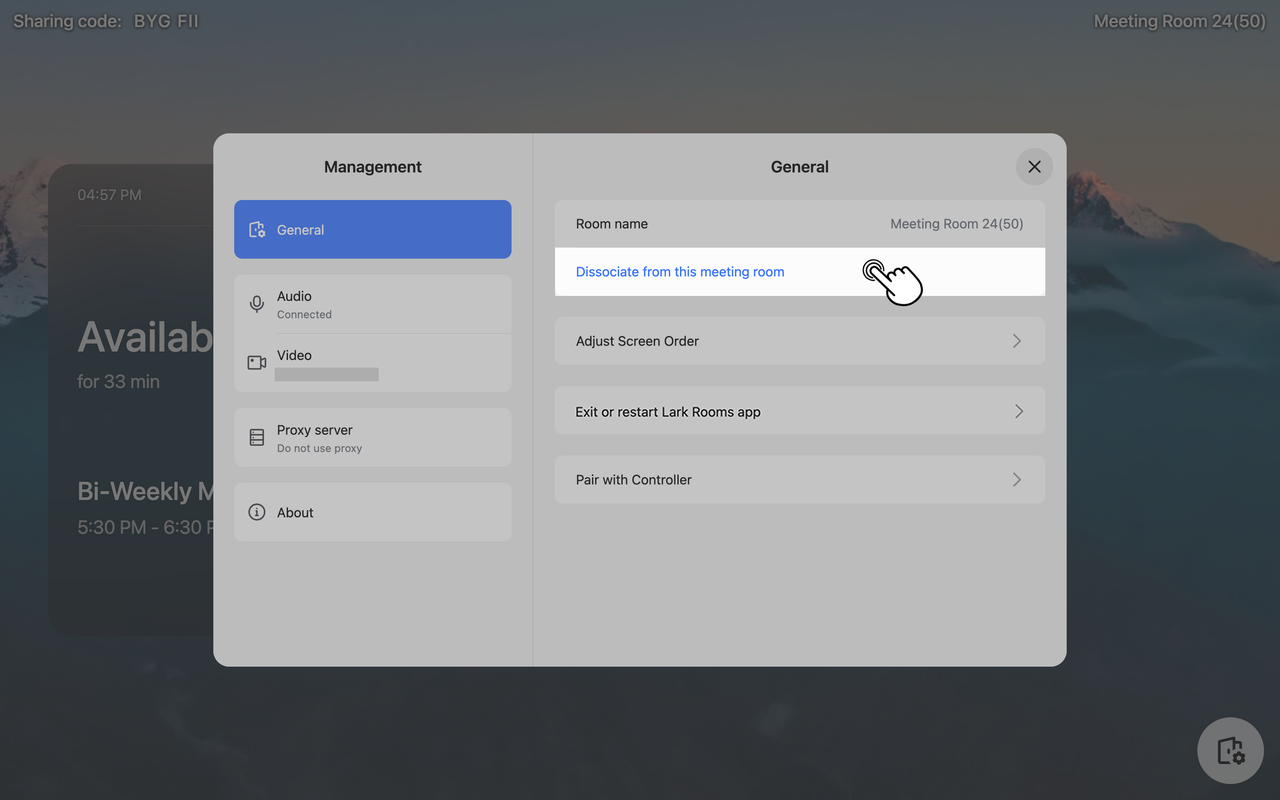
From the host computer
- Open the Lark Rooms app and click the Settings icon in the lower-right corner.
- Click General > Dissociate from this meeting room.
- Use the Lark mobile app logged in to an account with Lark Rooms deployment permission to scan the QR code, or enter an access code to complete authentication.
250px|700px|reset
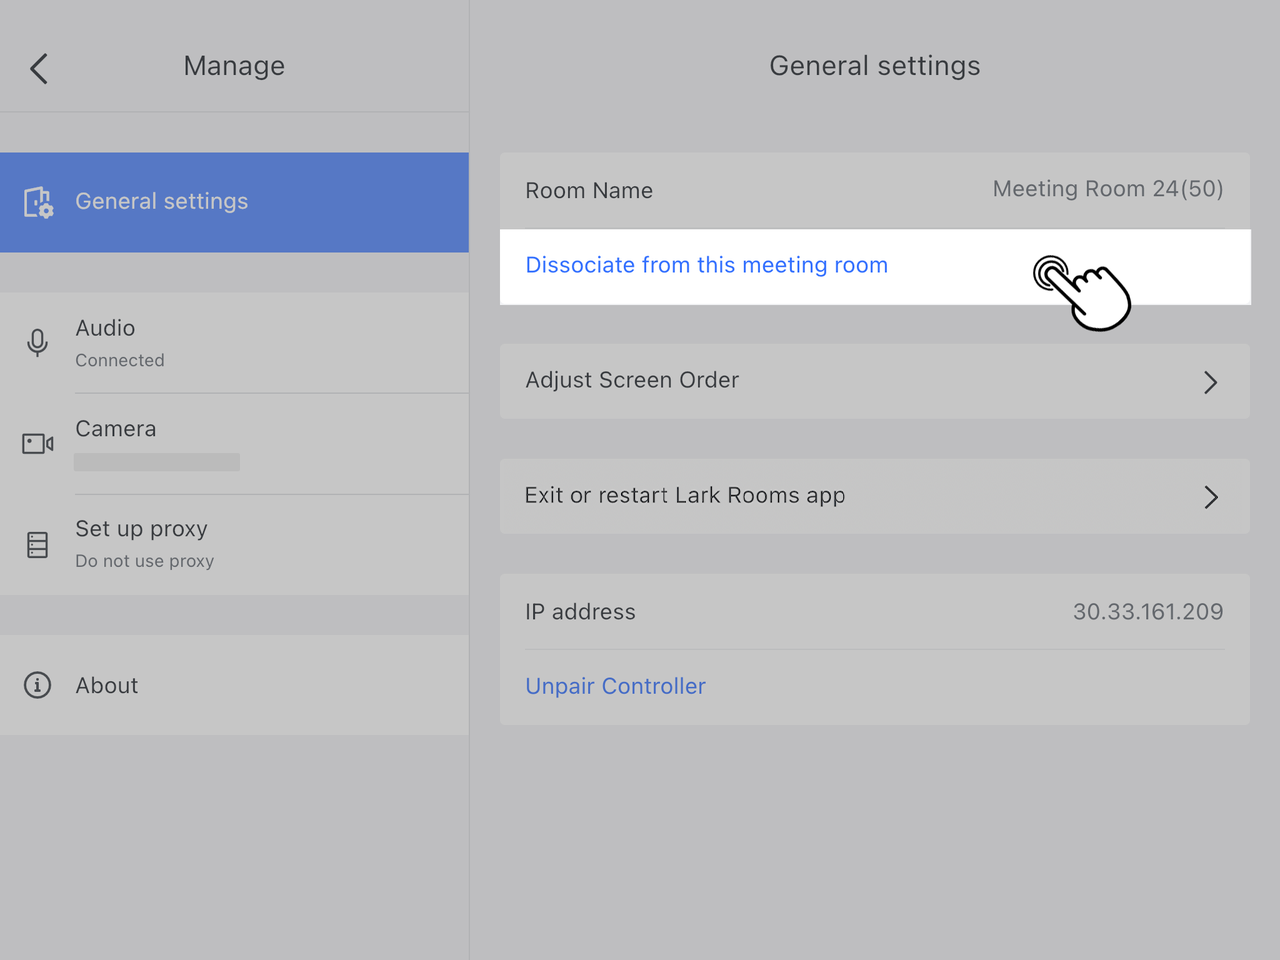
From the room controller
- Tap the Settings icon in the upper-right corner and select General settings > Dissociate from this meeting room.
- Use the Lark mobile app logged in to an account with Lark Rooms deployment permission to scan the QR code, or enter an access code to complete authentication.
250px|700px|reset
Dissociate automatically
Meeting room devices unlink automatically if stayed offline for over 30 days.
You can book system notifications to selected members when the meeting room automatically dissociates from devices.
- Open the Lark Admin Console and go to Meeting Rooms > Room Management > Basic info > Alert contacts when devices unlinked.
- Click Settings to select members who will receive the notification.

250px|700px|reset
The Meeting Room Assistant will notify the alert contacts on the day of auto-dissociation and 7 and 3 days ahead. Members who receive the alerts can click Reset timer to extend the linking of all devices in the meeting room for another 30 days.
III. FAQ
