
Recommended readership: Organizations in the traditional media industry
Functions used: Admin console, Lingo, Attendance, Approval, Calendar
With new forms of media emerging at breakneck speed, traditional media are seeking to innovate, transform, and upgrade. Covering the entire media creation and management process, Lark's functions can help those working in traditional media to optimize their existing work modes and effectively deliver high-quality multi-media content.
This article is for Lark administrators whose organizations are in traditional media, and the article provides instructions on how to set up key features in the Lark Admin Console. Throughout this article, newspapers are used as an example of a traditional media organization.
Initialize the Admin Console
As an administrator, after installing the Lark app, click your profile photo in the app, and then click Admin Console to get to the Admin Console.
1. Edit the basic information
To improve your internal employees' and external partners' recognition of your newspaper and to build your brand, click Settings > Organization Info to start specifying information about your organization. Specify your organization's information, such as logo, name, and so on. Or, click Edit to change existing info.
250px|700px|reset
2. Create departments and add employees
Many traditional media such as newspapers establish departments based on news lines. But in recent years, the emergence of new media has resulted in the appearance of additional comprehensive departments similar to omnimedia centers. This has posed new challenges for newspapers' internal collaborative work.
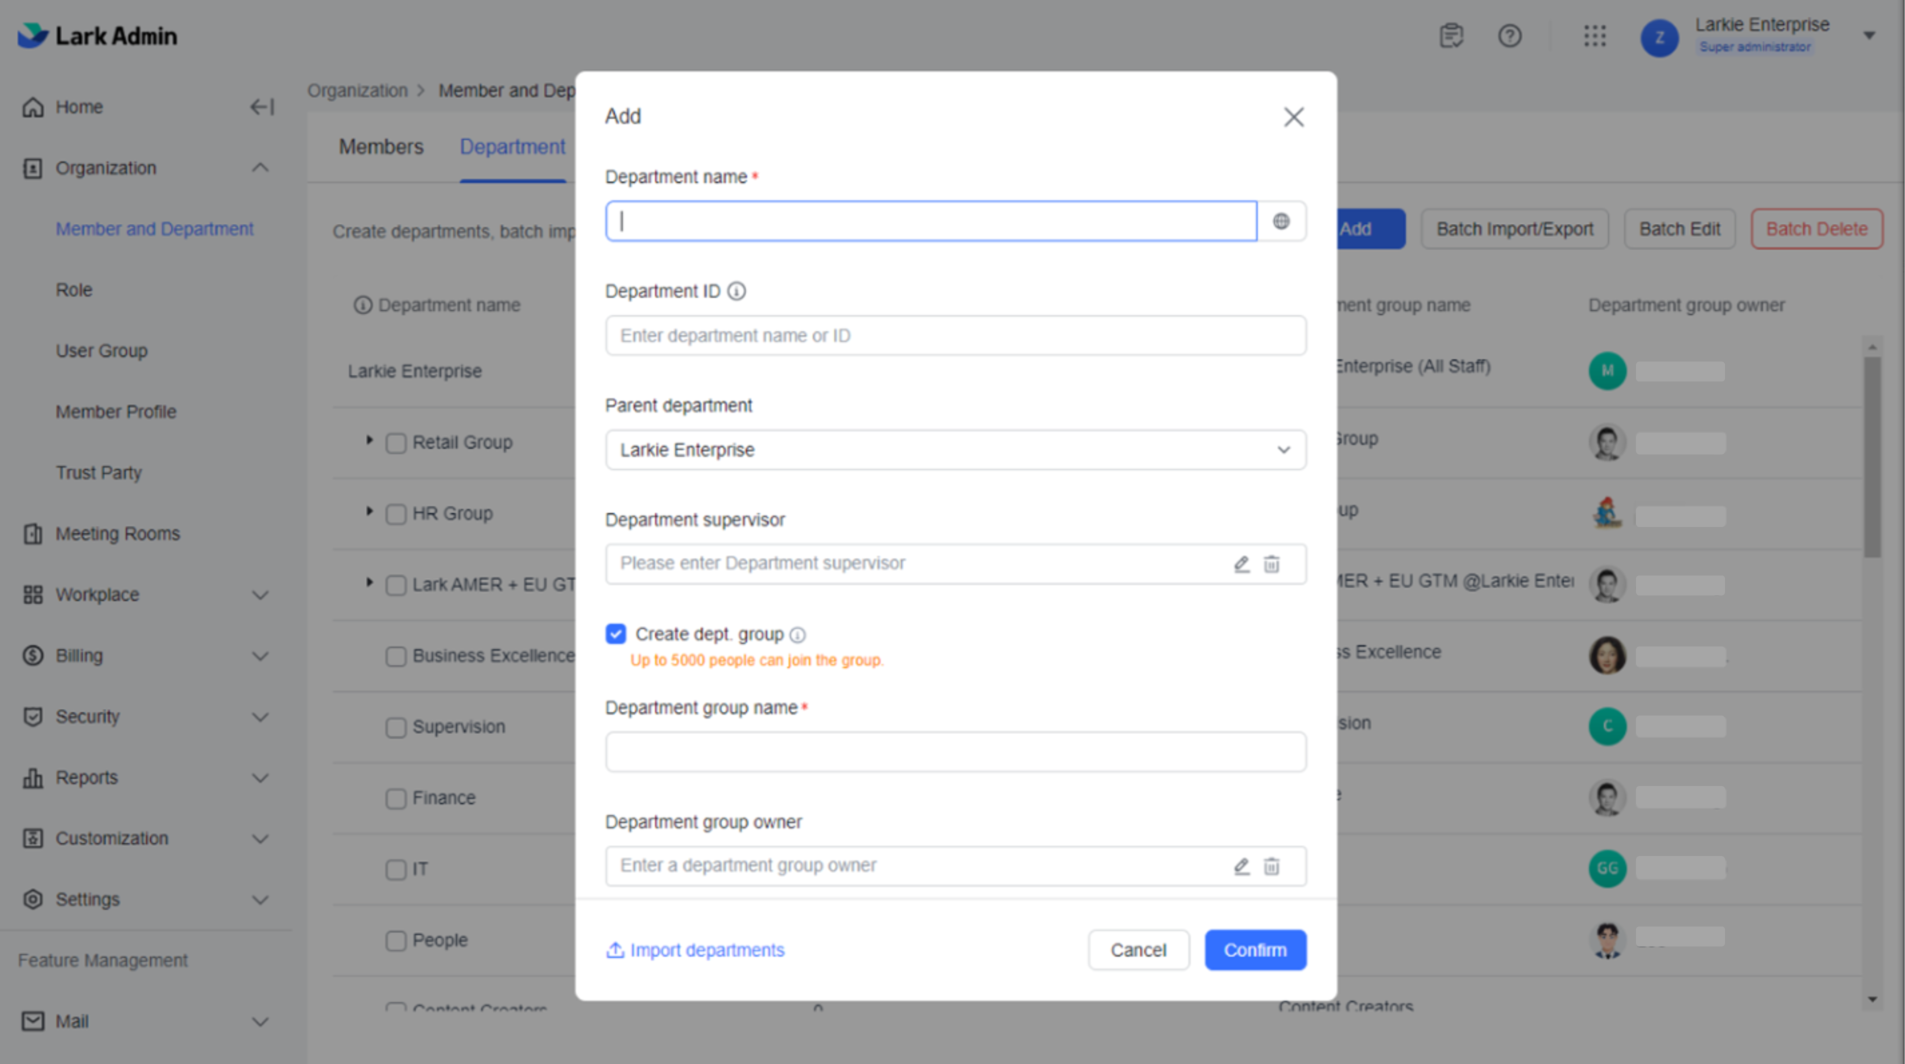
In Lark, you can go to Admin Console, and then click Organization > Member and Department > Departments > Add to create departments as needed. You can also select Batch Import/Export to download an import template, fill it in based on the division of labor in your existing business lines, and then upload the form. This is a quick way to create multiple departments.
250px|700px|reset
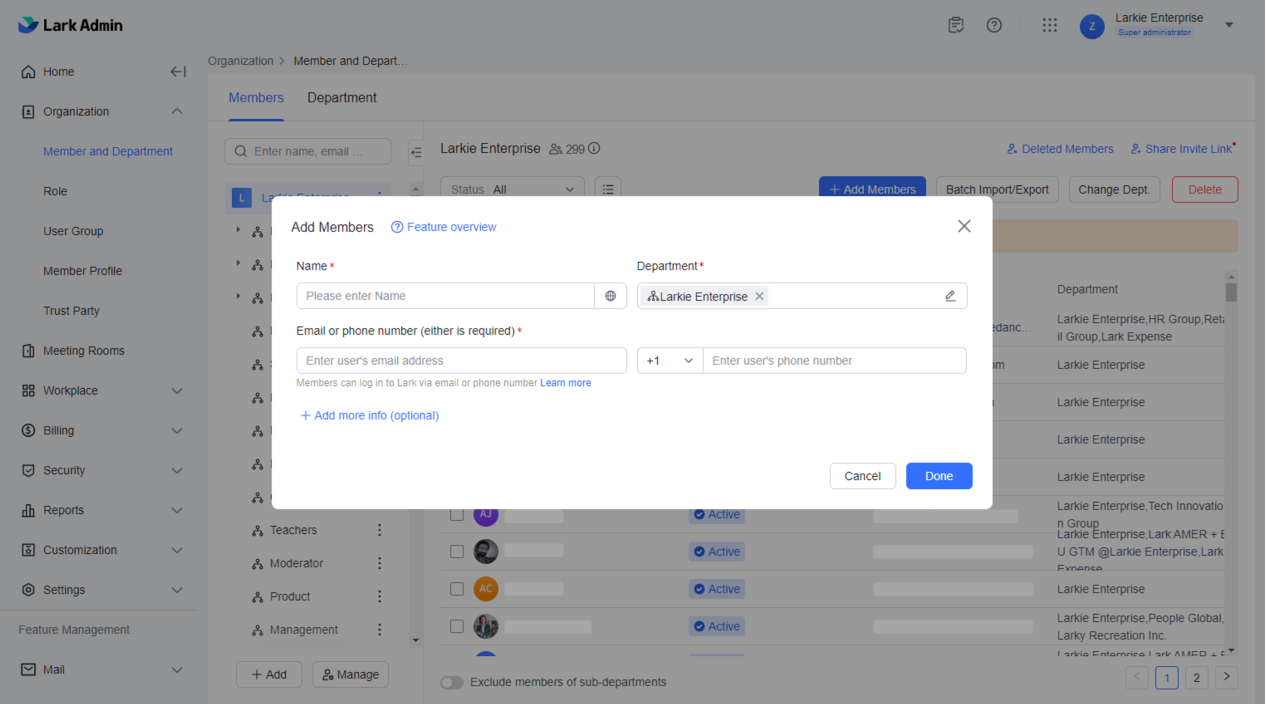
After creating departments, select Members > Add members. Or, click Batch Import/Export to download an import template. Fill it in locally, and then upload the form to batch add employees. If you don't have complete employee information, click Share Invite Link to share your organization team code, QR code, or link with employees and have employees add themselves to the organization.
250px|700px|reset
To ensure the balanced management of your newspaper and the fulfillment of editor-in-chief responsibilities, you can add the heads of the various news lines and the head of the omnimedia center, and so on, as primary administrators. To do this, click Settings > Administrator Permissions > Add Primary Administrator. Enter each person's name, email address, or phone number, and click Confirm.
Note: A maximum of 100 primary administrators can be set up for an organization. Primary administrators have all management permissions except permission to dissolve the organization.

250px|700px|reset
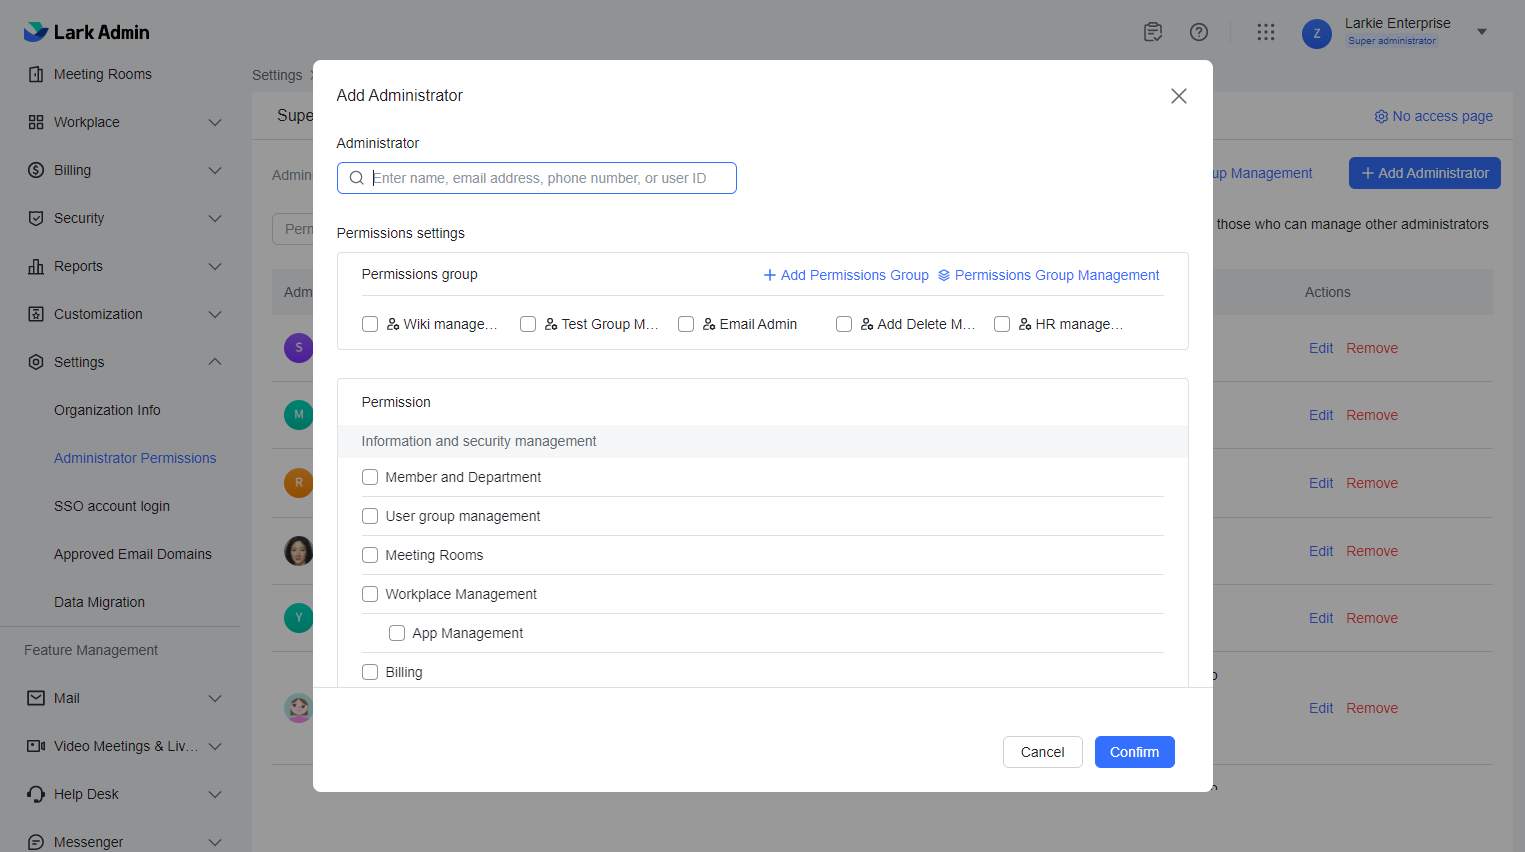
Besides adding primary administrators, you can add administrators for each department of your newspaper as needed to subdivide responsibilities under the primary administrators. Click Settings > Administrator Permissions to get to the administrators page. Click Add Administrator. You can also set different permissions groups for the administrators to specify the departmental areas they're allowed to manage.
250px|700px|reset
Activate a rich array of apps
The next step is to install the various apps that Lark provides, such as the Attendance app, which allows organizations to manage employee working hours, or the Calendar app. There are many more apps and features that you can install and configure by using the Admin Console.
1. Install apps
In the Lark Admin Console, click Workplace > App Management. Choose the apps you need, and click Use. This installs the apps.
After installing the apps, you need to activate them and configure which employees can use which apps. The configuration process differs for different apps. If you have any questions while configuring the apps, visit the Help Center to find related tutorials.
Listed below are just some of the apps that you can configure in the Admin Console:
Attendance app
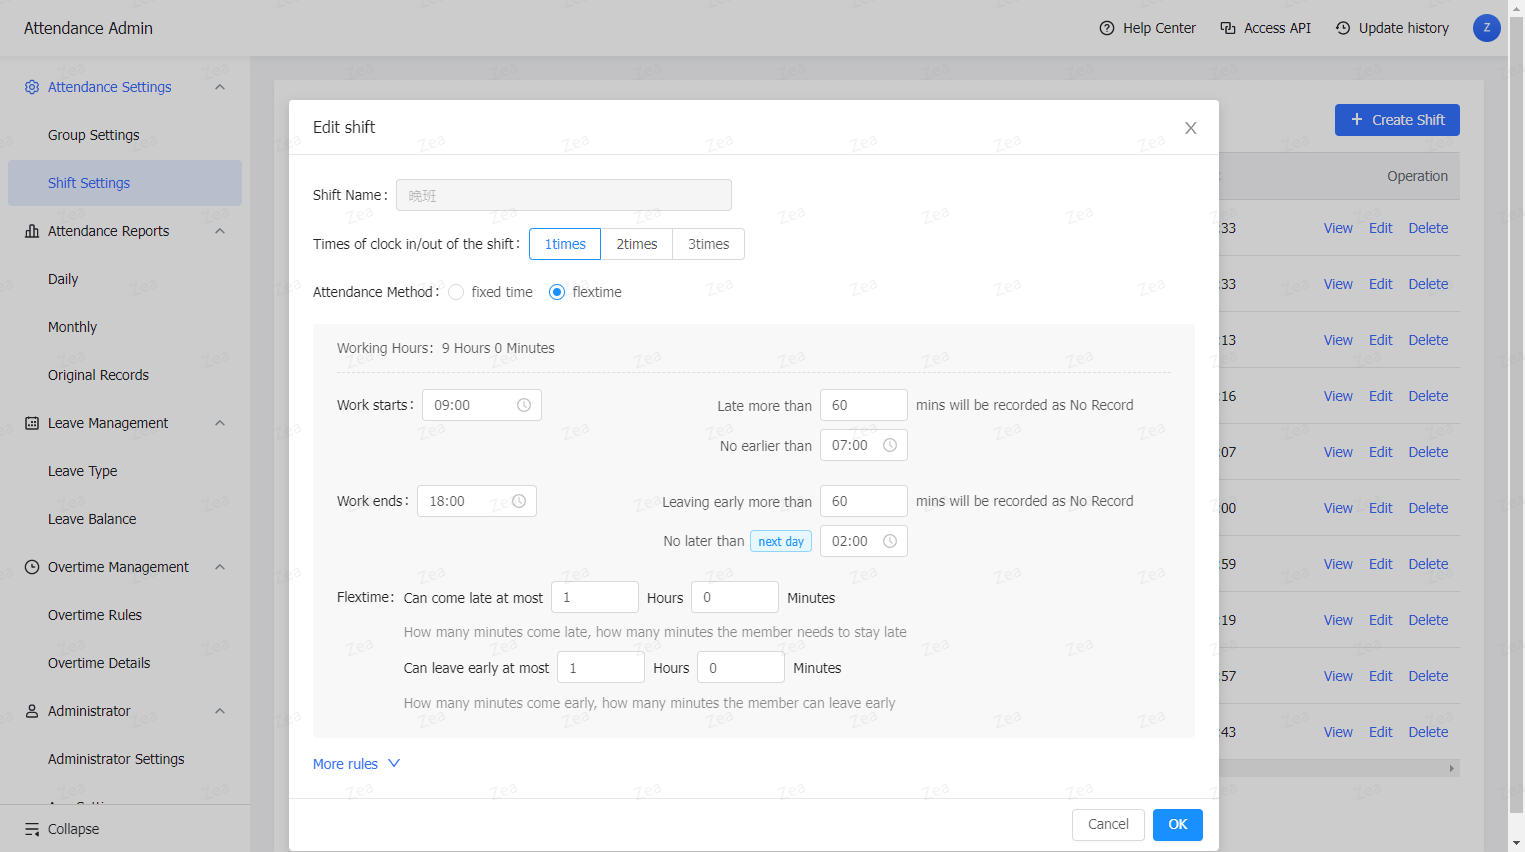
After installing the Attendance app, go to the attendance admin area and click Attendance Settings > Shift Settings. Then, follow the prompts to enter info about your shifts.
You can adjust and add flextime info at any time depending on breaking news and routine operational needs. This function can enable you to keep up with the ever-changing work arrangements at a newspaper. In addition, you can go into the Group Settings page in the attendance admin area and turn on the offsite attendance function. This way, flexible work times will never again be a source of aggravation when it comes to attendance.
250px|700px|reset
Lingo app
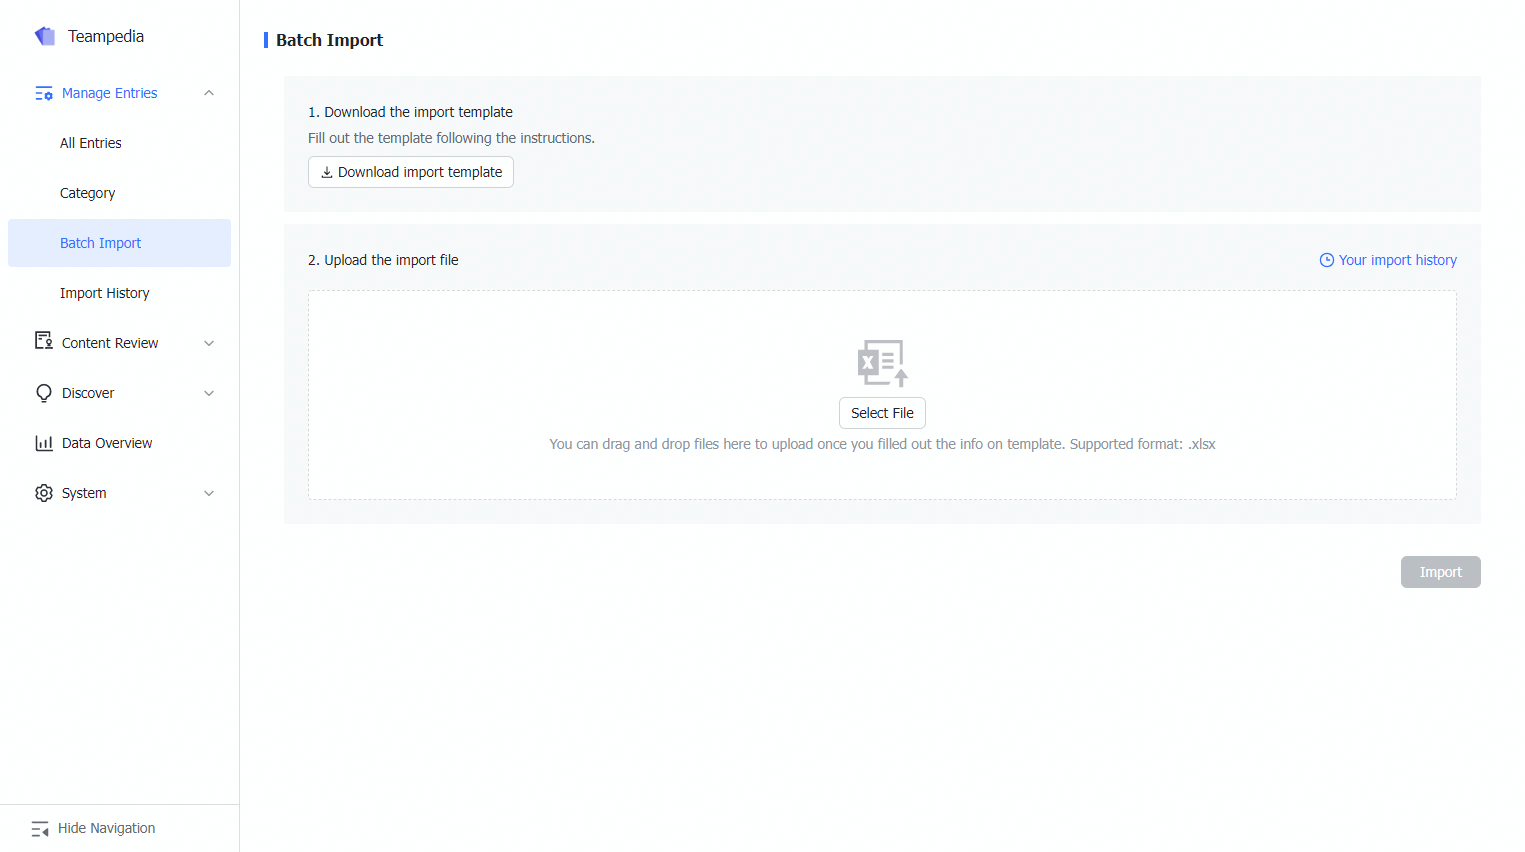
After installing the Lingo app, go into the Lingo admin area and click Manage Entries > Batch Import to download an import template for batch importing your newspaper's common dictionaries and your organization's frequently used dictionaries.
Lingo can help a newspaper gather together its organizational experience and knowledge, collaborate more efficiently, and reduce communication costs. It allows a newspaper to organize and manage its various categories of information, create knowledge out of them, and circulate that knowledge. Employees can take terms within the organization that have specific meanings (such as the organization's proprietary terms, abbreviations, specialized terminology, organizational jargon, and so on), distill them into entries, and request the entries be approved and collected into the organization's Lingo product.
250px|700px|reset
250px|700px|reset | 250px|700px|reset | 250px|700px|reset |
Approval app
After installing the Approval app, go to the approval admin area and click Approval Admin > Create to set up the approval processes a publisher needs.
Using the Approval app allows you to effectively speed up the approval of various processes within your newspaper while at the same time meeting the approval needs of a greater number of collaborative scenarios.
250px|700px|reset | 250px|700px|reset | 250px|700px|reset |
2. Create an all-staff calendar
To create an all-staff calendar that applies to all members, complete the following steps:
In Calendar > All-Staff Calendar, click Add all-staff calendar. Select Create an all-staff calendar, fill in a name and description, and add administrators and editors. Click Confirm. You've now successfully created an all-staff calendar.
You can add talks, team meetings, and other events that all employees need to know about to the all-staff calendar to cut down on the number of individual event notifications and reduce communication costs.
Note: After creating a calendar in the Admin Console, you need to add events to it. Switch to the Lark app, and then click Calendar > Create Event. Specify the event time, and make sure the Calendar to add event to is the all-staff calendar you created. Click Save. The event will now be visible to all staff.
250px|700px|reset | 250px|700px|reset | 250px|700px|reset |
3. Configure the security management
In Settings > Security > Security Strategy, set external document sharing functions and default document access permissions, and turn watermarks on or off. These can effectively inhibit the sources of document leaks.
250px|700px|reset | 250px|700px|reset | 250px|700px|reset |