
Available with these plans:
Starter
Basic
Pro
Enterprise
To upgrade your Lark Plan or for more information, contact Support or your Customer Success Manager. The Lark Basic plan supports only specific countries and regions.
If your plan does not cover this feature, you can enjoy a 7-day free trial.
I. Intro
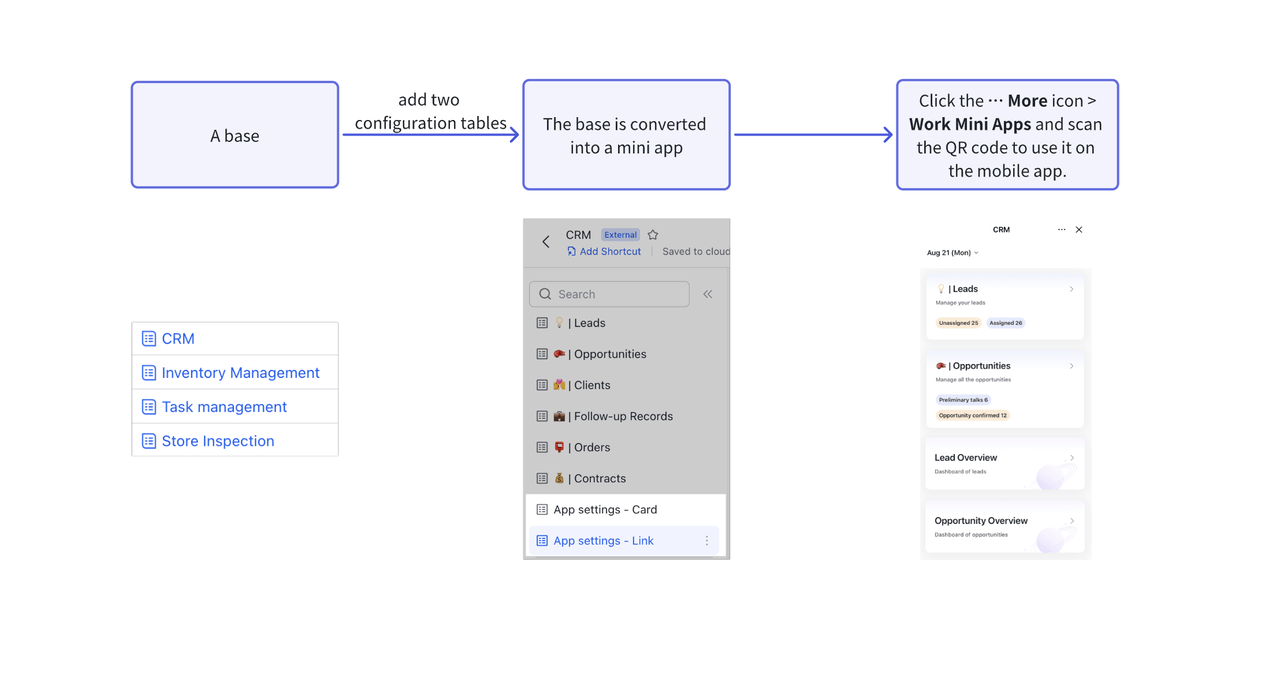
Work Mini Apps are lightweight applications powered by Base. Simply add two configuration tables to any base to convert it into a mini app. You can also directly use the mini app templates in the template gallery, and customize them according to your needs.
The configuration of mini apps is simple and flexible, meeting various business needs such as store inspections, customer relationship management (CRM), inventory checks, and strategy implementation. At the same time, frontline staff can view the data they need and carry out the necessary operations from their phone, lowering the barrier to adoption and improving efficiency.
Note: This feature is only available in English, Simplified Chinese, and Japanese.
Mobile interface
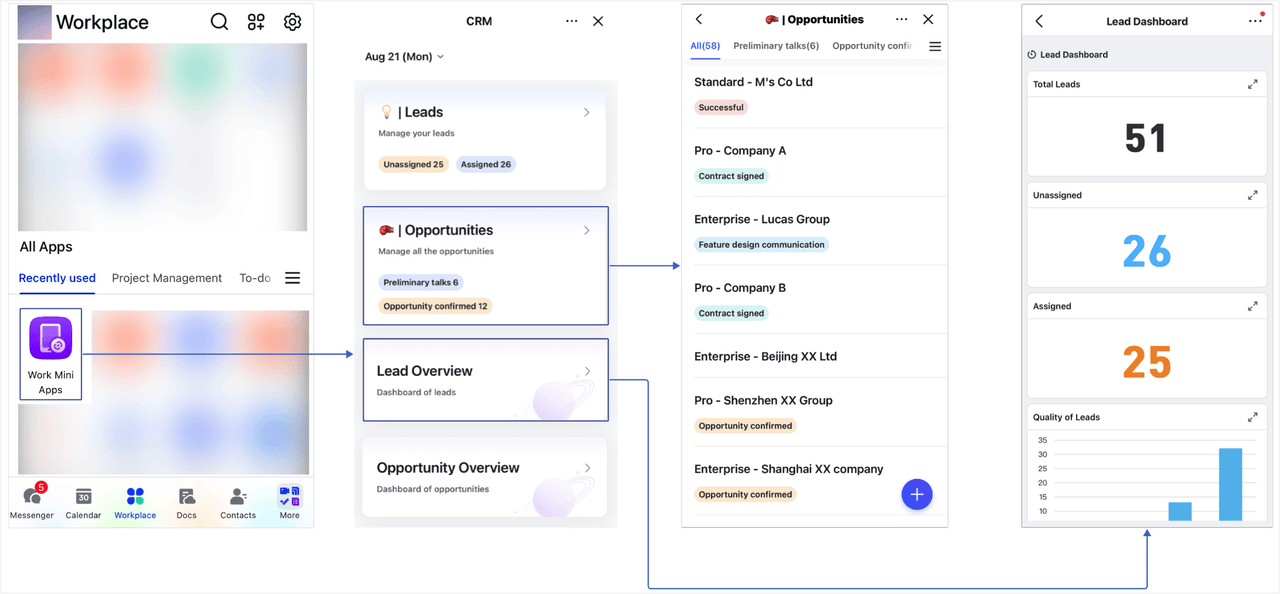
Here, we'll use a CRM mini app as an example for demonstration.
There are two types of cards on the mini app homepage on the mobile interface:
- Table cards, such as Leads and Opportunities in the screenshots are generated from the tables in the base. You can view records in the table by clicking on a card.
- Link cards, such as Lead Overview and Opportunity Overview in the screenshots have an image of a planet on the right side. You can configure any type of link here, such as Base dashboards, documents, and web pages.
Note: You can use multiple mini apps at the same time. When you exit and click Work Mini Apps again, the mini app you used last will open.
250px|700px|reset
Configuration overview
250px|700px|reset
Common scenarios
- Inventory management: Add purchase, sales, and inventory data into the mini app to allow team members to view the inventory status and add new records directly from their phones.
- Customer relationship management: Throughout the whole customer management process, the sales team can view the progress of opportunities and record customer follow-up details from anywhere.
- Store management: Frontline staff can complete daily store inspections or inventory checks on their phones, so they can get started, record results, and report problems in a timely manner.
II. Steps
- Enter Work Mini Apps
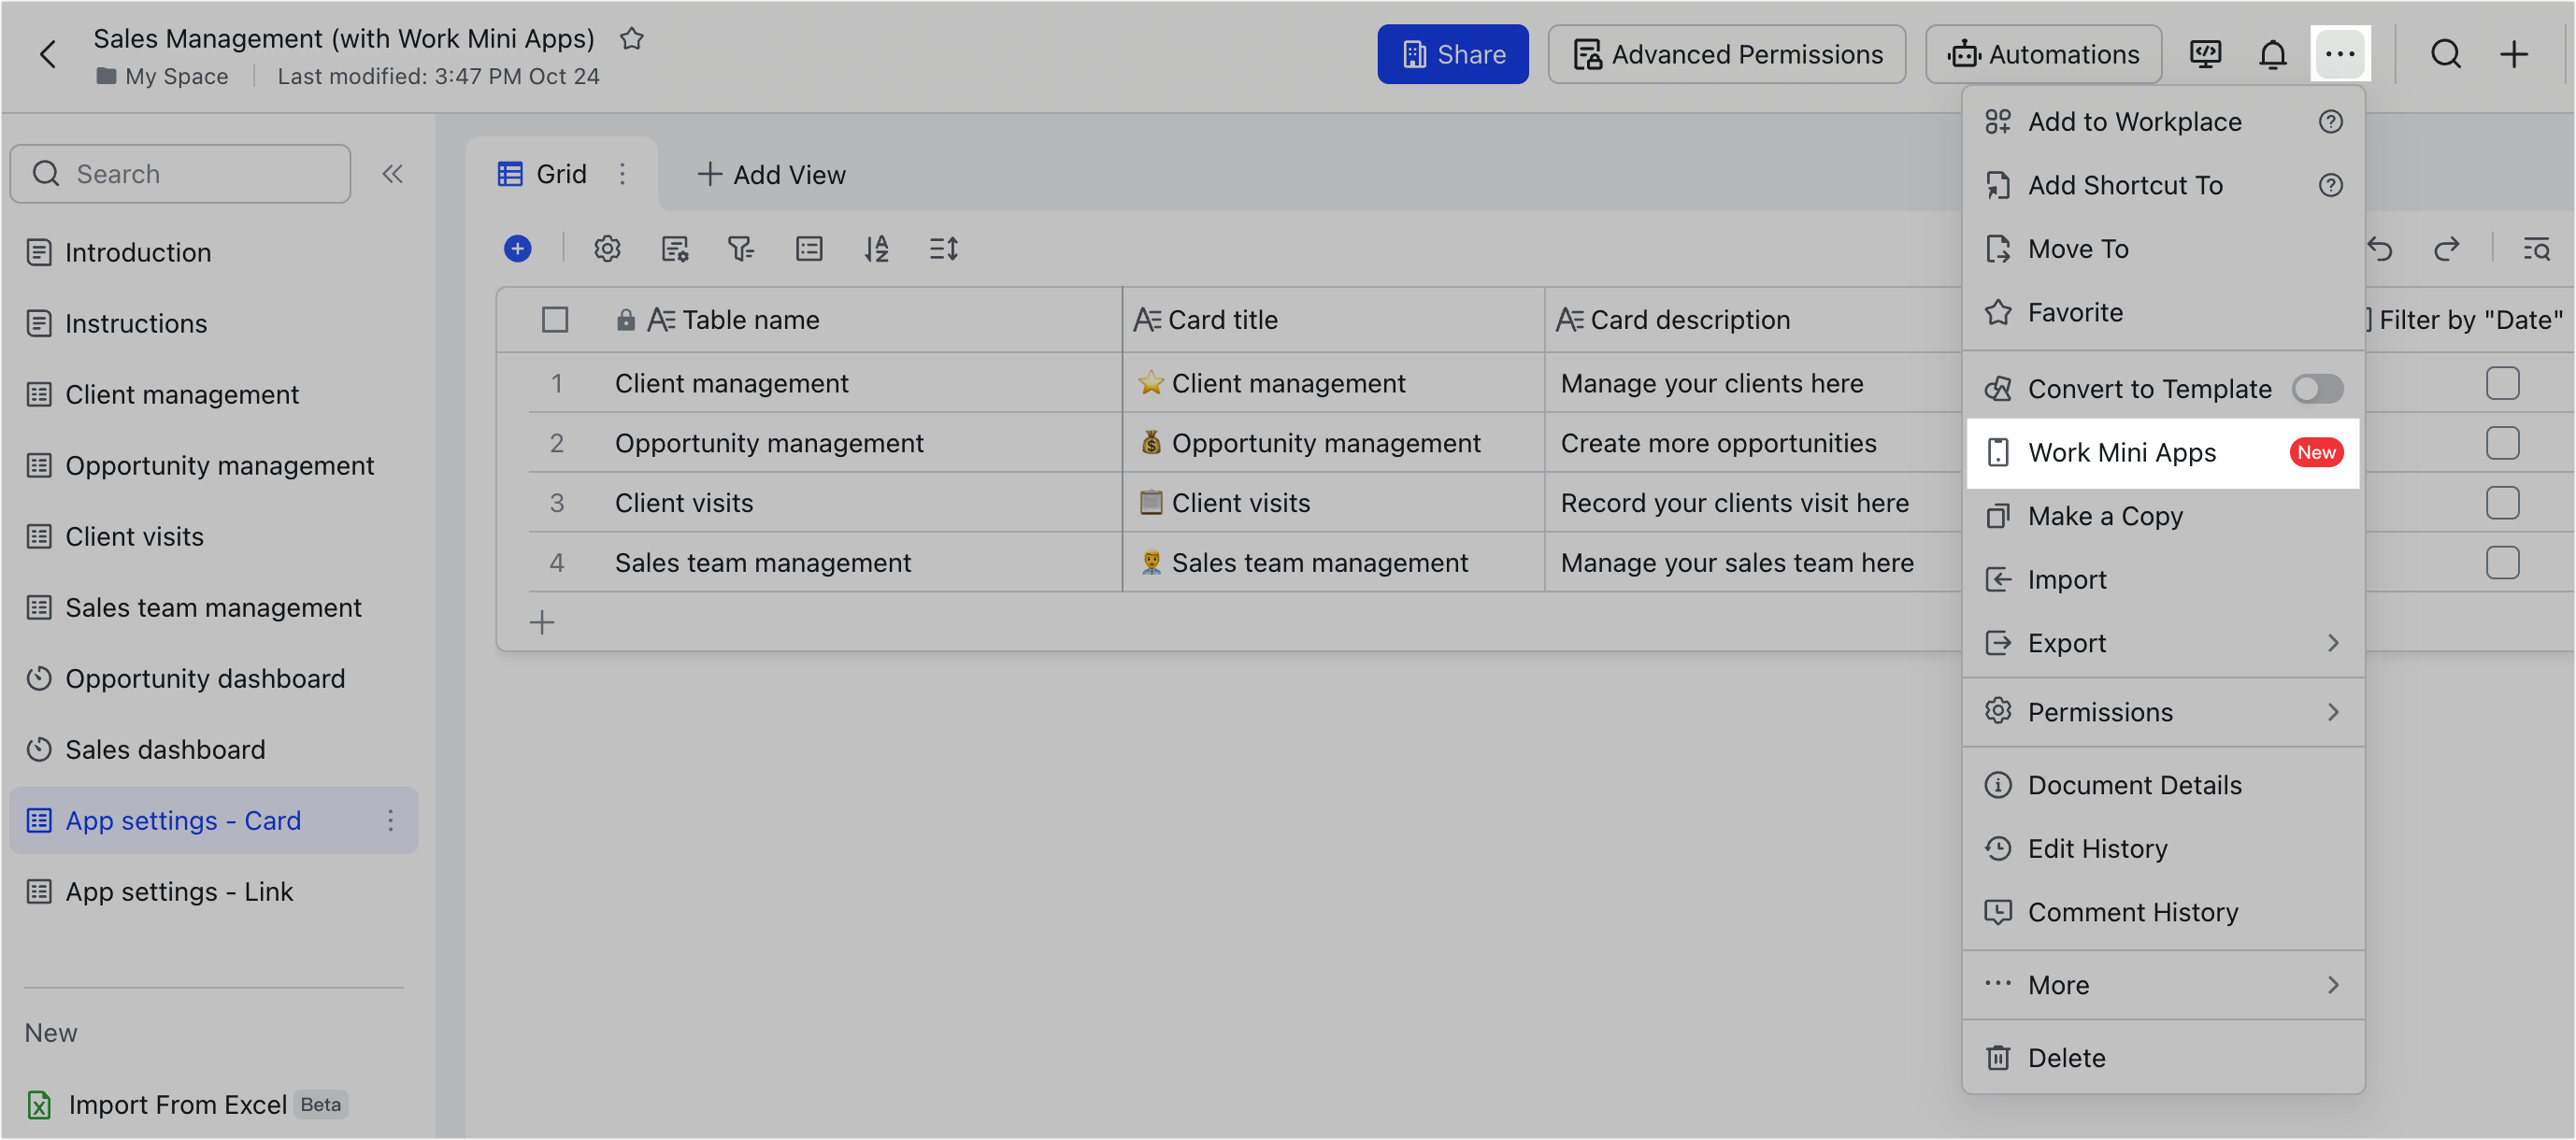
Open a base, click the ··· icon in the upper-right corner > Work Mini Apps.
250px|700px|reset
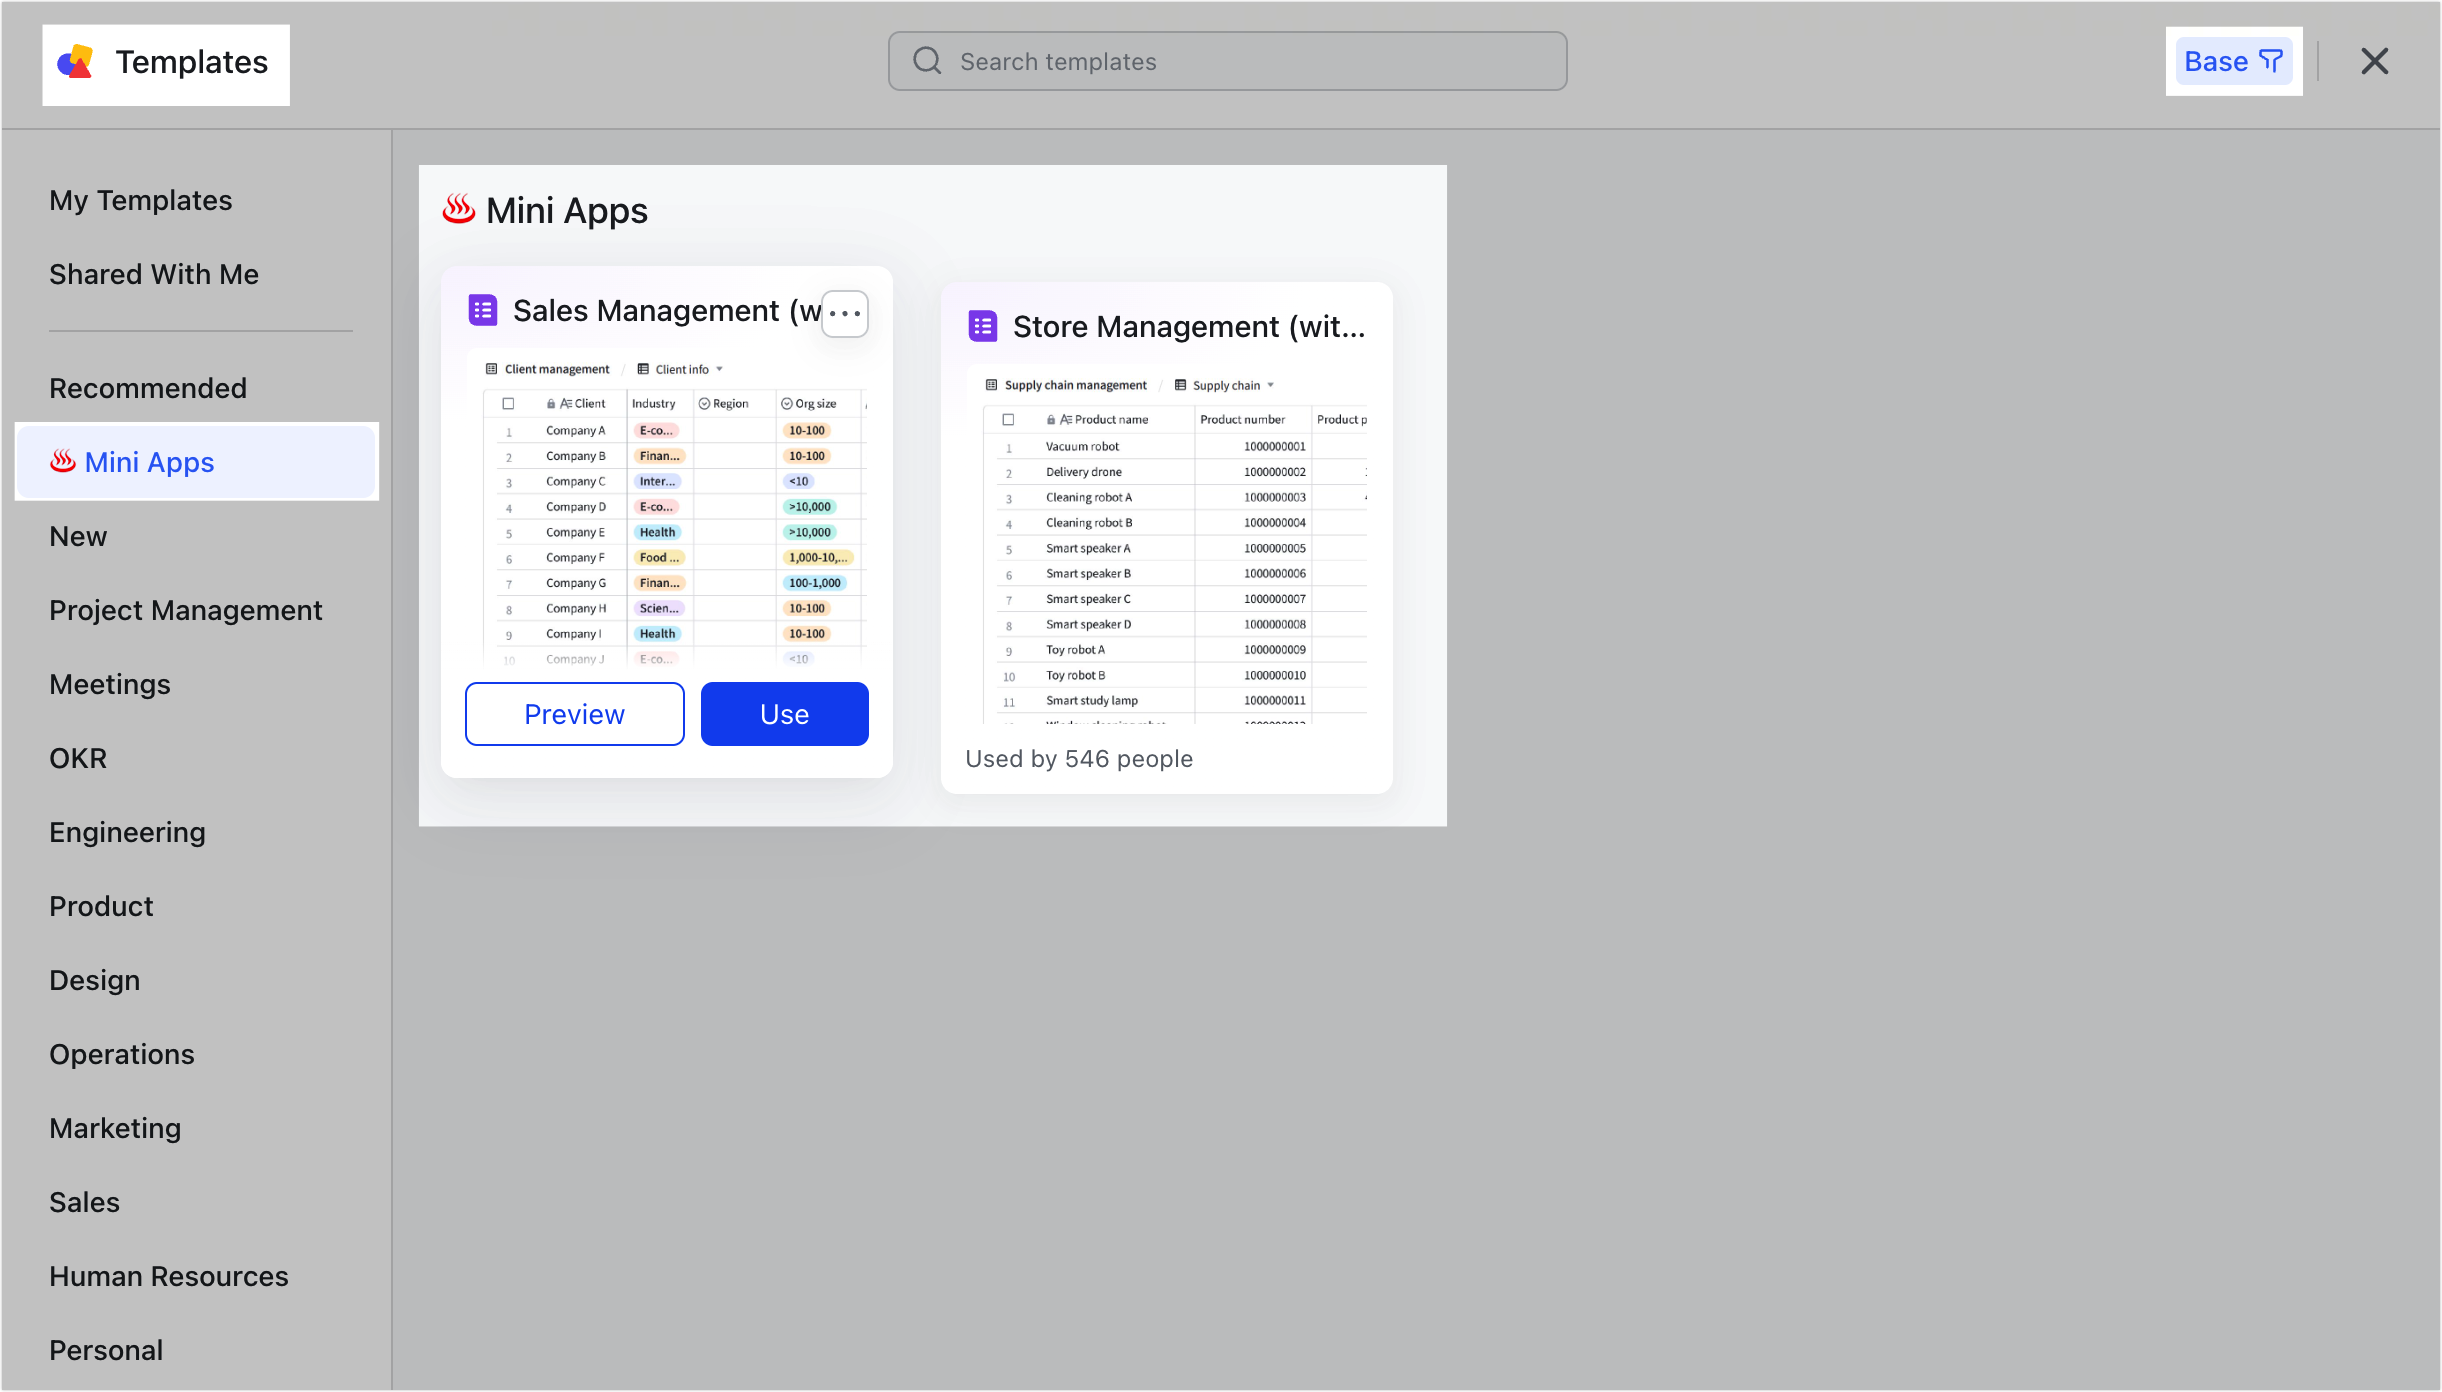
If the base does not contain two configuration tables (App settings - Card and App settings - Link), a template gallery for mini apps will open.
Click Use on the mini app you want and the base created will automatically include the two configuration tables above.
250px|700px|reset
If the base contains two configuration tables (App settings - Card and App settings - Link), a QR code will be displayed. Scan the QR code with the mobile app to use the mini app on your phone.
Click Explore Mini Apps in the lower-right corner to go to the template gallery for mini apps.
If your Lark plan is Enterprise, you can directly use the mini apps.
If you don't have the plan(s) mentioned above, you can try mini apps for 7 days.
After scanning the QR code, a mini app bot will send you a message card, which you can click to access the mini app. You can pin the bot to the top if you want quick access to the mini app.

250px|700px|reset
250px|700px|reset
- Configure Work Mini Apps
Any base can be converted into a mini app and data between them will stay in sync.
If you want to directly convert an existing base into a mini app, add these two tables (App settings - Card and App settings - Link) to the base.
Note: The names of the above two configuration tables cannot be modified, and the field names and field types within cannot be changed.
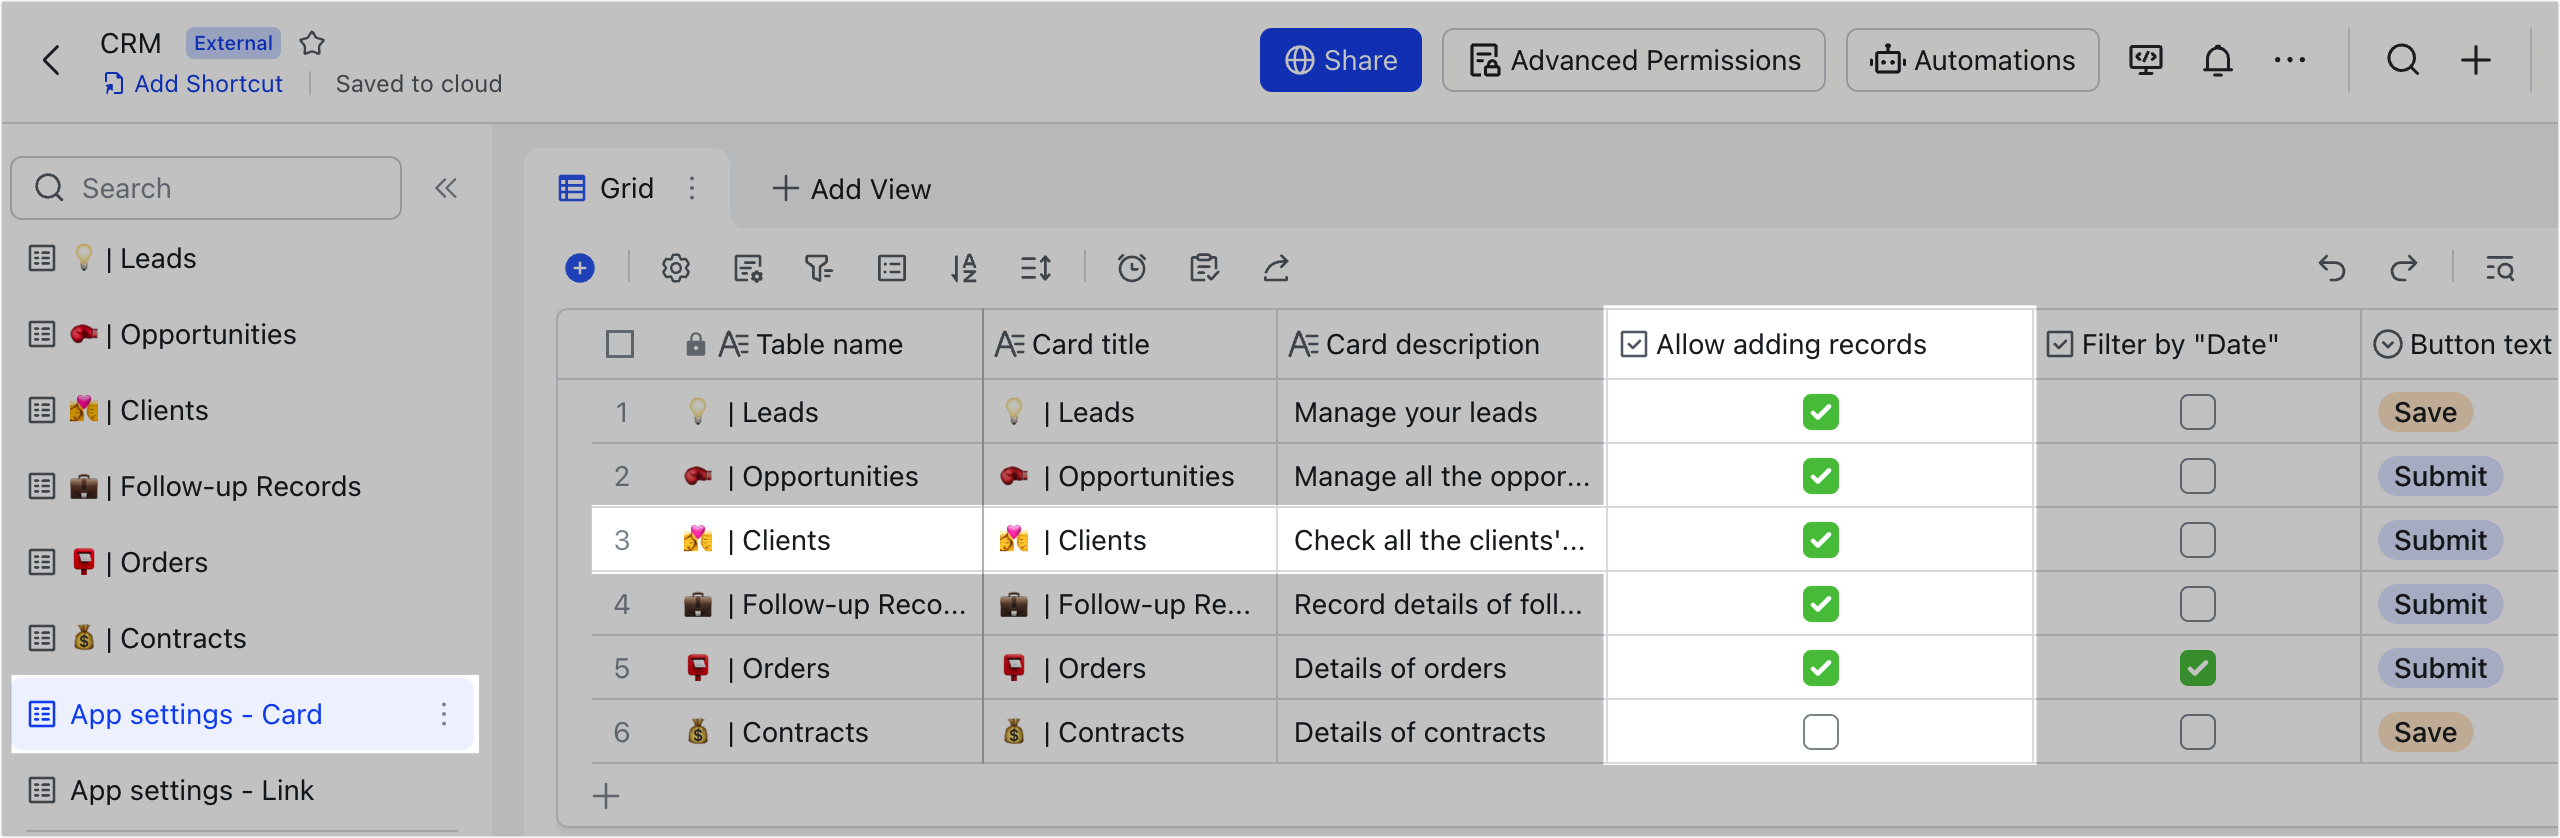
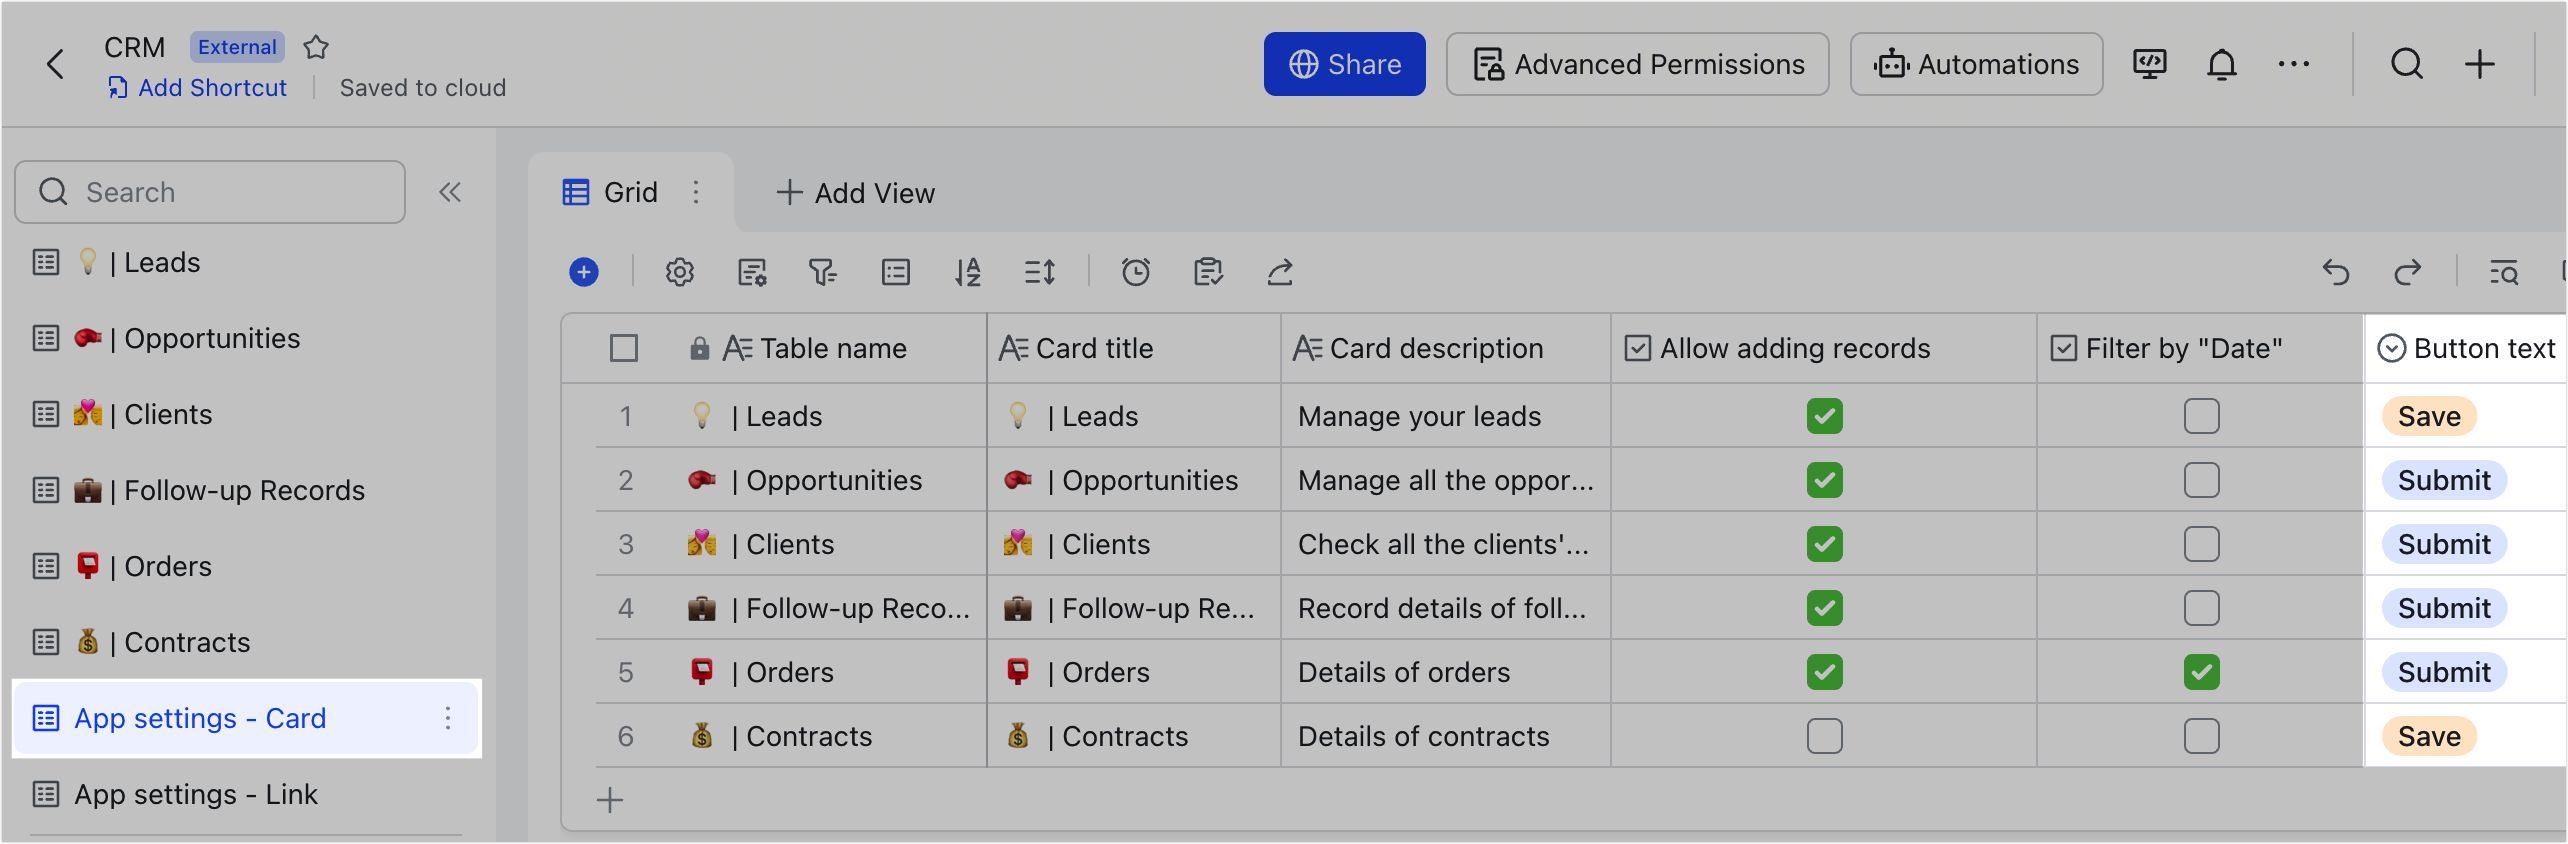
Configuration table descriptions | Example |
App settings - Card: For configuring which tables in the base will be displayed in the mini app. There is a limit of 30,000 rows per table. If there are more than 30,000 rows in a table, the table will not be displayed on the mobile app, and you'll get an error message instead. Note: The mini app homepage can display up to 20 table cards (the first 20 records from the "App settings - Card" table). The content that is visible to users depends on the permission settings of the base. To display more than 20 tables, you can split them into multiple mini apps.
(Note: This field filters for a date field titled Date. If such a field does not exist, the first date field in the first view will be used instead)
| In this CRM base, Leads, Opportunities, Clients, Follow-up Records, Orders, and Contracts tables are added to the mini app, allowing frontline staff to easily view and make changes on their phones. 250px|700px|reset 250px|700px|reset |
App settings - Link: To configure the link cards on the mini app homepage (cards with a planet image).
| Here, the links of four dashboards are configured in the App settings - Link table. Users can click the corresponding card to go to the dashboard. 250px|700px|reset 250px|700px|reset |
After completing the configuration of the two tables above, click the ··· icon in the upper-right corner of the base > Work Mini Apps and scan the QR code to access the mini app on your phone.
III. Tips and tricks
- Allow creating new records in mini apps
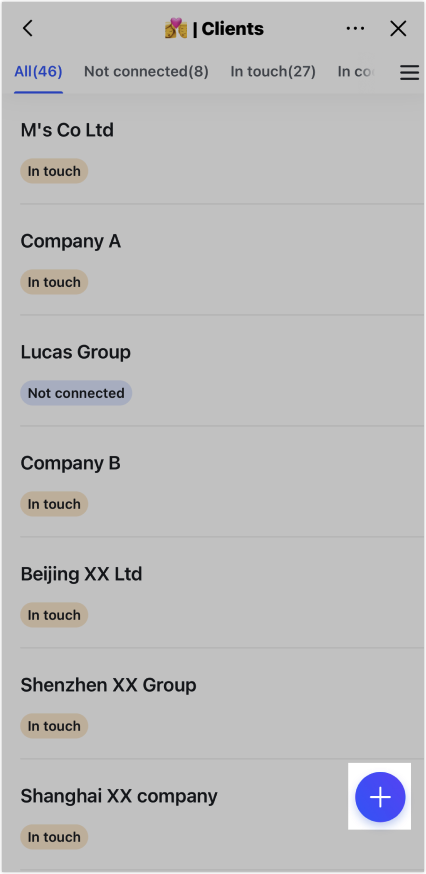
- In the App settings - Card table, select the checkbox under Allow adding records.
- In the mini app, a + button will appear in the lower-right corner of the corresponding detail page. Users can tap to add new records from their phone.
250px|700px|reset
250px|700px|reset
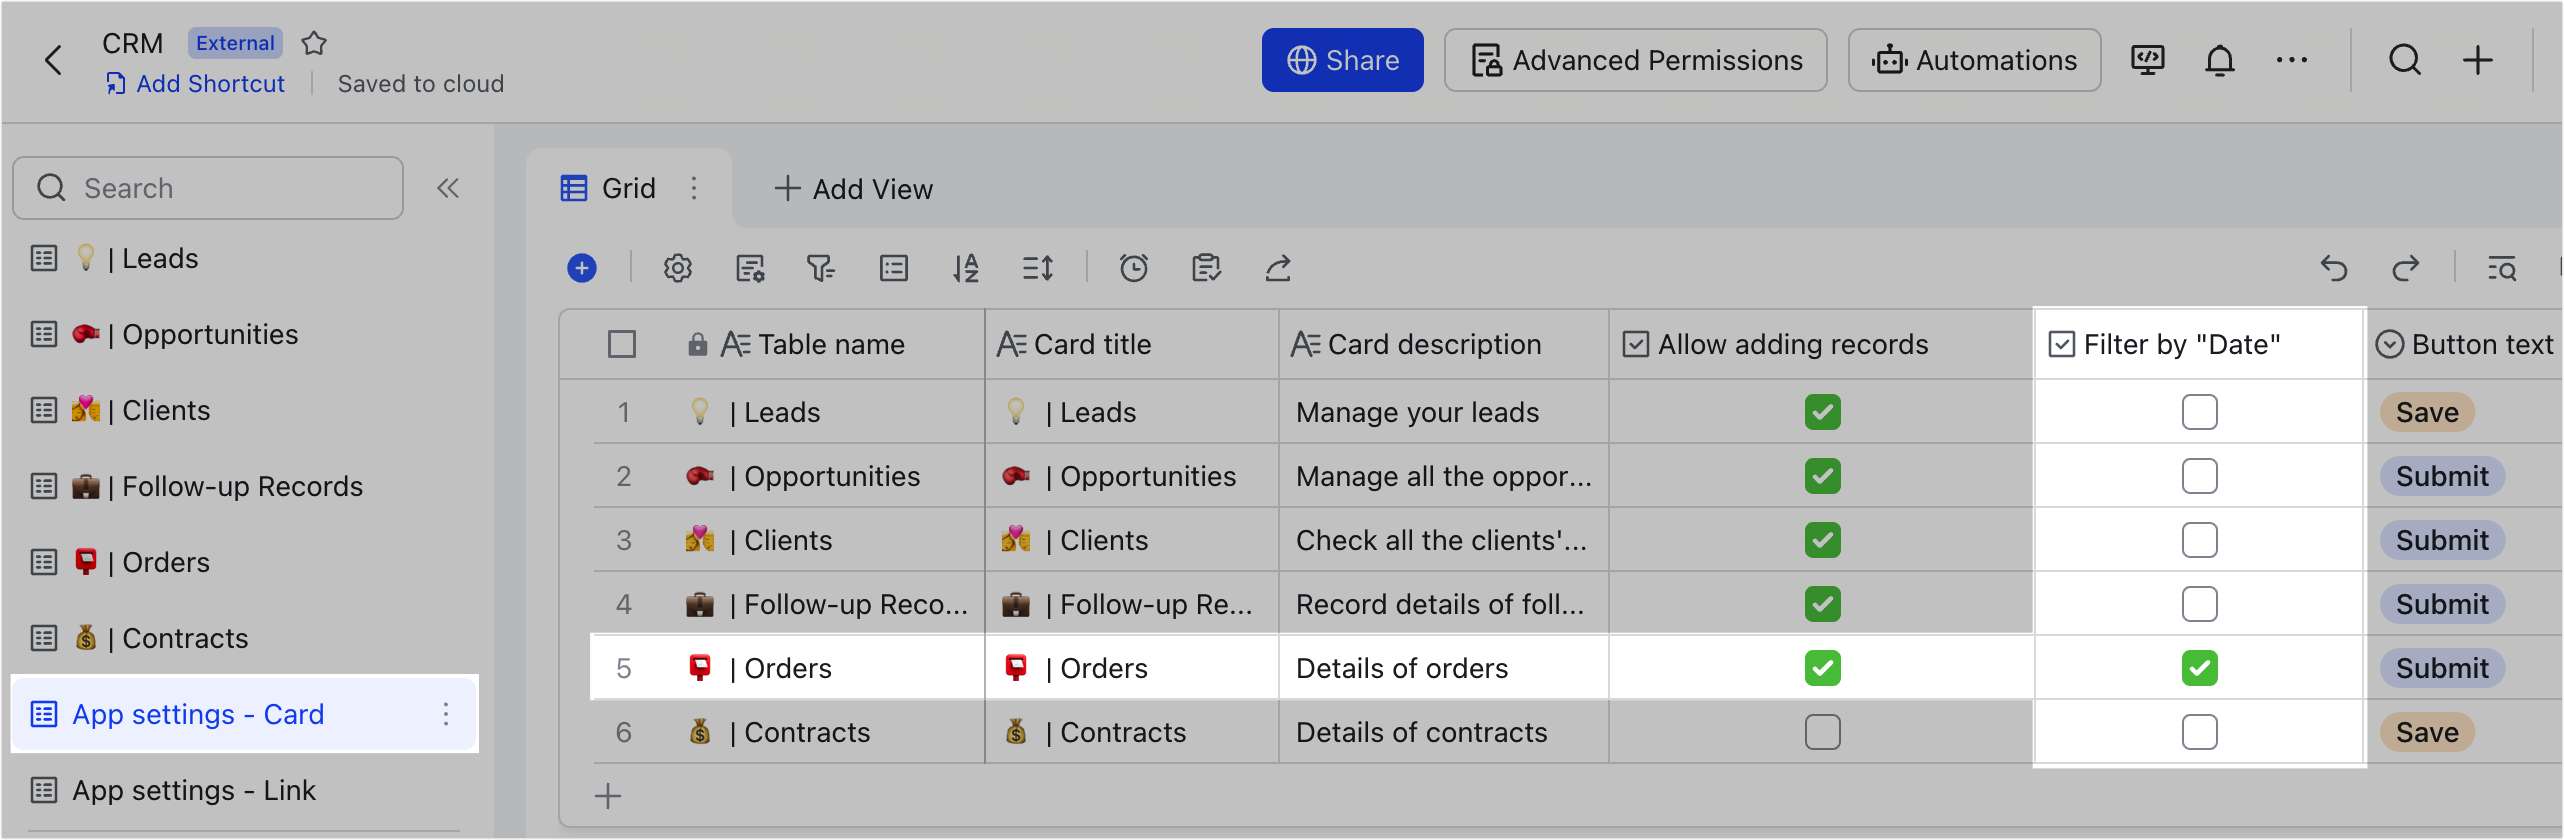
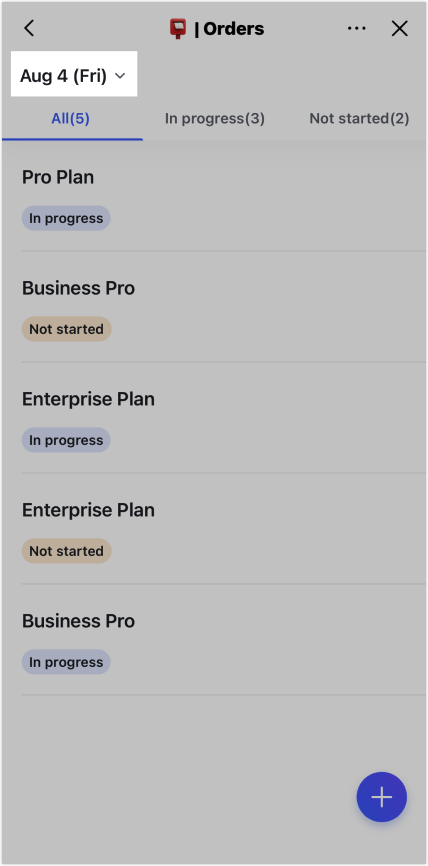
- Configure date filtering
In the App settings - Card table, select Filter by "Date" to add the date filter at the top of the mini app to allow users to filter data by date.
Filtering by date may be especially useful for scenarios that rely on daily data, such as store inspections and other tasks that need to be performed daily.
Filter condition: If there is a date field titled Date, it will be used as the filter condition, otherwise the first date field in the first view will be used instead, even if the field is hidden.
250px|700px|reset
250px|700px|reset
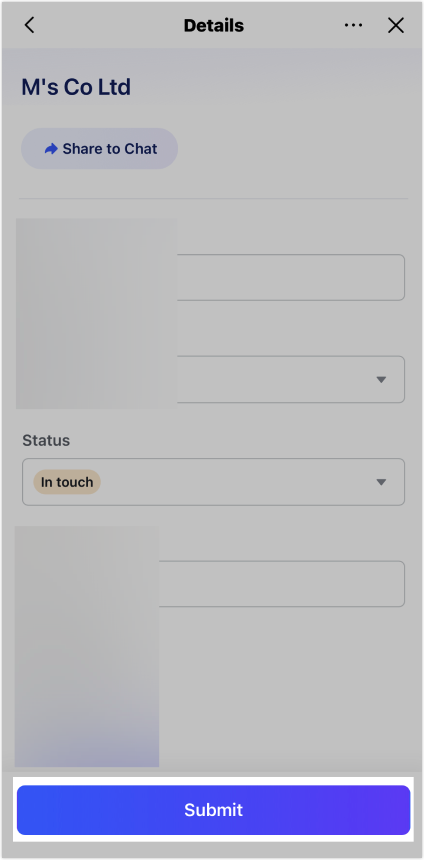
- Customize the button text
In the App settings - Card table, you can select or create an option in the single-option field Button text to customize the button text that'll appear at the bottom of each record page.
250px|700px|reset
250px|700px|reset
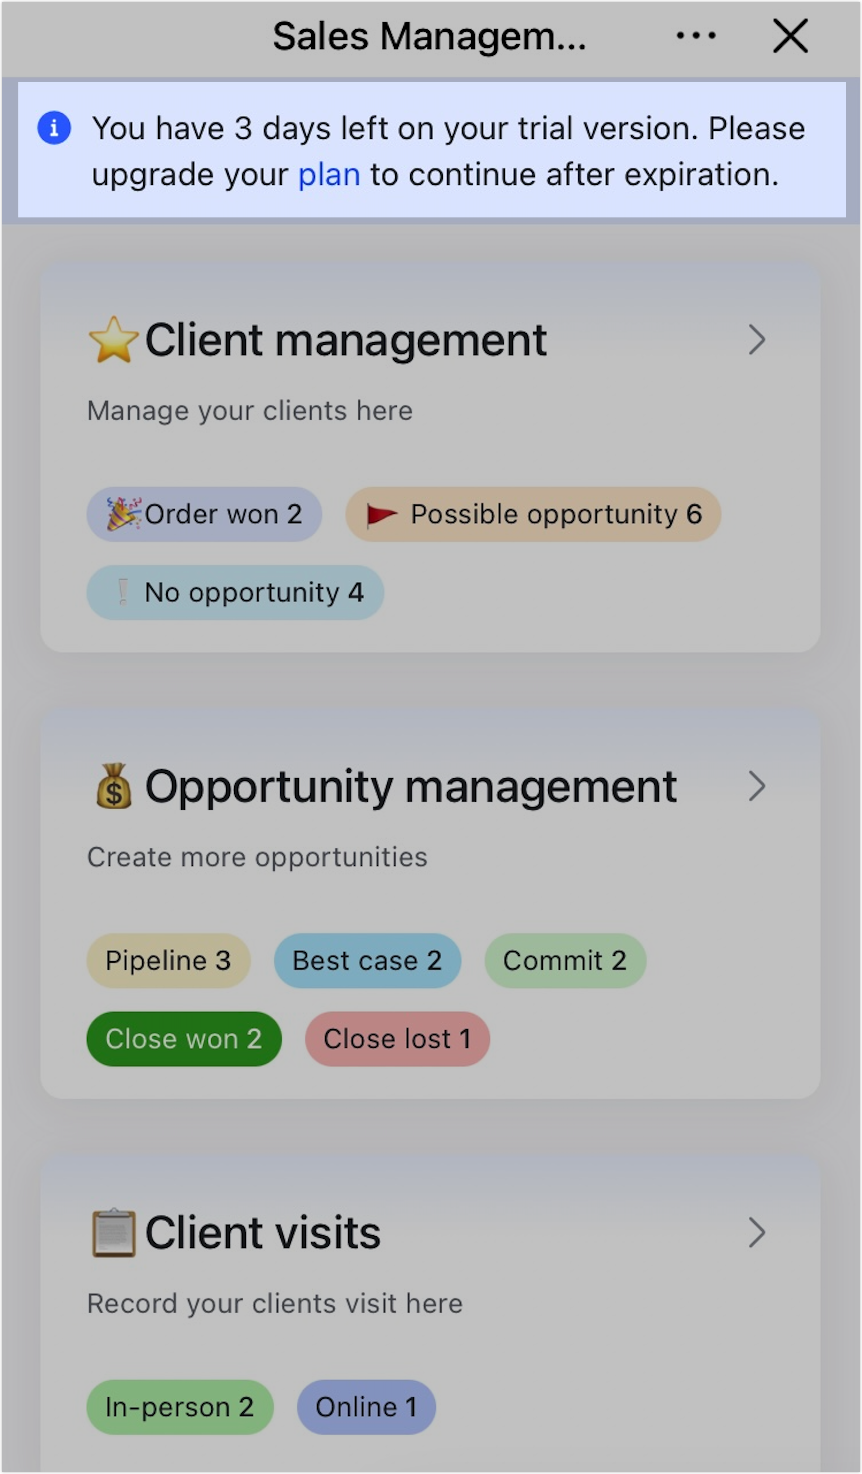
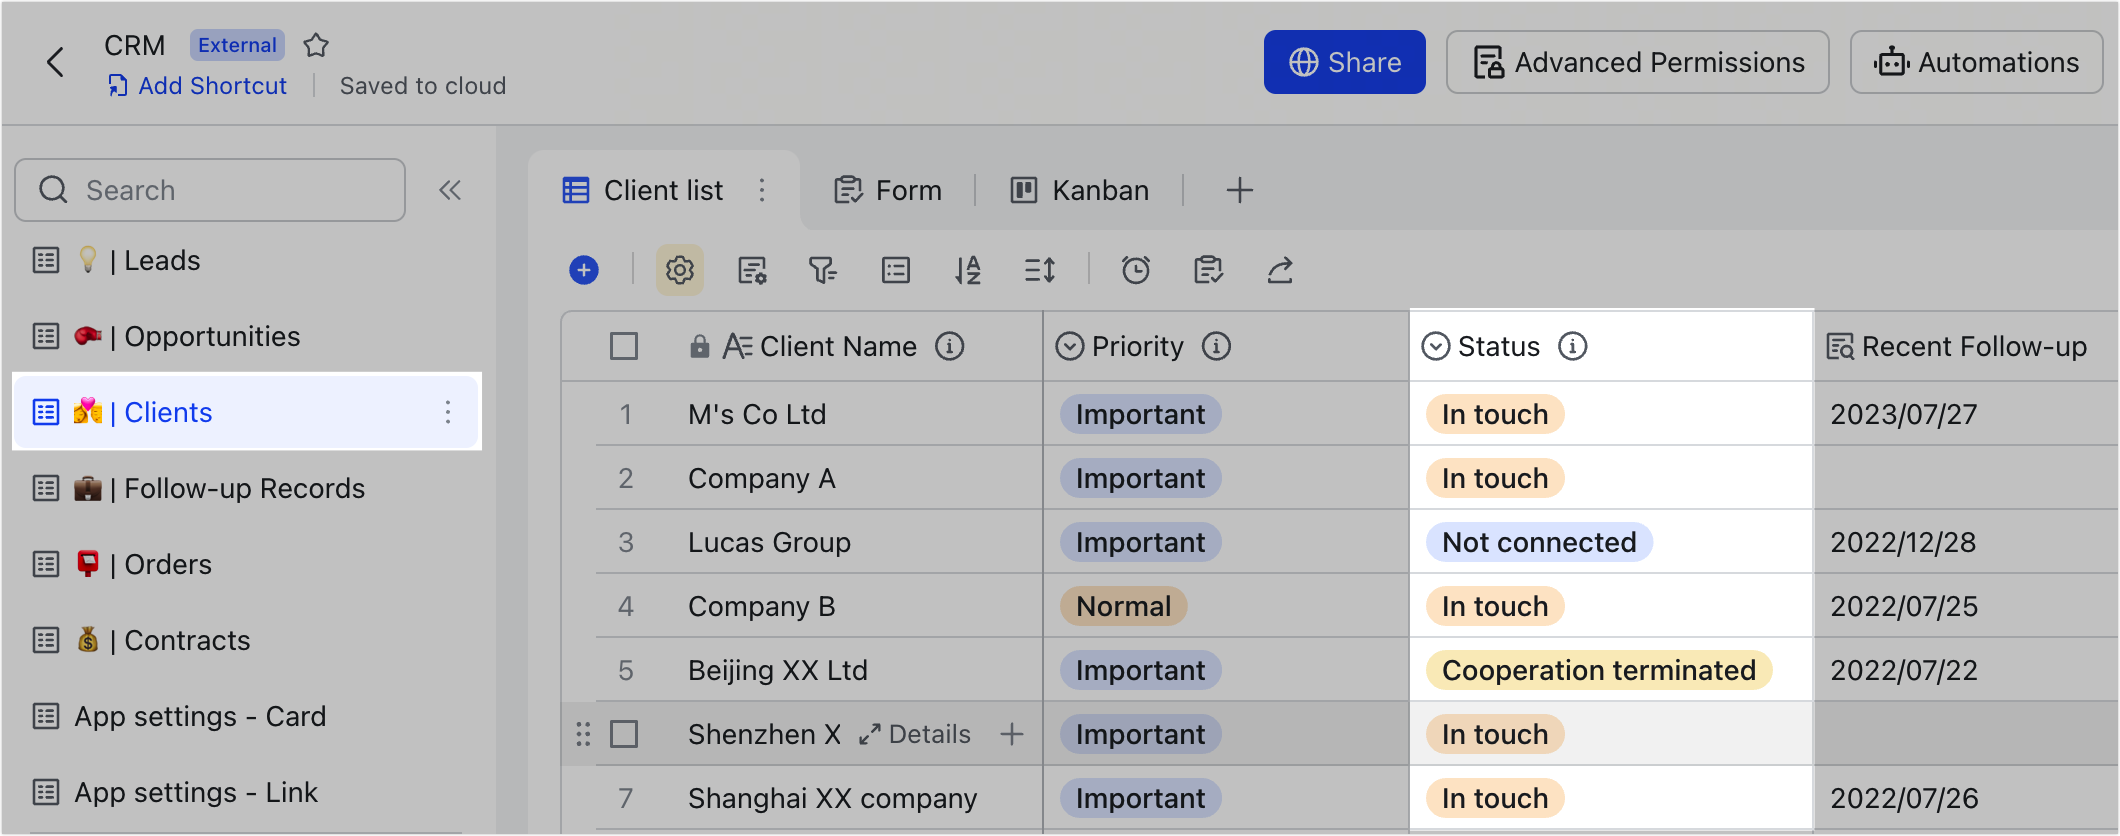
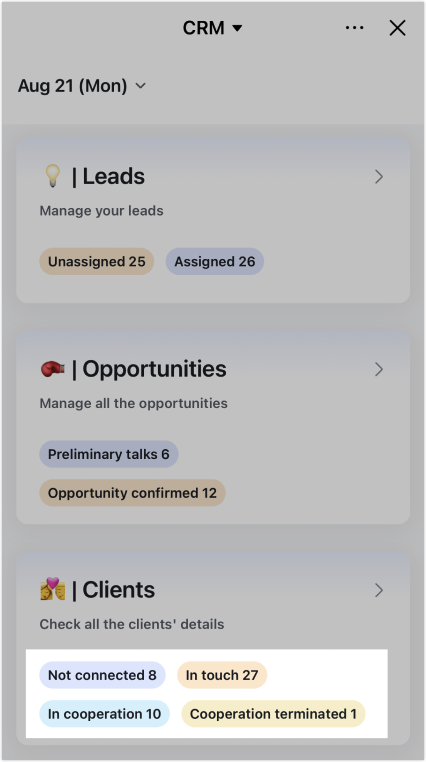
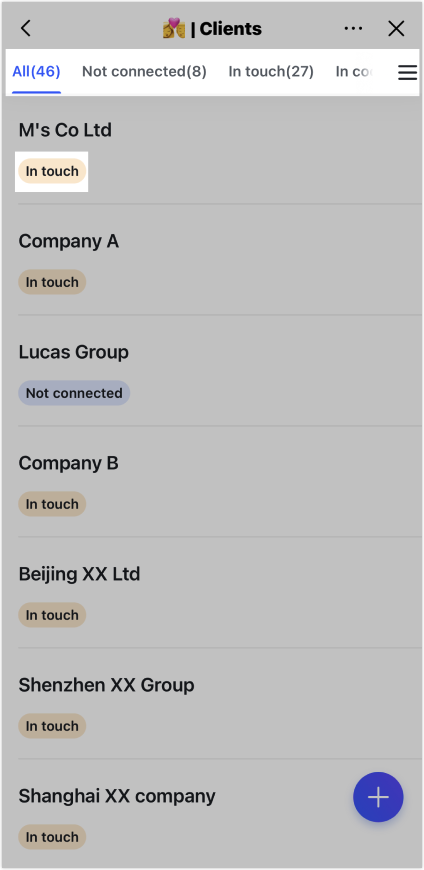
- Add "Status" labels to the card
Add a single-option field called Status in the base to display status labels of records in the mini app. For example, if a Status field is added to the Clients table:
- The number of records for each status in the Clients table is displayed on the mini app homepage.
- Tap the Clients card on mobile, and a filter can be found on top of the details page, which groups records by status. You can also see the status of each individual record on the page.
Grouping condition: If there is a single option field titled Status, it will be used as the grouping condition, otherwise the last single option field in the first view will be used instead, even if the field is hidden.
250px|700px|reset
250px|700px|reset
250px|700px|reset
IV. FAQs