
I. Intro
Version requirement: Lark version 6.4 or above
As a meeting's host or co-host, you can use stage mode to highlight one to four of a webinar's panelists. You can also set a background, adjust the screen's layout and apply this layout to all participants.
II. Steps
Click Layout > Stage to start using stage mode.
Select a stage background
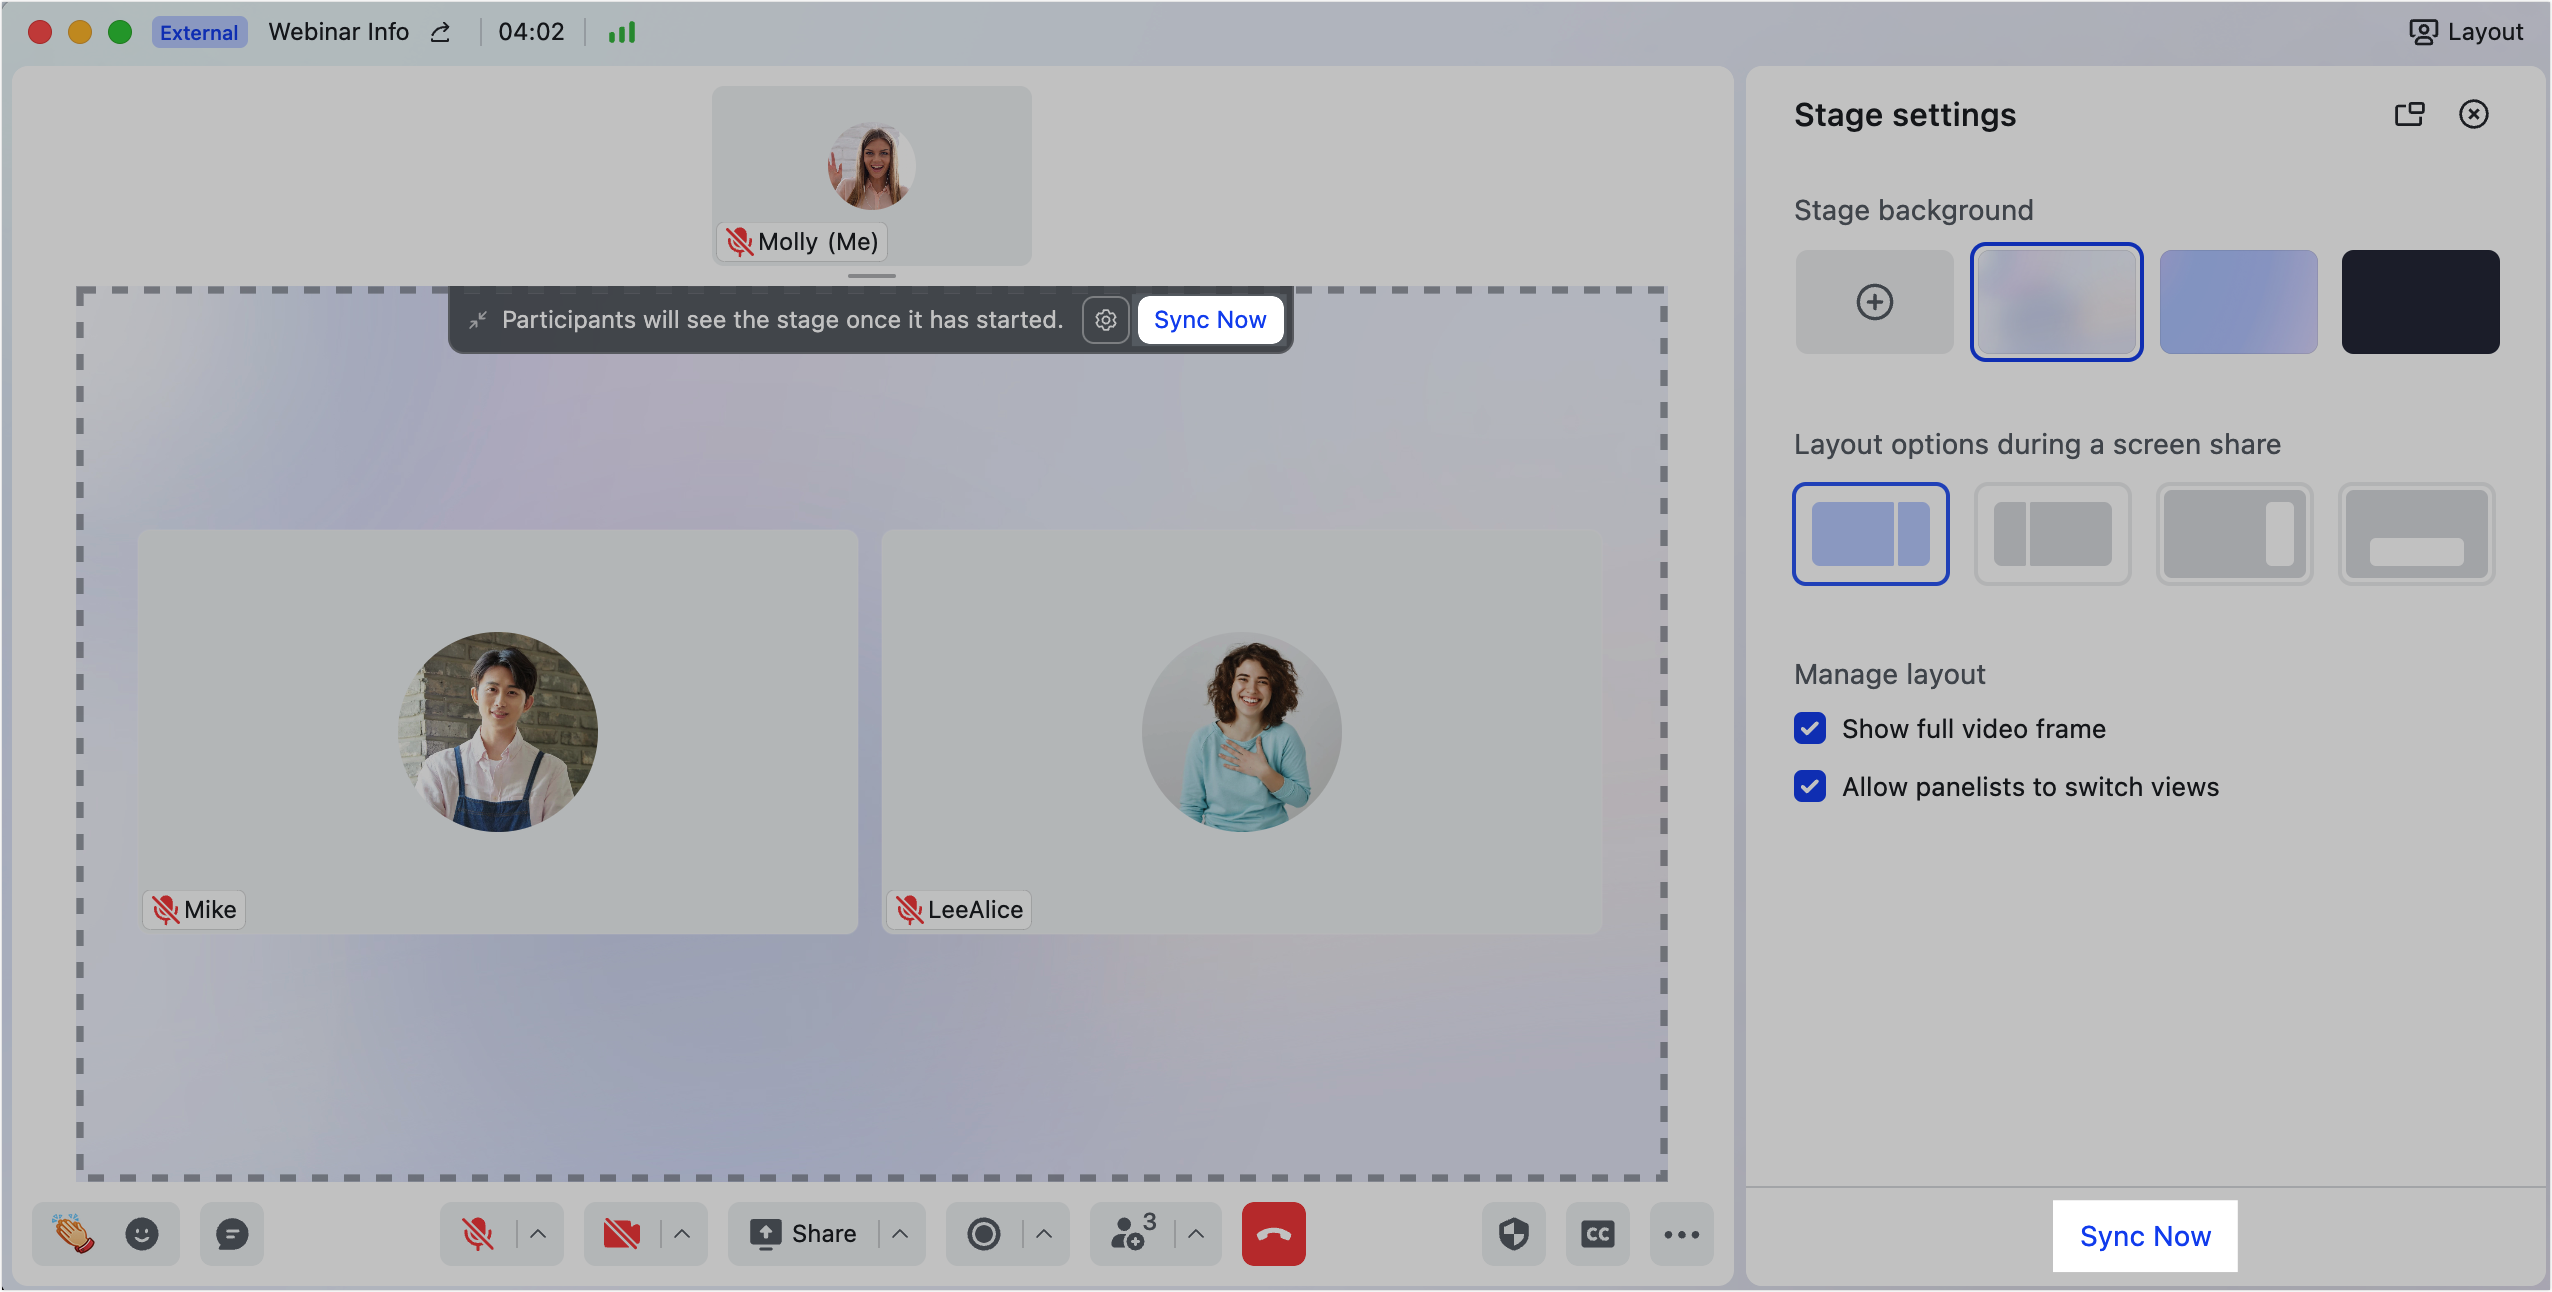
In the Stage settings area, you can select the default Stage background image as needed, and can also upload custom background images.
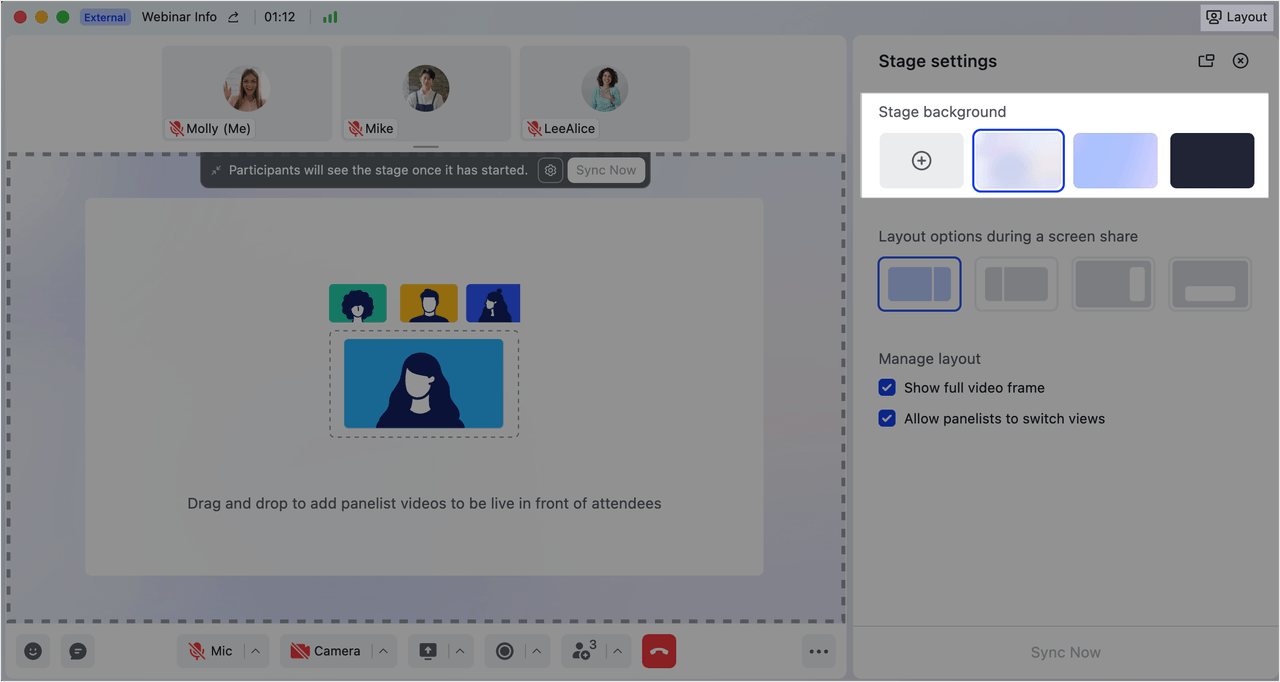
250px|700px|reset
Note:
- A maximum of 20 stage background images can be uploaded.
- Background images can only be JPEG/JPG or PNG-24, and the image size cannot exceed 15 MB. The recommended resolution is 1920×1080. To learn more, visit Optimal dimensions for background images in stage mode.
Set the stage layout
Move panelists to the stage area
You can use the two methods below to add panelists to the stage area. A maximum of four panelists can be added.
Method 1: Drag a panelist to the stage area.
Method 2: Click the ··· More icon > Move to Stage in the upper-right corner of a panelist.
Note: When an attendee raises hand, the host or co-host can approve the request. After the attendee turns on the microphone, the host or co-host can then move them to the stage.

250px|700px|reset
There are two ways to move panelists out of the stage area:
Method 1: Click the small icon Move off Stage in the upper-left corner of a panelist.
Method 2: Click the ··· More icon > Move off Stage in the upper-right corner of a panelist.
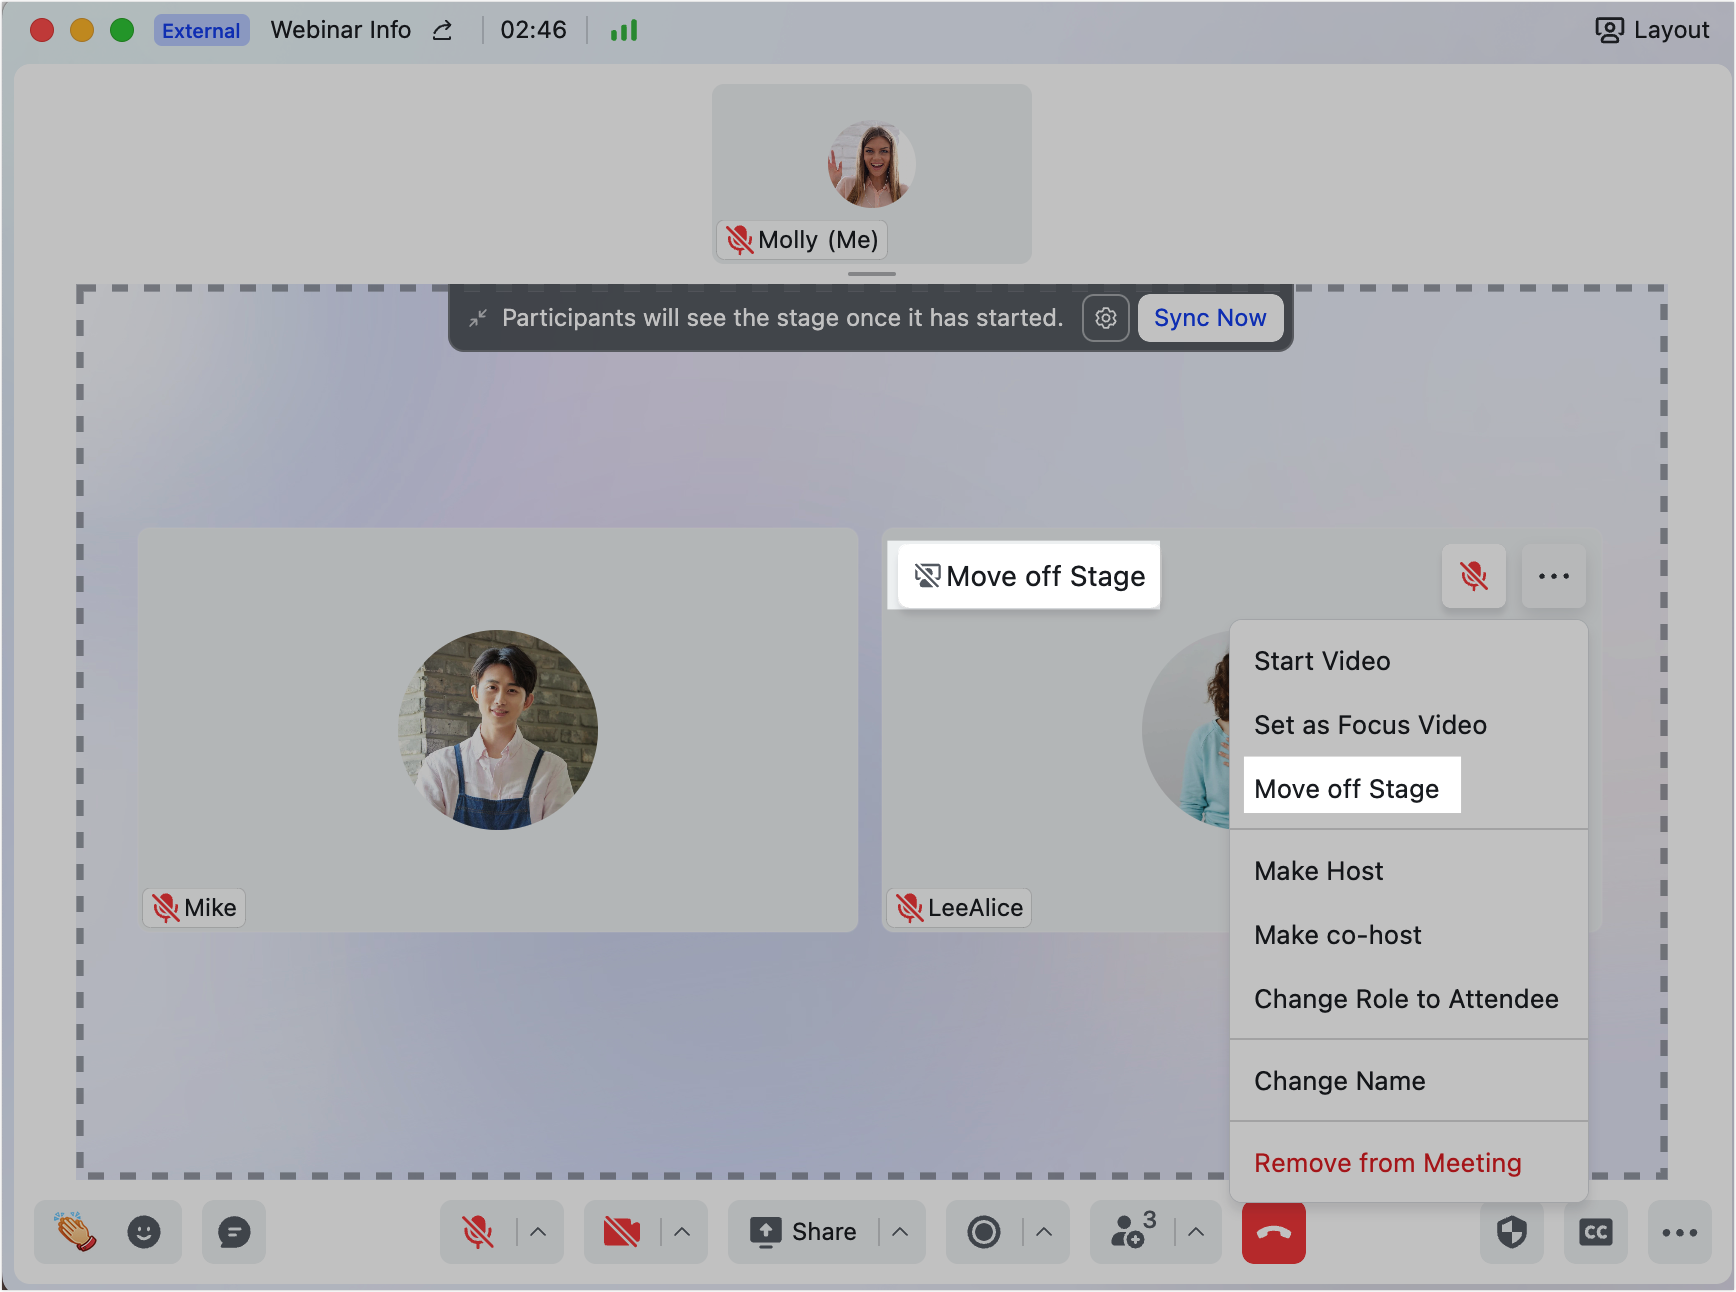
250px|700px|reset
Adjust the layout
You can drag panelists to adjust their layout. You can also drag shared content outside the stage area to remove it.
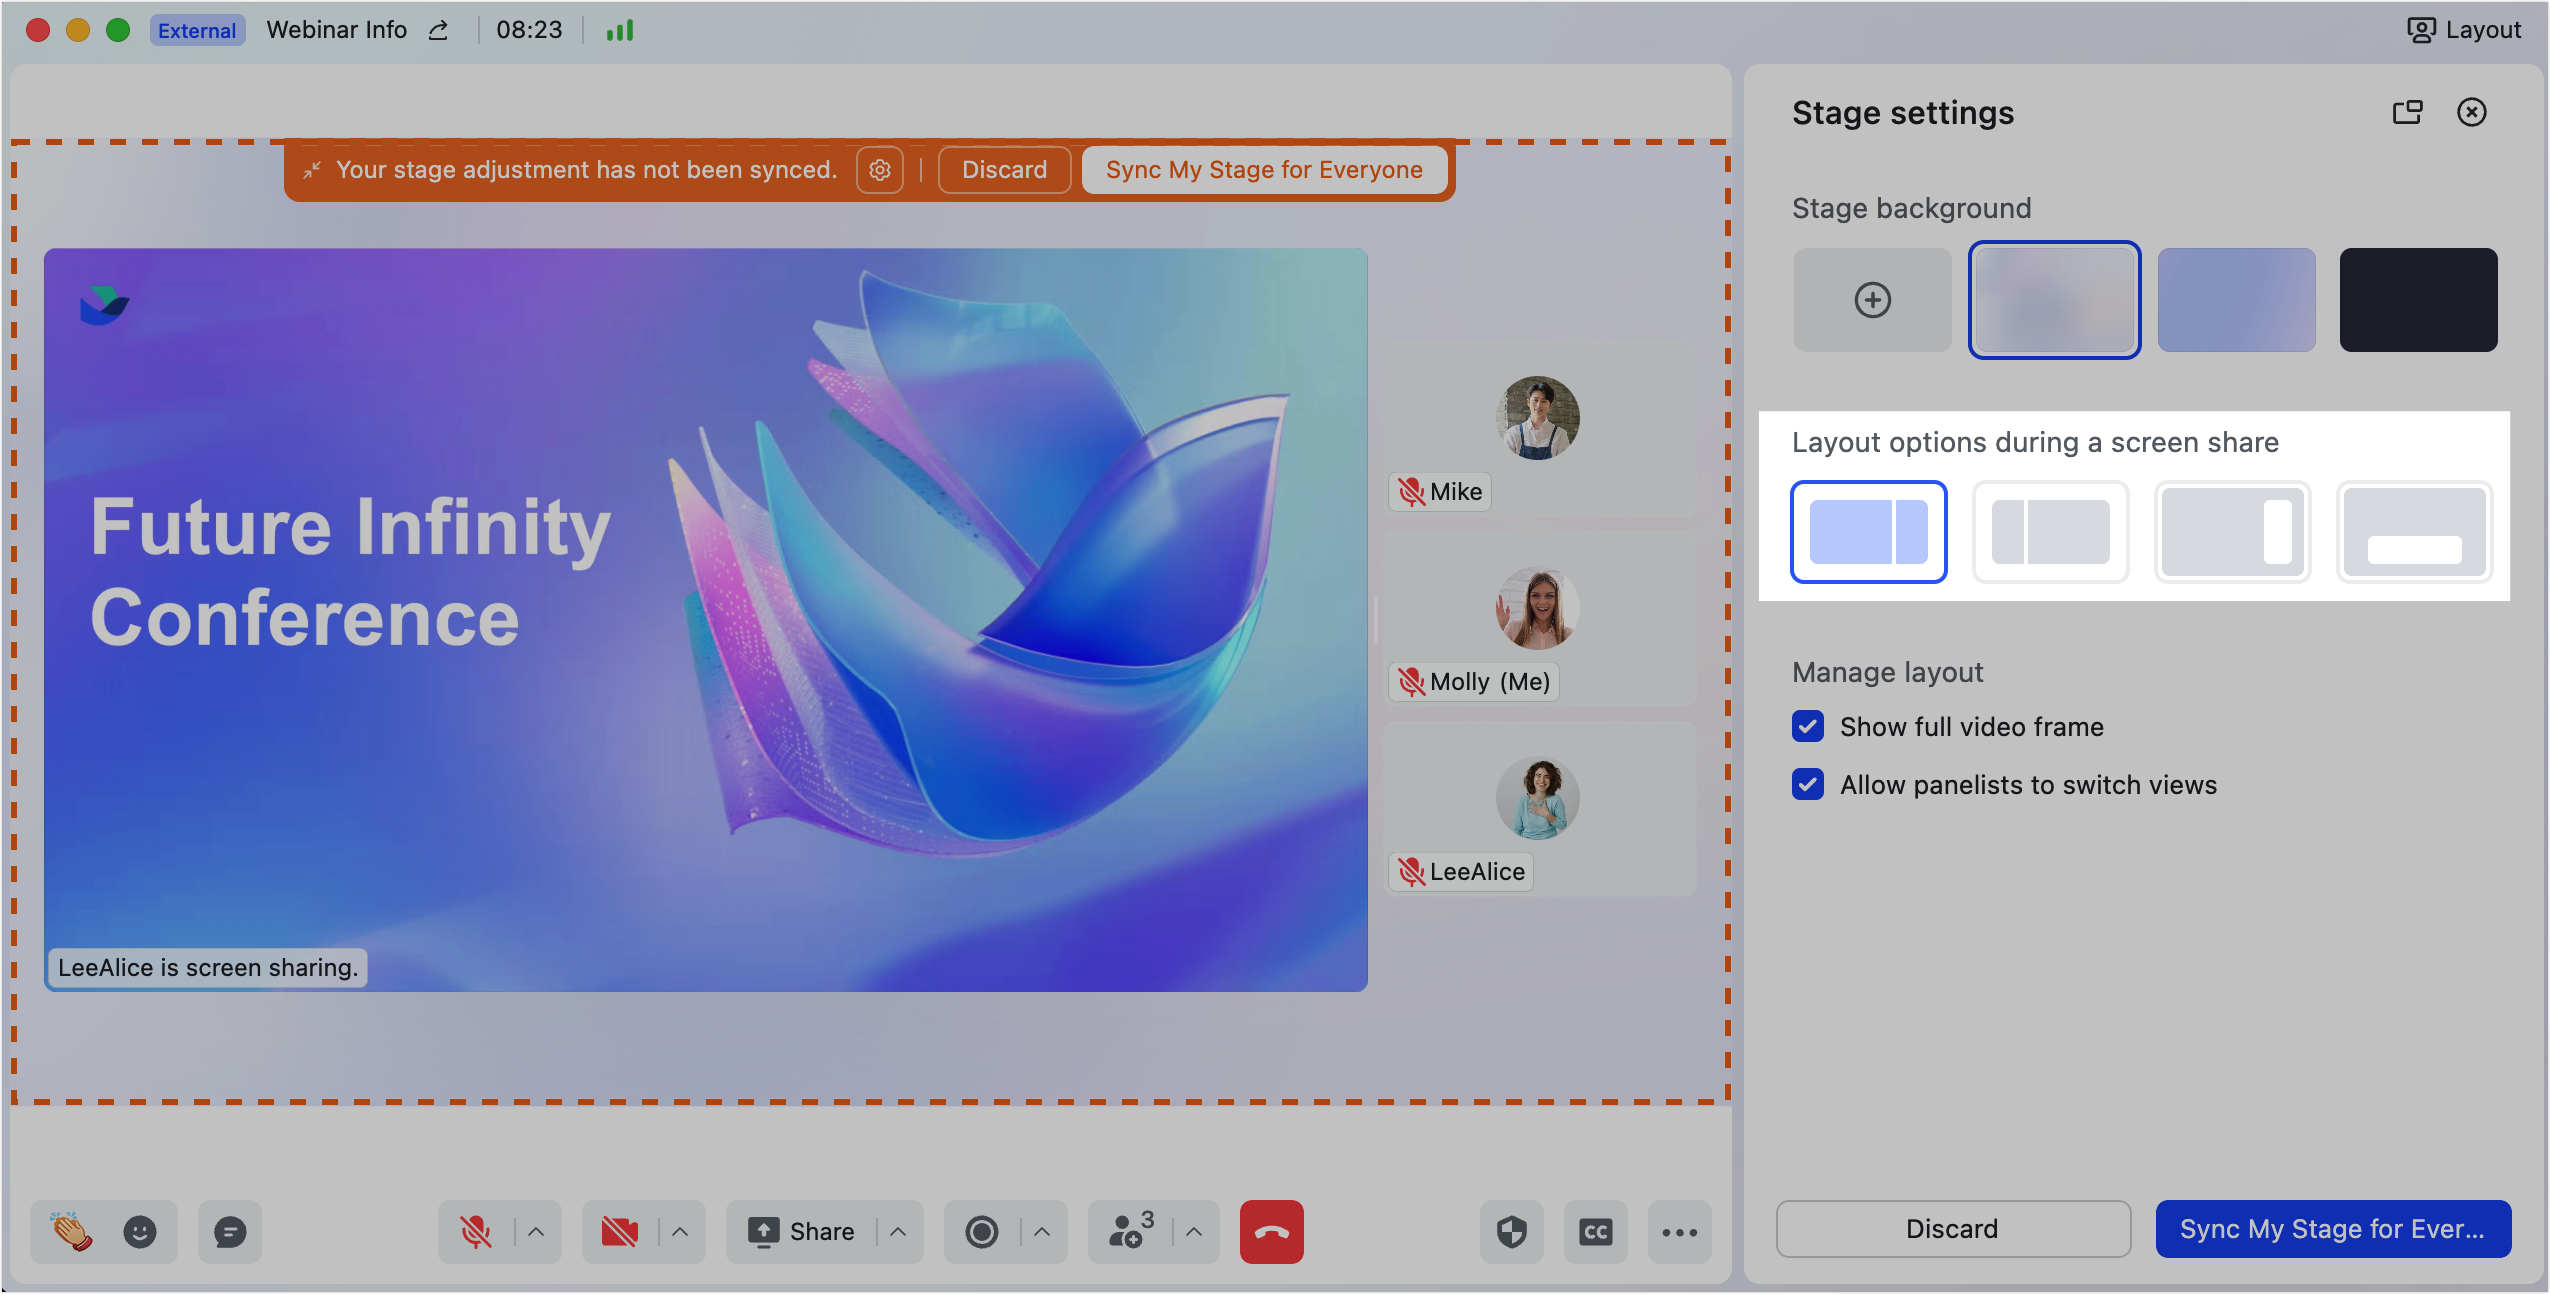
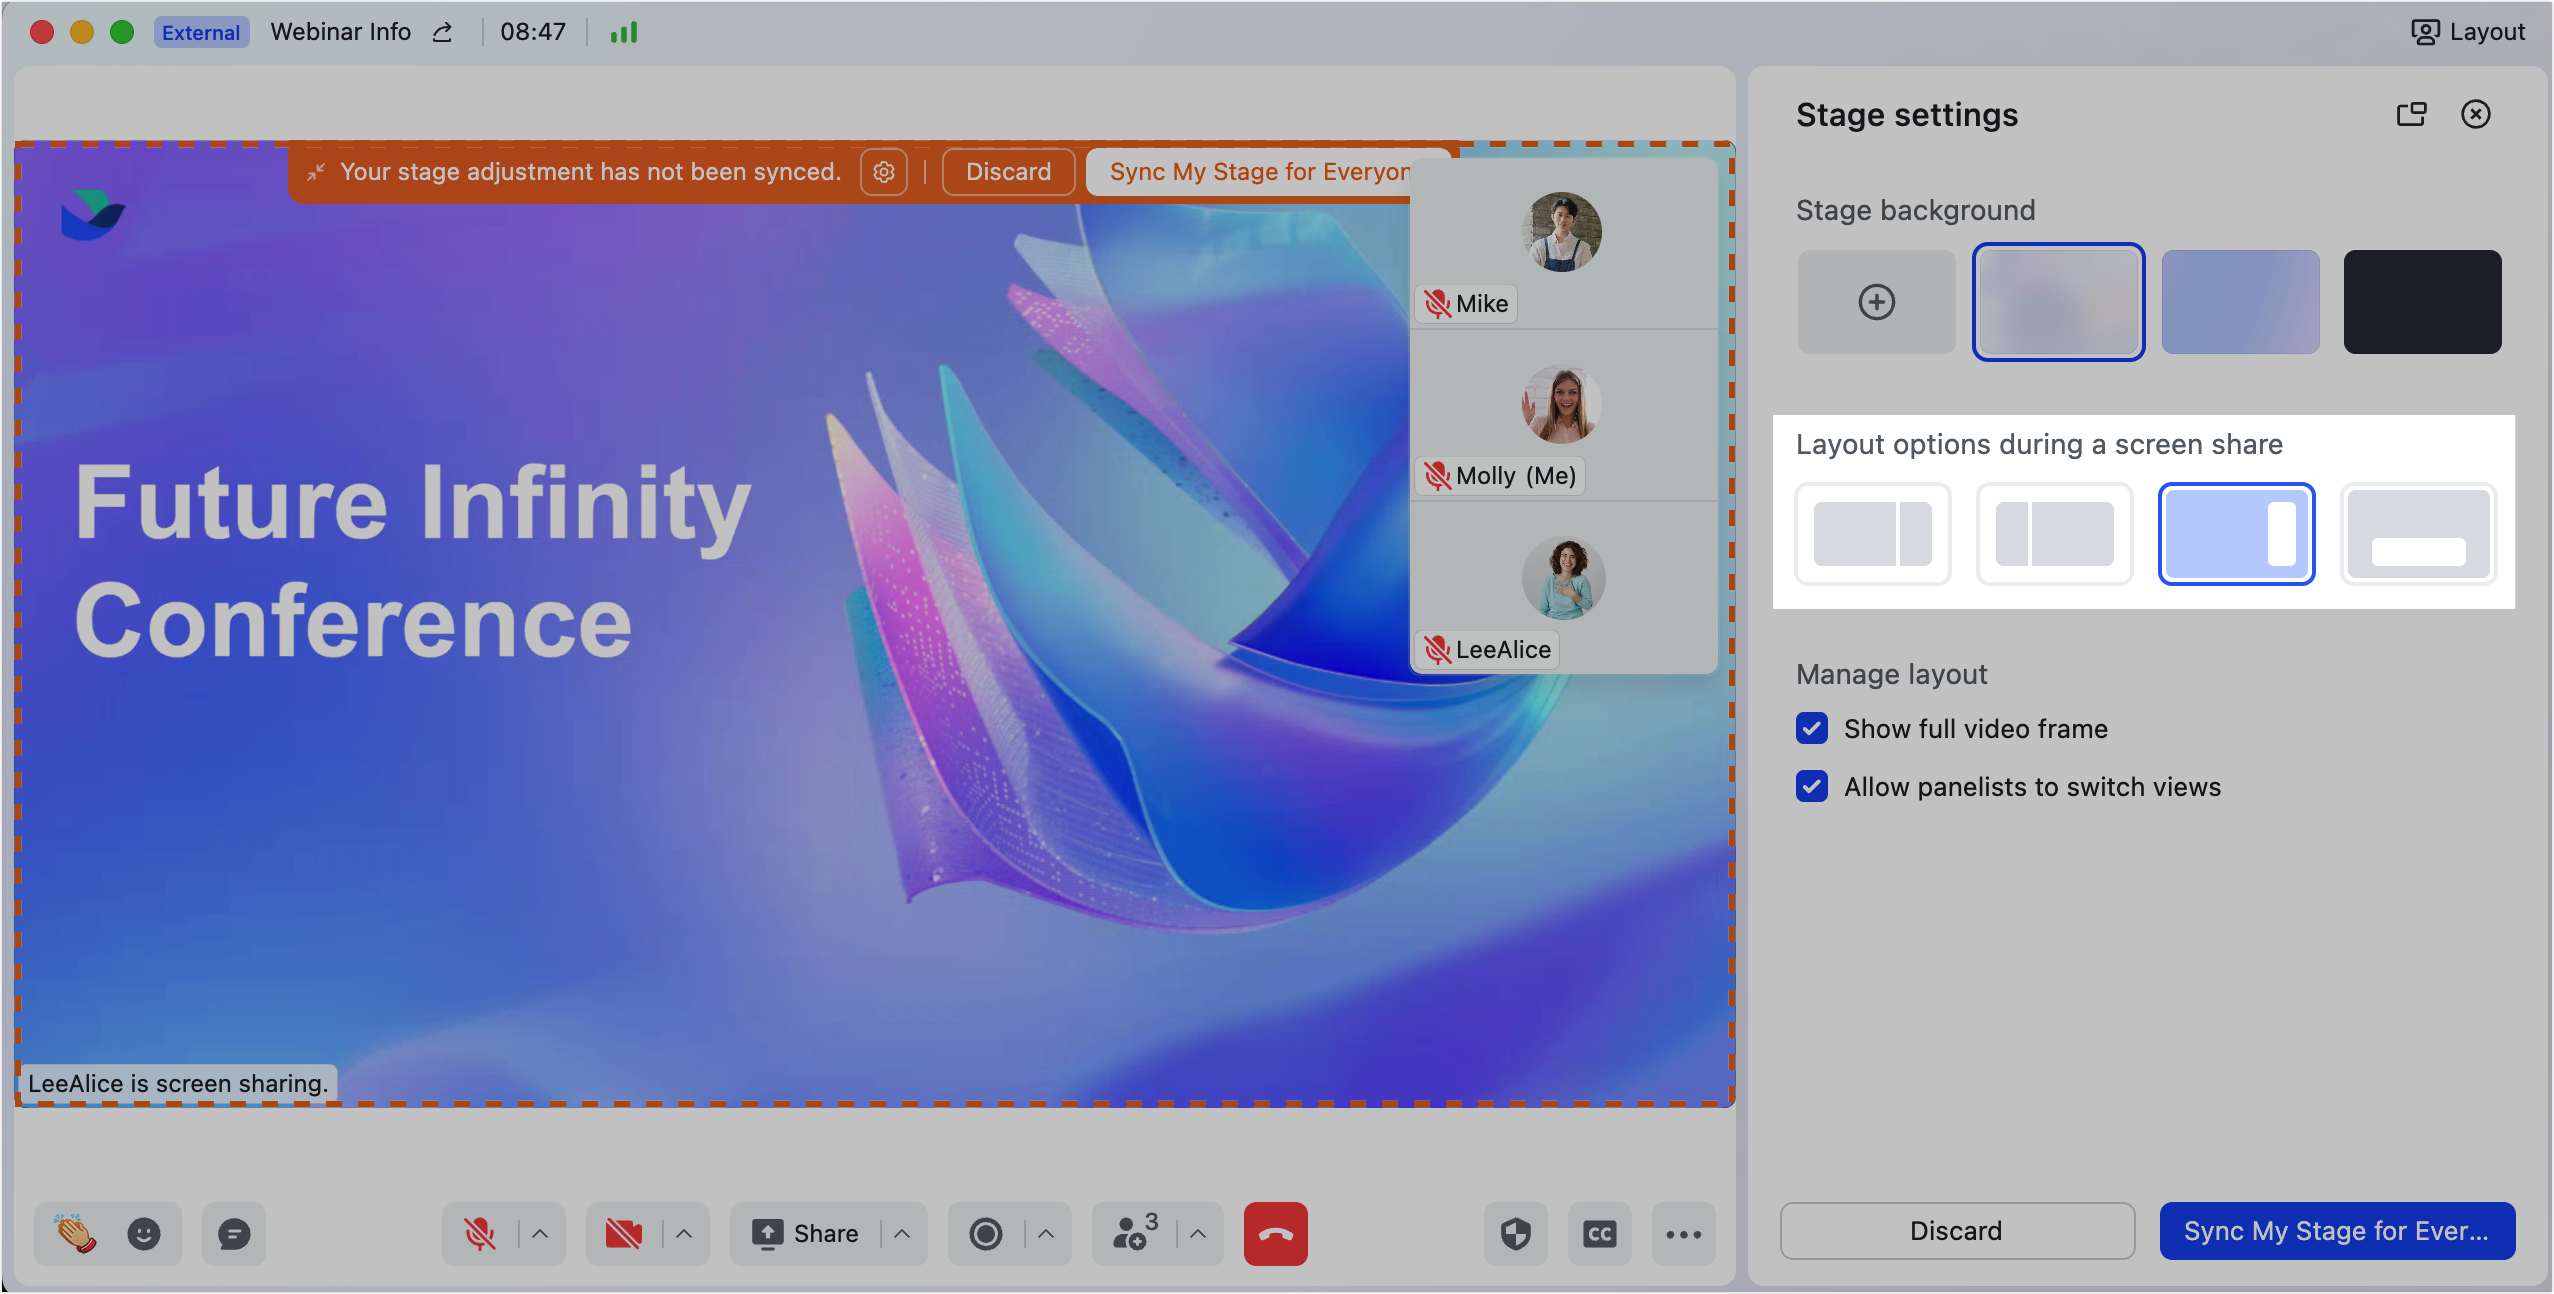
The host or co-host can also set the layout of shared content and panelist video at the Layout options during a screen share in the Stage settings pane:
- Side-by-side view: The panelists will be on the left or right side of the shared content. You can drag the divider between the panelists and shared content to adjust their sizes.
- Floating view: The panelists will float over the content, either in the upper right or lower right.
Notice: Lark version 7.6 or above is required for hosts/co-hosts to drag content outside the stage area, adjust the proportions in side-by-side view, and use floating view. Participants also require Lark version 7.6 and above to see these layouts.
250px|700px|reset
250px|700px|reset
Apply layout for all participants
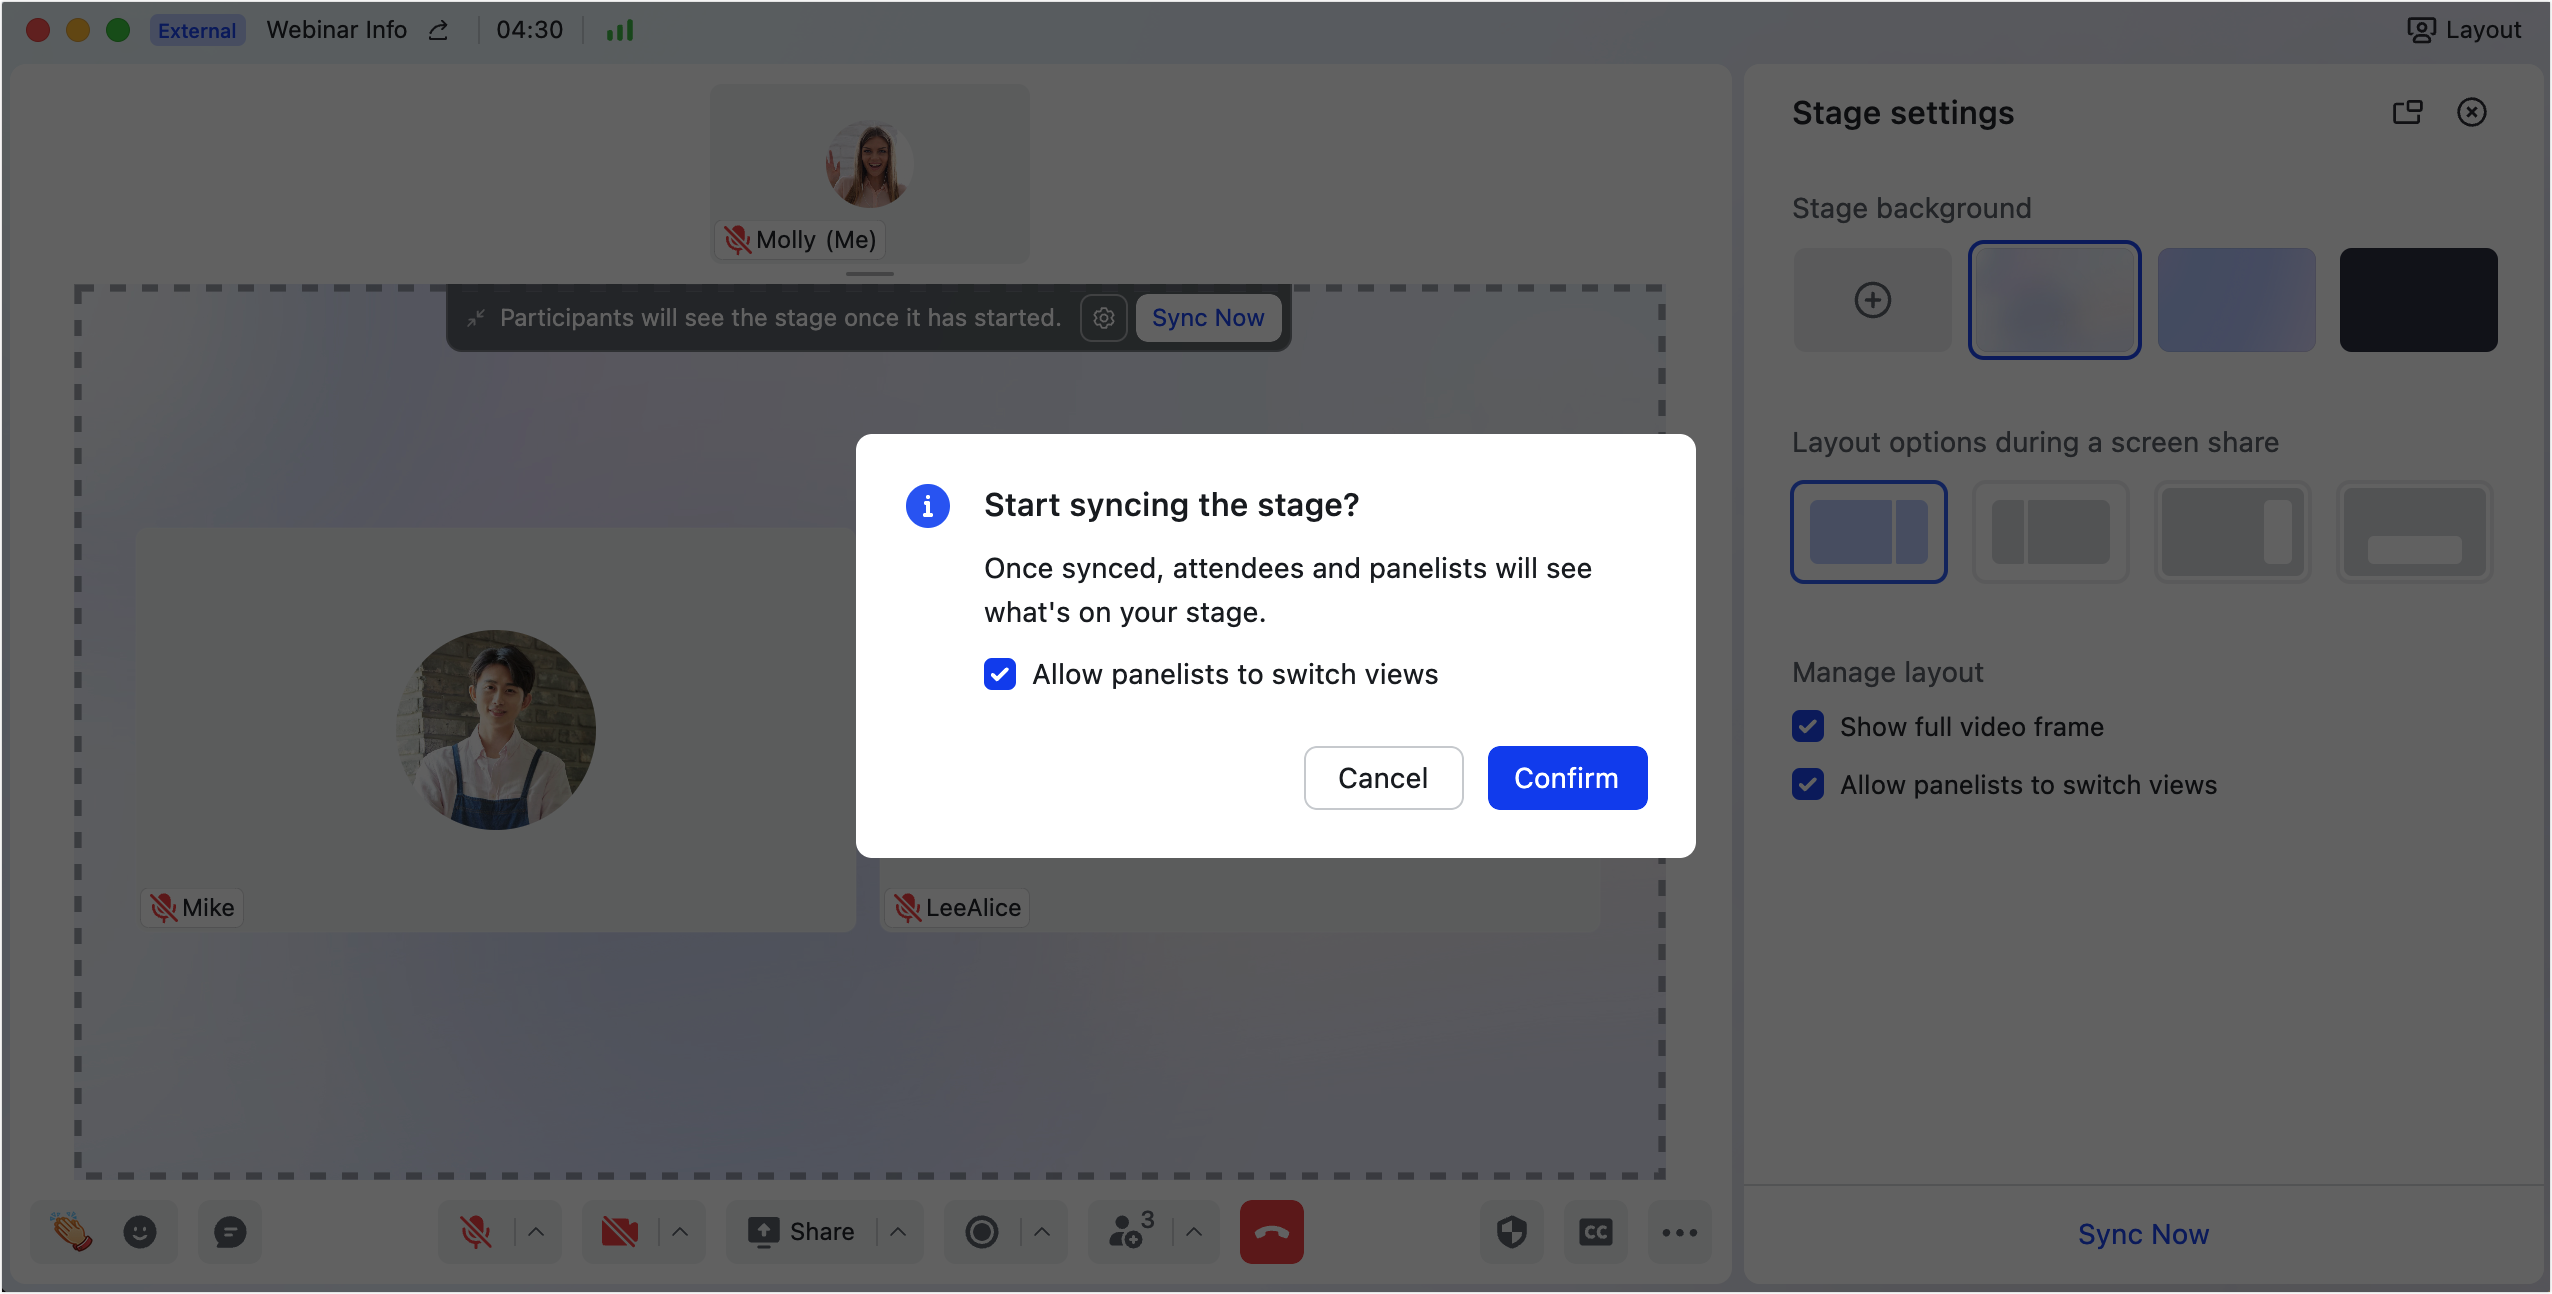
Once you're done setting the stage layout, you can click Sync My Stage for Everyone to apply the stage layout to all participants. Only one stage layout can be synced with participants at a time.
If the meeting is being recorded, the synchronized stage layout will be displayed in the recording.
Note:
- Participants can only view the displays presented on the stage.
- If you've checked the option Allow panelists to switch views, panelists can view the stage, and can also select other layouts.
250px|700px|reset
250px|700px|reset
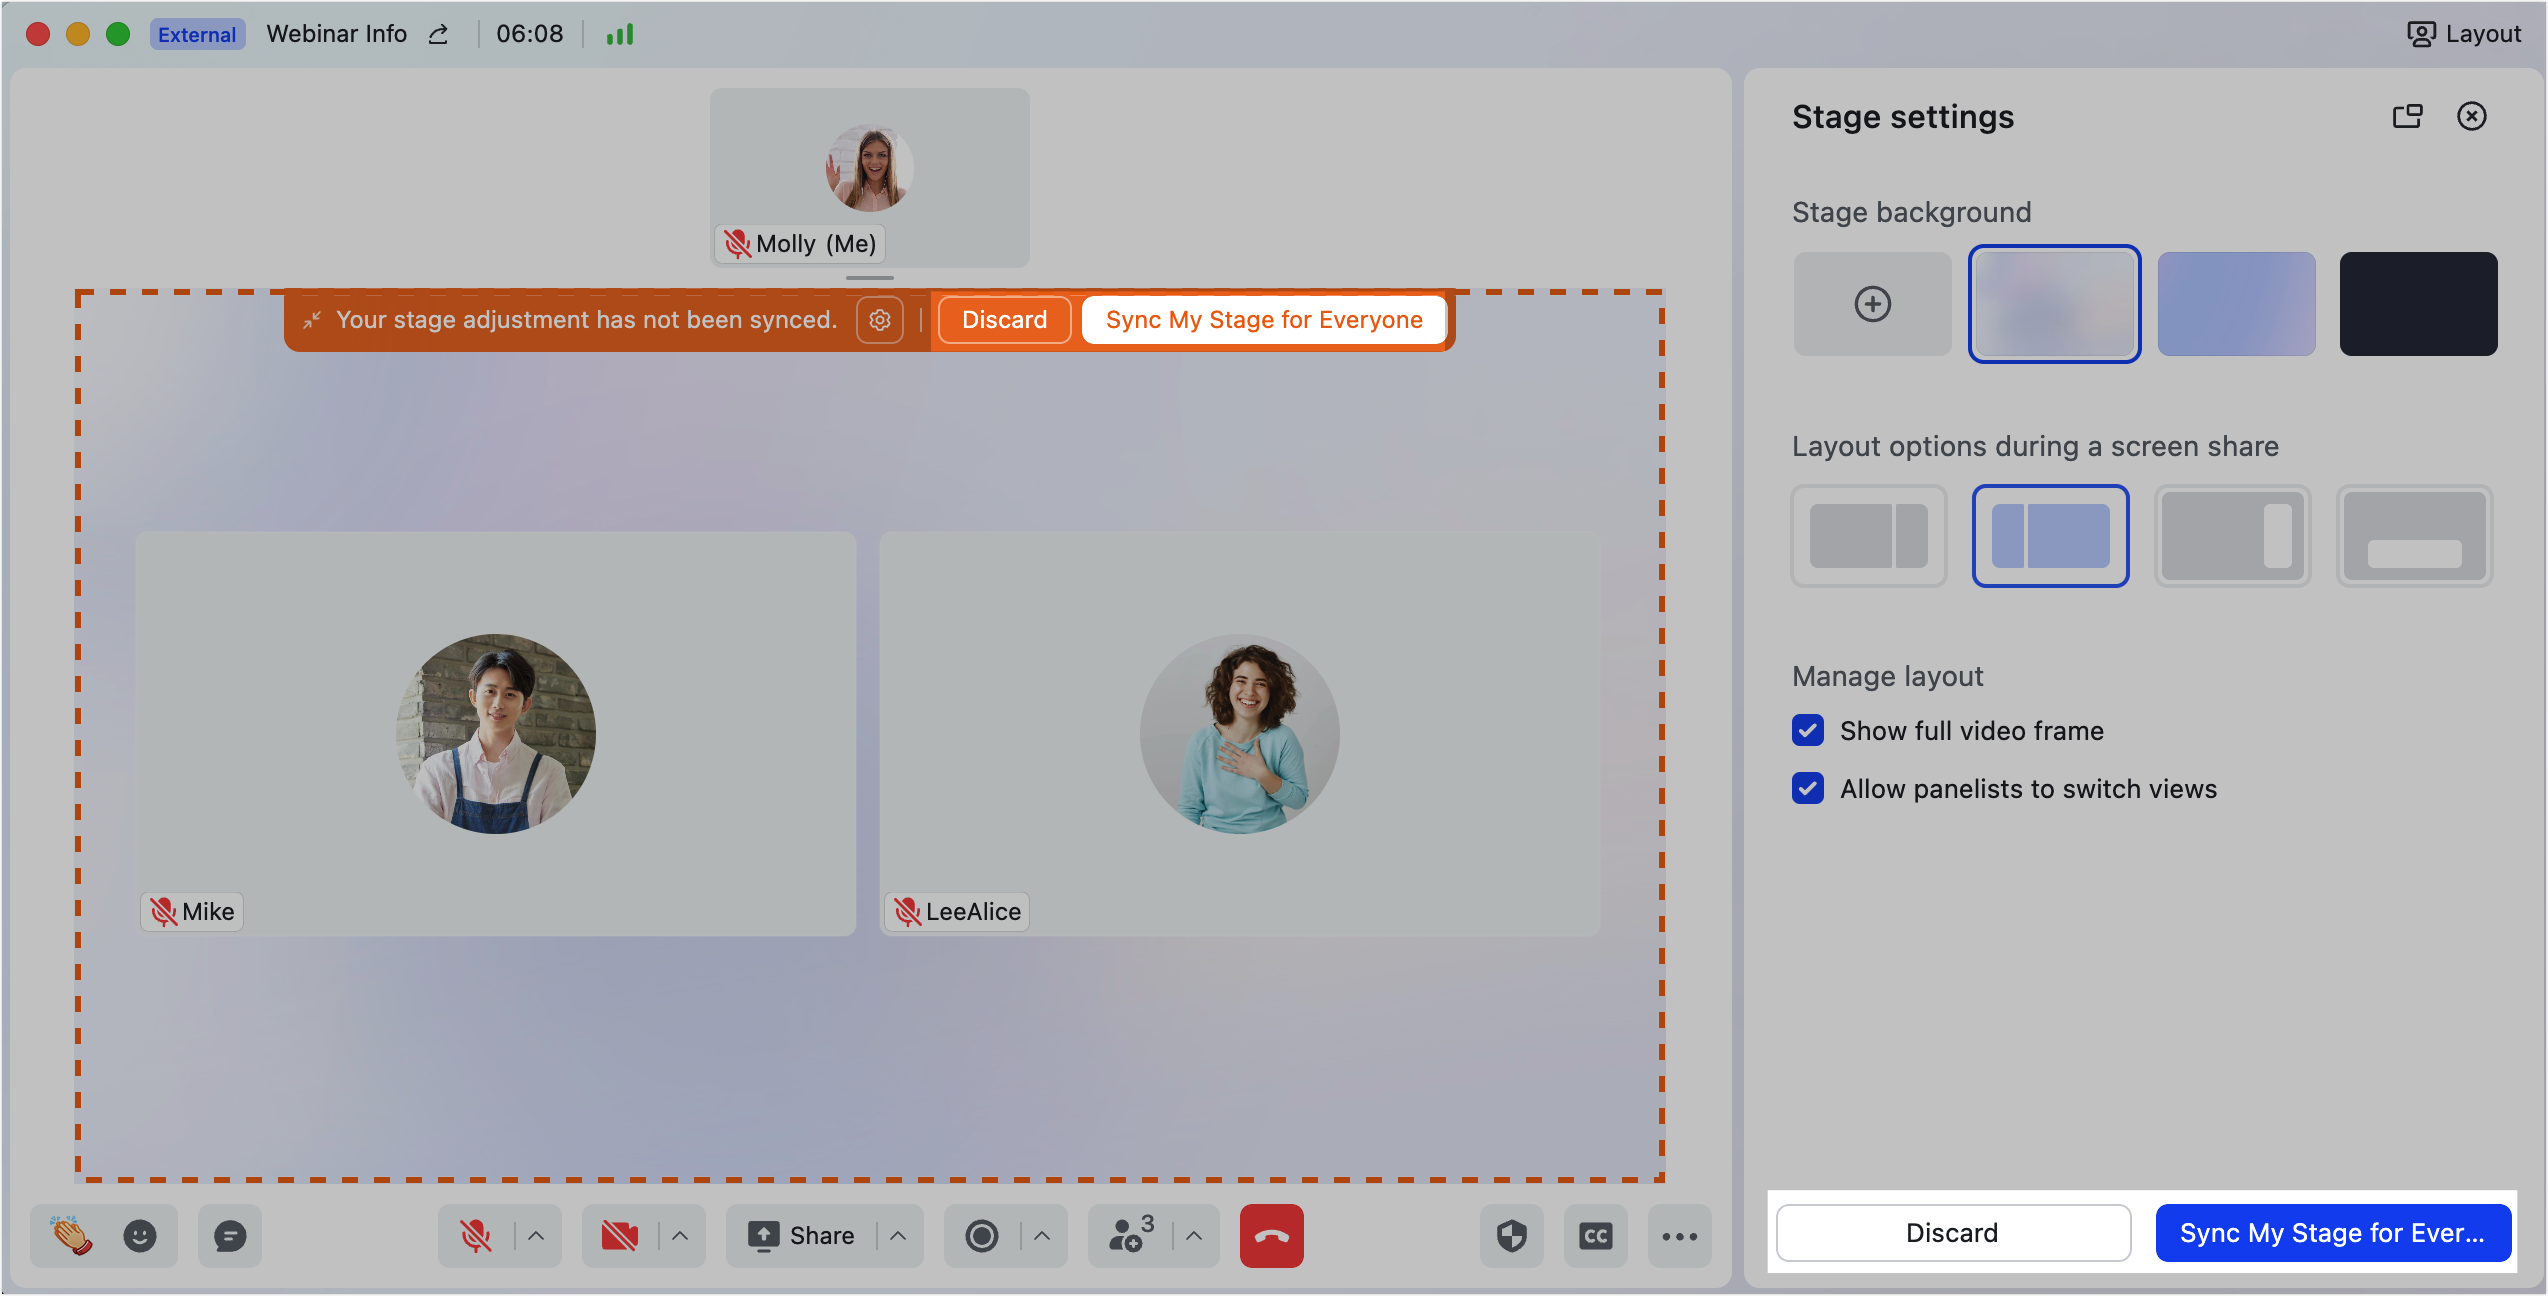
If the display layout has been changed, click Sync My Stage for Everyone in the popup window at the top to apply the new layout for all participants.
If you have made an unwanted change to the display layout in the stage area, click Discard in the popup window at the top to maintain the synced stage layout that participants are currently viewing.
250px|700px|reset
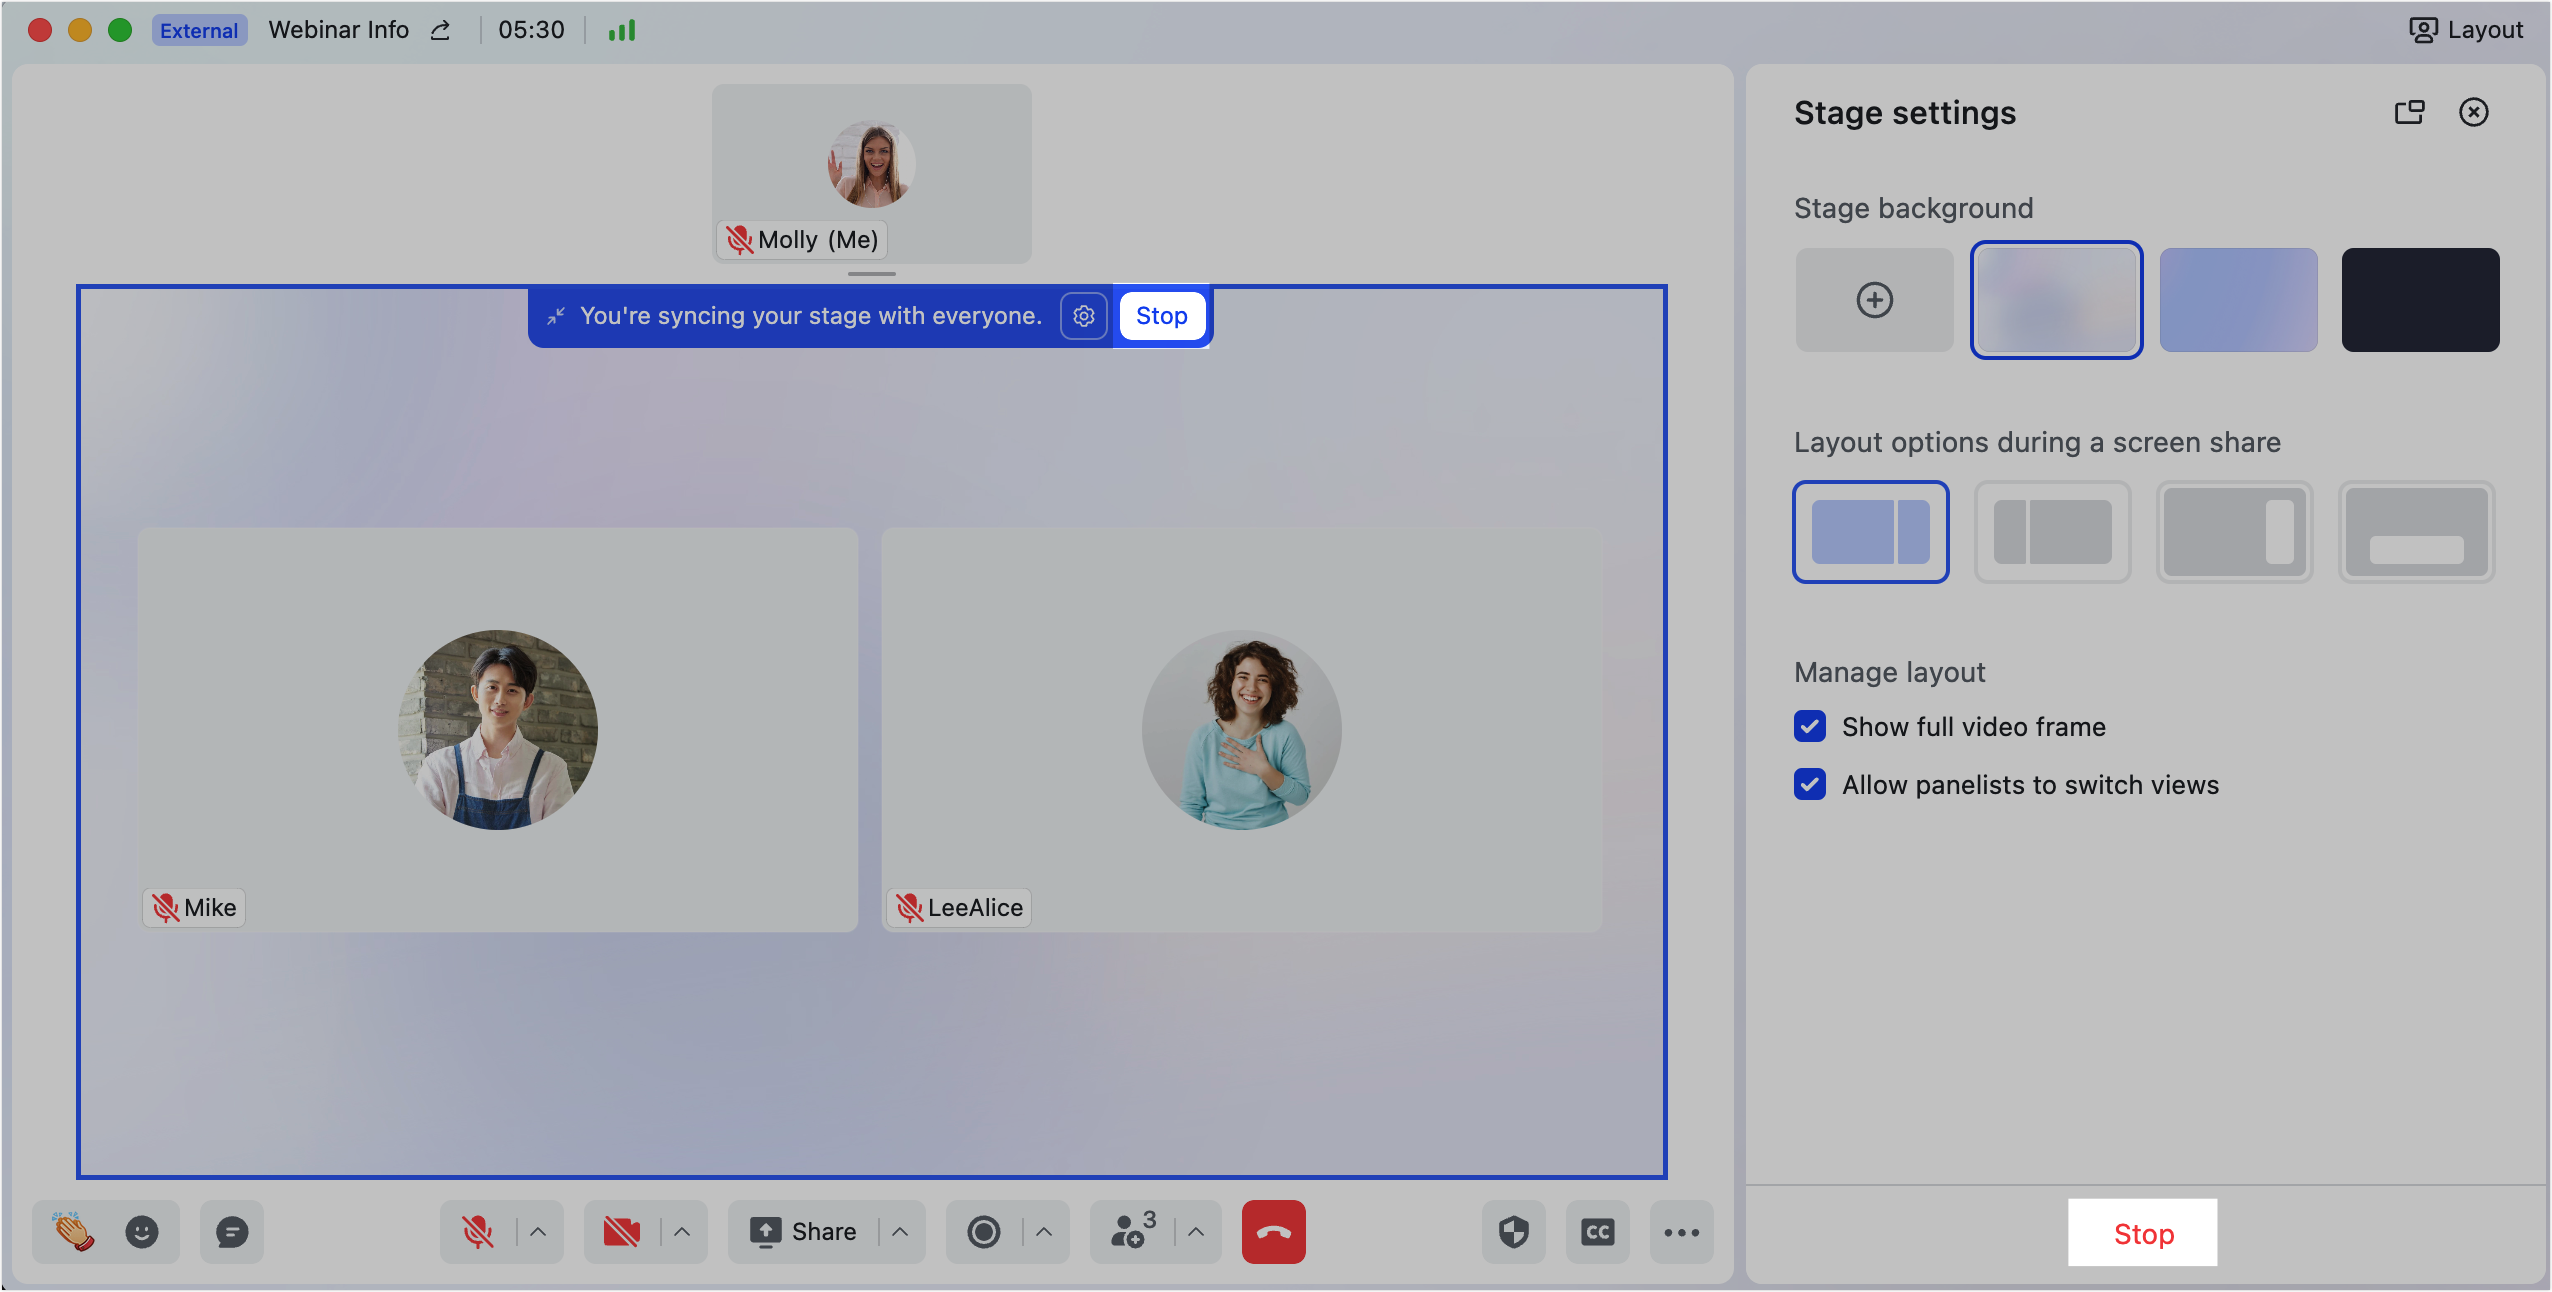
If you no longer need to apply a synced stage layout for all participants, click Stop.
250px|700px|reset
III. Suggestions
Sharing slides in stage mode
When sharing slides in stage mode, the shared content is displayed in a 16:9 aspect ratio. Follow the steps below to avoid black or grey edges around the shared content and optimize your presentation.
Optimal Display | With Black/Grey Borders |
250px|700px|reset | 250px|700px|reset |
No external display or with single screen
When there is no external display, it is recommended you use Keynote to share slides. If you share slides without any adjustment, the shared content will have grey borders around it.
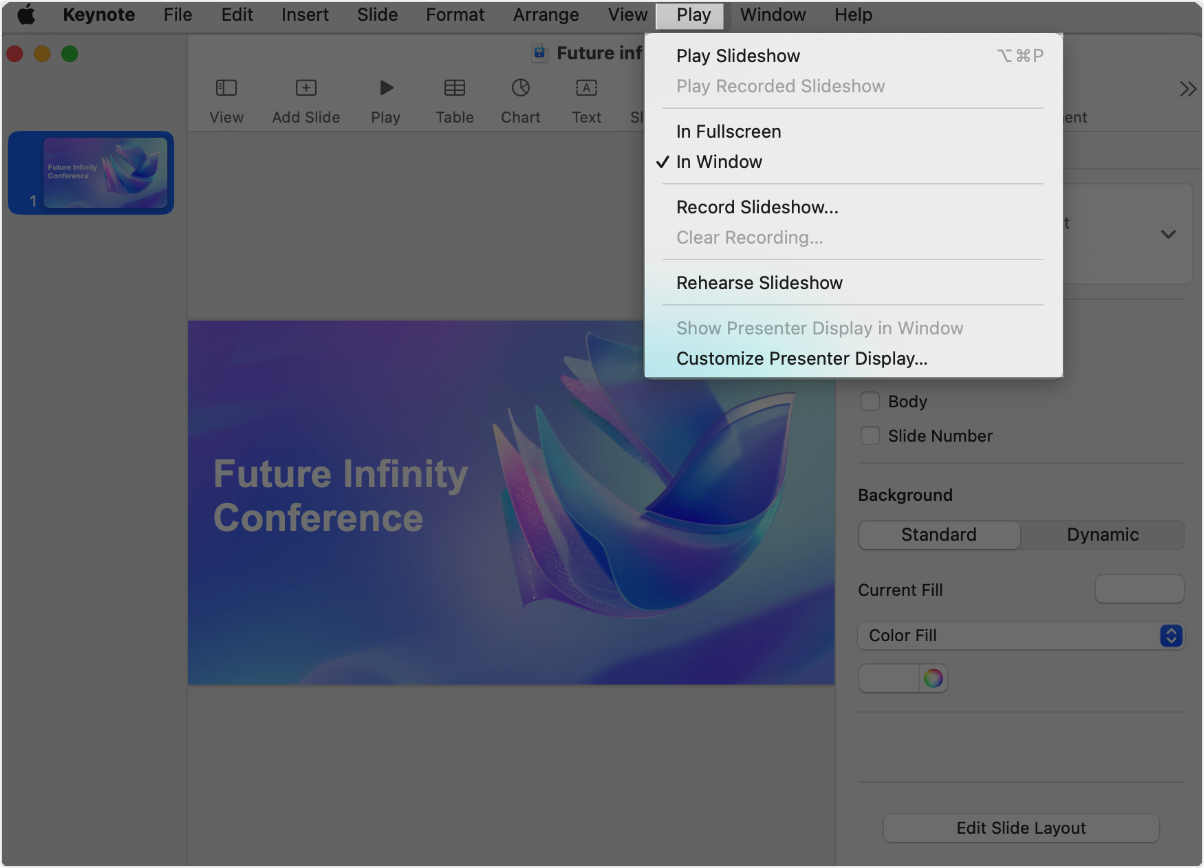
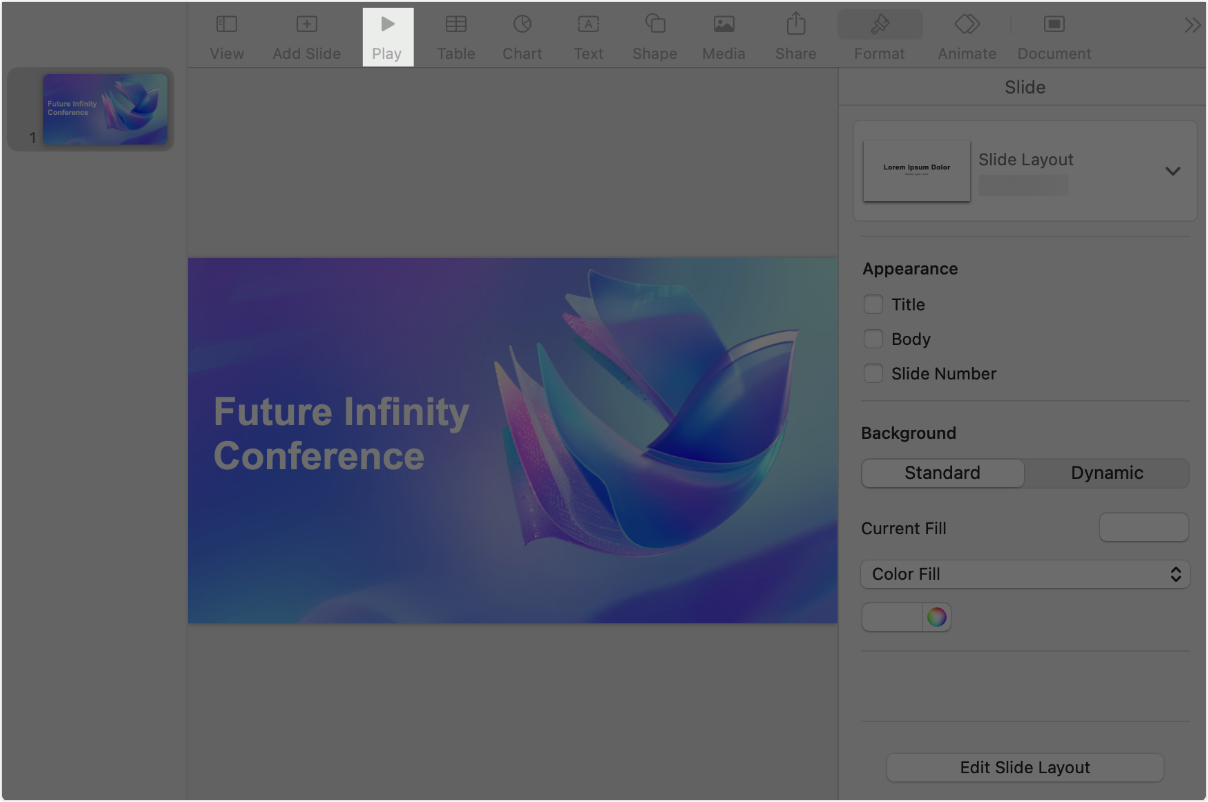
- Open the target presentation in Keynote and click Play in the top toolbar > In Window.
250px|700px|reset
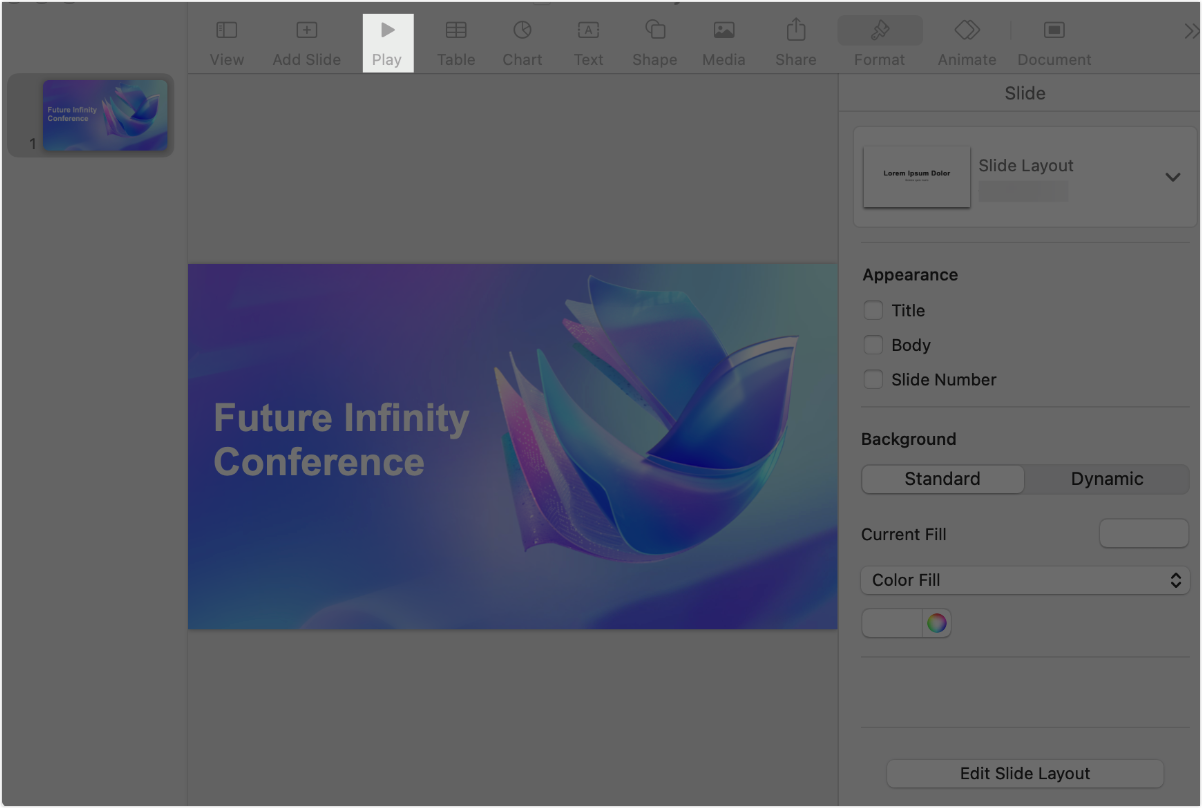
- Click Play and an independent window will appear.
250px|700px|reset
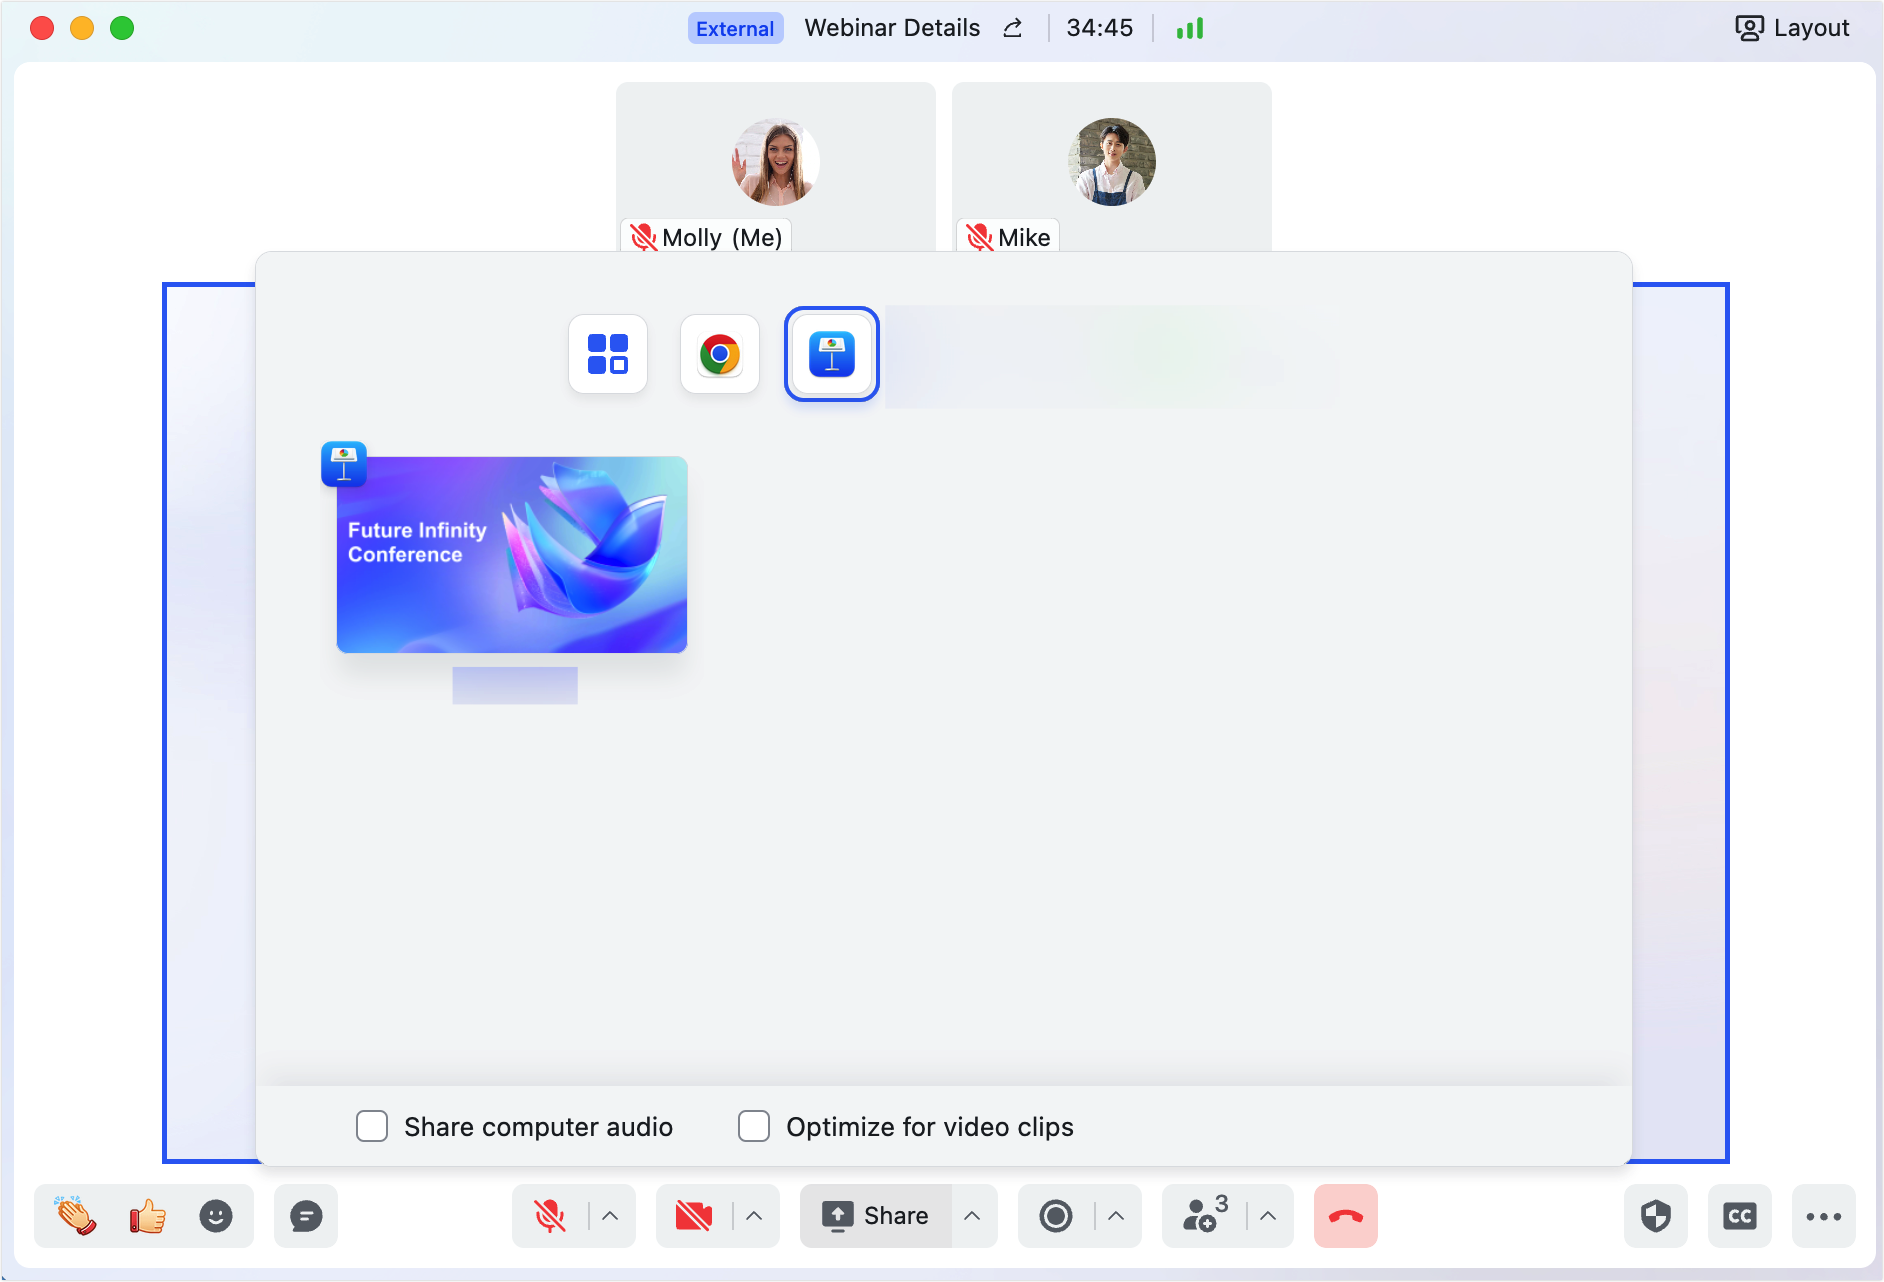
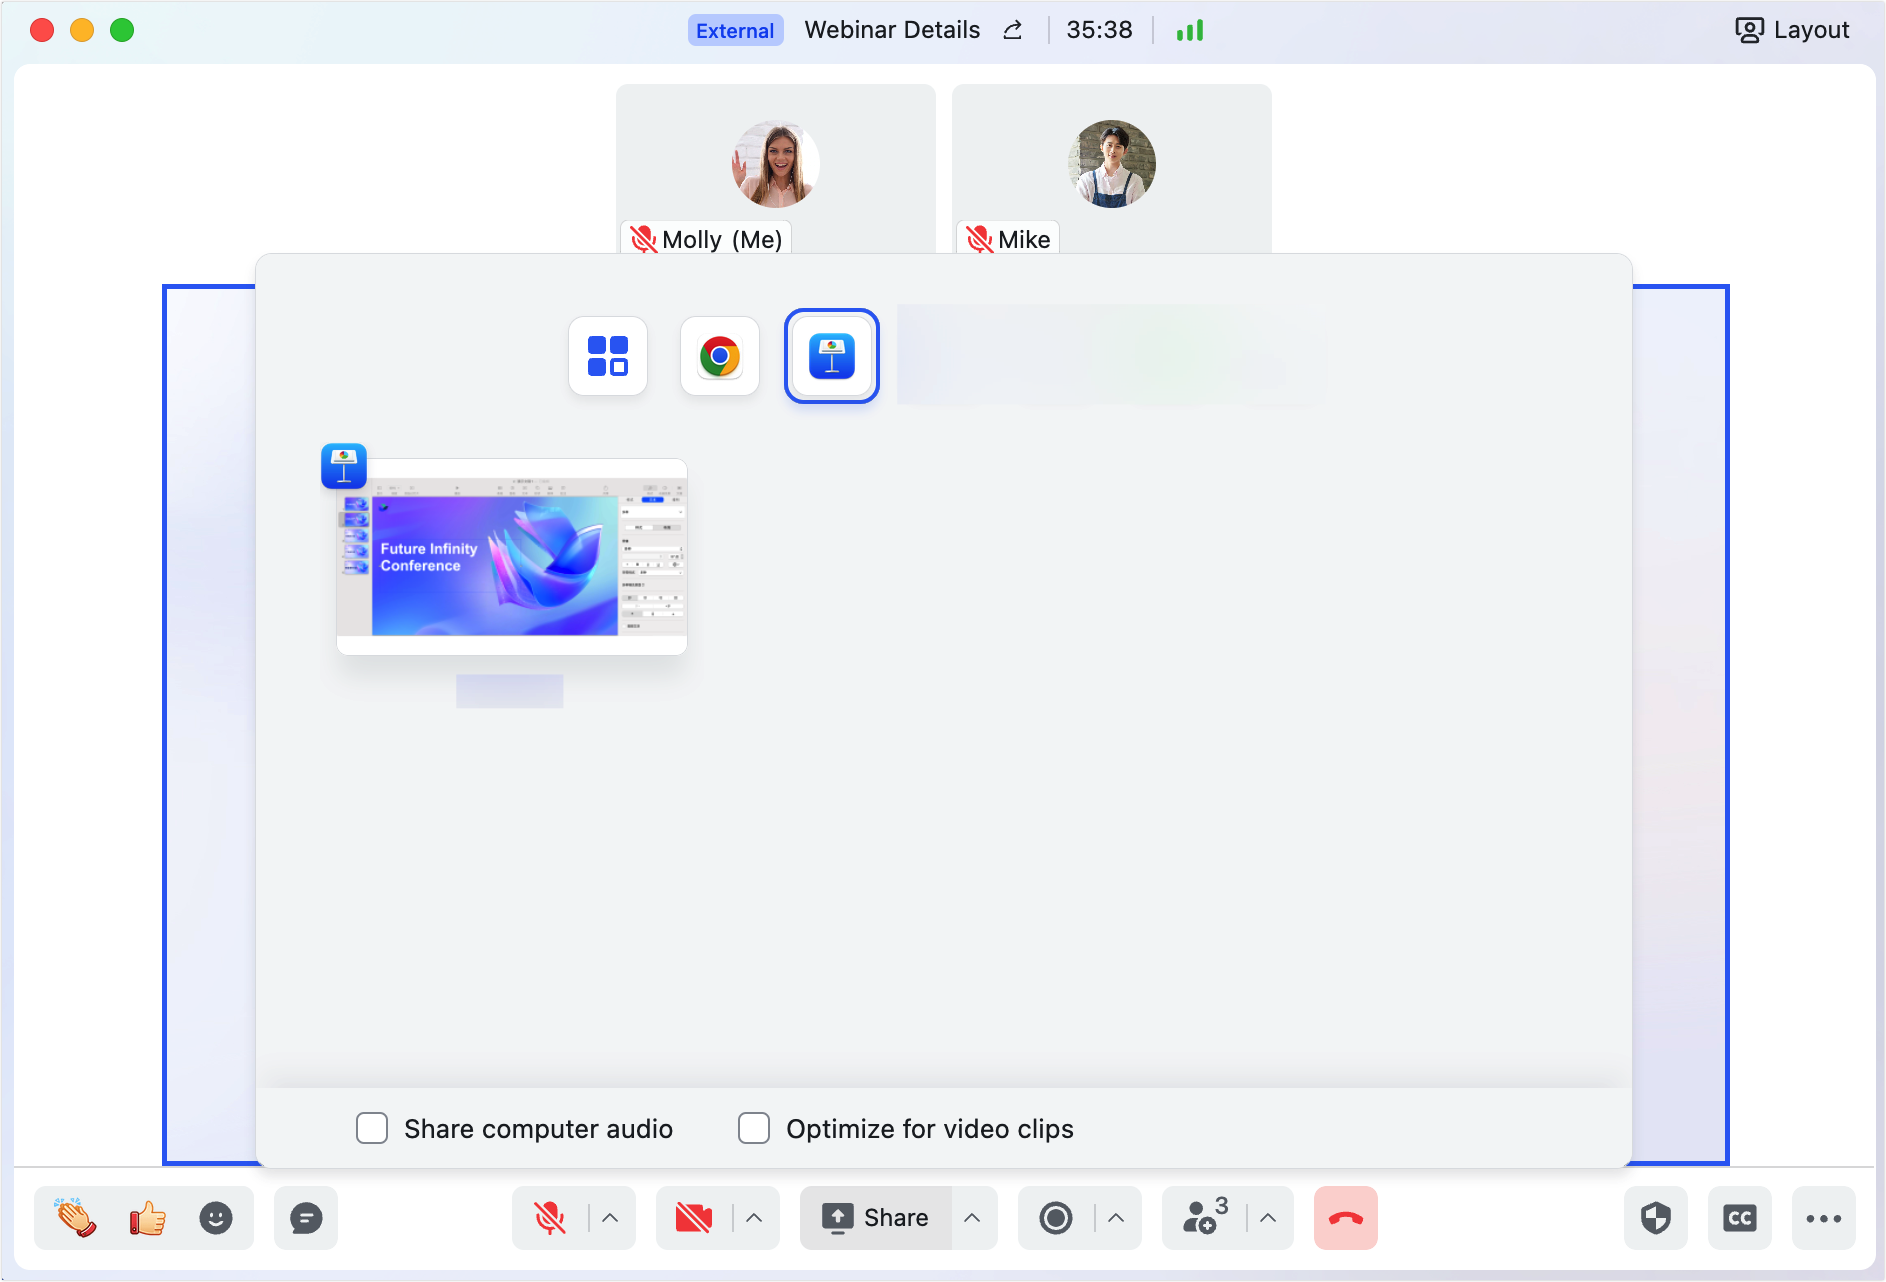
- Click Share in Webinar and select the Keynote icon.
250px|700px|reset
- Play the slides in Keynote. The sharing will automatically end when you exit the slide show or reach the last slide.
Note: Please avoid moving the mouse into the playback area during sharing, as the audience will be able to see it.
With external display/dual screens
When there is an external display, it is recommended you use Keynote or PowerPoint to share slides. Set your MacBook as the primary display, which serves as the operation console, displaying the presenter view. Set the external screen as the secondary display, which acts as the sharing screen, showing the complete slide.
Keynote
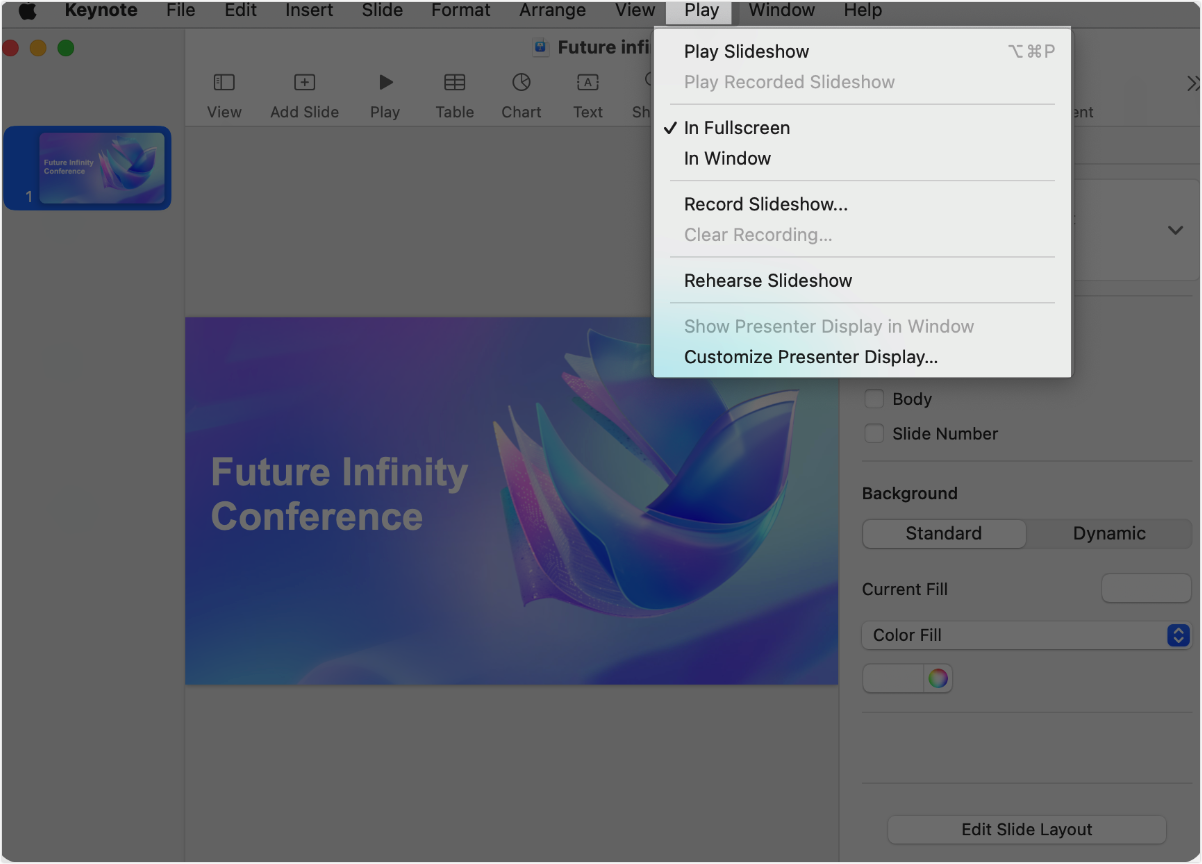
- Open the target presentation in Keynote and click Play in the top menu bar > In Fullscreen.
250px|700px|reset
- Click Share in Webinar and select the Keynote icon.
250px|700px|reset
- Click Play in Keynote.
250px|700px|reset
- Play the slides in Keynote. When you exit the slide show or reach the last slide, the screen will display Keynote's operation interface. You can choose to stop sharing or re-enter the slide show.
Note: The audience cannot see the mouse when it is on the primary display, but they can see it if it's on the secondary display.
PowerPoint
- Open the target slides in PowerPoint.
- Click Share in Webinar and select the PowerPoint icon.
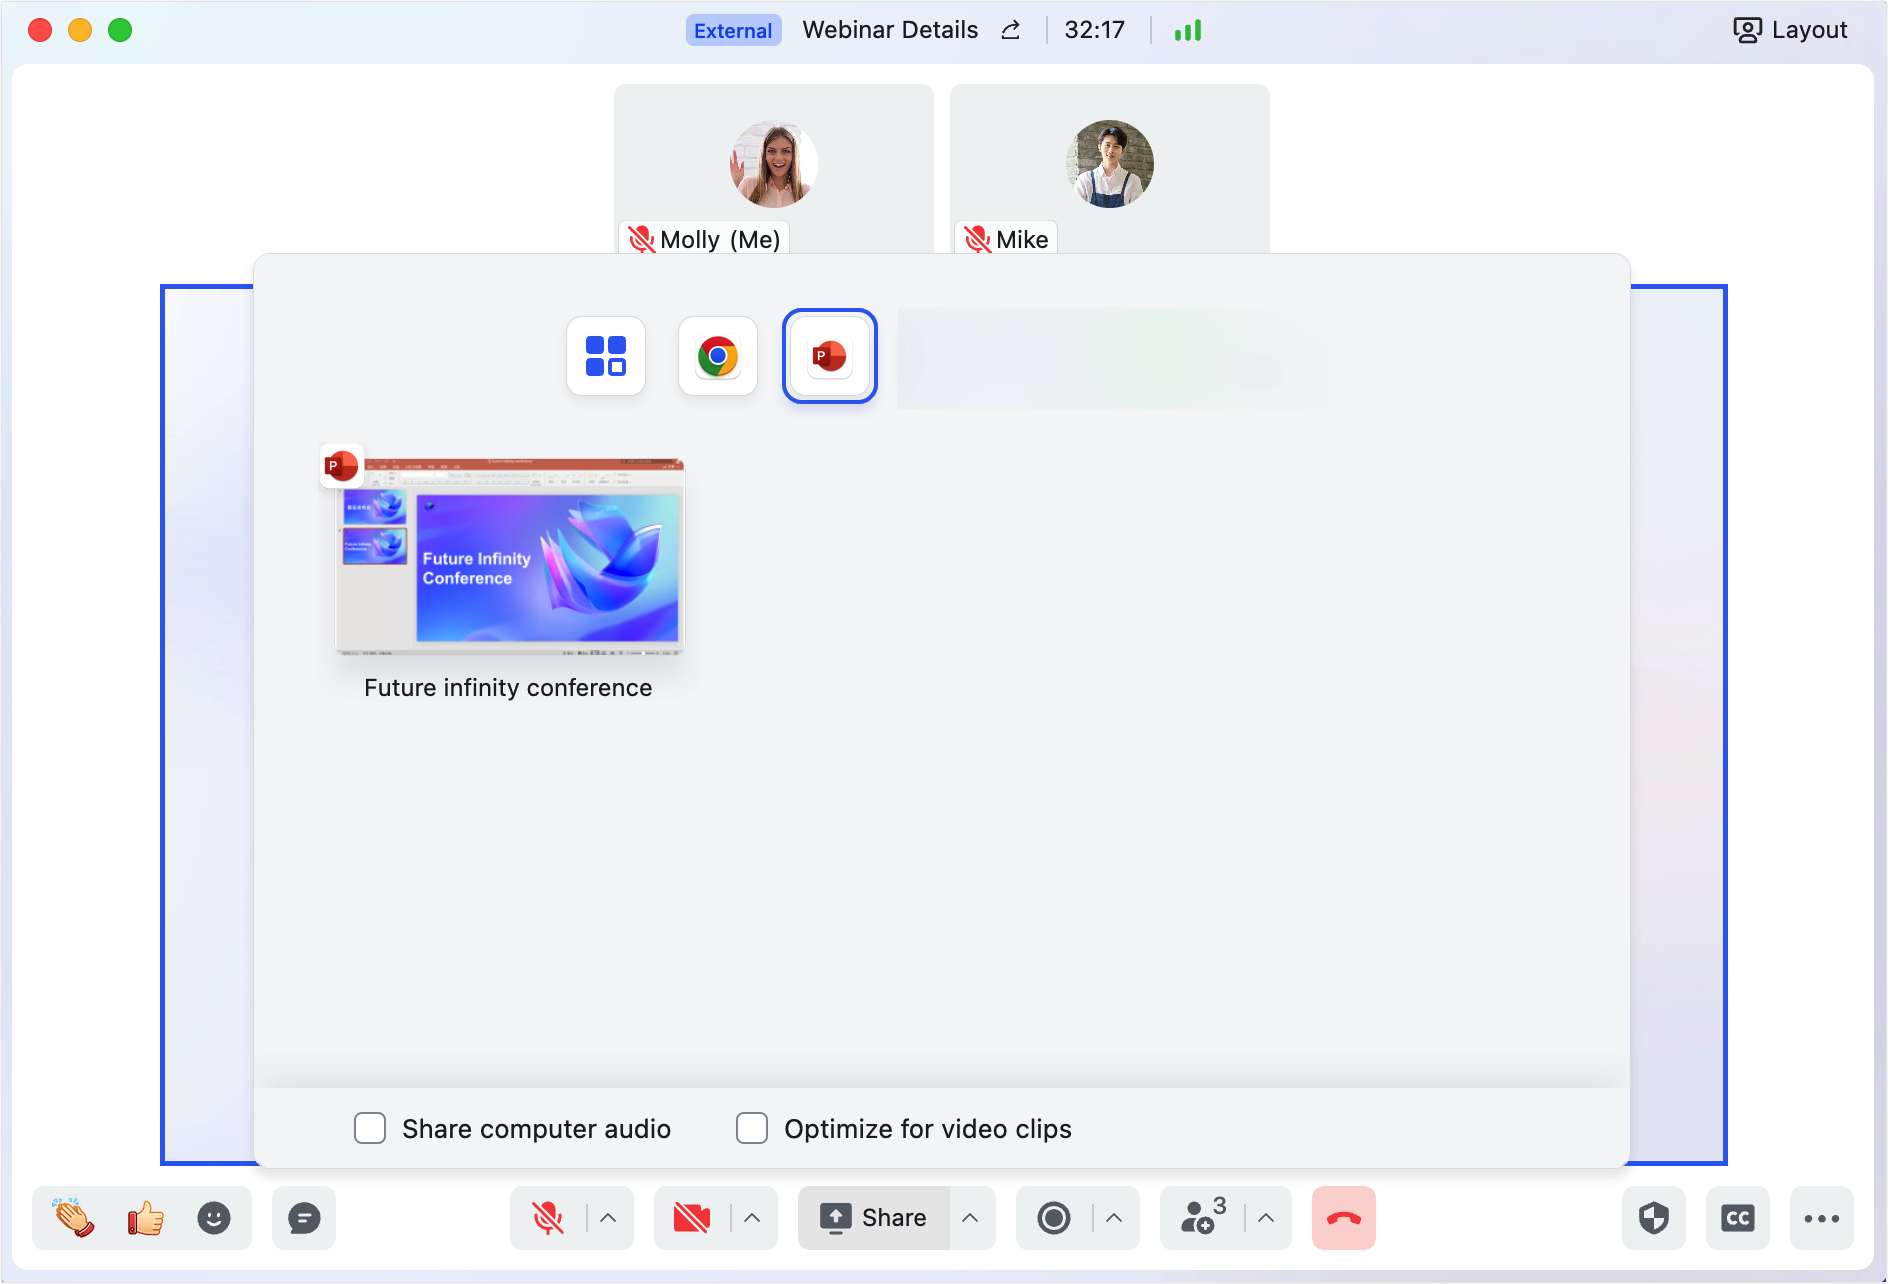
250px|700px|reset
- Click Slide Show in PowerPoint's top menu bar > Play from Start / Play from Current Slide / Presenter View.
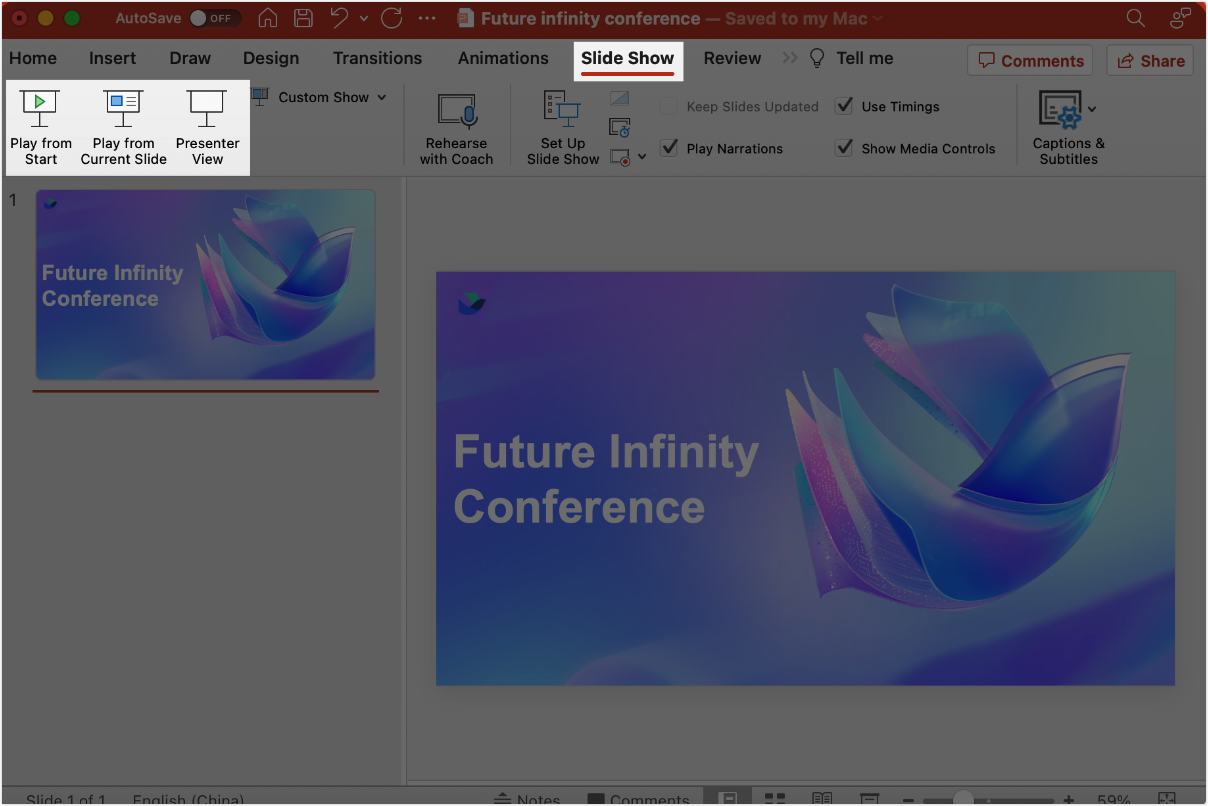
250px|700px|reset
- Play the slides in PowerPoint. When you exit the slide show or reach the last slide, the screen will display PowerPoint's operation interface. You can choose to stop sharing or re-enter the slide show.
Note: The audience cannot see the mouse when it is on the primary display, but they can see it if it's on the secondary display.
Sharing browsers in stage mode
When sharing browsers in stage mode, it is recommended to follow the steps below to provide a more immersive viewing experience for the audience and effectively protect personal information.
- Only open the necessary tab(s) in the browser and close other irrelevant tabs.
- Hide the browser's toolbar, bookmark bar, and address bar.
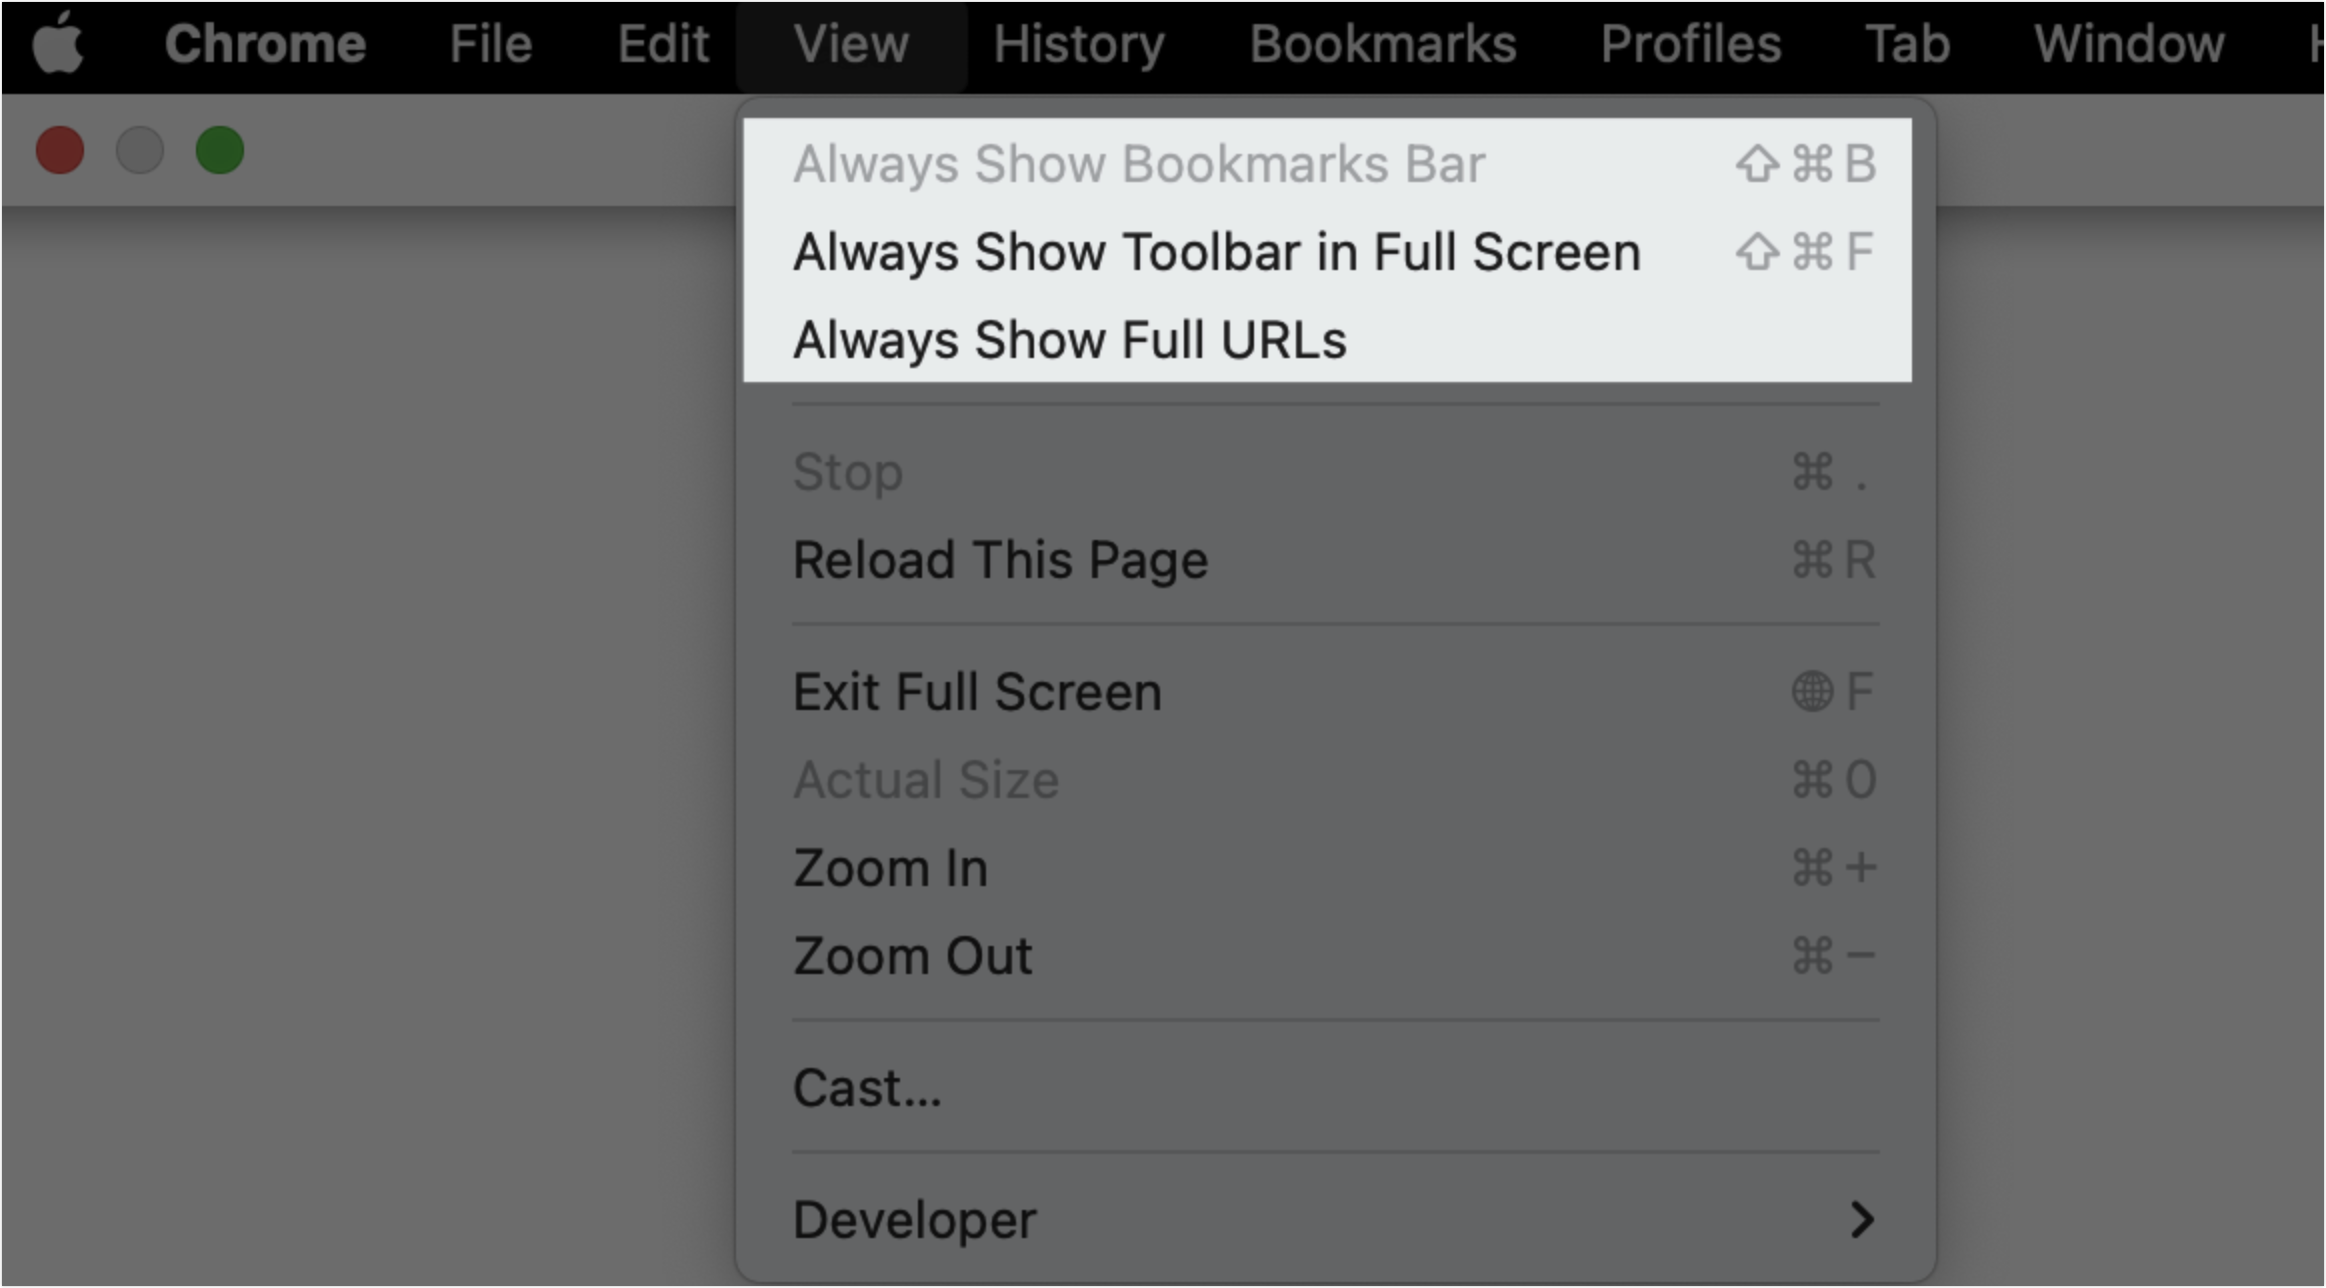
When using Chrome, you can click View in the browser's top menu bar and deselect Always Show Bookmarks Bar, Always Show Toolbar in Full Screen, and Always Show Full URLs.
250px|700px|reset
IV. FAQs