
00:00
/
00:00
Audio/video is not supported
Please TryRefresh
Play
Fullscreen
Click and hold to drag
I. Intro
A view represents the way information in the base is organized and displayed. There are many types of views in Base, including grid, kanban, calendar, Gantt, gallery, and form.
You can create multiple views to look at the information from different perspectives. Any changes made to the data in one view will appear in other views.
II. Steps
Create a view
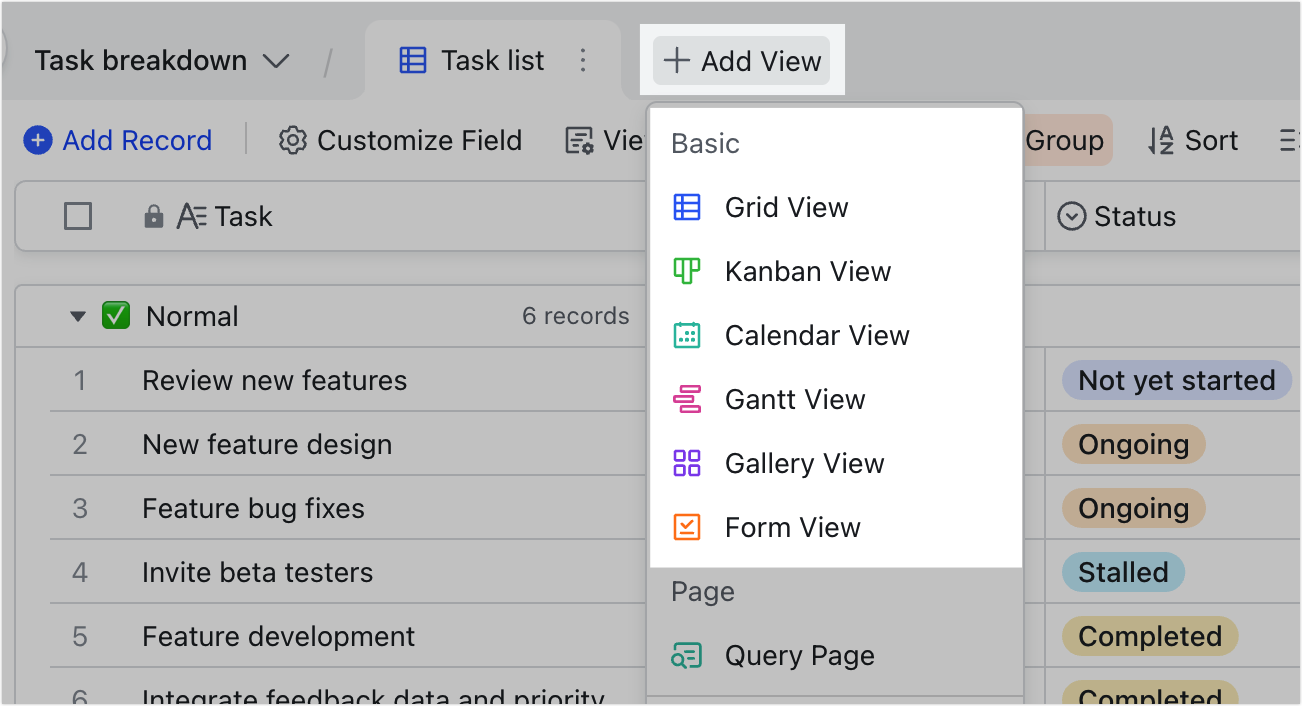
- Create a view: Click Add View at the top of the table, and select a view.
250px|700px|reset
Rename a view
Method 1: Double-click the view name and enter a new name.
Method 2: Click the ⋮ icon in the view tab and select Rename View.
Copy, delete, or move a view
- Copy or delete a view: Hover over a view in the left menu bar. Right-click the view name or click the ⋮ icon, and select Duplicate view or Delete view. Copied views will be saved under the original view.
- Move a view: Drag a view in the left menu bar to any location to reorder views.
Filter, group, sort, and other view configurations
You can use filter, group, sort, and make other configurations to organize the data according to your needs. These configurations will only apply to the view in which they're made.
- Any fields can be filtered, grouped, or sorted based on one or more conditions.
- Filtering, grouping, and sorting (including dragging a record to a different location), adjusting the row height, and freezing fields, are considered temporary configurations and are only visible to the person performing the action. As such, users can configure the view according to their own needs without interfering with each other. If they do not save the configuration, it will reset after you refresh the page.
- Everyone can configure the view. Users with only view permission can configure the view but cannot save it. Users with edit permission can save their configurations to everyone.
- Note: When advanced permissions are turned on, users can save configurations even if they can only edit only some fields or records.
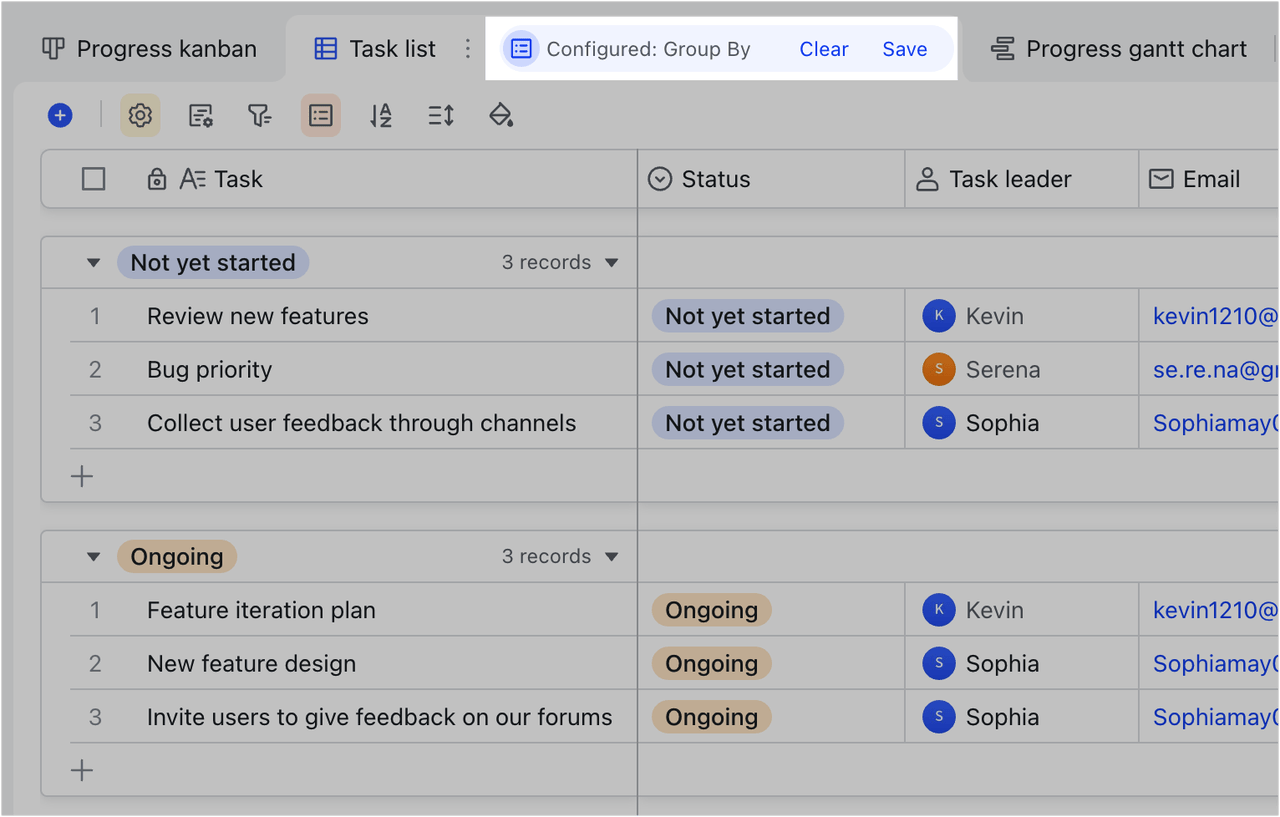
- When a user with edit permission performs one of the actions mentioned above, their latest actions will be displayed at the top of the view, and a Clear button and a Save button will appear. Click Clear to clear the configuration. Click Save or press Control + S (Windows) or Command + S (Mac) to save the configuration.
250px|700px|reset
- The temporary configuration of the view will not be cleared when the user switches between different views within the same table.
- When a user with edit permission leaves the current table (switching to another table, creating a new table, creating a form, creating a new dashboard, creating a new document), a prompt will appear, and the user can choose whether to save their configurations. Click Save to save the configuration and Discard to clear it.

250px|700px|reset
- When a user with edit permission shares a view with temporary configuration, a prompt will appear, and the user can choose whether to sync the temporary configuration to the shared view.

250px|700px|reset
III. View types
Grid view
When you create a new Base, grid view is the default view. It looks like a traditional table and is easier for beginners to get started with. You can add multiple fields and define the format of all cells in the fields. Grid view is applicable in any scenario.

250px|700px|reset
Once a table is ready, you can add a view. Base will automatically generate the new view based on the original data.
Kanban view
Kanban view can be used to group and organize data records based on your grouping criteria. You can drag record cards to different locations to update data. All changes made will be synced to all other views. Kanban view is useful for individual management of members, candidates, and tasks.
Kanban view displays compact record cards to ensure more efficient access to key information. To help you get a quick idea about the content of a record, Kanban view supports showing a preview of the record's attachment field as its cover.
Kanban view can be grouped by the following field types: Person, single option, multiple options, checkbox, flow, rating, one-way link, and two-way link.
250px|700px|reset
Calendar view
Calendar view organizes records according to the date field in a calendar format, so you can check your entire monthly schedule at a glance. You can drag-and-drop events to change their dates, making event planning and project management more convenient.

250px|700px|reset
Gallery view
Gallery view visualizes content found in the attachment field, directly displaying any file content such as images and PDFs. You can click the record cards to view more record information.

250px|700px|reset
Gantt view
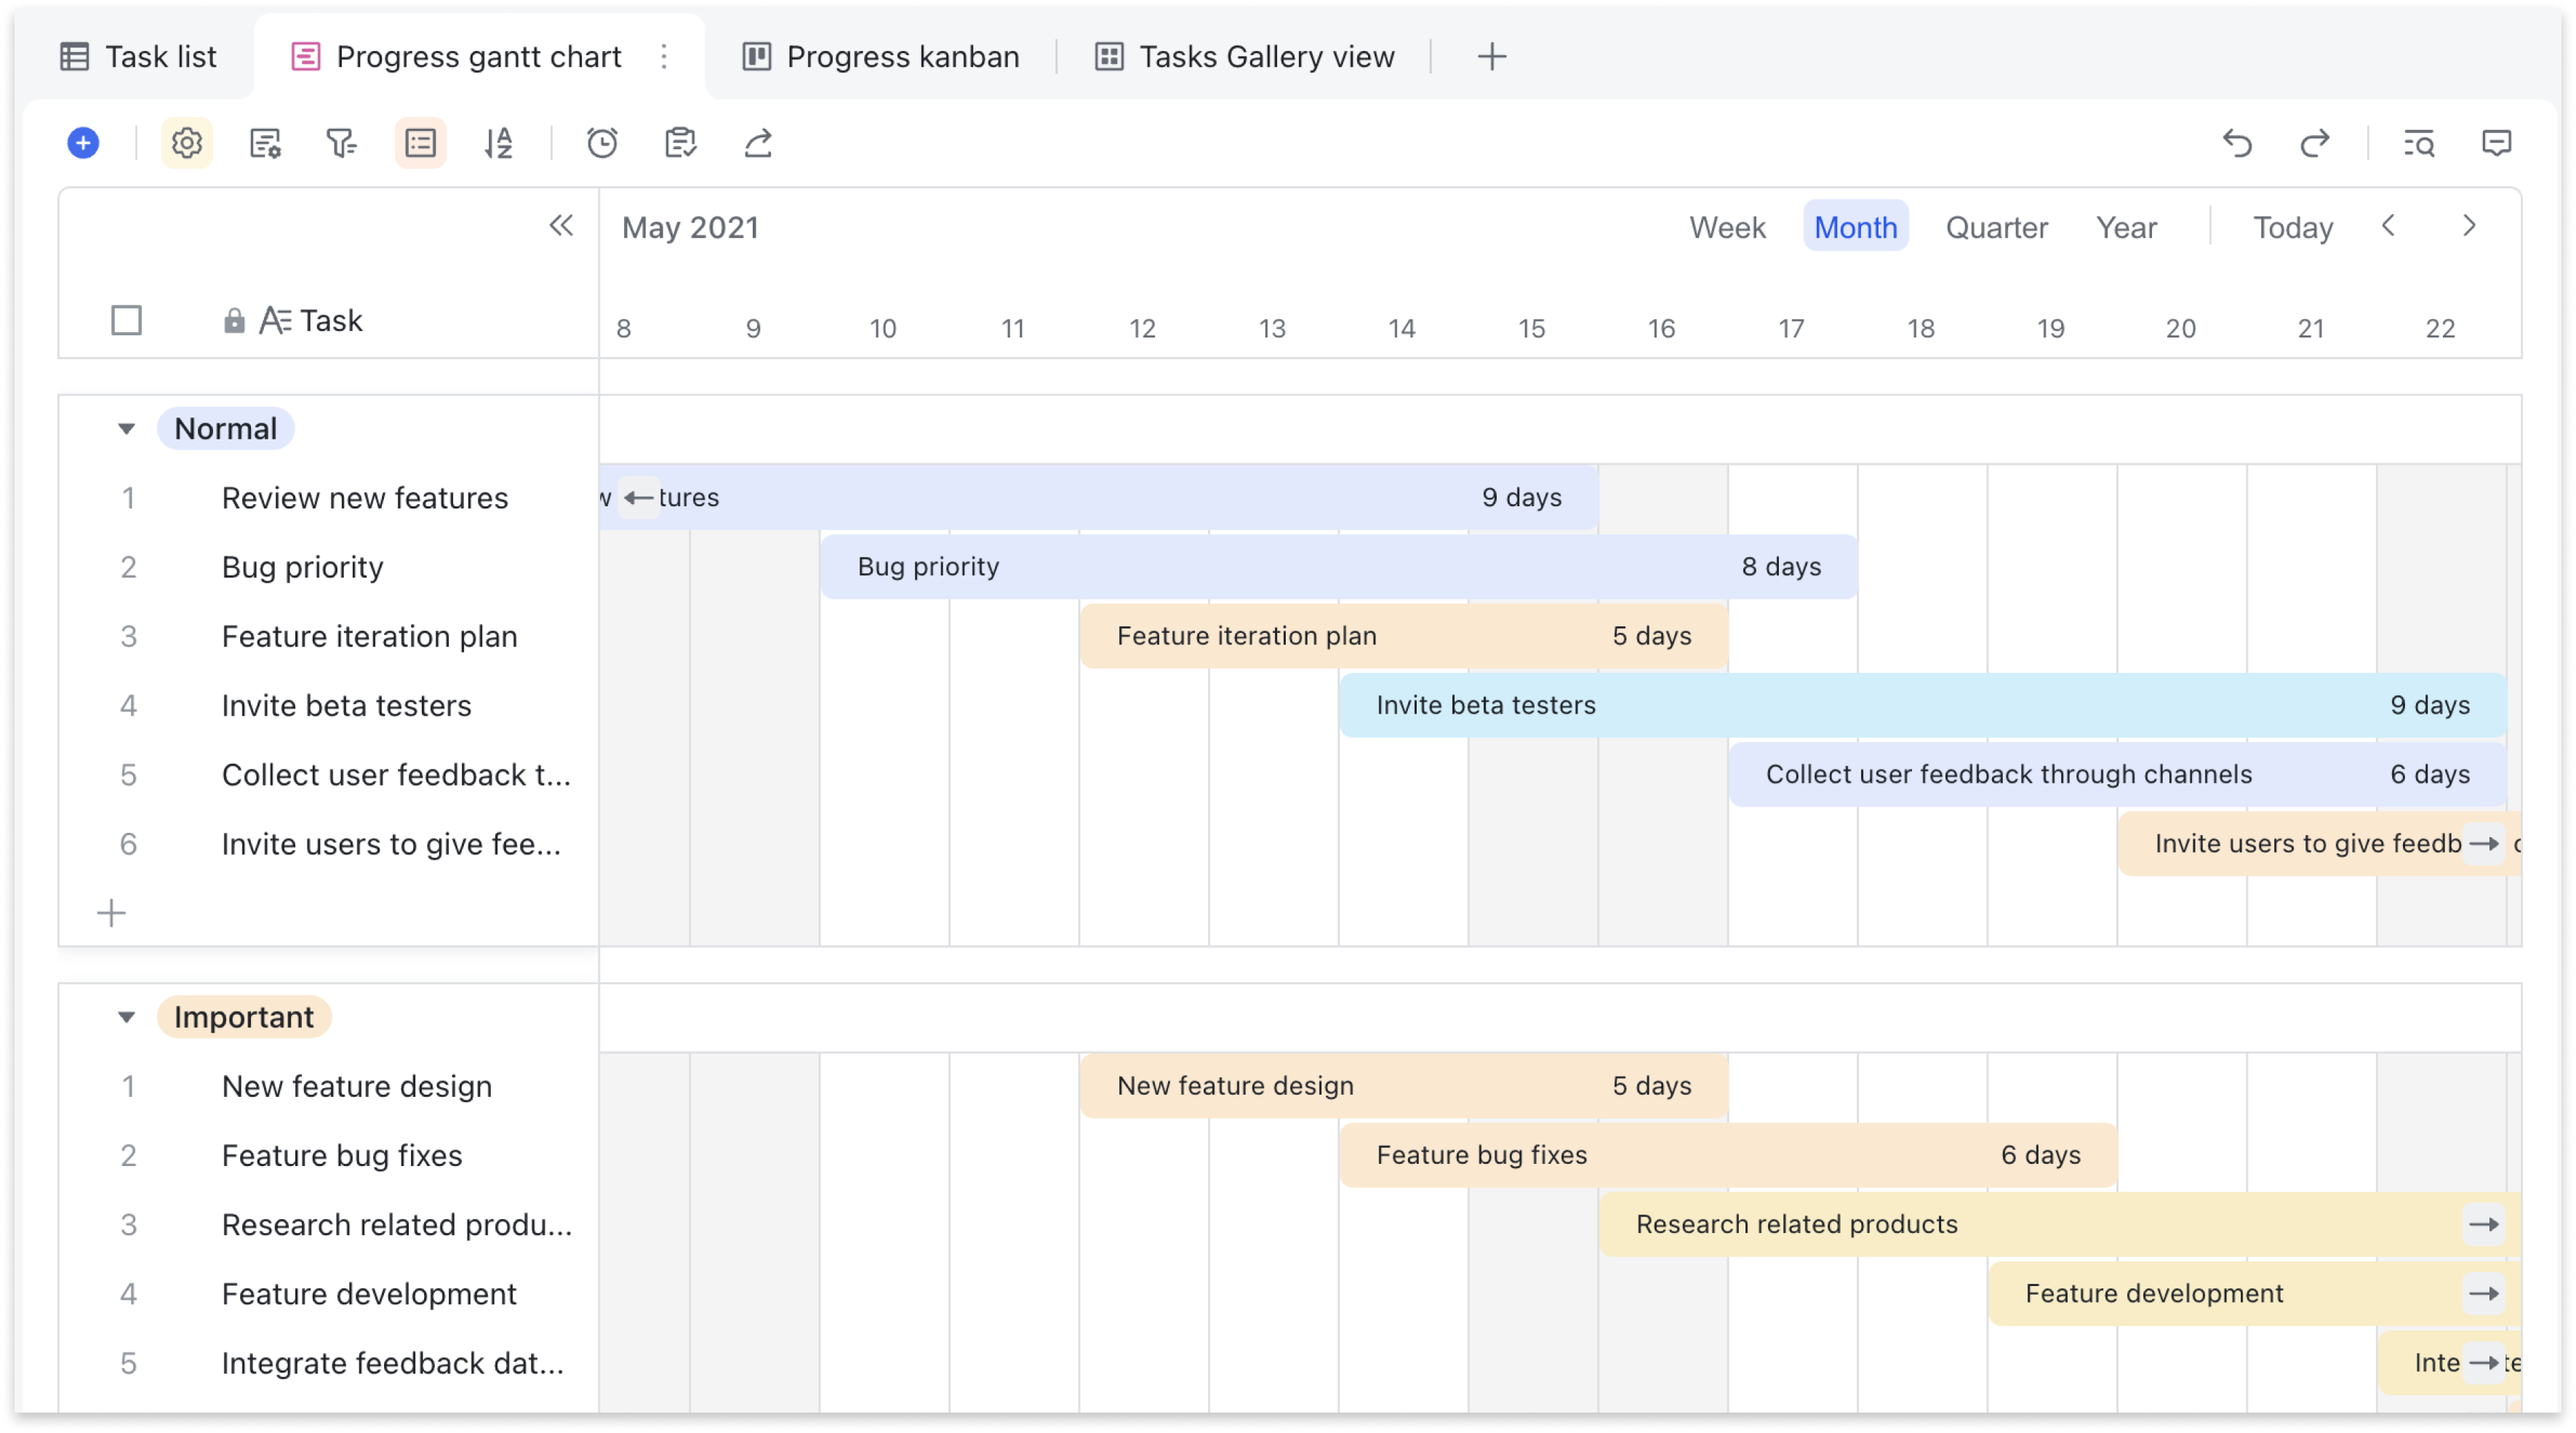
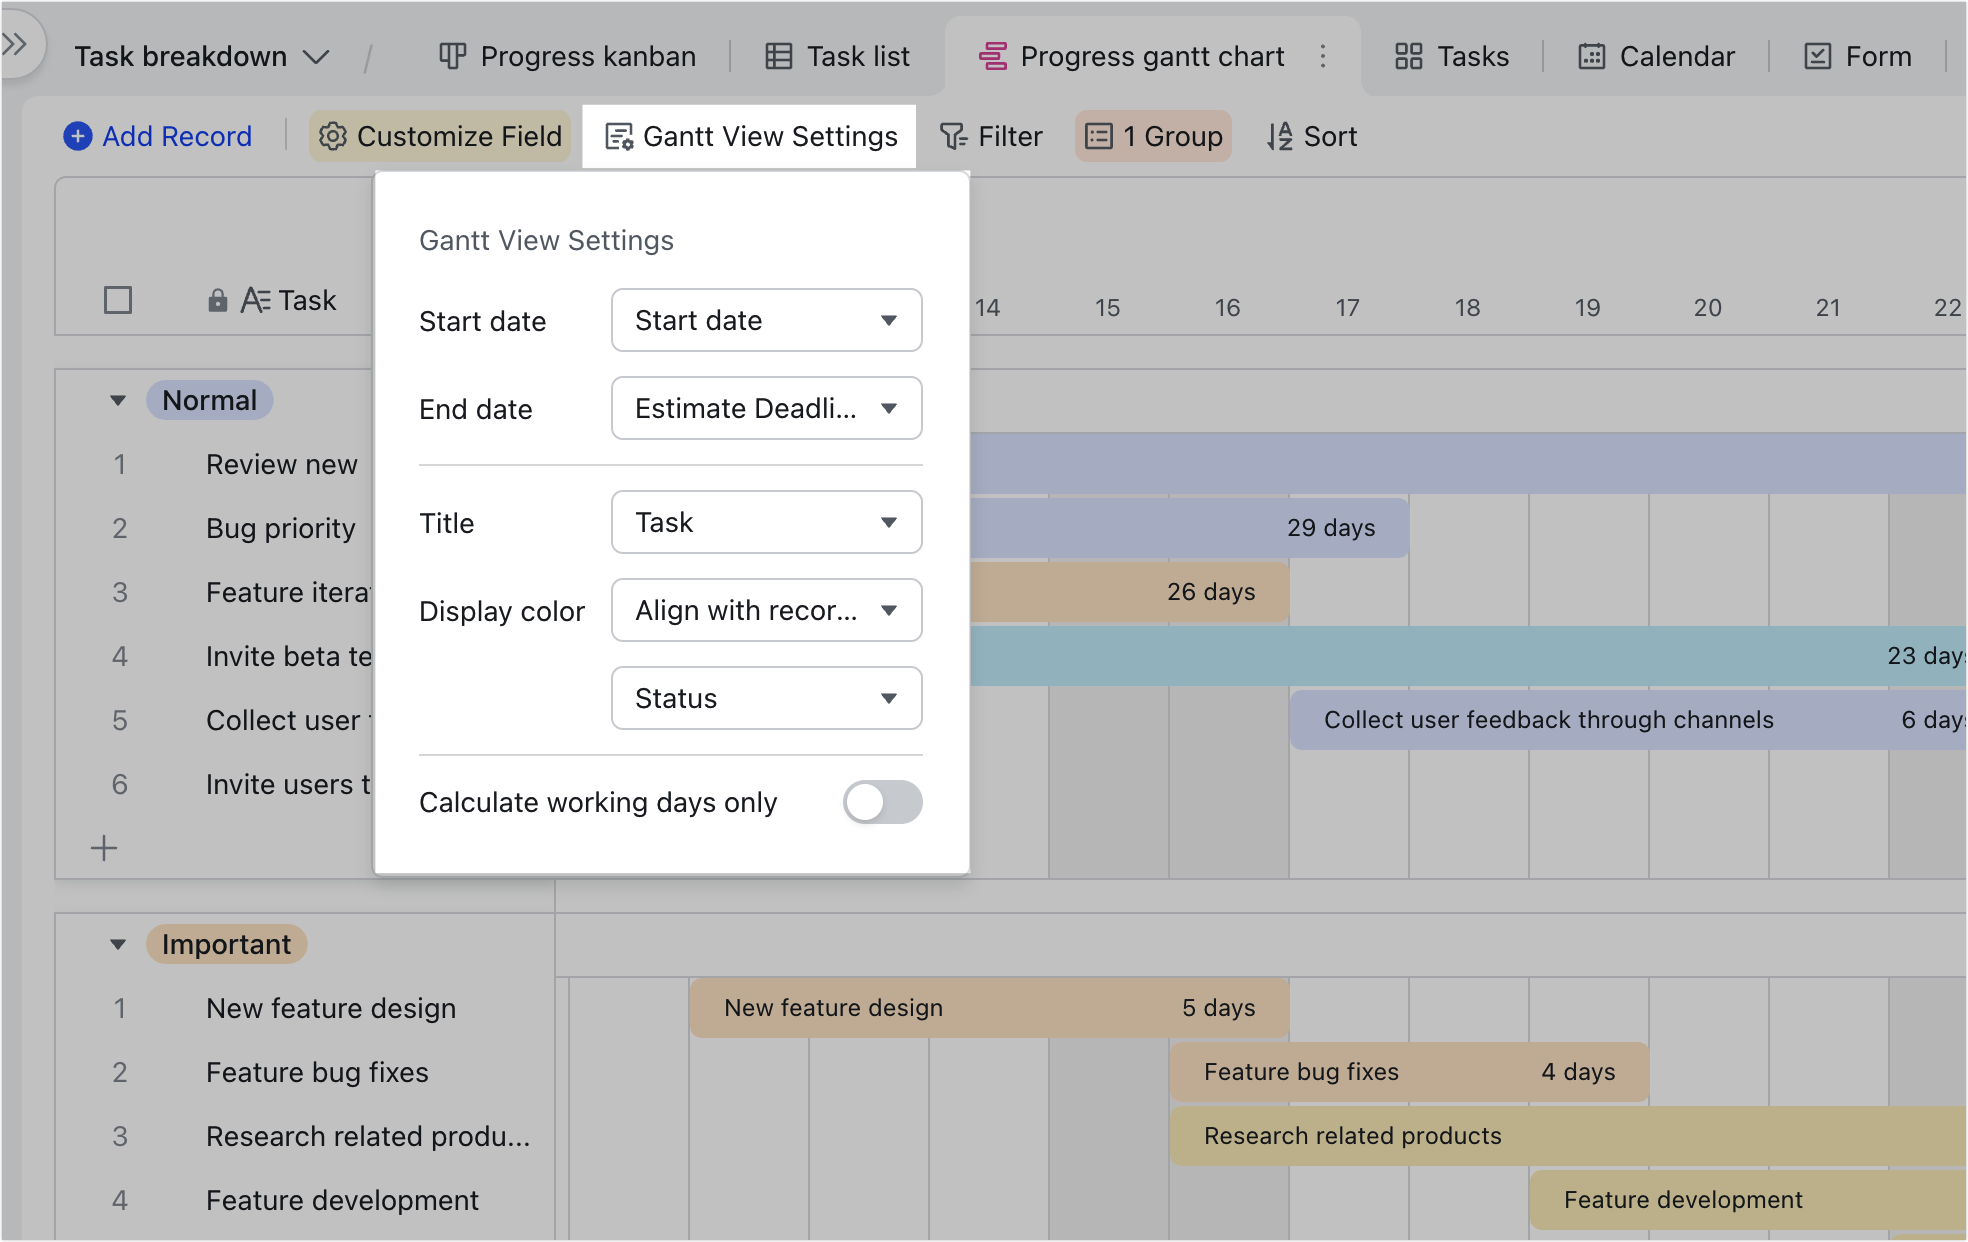
Gantt view allows you to click on specific dates to create milestones. It also allows you to select any time dimension such as a week, month, quarter, or year. Gantt view displays the progress of every task with a progress bar, making the view useful for project management.
250px|700px|reset
Project owners can update tasks by dragging or moving the progress bar. Gantt view also uses grouping and filtering functions to further categorize tasks so you can stay focused.
By using the progress bar, you can visually check and edit the days allocated to each task. You can configure which fields are displayed and customize the progress bar color and more.
250px|700px|reset
Form view
Form view converts the table into a questionnaire-like form that you can share with organization members or anyone on the internet. Recipients can fill out the form and their responses will be synced to the table. It is recommended that you write the form questions and field types in grid view first, and then create the form view.

250px|700px|reset
IV. Record hierarchy in grid view
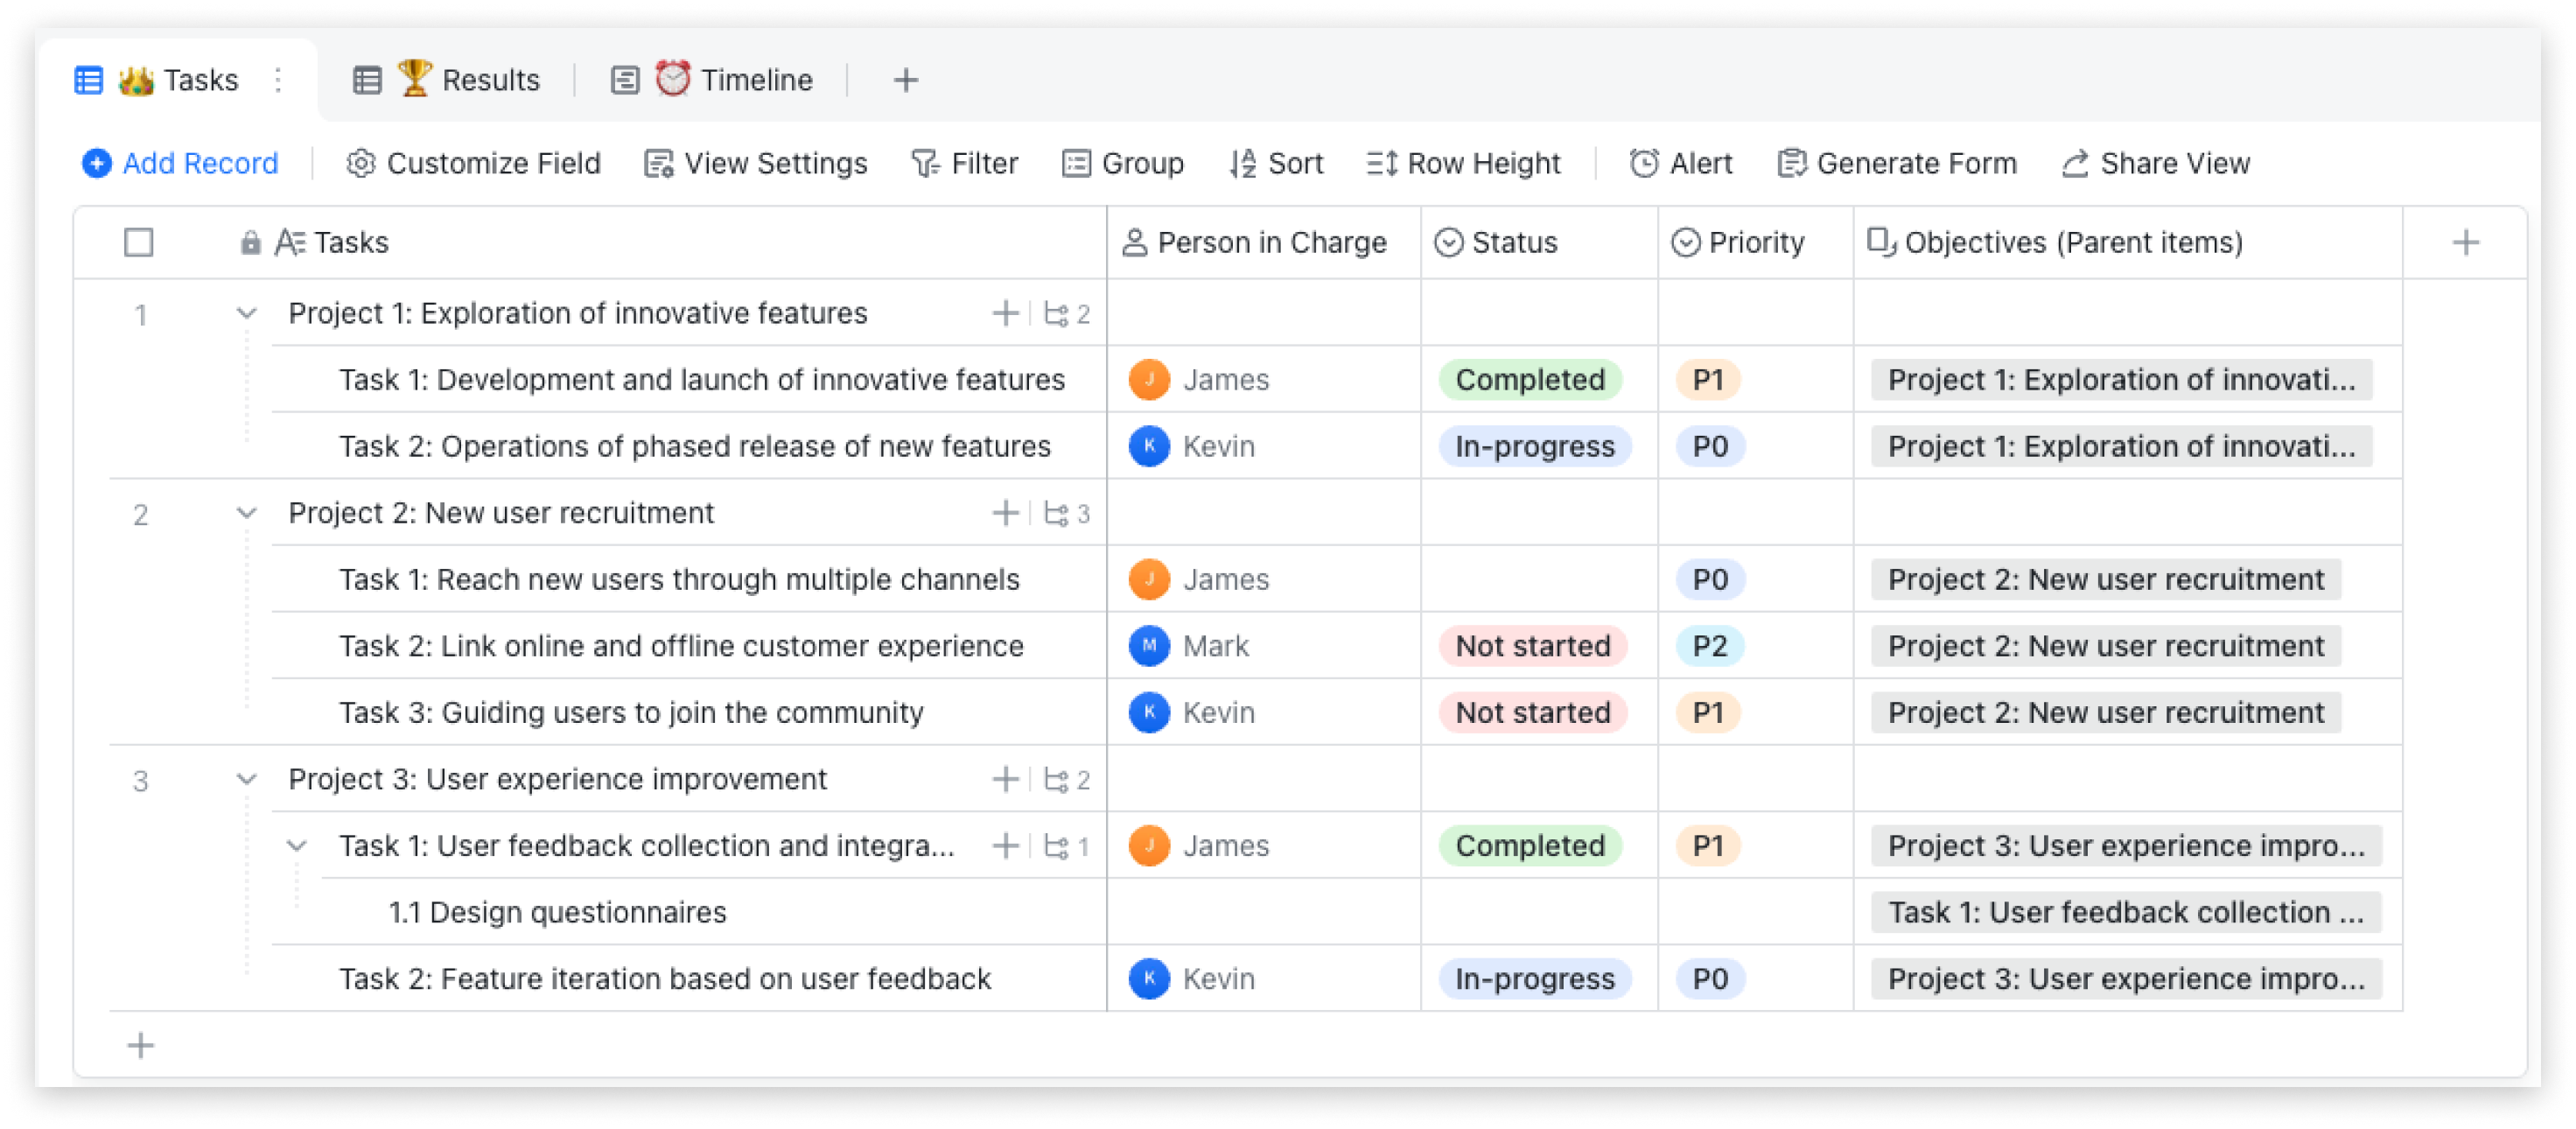
You can set hierarchical relationships between records in grid view to create a clearer structure of your data.
250px|700px|reset
Every sub-record is associated with a parent record.
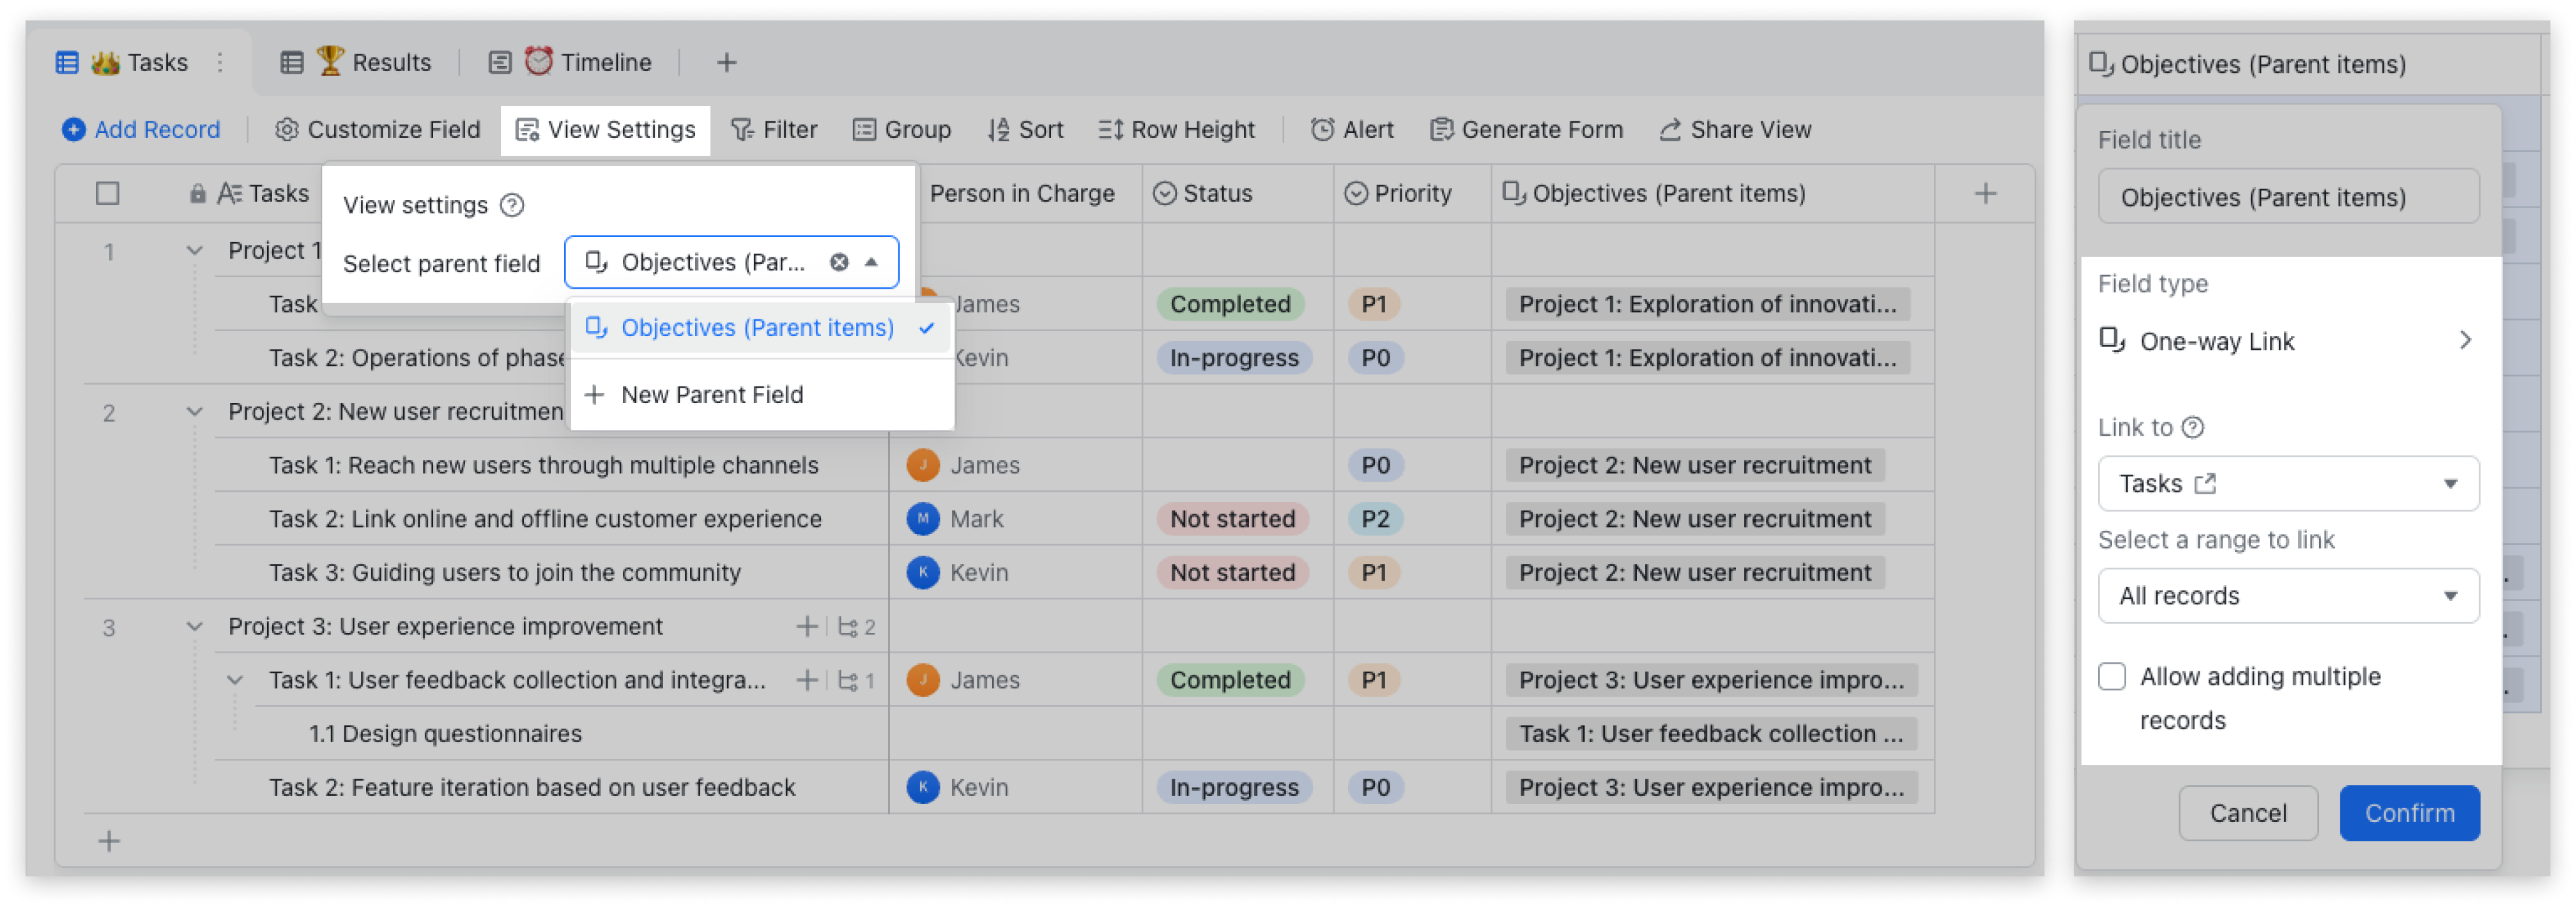
Click View Settings in the toolbar at the top to select a parent field: You can select an existing one-way link field or add a new field. The field can then be linked to any record in the table (only one record can be linked).
Note: If there are multiple parent fields in the table, you can select one in View Settings and newly added sub-records will be linked to it.
250px|700px|reset
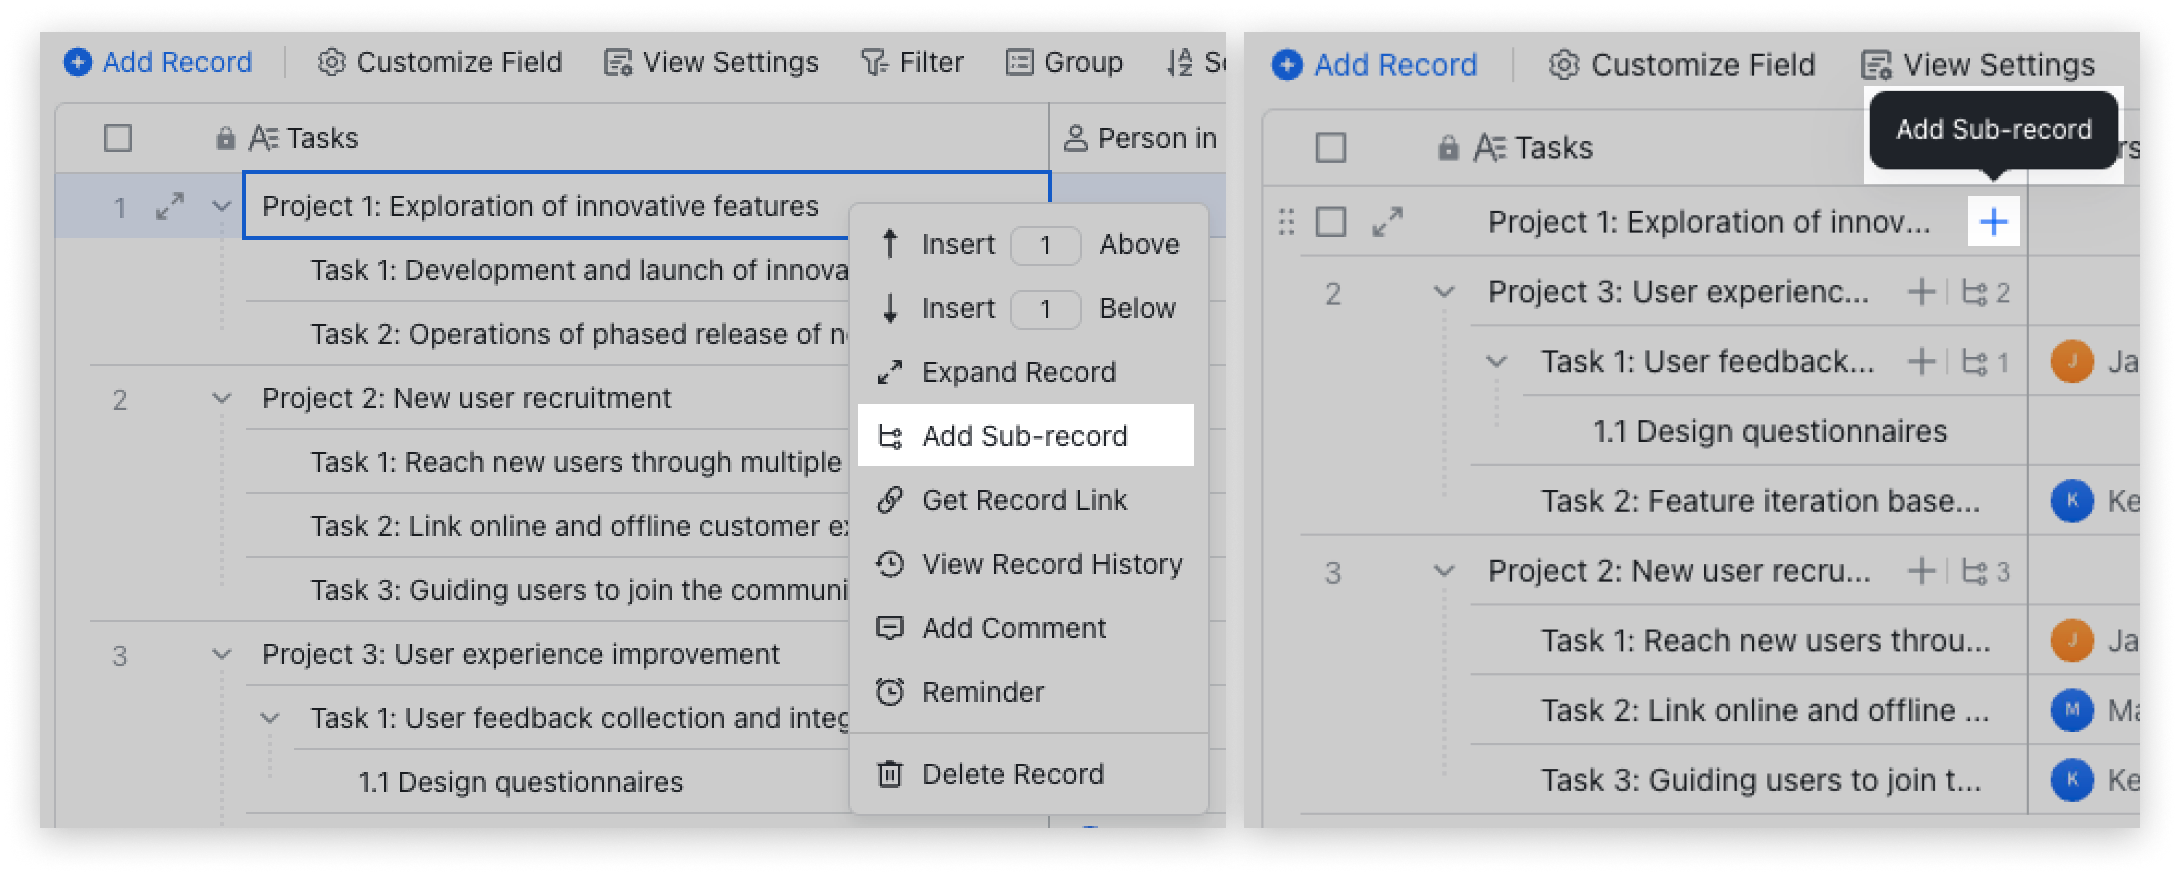
- Add a sub-record: Right-click a record > Add Sub-record, or hover over a record and click Add Sub-record.
250px|700px|reset
Note: If there are no parent records in the grid view when you add a sub-record, a one-way link field called "Parent items" will be created automatically. The newly created parent field can be linked to any data in the table (only one record can be linked).
250px|700px|reset
- Delete a sub-record: Right-click the target record > Delete record.
Note: When a parent record is deleted, its sub-records won't be deleted.
- Collapse and show records: Click the arrow on the left side of a cell or the Hierarchy icon on the right to expand or collapse a record.
250px|700px|reset
- Move records: Hover over the left side of a record, then drag the ⋮⋮ icon to move it.
- Sub-records move with parent records.
- Both parent records and sub-records can be dragged to change their sort order and hierarchy.

250px|700px|reset
V. FAQs