
I. Intro
With Base automated workflows, you add events to Lark calendar as well as create tasks and groups, boosting efficiency and facilitating communication.️
Use cases:
- When a new employee joins the organization, the HR manager can quickly create a training schedule using automated workflows.
- Break down projects into discrete tasks in the base, then sync events to Lark calendar according to task duration and owner using automated workflows.
- When participants sign up to an event using a Lark form, they can automatically join the corresponding group to get in contact and find more information.
II. Steps
If you're not too familiar with base automation, we recommend reading Use automated workflows in Base before proceeding.
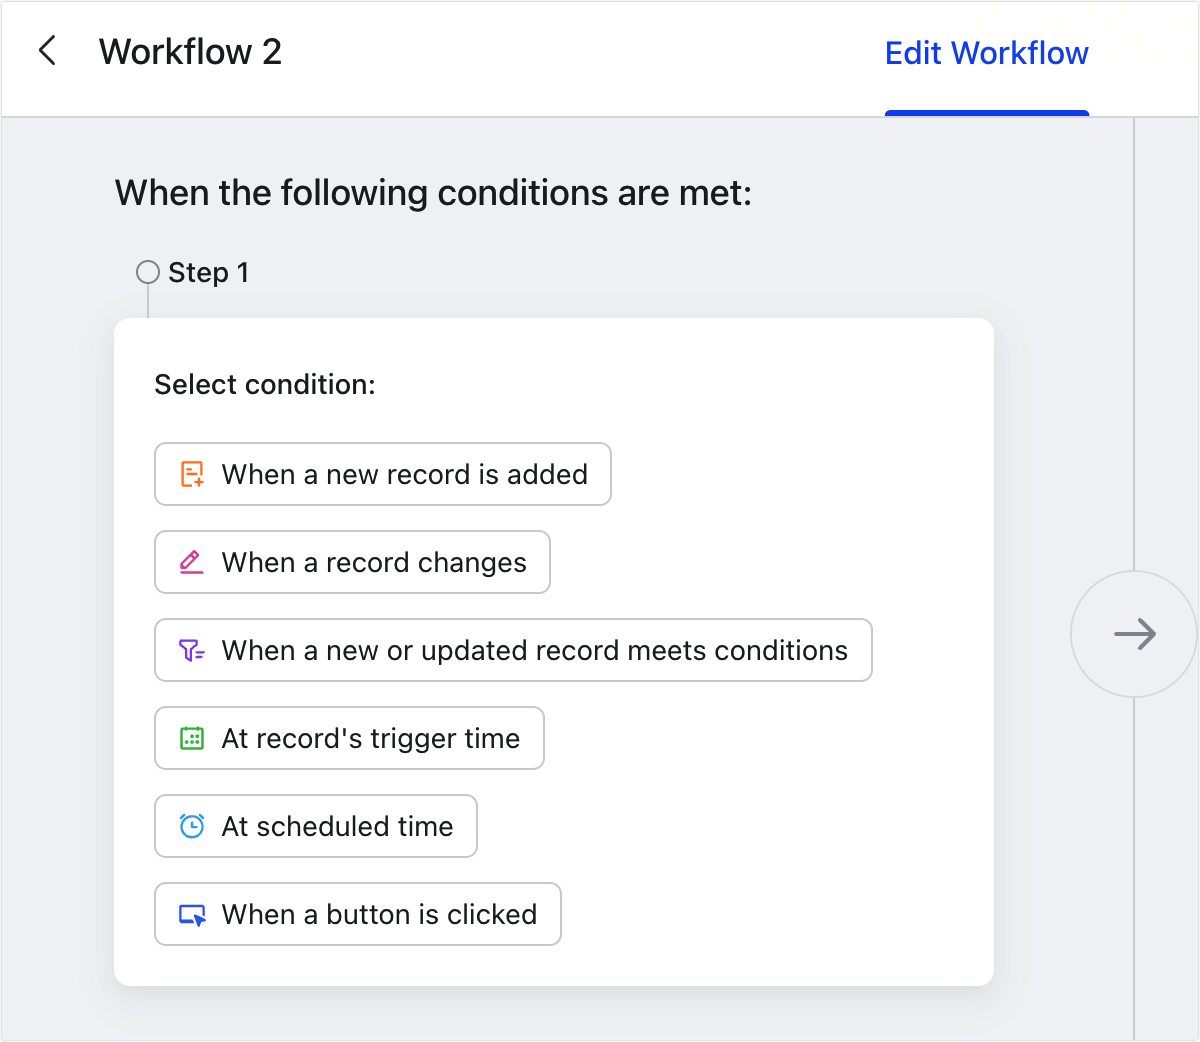
- Configure triggers
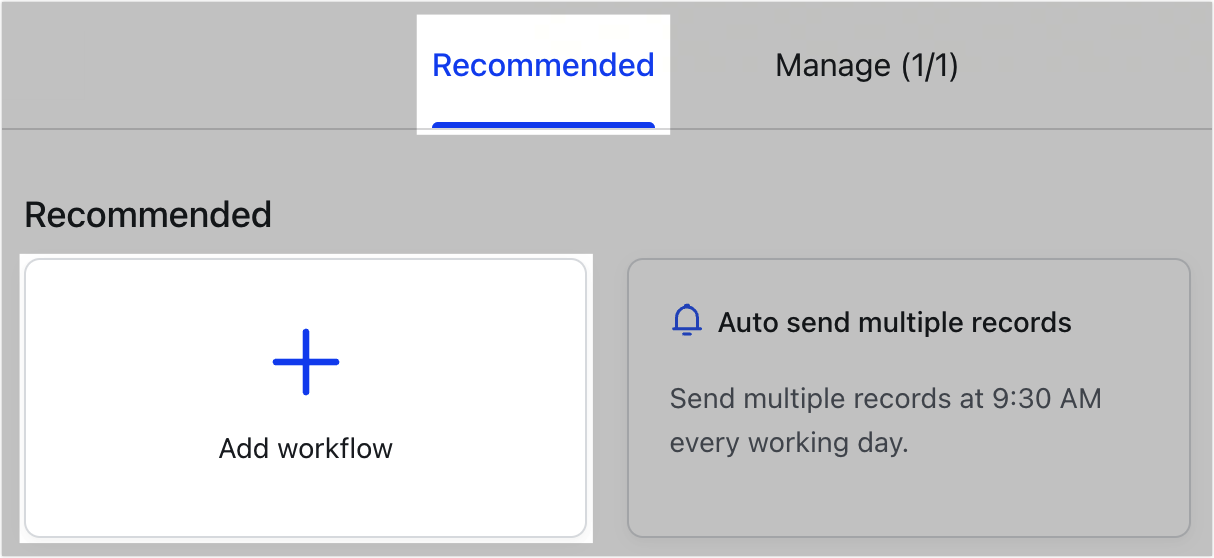
- Enter the base and click Automations in the upper-right corner.
- Click Recommended, select Add workflow, and select the trigger conditions on the left side of the panel.
250px|700px|reset
250px|700px|reset
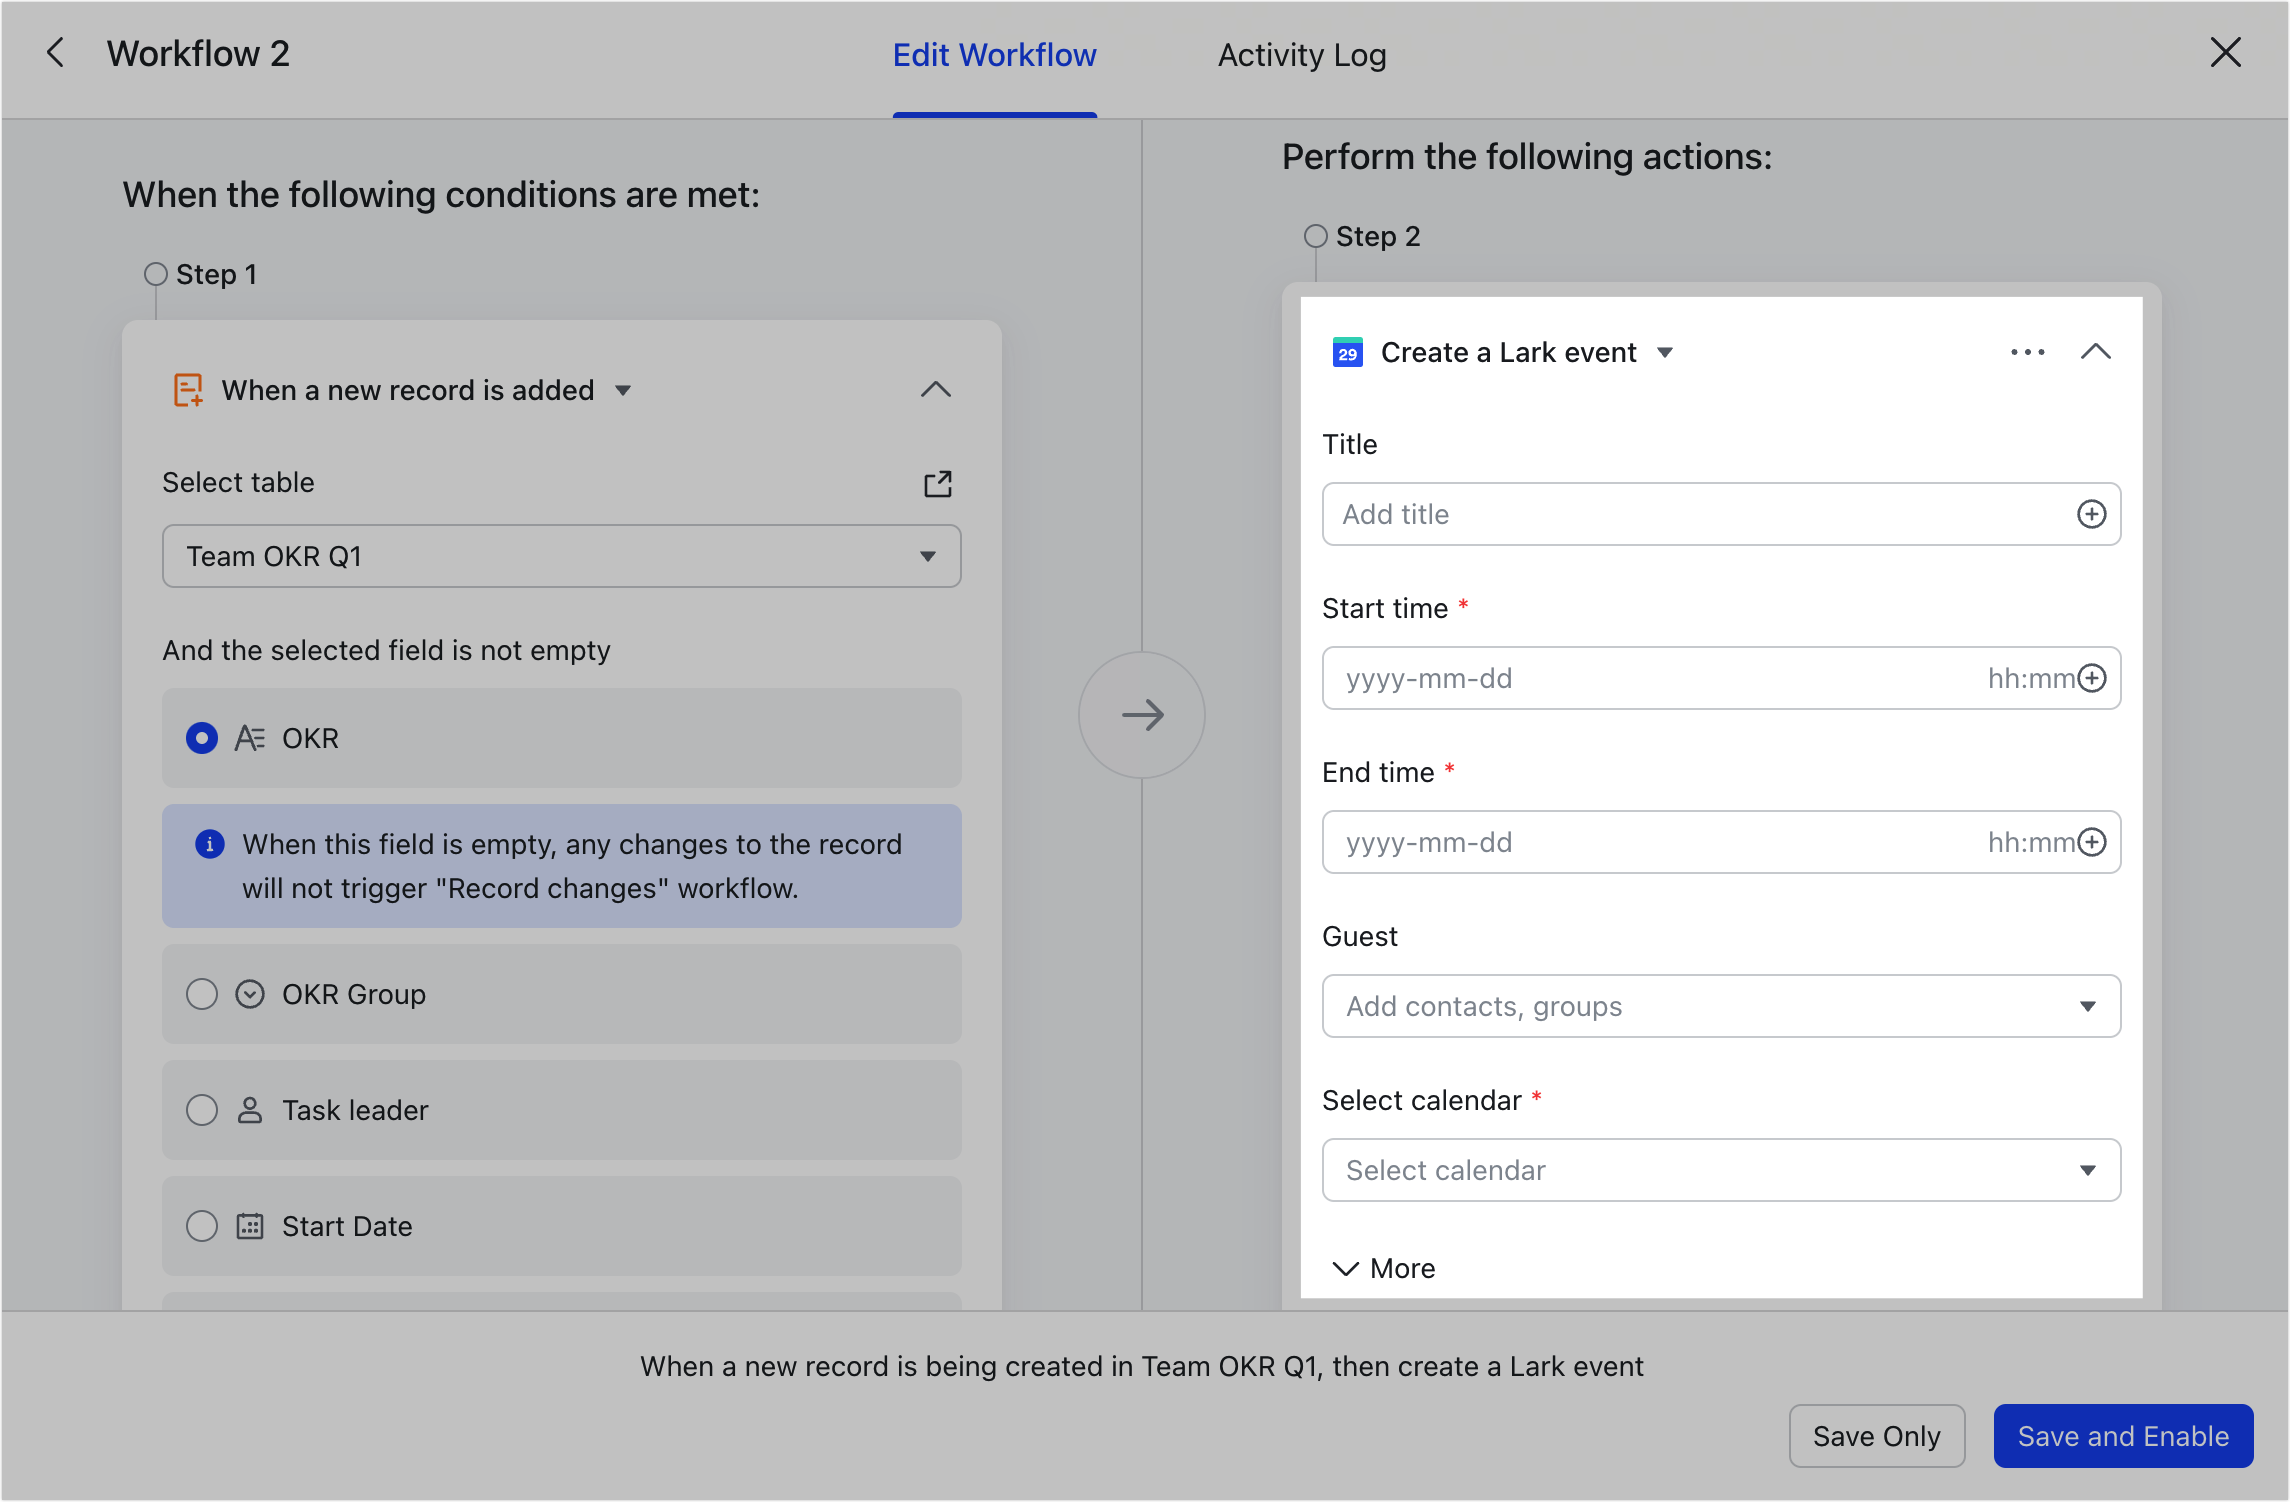
- Configure an action to perform
Create an event
- Select Create a Lark event.
- Fill out the title, start time, and end time for the event. You can fill it out manually or click the ⊕ icon on the right side of the input field to reference data from the base.
- In the Guest section, select the contacts or groups you wish to add to the event (external contacts or groups can also be added). If this section is left empty, then the automated workflow configurator is added as a guest by default.
- Select the calendar to add the event to.
- Note: Click More if you want to add an event description or location or if you want to enable reminders.
- Click Save and Enable in the lower-right corner.
250px|700px|reset
If you need to use the generated event link later, you can:
- Create a new text field in the table to store the event link.
- Add an Update Record step after the Create a Lark event step. Under Set record content, select the text field you've just created. Click the Reference value icon, then Return value from step 2, and select Video meeting link. You can also select Calendar ID, Event ID, and Event creator as needed.
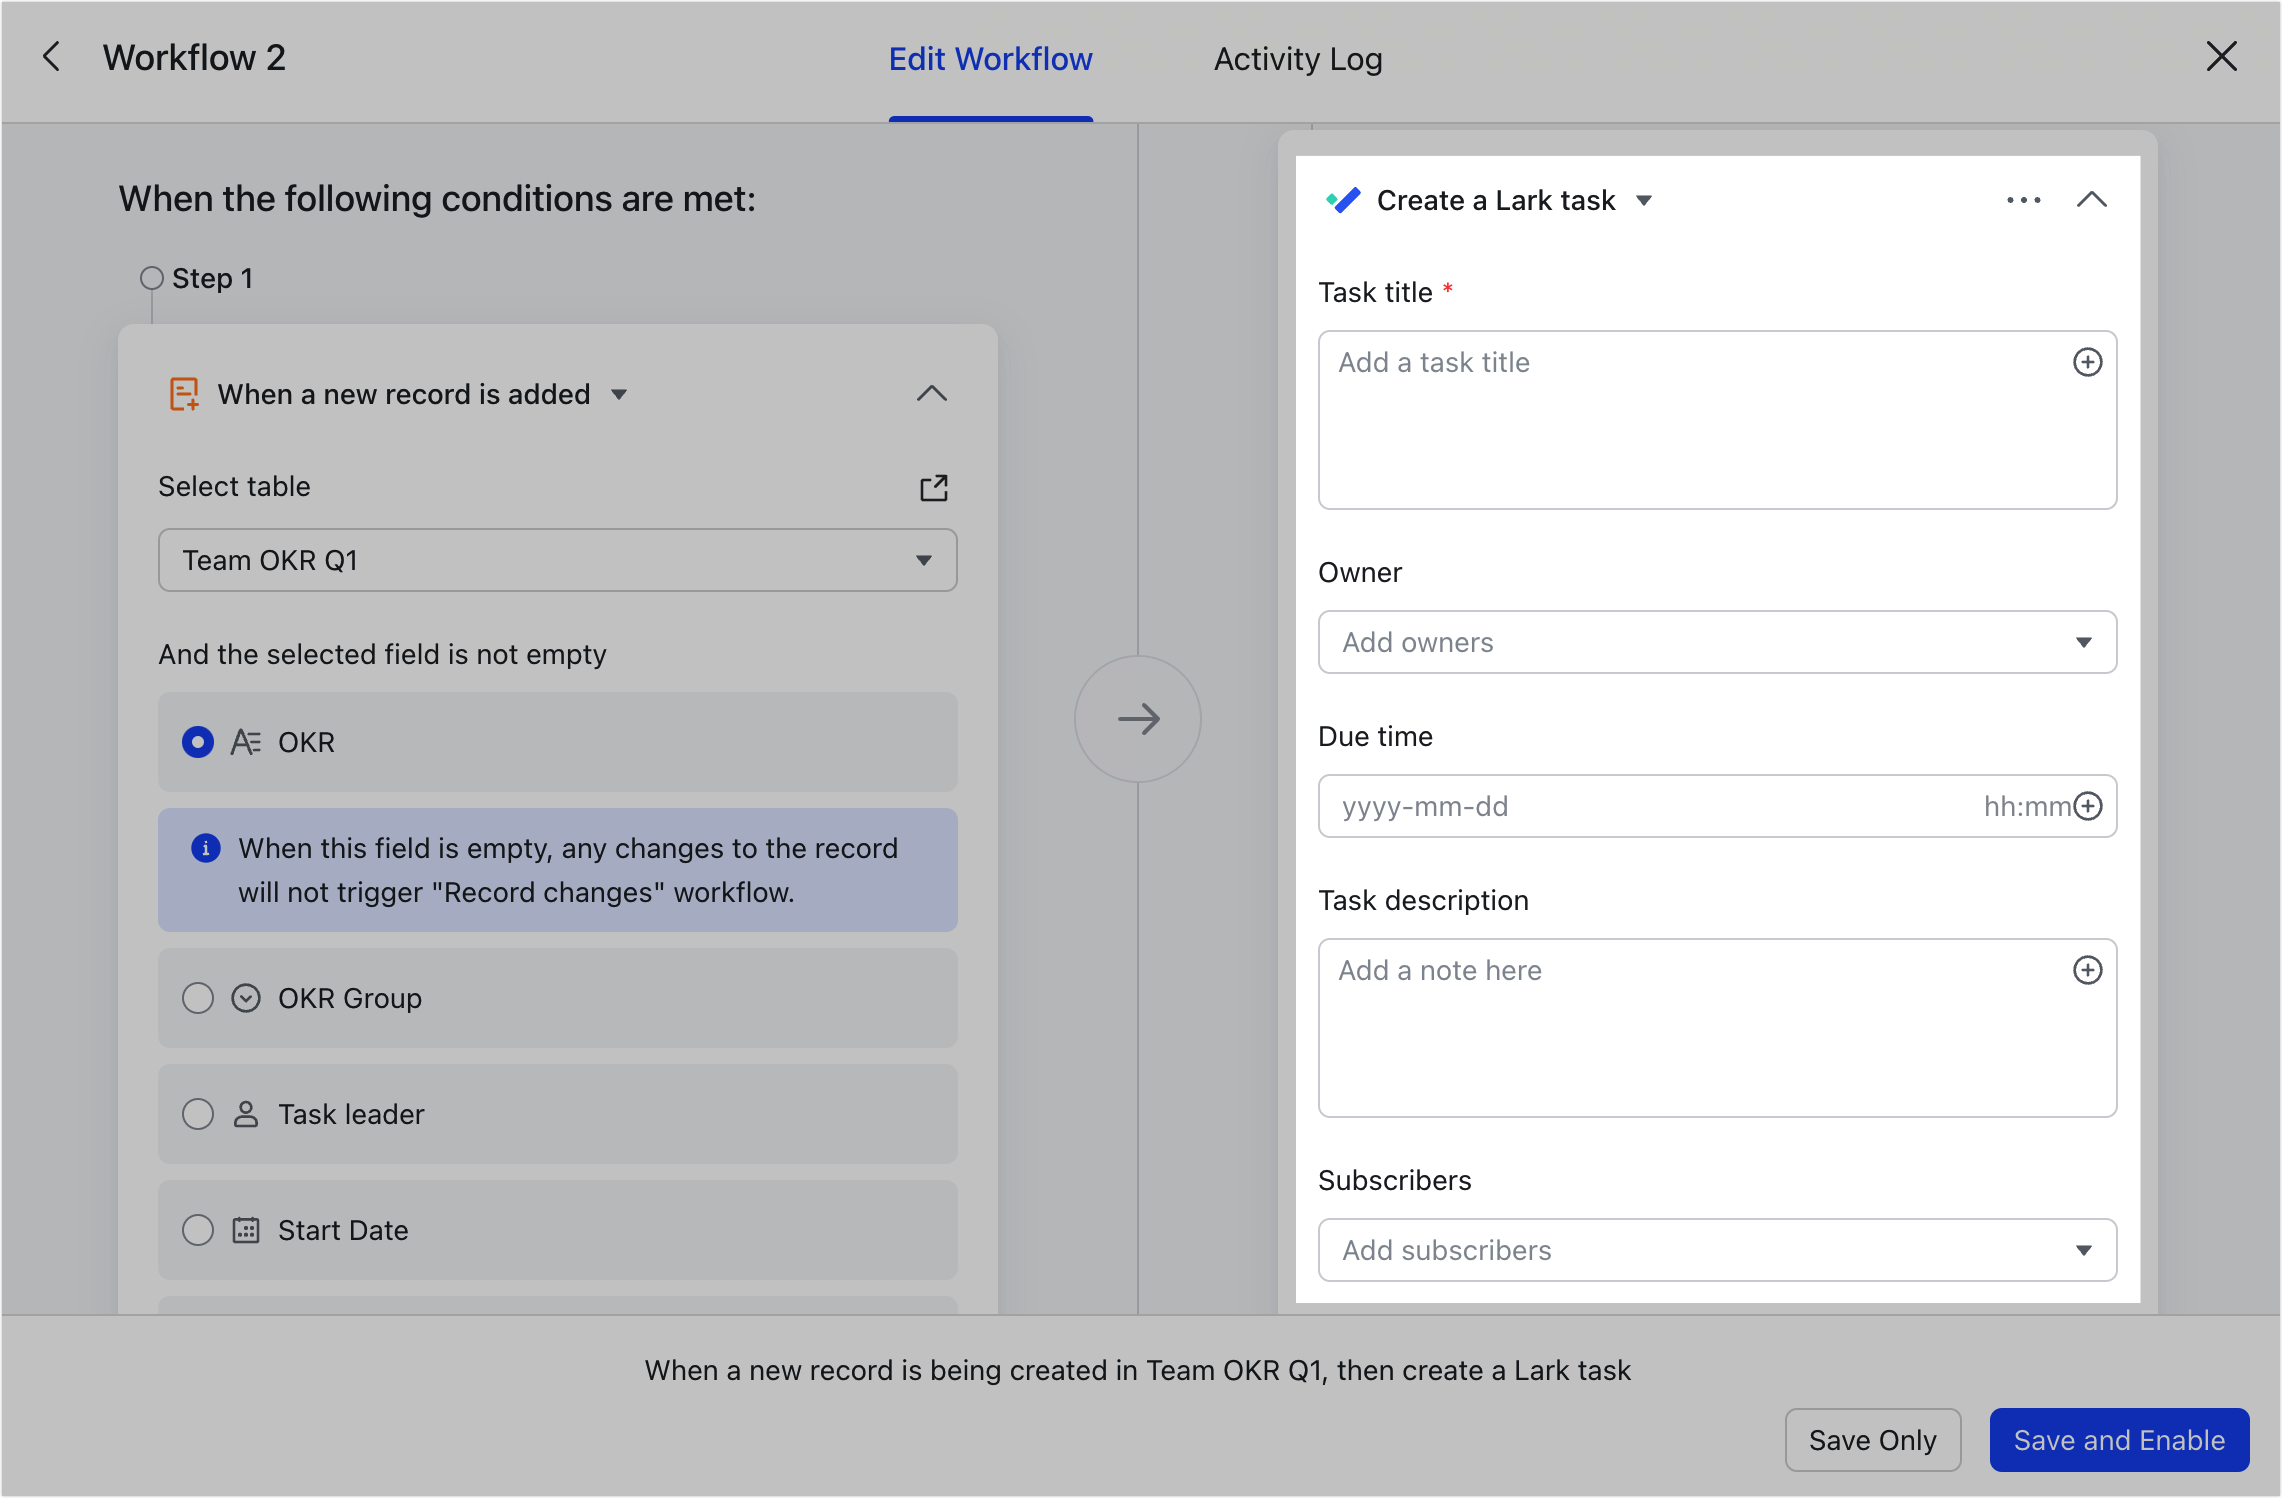
Create a task
- Select Create a Lark task.
- Enter a title or click the ⊕ icon on the right side of the input field to reference data from the base.
- Add task owners. Both internal and external contacts can be added.
- Set the due date and time.
- Note: Click More if you want to add a description or subscribers.
- Click Save and Enable in the lower-right corner.
Note: If the task creator sets themselves as the task owner or follower, then a notification won't be sent to the creator. Therefore, when you create tasks through automated workflows and you're the task owner or follower, you will not receive notifications even if the task is created. You can view the tasks in Lark Tasks.
250px|700px|reset
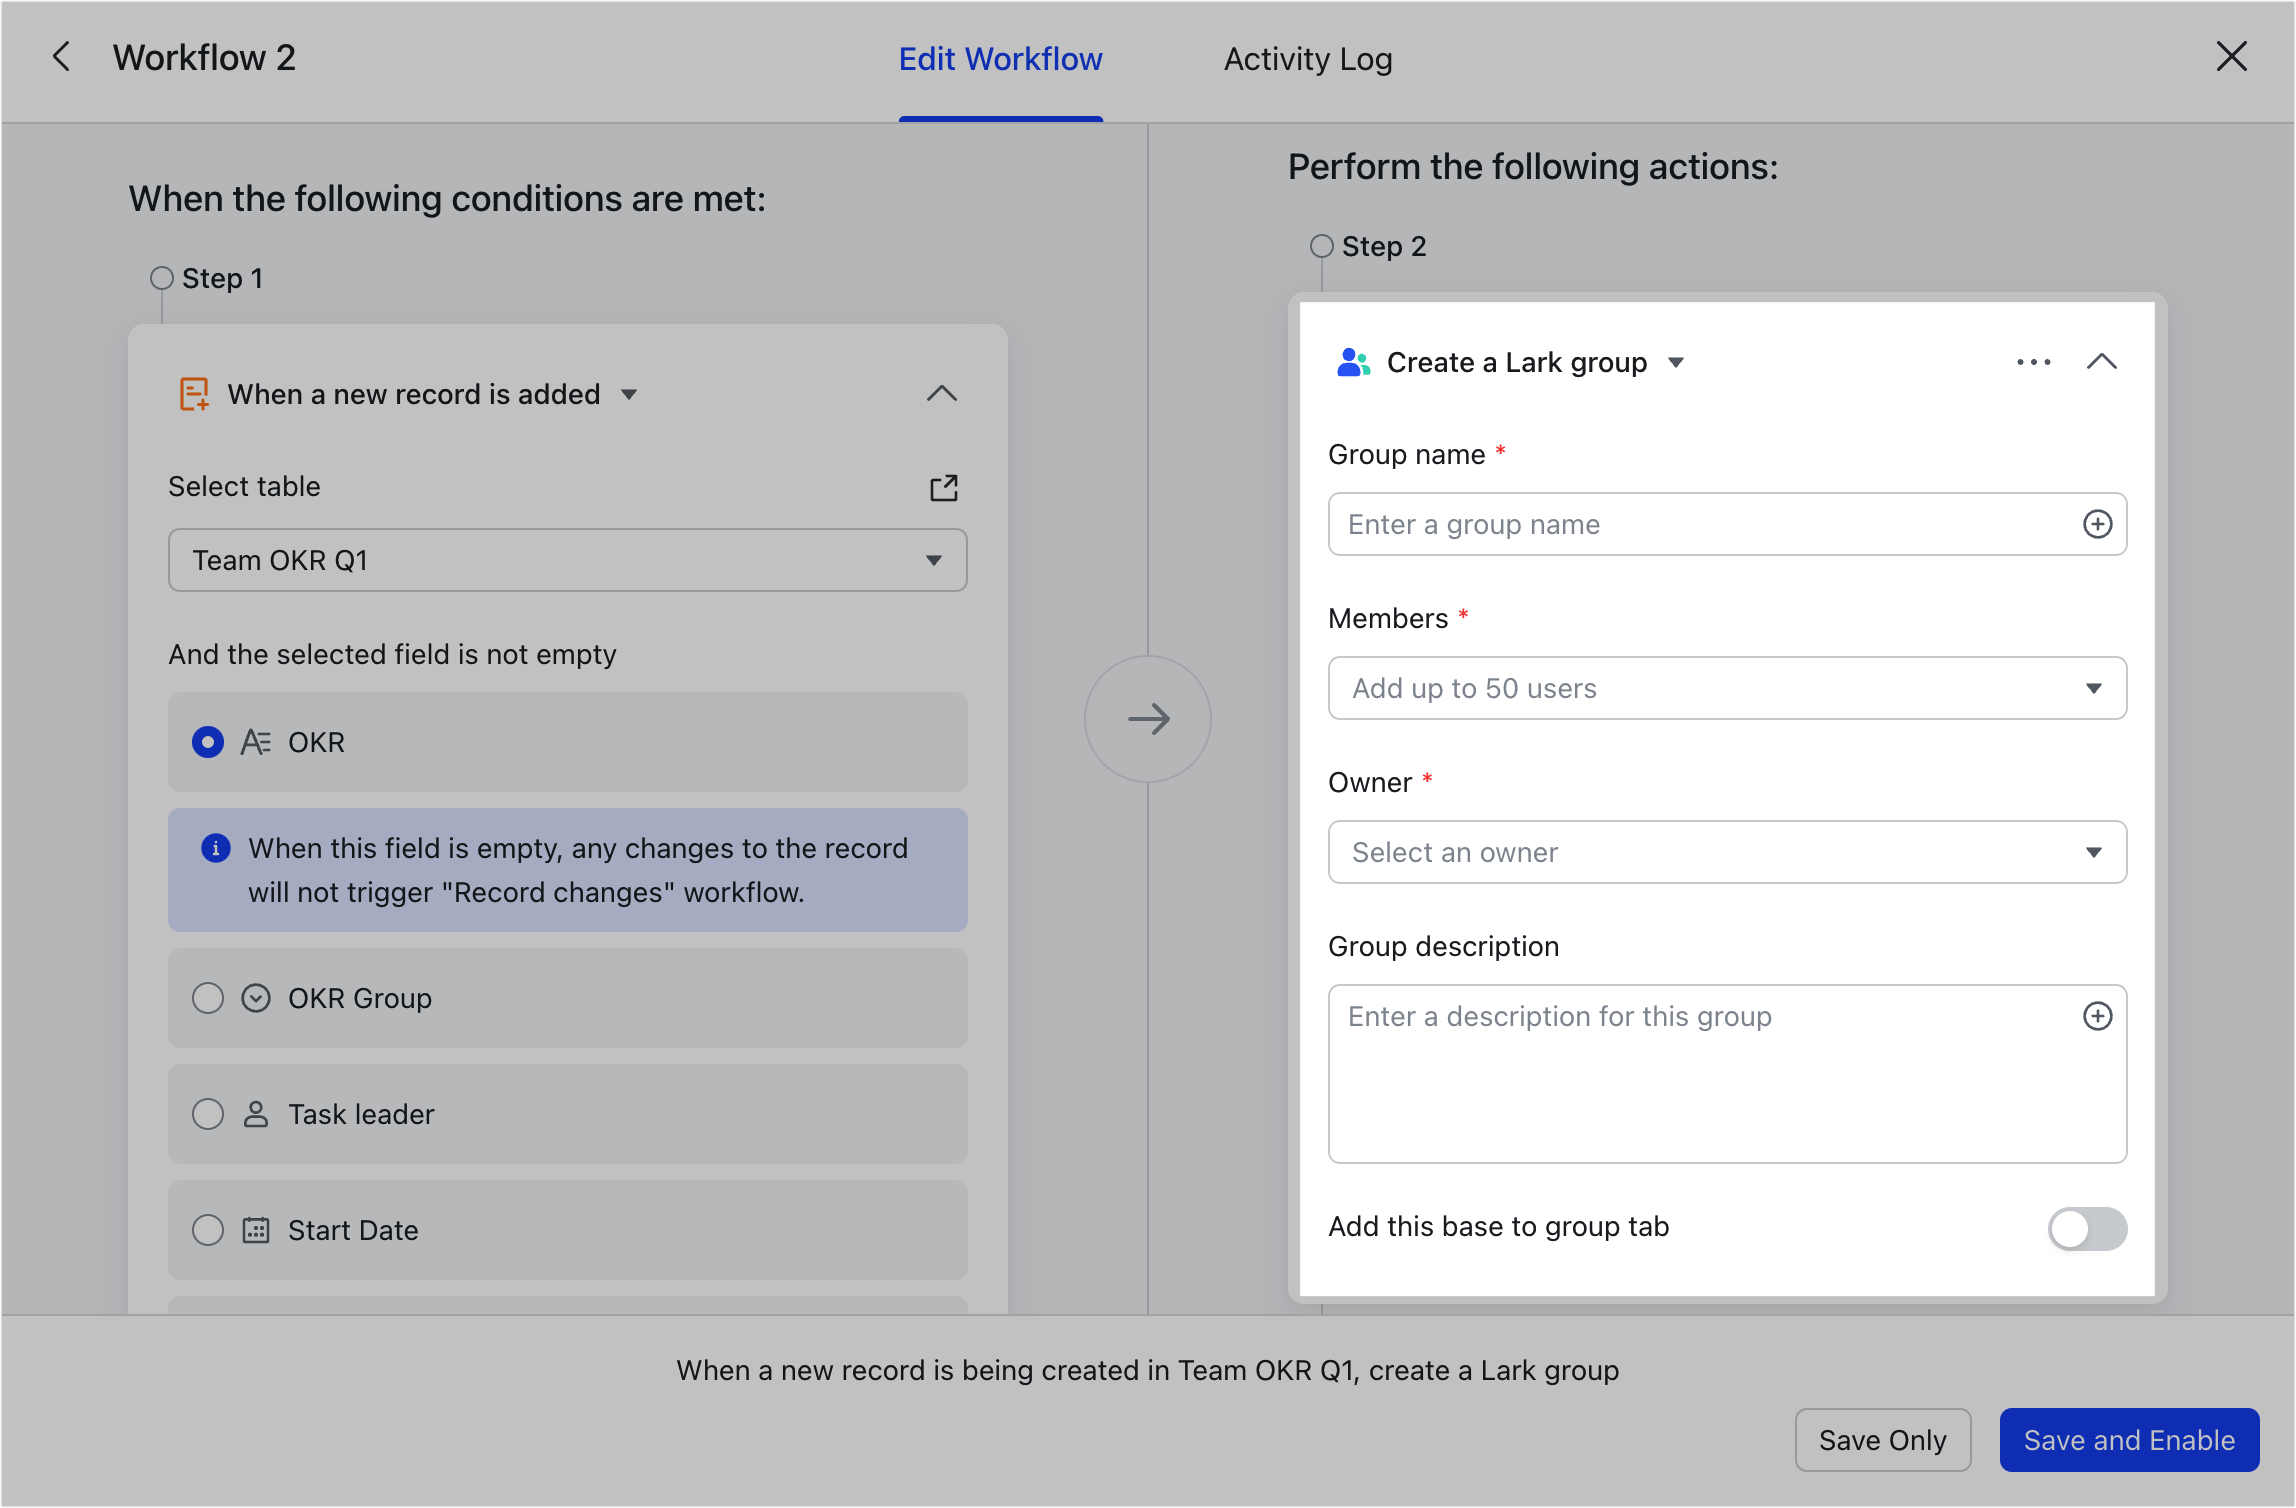
Create a group
- Select Create a Lark group.
- Enter a group name or click the ⊕ icon on the right side of the input field to reference data from the base.
- Add group members. Up to 50 people can be added. You can search for and select your contacts, including external contacts. You can also select data generated from previous steps (if any) and reference person fields in the base.
- Add an owner. Only one person can be added. External users cannot be selected as the owner. You can select data generated from previous steps (if any) and reference person fields in the base. If the person field referenced contains more than one person, "Base Assistant" will become the owner of the group.
- Enter a group description (optional). You can turn on Add this base to group tab and the base you're configuring will be added to the top of the group chat.
- Click Save and Enable in the lower-right corner.
250px|700px|reset
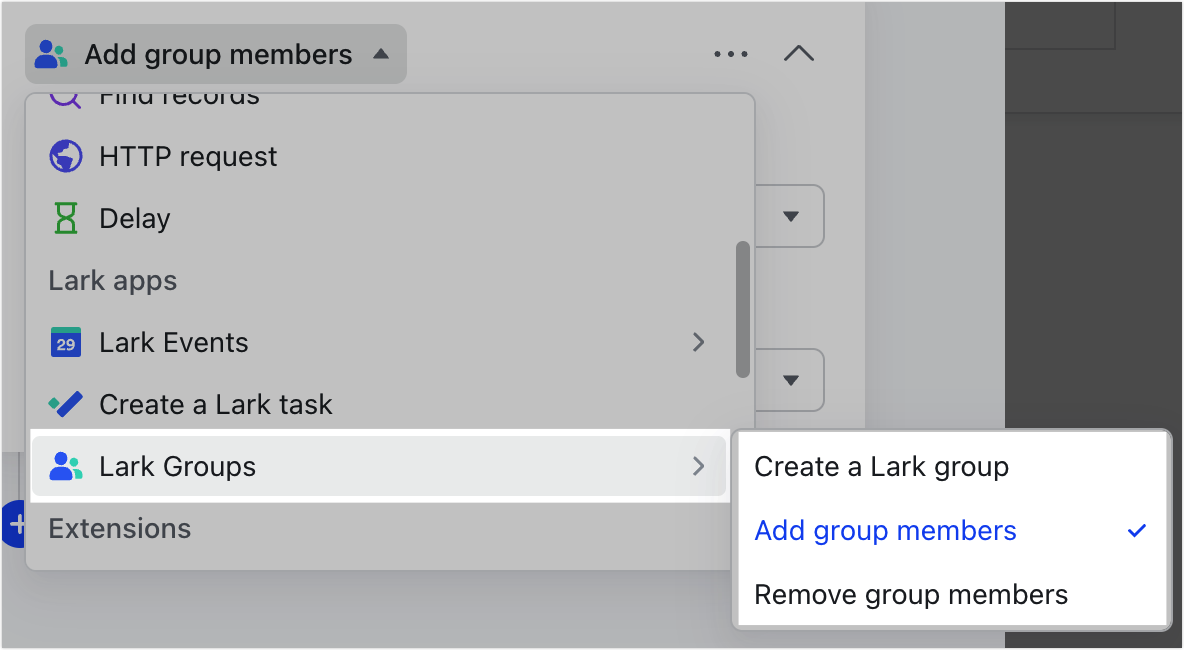
For the Create a Lark group step, you can also choose Add group members or Remove group members instead. A maximum of 50 members can be added or removed at a time.
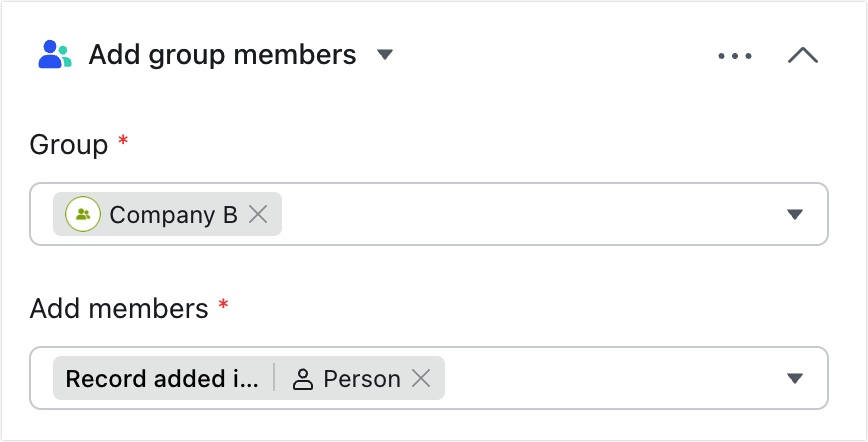
We'll use adding group members as an example. In the Group section, select a group by searching, selecting data generated from previous steps (if any), or referencing a group field in the base. In the Add members section, select a group by searching your contacts (including external contacts), selecting data generated from previous steps (if any), or referencing a person field in the base.
250px|700px|reset
250px|700px|reset
III. Use cases
Create events automatically using forms and automated workflows
You can configure automation to create an event with yourself when users fill out the form. The title of the event can be set in advance.
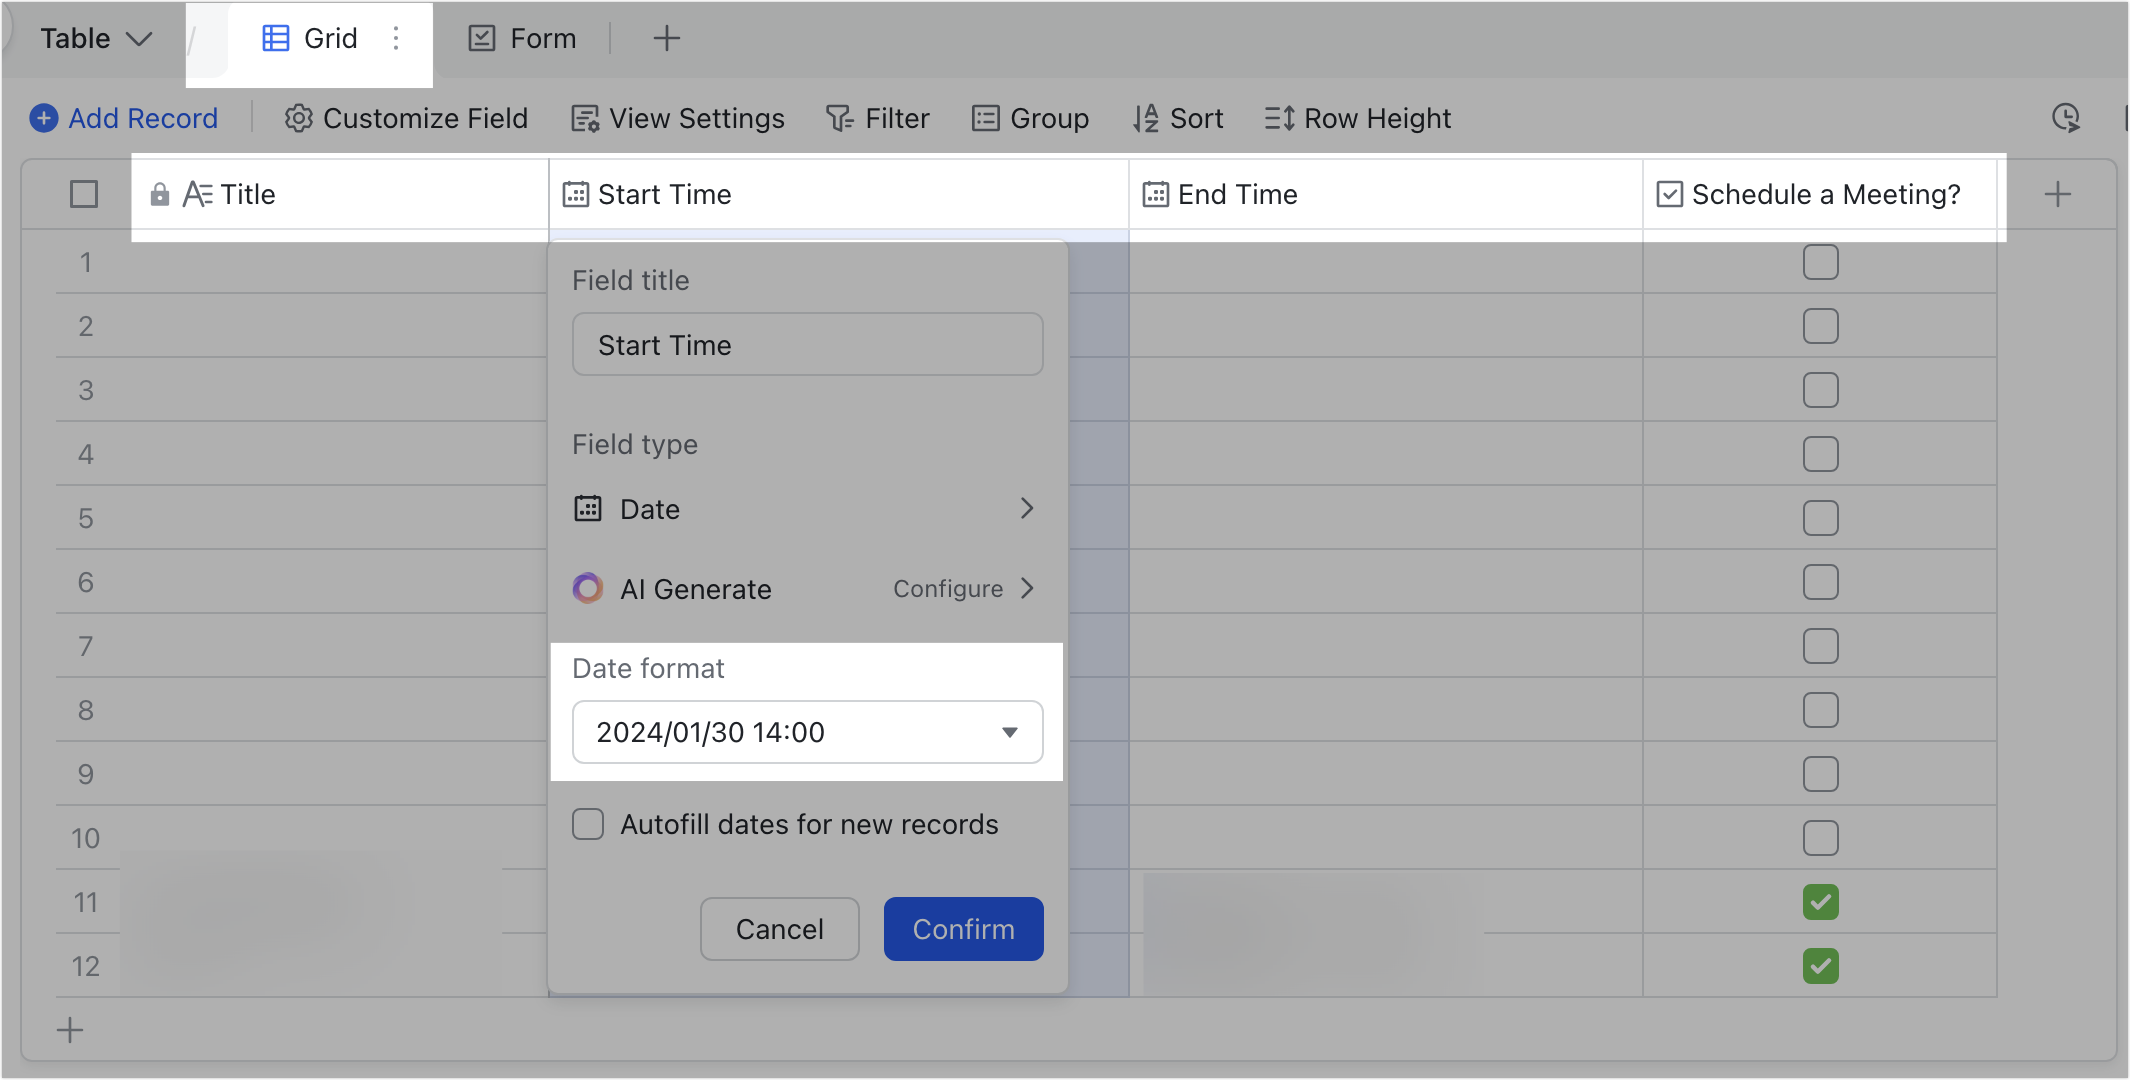
- In grid view, add "Title" (text field), "Start Time" (date field), "End Time" (date field), and "Schedule a Meeting?" (checkbox field). The date fields should be in a format with minutes.
250px|700px|reset
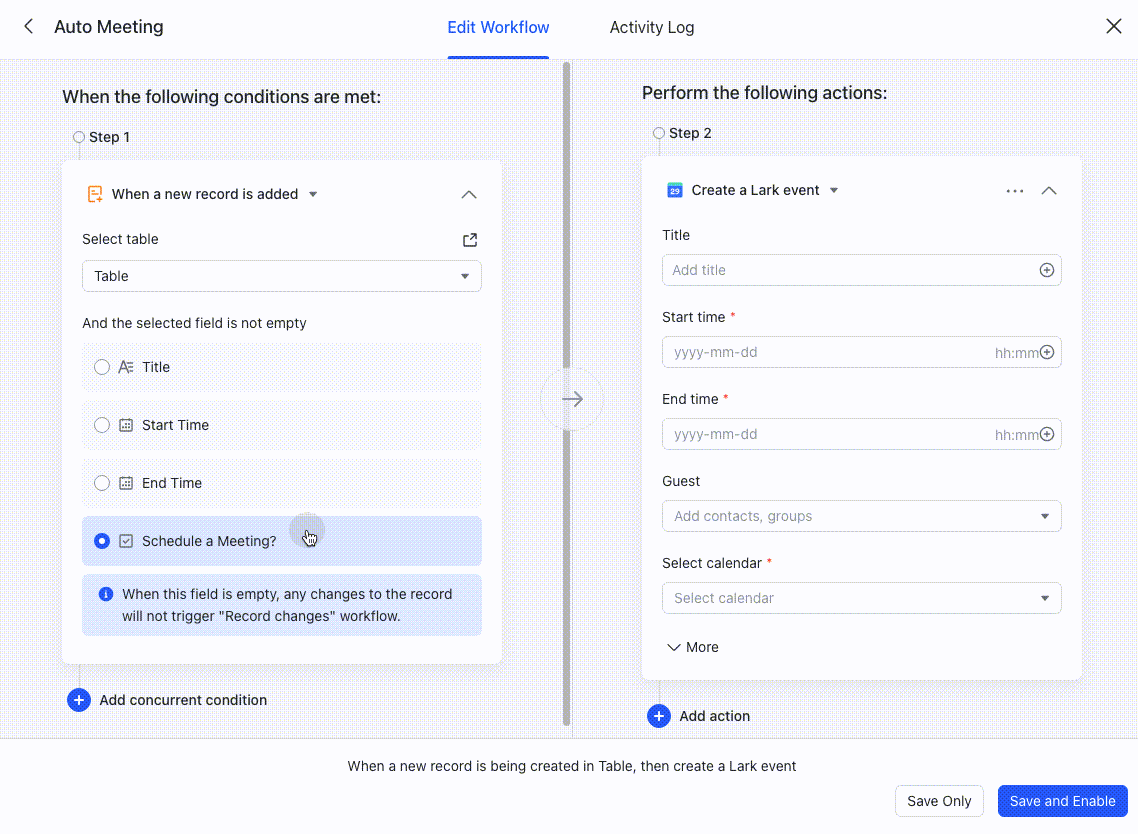
- Create an automated workflow. Set the trigger conditions and execution actions.
- Select When a new record is added as the trigger and then select "Schedule a Meeting?" field under And the selected field is not empty.
- Select Create a Lark event as the action to perform. Enter the event title, start time, end time, and other required fields (you can reference data from the base as needed).
- Click Save and Enable.
250px|700px|reset
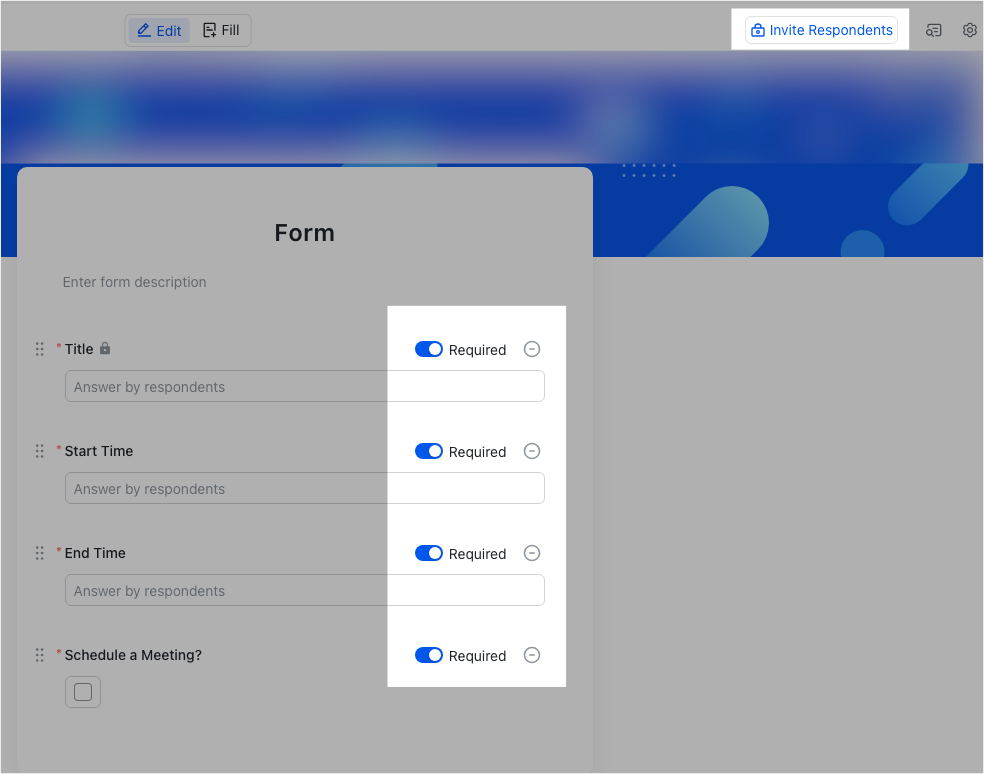
- Create a form view. In the form view, turn on Required for all questions. Click Invite Respondents in the upper-right corner to share the form with other users.
250px|700px|reset
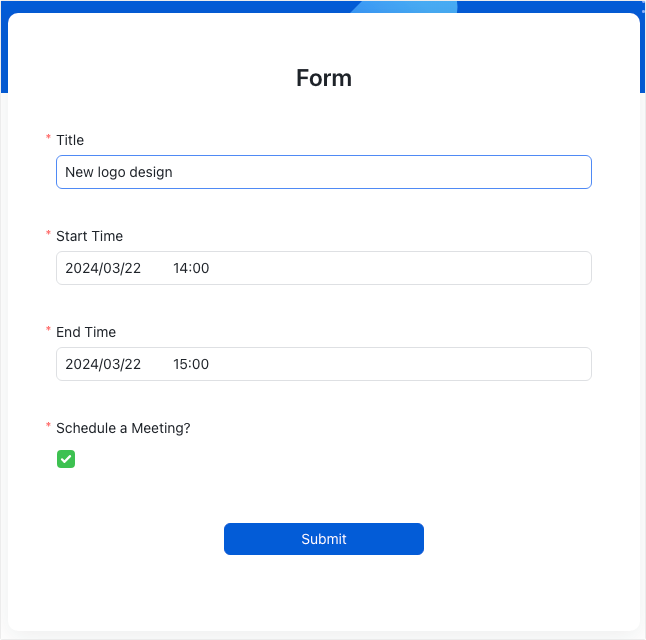
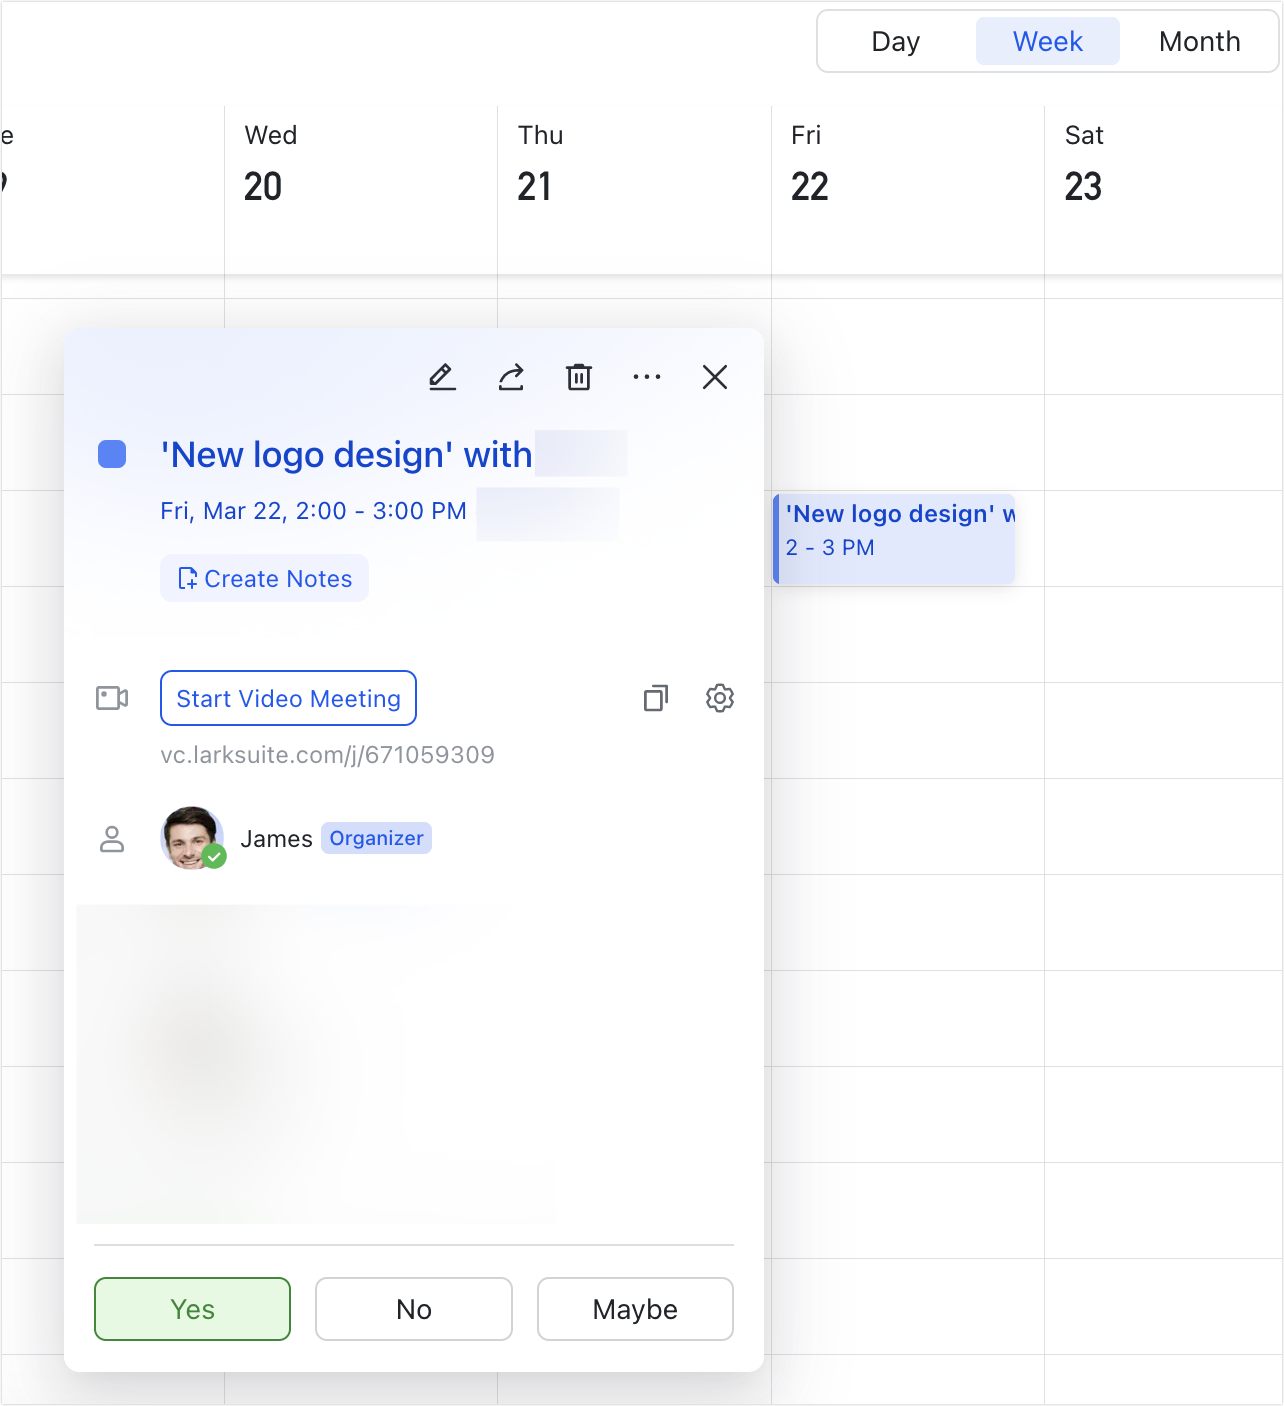
Here's what it looks like in action: When users fill out the form (left image), an event with you is automatically created (right image).
250px|700px|reset
250px|700px|reset
IV. FAQs