
I. Intro
If you record a meeting, you can create a shareable clip, including audio and video content. By default, anyone who is able to view a Minutes recording will be able to create clips, though this can be changed by the recording's owner.
II. Steps
Create and view Minutes clips
You need corresponding permission to create the Minutes clips. For details, see the "Set clip permissions" section.
- In the Lark desktop app, click Meetings > Minutes.
- Find the Minutes file that you want to create a clip for, and do either of the following to start creating the Minutes clip:
- Click Transcript > the icon next to the search bar > Create Clip.
- 250px|700px|reset
- Click Transcript, select the text that you want to include in the clip and click the Create Clip icon in the pop-up.
- 250px|700px|reset
- On the video, click the icon in the lower-right corner > Create Clip.
- 250px|700px|reset
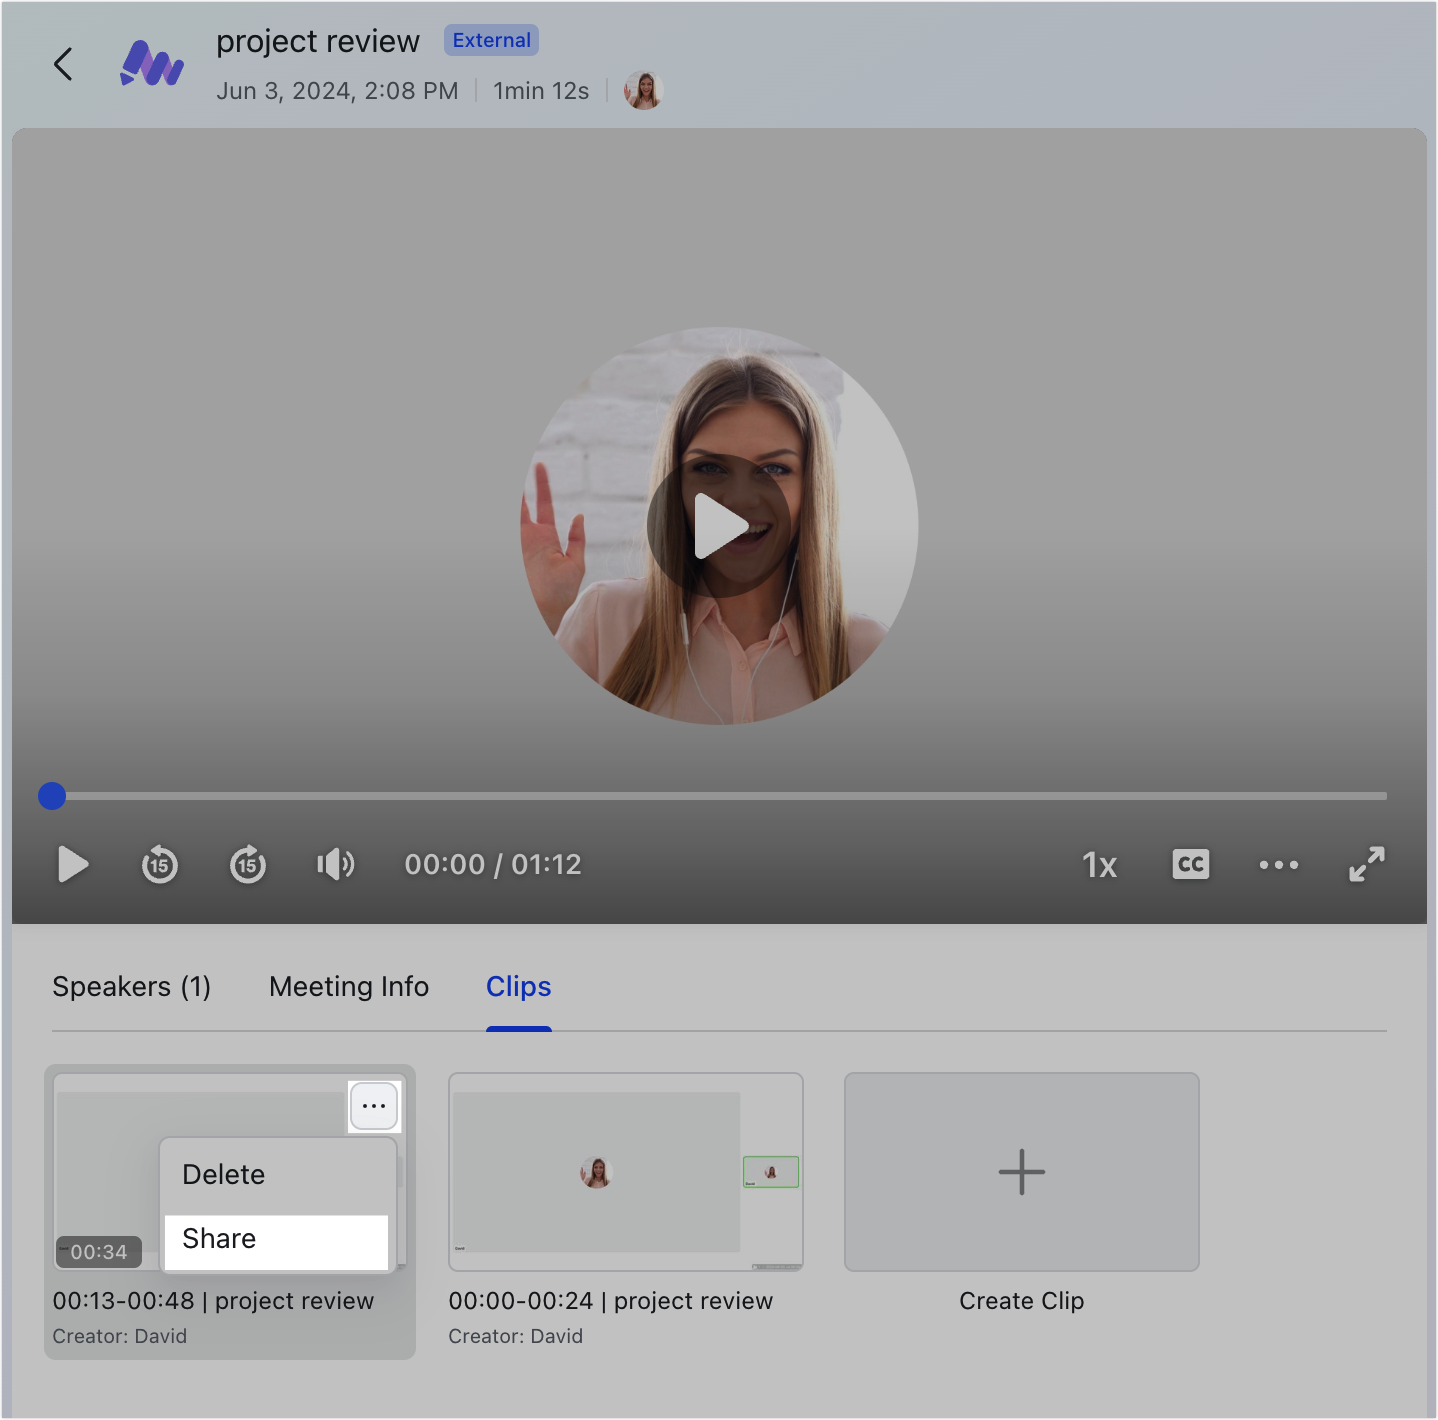
- Owner of the Minutes file can click Clips under the video > the icon above Create Clip.
- 250px|700px|reset
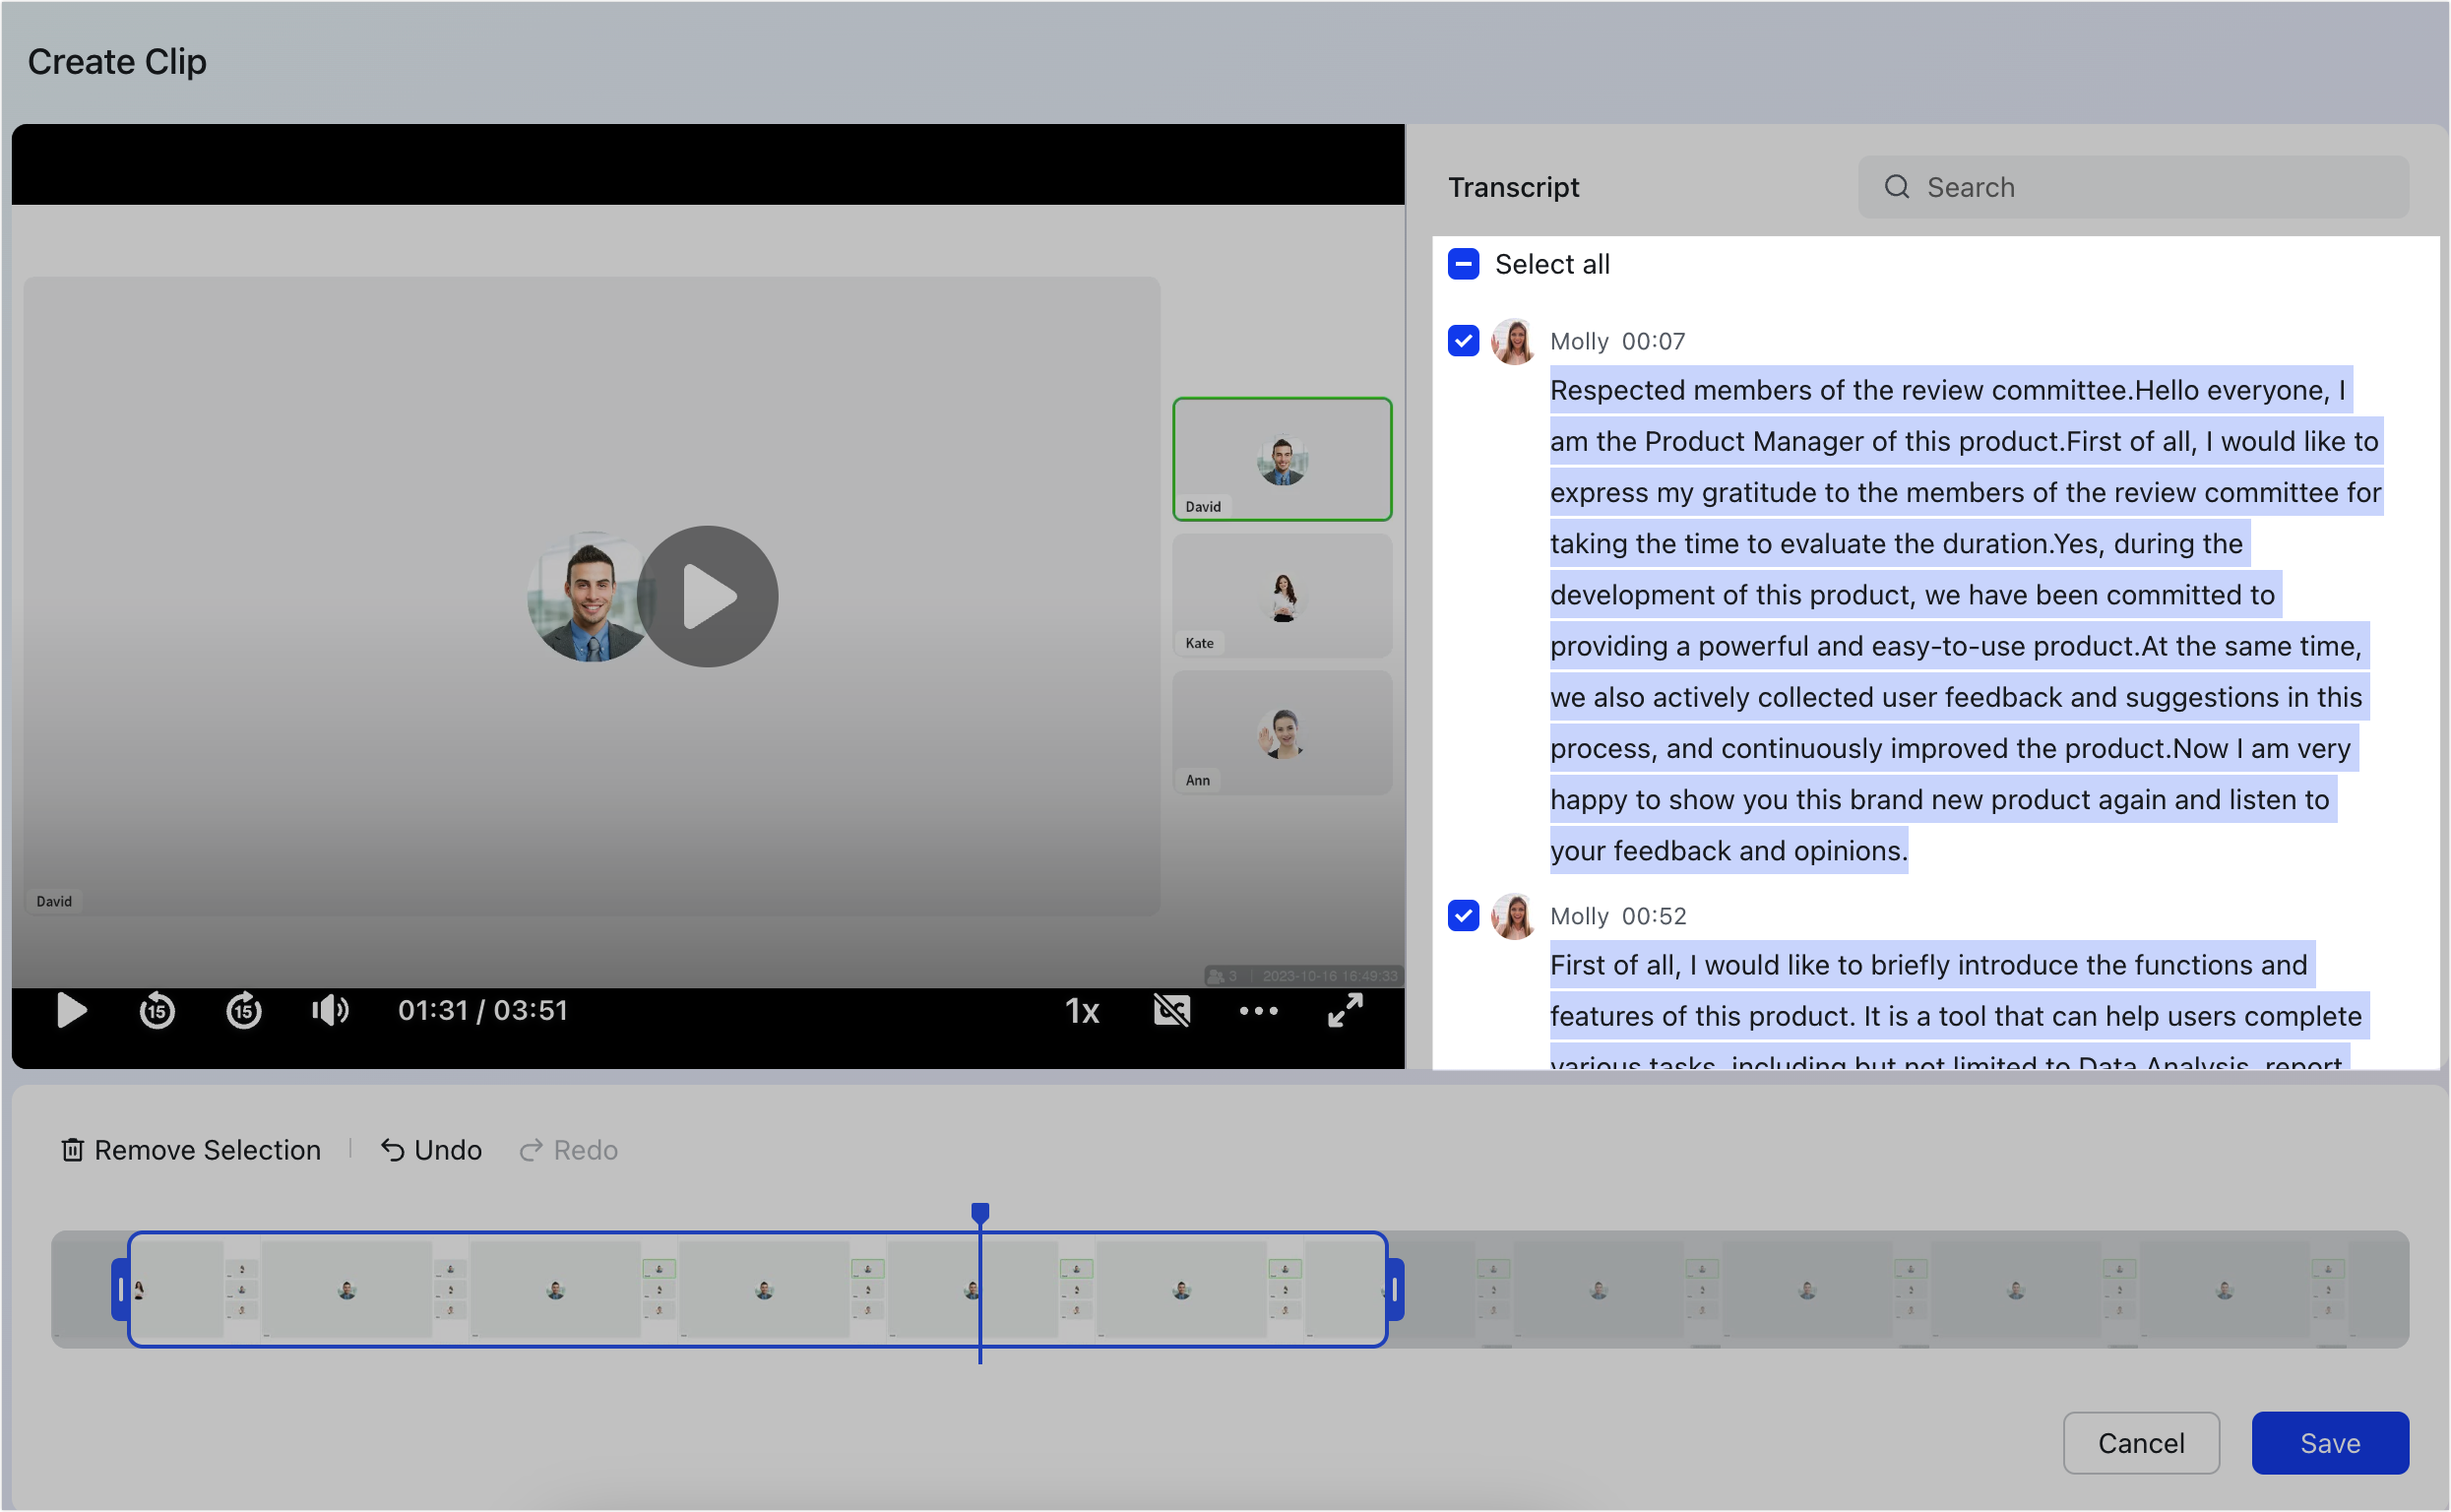
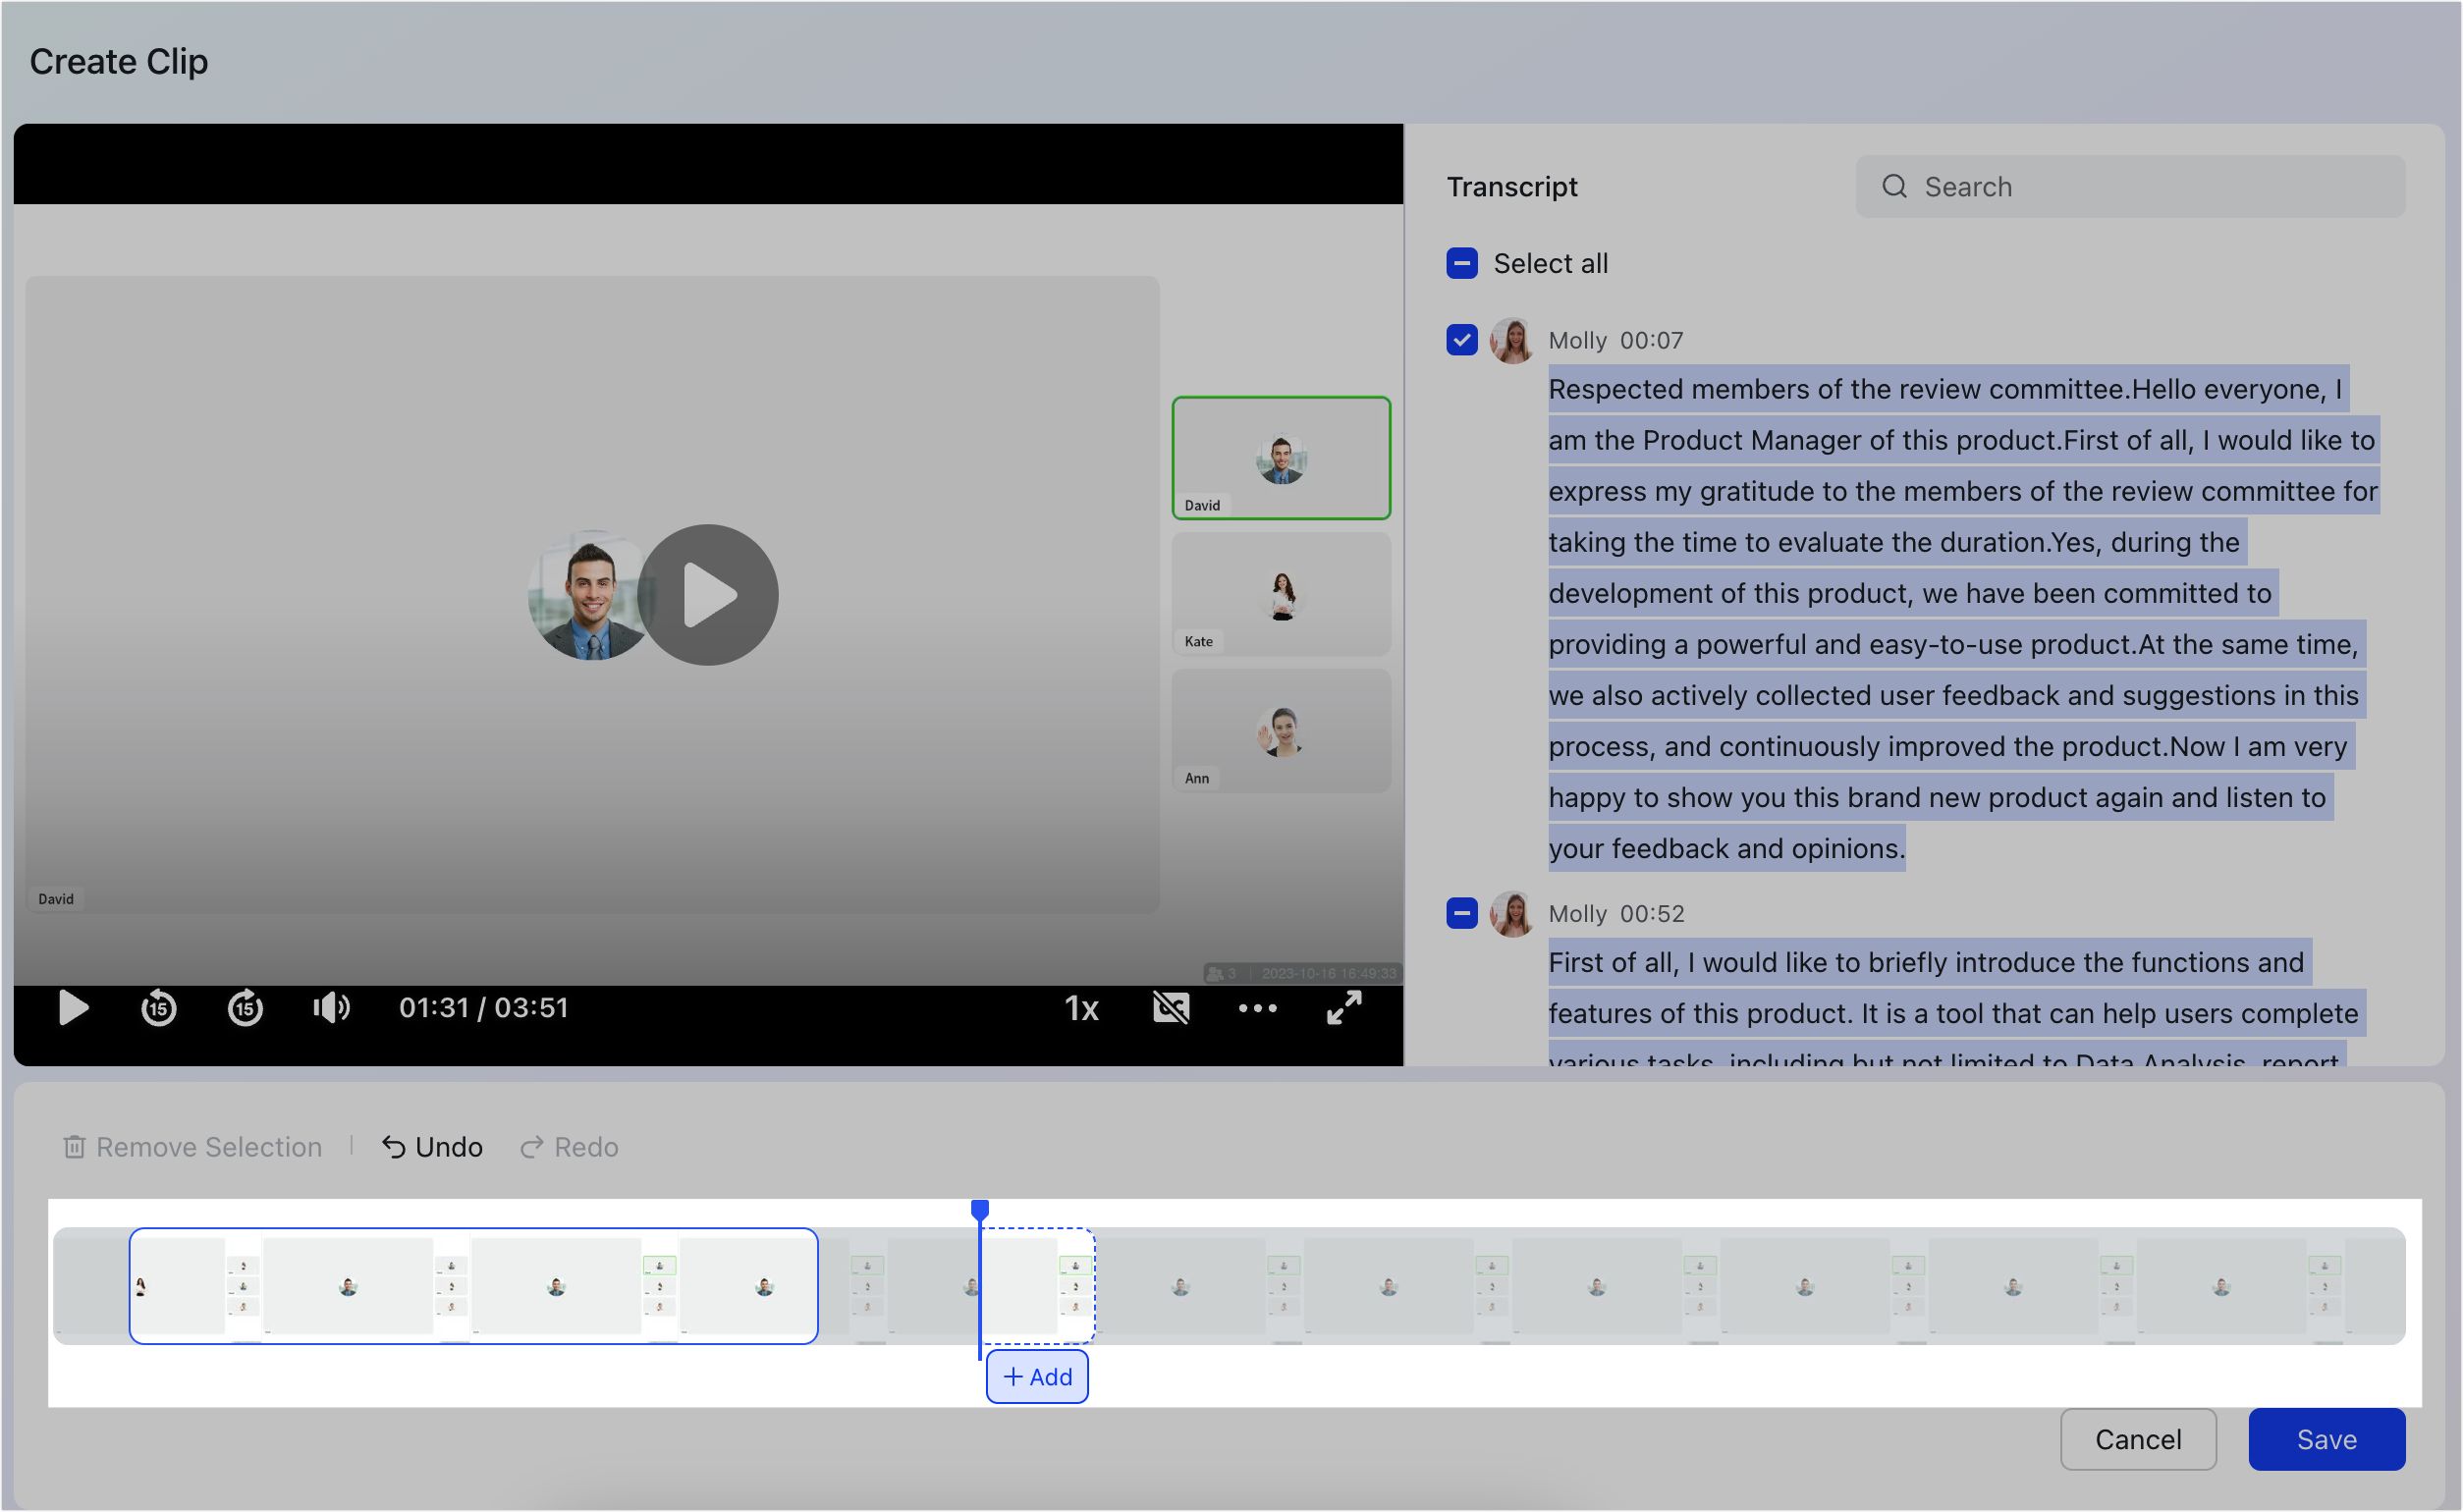
- On the Create Clip page, either select texts or clips on the Transcript tab, or click where the clip will start in the chapter bar at the bottom.
- Click Add in the chapter bar and then manually adjust the frame as needed.
250px|700px|reset
250px|700px|reset
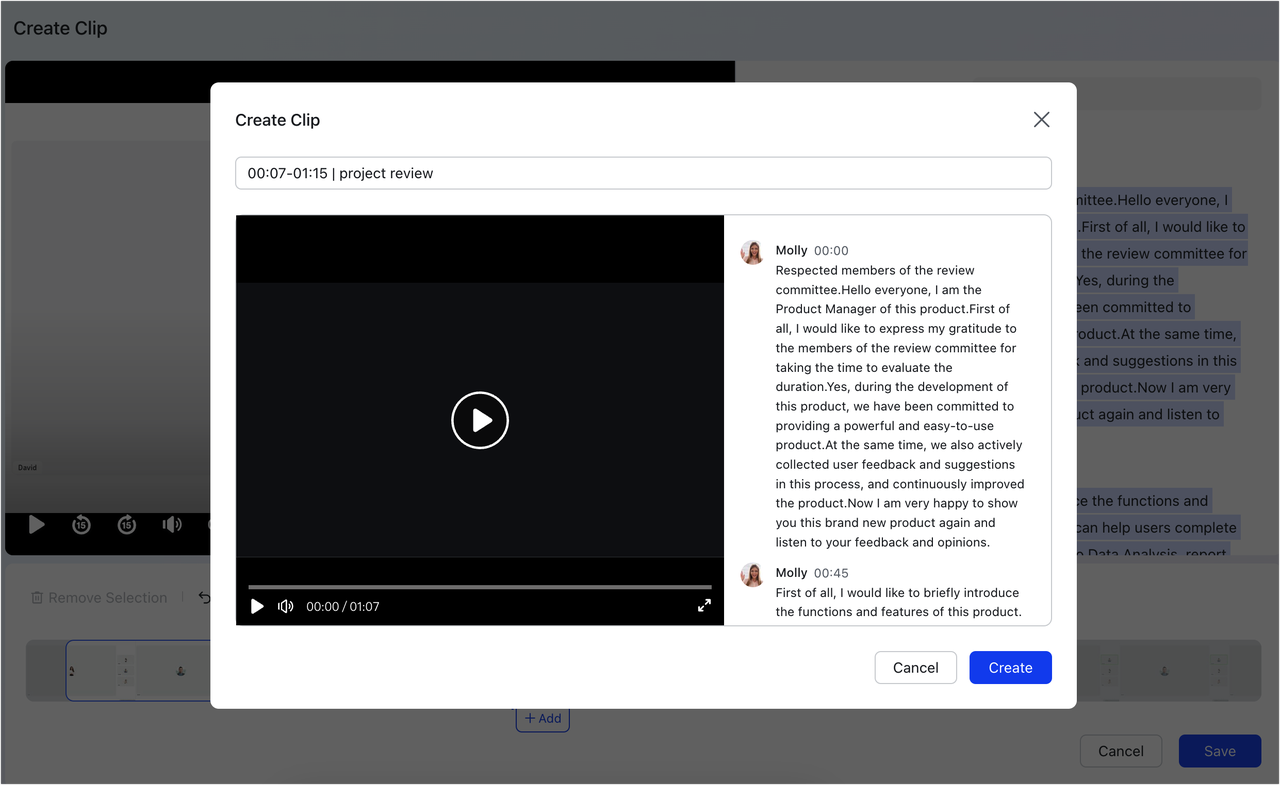
- Click Save. Preview the clip in the pop-up window, and click Create.
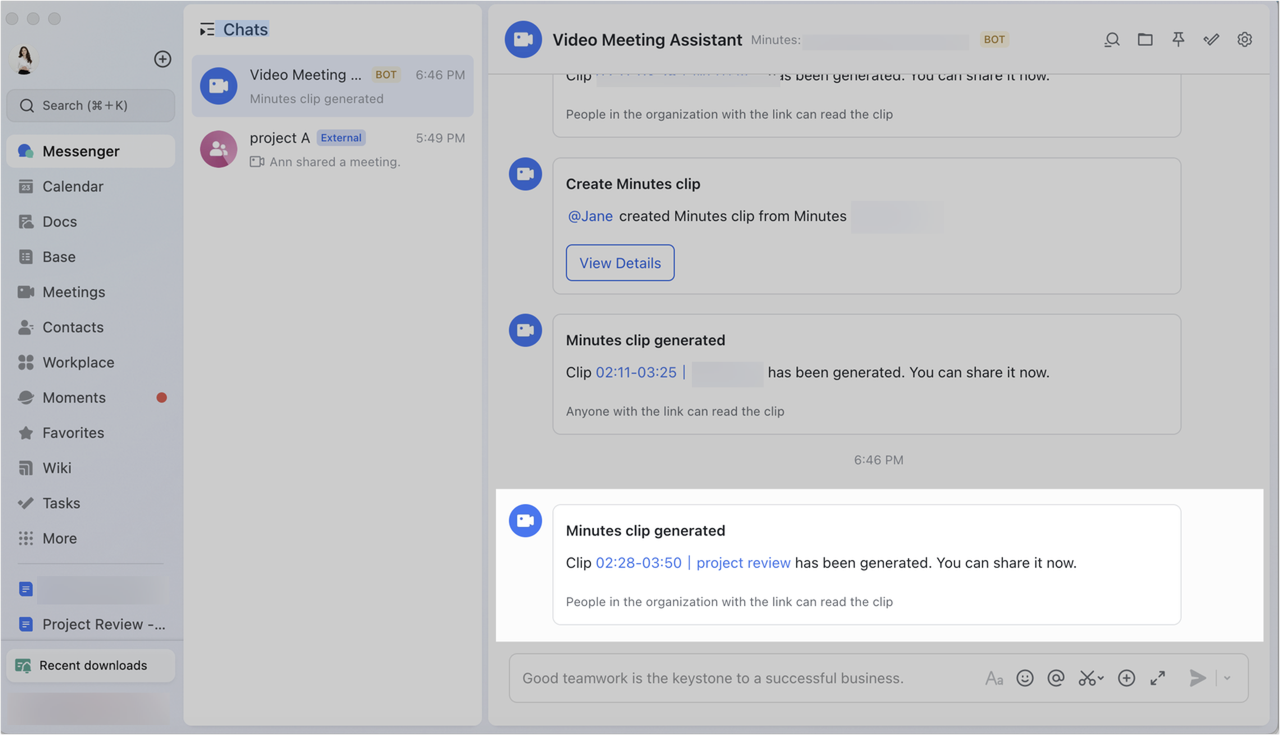
- The clip will be generated within 1-3 minutes, and both the clip creator and the Minutes owner will receive a notification from the Video Meeting Assistant.
- Click the link in the notification to view the details of the Minutes clip.
250px|700px|reset
250px|700px|reset
The Minutes owner can further view all the clips created in the current Minutes file by clicking Transcript > the
icon next to the search bar > Manage Clips on the details page, or the Clips tab below the Minutes video.
Share Minutes clips
You can share Minutes clips in the following ways:
- Copy and share the link from the notification sent by Video Meeting Assistant. Alternatively, forward the notification to a chat.
- While viewing the clip, click the Copy link icon in the upper-right corner in the desktop app, or copy the link from the browser directly.
- While viewing the clip, click Share in the upper-right corner to share it with specified users, groups, or departments.
- 250px|700px|reset
- While viewing the clip, the Minutes owner can do either of the following to share the clip with specified users, groups, or departments.
- Click Transcript > the icon next to the search bar > Manage Clips > the icon beside the clip.
- Click Clips under the video, hover over a clip and then click the icon > Share.

250px|700px|reset
250px|700px|reset
Set clip permissions
Who can view clips
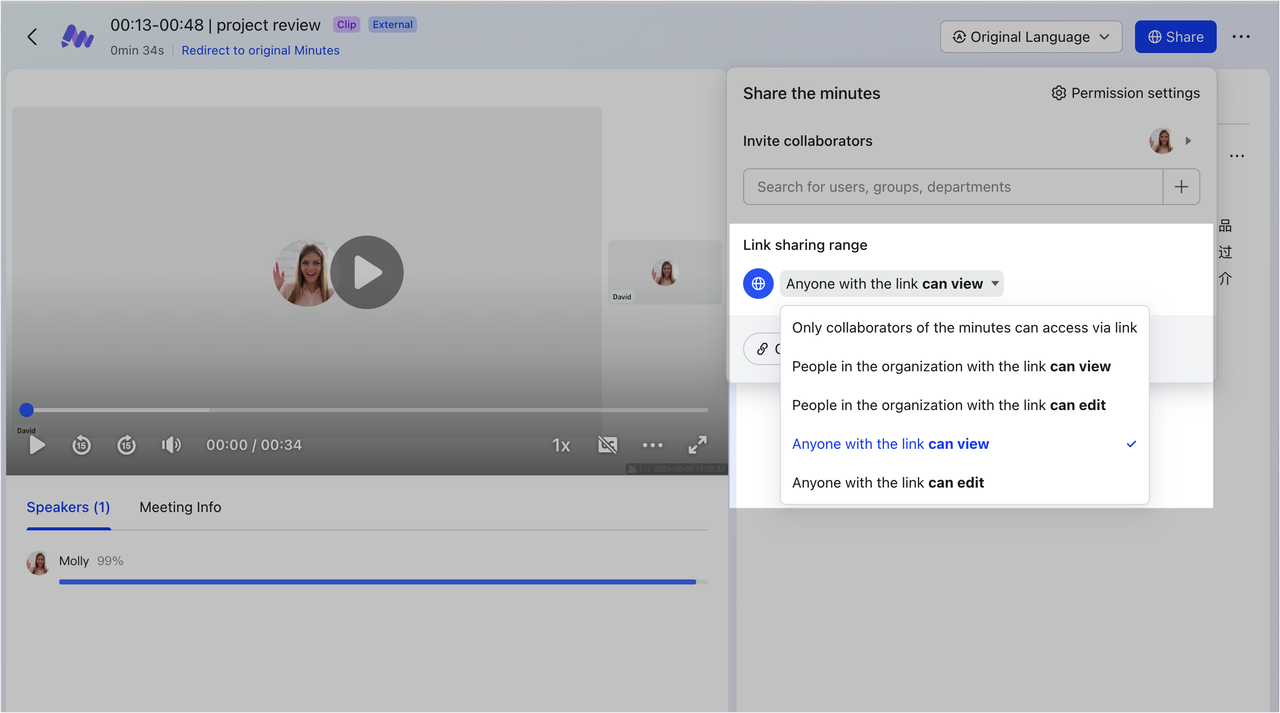
By default, clips inherit the access permission setting of the Minutes file. For example, if the Minutes file is set to People in the organization with the link can view, then the clip's permission will be the same by default.
You can also click Share in the upper-right corner of the clip details page, and set the access permission for the Minutes clip separately in the Link sharing range.
Note: Changing the access permissions of Minutes clips will not affect the access permissions of the Minutes file.
250px|700px|reset
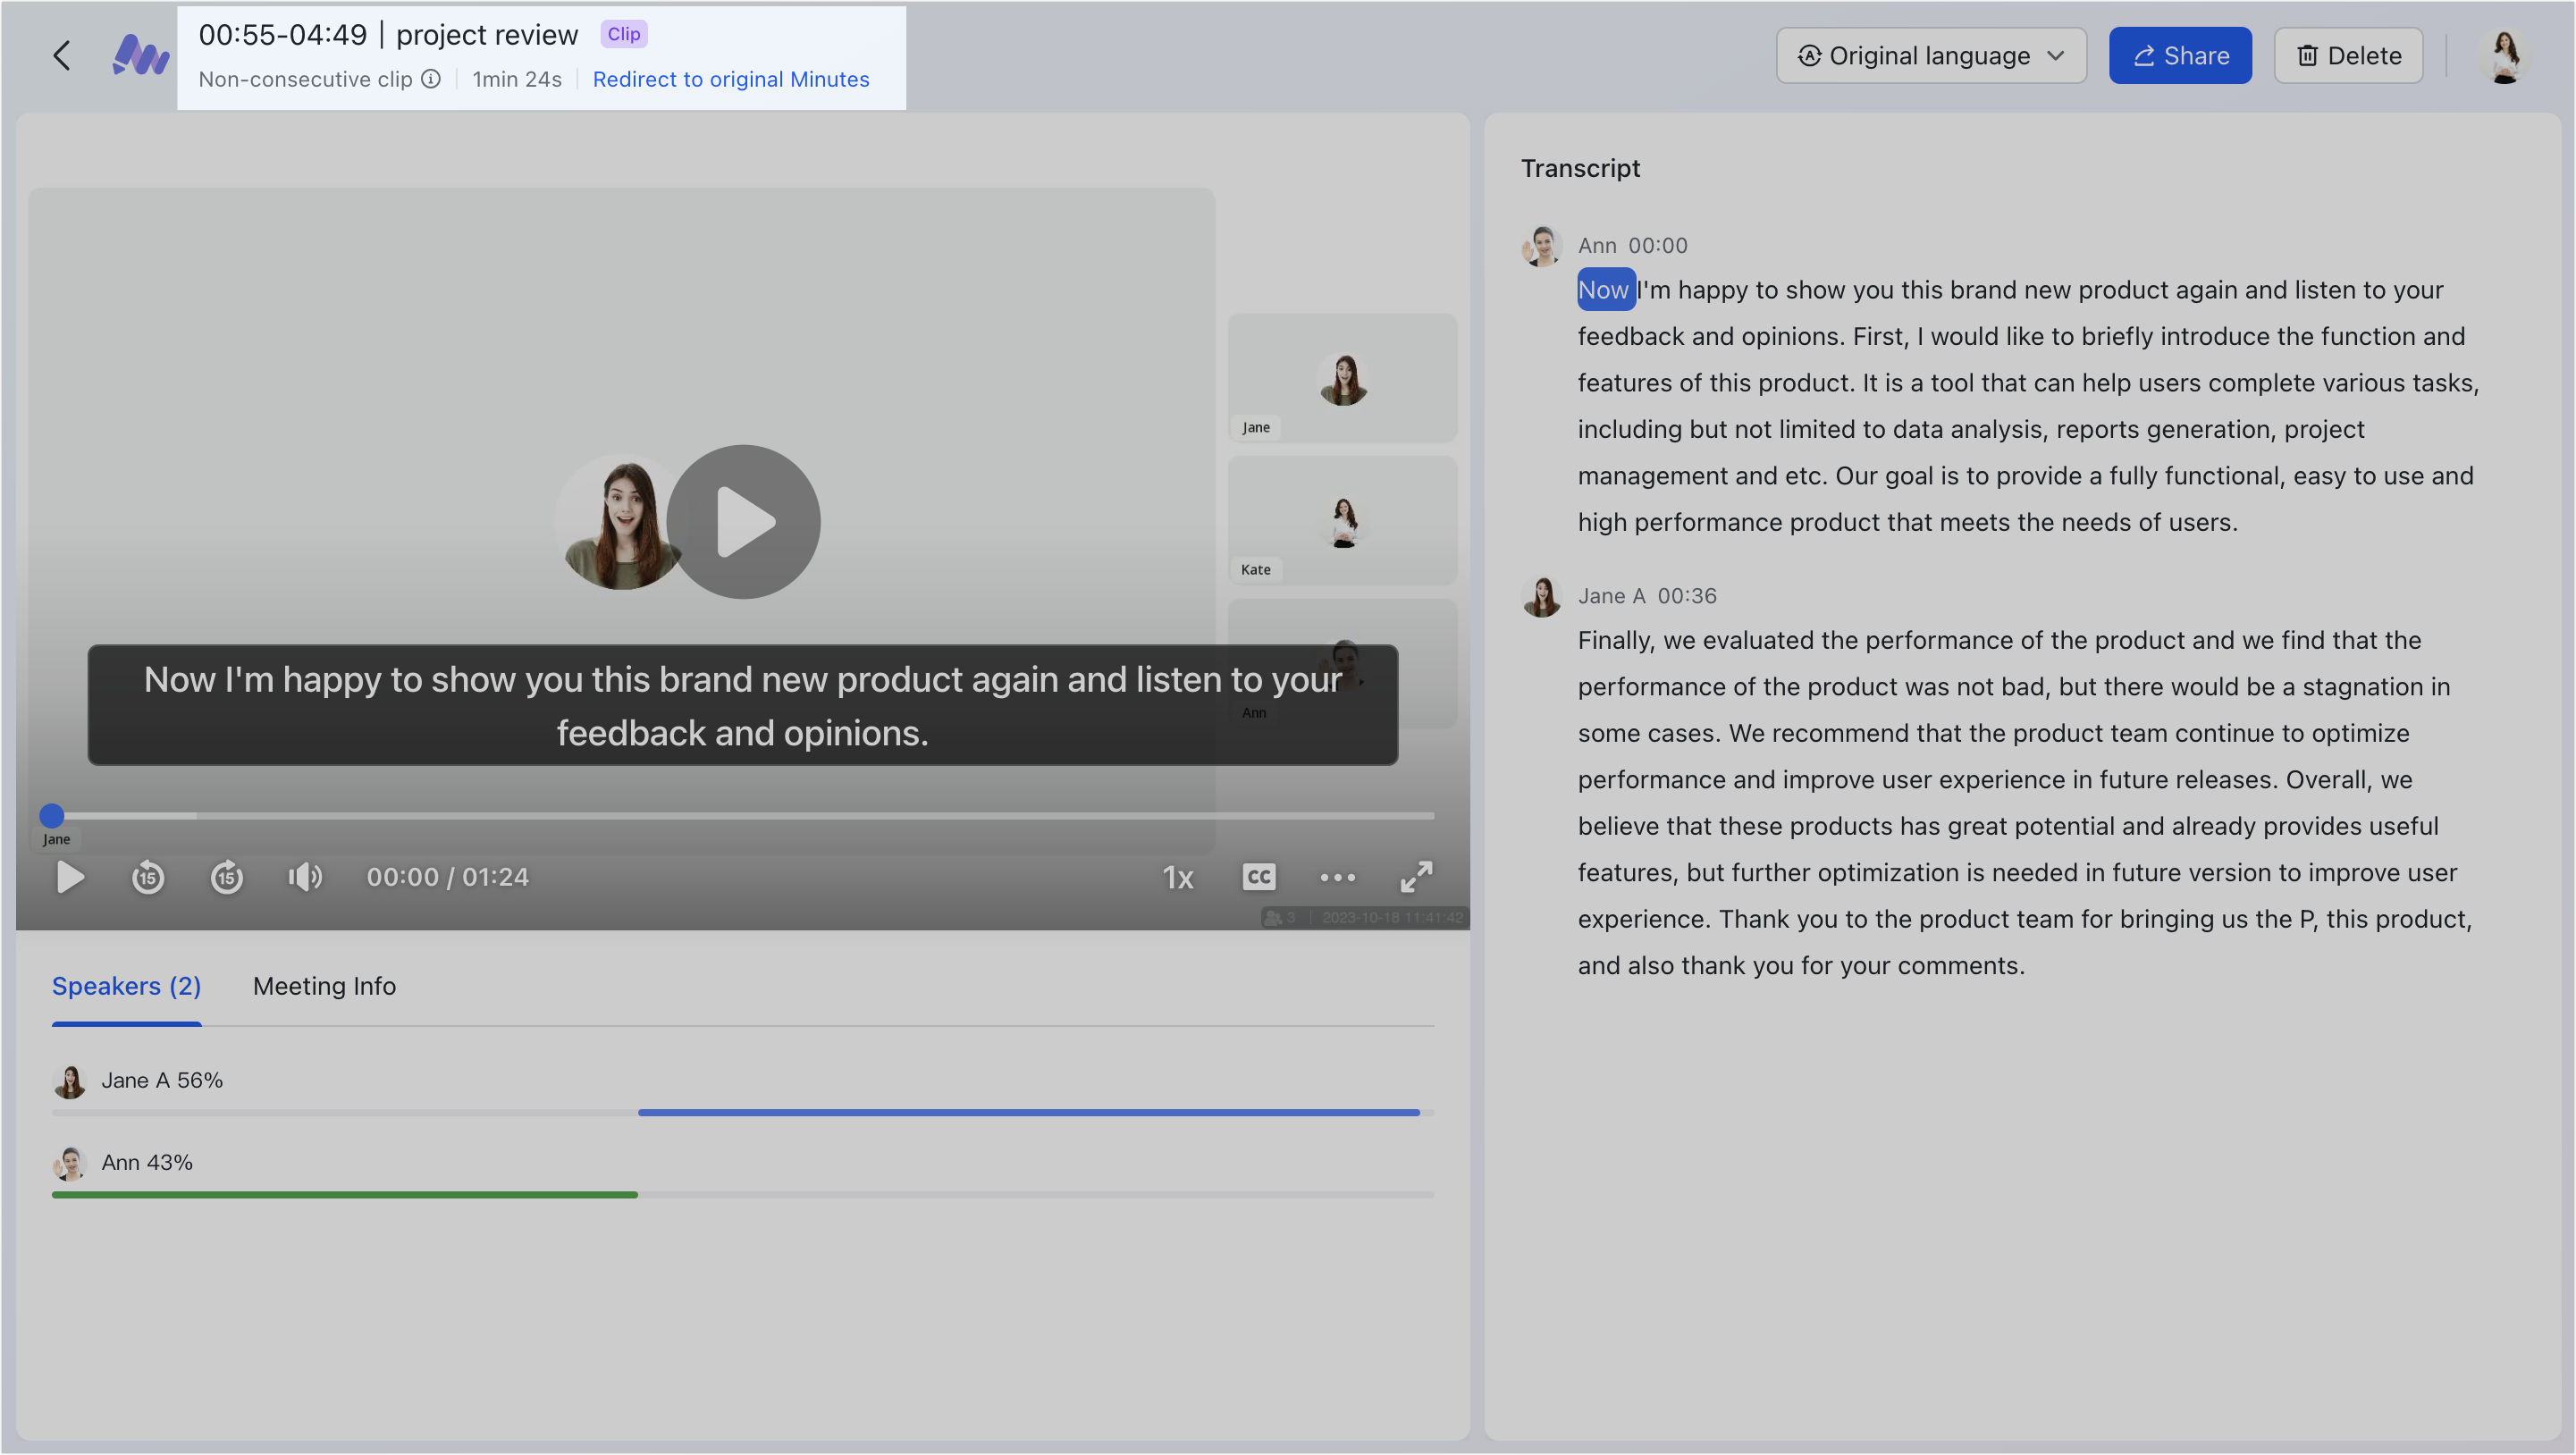
You can click Redirect to original Minutes to see the Minutes file or apply for permission to view the full recording.
Note: Users who can view the clip do not necessarily have viewing permissions for the Minutes file. For details about Minutes permission settings, see Set permissions for Minutes.
250px|700px|reset
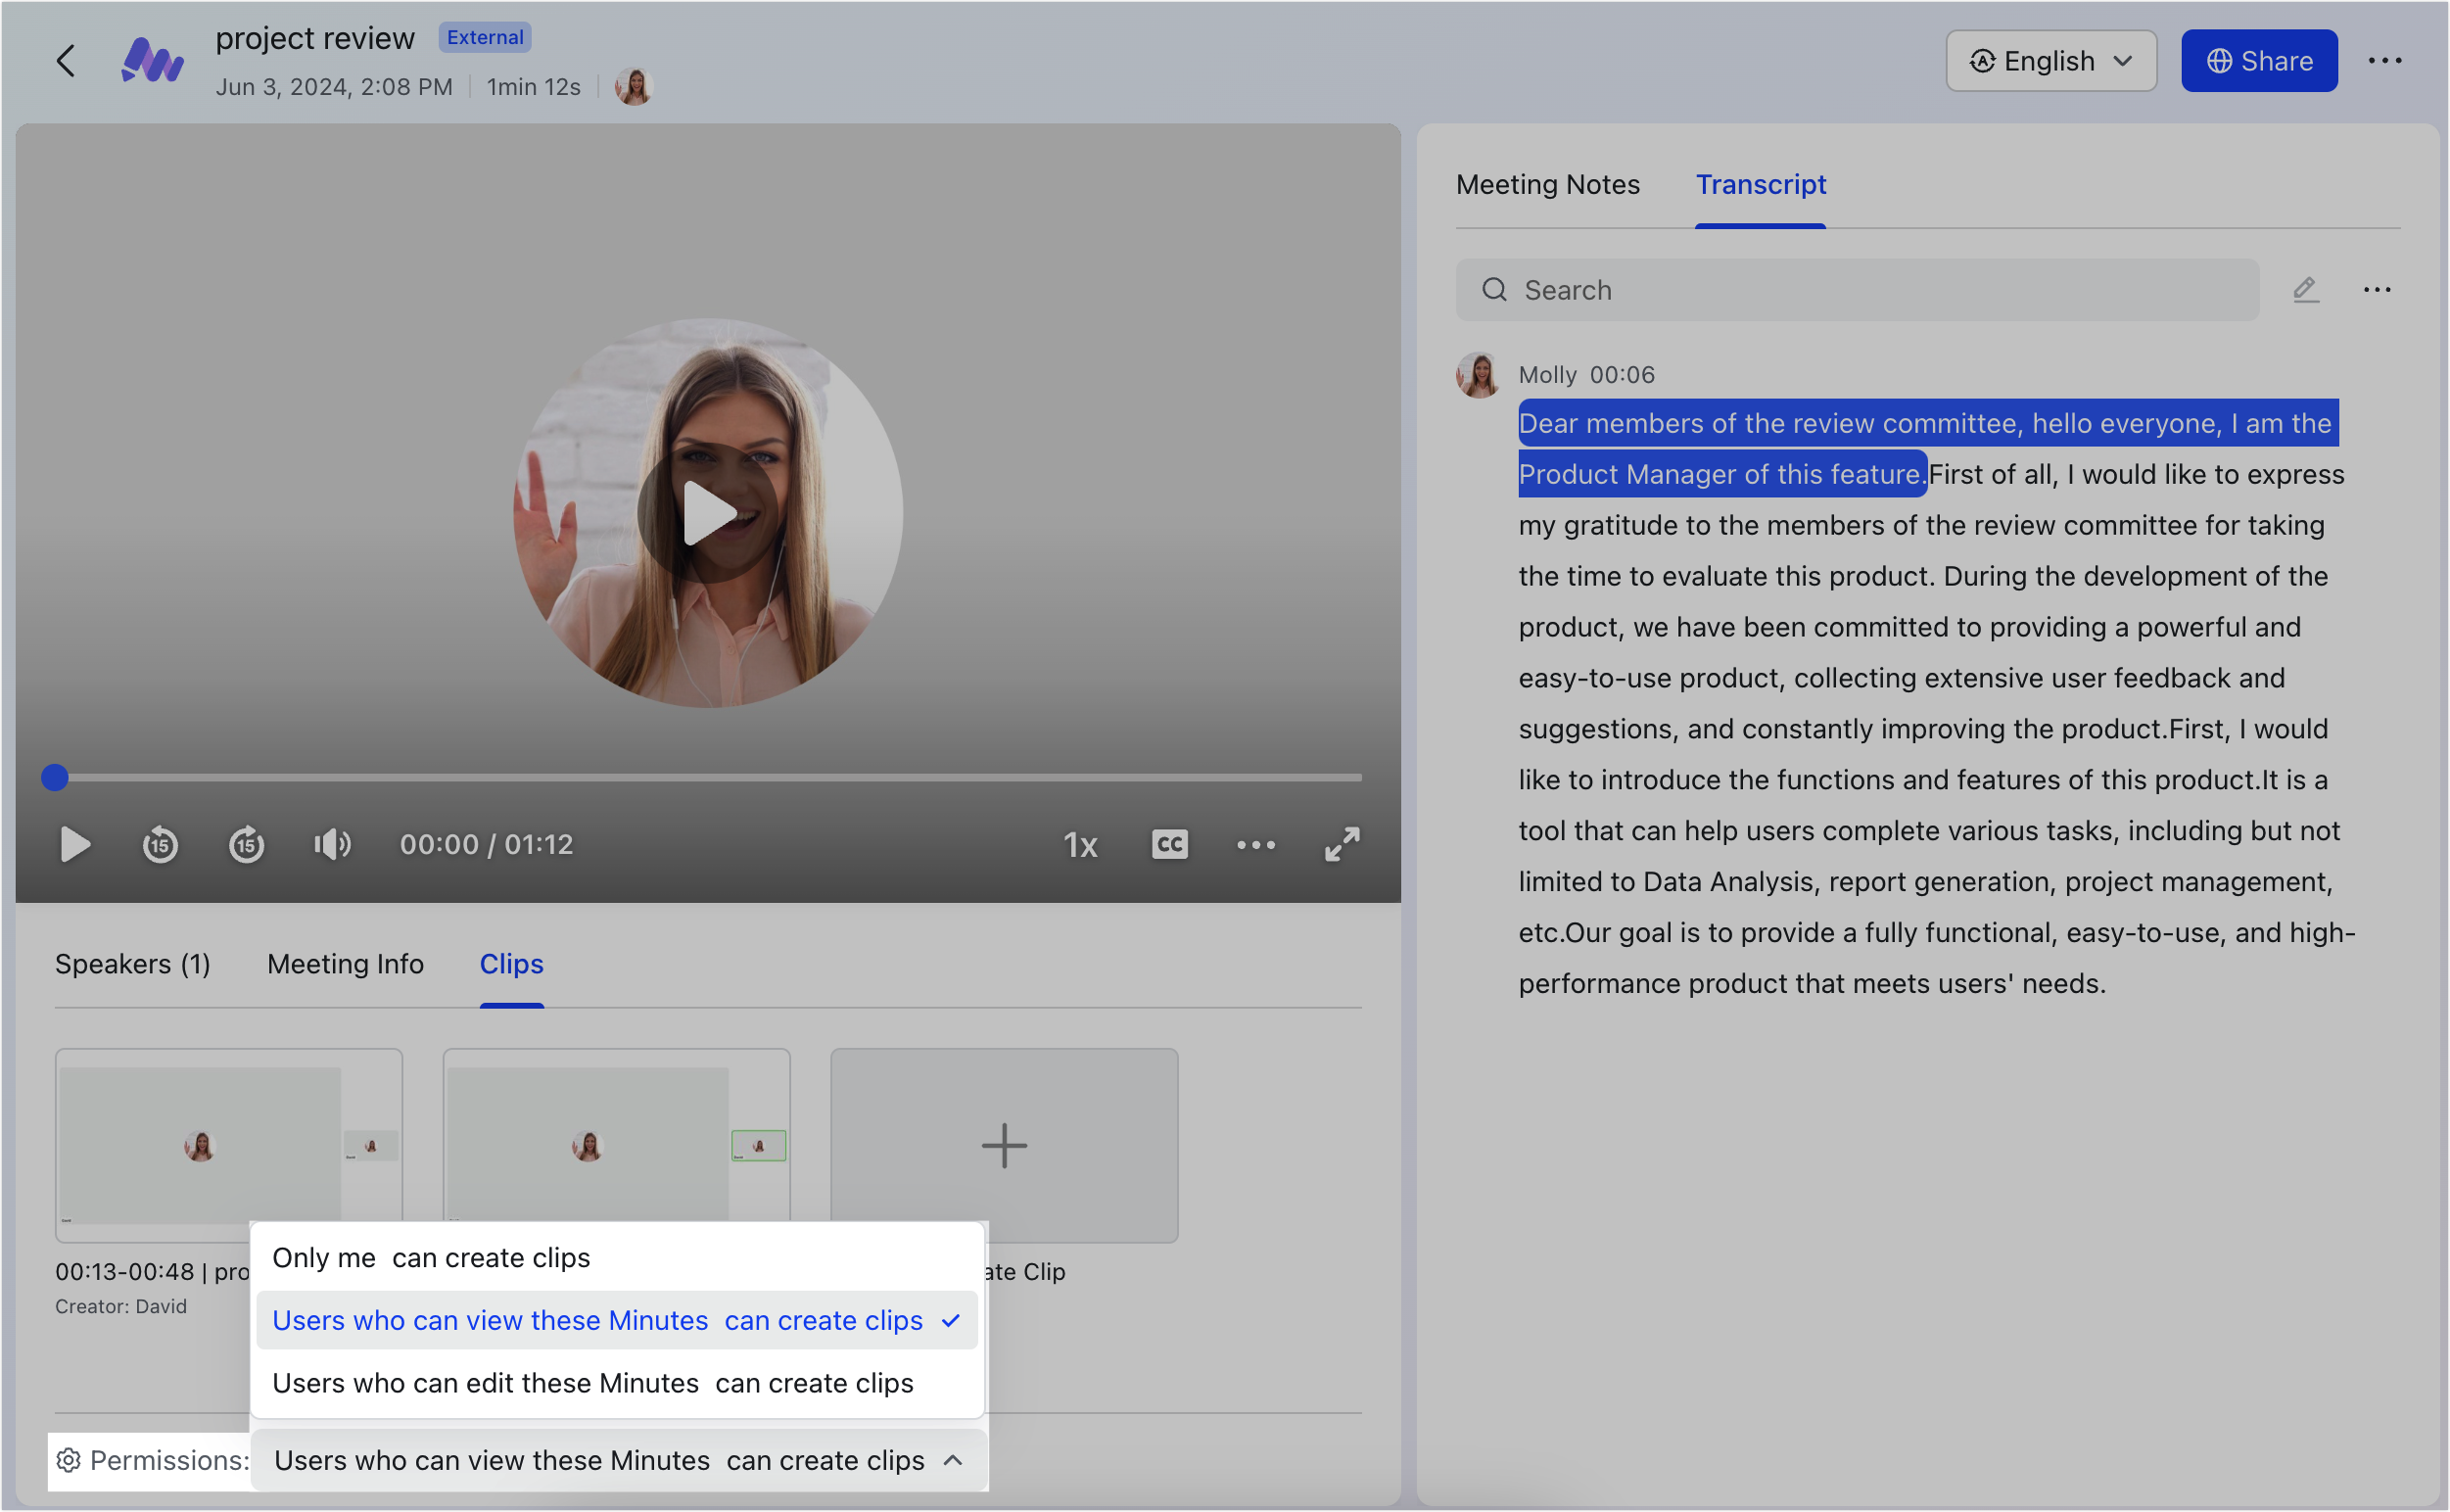
Who can create clips
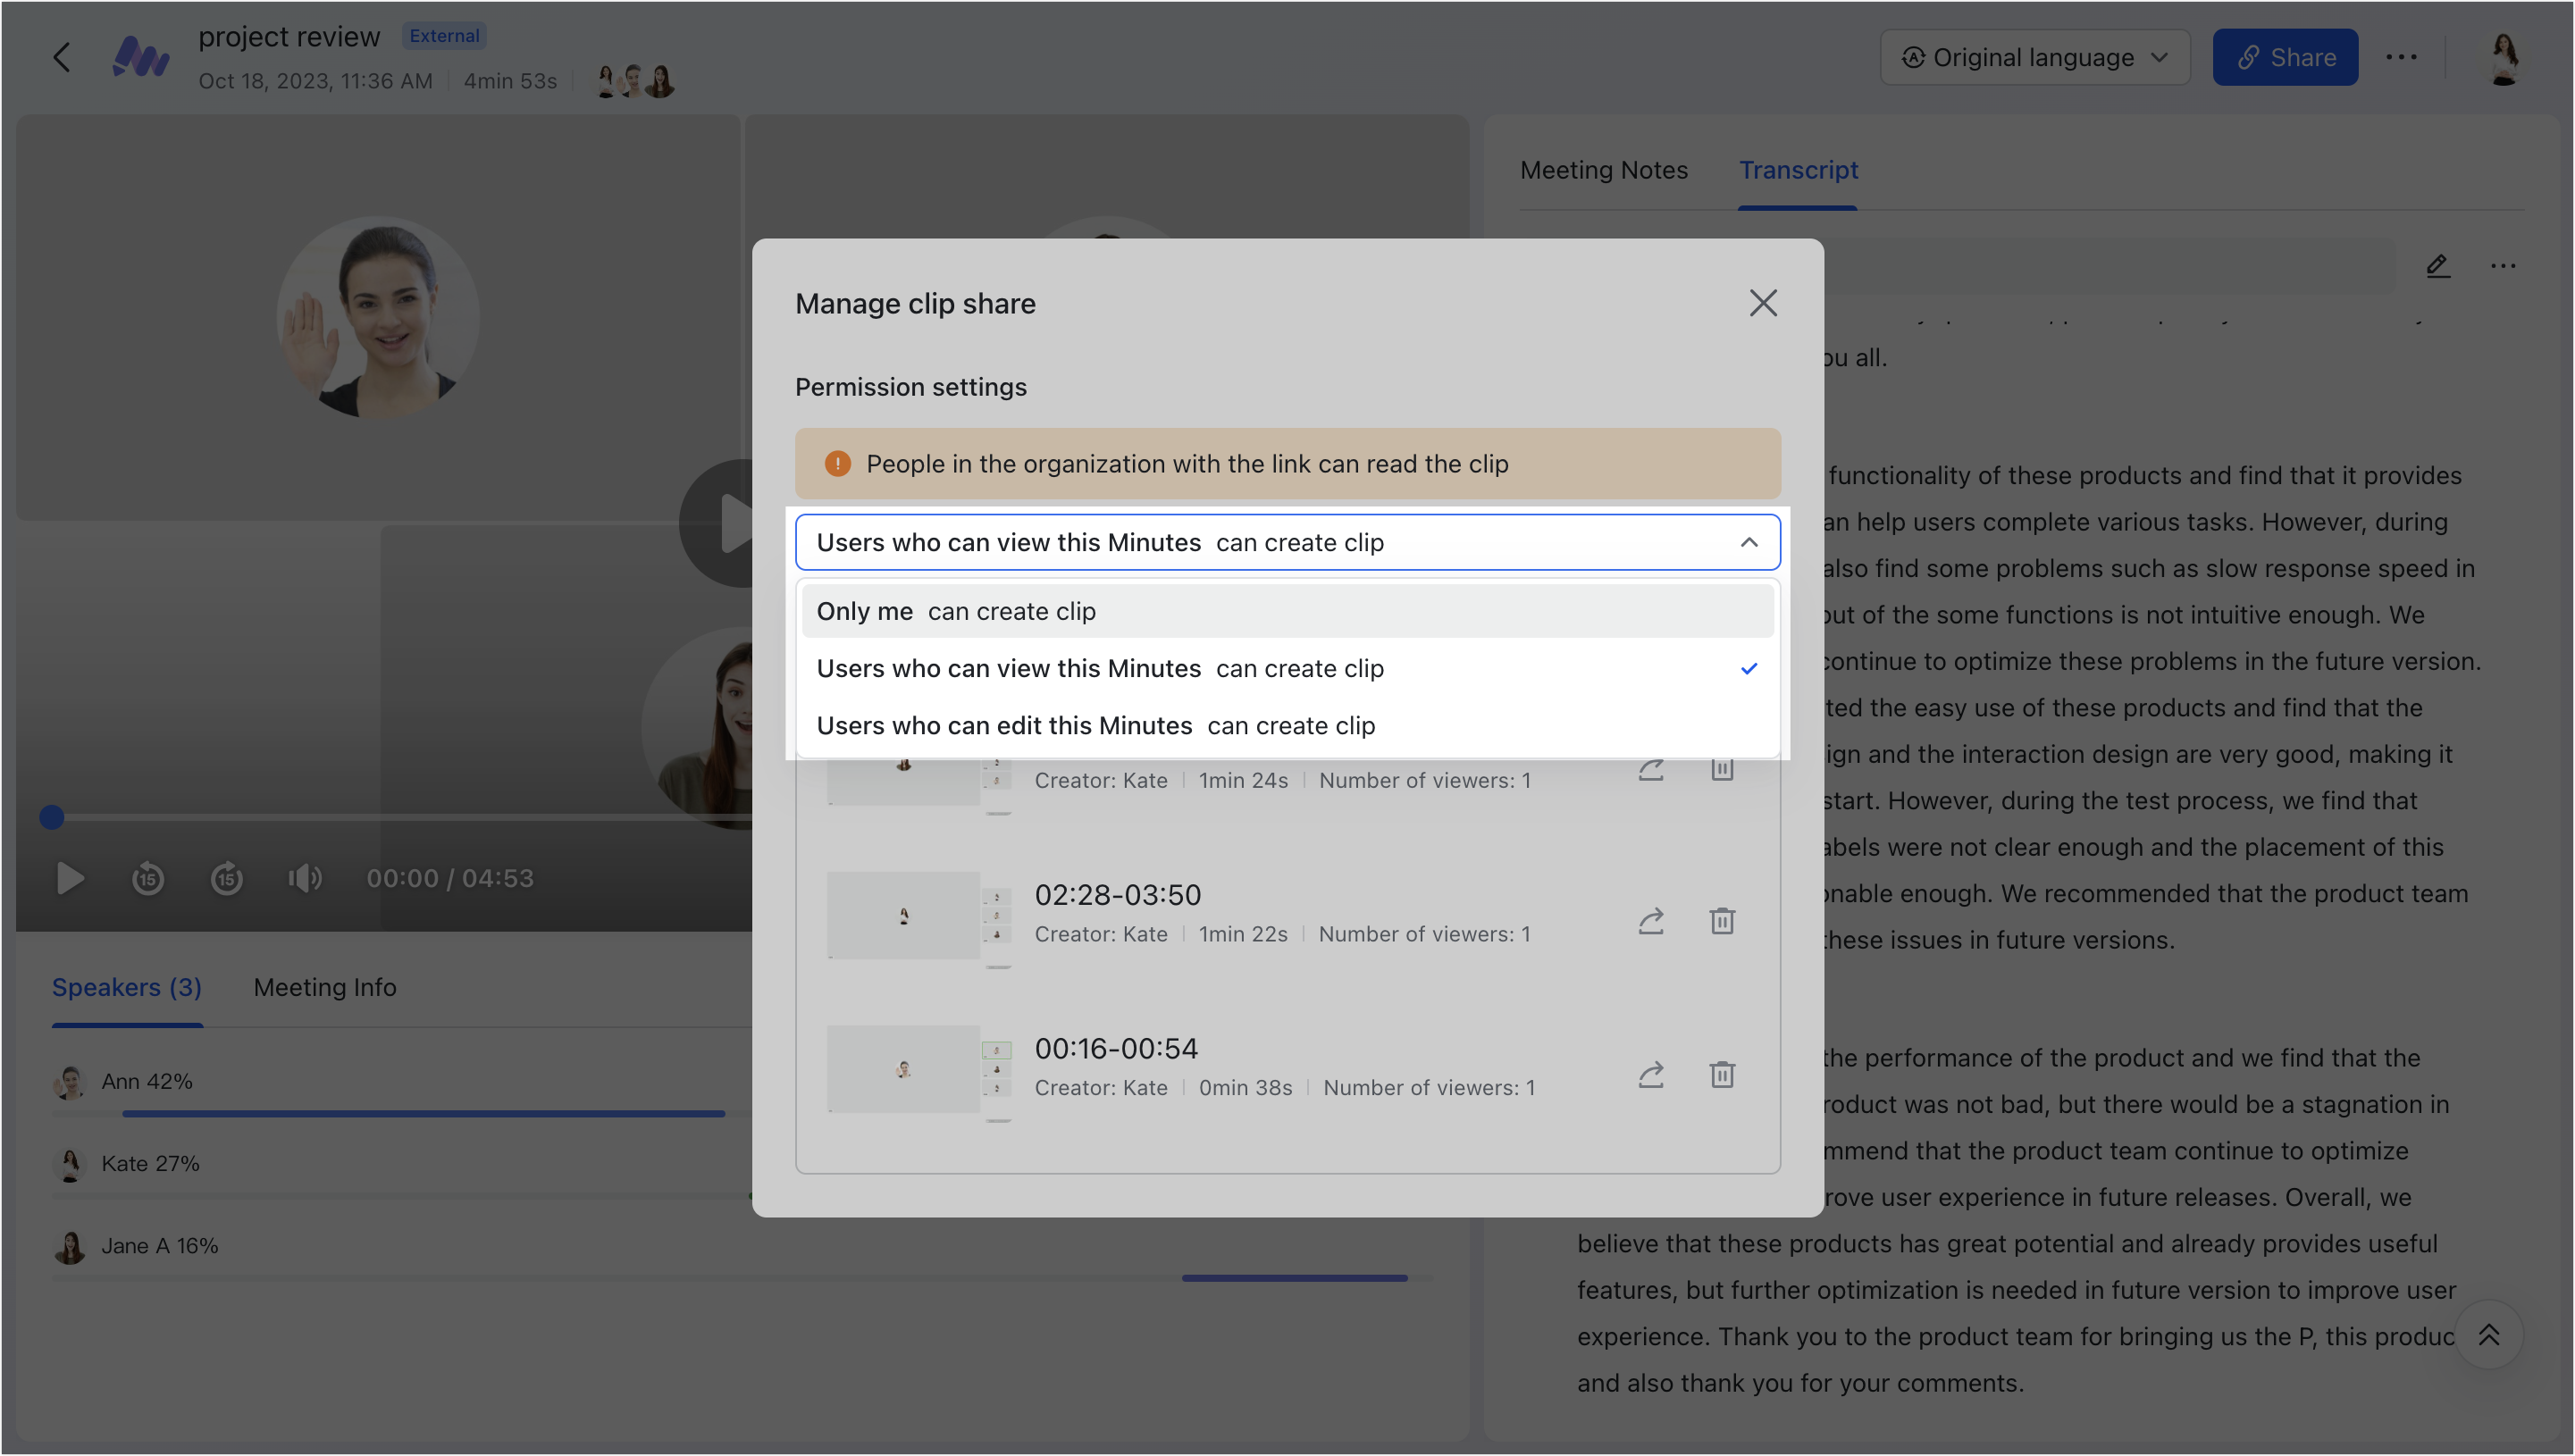
By default, users who can view the Minutes file will be able to create clips for it. To change the permission, the Minutes owner can click Transcript > the
icon besides the search bar > Manage Clips, or click Clips under the video and set the permission from the drop-down list at the bottom. The settings can be changed to allow only the owner to create clips, or only people with permission to view or edit the Minutes file.
250px|700px|reset
250px|700px|reset
Delete Minutes clips
Only the owner of Minutes can delete Minutes clips. Deleted clips cannot be viewed or restored.
To delete a Minutes clip, do either of the following:
- Click Transcript > the icon besides the search bar > Manage Clips > the icon besides the clip.
- Click Clips under the video, hover over the clip cover, and click the icon > Delete.
III. FAQs