I. Intro
Purchase information: Separate payment is required for this feature. For more information, contact Support or your Customer Success Manager.
Who can perform these steps: Primary administrators or administrators with "Deployment and Encryption" permission.
Keys are critical for the security of your organization's data. Client data is stored in the database on the cloud after being encrypted using keys. This service not only allows organizations to manage their keys but use their own keys instead of default ones, giving more control to the organization.
Keys can be imported based on business lines, which include messages, online documents, video meetings, events, emails, and more. Organizations can use one key for all business lines, or different keys for different business lines (recommended).
The administrator is able to replace keys. Data generated after the replacement will be encrypted using the new key, while the old key may only be used for the decryption of historical data.
II. Steps
1. Import a key
1.1 Start

250px|700px|reset

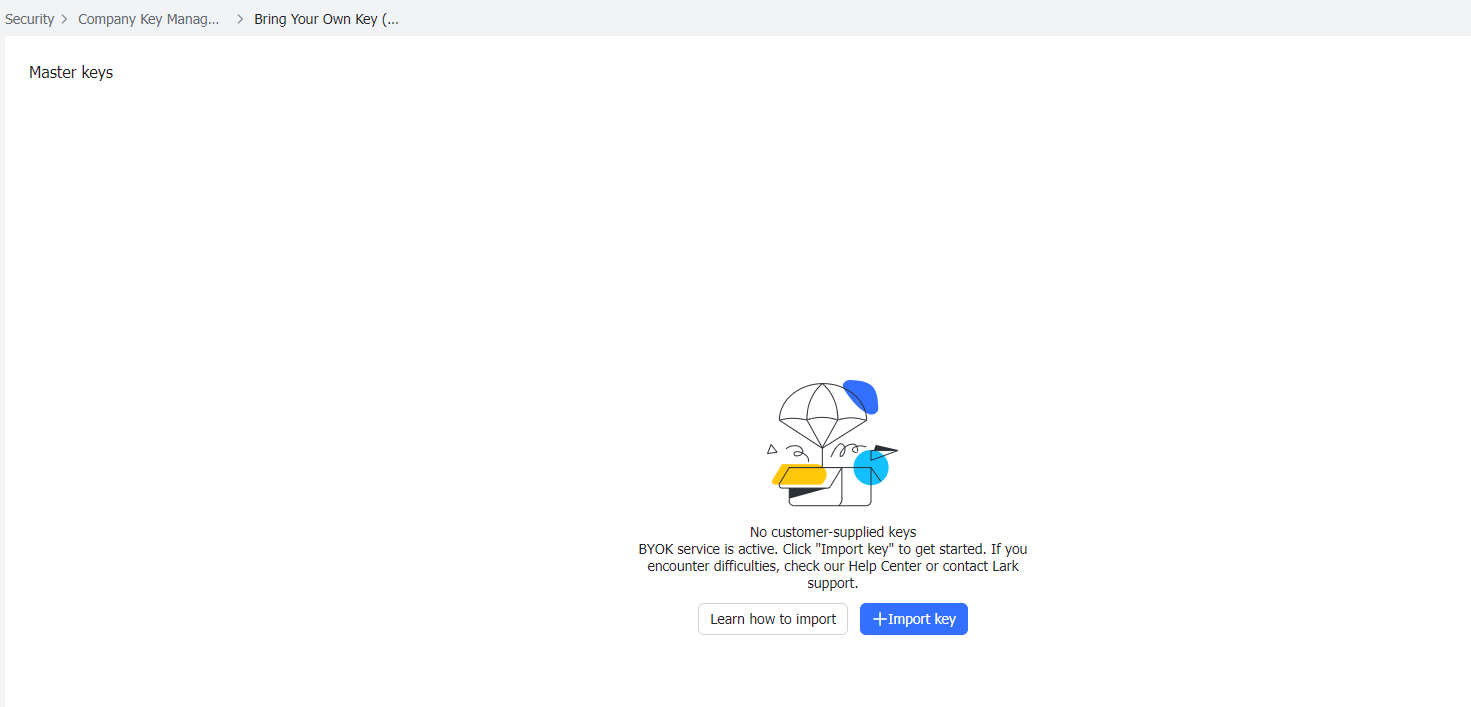
250px|700px|reset
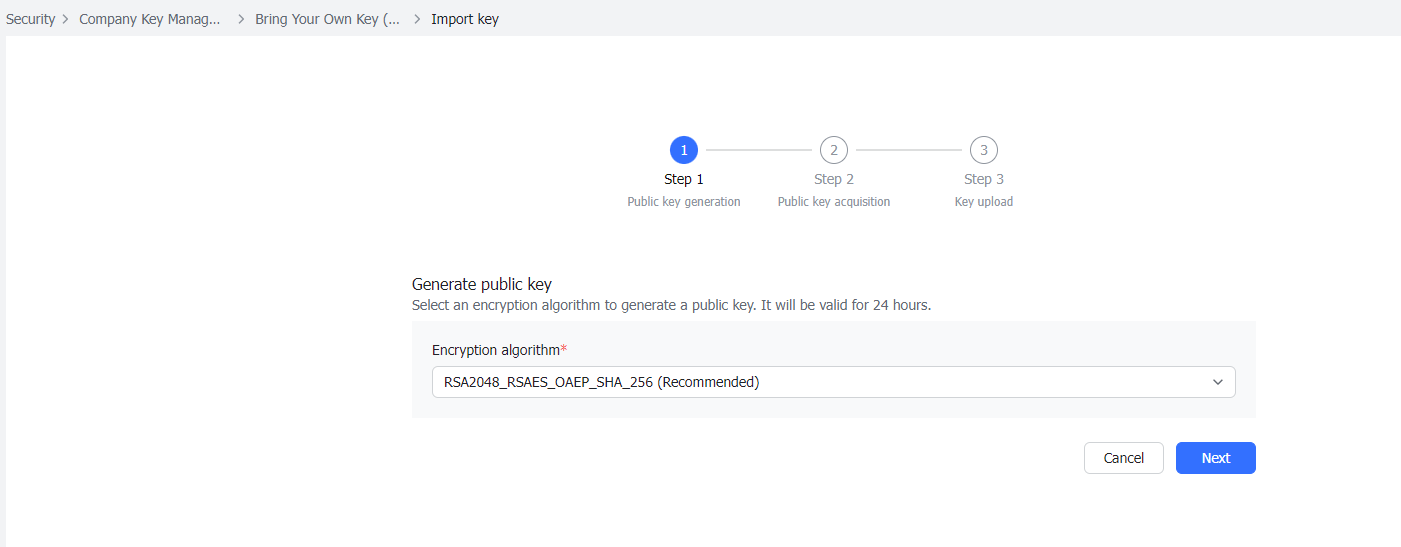
1.2 Select a public key algorithm
In Step 1, select the public key algorithm and click Next after confirmation. (RSA2048_RSAES_OAEP_SHA256 is recommended.)
250px|700px|reset
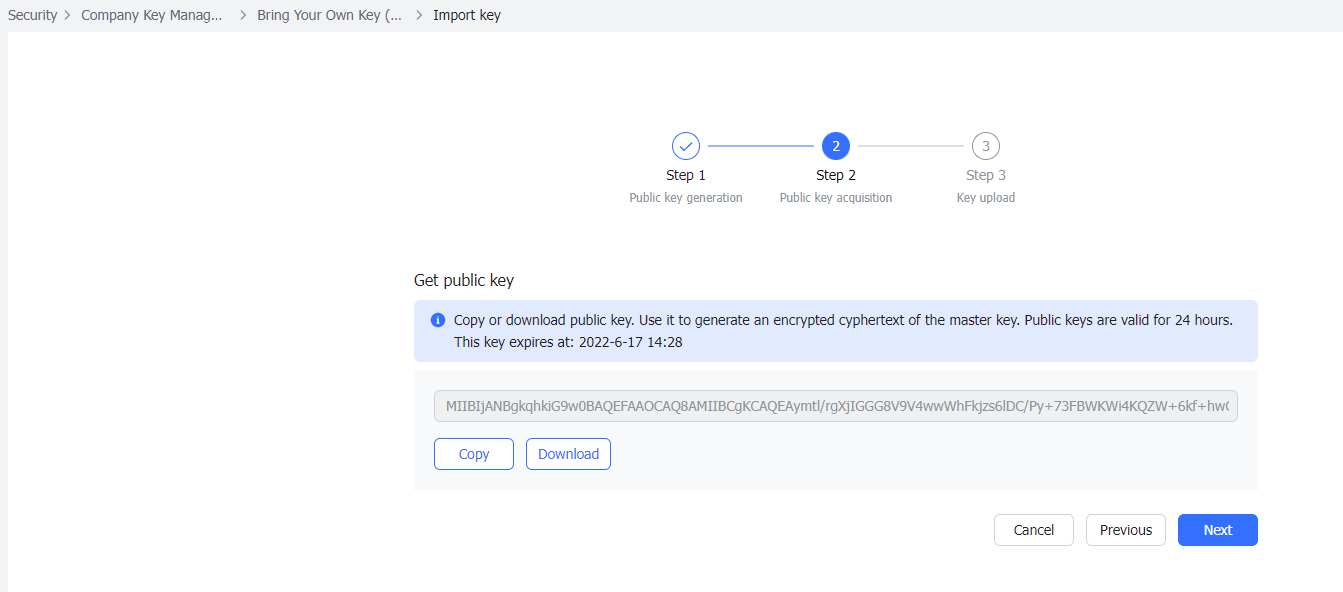
1.3 Download the public key file
In Step 2, you can access a public key by either copying or downloading it. We recommend downloading the public key and naming the file as "PublicKey_base64.txt", and saving it locally. Confirm and click Next.
250px|700px|reset
Note: The public key expires 24 hours after it is generated.
1.4 Generate and encrypt a key locally
- Create a folder called KeyImport and open it.
- Download the corresponding script and save it in the KeyImport folder according to your Windows system type.
- Put the public key file PublicKey_base64.txt downloaded in Step 1.3 to the KeyImport folder.
- Open the terminal and then KeyImport.
- How to access KeyImport: Enter cd and a space, use your mouse to select and drag the KeyImport folder to the command line tool, and click Enter to go to KeyImport.
- Generate a key and use the public key to encrypt it.
- Enter the encryption command in the terminal. Users are required to select the key type based on the public key algorithm in Step 1.3 and enter the corresponding command. Users can choose between AES_256_GCM (recommended) and SM4_128_GCM, the two key types currently supported by Lark. The corresponding relationships between public key algorithms, key types, and commands are shown in the table:
- MasterKey_hex (key plaintext) and PublicEncryptedMasterKey_base64.txt (key ciphertext) files will be generated in the KeyImport folder. PublicEncryptedMasterKey_base64.txt contains the ciphertext to be uploaded.

250px|700px|reset
Note: Please make sure to properly save the key ID (displayed after the import) and key plaintext file (contains the key plaintext) so that the information and plaintext relating to the key ID are available when you need it.
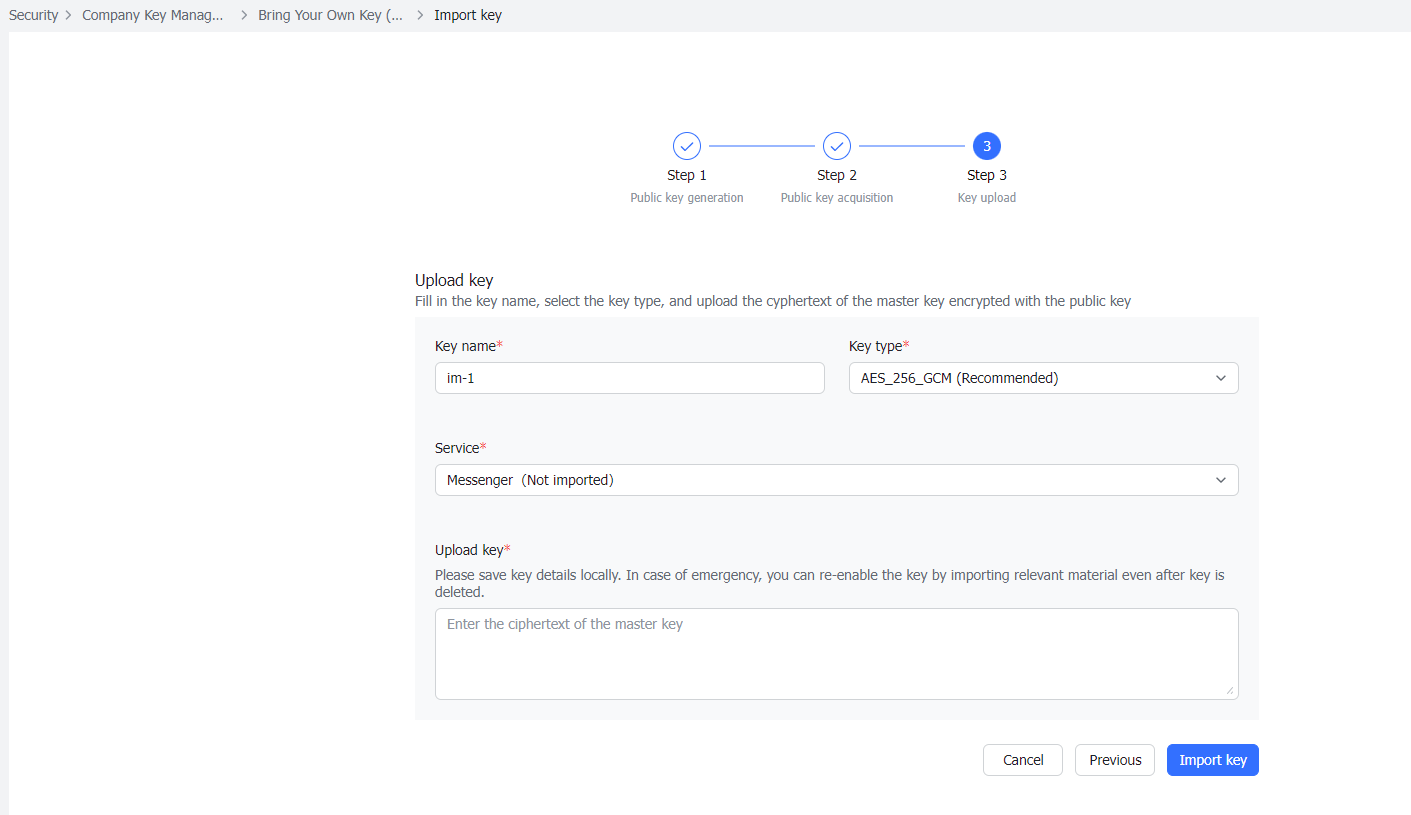
1.5 Upload the key
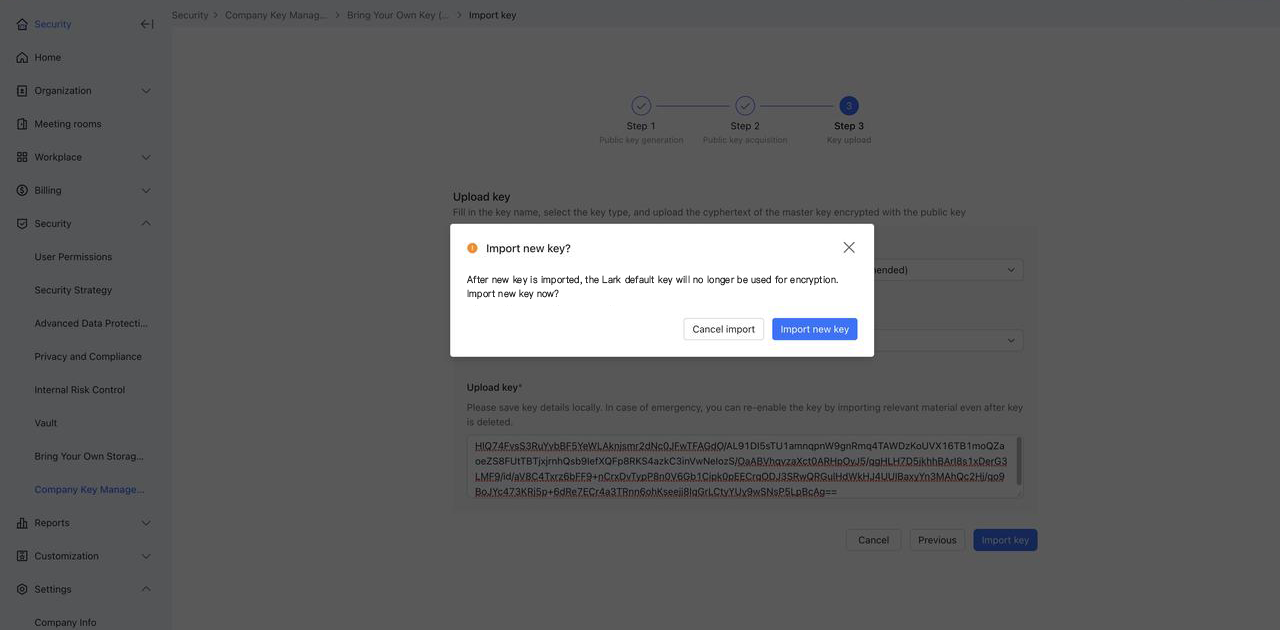
In Step 3, enter the key name, select the corresponding key type and the corresponding business to be encrypted, and copy the content of the encrypted document PublicEncryptedMasterKey_base64.txt to the key upload box. It is recommended to use different keys to encrypt different business lines.
250px|700px|reset
Click Import key and then Import new key in the pop-up window after confirmation.
250px|700px|reset
1.6 Complete import
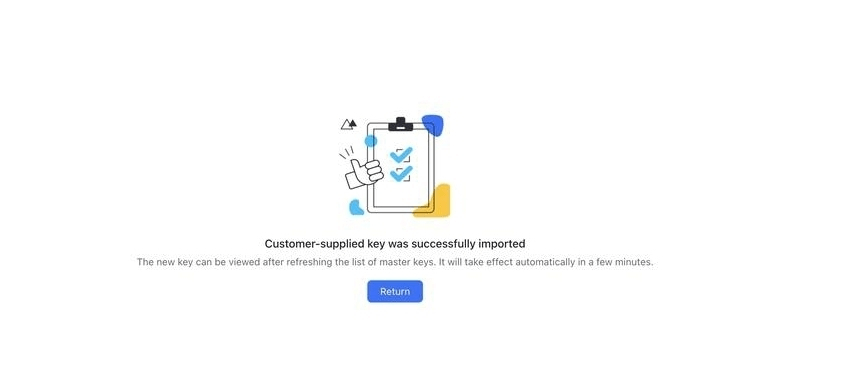
After importing, the system will check if the key name and ciphertext submitted are legal and if the length of the key complies with the algorithm as the initial key length required varies between different algorithms. If all parameters are valid, a key imported notification will be shown.
If all business lines have been encrypted, the page will look like this:
250px|700px|reset

If there are still some business lines that have not been encrypted, they will be shown on the page when the key is imported. Users can click Continue to import to import keys for these business lines. The following is the notification page when only the key for the messages business line has been imported.

250px|700px|reset
2. View and replace keys
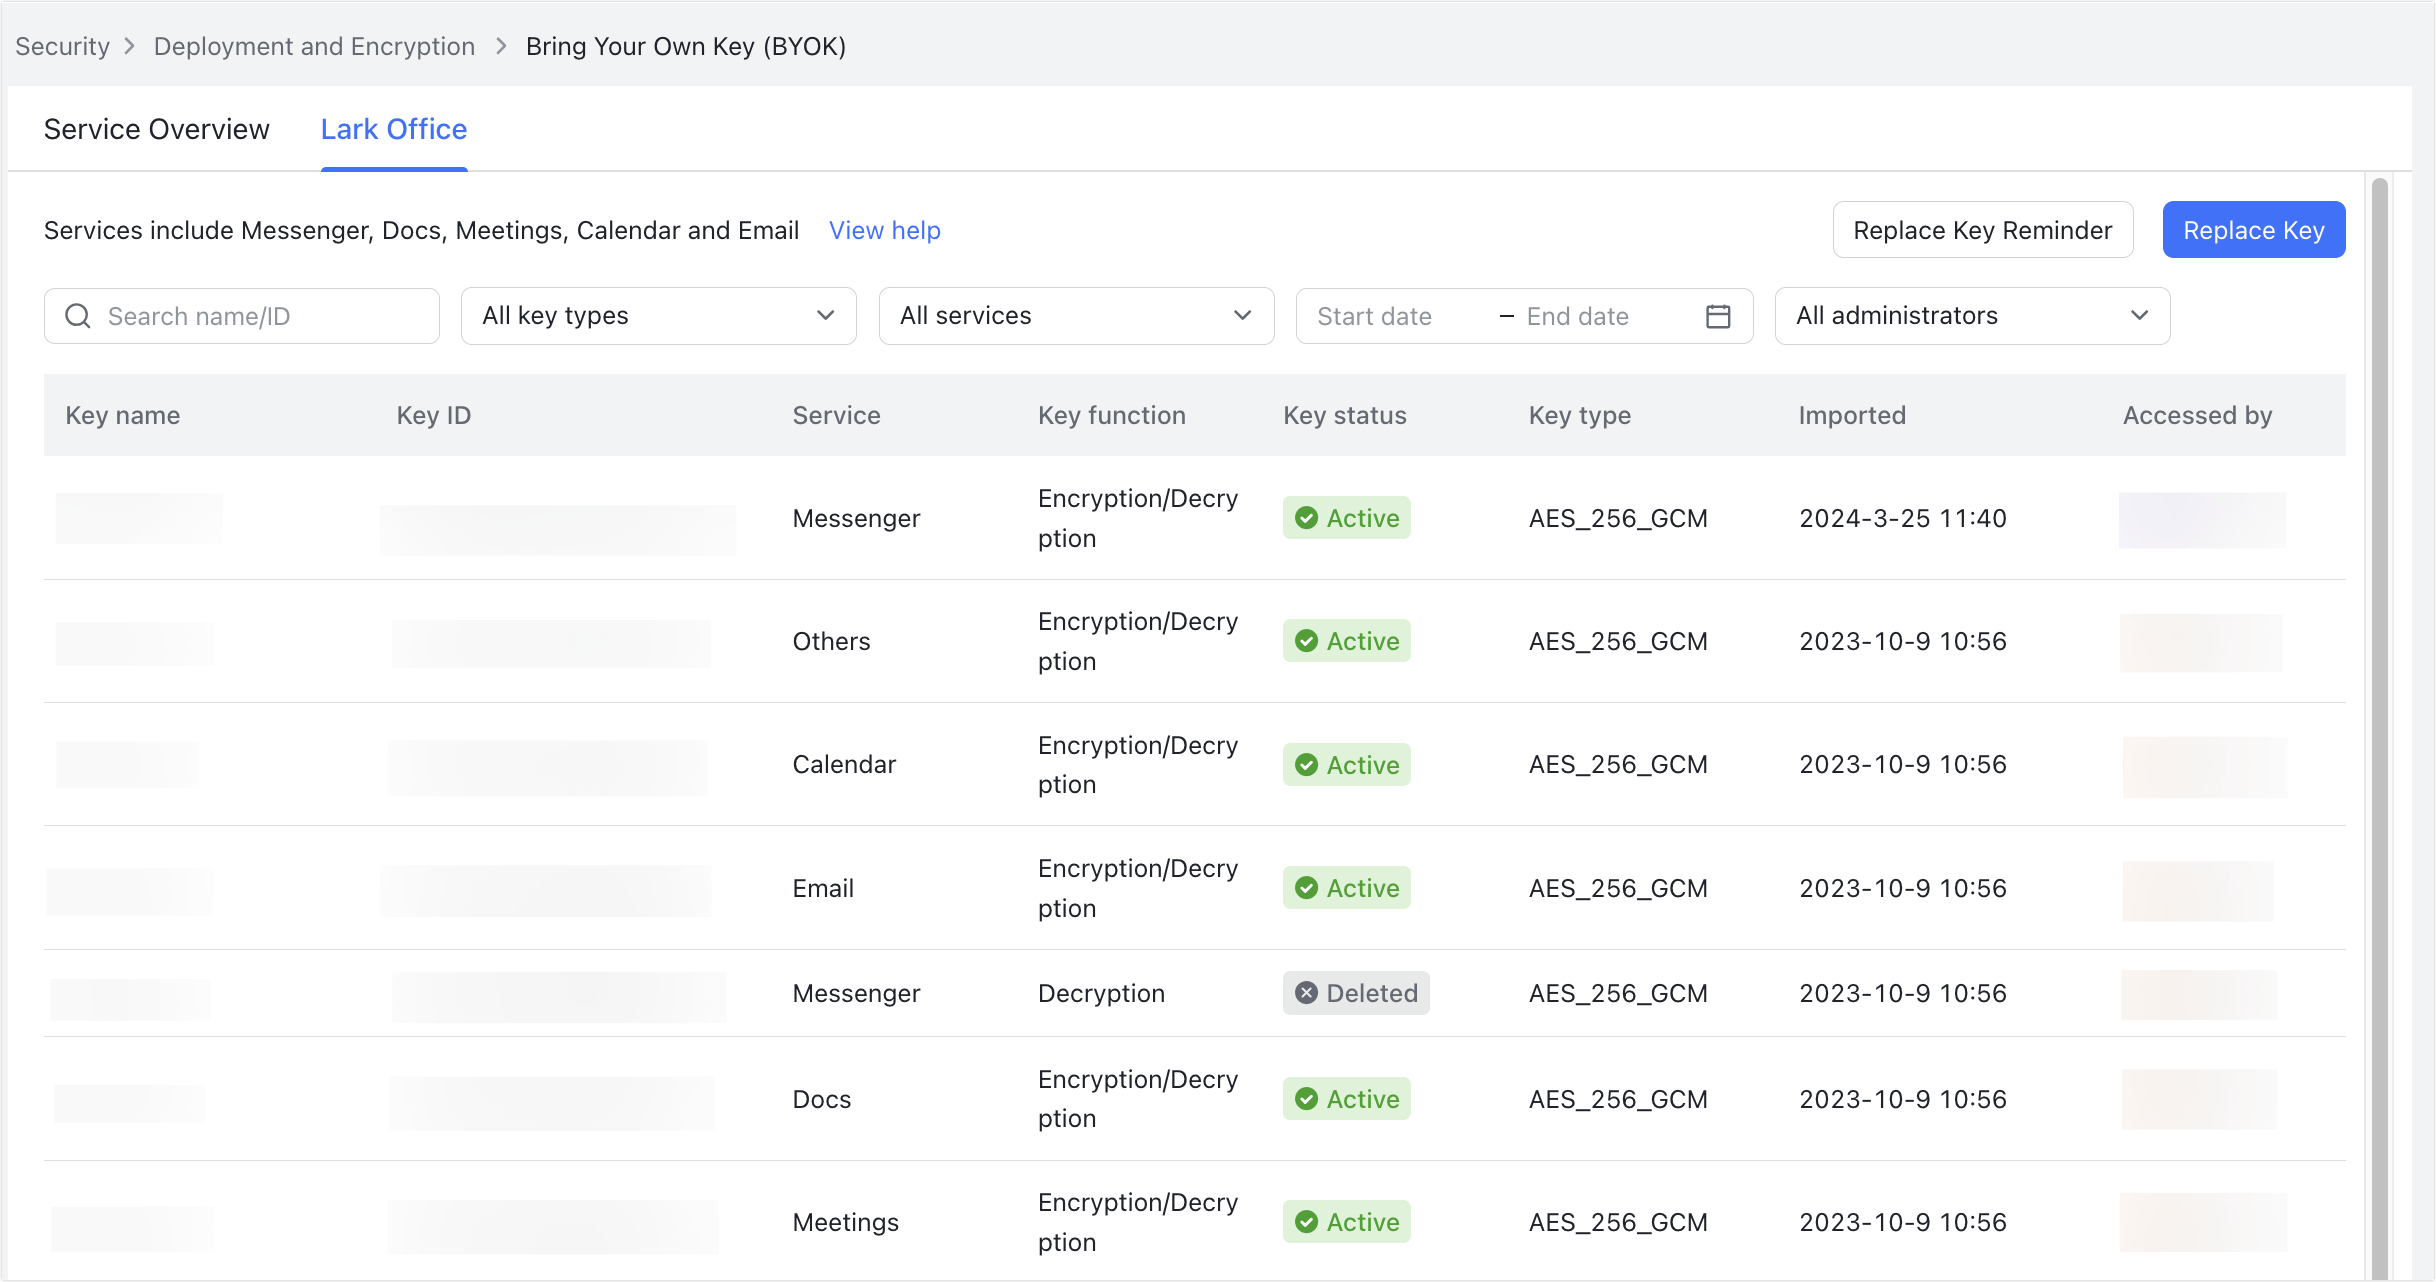
- The newly uploaded key will be displayed in the list after it is imported.
- The original Import key button has been moved to the upper-right corner of the interface and renamed as Replace key, but the operation process is exactly the same.
- The record of the key will also appear in the key list, and the key will be marked as enabled.
250px|700px|reset

Note: The key is not immediately effective after import or replacement. It comes into effect within 5 minutes when the cache is refreshed. Therefore, if users click Import key or Replace key again within 10 minutes, the import process will not start.
III. FAQs
