Read this article to learn more about configuring the Cisco SIP/H.323 conference room system to ensure that Lark Meetings can run smoothly on it.
The following configuration uses the Cisco Webex Room Kit Mini as an example.
I. Configure the SIP conference room system
As the administrator, log in to Cisco's webpage.
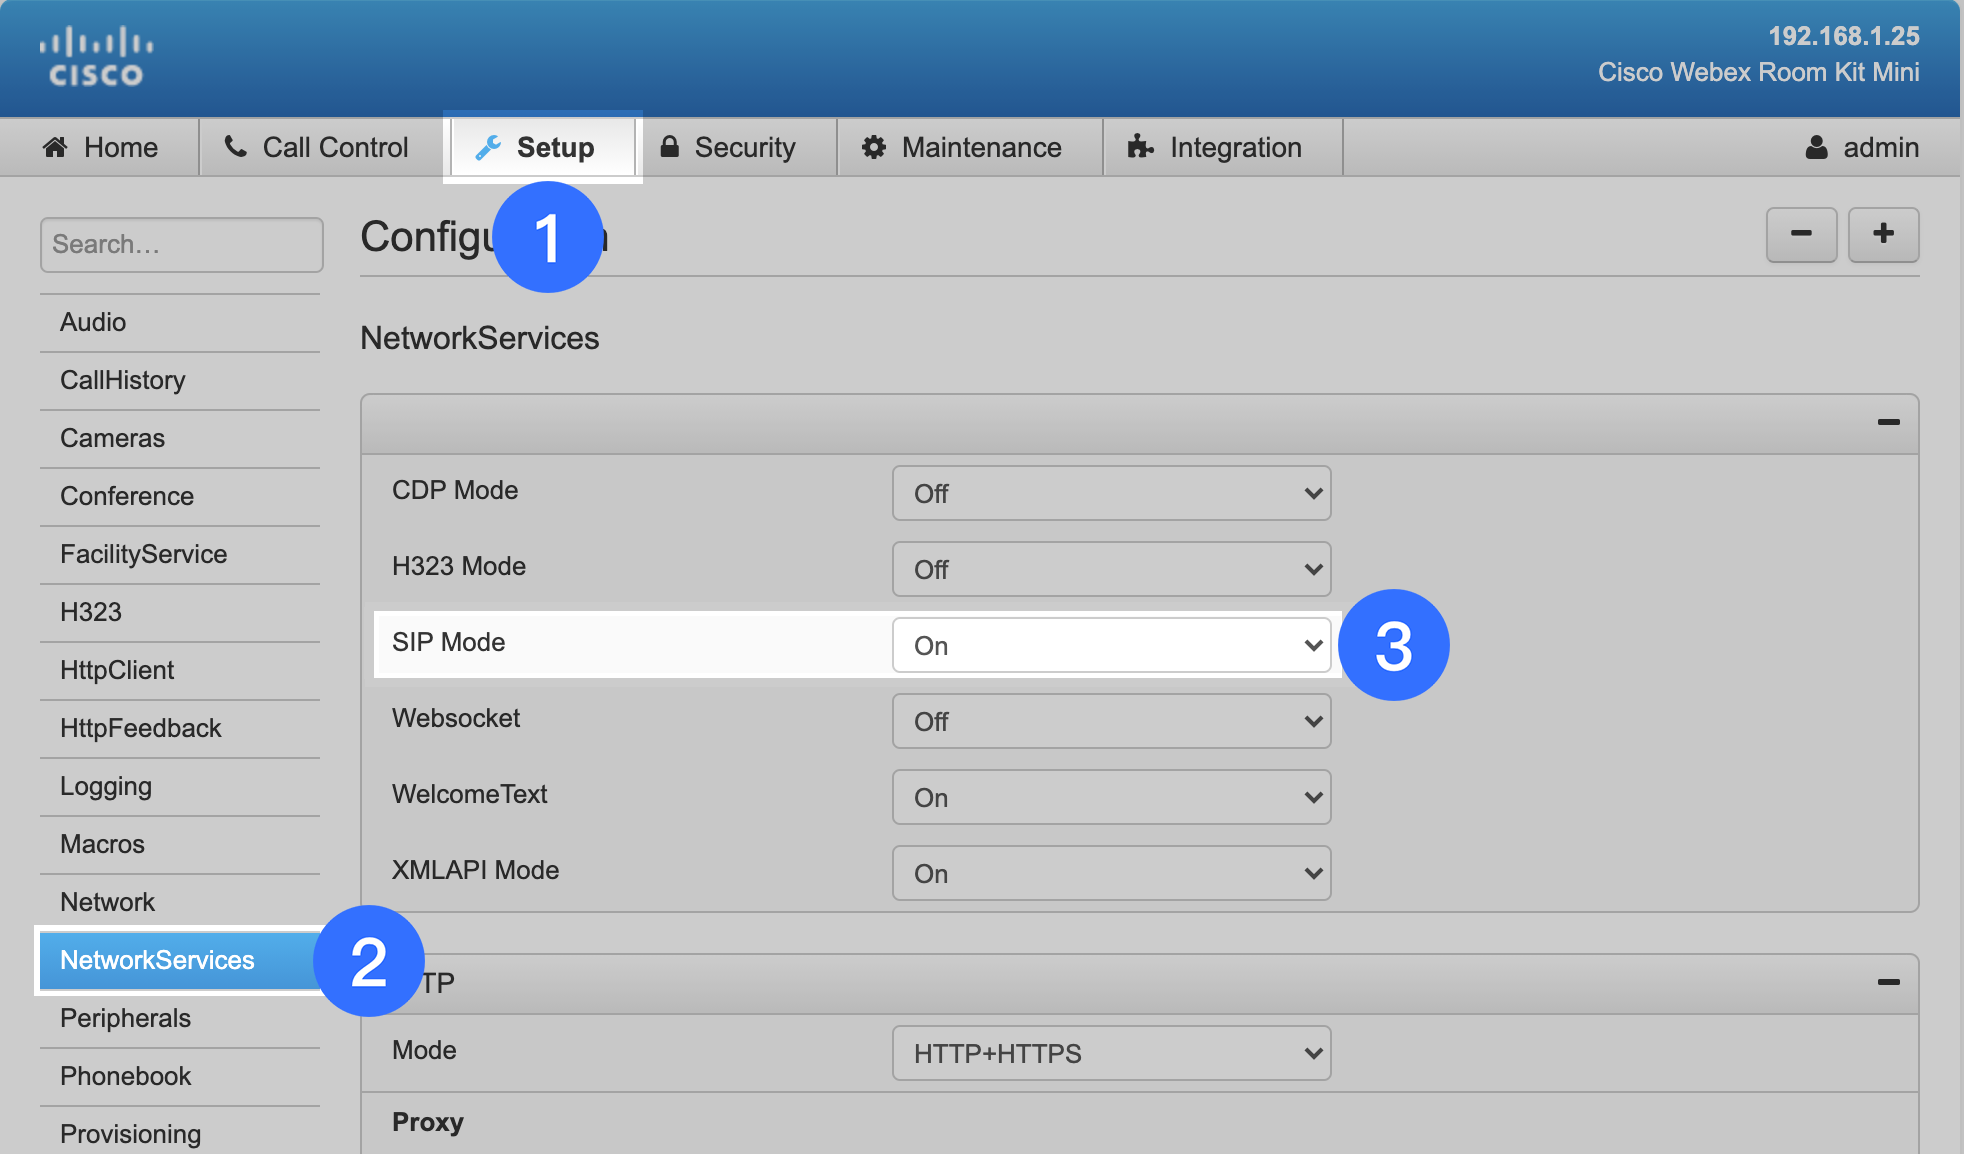
- Go to Setup > Network Services and on the configuration page, set SIP Mode as On.
250px|700px|reset
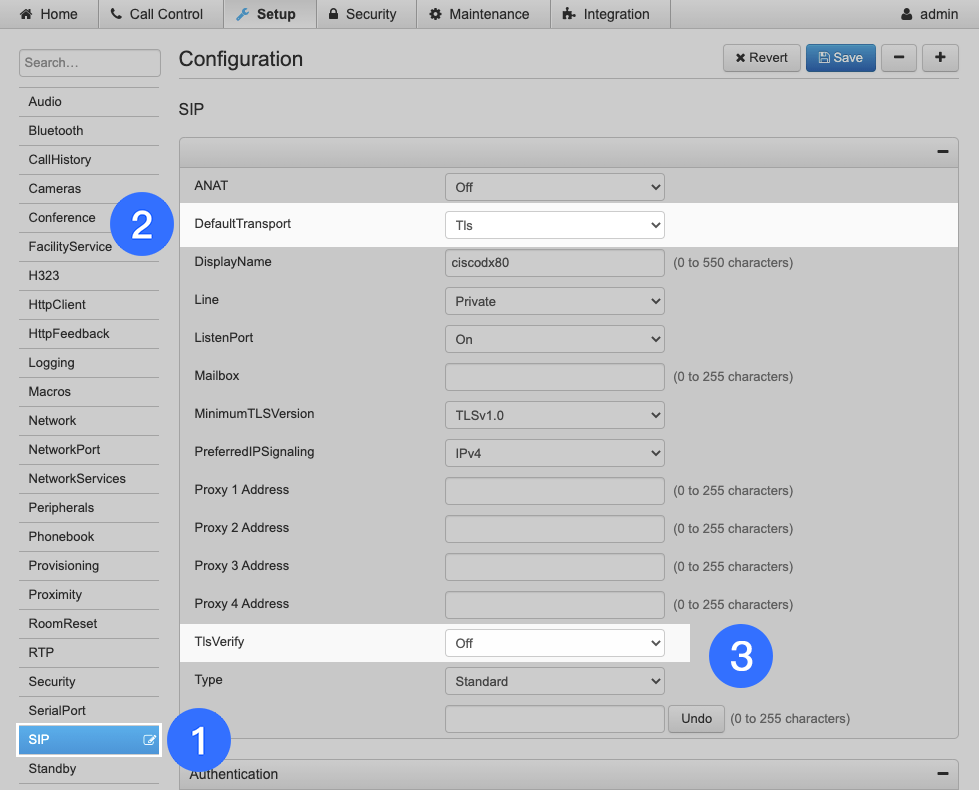
- Click SIP on the left sidebar. On the configuration page, set Default Transport as TLS, and TlsVerify as Off.
250px|700px|reset

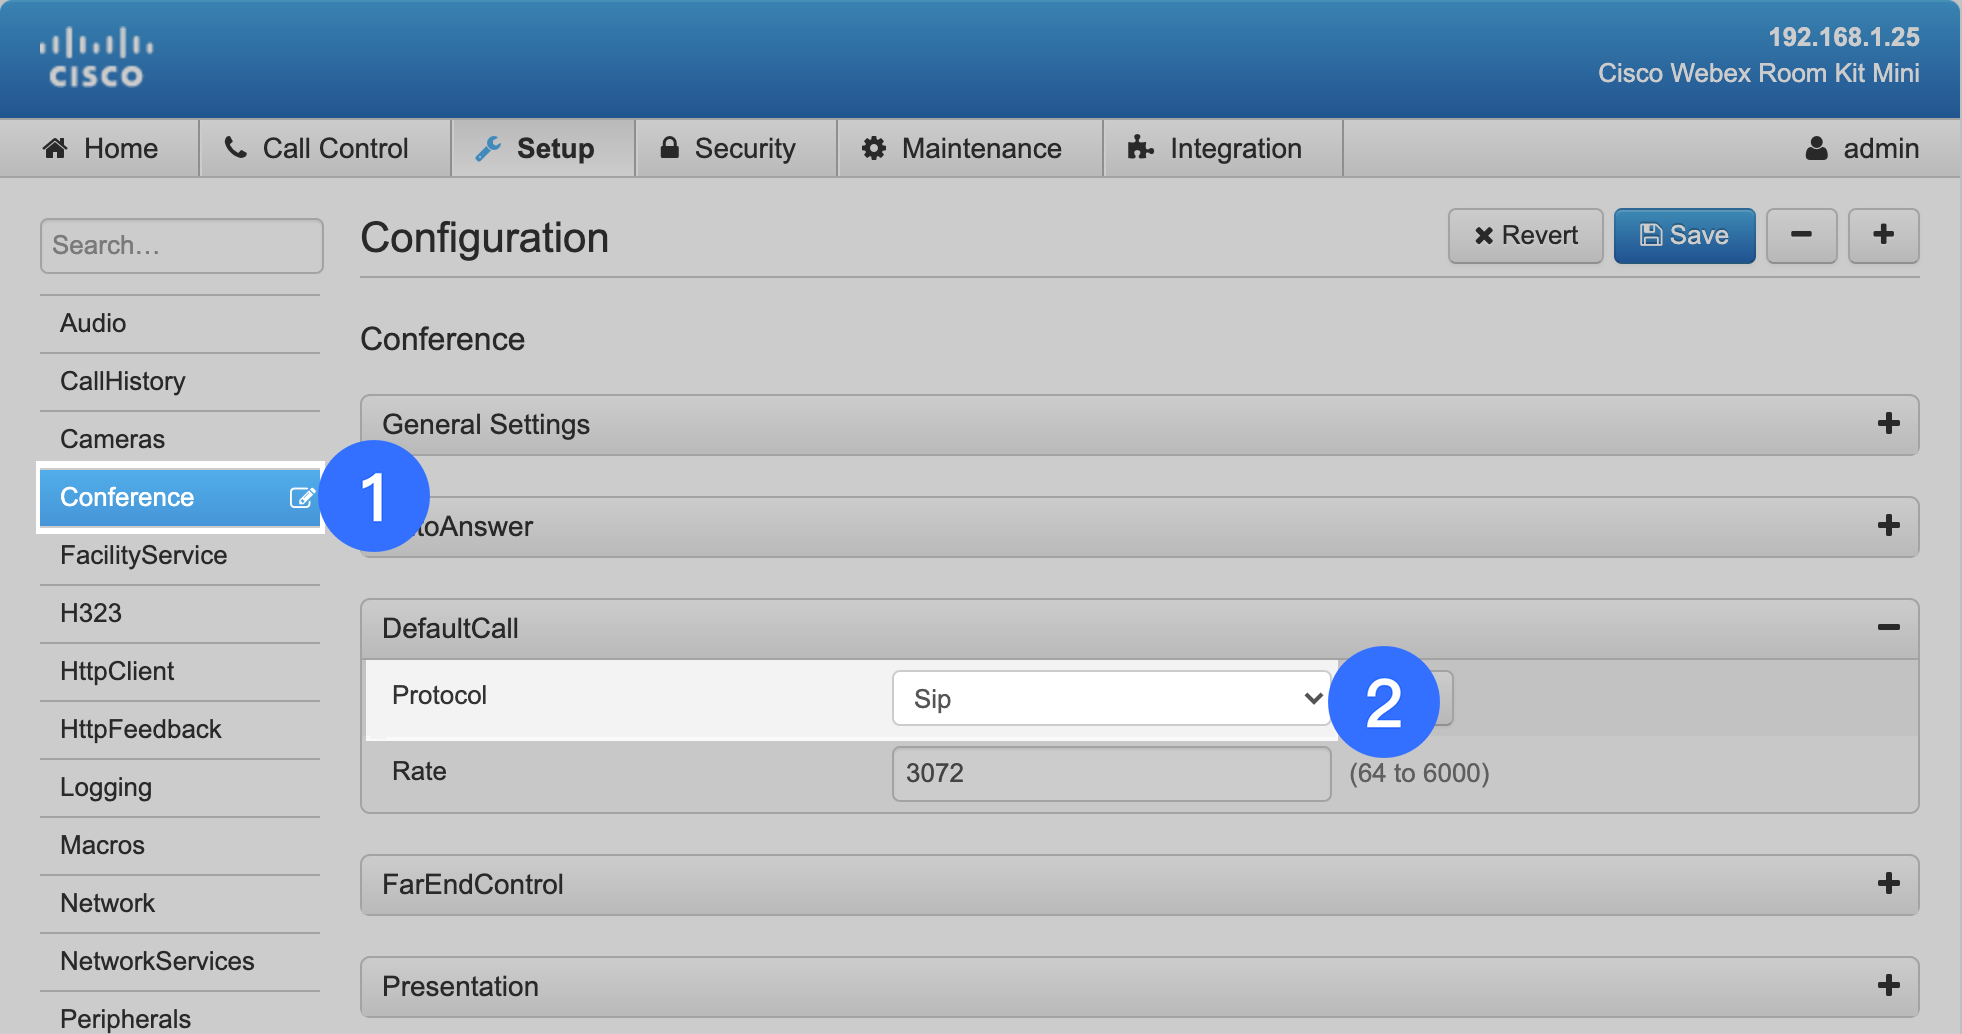
- Click Conference on the left sidebar. On the configuration page, set Protocol as SIP.
250px|700px|reset
II. Configure the H.323 conference room system
As the administrator, log in to the terminal's webpage.
Steps:
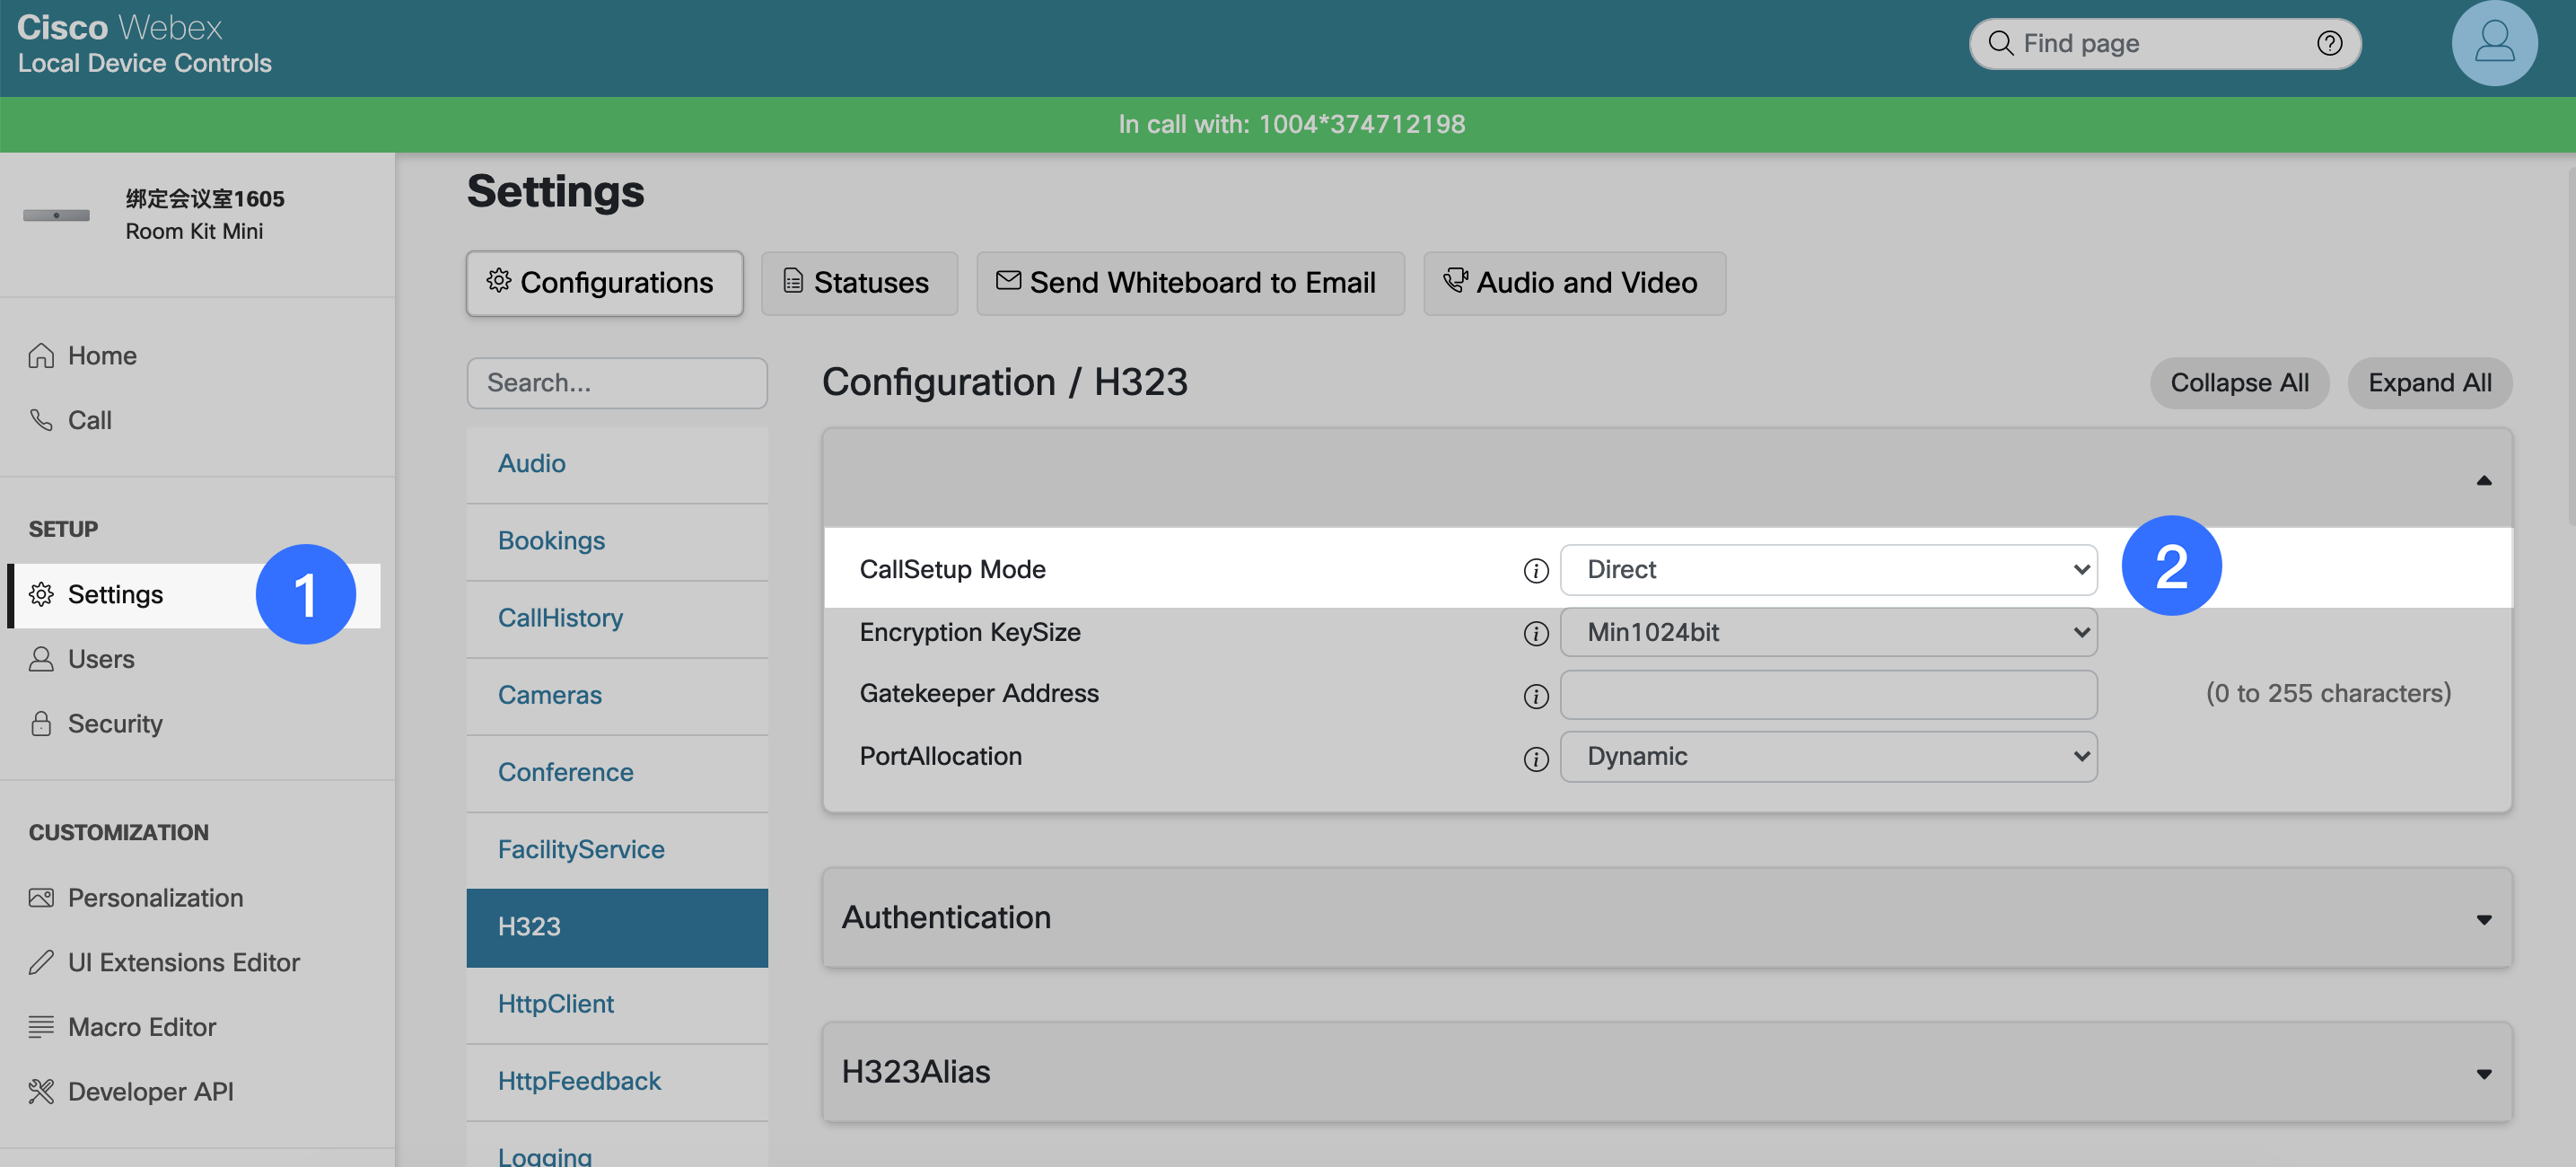
- Go to Settings > H323 and on the configuration page, set CallSetup Mode as Direct.
250px|700px|reset
- Click NetworkServices on the left sidebar. On the configuration page, set H.323 Mode as On.
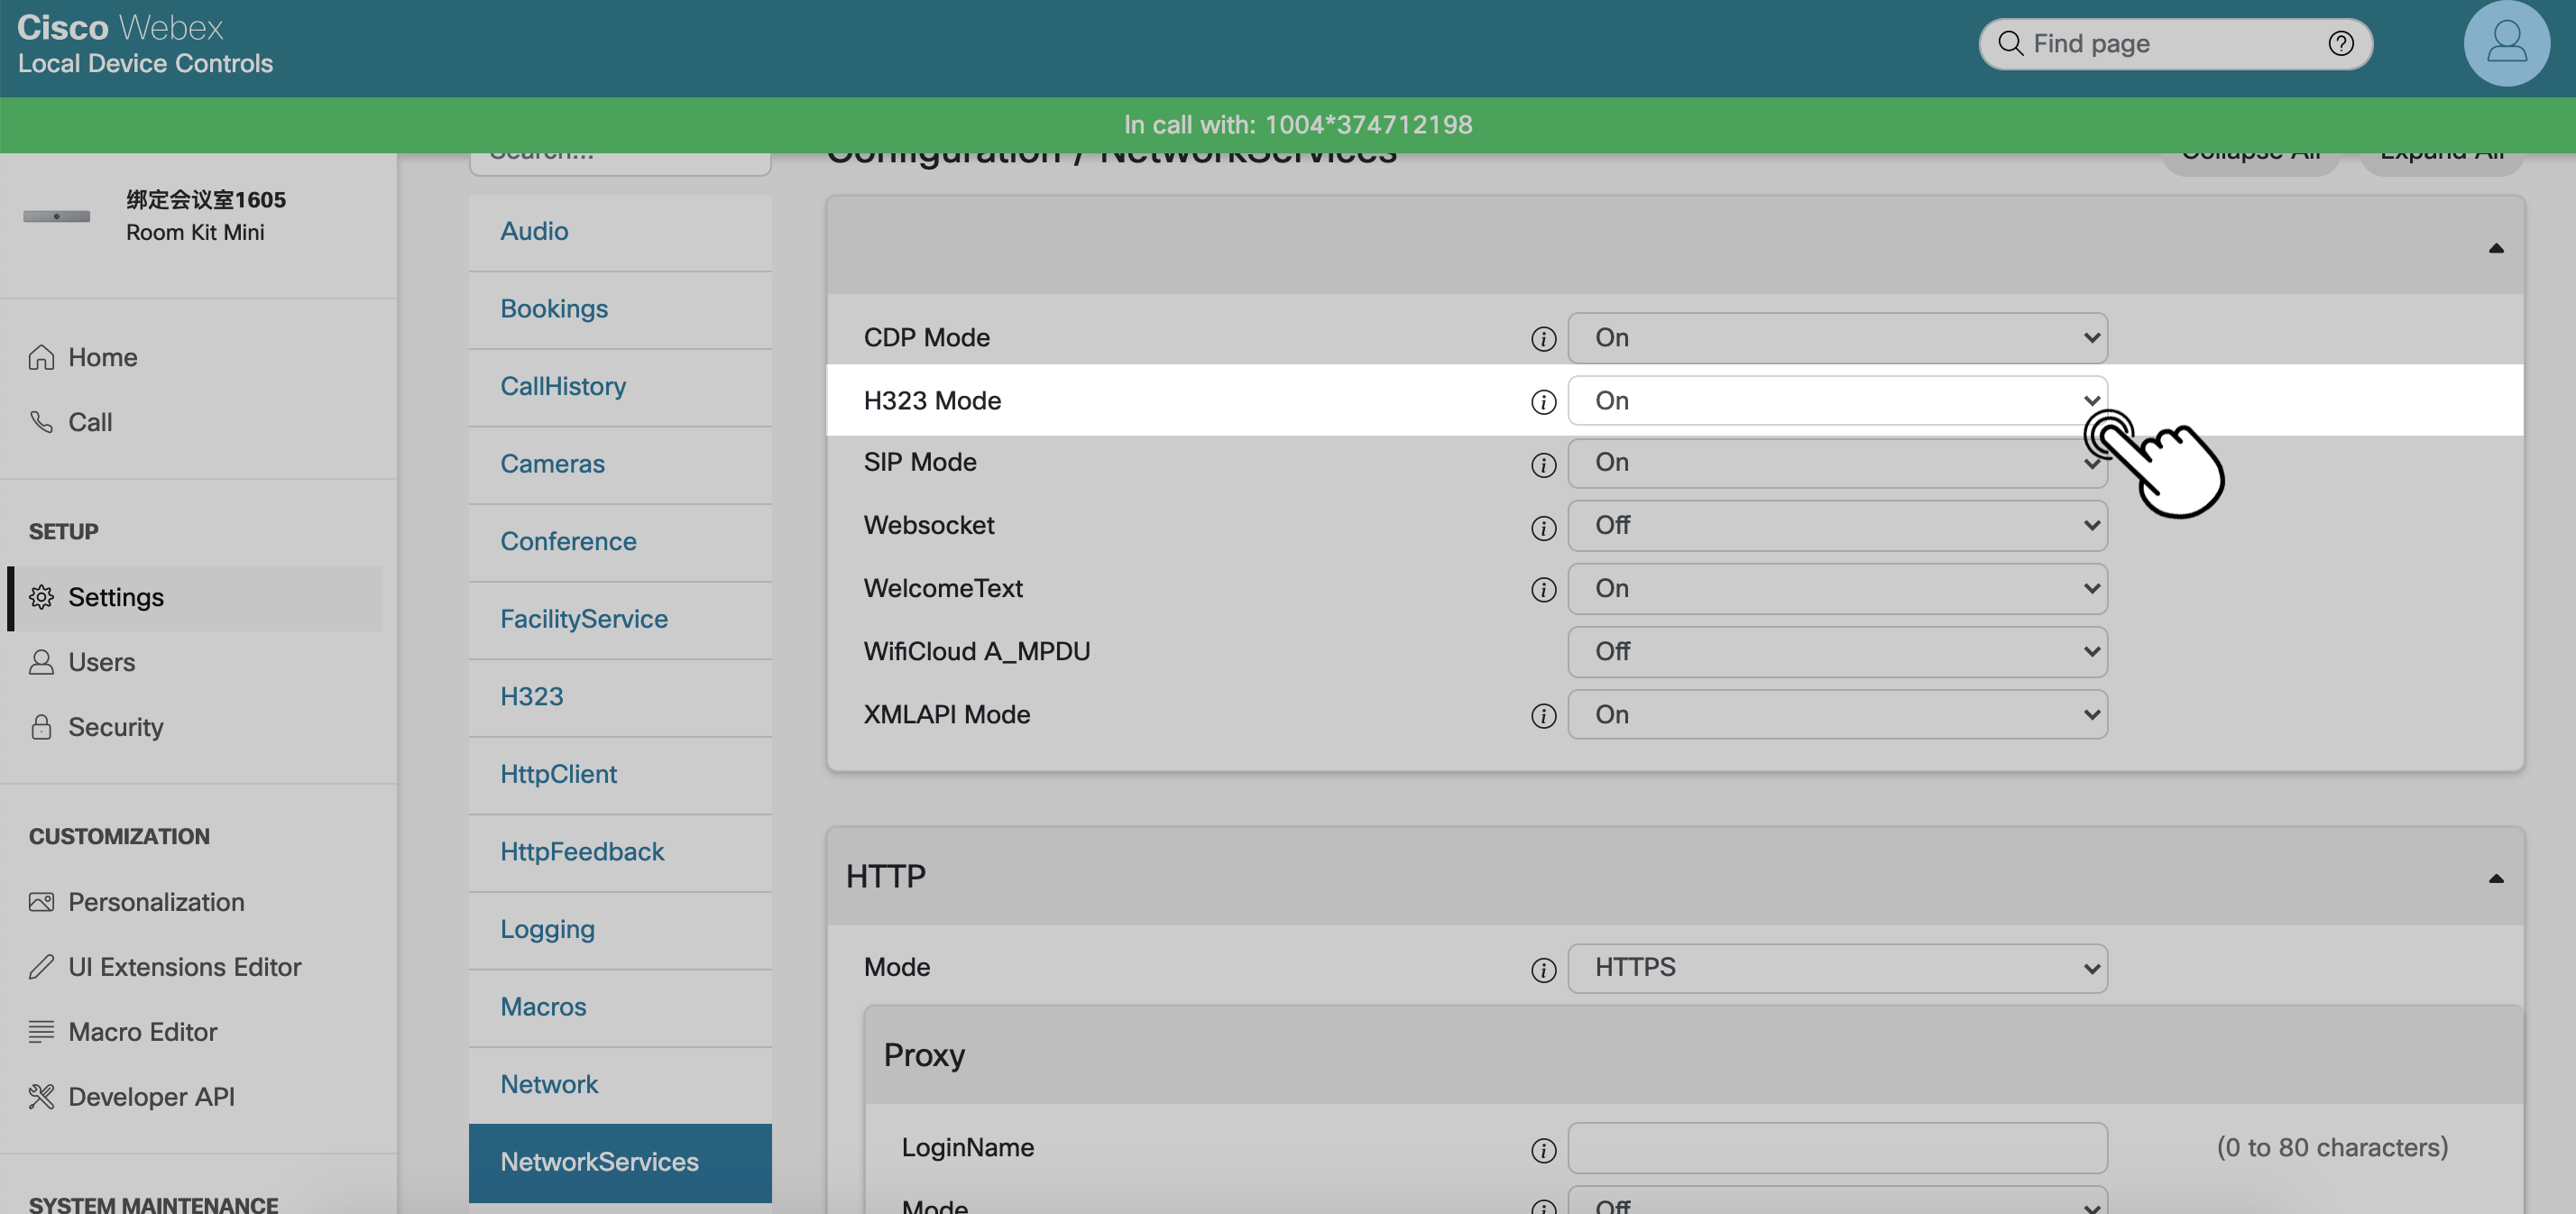
250px|700px|reset
- Click Conference on the left sidebar. On the configuration page, set Protocol as H323.
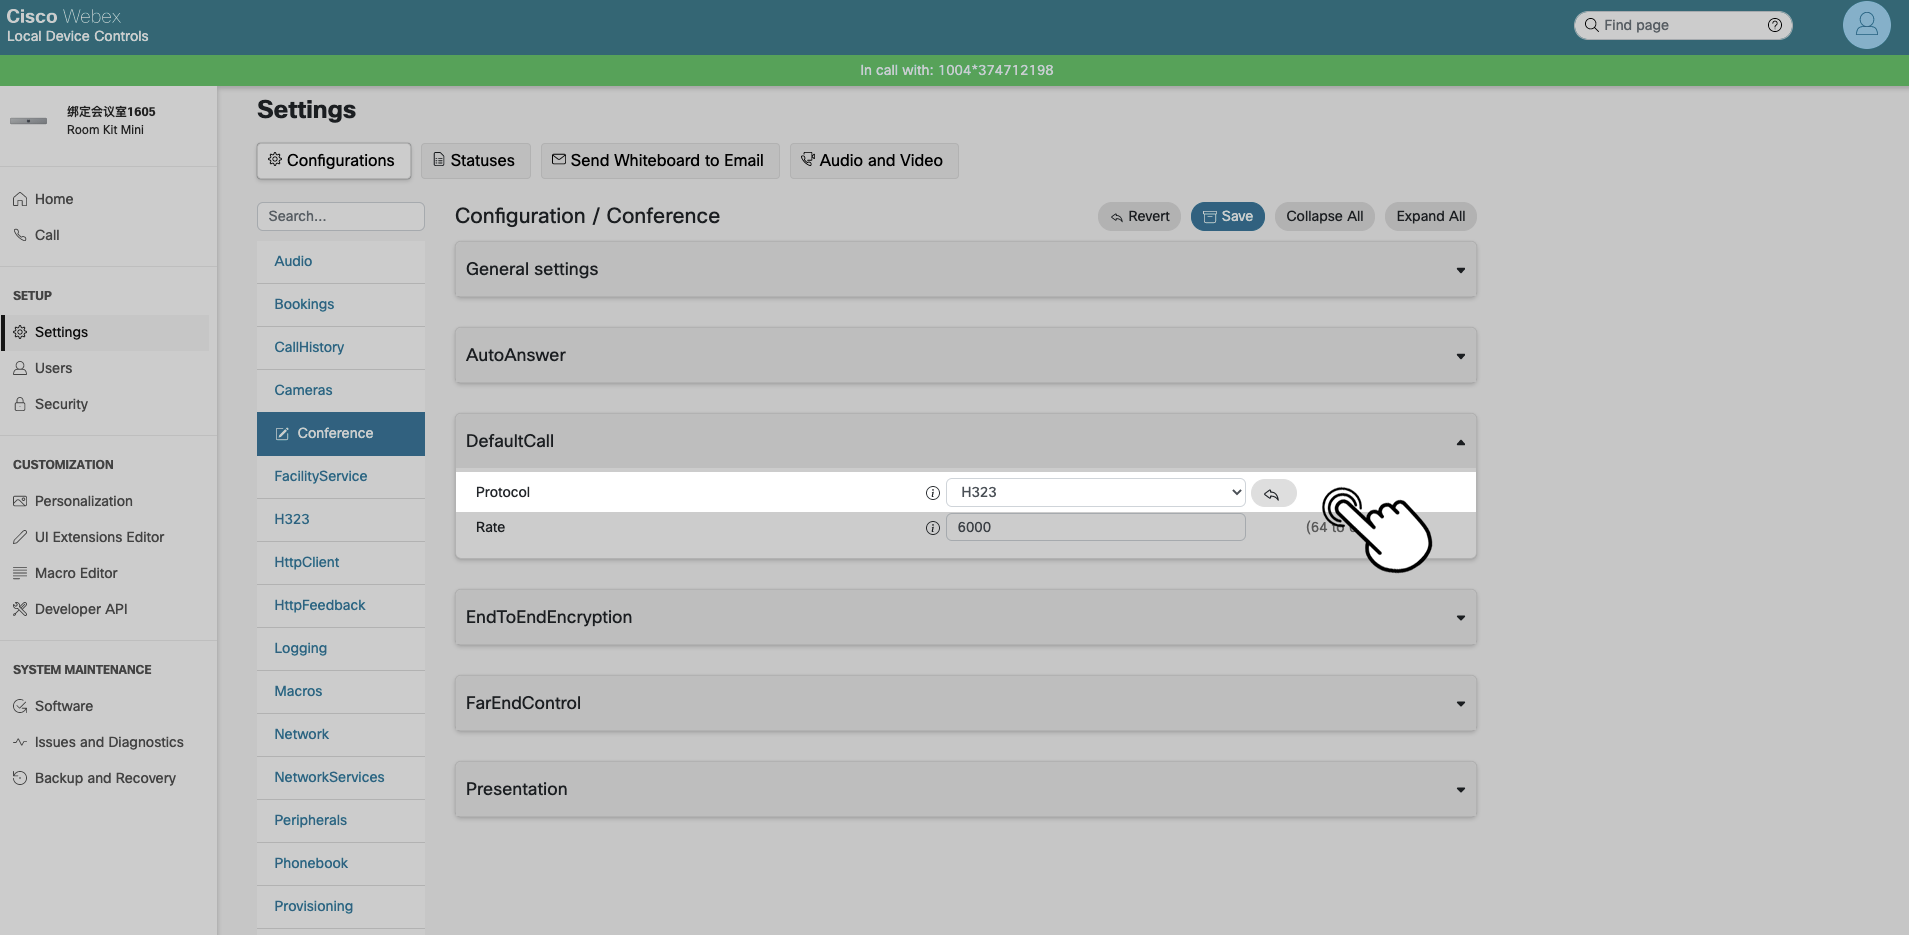
250px|700px|reset
III. Install and uninstall the Lark extension
With the Lark extension, you can call the Lark meeting ID on your Cisco device to join a meeting.
Cisco CE version devices equipped with a touchscreen can install the extension for free (for example: Cisco Touch 10 or Cisco Webex Rooms Navigator).
1. Install the extension
Method 1: Install via commands
- As the administrator, log in to the terminal's webpage. Go to Integration > Developer API in the navigation bar.
- In the Developer API command box, enter the command to install the SIP version of the Lark extension.
- Enter xCommand Provisioning Service Fetch Mode: Replace URL: https://lf3-static.bytednsdoc.com/obj/eden-cn/upipogbpu/lark_join.zip and tap Execute.
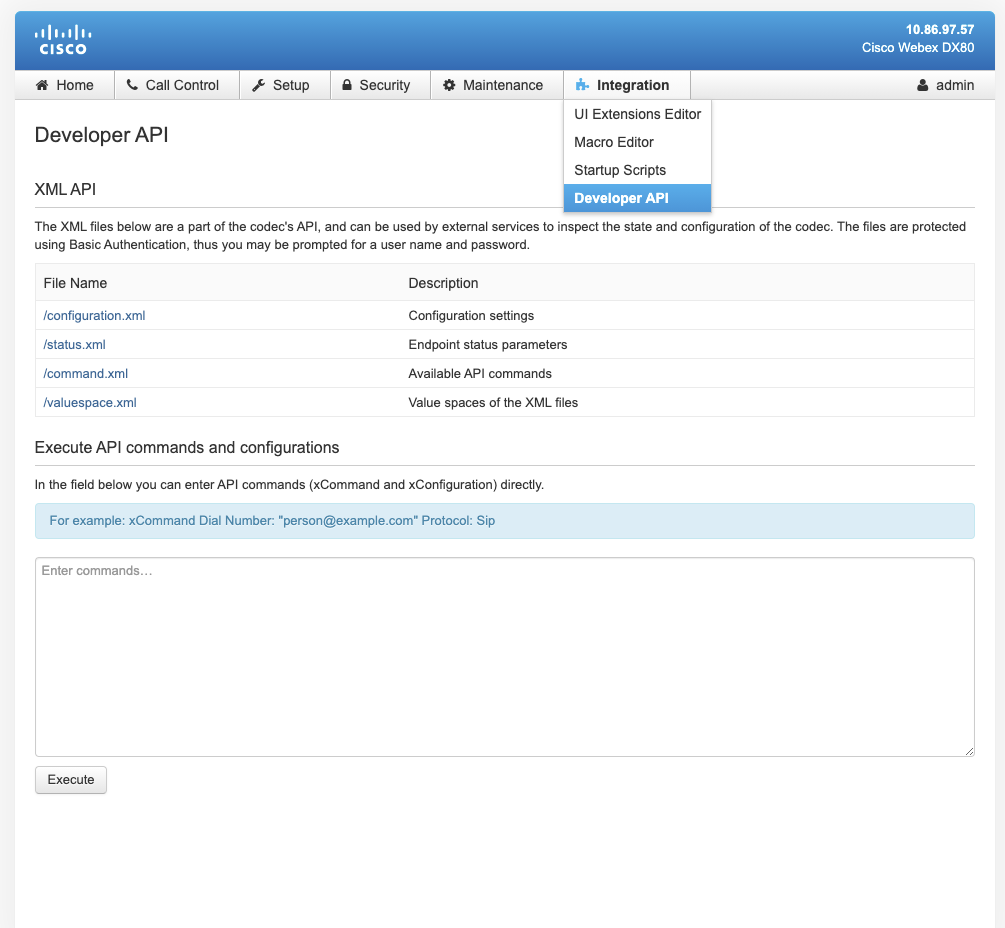
250px|700px|reset
- If the installation is successful, the terminal interface will have a newly added Lark button.

250px|700px|reset
Note: Only version CE 9.15.3 and above can display the Lark logo.
Method 2: Install via uploading the installation package
Steps:
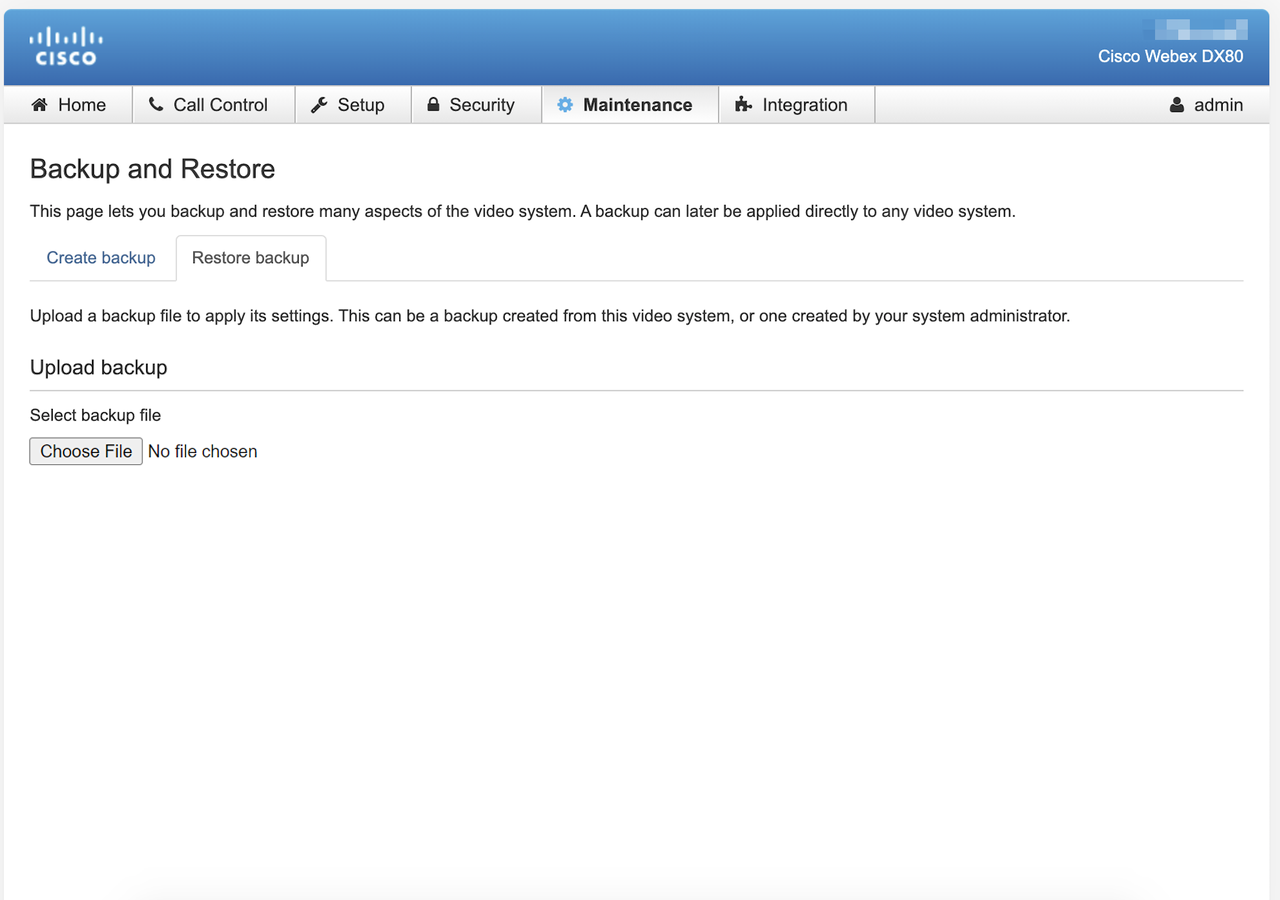
- As the administrator, log in to the terminal's webpage. Go to Maintenance > Backup and Restore in the navigation bar.
- Select Restore backup. Under Upload backup, select the downloaded extension installation package and upload it.
- If the installation is successful, the terminal interface will have a newly added Lark button.
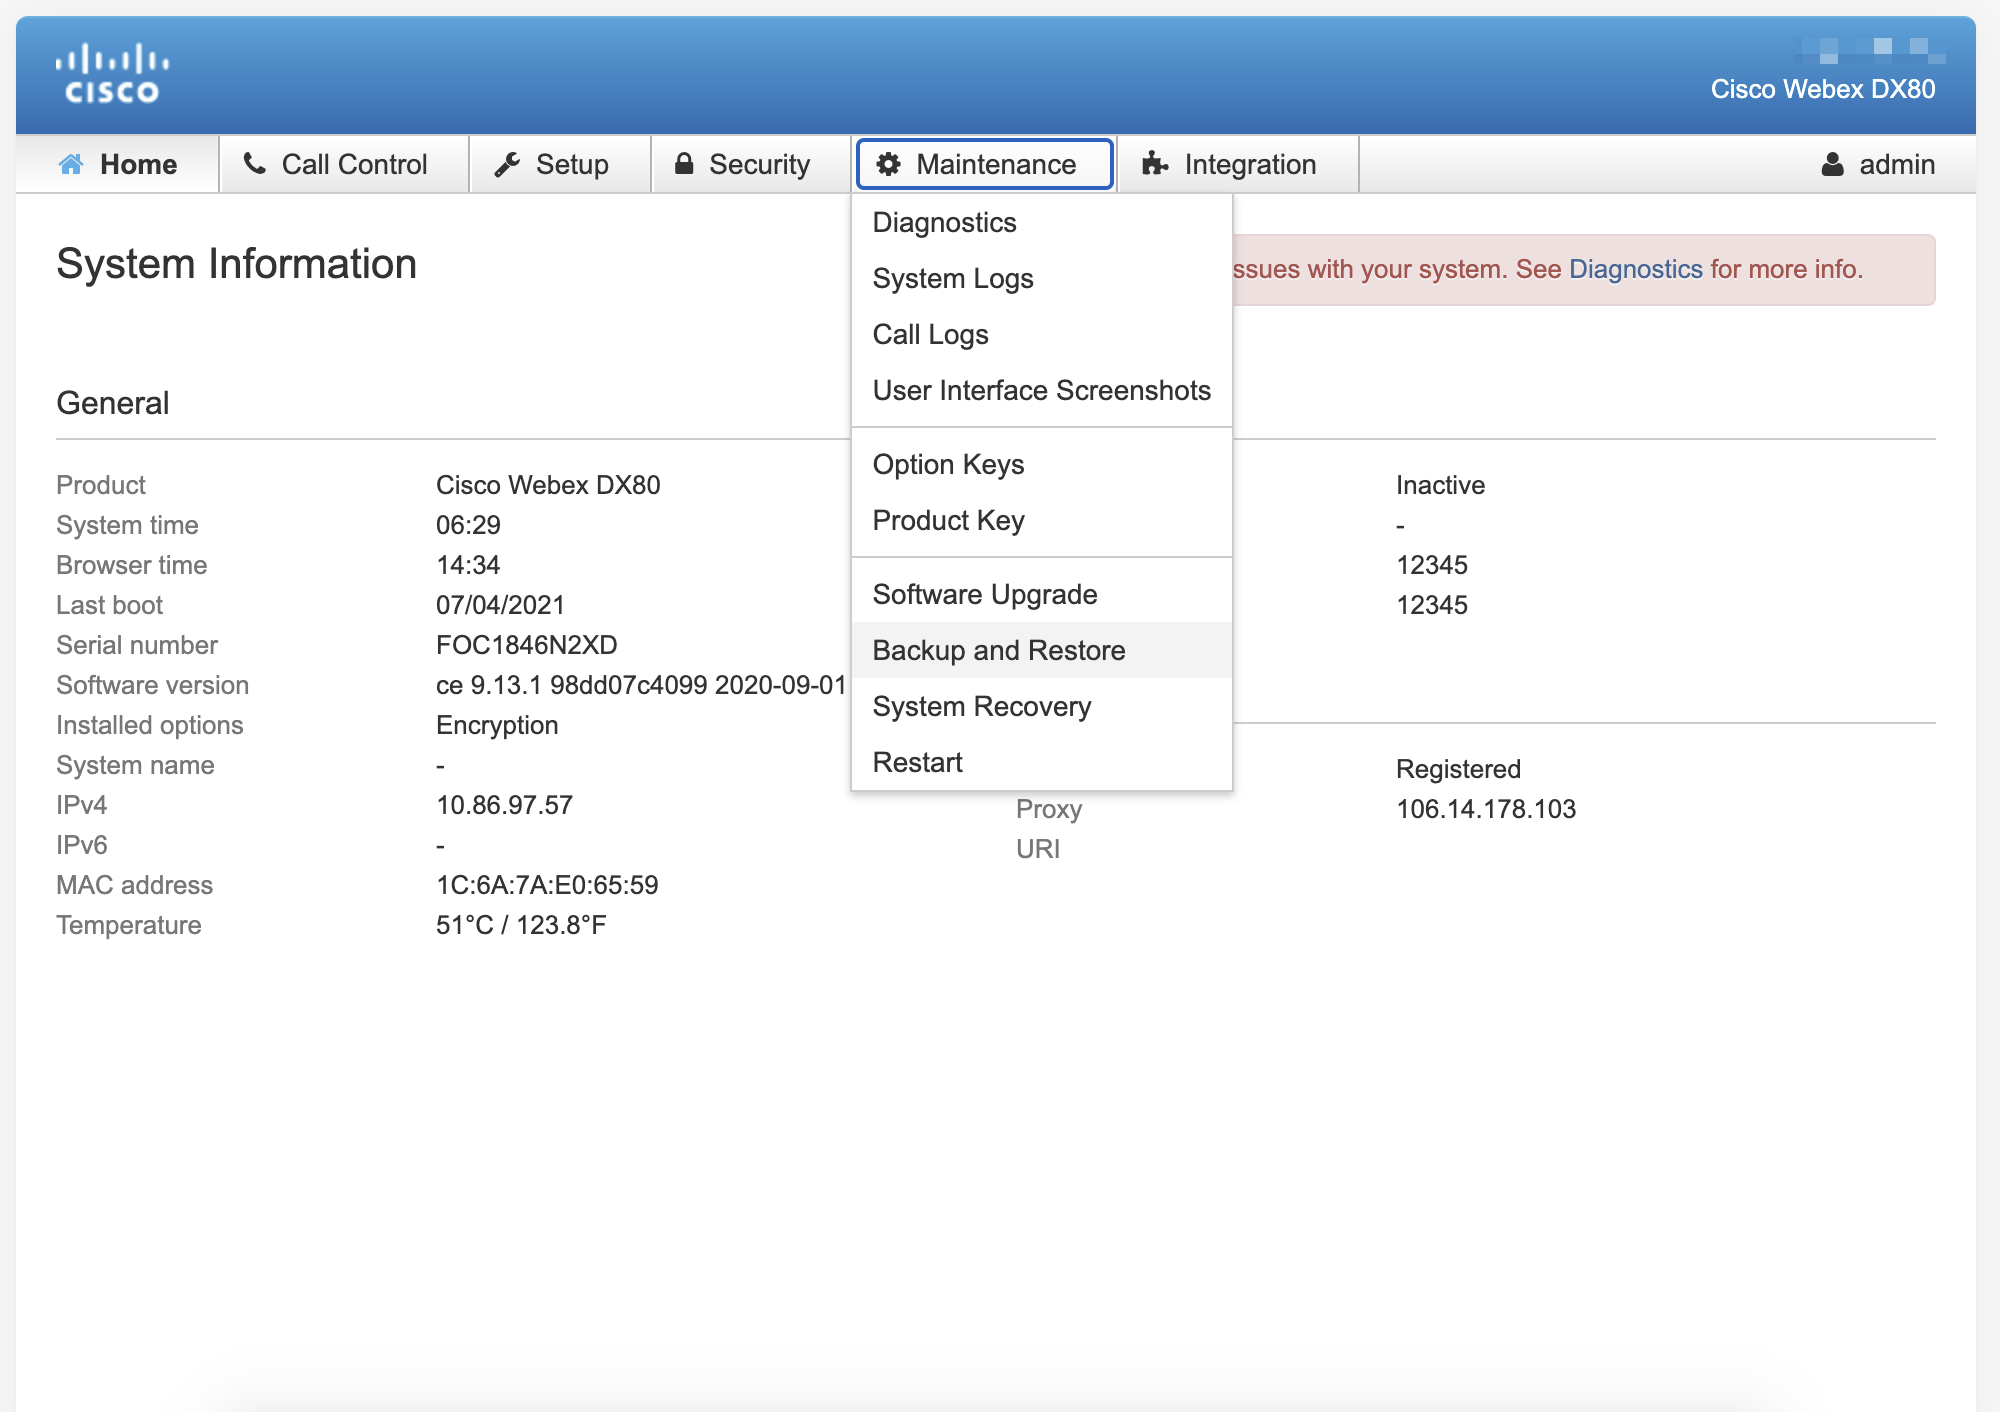
250px|700px|reset

250px|700px|reset
2. Uninstall extension
- As the administrator, log in to the terminal's webpage. Go to Integration in the navigation bar.
- Delete UI Extensions and Macro. Then, in Setup/Personalization, delete Brand Logo.
