
I. Intro
Version requirement: Lark mobile version 7.34 or above. No version requirements for the desktop app or web version.
Platform requirement: These steps can only be performed on the desktop app or web version. The mobile app supports form filling and sharing only.
You can add a Details Table question in the form view of Base to batch collect data in a table format. Respondents can submit multiple pieces of information at once, reducing repetitive data entry and improving efficiency.
Note: If Base advanced permissions are not turned on, collaborators with edit permission can add, edit, and delete details tables. If Base advanced permissions are turned on, collaborators with manage permission for the table where the form is located can add, edit, and delete details tables.
Use cases:
- Inventory management: If there are 30 pieces of product information on a single inbound delivery note, you can use the details table to enter all of them at once to quickly associate the data on the inbound delivery note with product details.
- Batch data collection: If a manager is responsible for multiple projects, they can use the details table to enter data of multiple projects in one go. Similarly, when collecting information on multiple family members, information of all members can also be filled out all at once.
II. Steps
Add a details table to a form
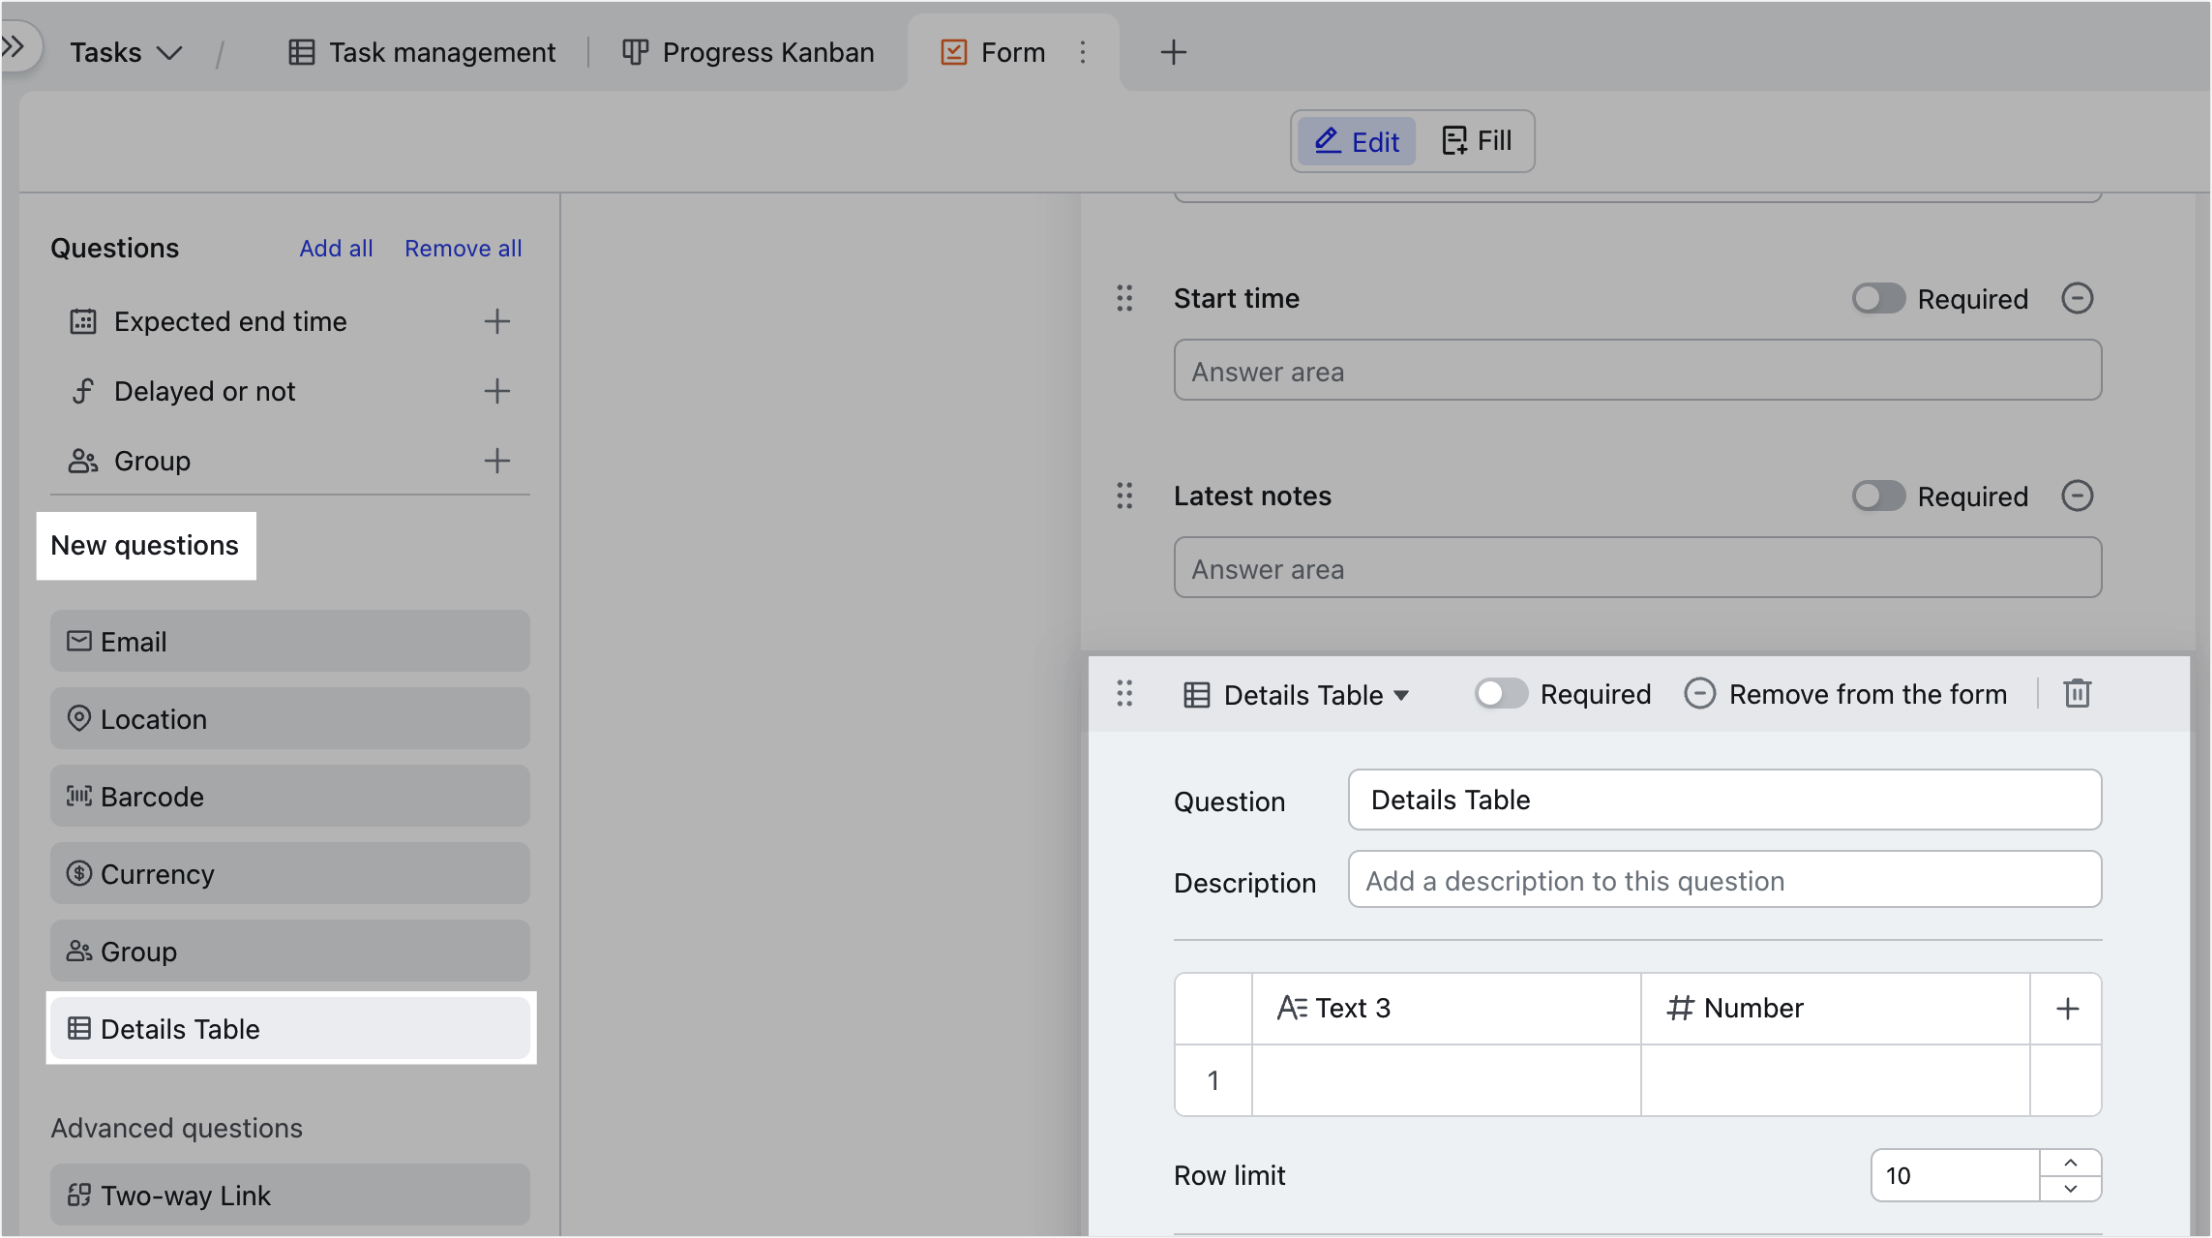
Open a base and create or open a form view. Under New questions > General questions on the left-side pane, select Details Table.
Note: You can add up to 20 details tables in one form.
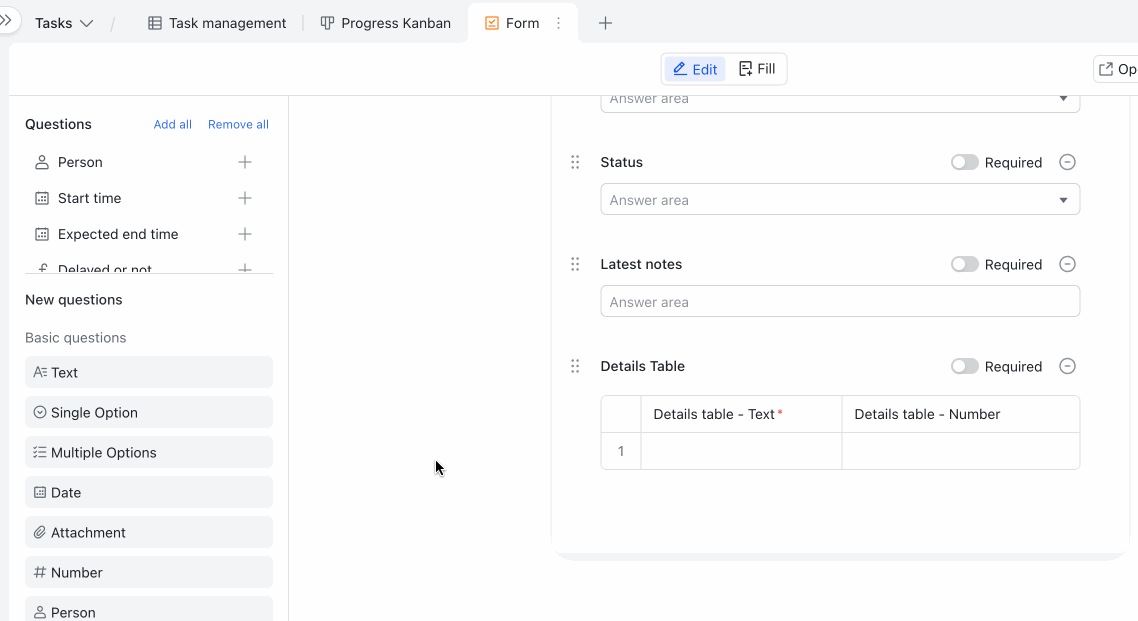
The details table contains two fields by default: a text field and a number field. The two fields will also appear on the rightmost side of the grid view. You can modify the field type and field name in grid view as needed.
250px|700px|reset
Edit the details table in the form
Add a field in the details table
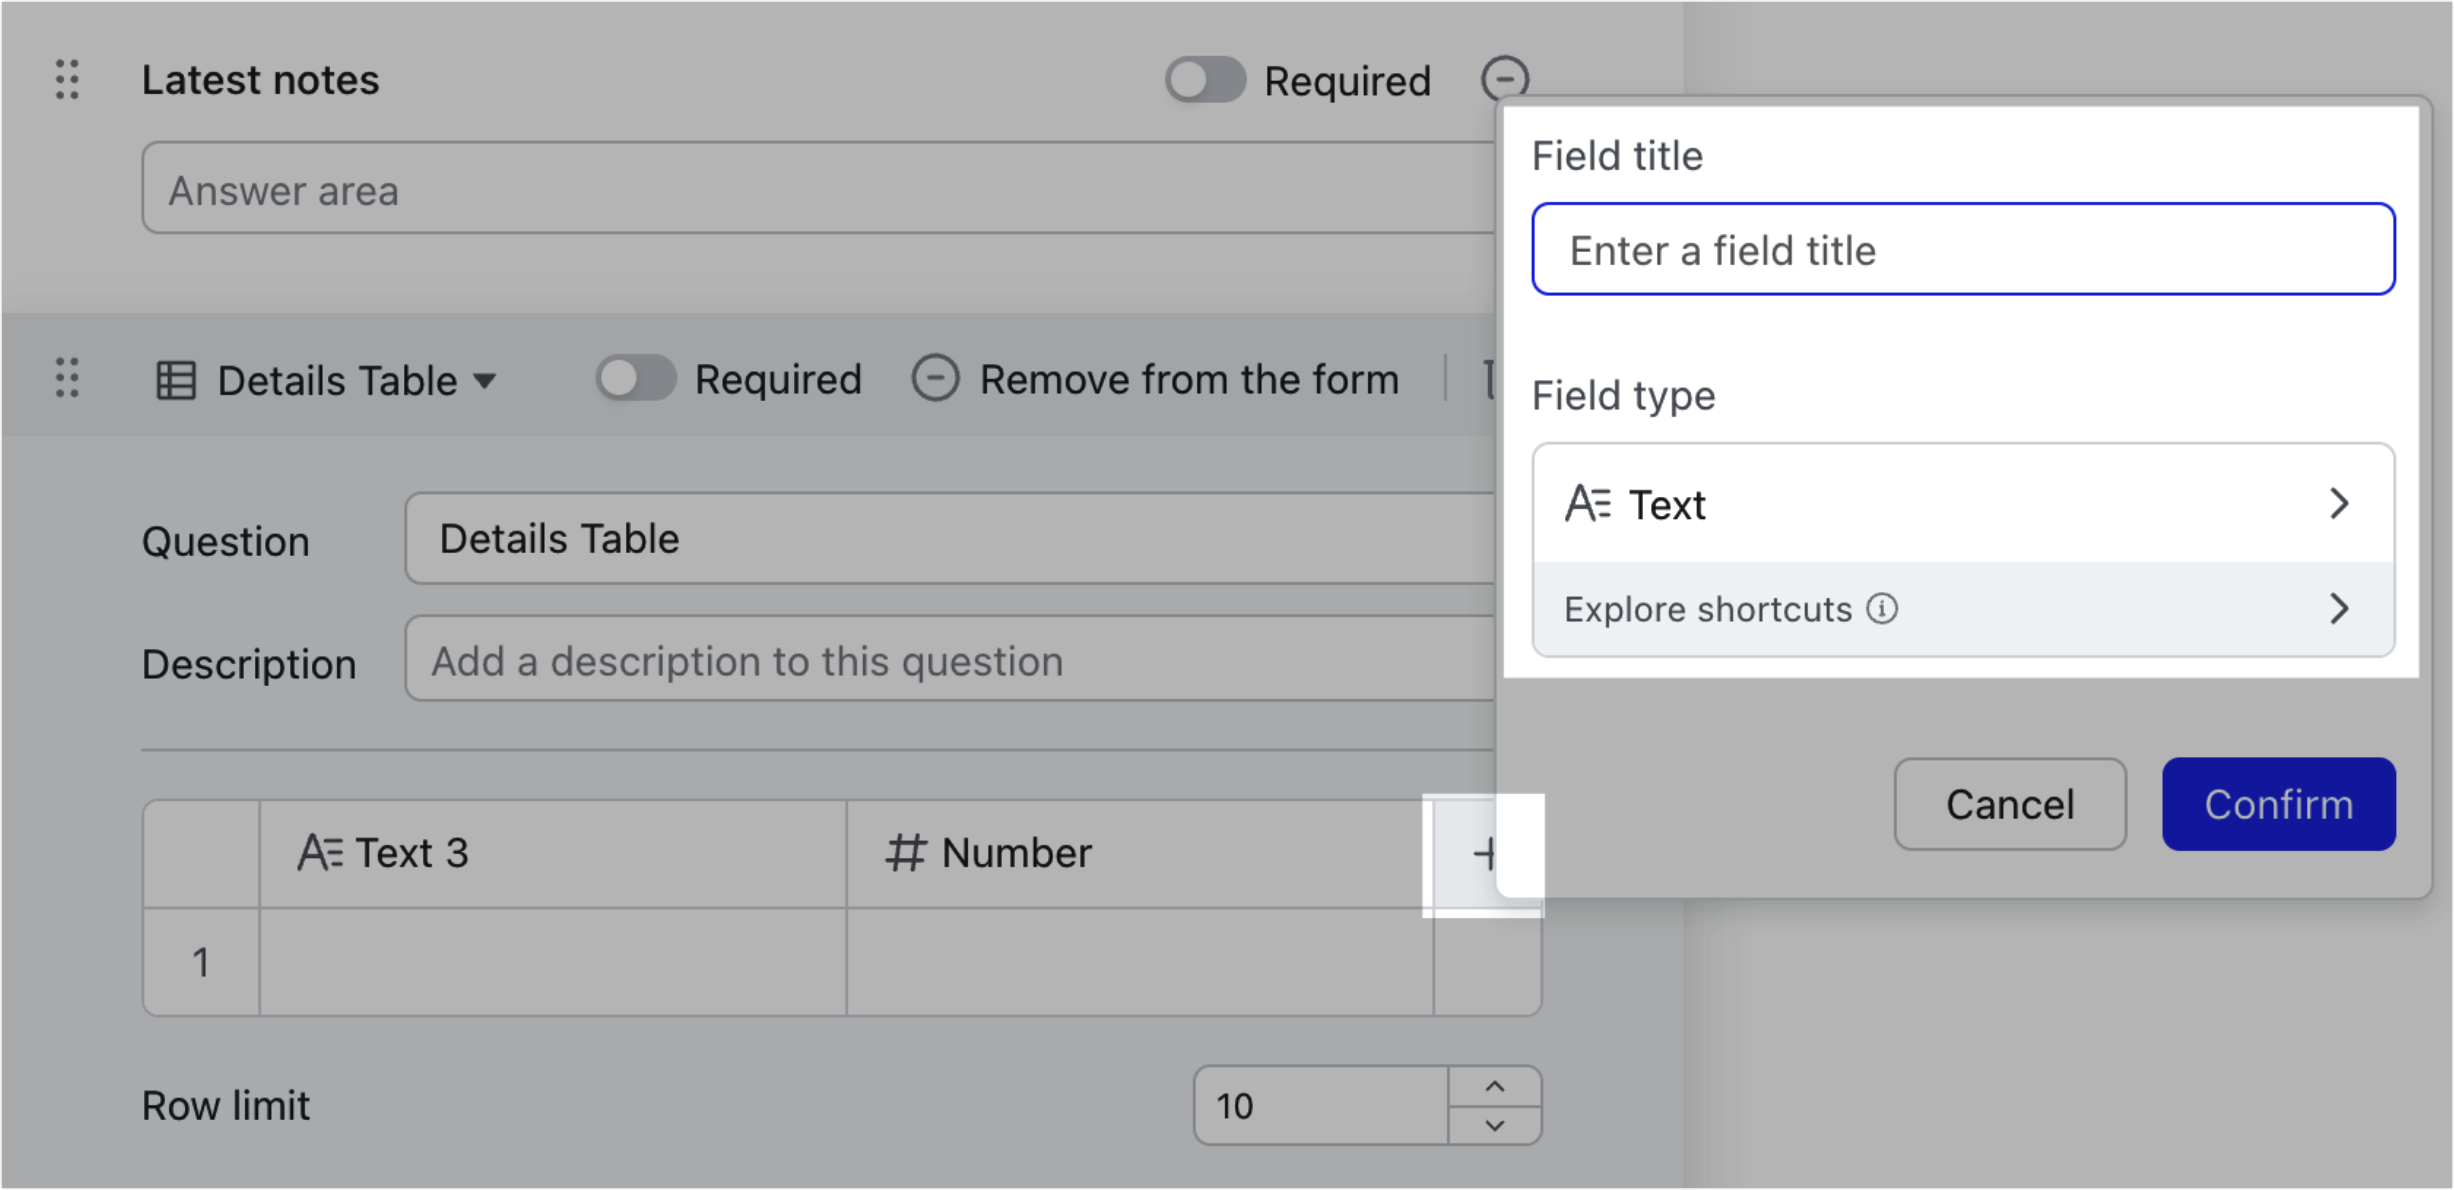
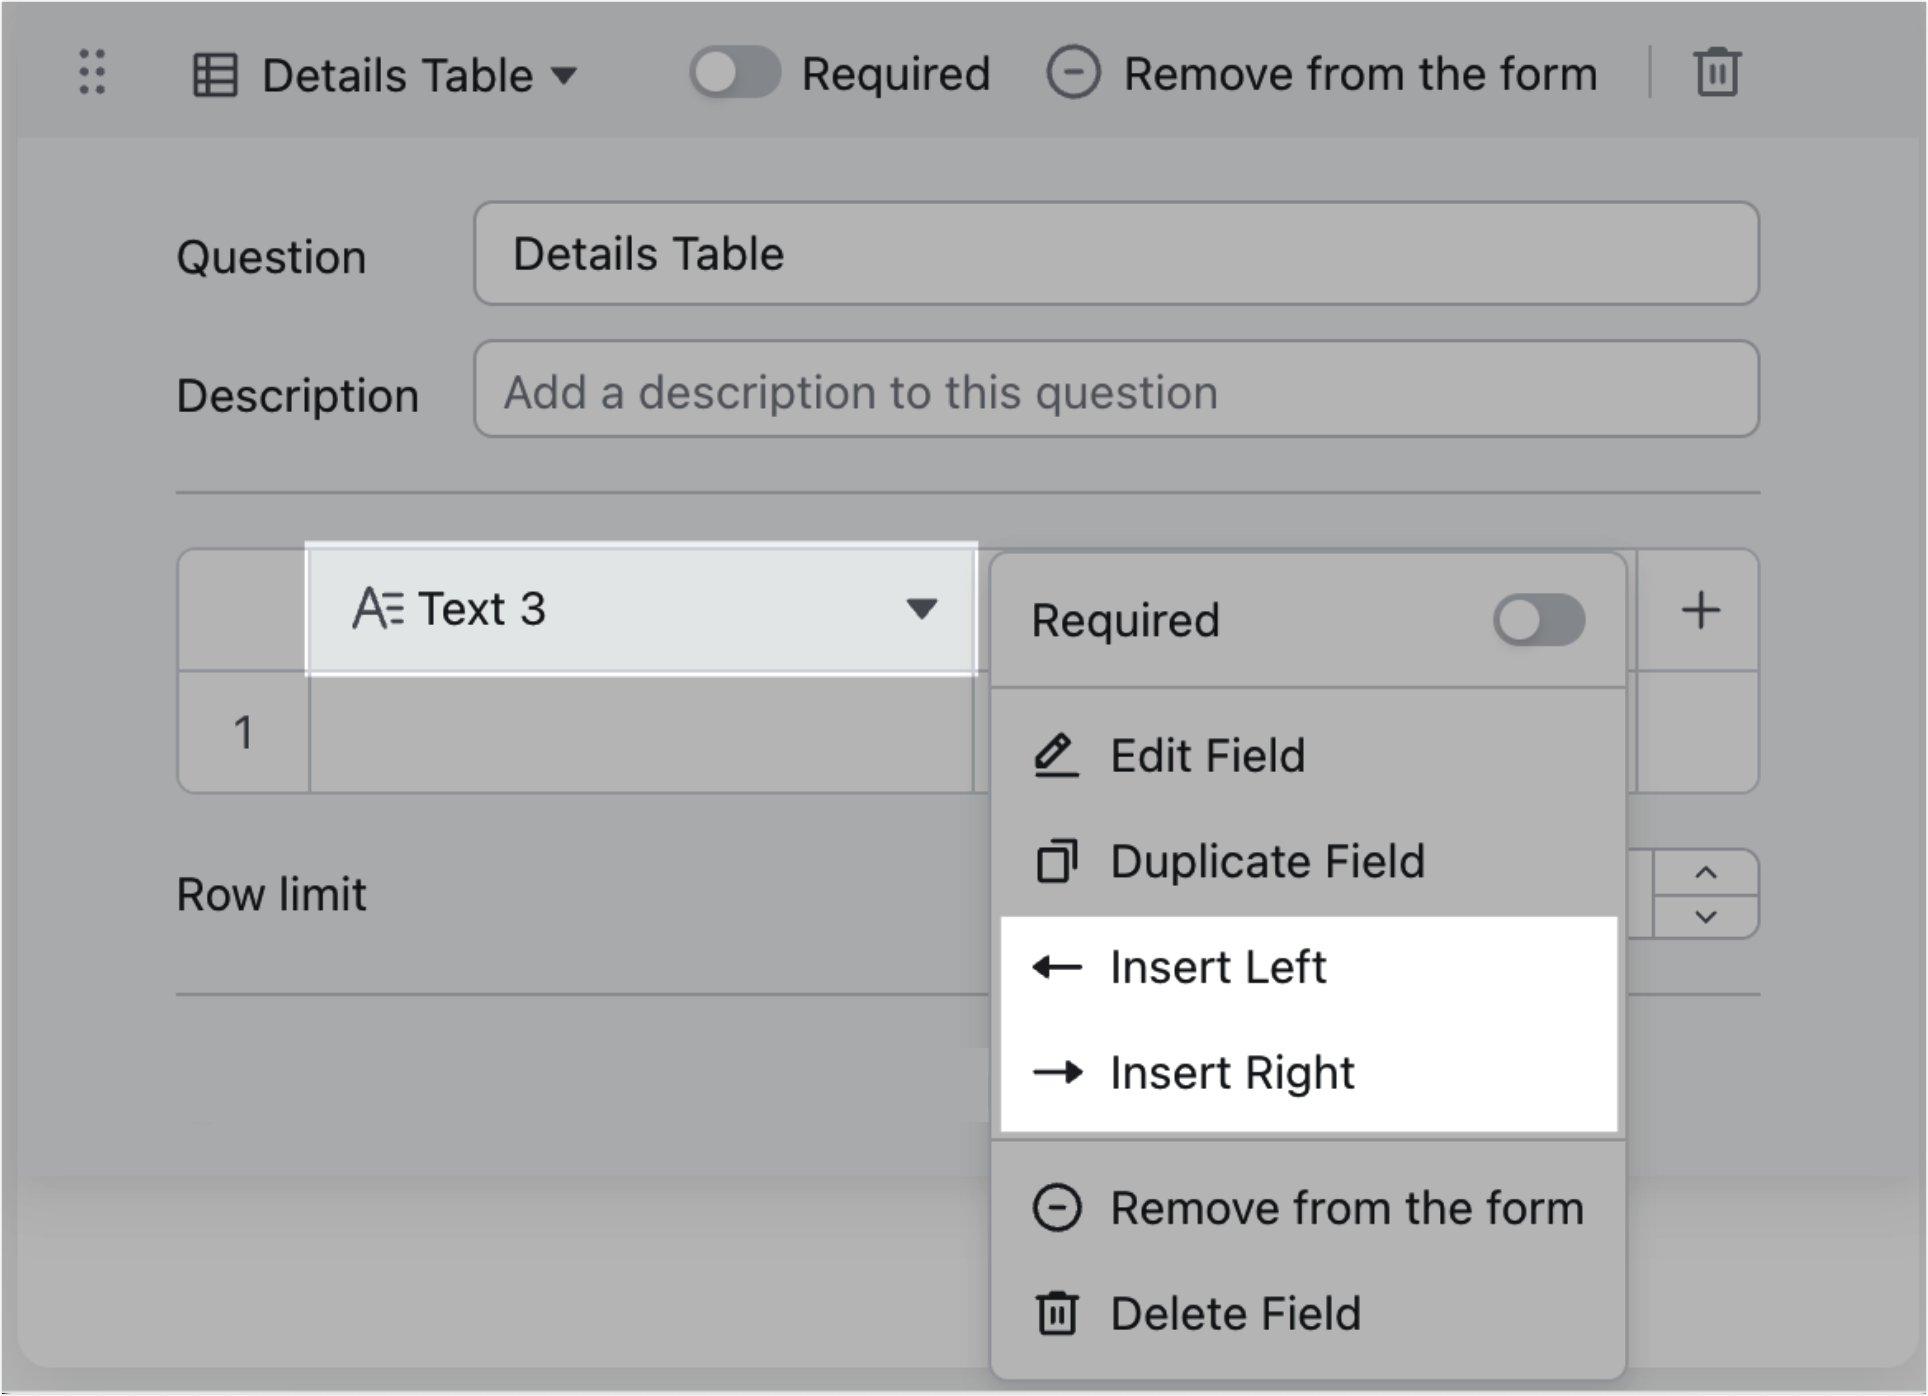
Click the + icon on the right side of the details table to add a field. You can also right-click the name of any field in the details table and select Insert Left or Insert Right to add a new field. By default, the new field will be a text field. You can change the field type and title as needed.
Note: The field types that can be added to the details table are the same as those that can be added to the form view. Neither the details table nor the form view support flow, button, numbering, created by, modified by, date created, or last modified date fields.
250px|700px|reset
250px|700px|reset
You can also add a new field to the details table by clicking any question type under Questions or New questions: Select the details table and click a question on the left-side pane.
250px|700px|reset
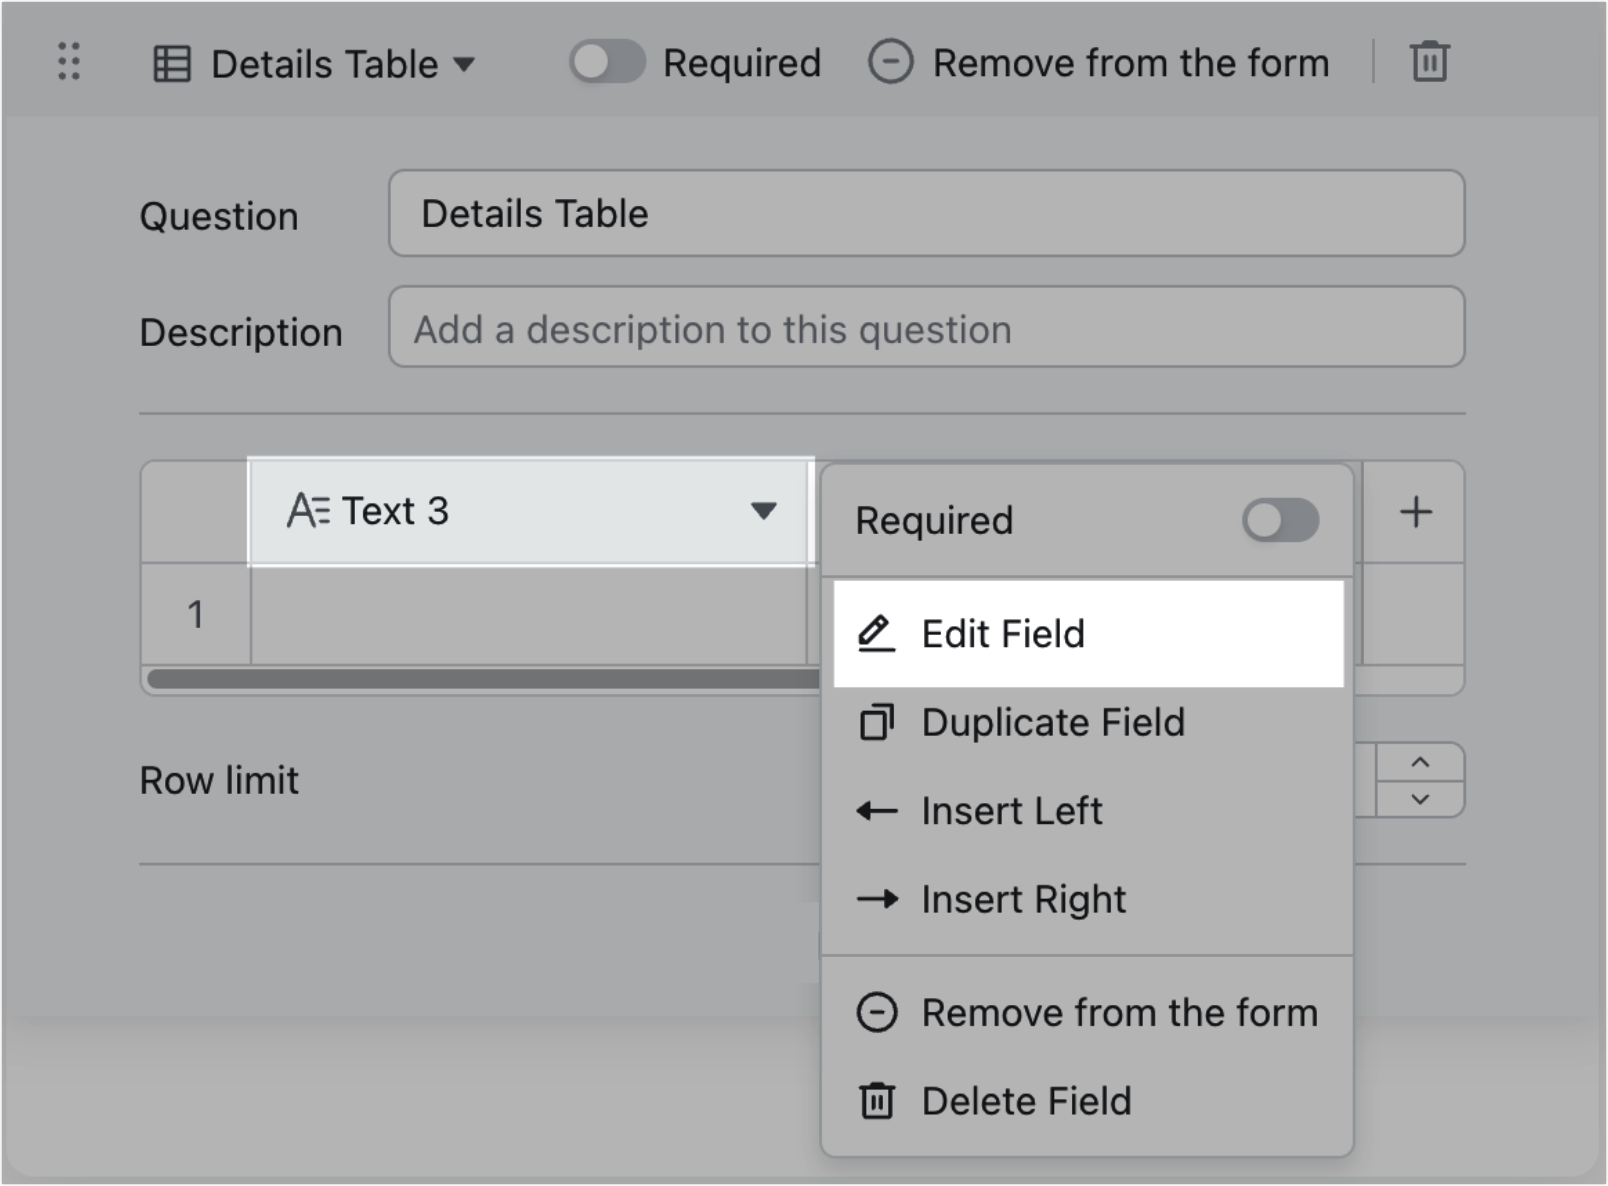
Modify the type or name of a field in the details table
Double-click the field name to modify it as needed. You can also right-click any field name in the details table and select Edit Field.
Note: Changes to the field name in the details table will be synced to the field name in grid view.

250px|700px|reset
250px|700px|reset
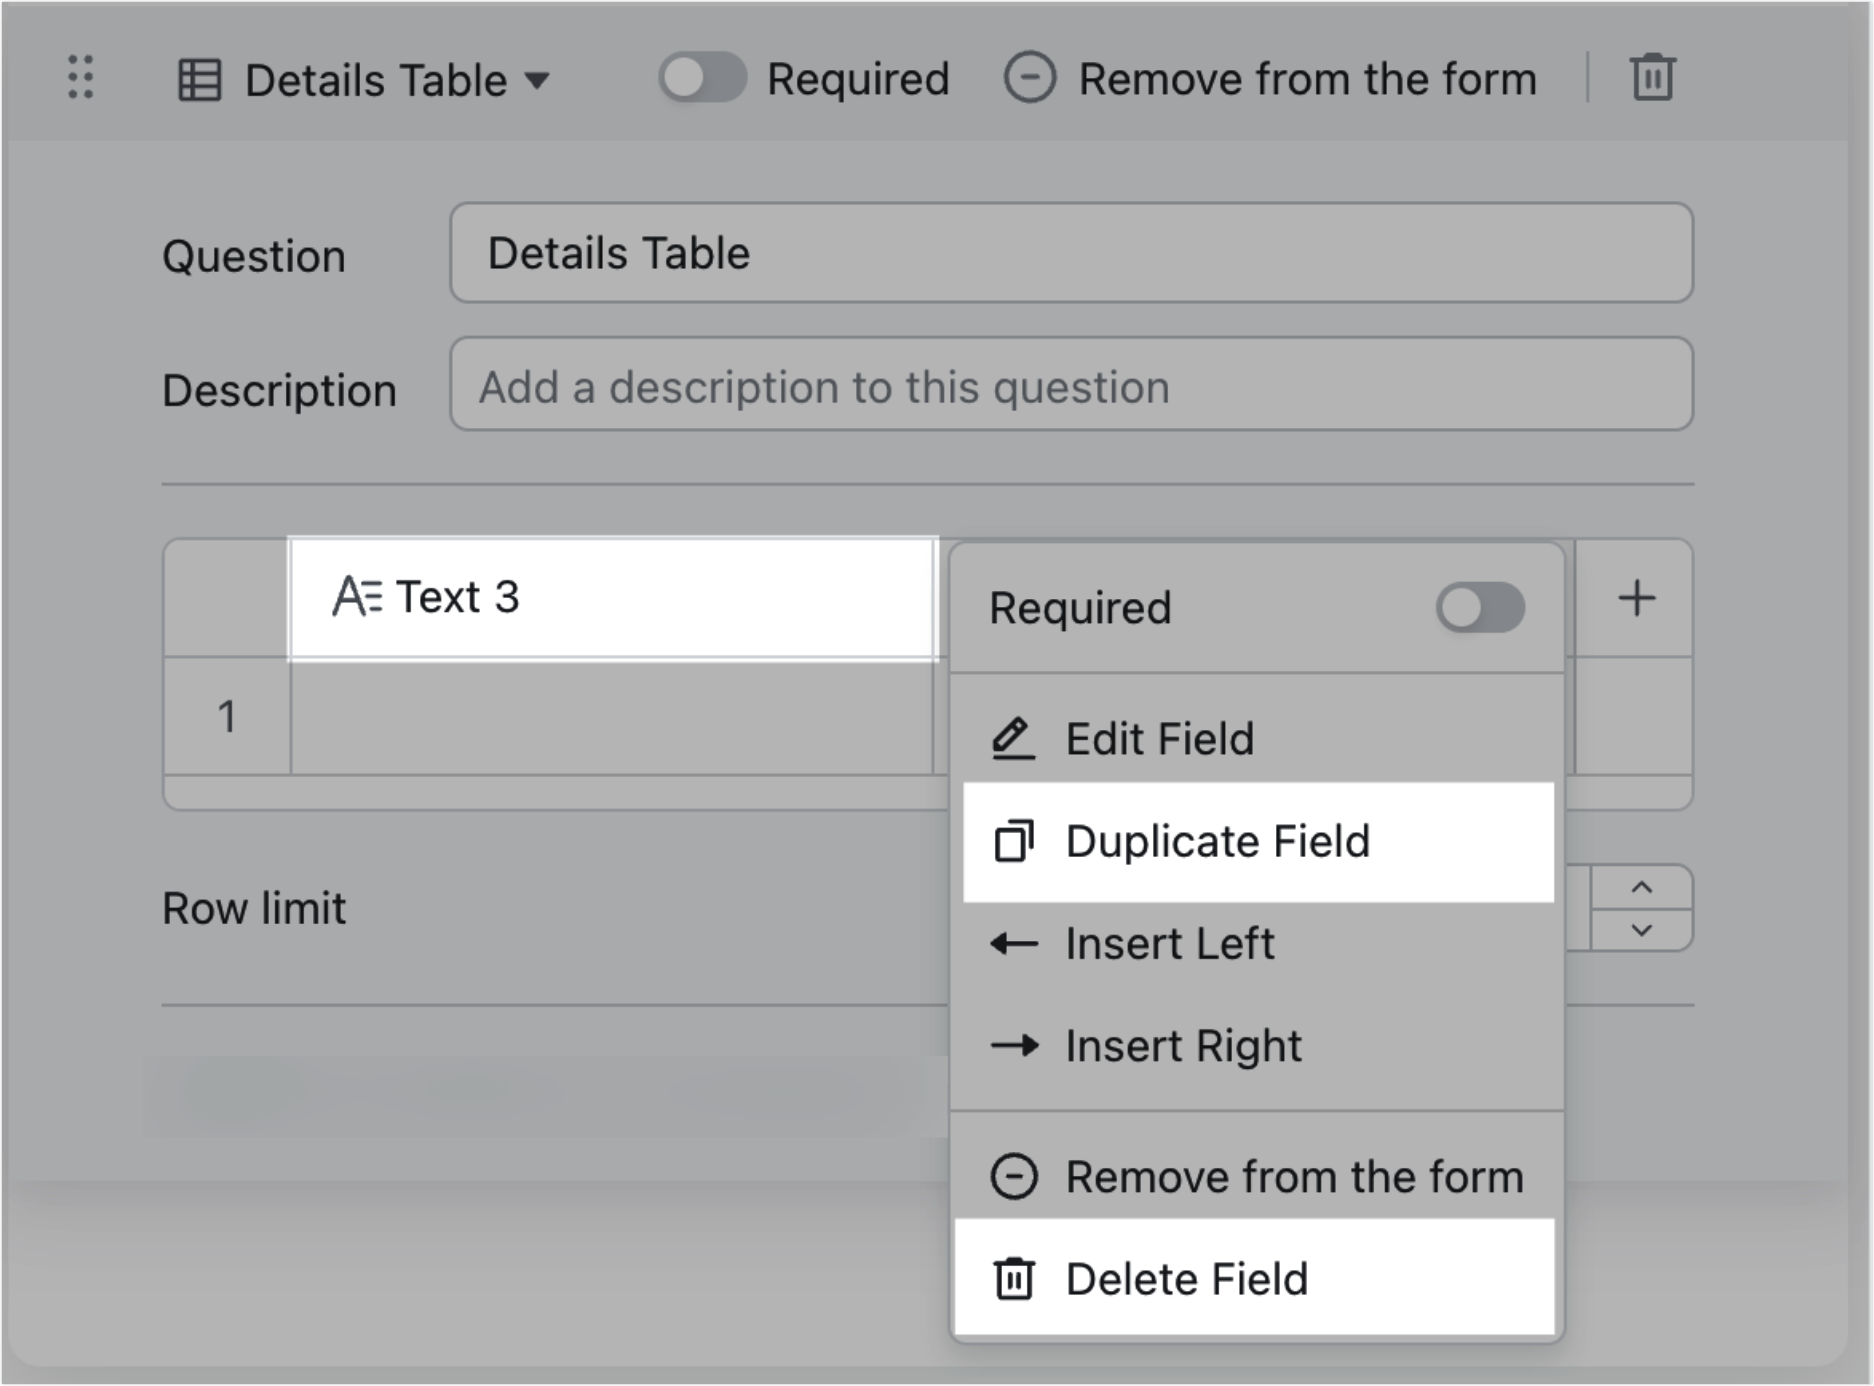
Copy or delete a field in the details table
- Duplicate a field: Right-click the name of a field in the details table and select Duplicate Field. A duplicate field will be added to the right.
- Delete a field: Right-click the name of a field in the details table and select Delete Field. If there is only one field remaining in the details table, it cannot be deleted.
250px|700px|reset
Move a field
Drag the field name to move the field and change the order of the fields.
Note: Changing the field positions in the details table will not change the field positions in the corresponding grid view.
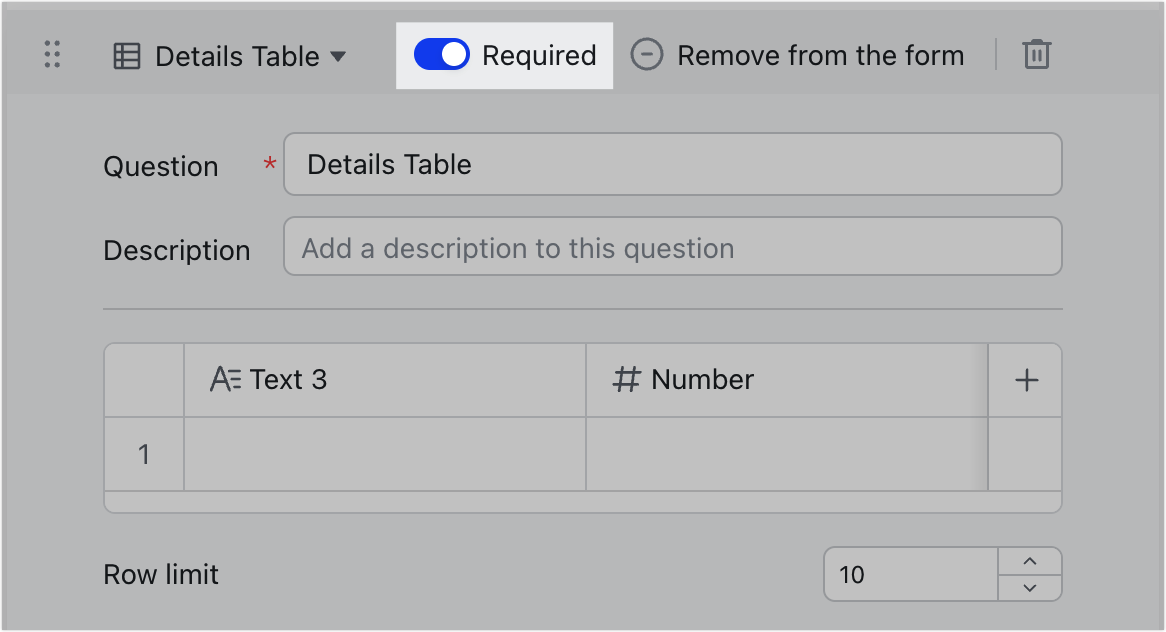
Set as required
- Set whether the details table question is required:
- Turn on Required at the top of the details table to set this question as required. If you only turn on this switch and do not set each field individually, the details table will be considered to have been filled out as long as one field is filled out. This means this setting cannot guarantee that all fields in the table are filled out, but can only ensure that the details table is not empty.
250px|700px|reset
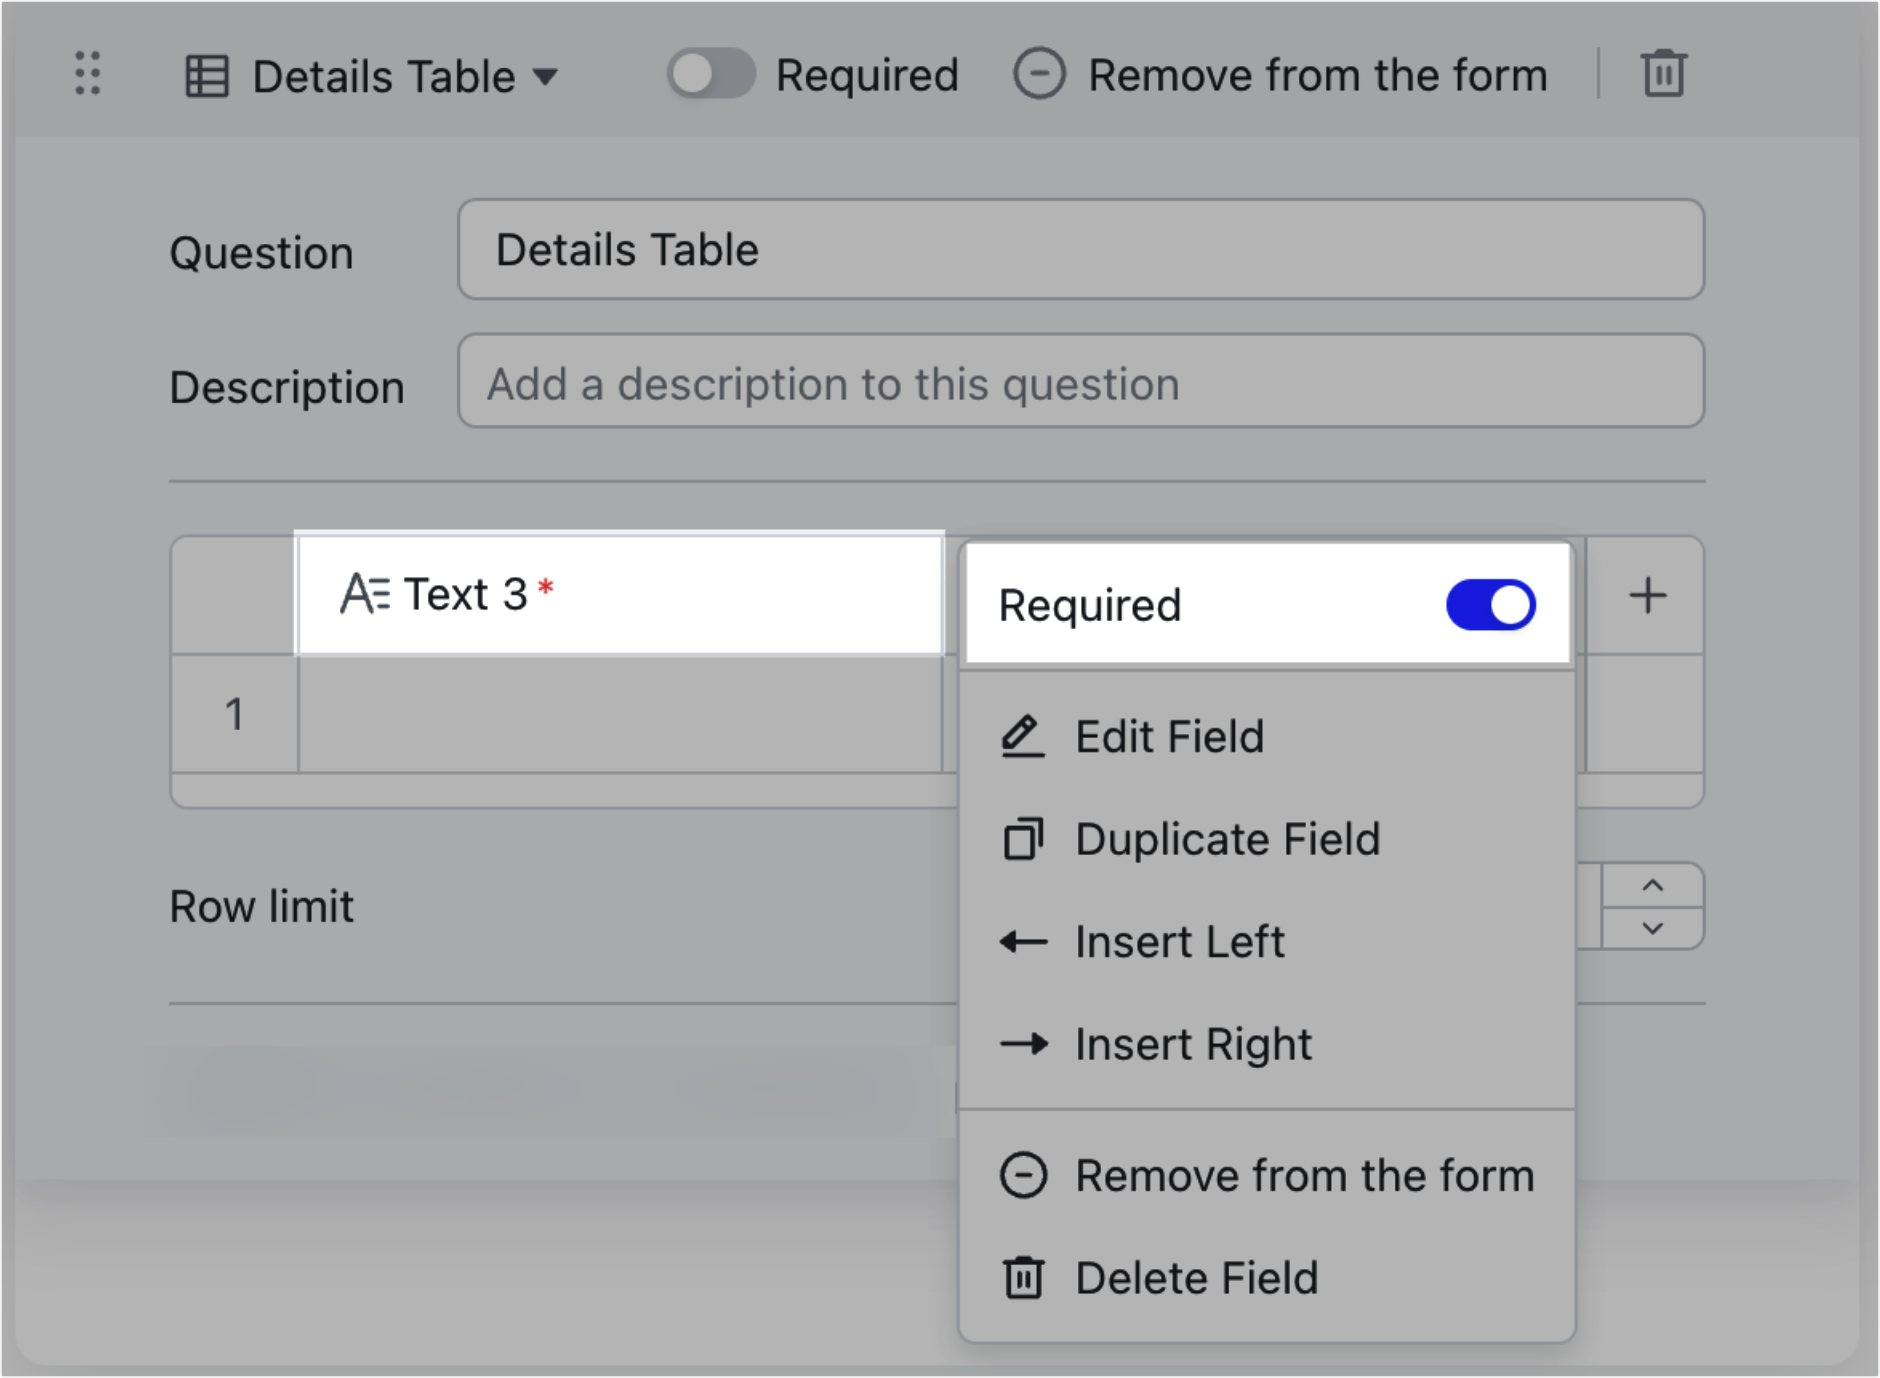
- Set whether each field in the details table is required:
- Right-click the name of the field in the details table and turn on Required. The names of the fields set as required will have a red asterisk on the right.
250px|700px|reset
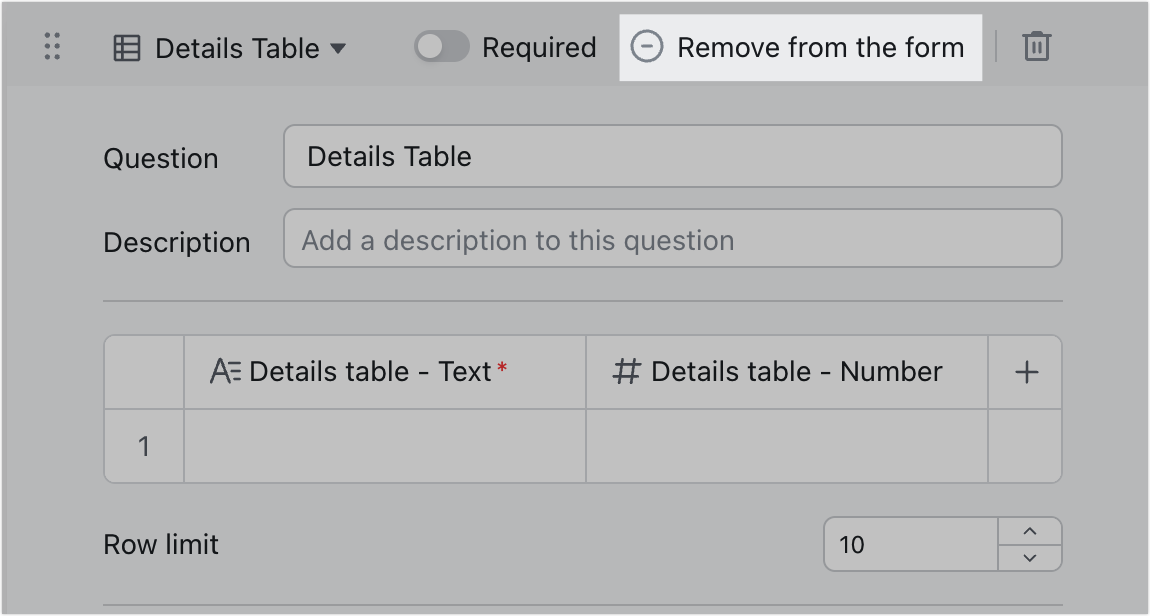
Remove from the form
- Remove the entire details table from the form:
- This action is equivalent to removing all fields from the details table. Click Remove from the form in at the top of the details table to remove the details table from the form. Once removed, these fields will not be deleted, and you will still be able to find them under Questions on the left-side pane and in the corresponding grid view.
- Note: If you add these fields back to the form by clicking the + icon or Add all, they will be added as separate questions instead of fields in a details table.

250px|700px|reset
250px|700px|reset
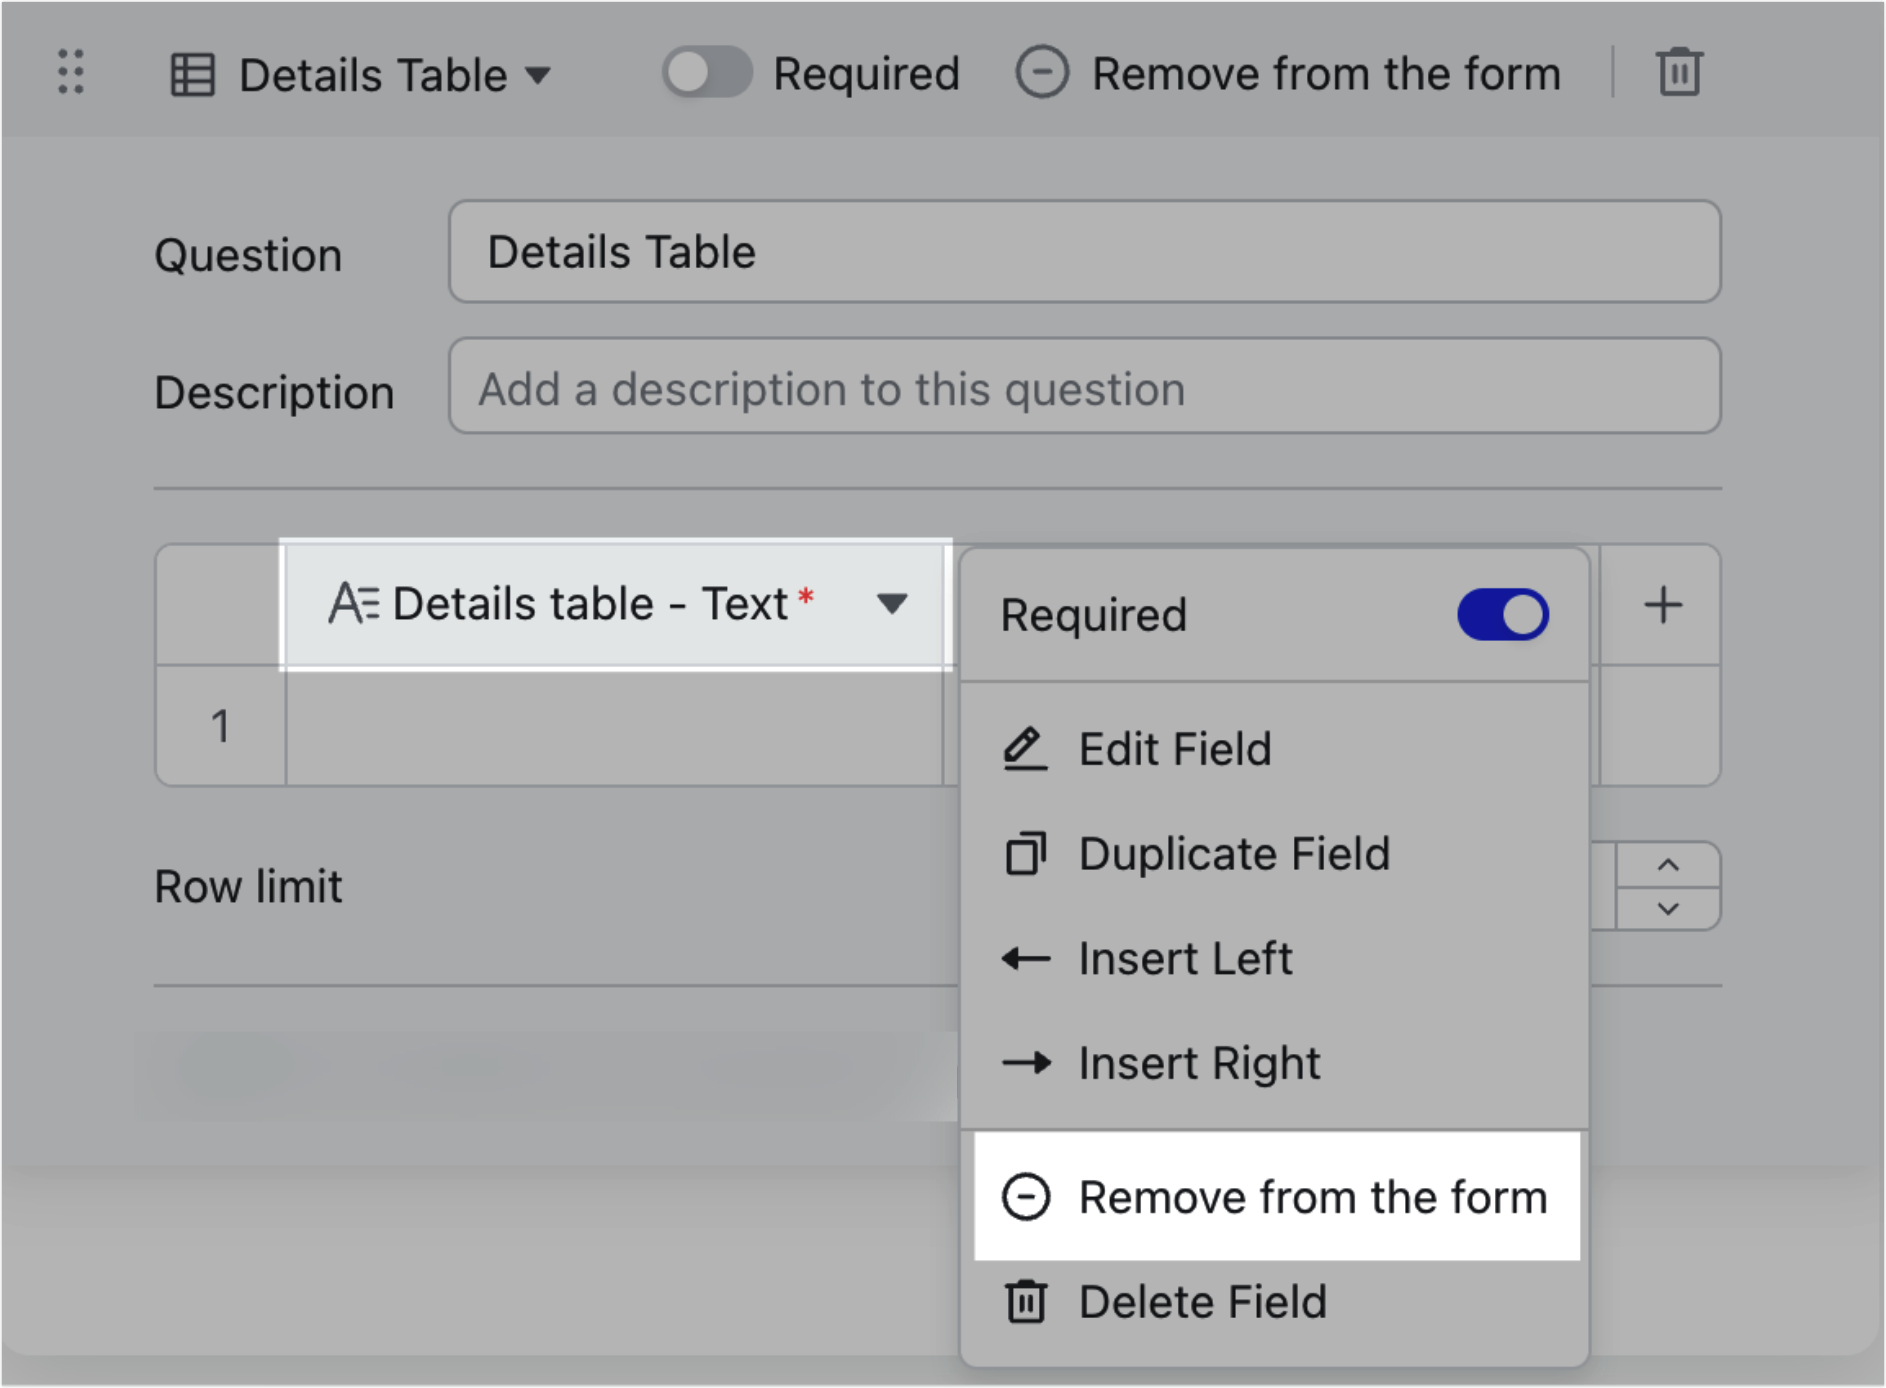
- Remove a field from the details table:
- Right-click the name of a field in the details table and select Remove from the form. Fields removed from the form will not be deleted, and you will still be able to find them under Questions on the left-side pane and in the corresponding grid view. When there is only one field left in the details table, it cannot be removed from the form.
- Unlike removing the entire details table, when fields are removed from the form using this method and then added back to the form later, they will still be added back to a details table.
250px|700px|reset
Other settings for details tables
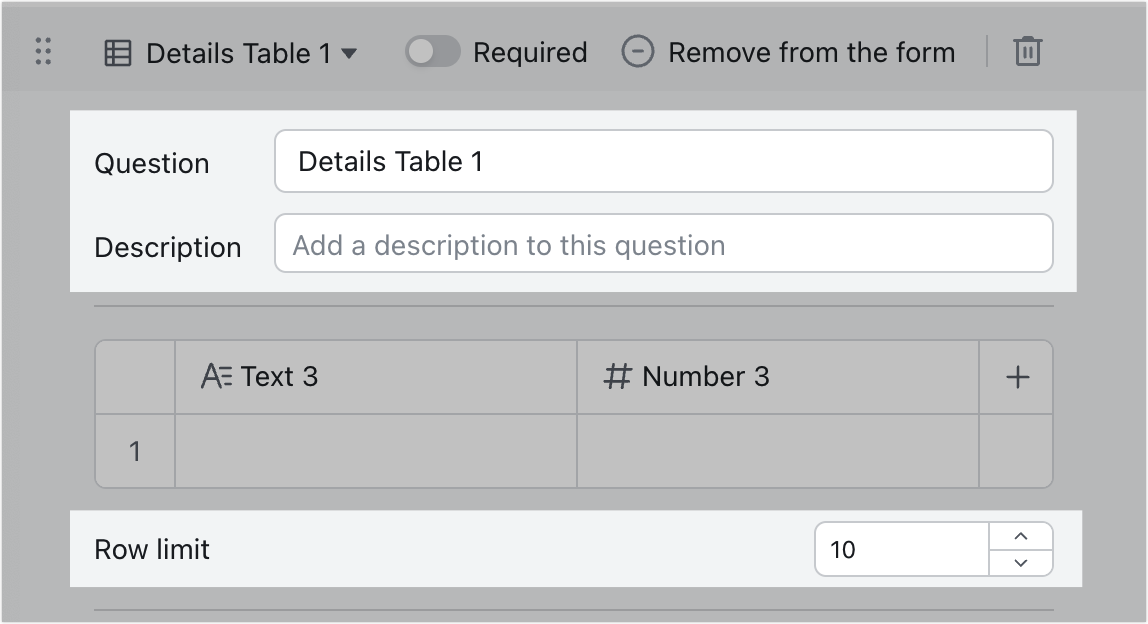
- Modify the Question field: After creating a new details table, the Question field will be called Details Table by default, which can be modified as needed. Modifying the Question field here will not affect the field name in grid view.
- Enter or modify the Description field: You can enter a description for this question in the Description field, which is optional.
- Set the Row limit: You can set an upper limit for the number of rows to be filled out in the details table, that is, the maximum number of rows of data that a respondent can add to the details table. The default value is 10, which can be changed to any integer between 1 and 100.
250px|700px|reset
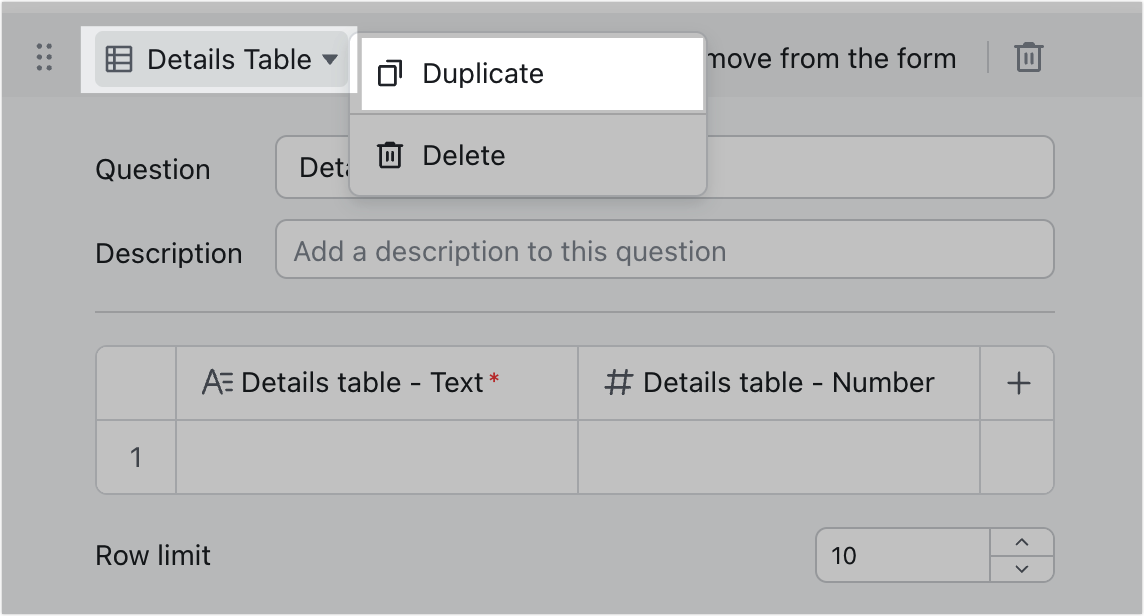
- Copy the details table: Click the name of the details table and select Duplicate to copy all the settings and content of the details table.
250px|700px|reset
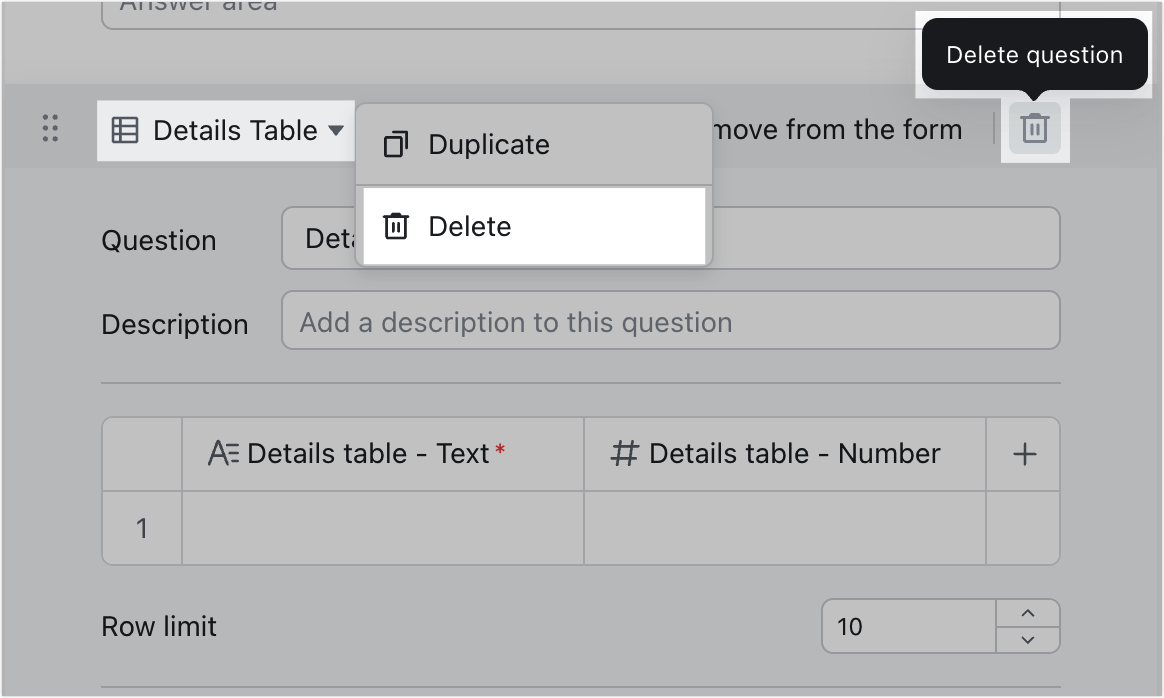
Delete a details table from a form
Click the Delete question icon in the upper-right corner of the details table or click the name of the details table and select Delete. The corresponding fields in the grid view will also be deleted.
250px|700px|reset
Fill out a details table in a form
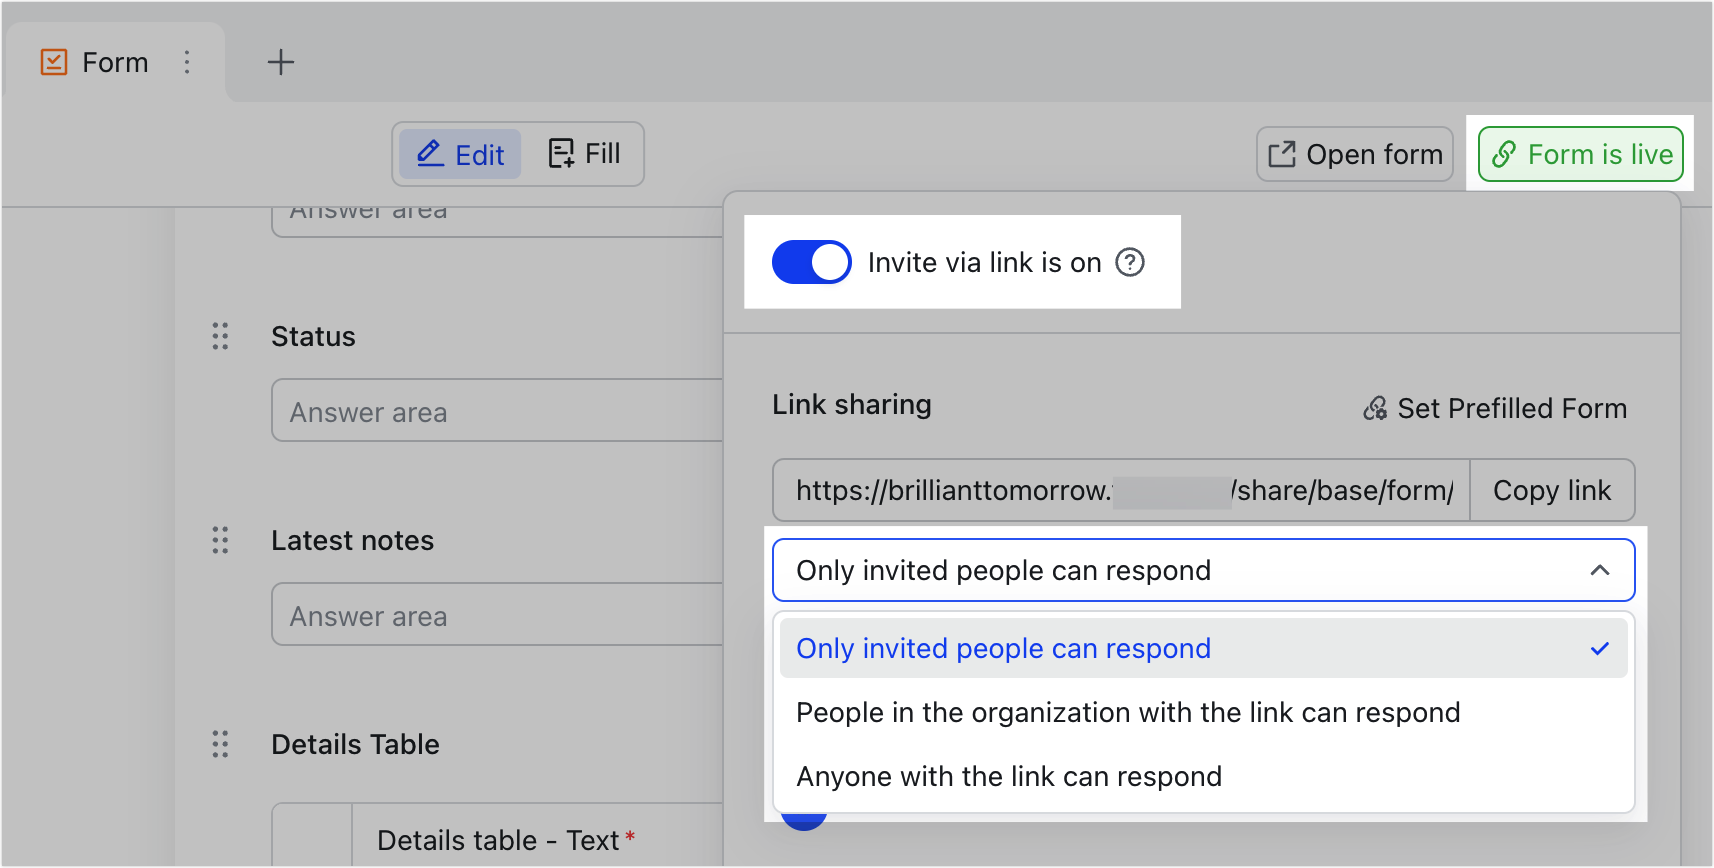
Who can fill out the form depends on the sharing scope of the form.
250px|700px|reset
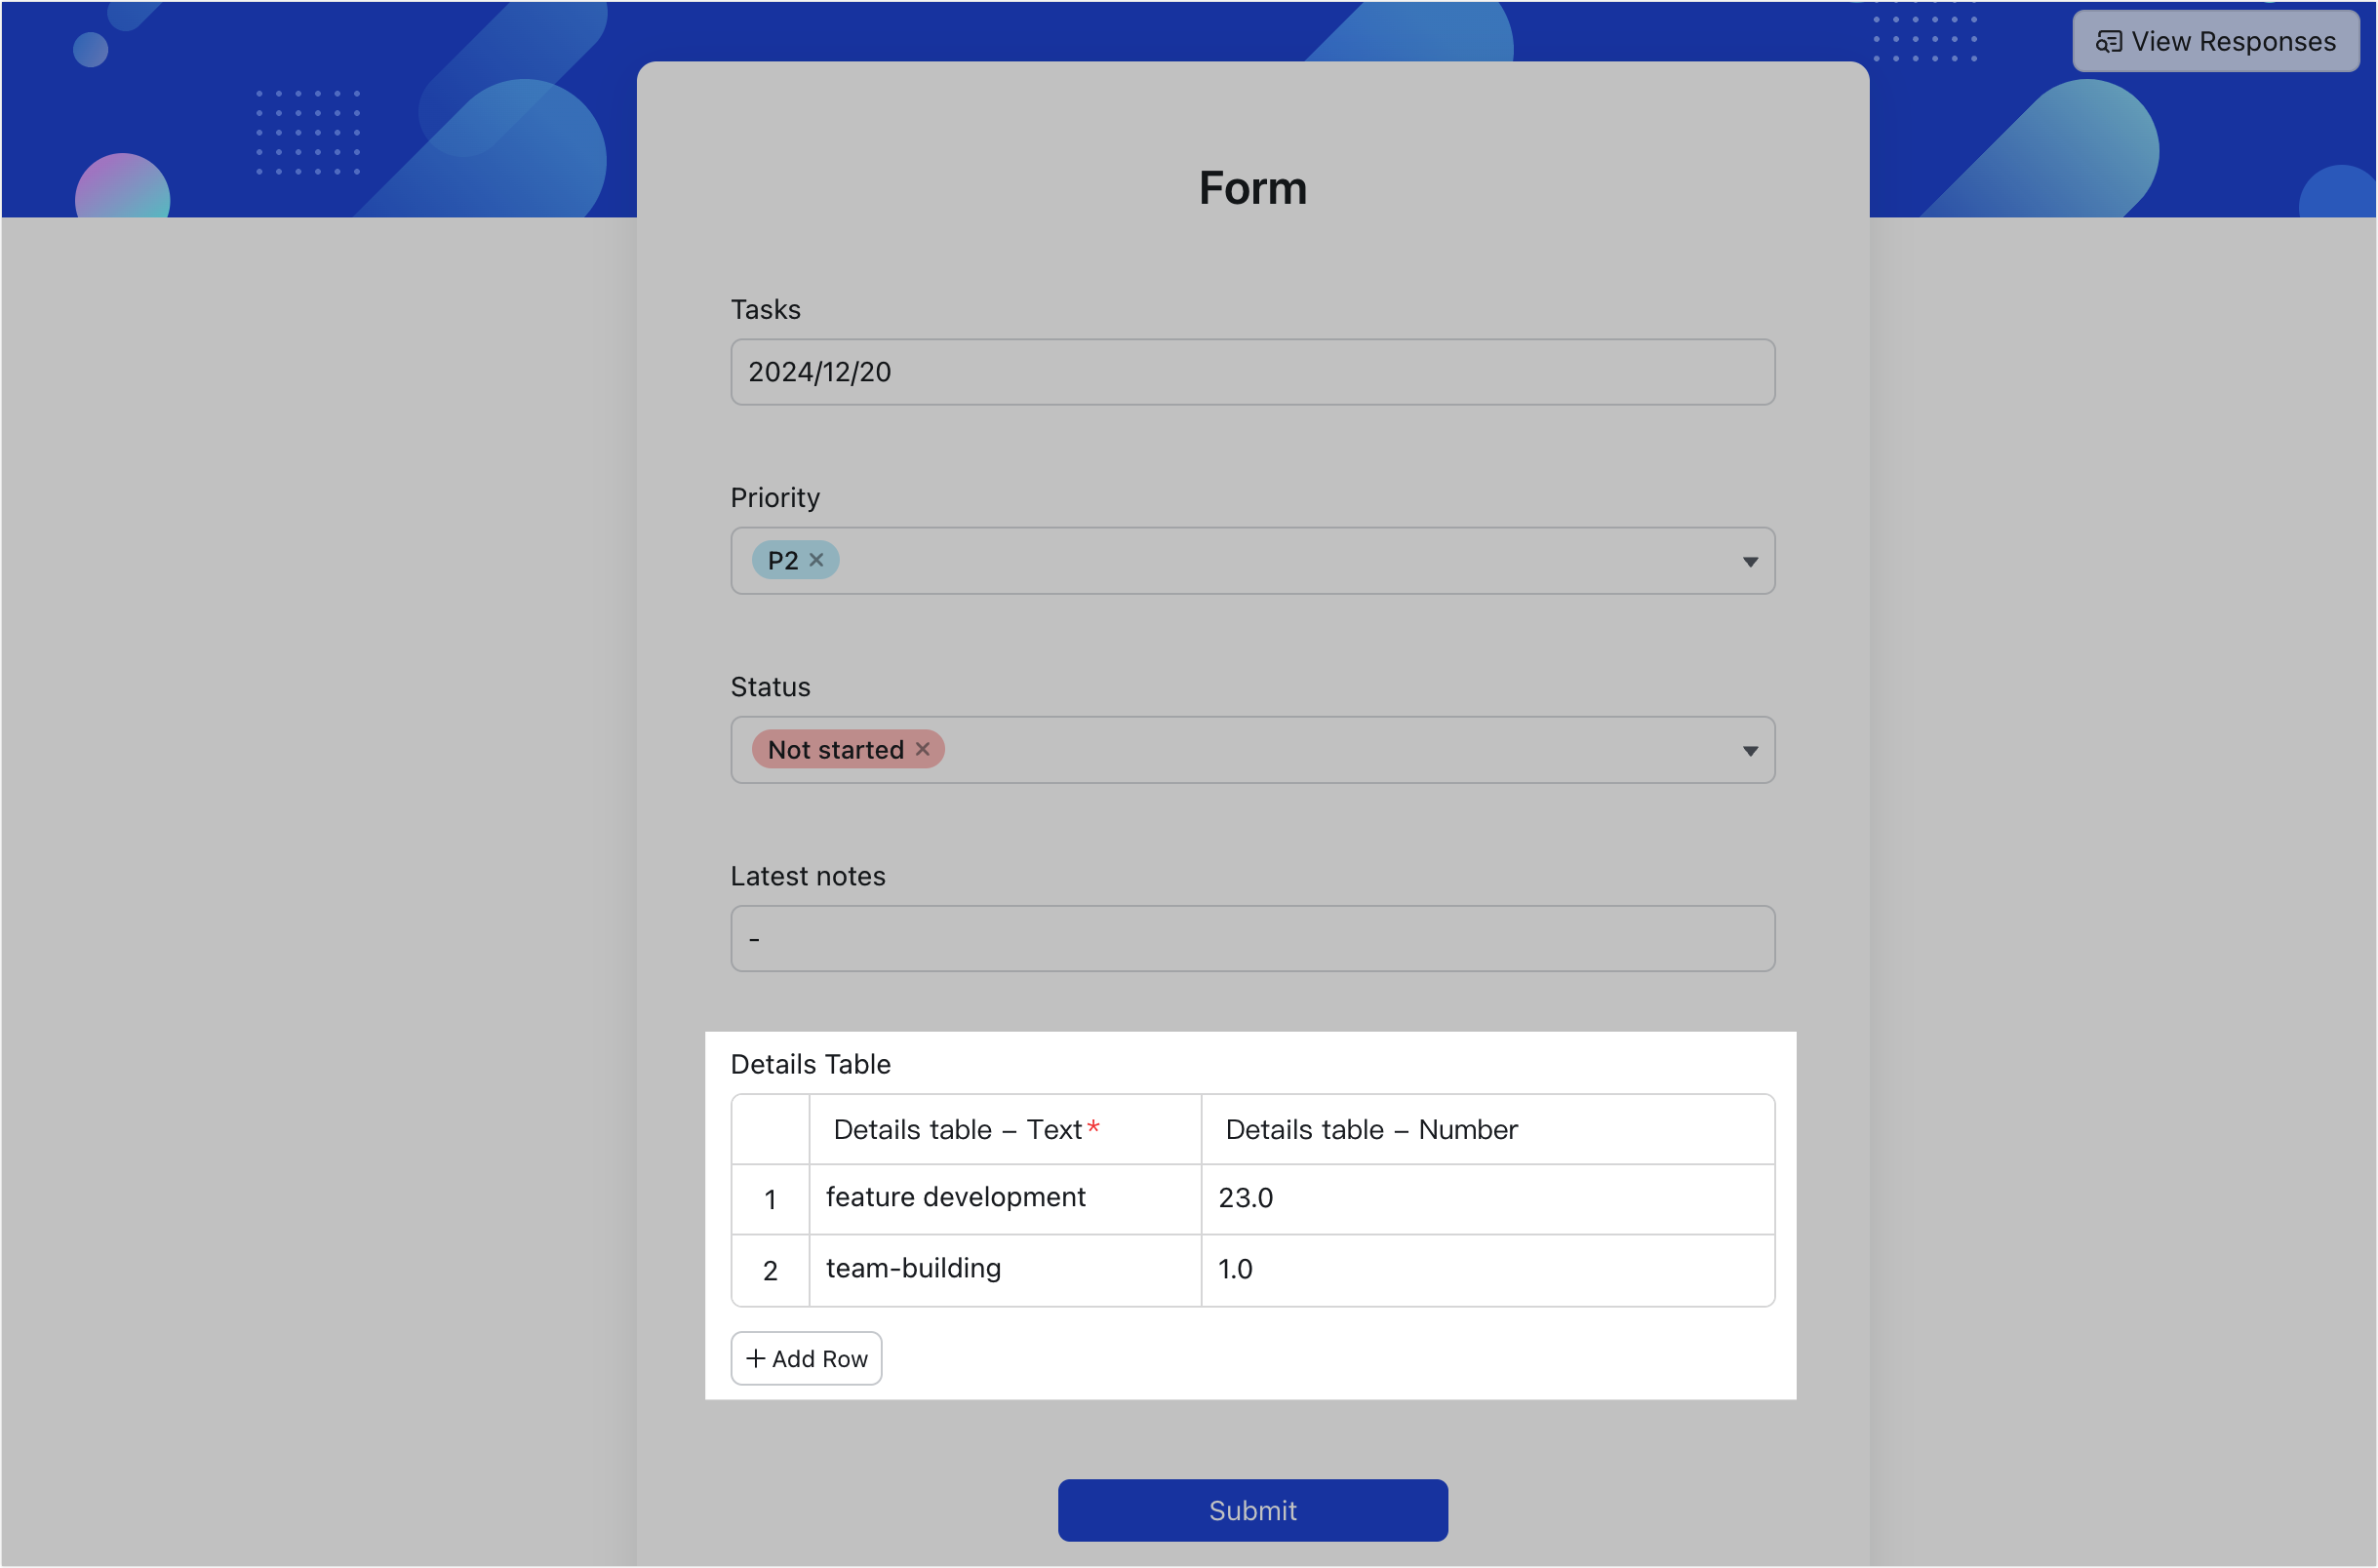
Fill out a form on the web version and desktop app
Go to the Fill tab of the form and click the cells in the details table to fill them out. The number of rows that can be added to the details table depends on the Row limit setting of the details table.
- Add a row:
- Method 1: Click Add Row below the table to add a new row.
- Method 2: Right-click a row and select Insert [number] Above or Insert [number] Below to add new rows.
- Delete a row:
- Method 1: Hover over the row, and click the Delete this row icon that appears on the right.
- Method 2: Right-click a row and select Delete this row.

250px|700px|reset
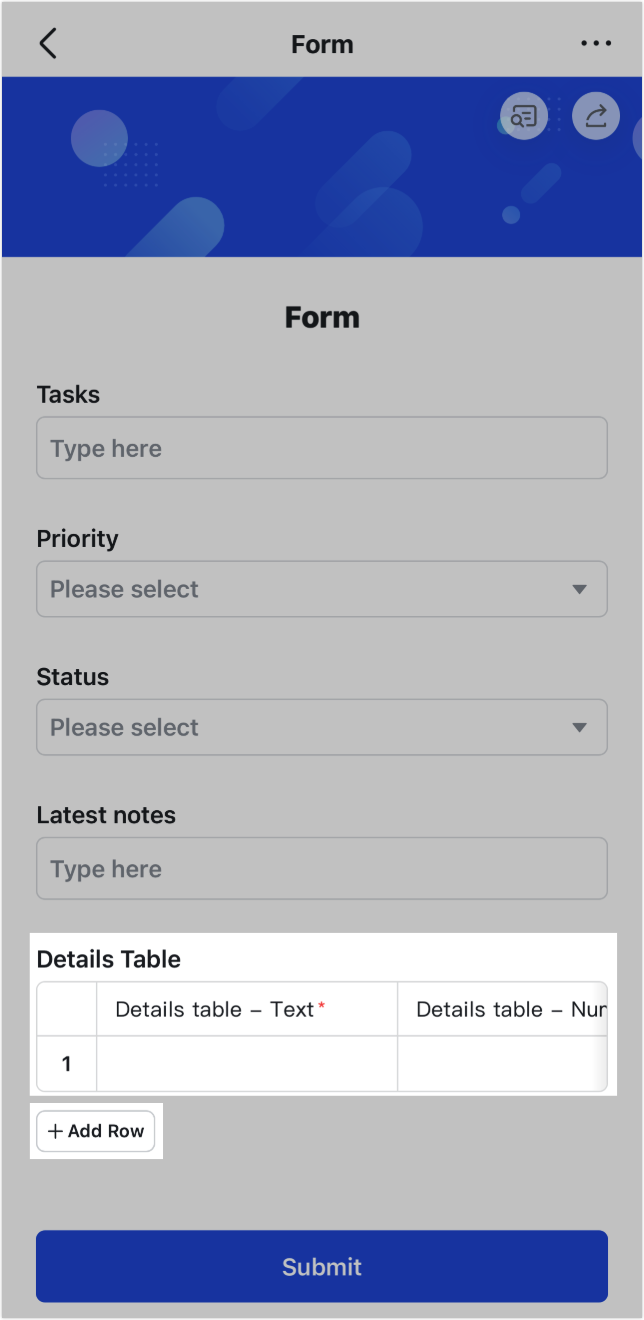
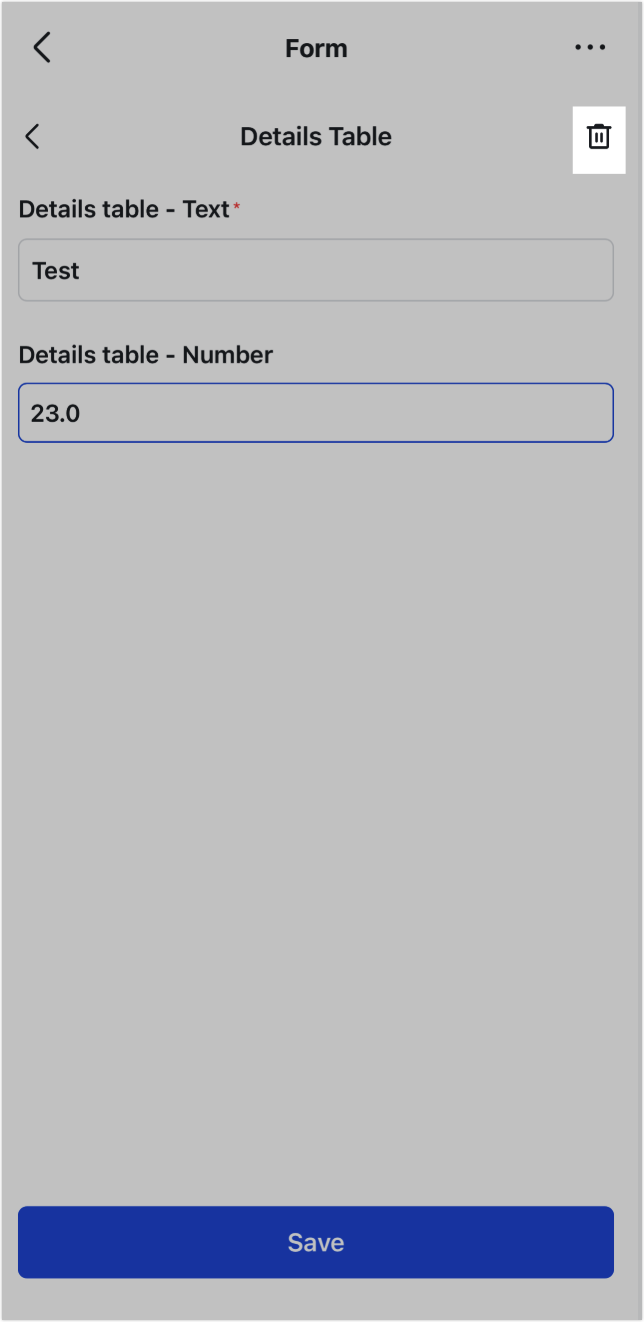
Fill out a form on the mobile app
Go to the form filling page, tap a cell, and fill it out on the page that opens. The number of rows that can be added to the details table depends on the Row limit setting of the details table.
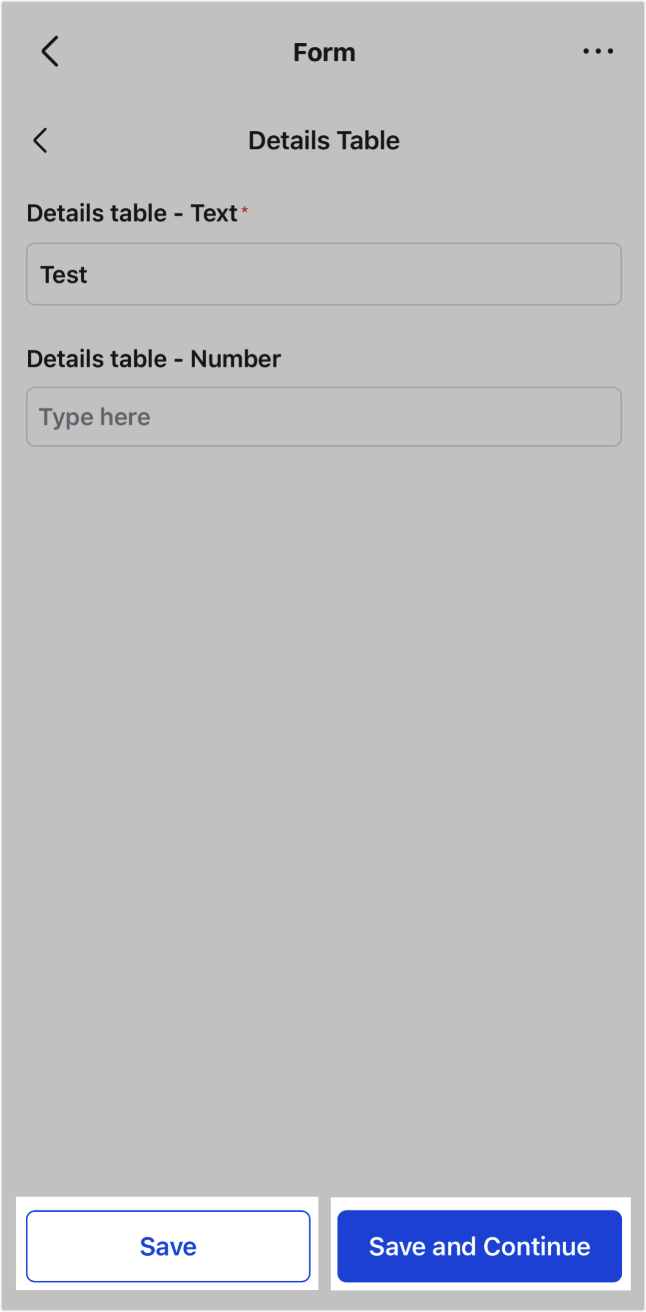
- Add a row: On the form filling page, tap Add Row to add a new row.
- At the bottom of the page, there are two buttons: Save and Save and Continue. Fill out the row, and tap Save and Continue to add another row or tap Save to return to the form.
250px|700px|reset
250px|700px|reset
- Delete a row: Tap the row to be deleted, then tap the Delete icon in the upper-right corner of the details page. Deletions cannot be undone.
250px|700px|reset
How data is stored for details tables
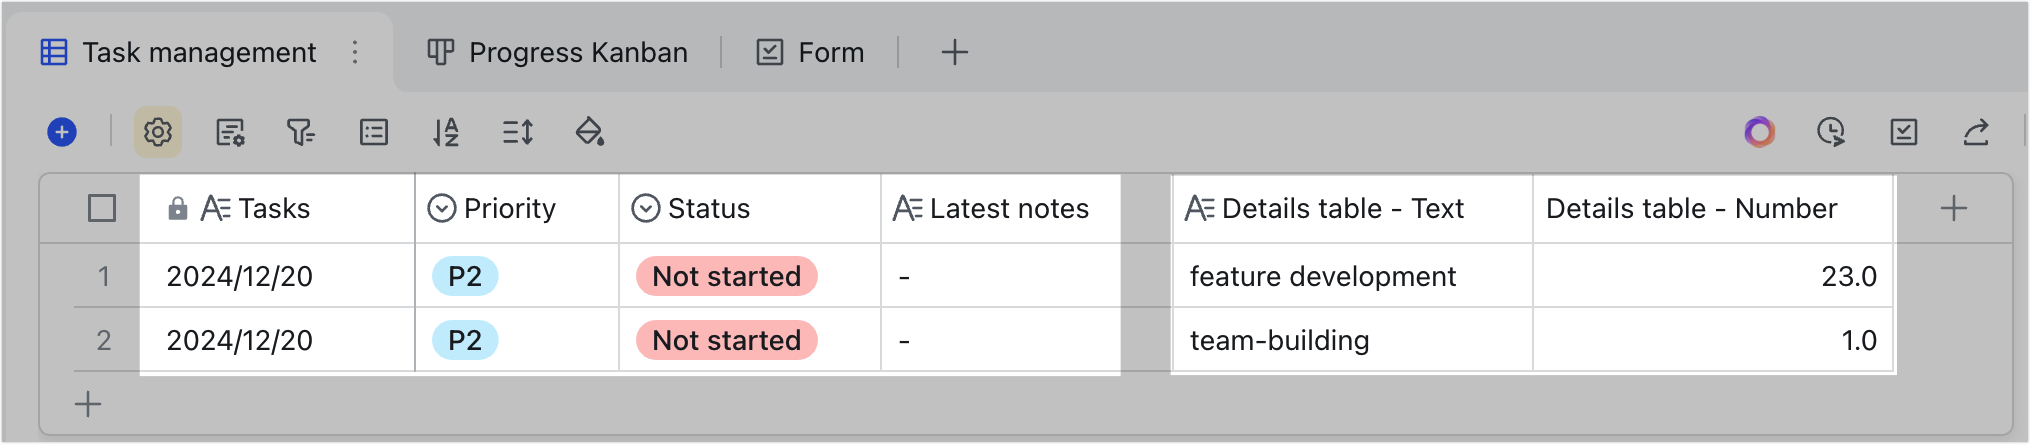
Data that is entered into a details table is split into multiple rows and added to grid view. Each row of data in a details table will be displayed as a separate row in the grid view.
In the example below, the respondent filled out two rows in the details table. In the grid view, this will be displayed as two rows of records, and the Tasks, Priority, Status, Latest notes and other fields will be automatically filled out based on the answers to the other questions in the form.
250px|700px|reset
250px|700px|reset
Note: If the form contains multiple details tables, the final number of records generated depends on the maximum number of rows that were filled out in each details table. For example, if three rows of data were entered in the first details table and five rows of data were entered in the second details table, then five rows of records will be generated in grid view.
III. FAQs