
Available with these plans:
Starter
Basic
Pro
Enterprise
1 role
30 roles
30 roles
300 roles
The above numbers are the maximum roles you can create for each plan. To upgrade your Lark Plan or for more information, contact Support or your Customer Success Manager. The Lark Basic plan supports only specific countries and regions.
00:00
/
00:00
Audio/video is not supported
Please TryRefresh
Play
Fullscreen
Click and hold to drag
I. Intro
Availability: Some of the features described in this article are in beta.
Who can perform these steps: Primary administrators or administrators with access to "Administrator Permissions".
There are two types of administrators in the Lark Admin Console:
- Primary administrators (including the organization's founder), who have access to all permissions in the Admin Console and can define other administrator roles.
- Administrators with specific roles, who can manage specific parts of the Admin Console.
The primary administrator can create specific roles, such as HR admin or IT admin, and assign necessary permissions and members to them. Then, the assigned members in a role share the same assigned permissions.
II. Steps
Create administrator roles
- Open the Lark Admin Console and click Settings > Administrator Permissions > Administrator Role.
- Click Create Role in the upper-right corner.
- 250px|700px|reset
- Set the role's information and click Next.
- Select which permissions the role will have and click Next.
- 250px|700px|reset
- Note: If you selected a parent administrator role in the previous step, you can only select from the permissions owned by the parent role. For more information, see the "III. About management scope of administrator roles" section in this article.
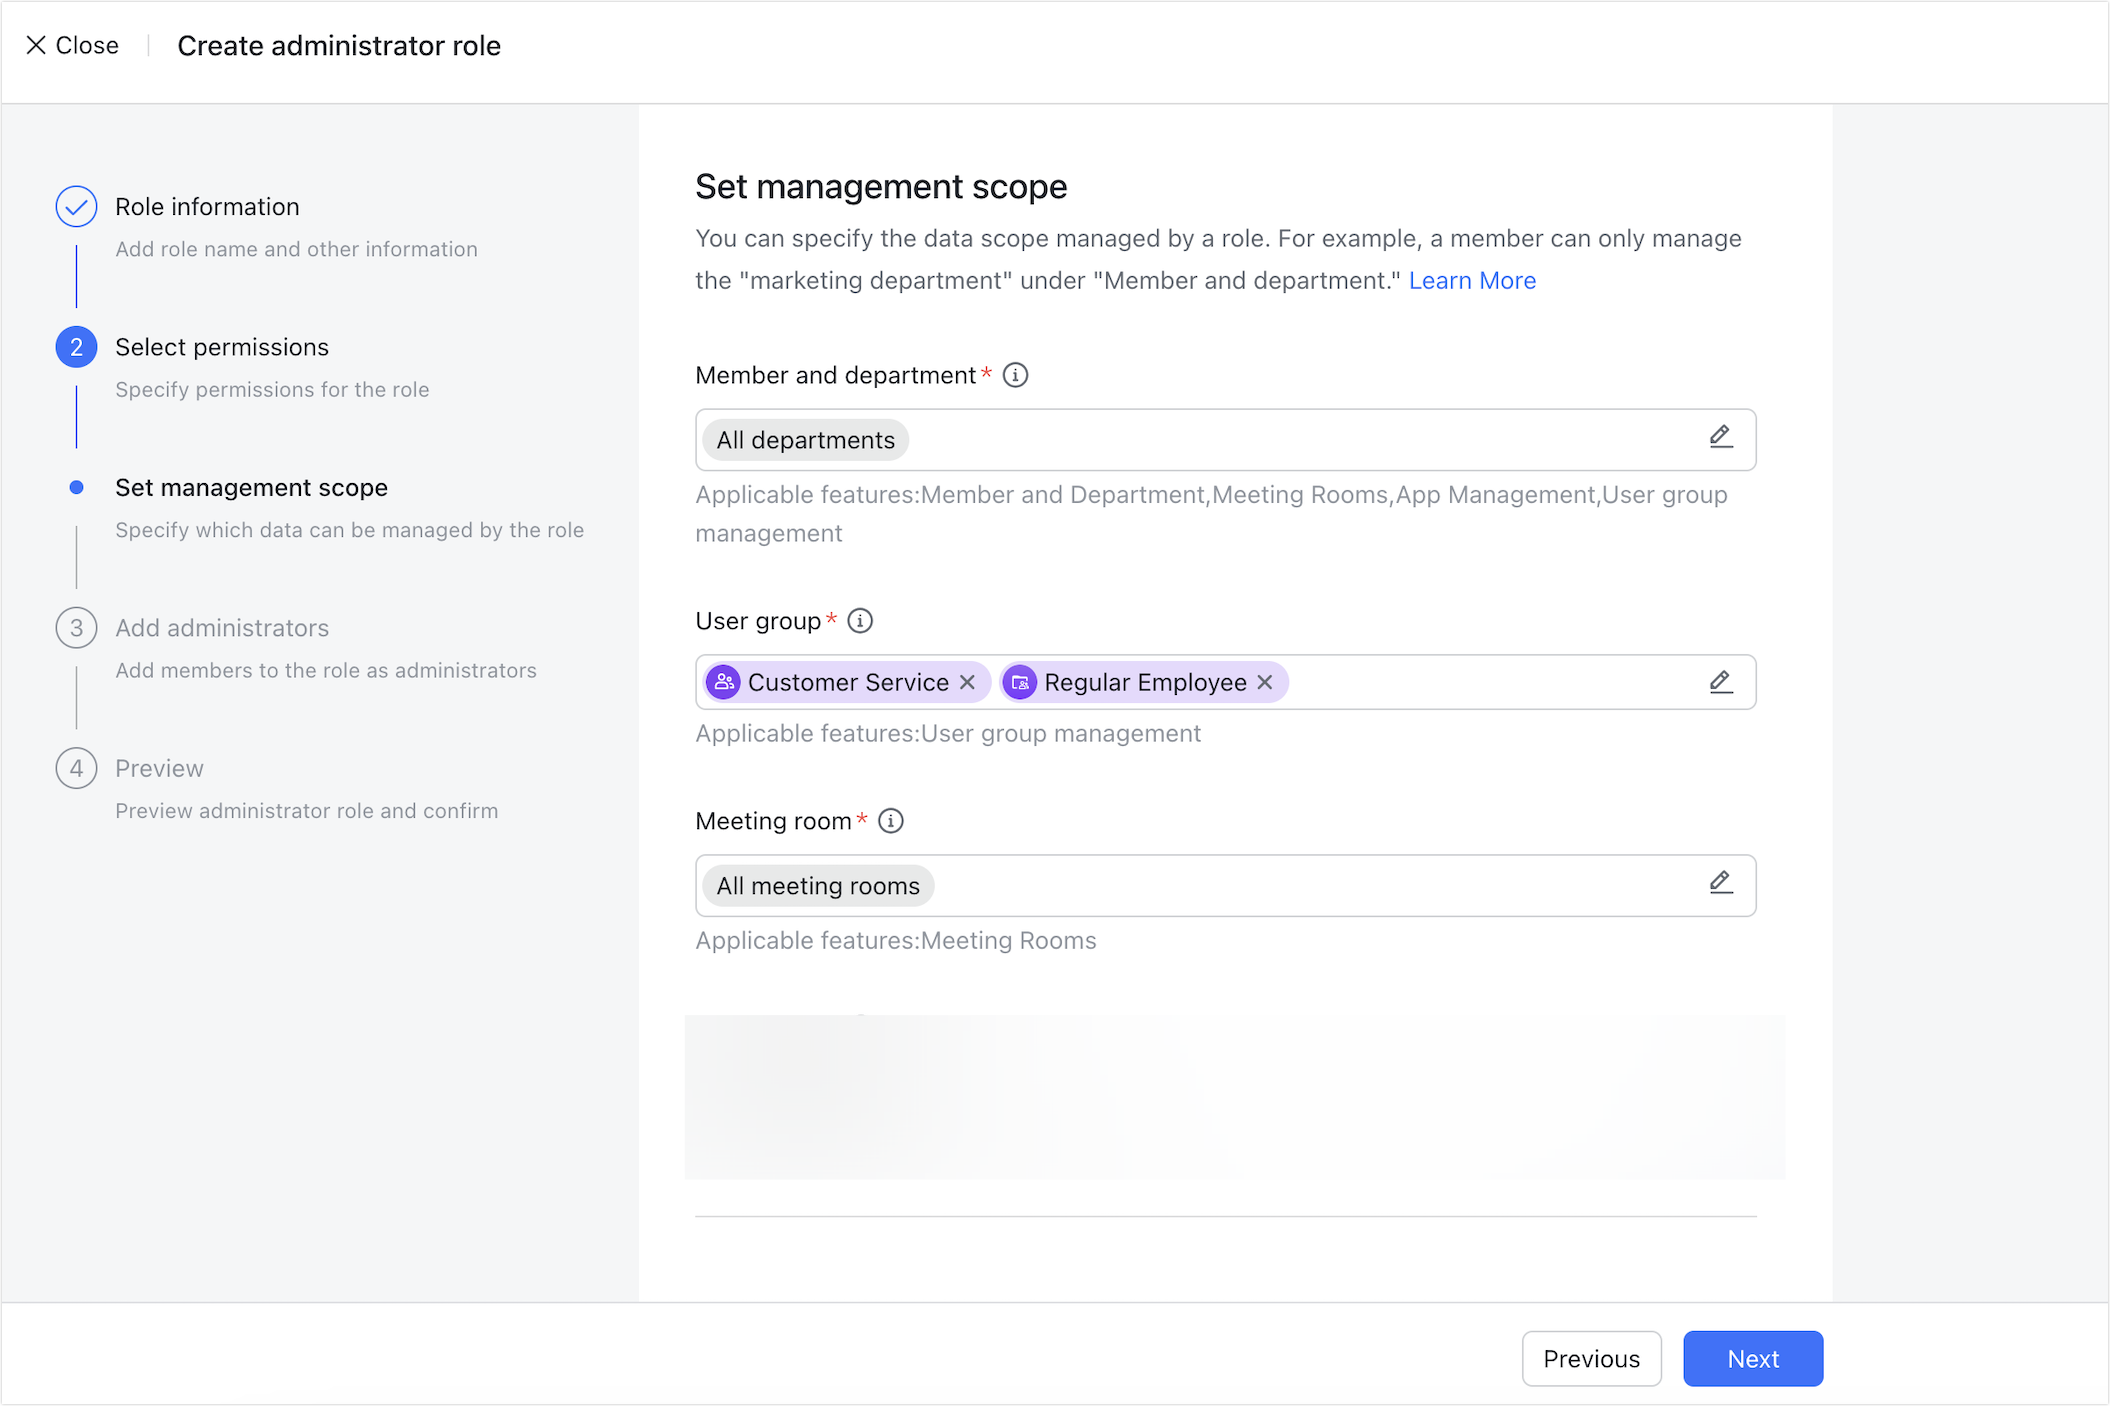
- For some of the permissions, select the management scope of the role and click Next.
- Note: The management scope options vary depending on the permissions you selected in the previous step. For example, if the role has Member and Department permission, you'll be able to set which members or departments are covered; if the role has Meeting Rooms permission, you'll be able to choose which rooms this role can manage.
- 250px|700px|reset
- Click Add Administrator in the upper-right corner of the page, search for and select members as administrators for this role in the pop-up, and click Next.
- Confirm the role's information, choose whether to send notifications to the new administrators, and click Create Role to finish the process.
- 250px|700px|reset
The new role will appear in the Administrator Role list. The list comes with a default "Primary administrator" role. The primary administrators can directly add or remove other primary administrators (except the founder) from the primary administrator role. For more information, see Admin | Add or remove primary administrators.
Create sub-administrator roles
After you create an administrator role, you can further create sub-roles under it. The sub-administrator will be able to have the same, or fewer, permissions as its parent.
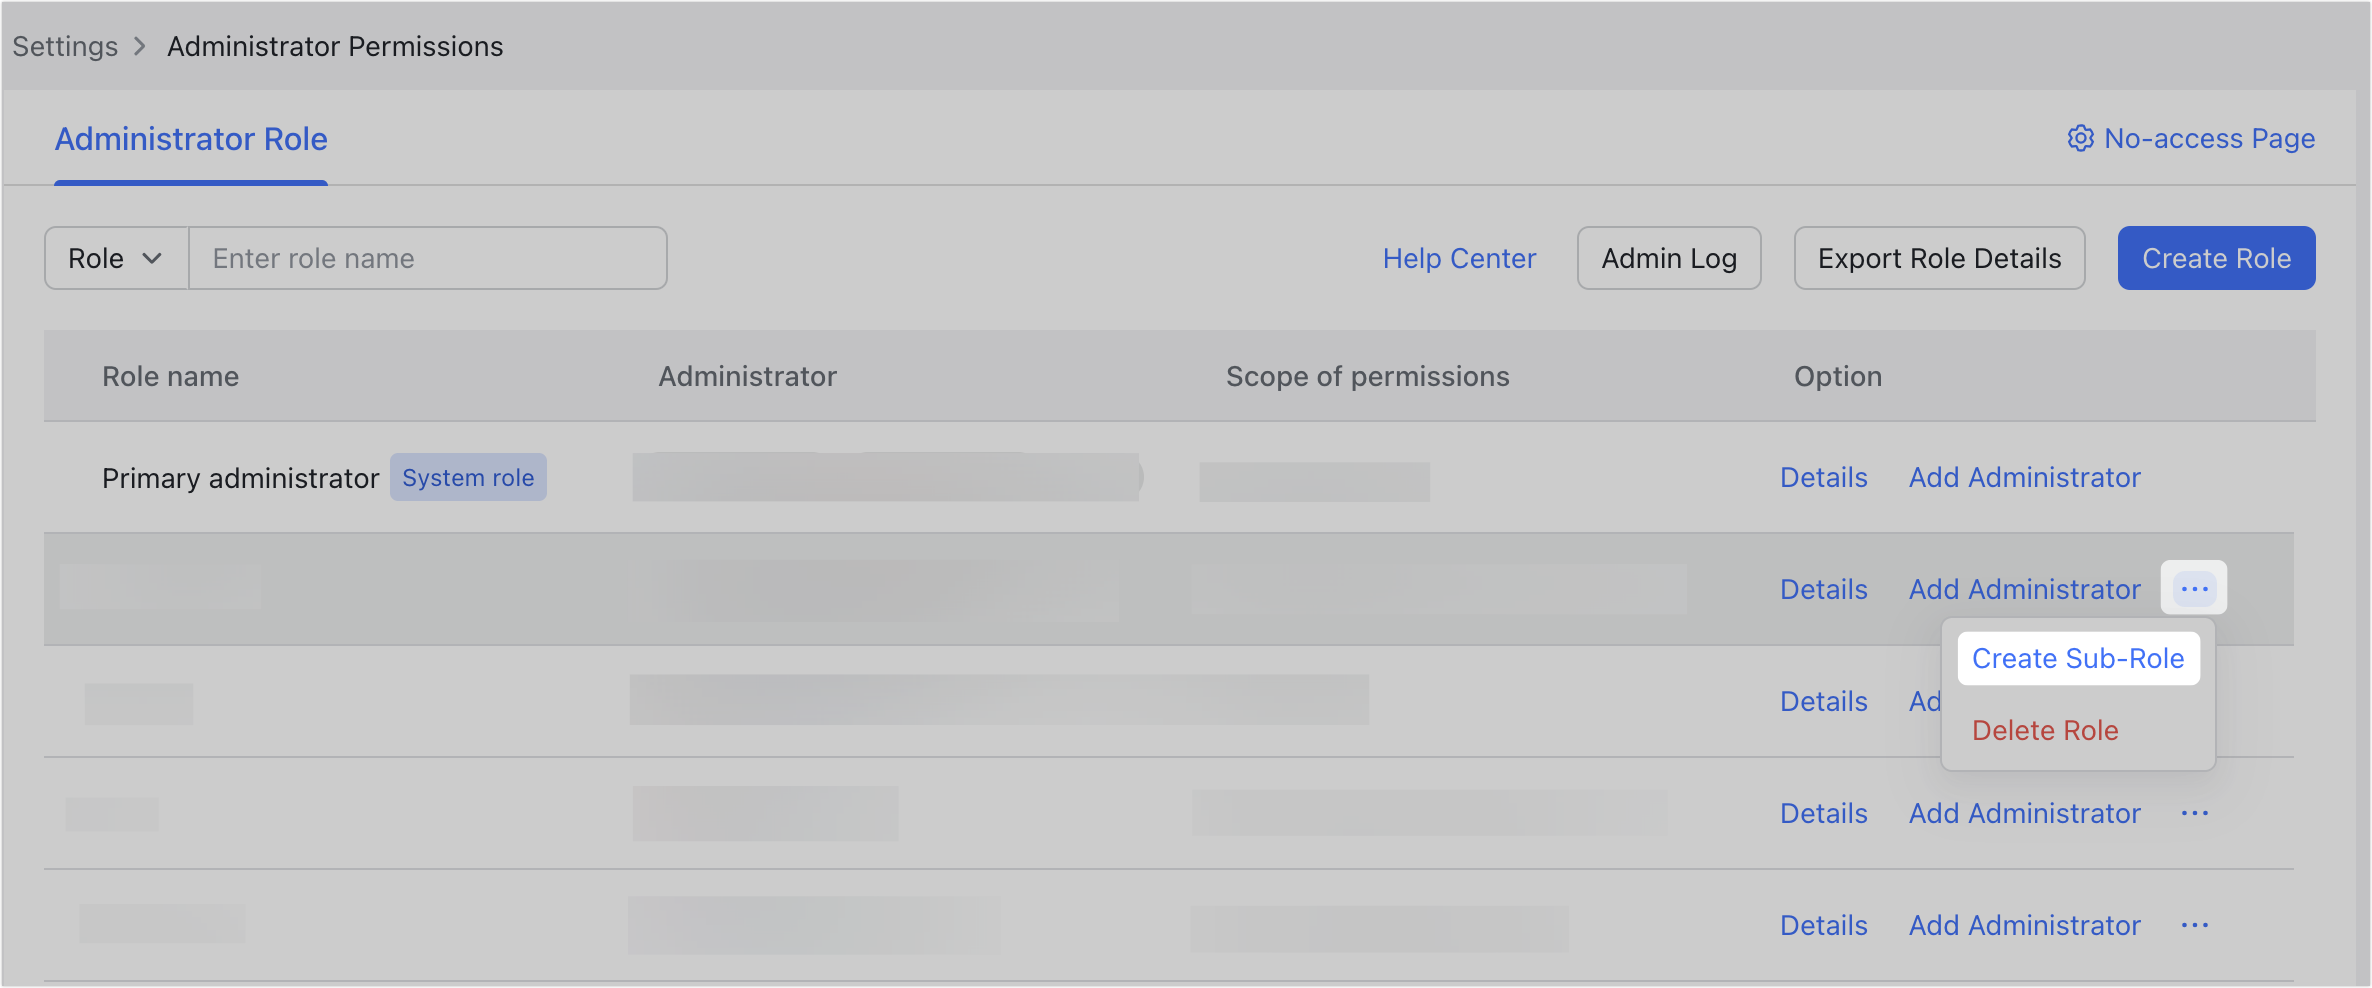
On the Administrator Role page, click the ··· icon to the right of a role > Create Sub-Role, which brings you to the Create administrator role page with Parent administrator role defaulted to the role you specified.
250px|700px|reset
Manage administrator roles
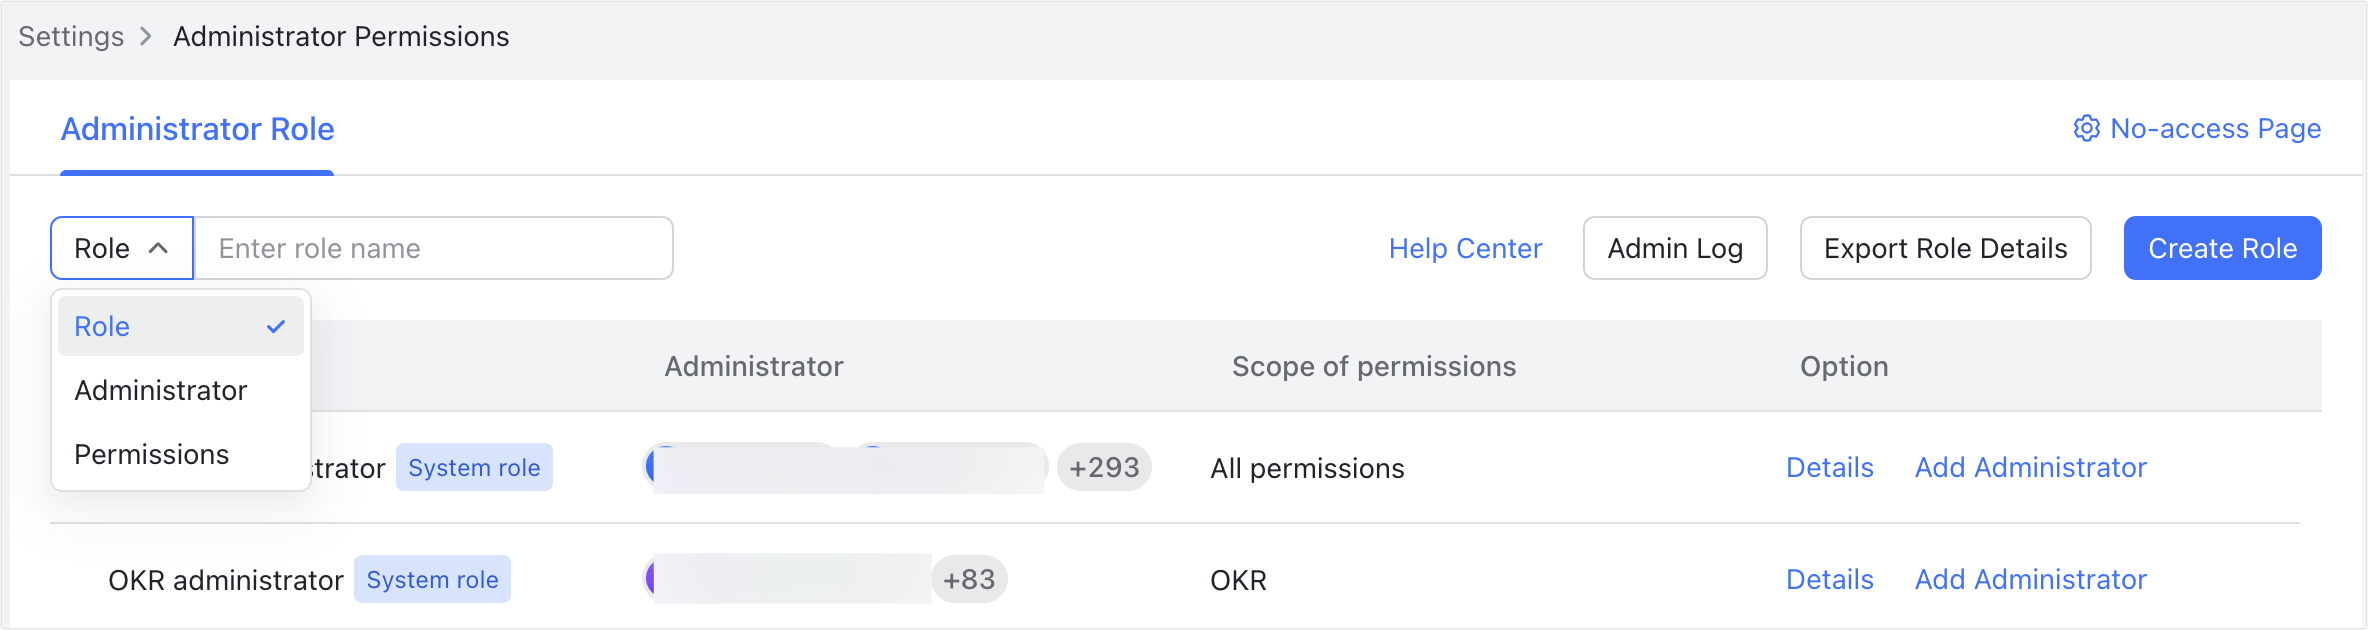
On the Administrator Role page, you can search for roles to see and edit their information or permissions, add or delete administrators from roles, and delete roles.
You can do the following in the administrator role list:
- Delete a role: Click the ··· icon to the right of a role > Delete Role, and confirm again in the pop-up.
- Note: You must delete all of its sub-roles before you can delete a role.
- Add administrators: Click Add Administrator to the right of a role, search for and select members as administrators for this role in the pop-up, and click Confirm twice in different pop-ups. Alternatively, you can click a role to bring up its details page and click Add Administrator.
- Remove administrators: Click a role to bring up its details page, click Remove to the right of the name you want to remove, and confirm again in the pop-up.
- Edit role information: Click a role to bring up its details page, then click the Edit role information icon next to the role name to modify the role name, description, and whether to allow members in the role to assign permissions to sub-administrator roles.
- Modify role permissions: Click a role to bring up its details page, go to the Permissions tab, and click Edit.
View and edit administrator roles
On the Administrator Role page, you can search for roles to see and edit their details, add administrators to roles, create sub-roles, and delete roles.
250px|700px|reset
Export role and administrator information
- Go to Settings > Administrator Permissions > Administrator Role and click Export Role Details in the upper-right corner.
- Verify your administrator identity with the login phone number or email, and click Confirm.
- Select whether you want to export the information of roles or members, and click Confirm.
- Export by Role: Creates a table listing the roles, which administrators are assigned to each role, and each role's permissions.
- Export by Administrator: Creates a table listing the administrators, their user IDs, departments, and to which roles they are assigned.
The exported spreadsheet is downloaded to your local drive. You can also redownload it in the Admin task center in the upper-right corner of the Lark Admin Console.
III. About management scope of administrator roles
Notice: The permissions of "User group management" and "Application" are in beta..
Administrators in the same role share the same management scope. For example, if administrators in the "HR Admin" role can manage the "HR Department" for the "Member and Department" permission, then these administrators can only manage the same "HR Department" for other permissions such as "User group management" or "Custom Workplace".
250px|700px|reset
You can find the following types of management scope when you set up an administrator role:
- Member and department: The members that one can manage with the Member and Department permission. For example, if you set the Design Department for a role, the corresponding administrators will only be able to take action on members of the Design Department.
- Important: Workplace supports fine-tuned permissions of "owning department" so different administrators can manage different workplaces. If the management scope of the role with Custom Workplace permission changes, a Workplace administrator may not be able to view or manage the workplaces as they did before the change. For more information, see Set Custom Workplace management permissions..
- Meeting room: The physical rooms that one can manage. For example, if you select the "Asia" region for a role, the corresponding administrators will only see the rooms which are located in Asia in the room list.
- User group: The user groups or their parent group that one can manage. For example, if you select the "FTE" group for a role, the corresponding administrators will be able to manage the existing user groups or future user groups created under "FTE".
- Application: The applications that one can manage. For example, if you only select "Approval" for a role, the corresponding administrators will only see and manage Approval in Workplace > App Management.
IV. Related
V. FAQs