
I. Intro
You can quickly add Lark meetings to your Outlook with the Lark meeting add-in. The add-in allows you to adjust all meeting settings, respond to invites, or join a meeting directly, with updates viewable by all participants.
II. Steps
- Install the Lark meeting add-in
Administrators install the add-in
Notice: The administrator can directly install the Lark meeting add-in for specific user groups in the Microsoft Admin Console. You can find the add-in installation package at the end of this article.
Install the add-in in the Microsoft admin center
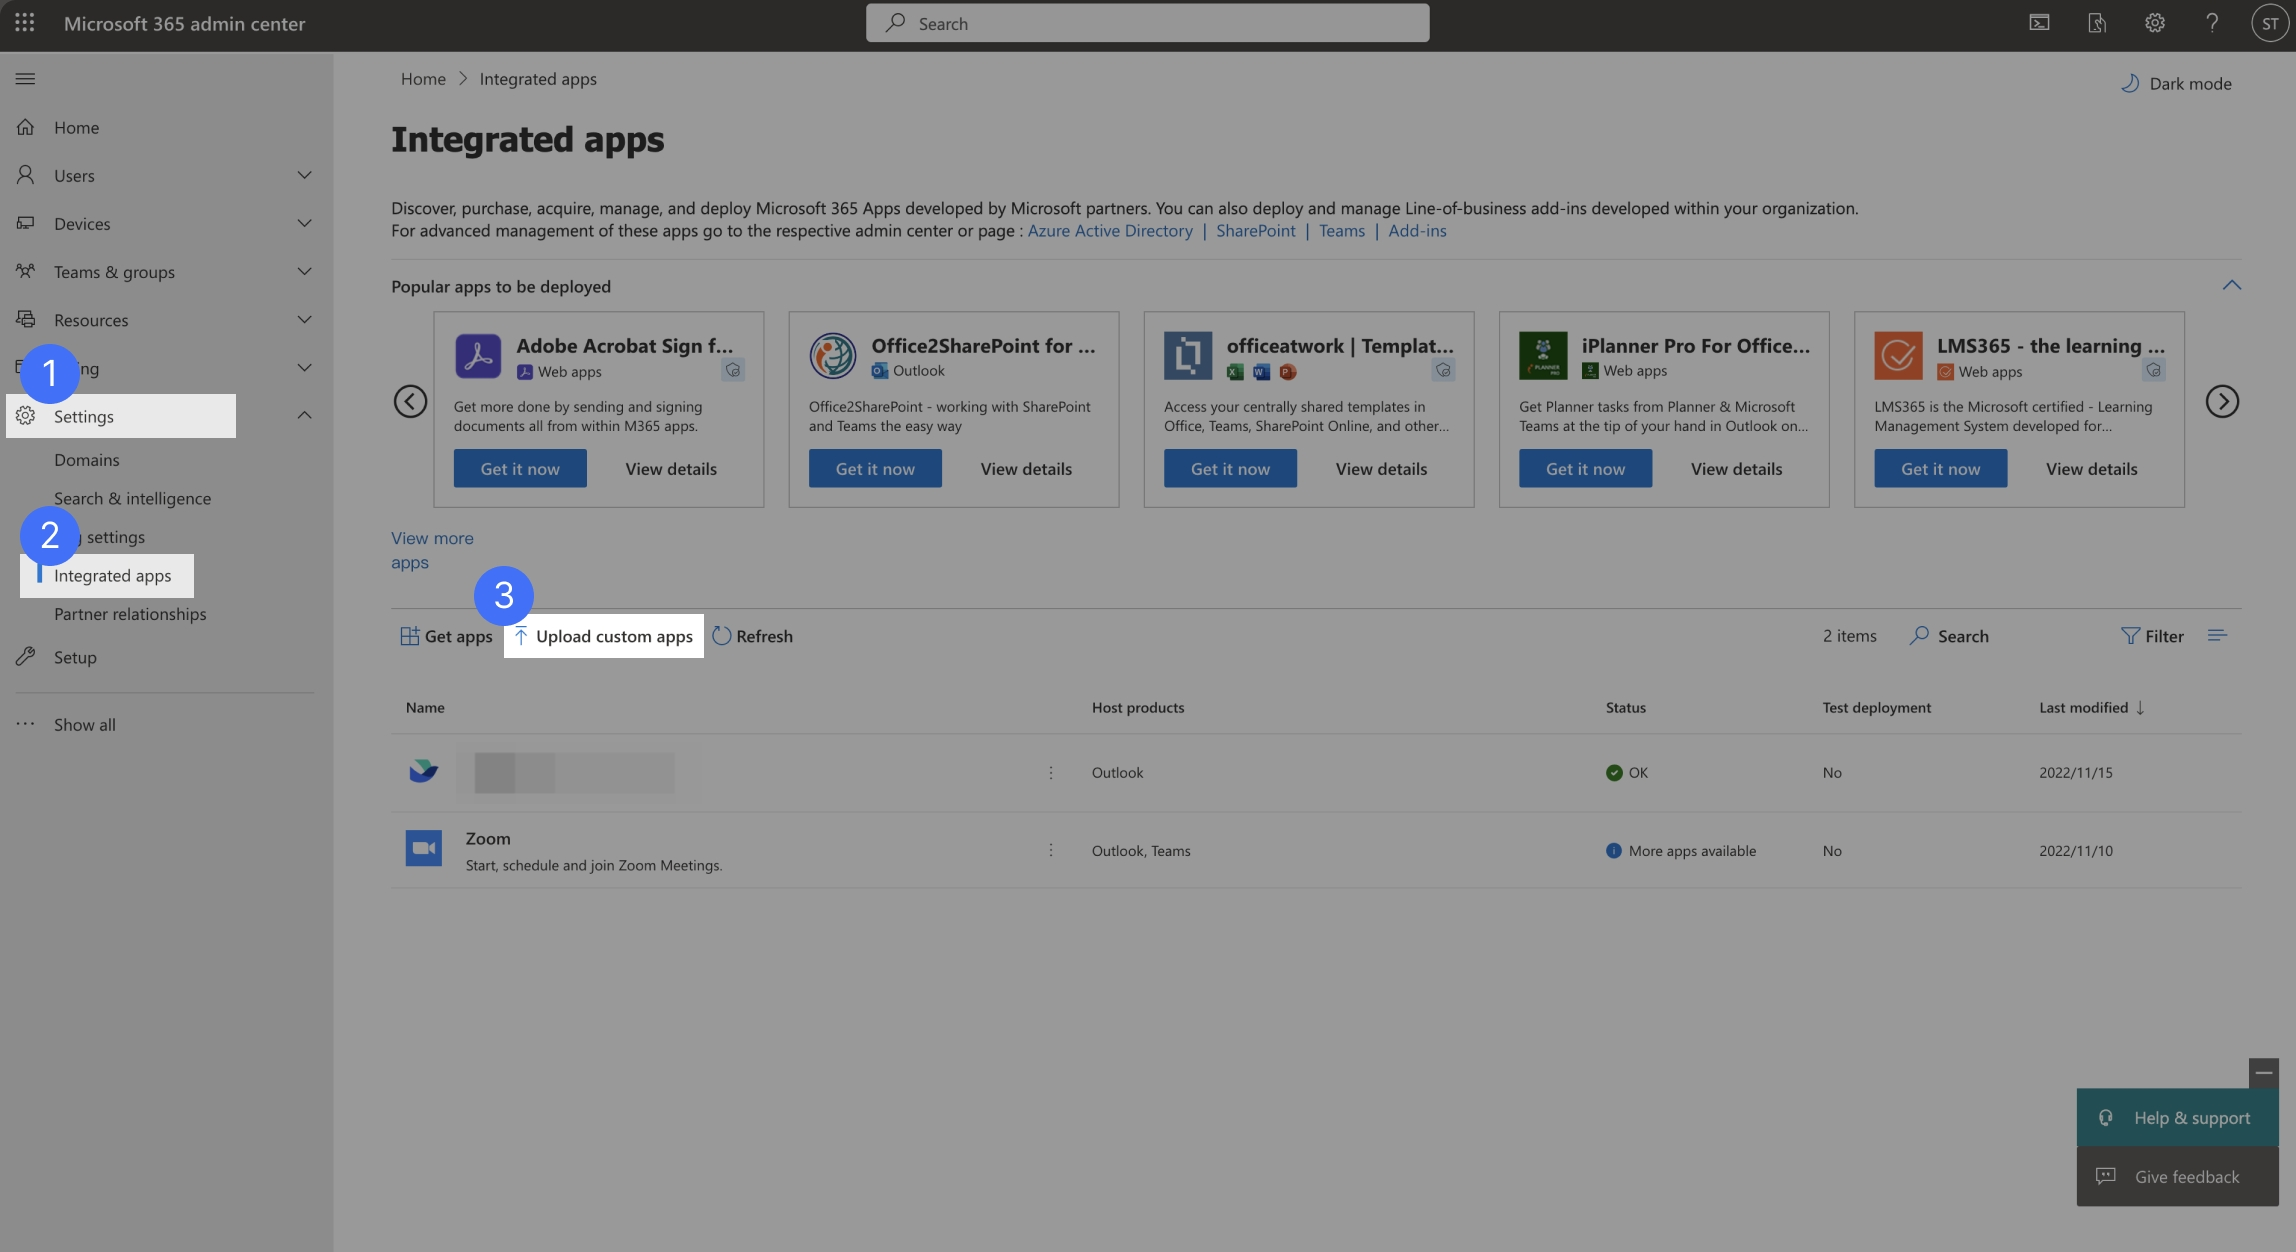
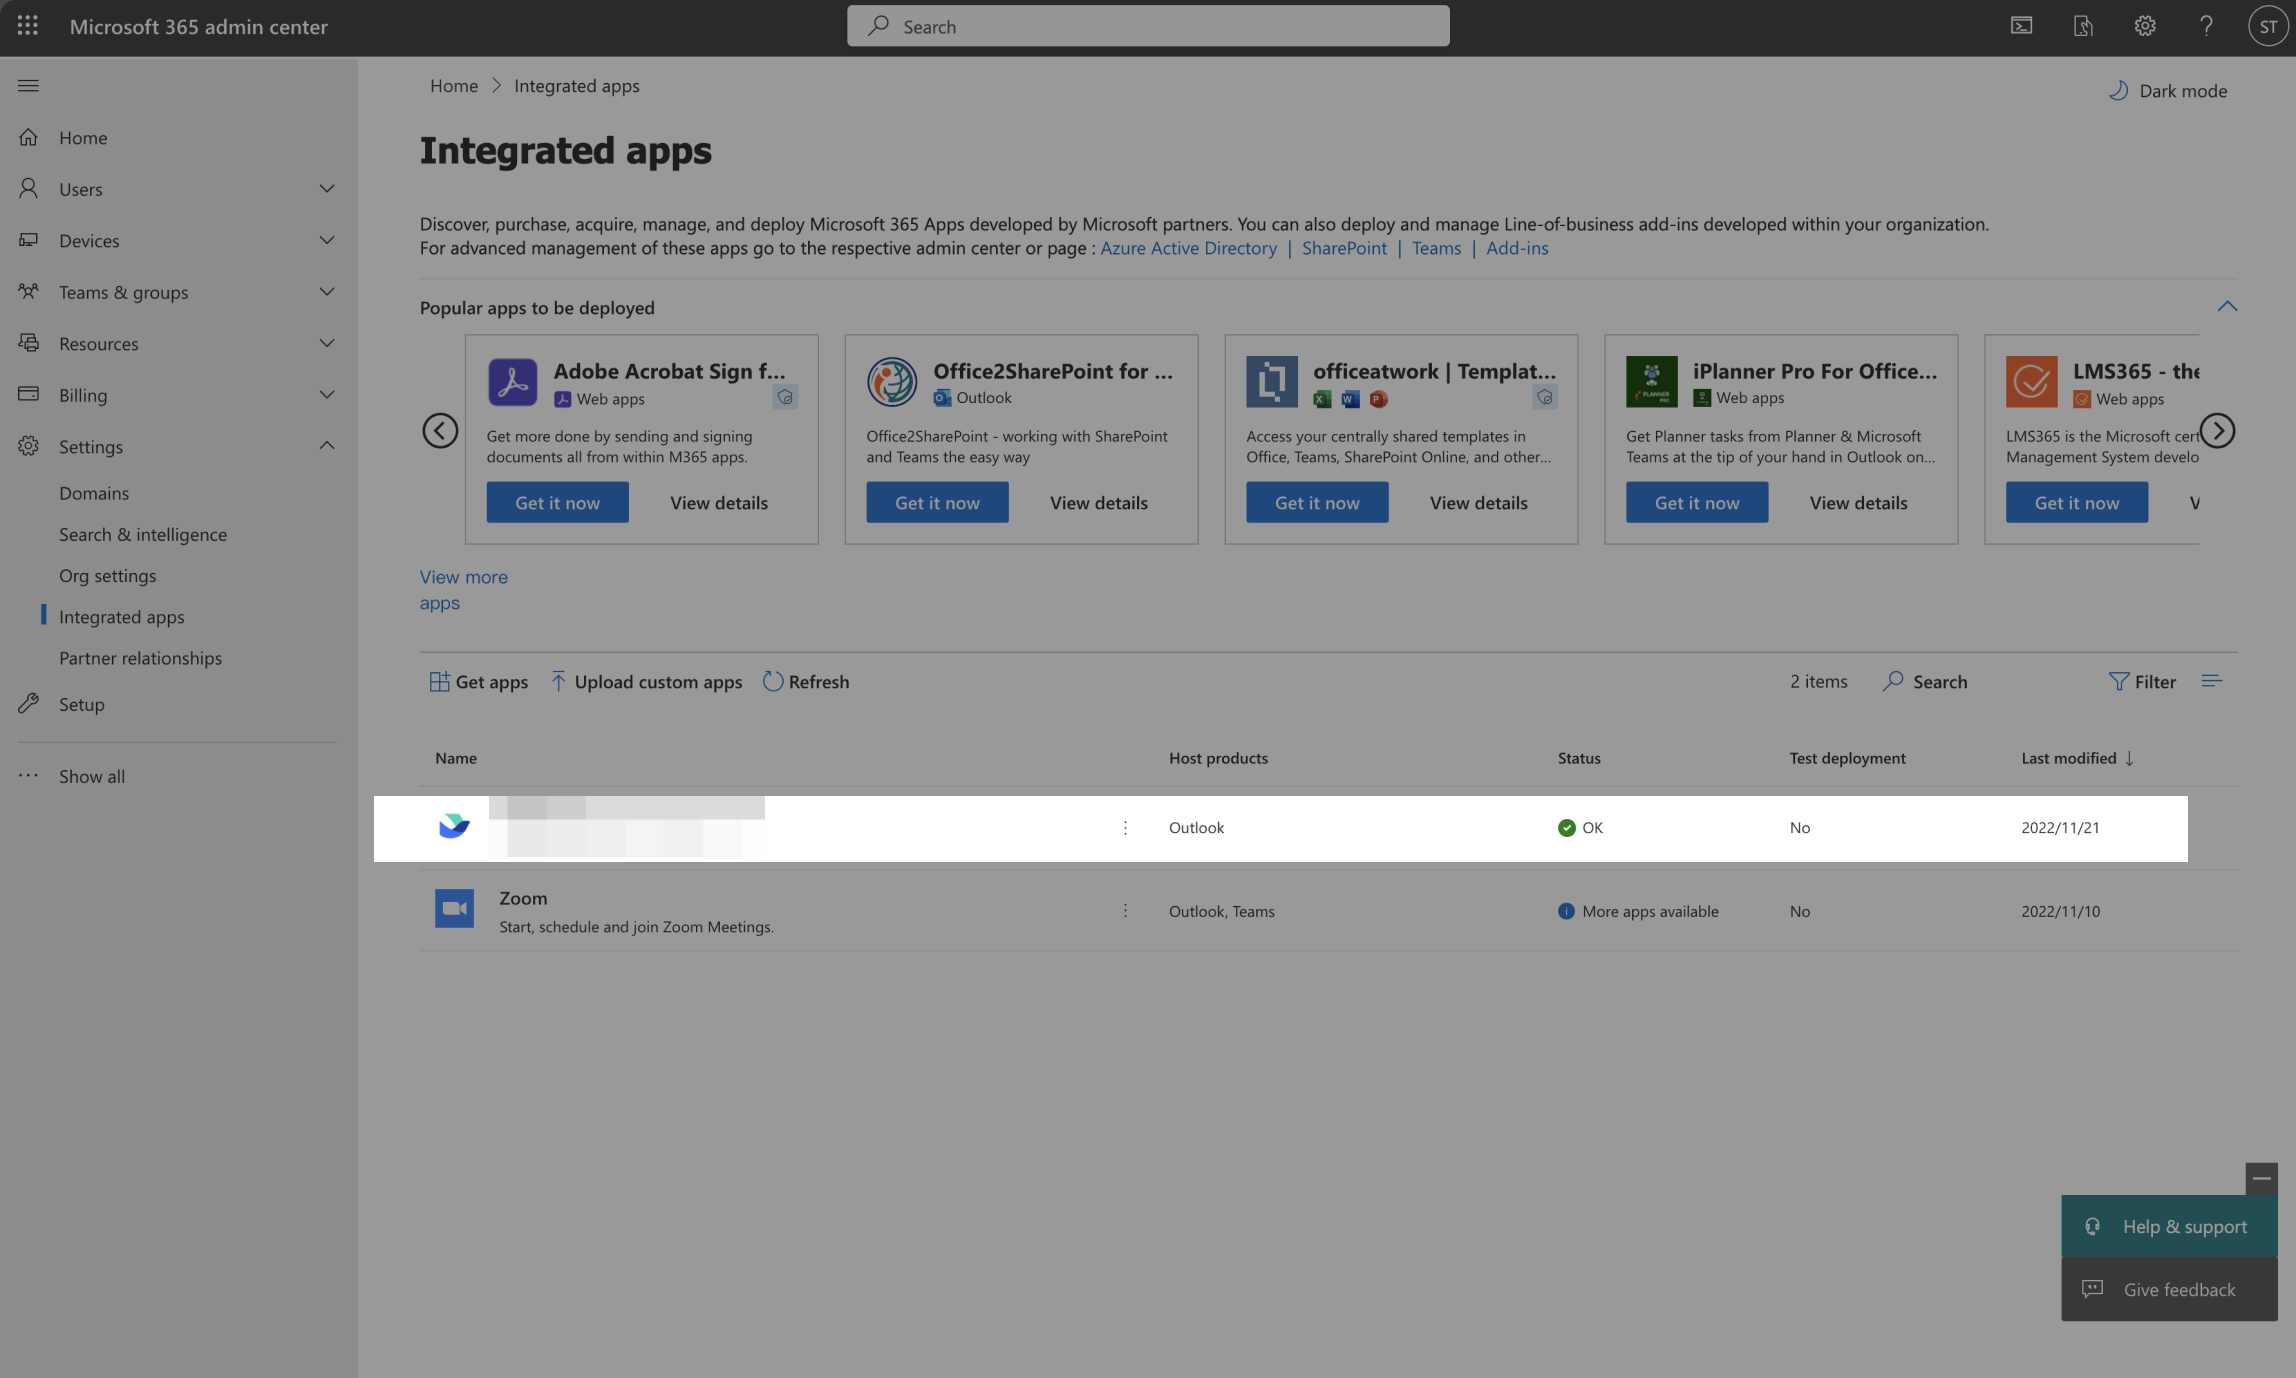
Go to the Microsoft admin center, select Settings > Integrated app on the left-side directory, and select Upload custom apps on the page.
250px|700px|reset
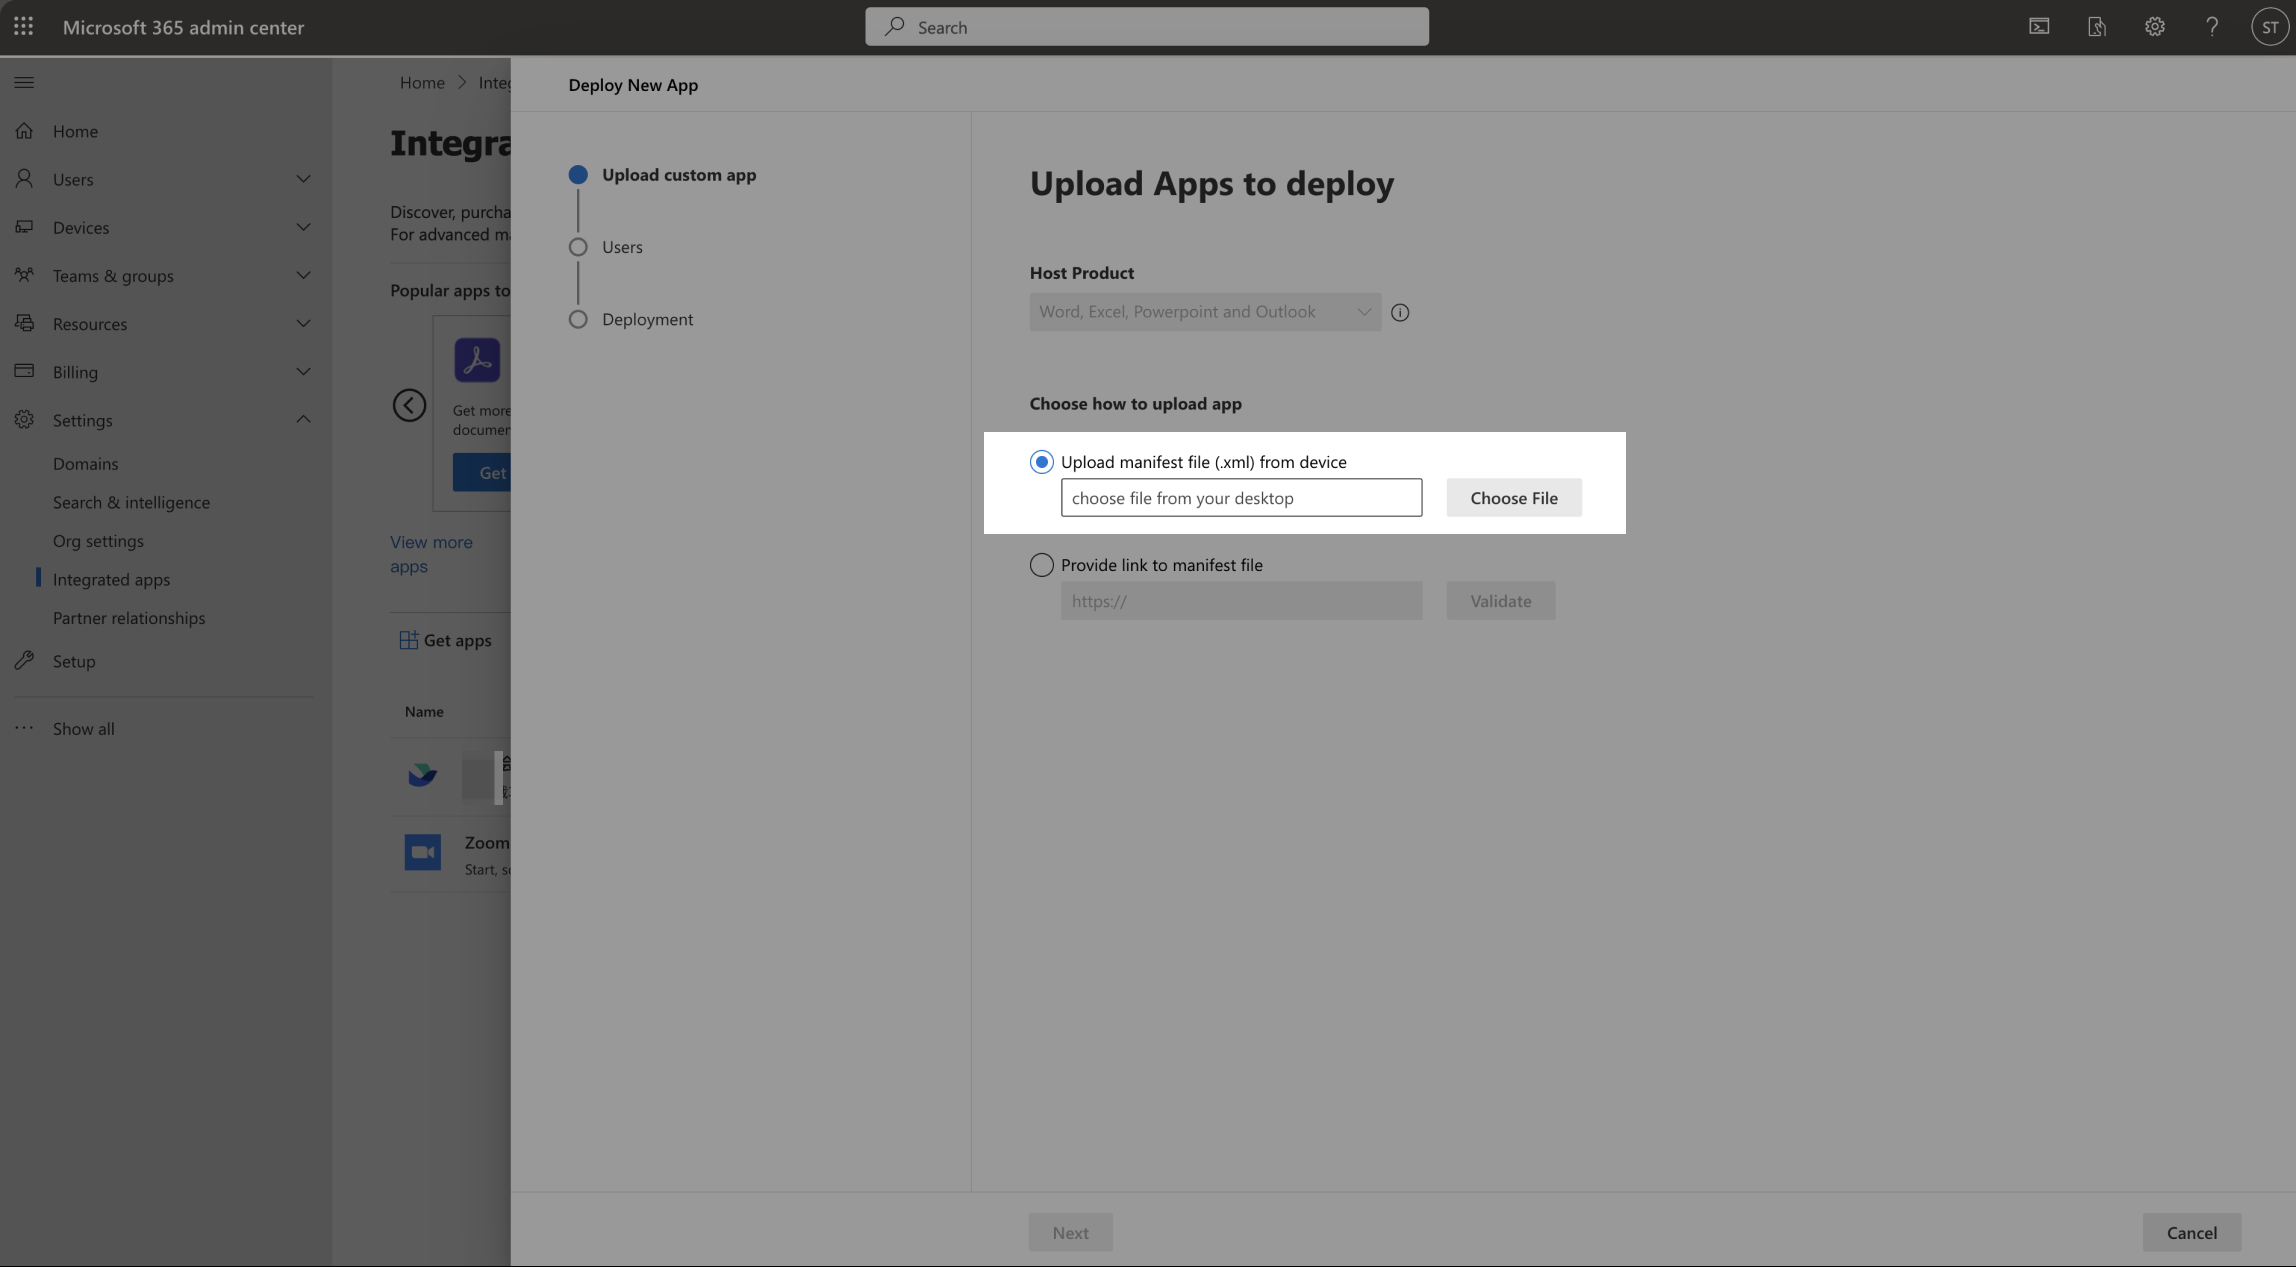
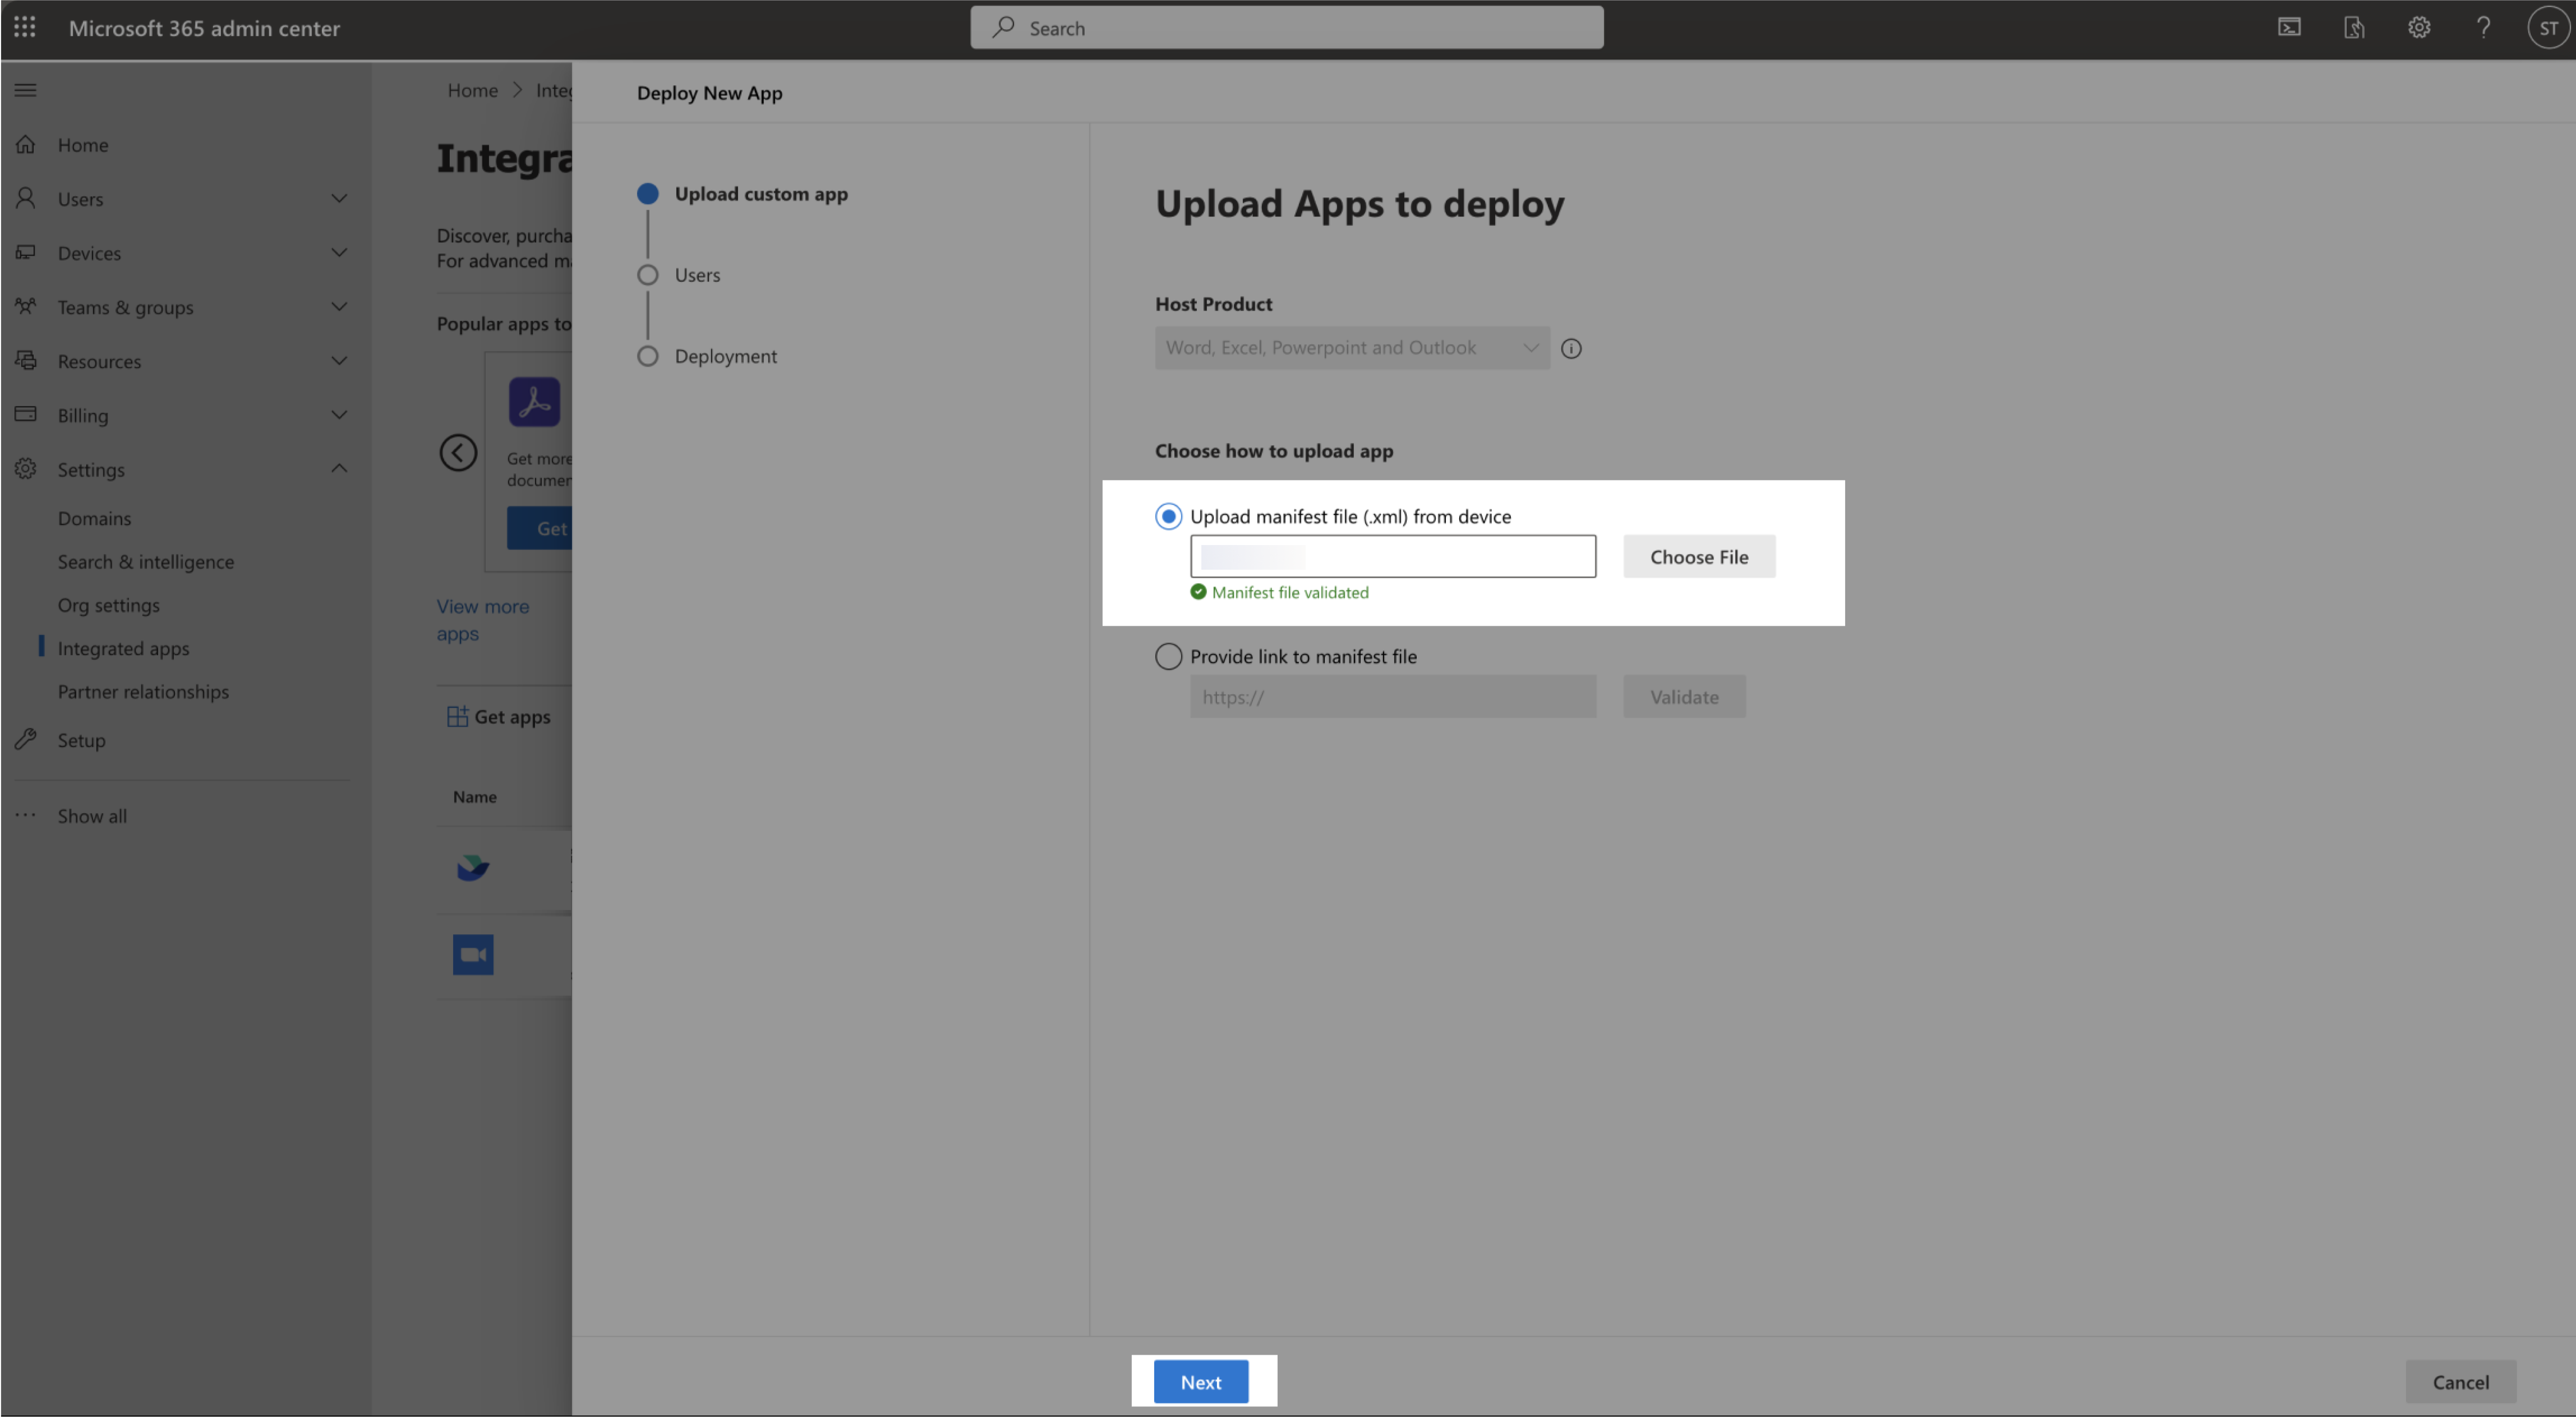
In the pop-up interface, select Upload manifest file from device > Choose File, select the Lark meeting add-in installation package. After the upload is successful, click Next at the bottom of the page.
250px|700px|reset
250px|700px|reset
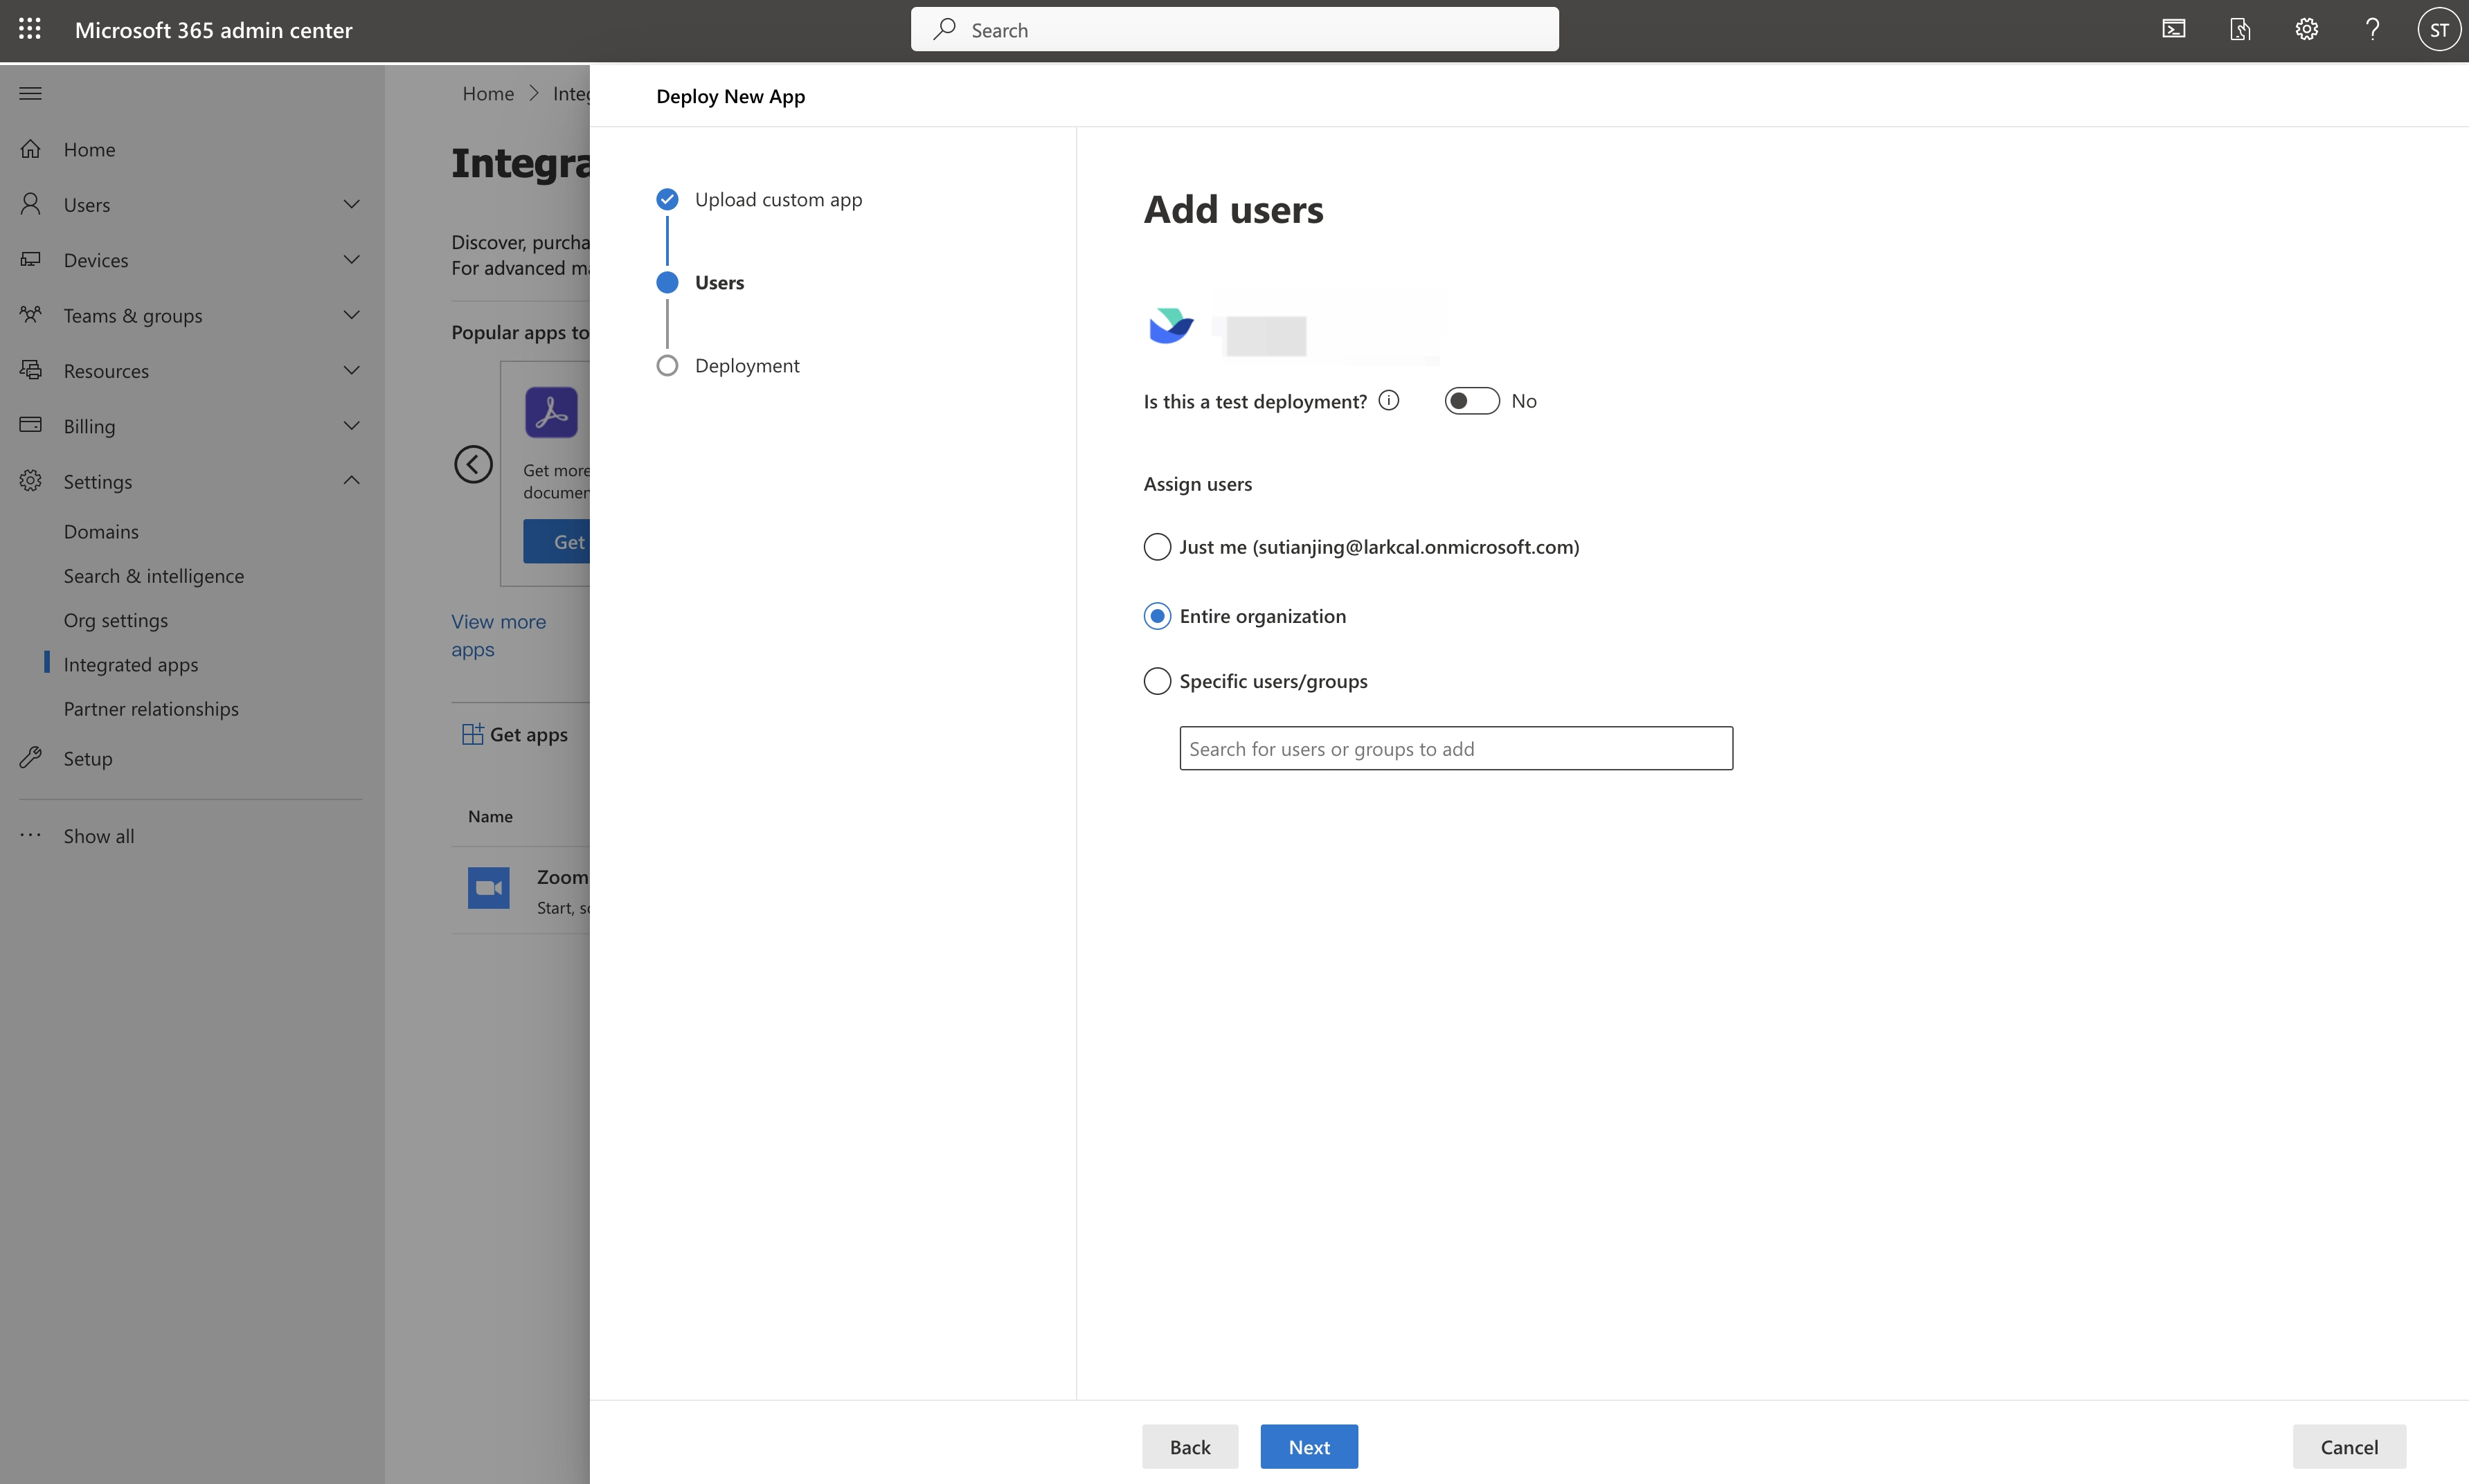
In the Add users interface, you can assign users.
- Just me: You can only install the Lark meeting add-in for yourself
- Entire organization: The Lark meeting add-in will be installed for all members of the organization
- Specific users/groups: You can choose to install the Lark meeting add-in for specific users or user groups within the organization
250px|700px|reset
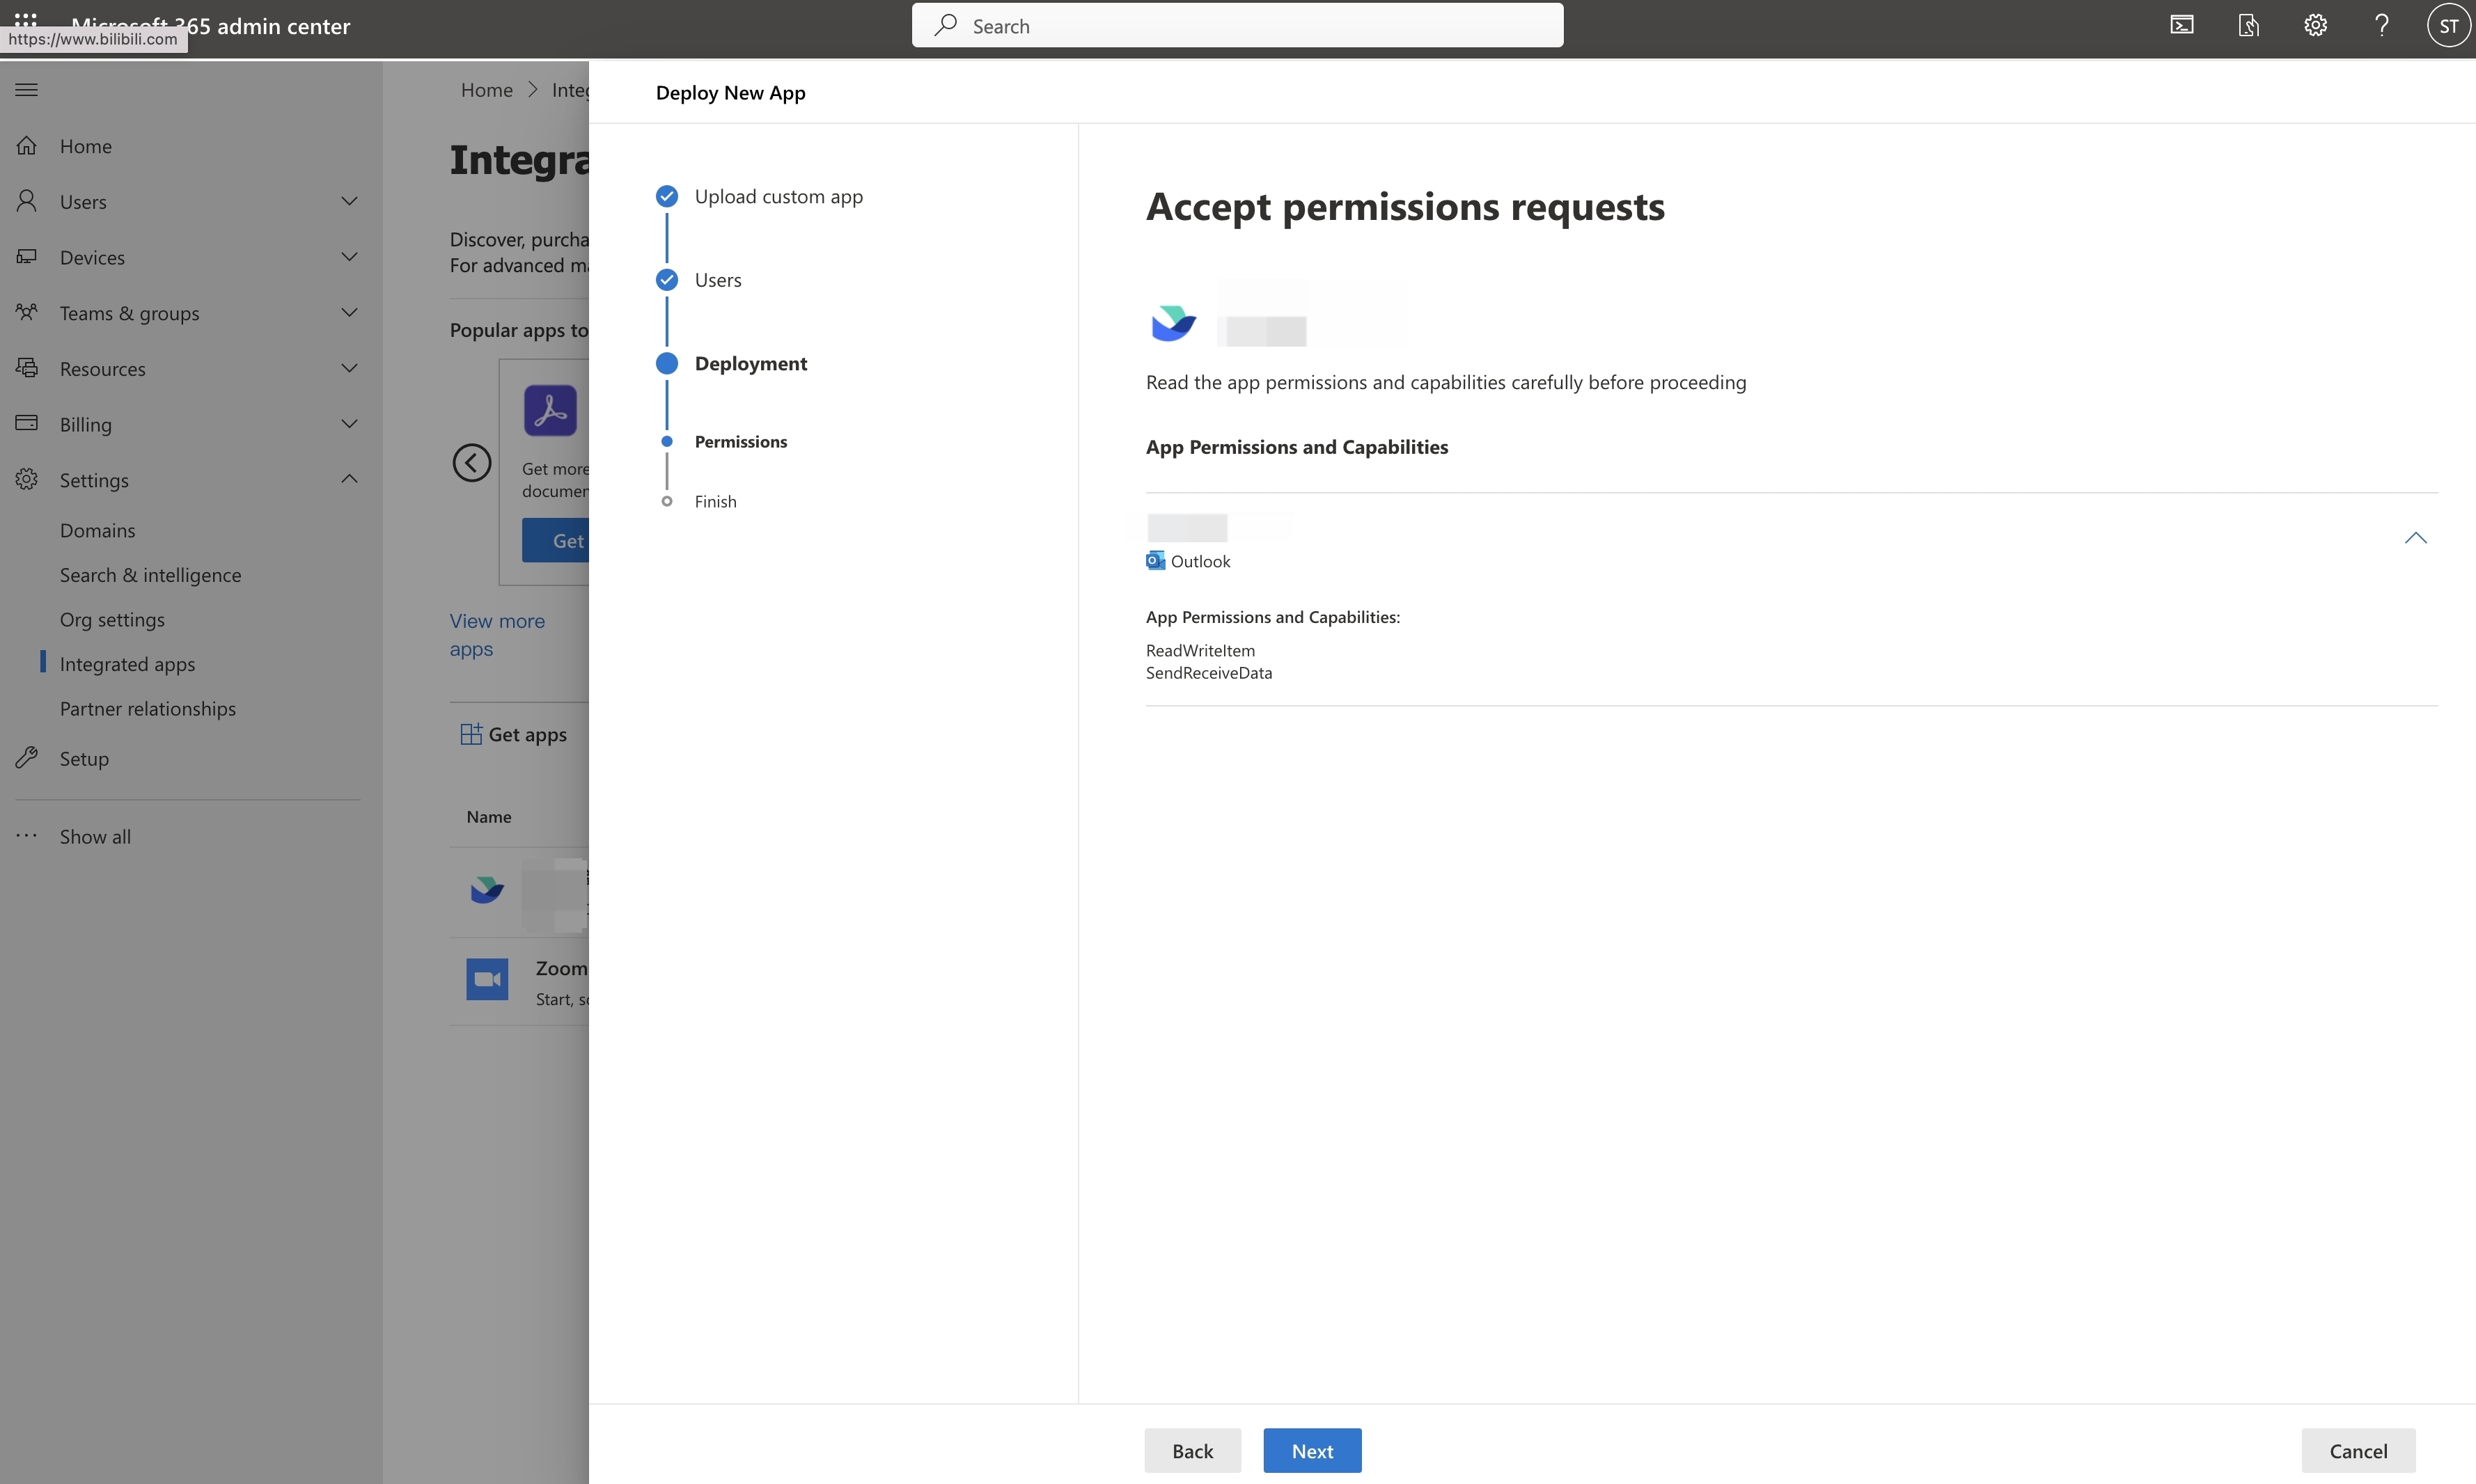
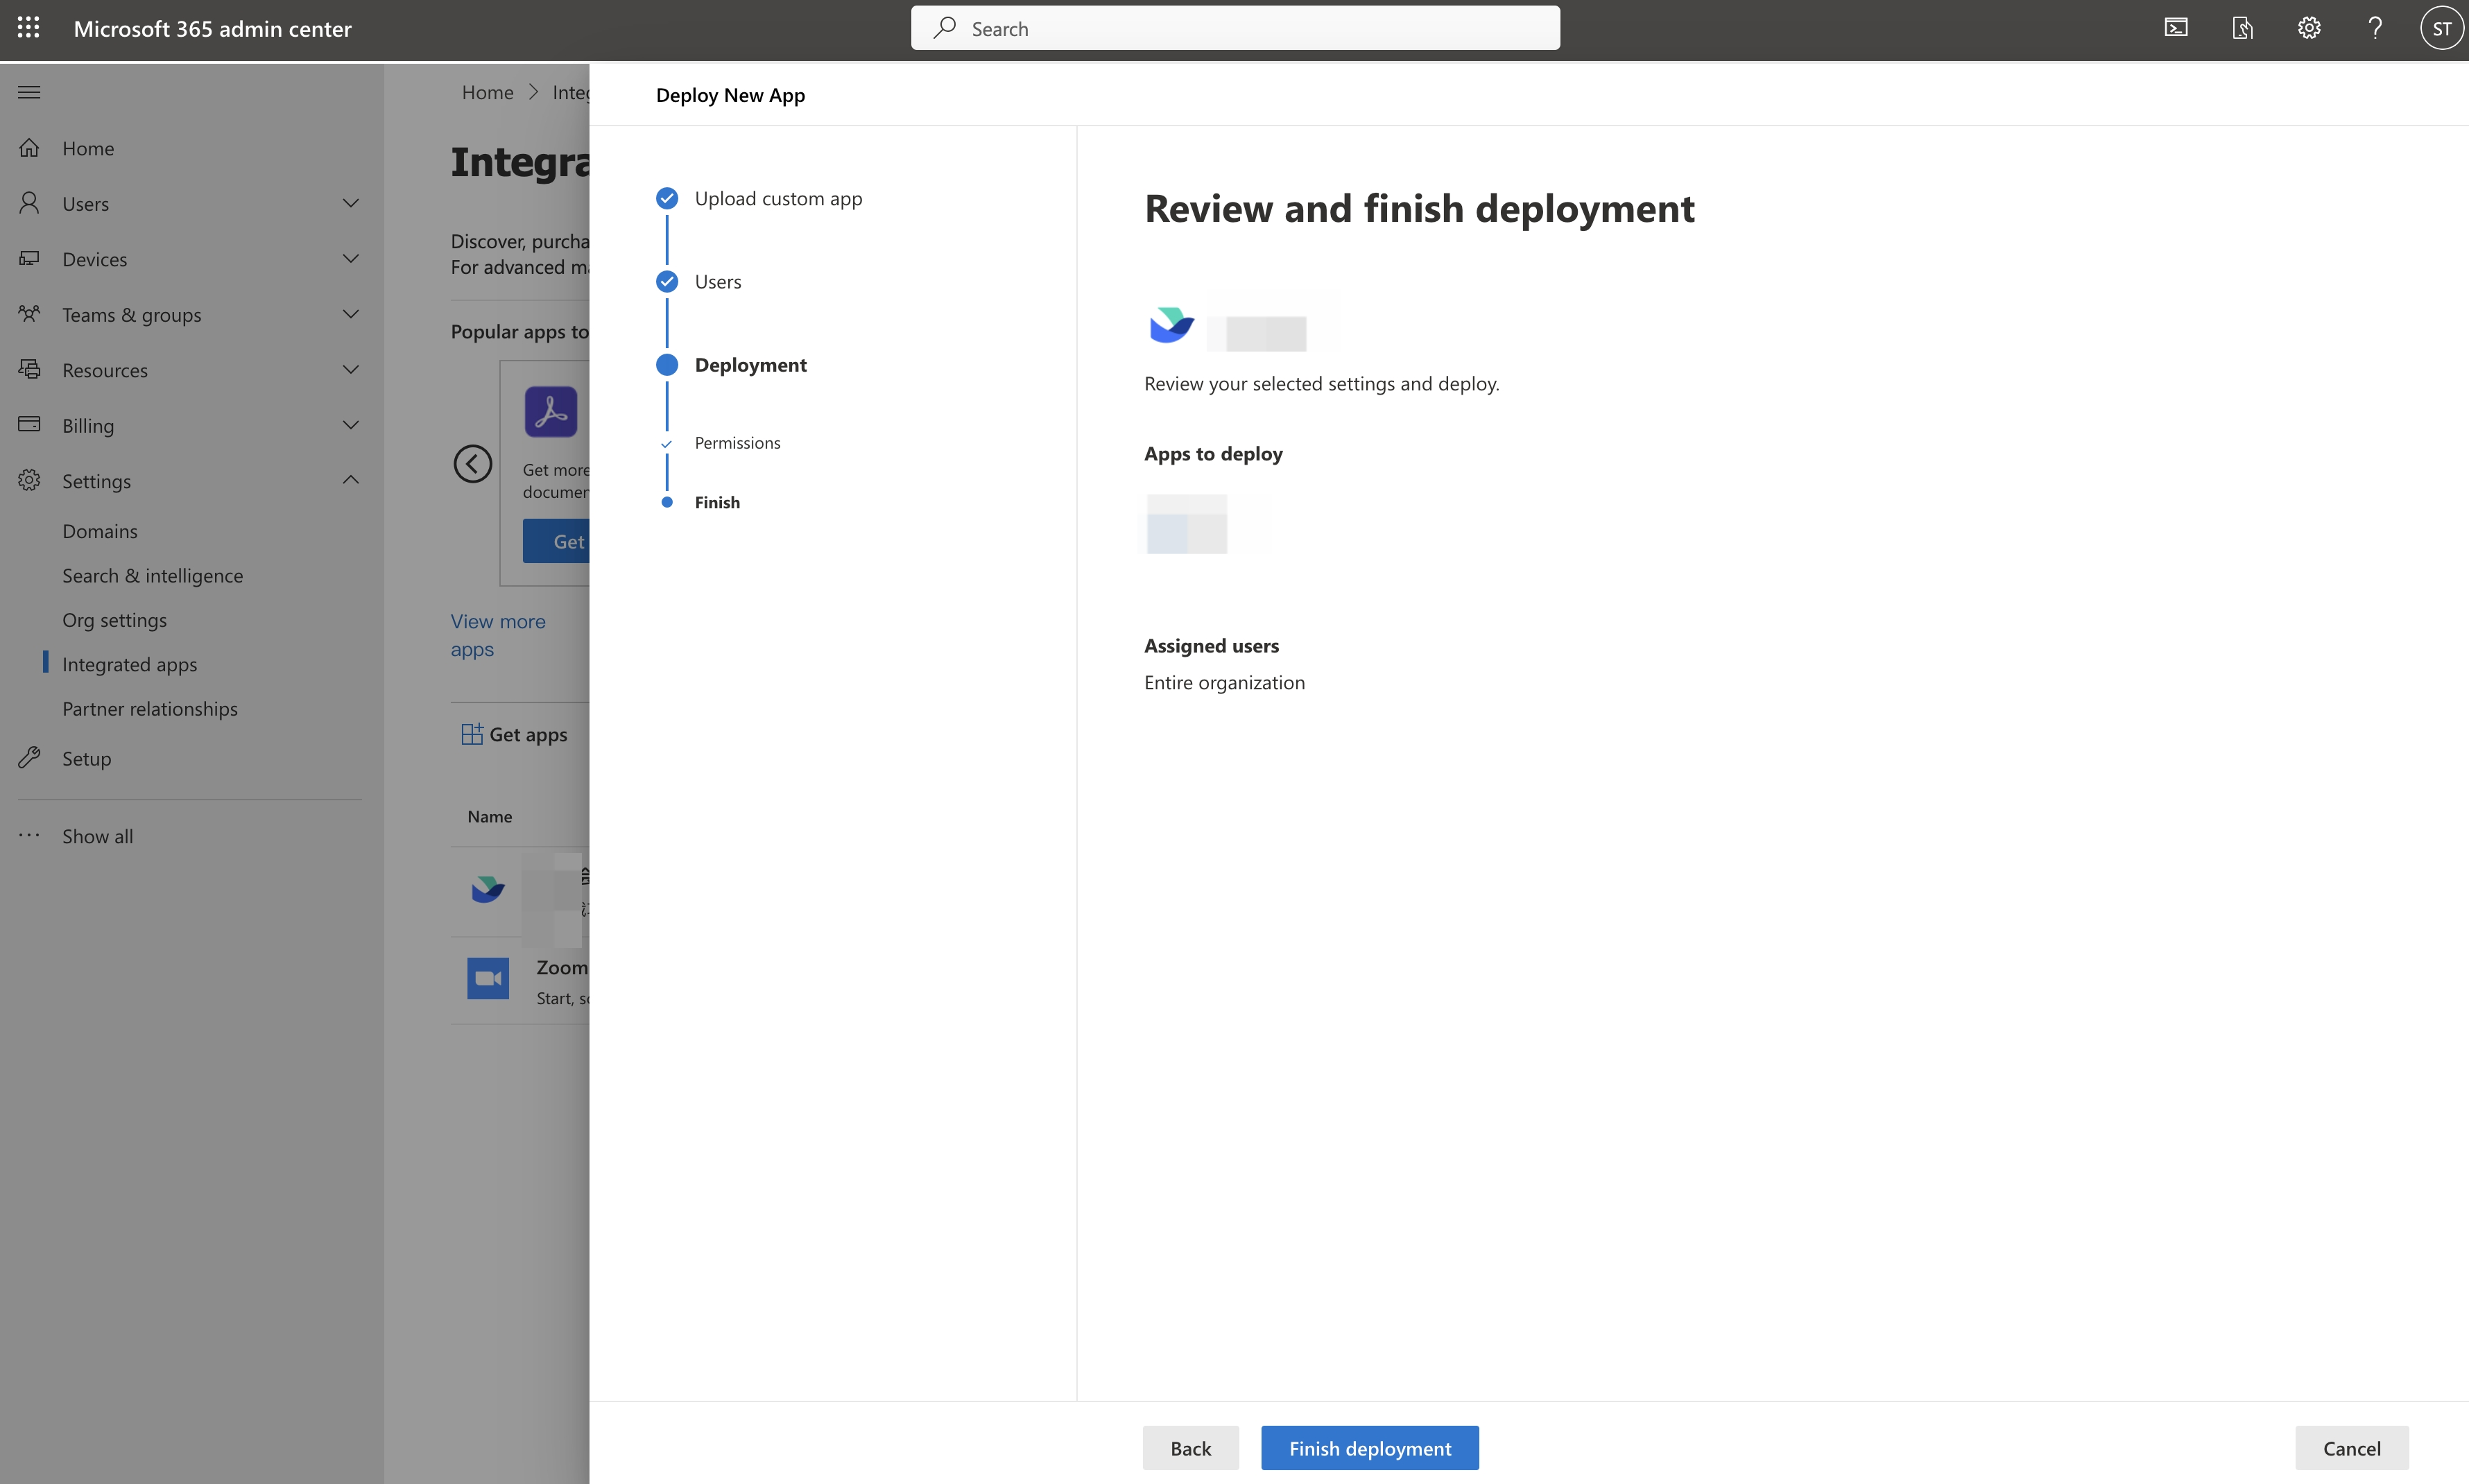
After assigning users, click Next. On the Accept permissions requests page, click Next. On the Review and finish deployment page, click Finish Deployment.
250px|700px|reset
250px|700px|reset
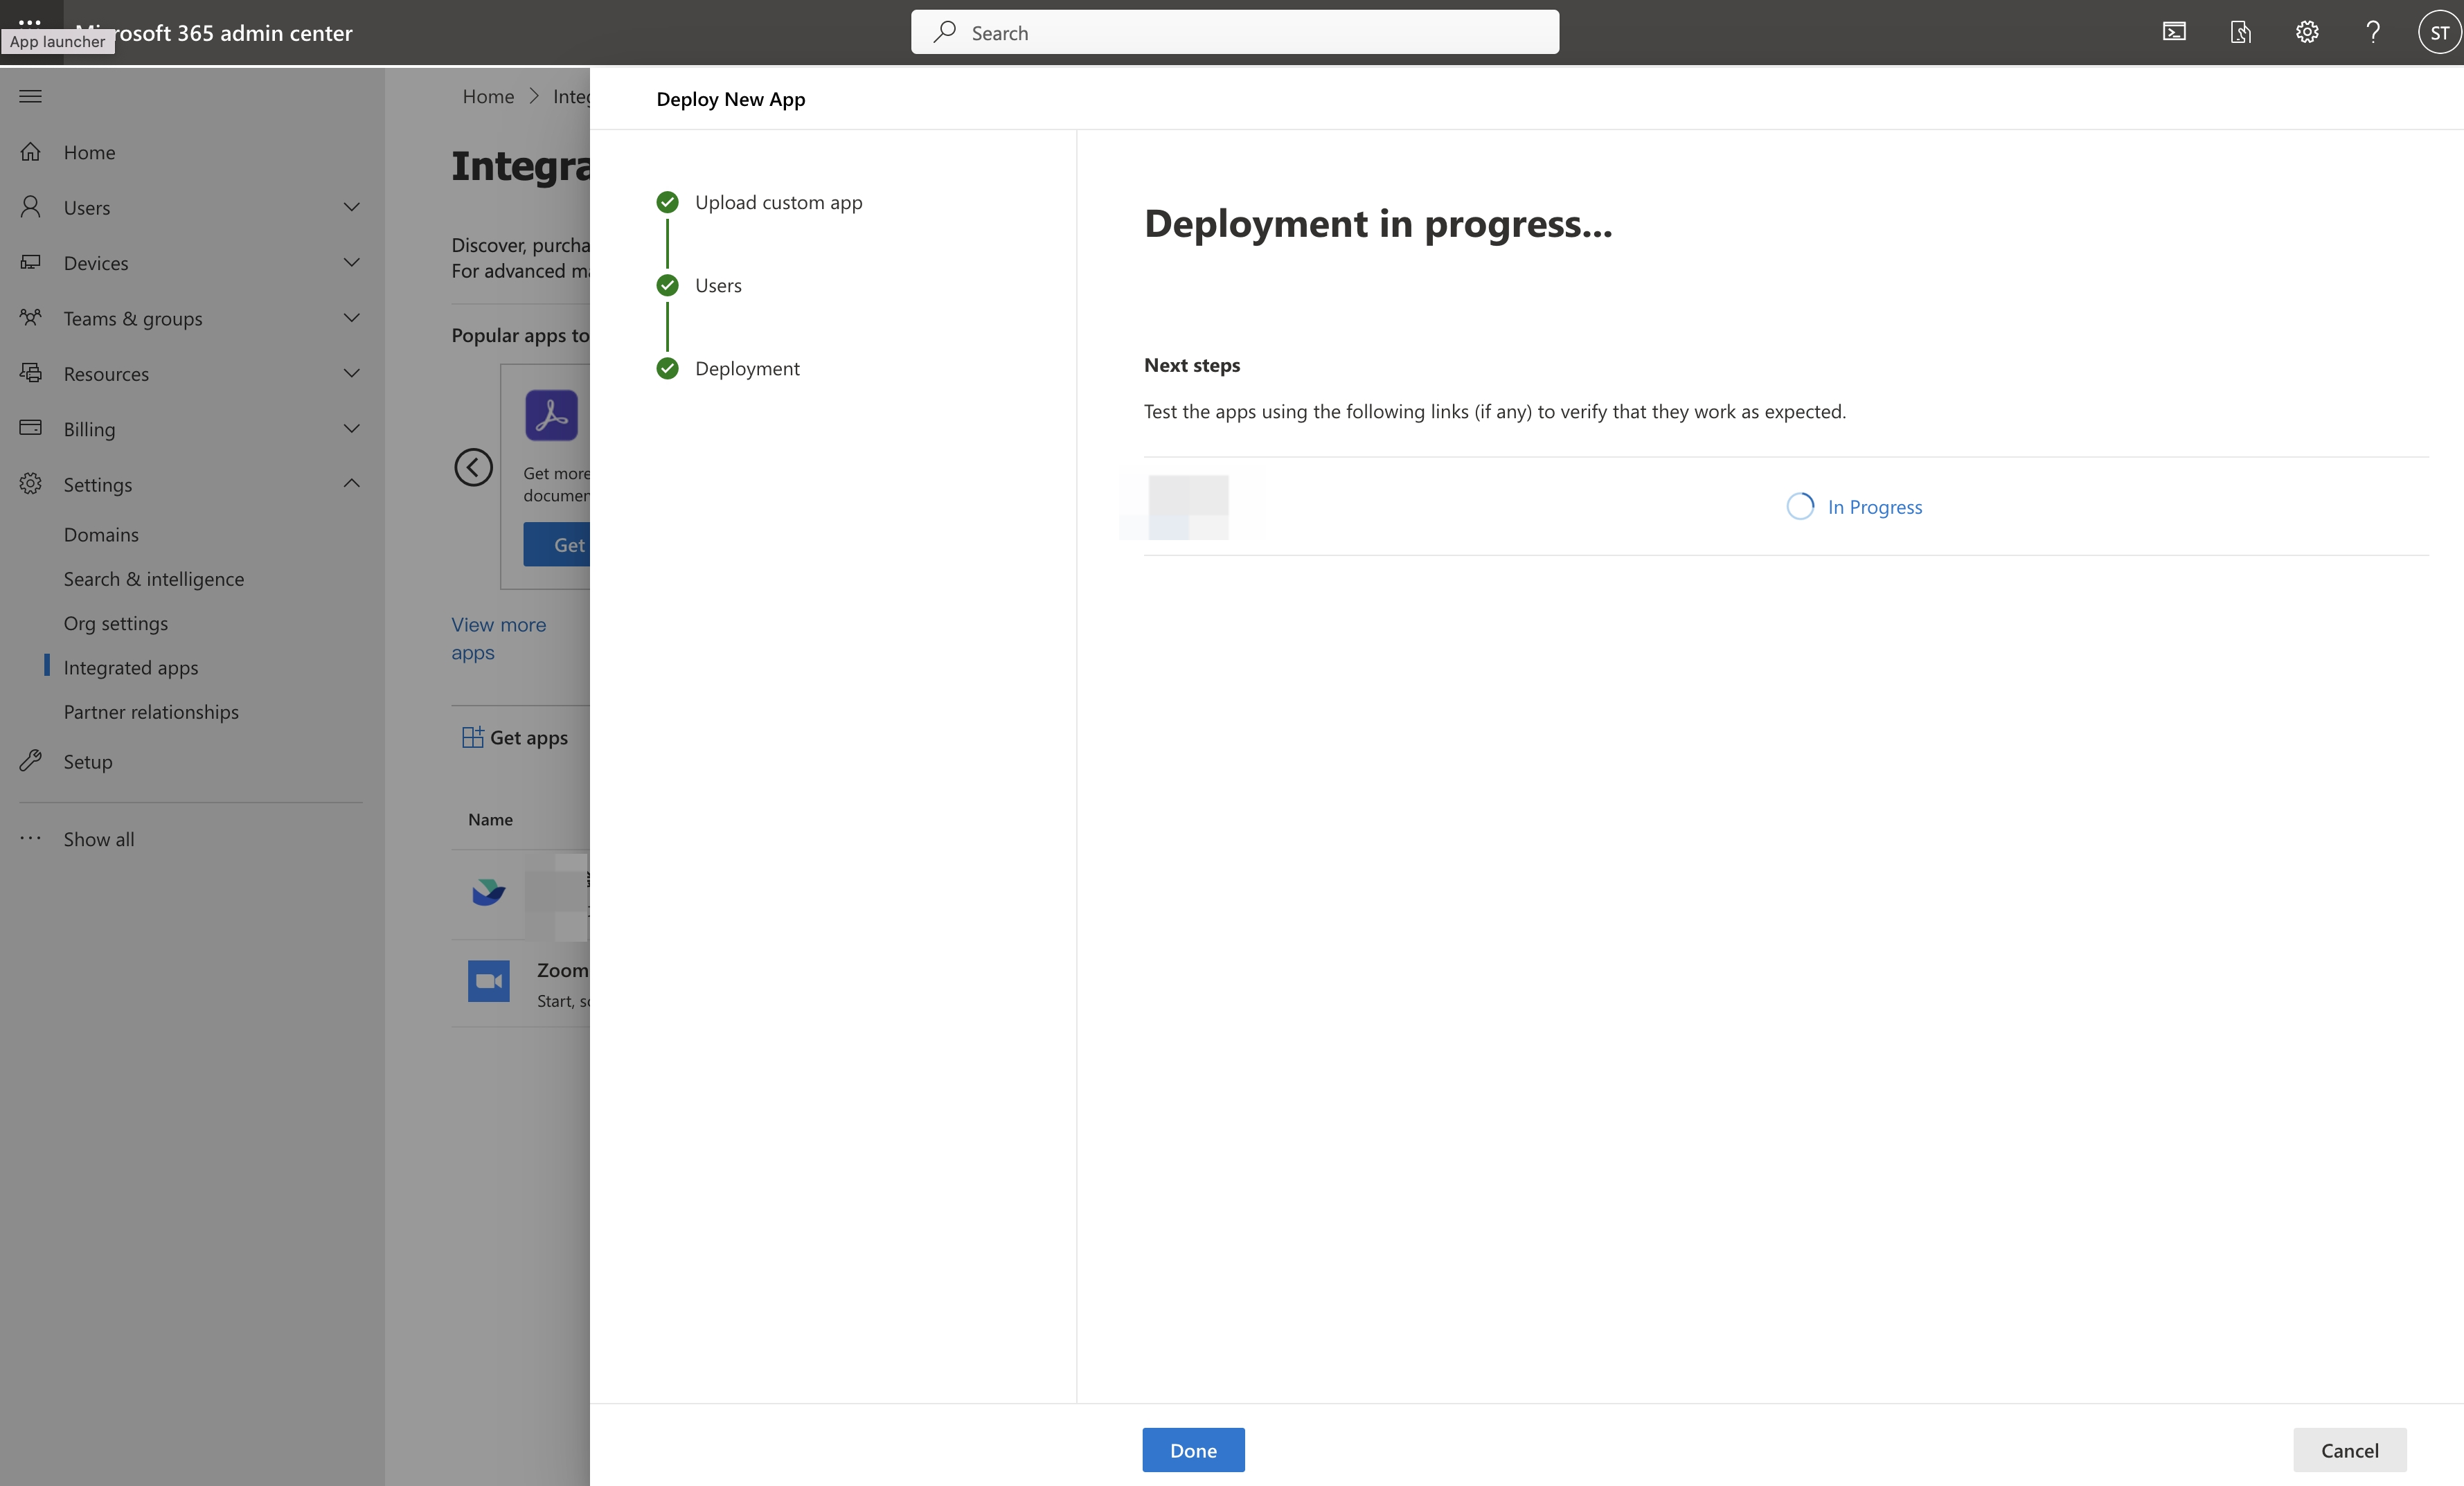
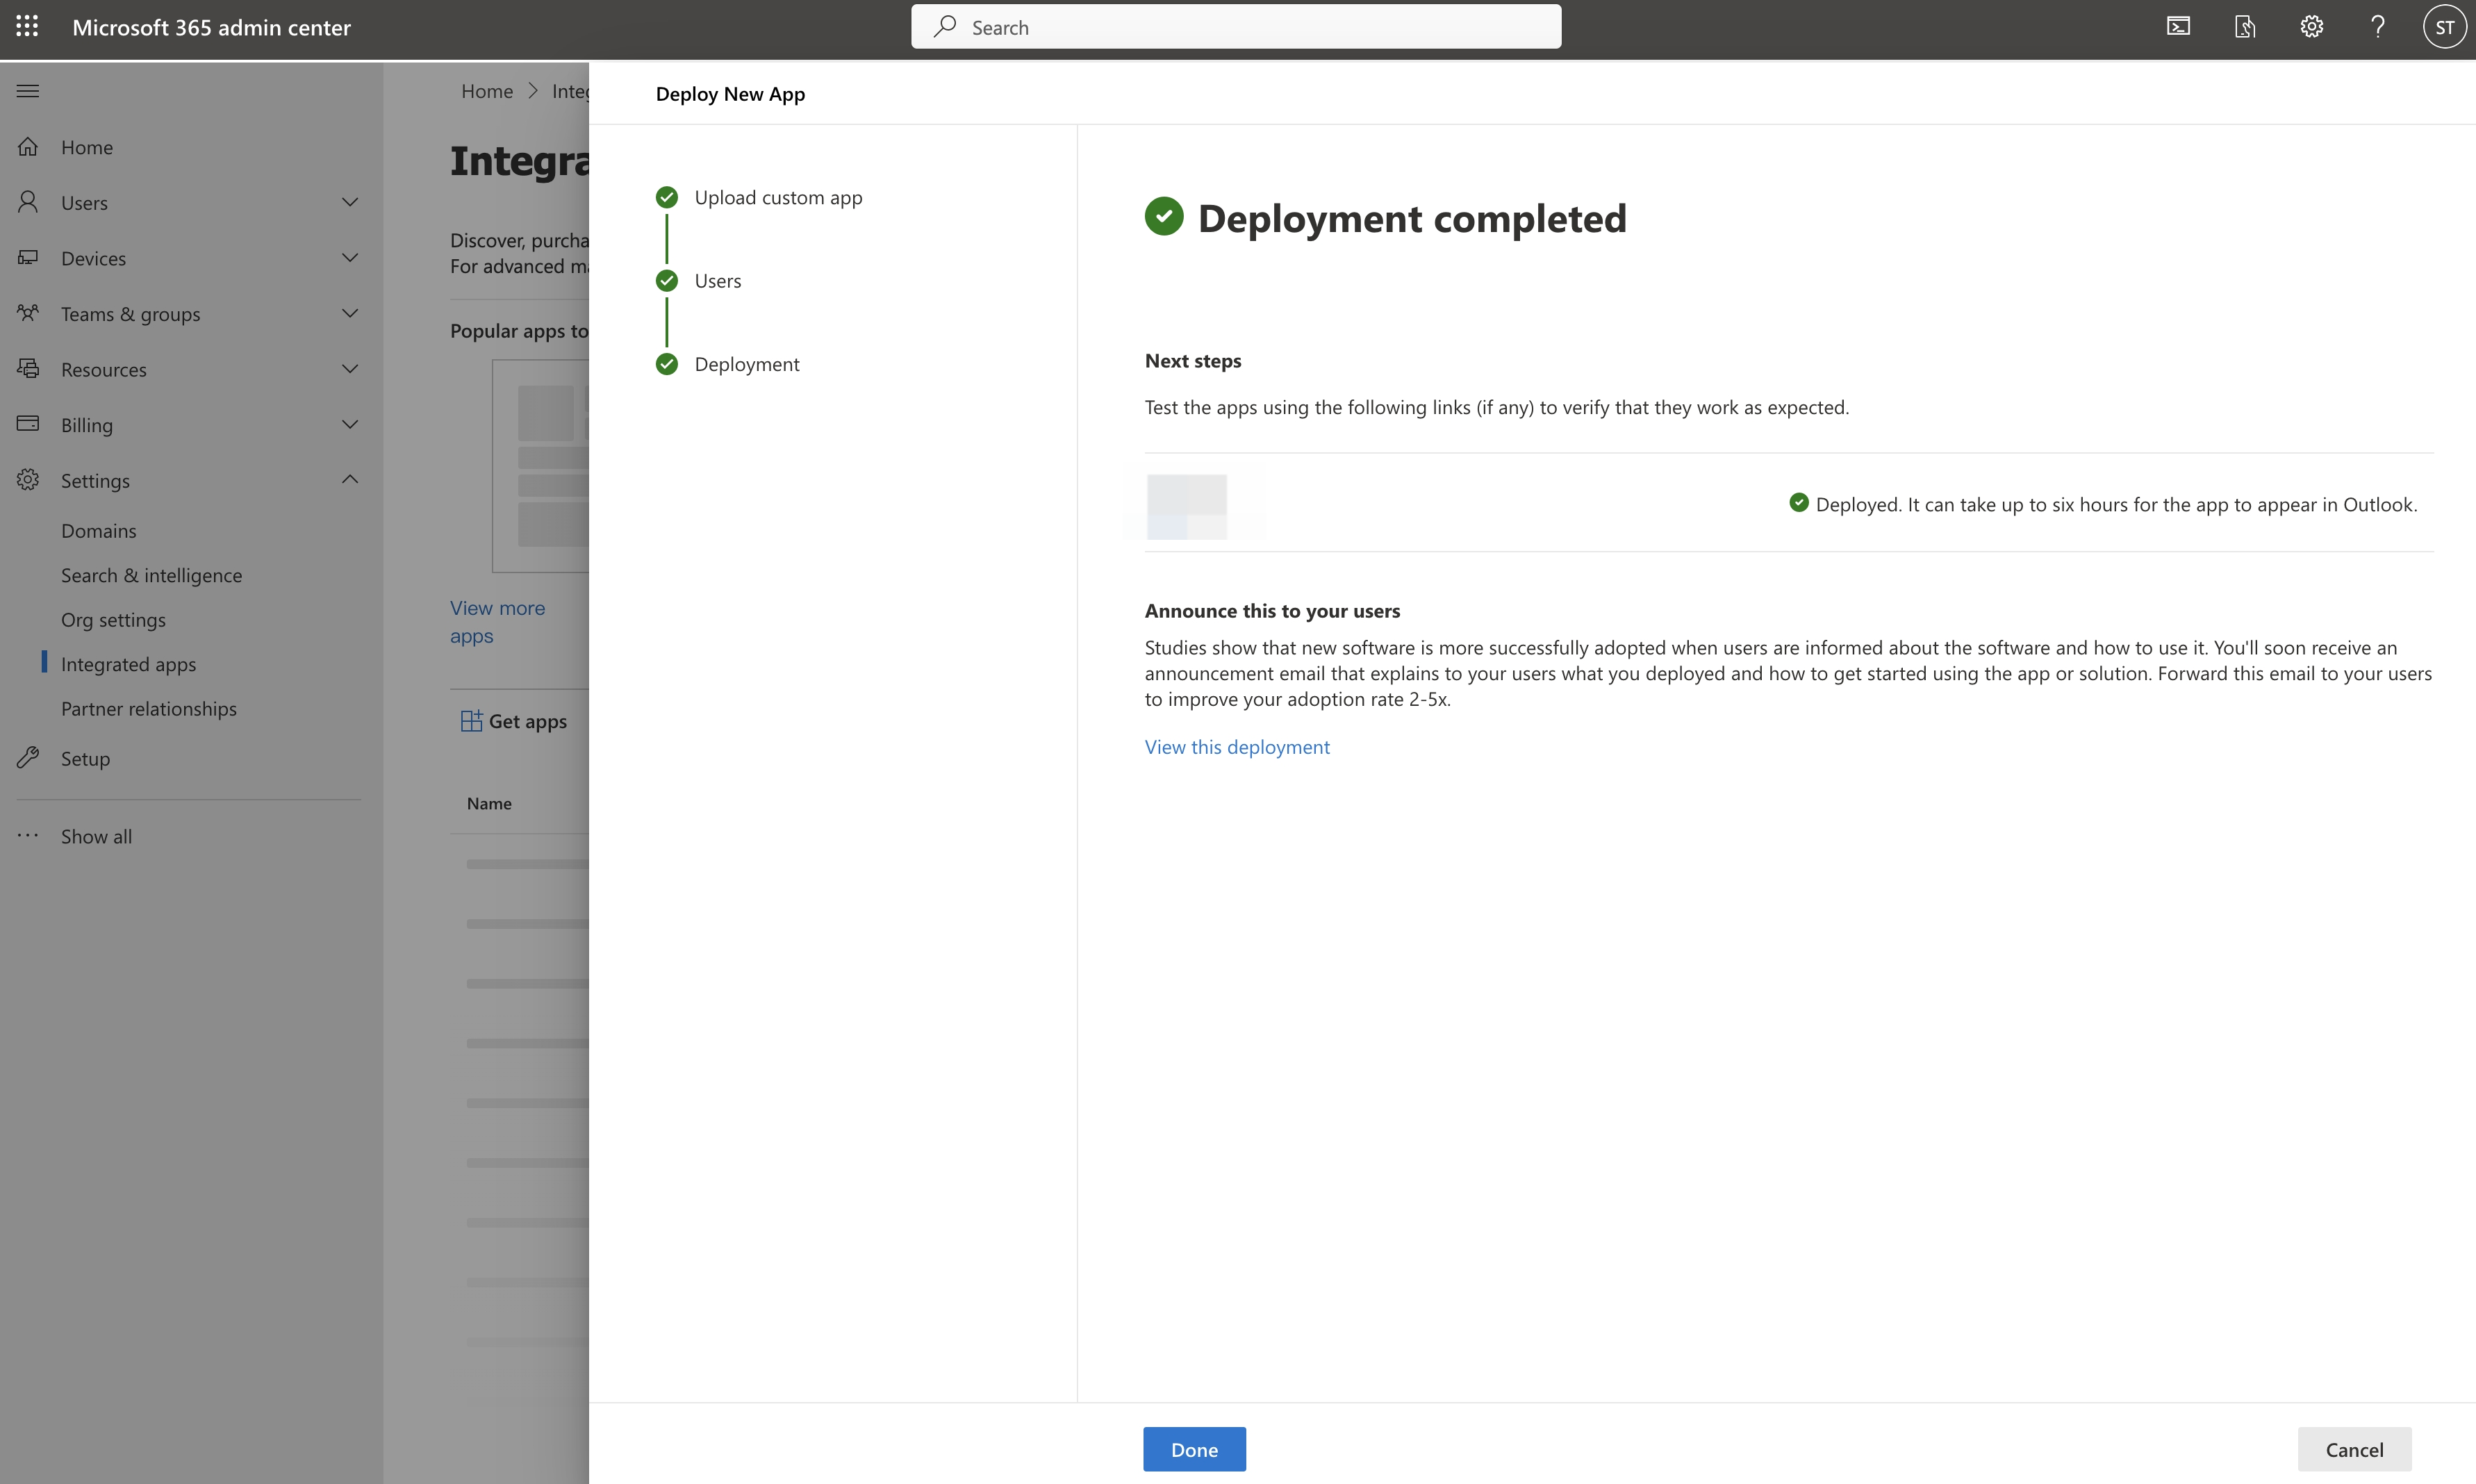
During the deployment process, the message Deployment in progress... displays. When the deployment is complete, the message Deployment completed displays. You can test the app using the link in the interface, and click Done at the bottom of the page to complete the entire add-in installation process.
250px|700px|reset
250px|700px|reset
The Lark meeting add-in will display on the Integrated apps page, indicating that the add-in has been successfully installed.
250px|700px|reset
Users install the add-in
Install the Lark meeting add-in in Outlook
The steps in different versions of Outlook are different. Refer to the corresponding instructions below.
For Outlook Version 16.85 (24051214) and above versions:
- Click https://aka.ms/olksideload to open the web version of Outlook.
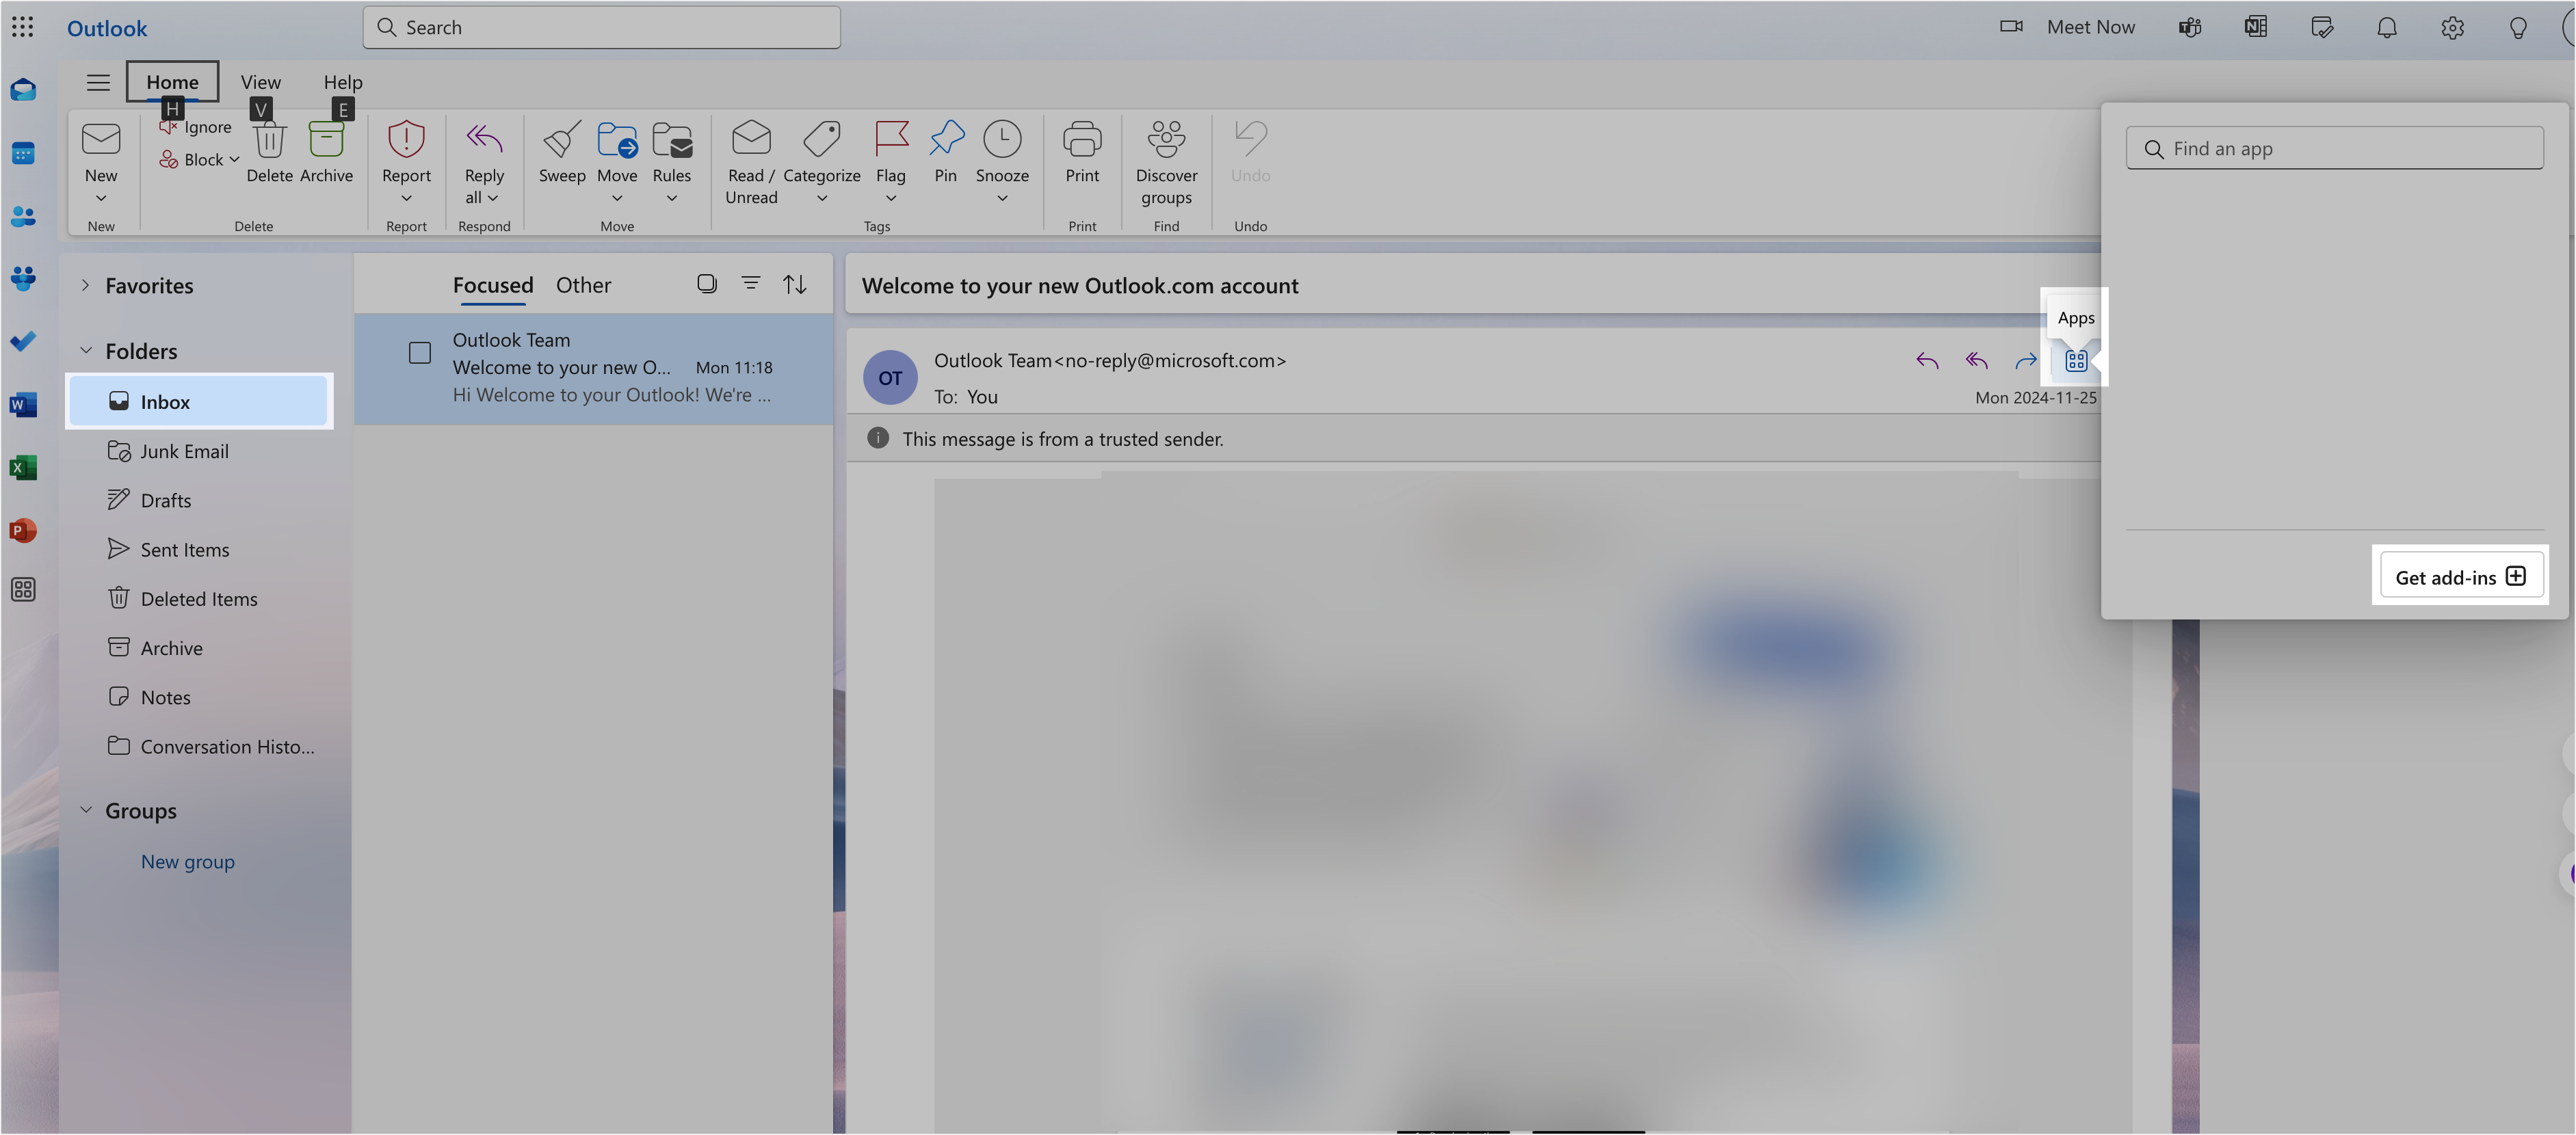
- Open any email in the Inbox. On the email details page, click the Apps icon on the right side of "To".
- Click Get add-ins + in the pop-up window to open the add-in page.
250px|700px|reset
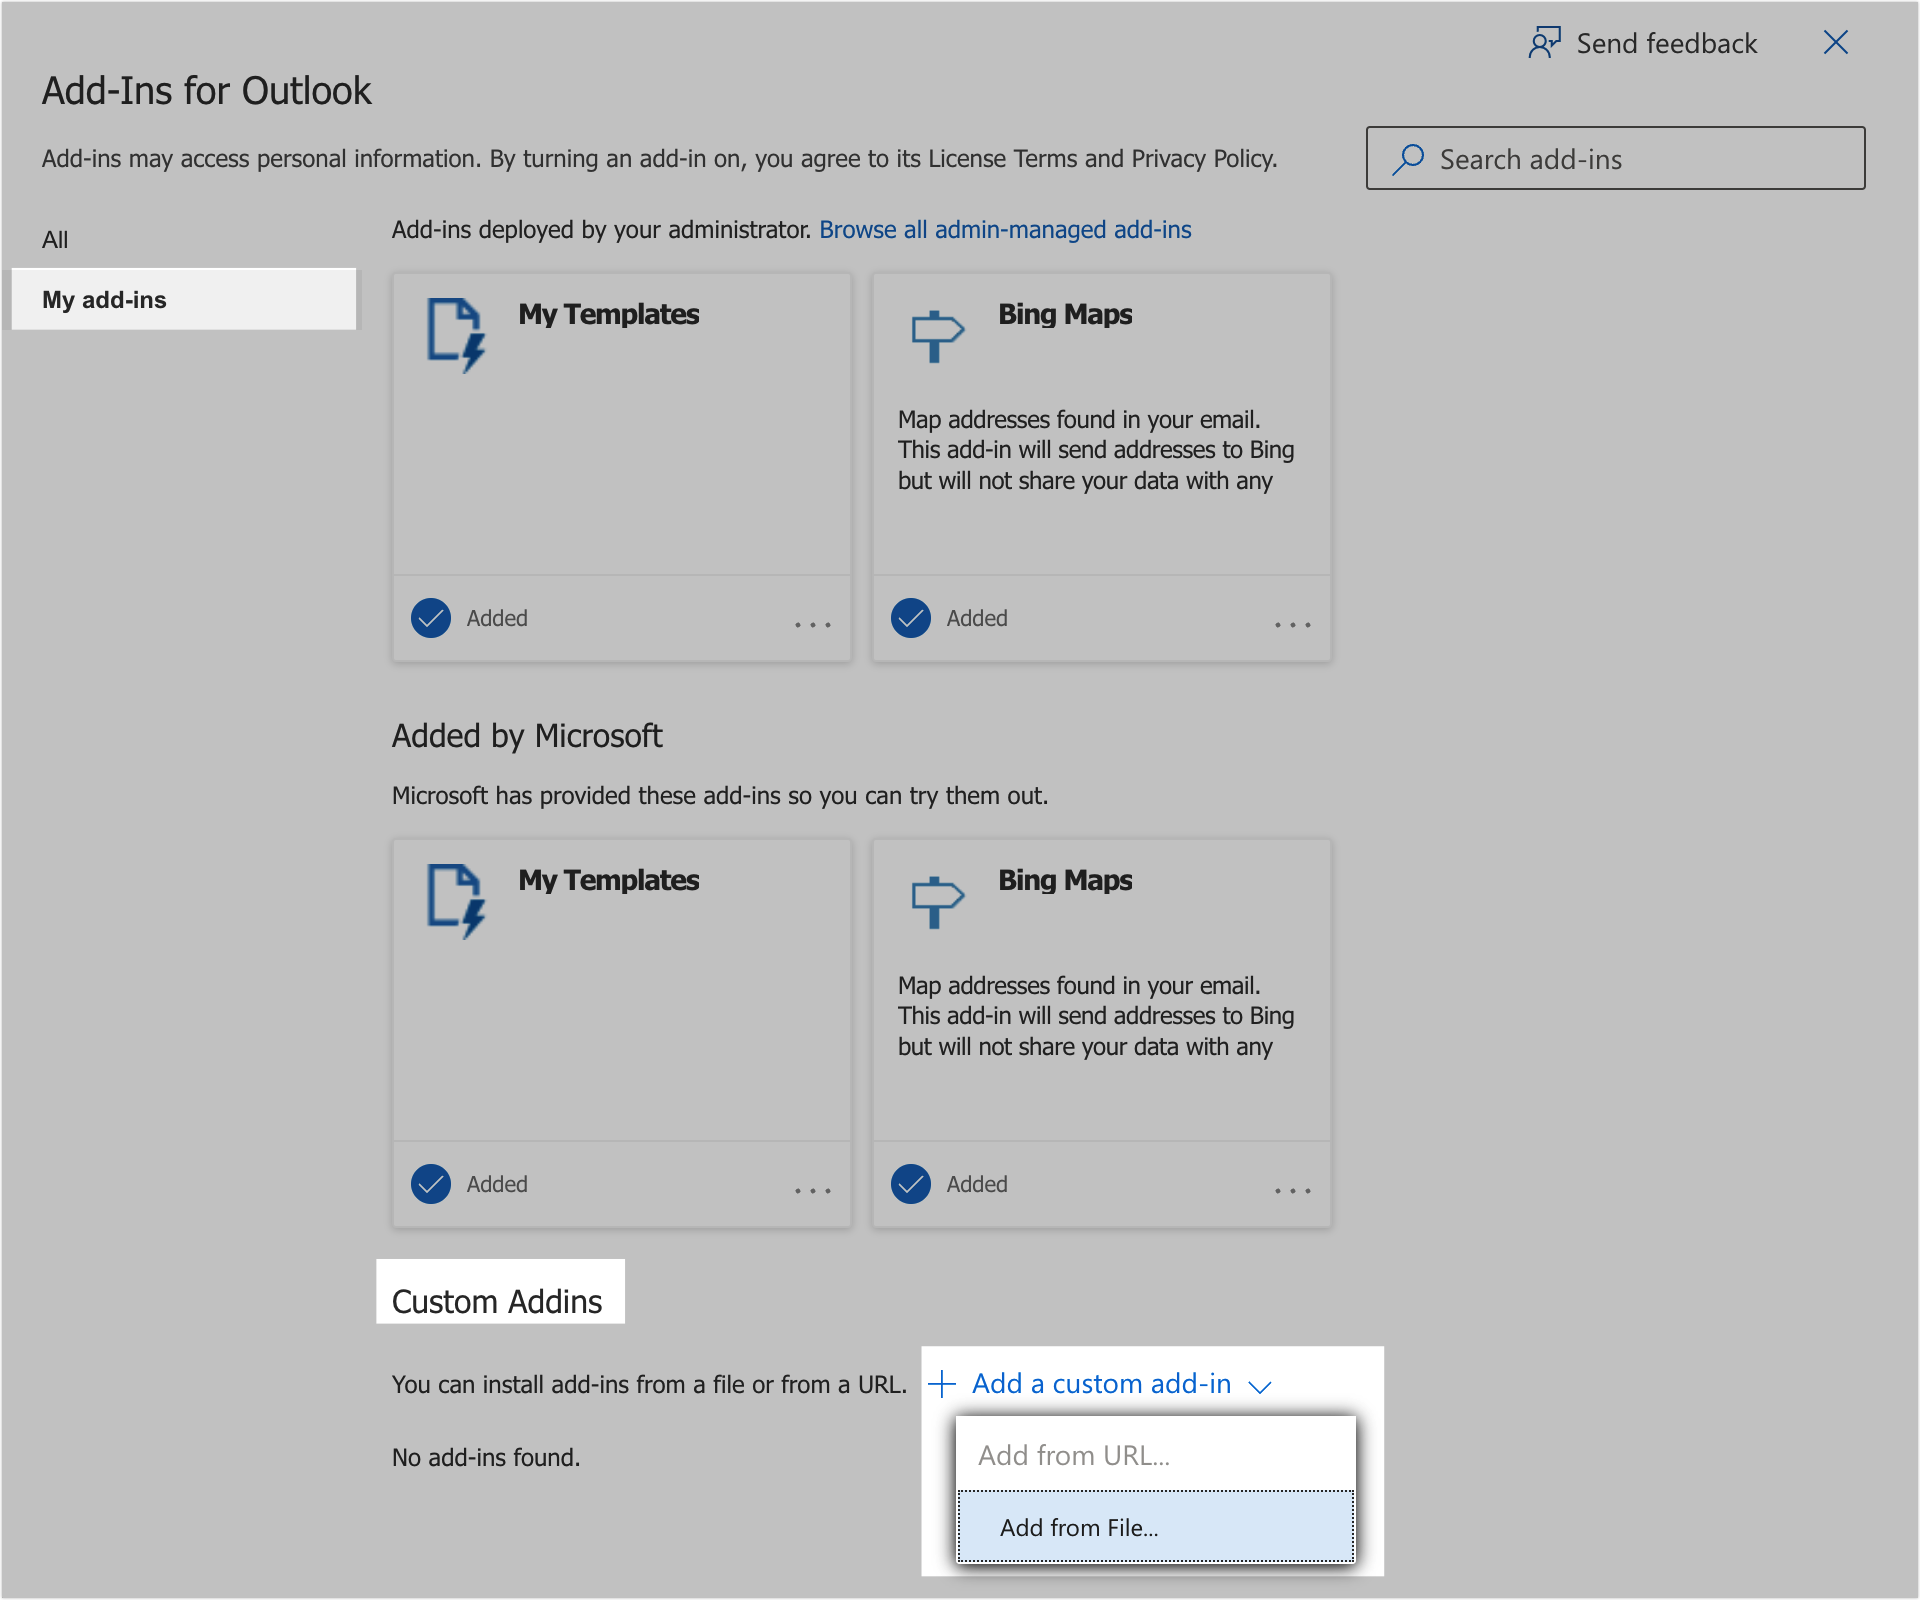
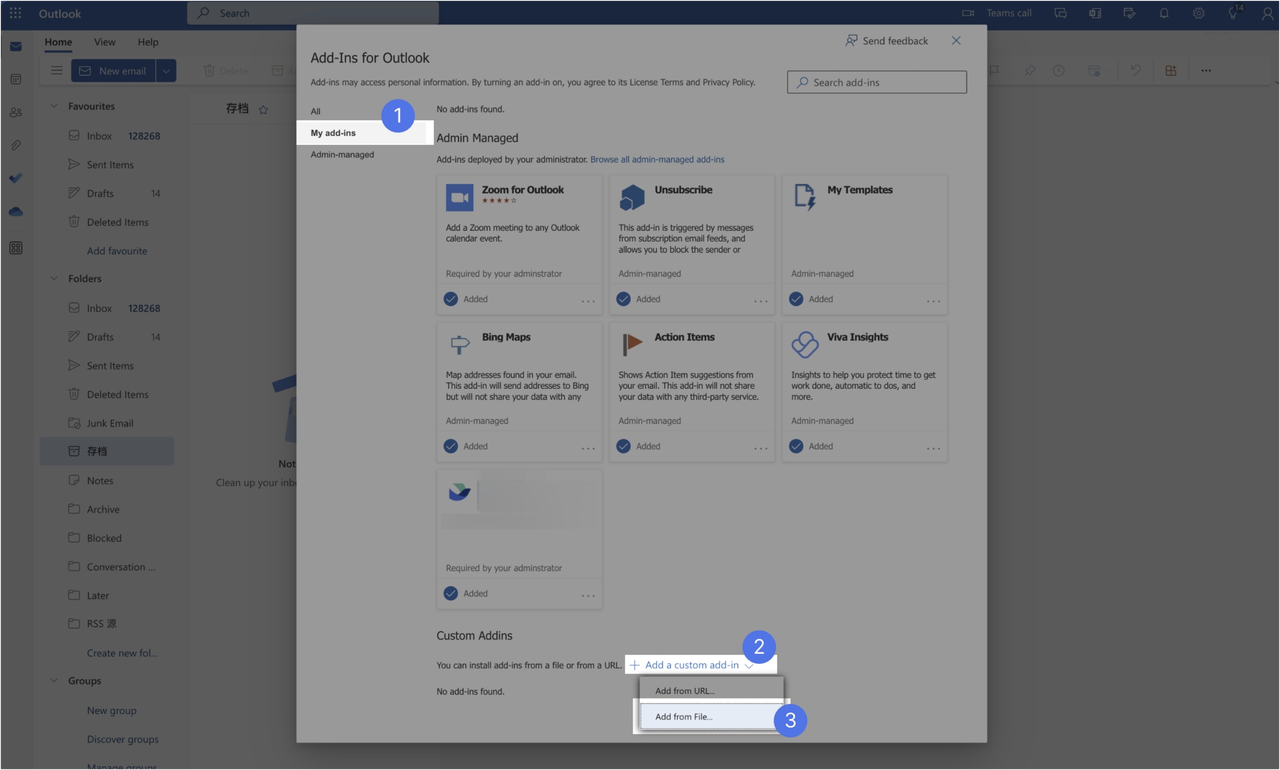
- Click My add-ins on the left. In the section of Custom Addins, click Add a custom add-in > Add from File, and select the Lark Meetings add-in that you downloaded (You can find the plug-in installation package at the end of this article).
250px|700px|reset
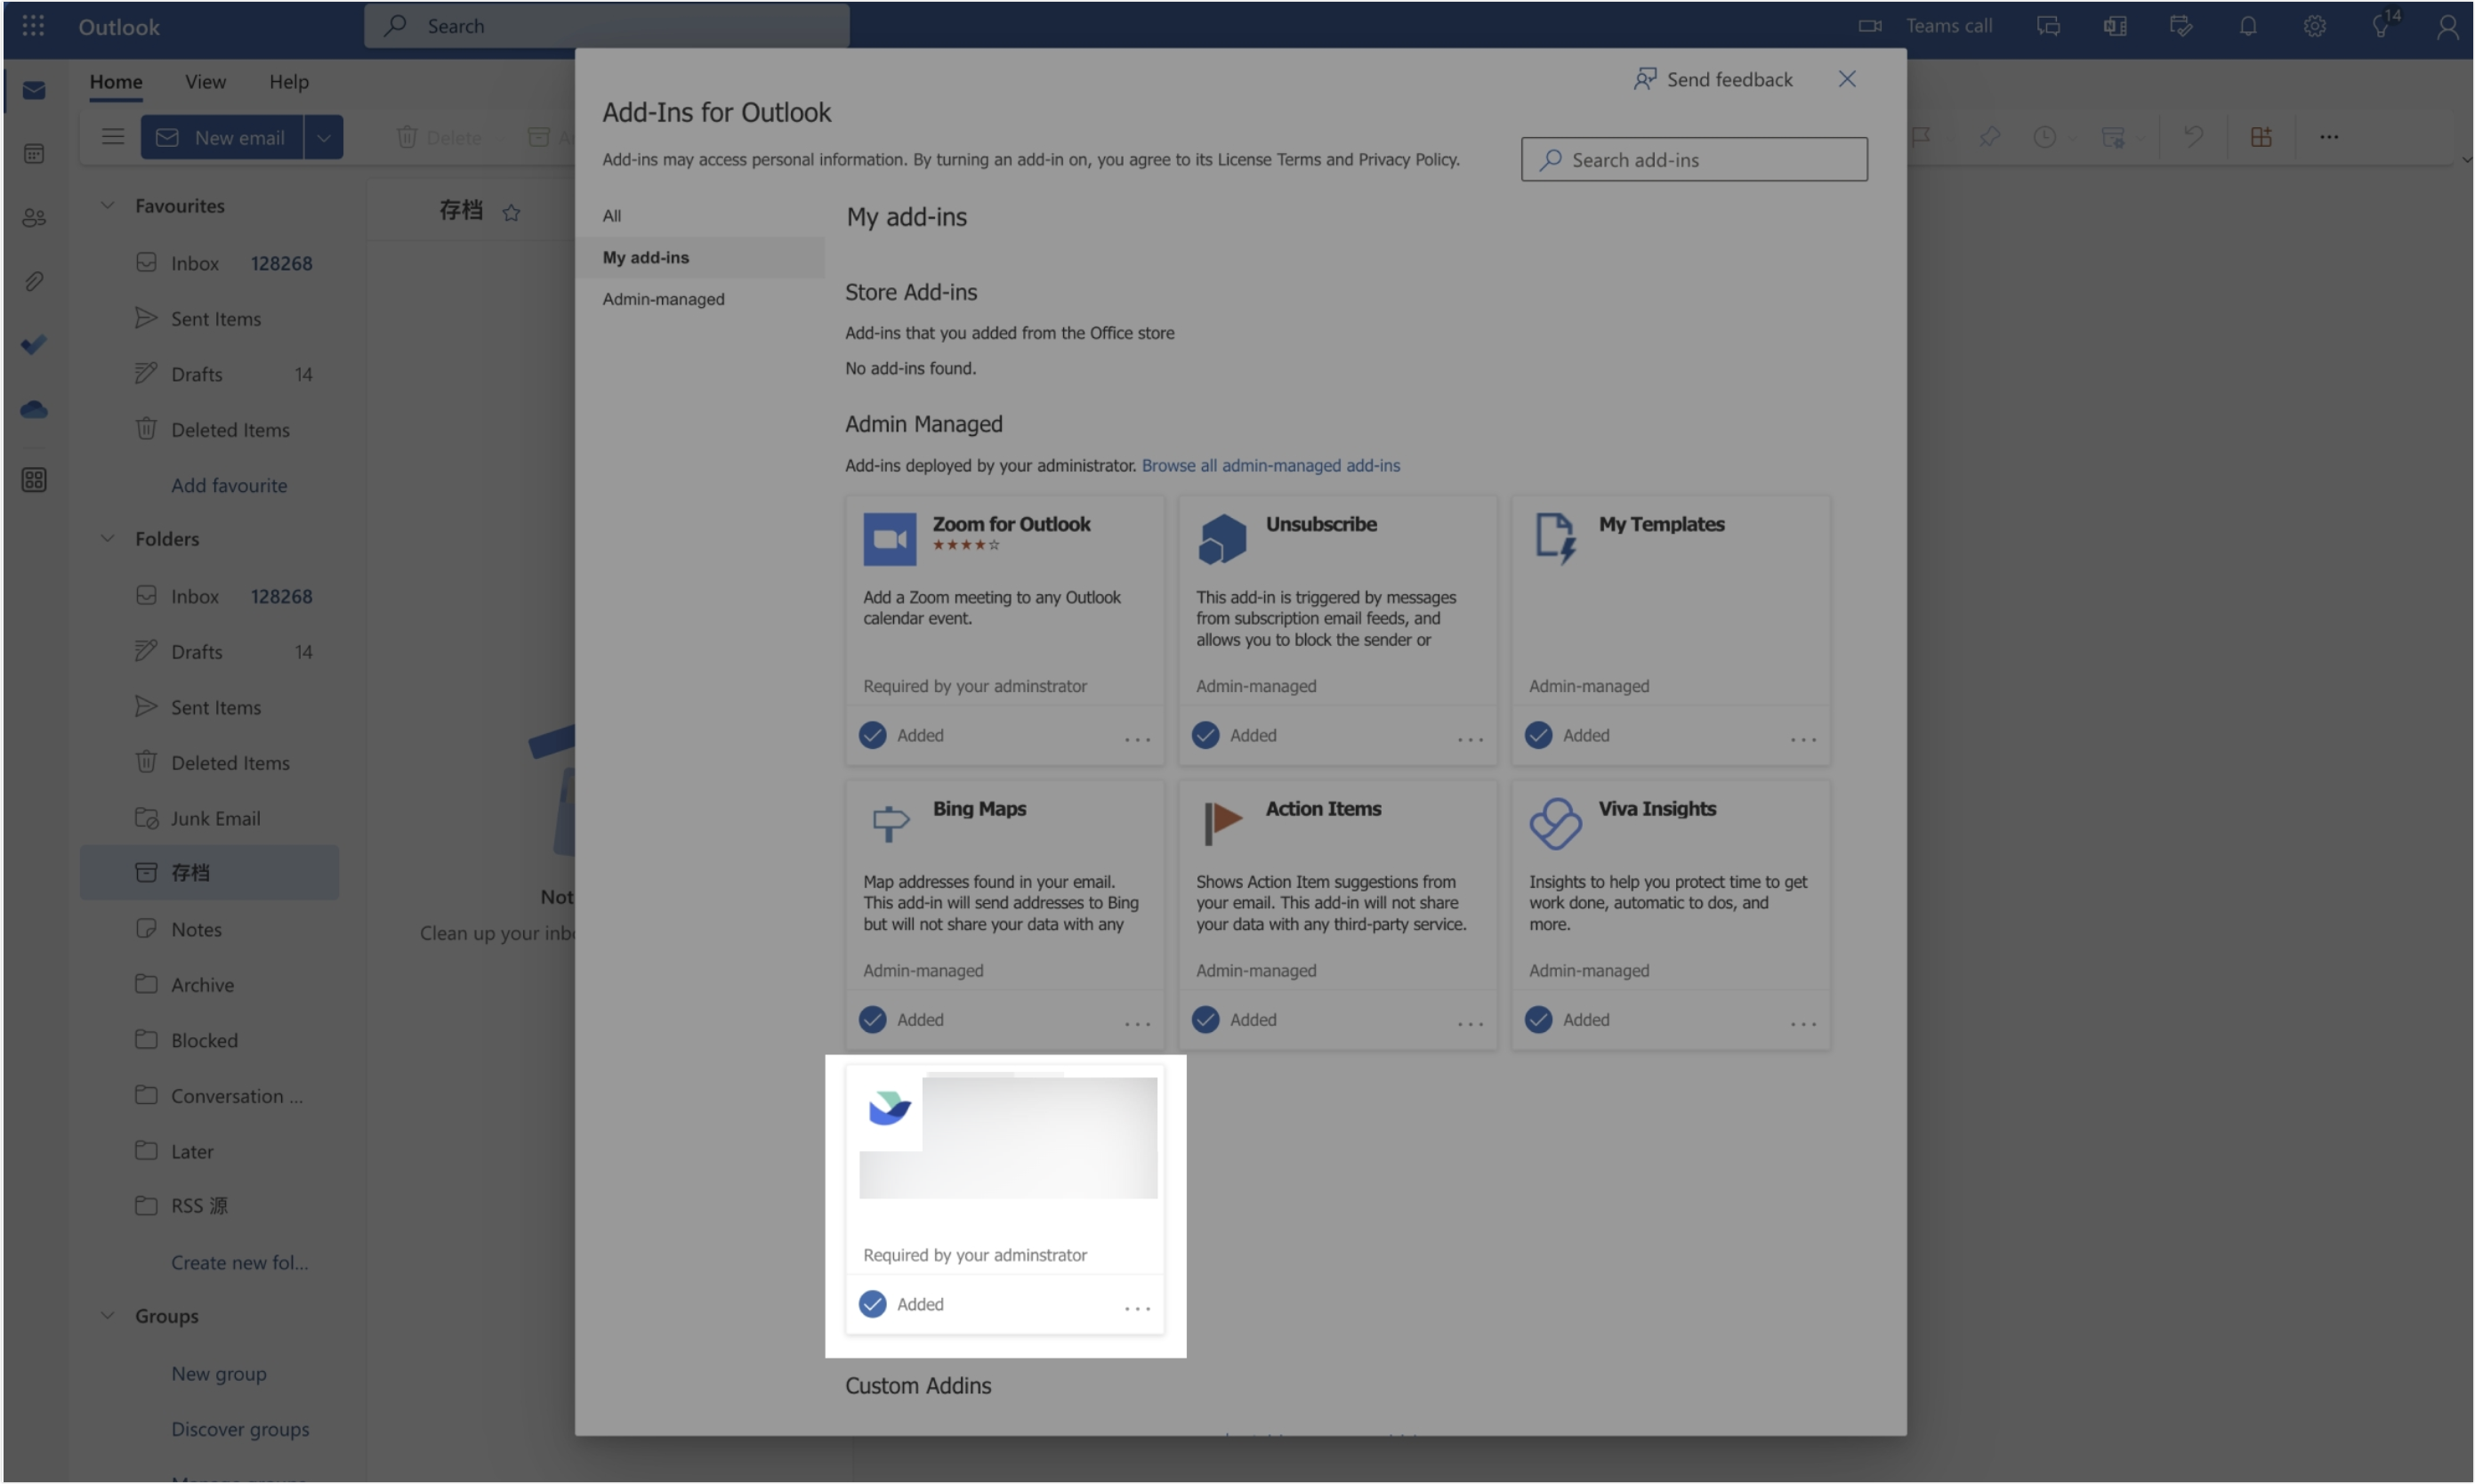
- The Lark Meetings add-in will be displayed in the Custom Addins section indicating that the add-in has been successfully installed.
For earlier versions before Outlook Version 16.85 (24051214):
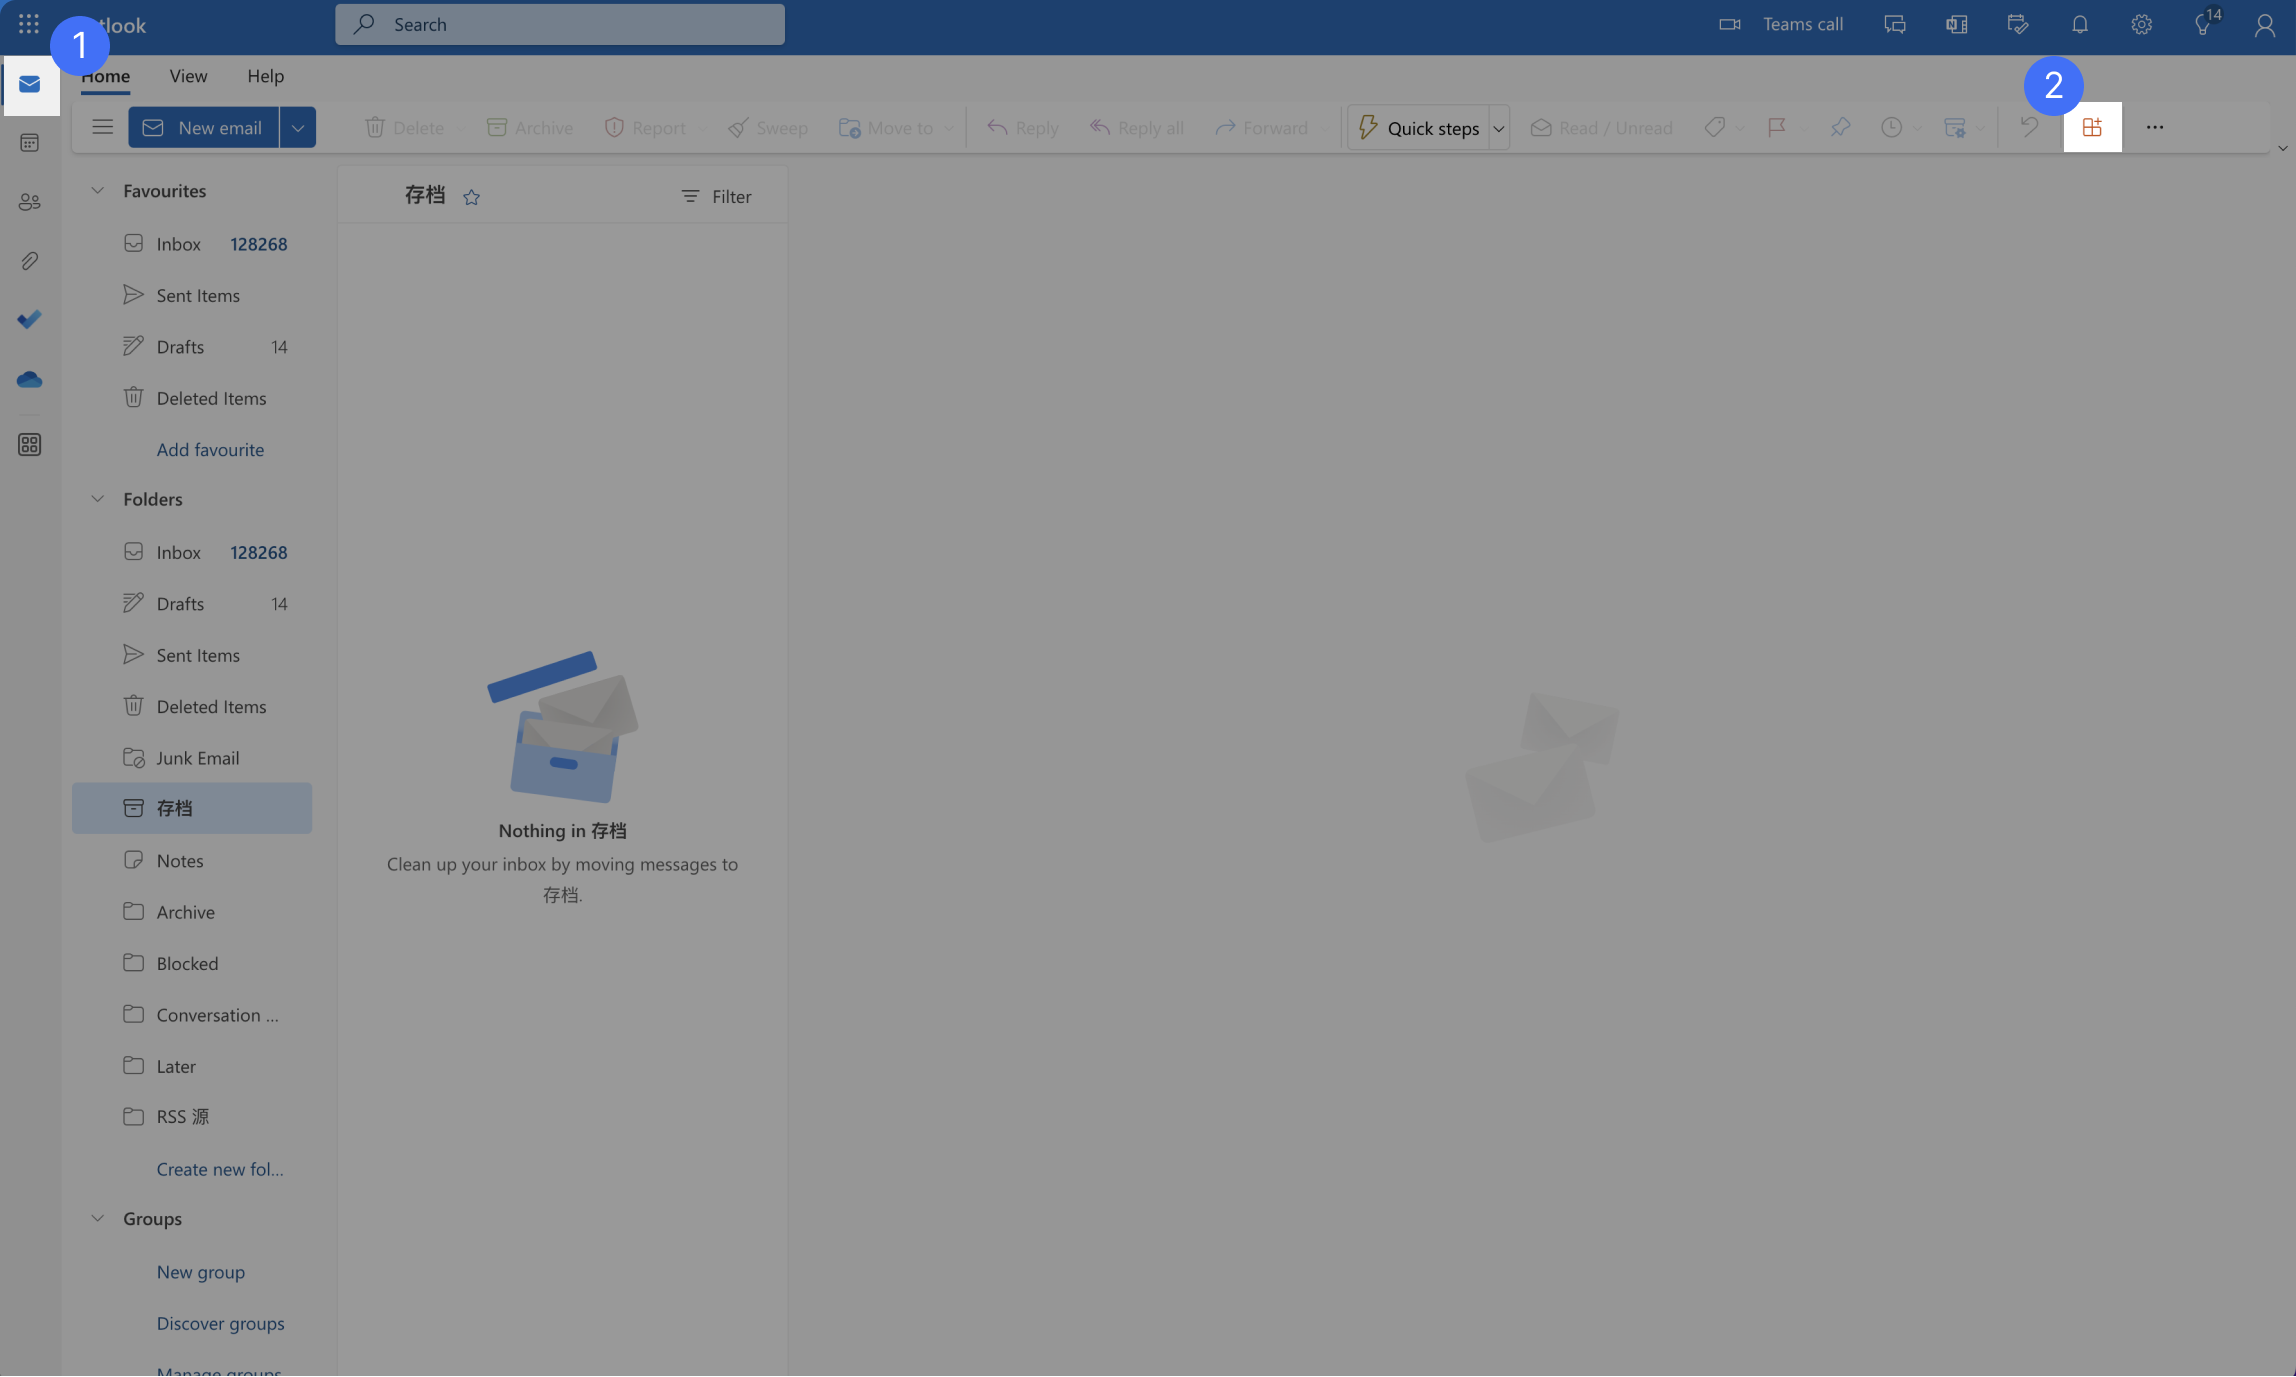
- Open Outlook, and then click Get add-ins in the upper-right corner in the Mail view.
250px|700px|reset
- A pop-up window for installing add-ins displays. In the section of Custom Addins, click Add a custom add-in > Add from File, and select the Lark Meetings add-in that you downloaded
250px|700px|reset
- The Lark meeting add-in will display in the Custom Addins section indicating that the add-in has been successfully installed.
250px|700px|reset
- Bind your Lark account
After the add-in is installed successfully, you can add Lark meetings in the Outlook Calendar. But you need to bind your Lark account before using the Lark add-in.
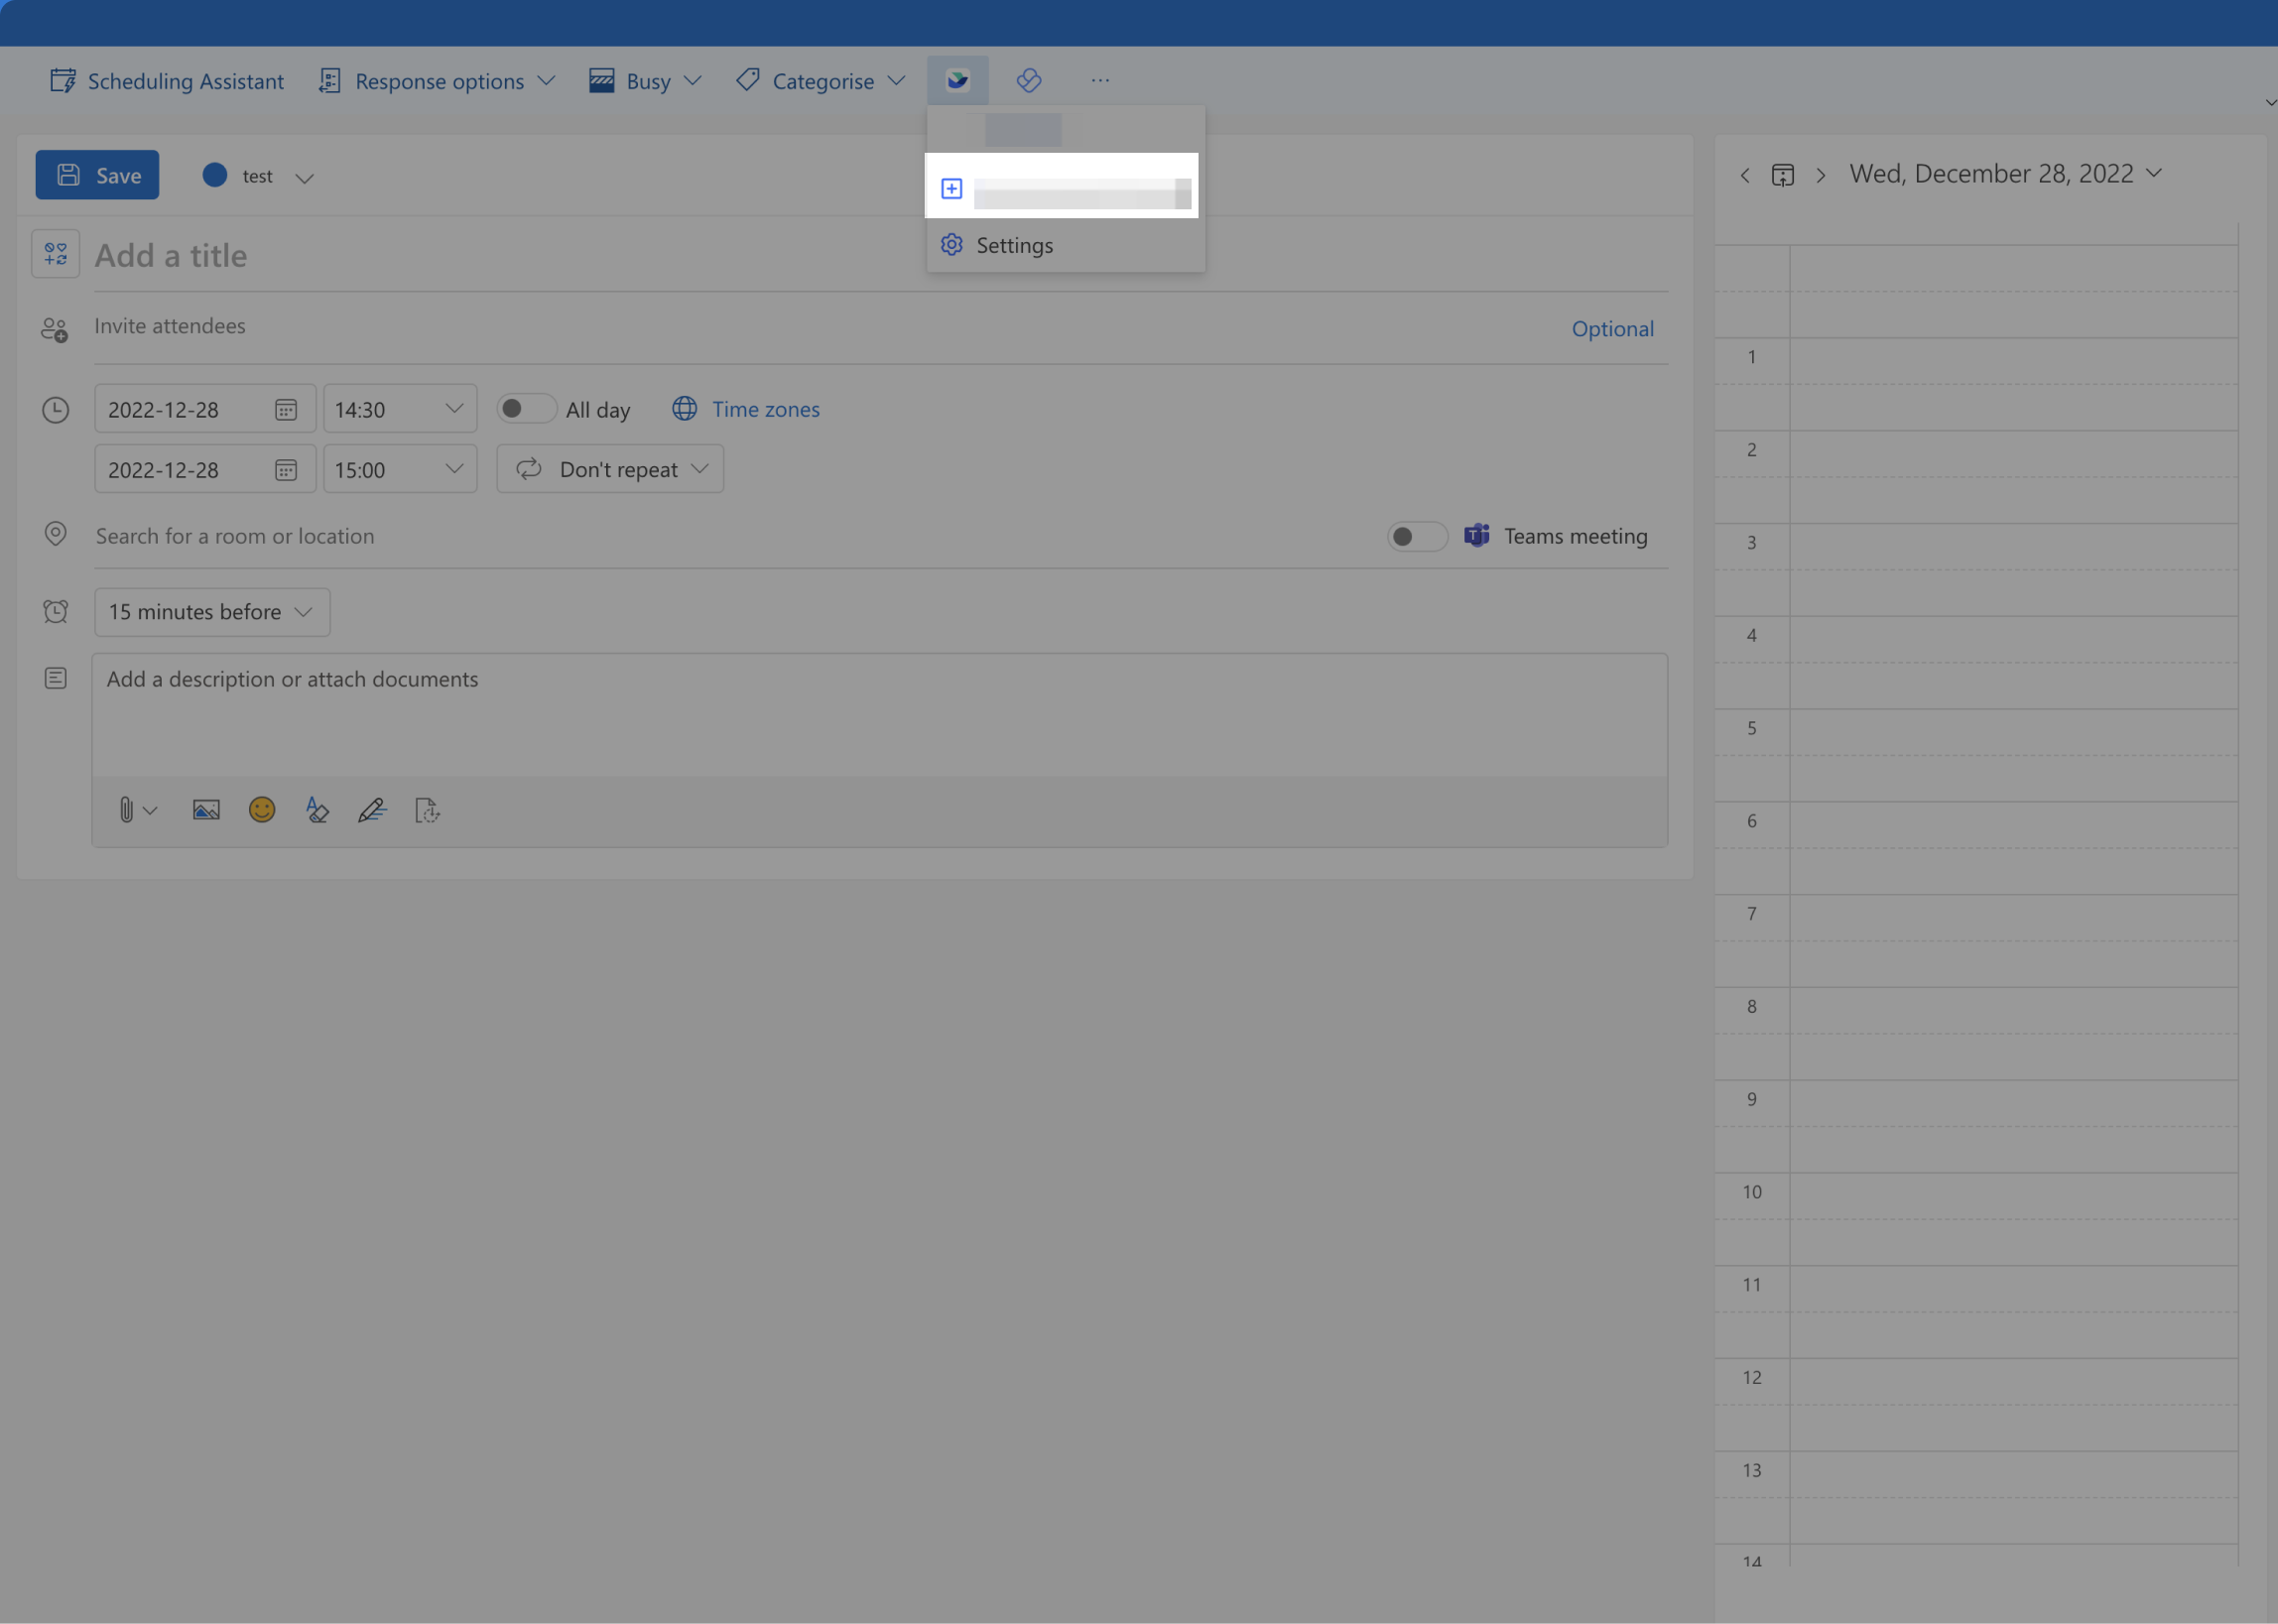
When creating an event in the calendar view, click More options at the bottom right. Then click Lark Meeting > settings at the top and you will be prompted to log in to Lark. Click Log in, a Lark QR code login page will pop up. Use the Lark mobile app to scan the QR code to log in and bind the Lark account.
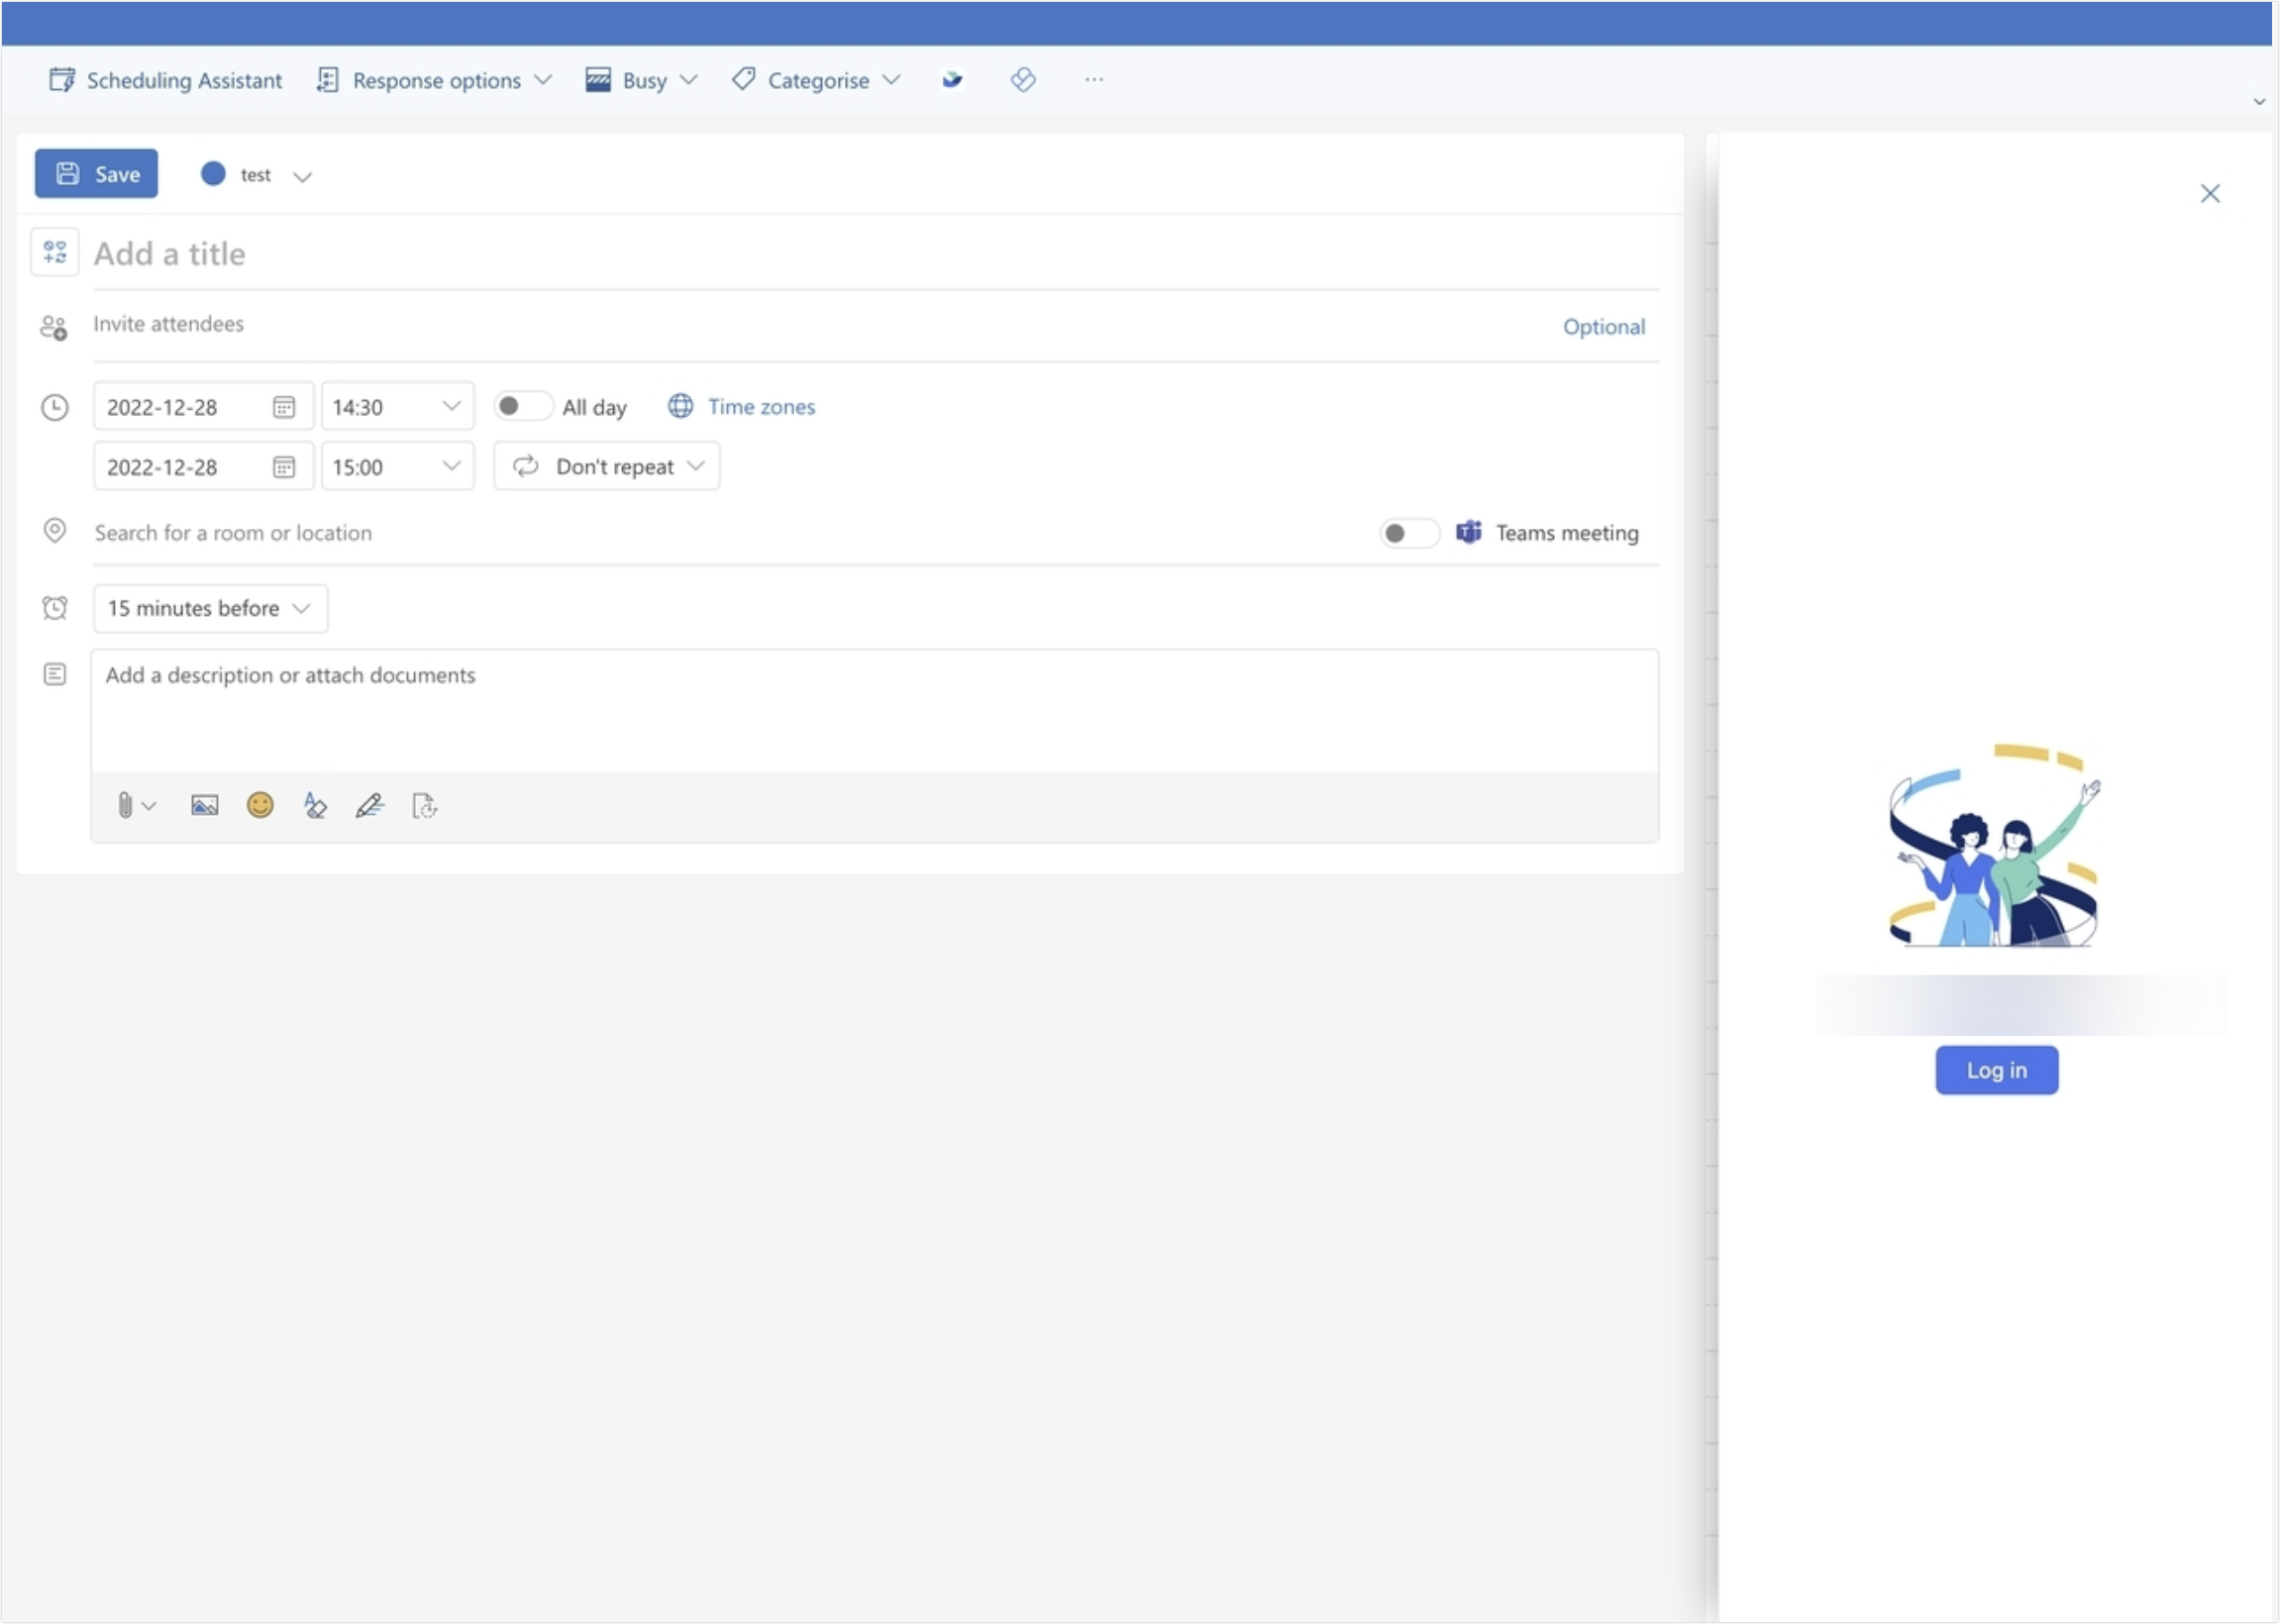
250px|700px|reset
- Create a Lark meeting
After the Lark account is successfully bound, click Lark Meeting > Add a Lark meeting at the top of the event editing interface where you can add a Lark meeting to this event.
250px|700px|reset
- Set up the meeting
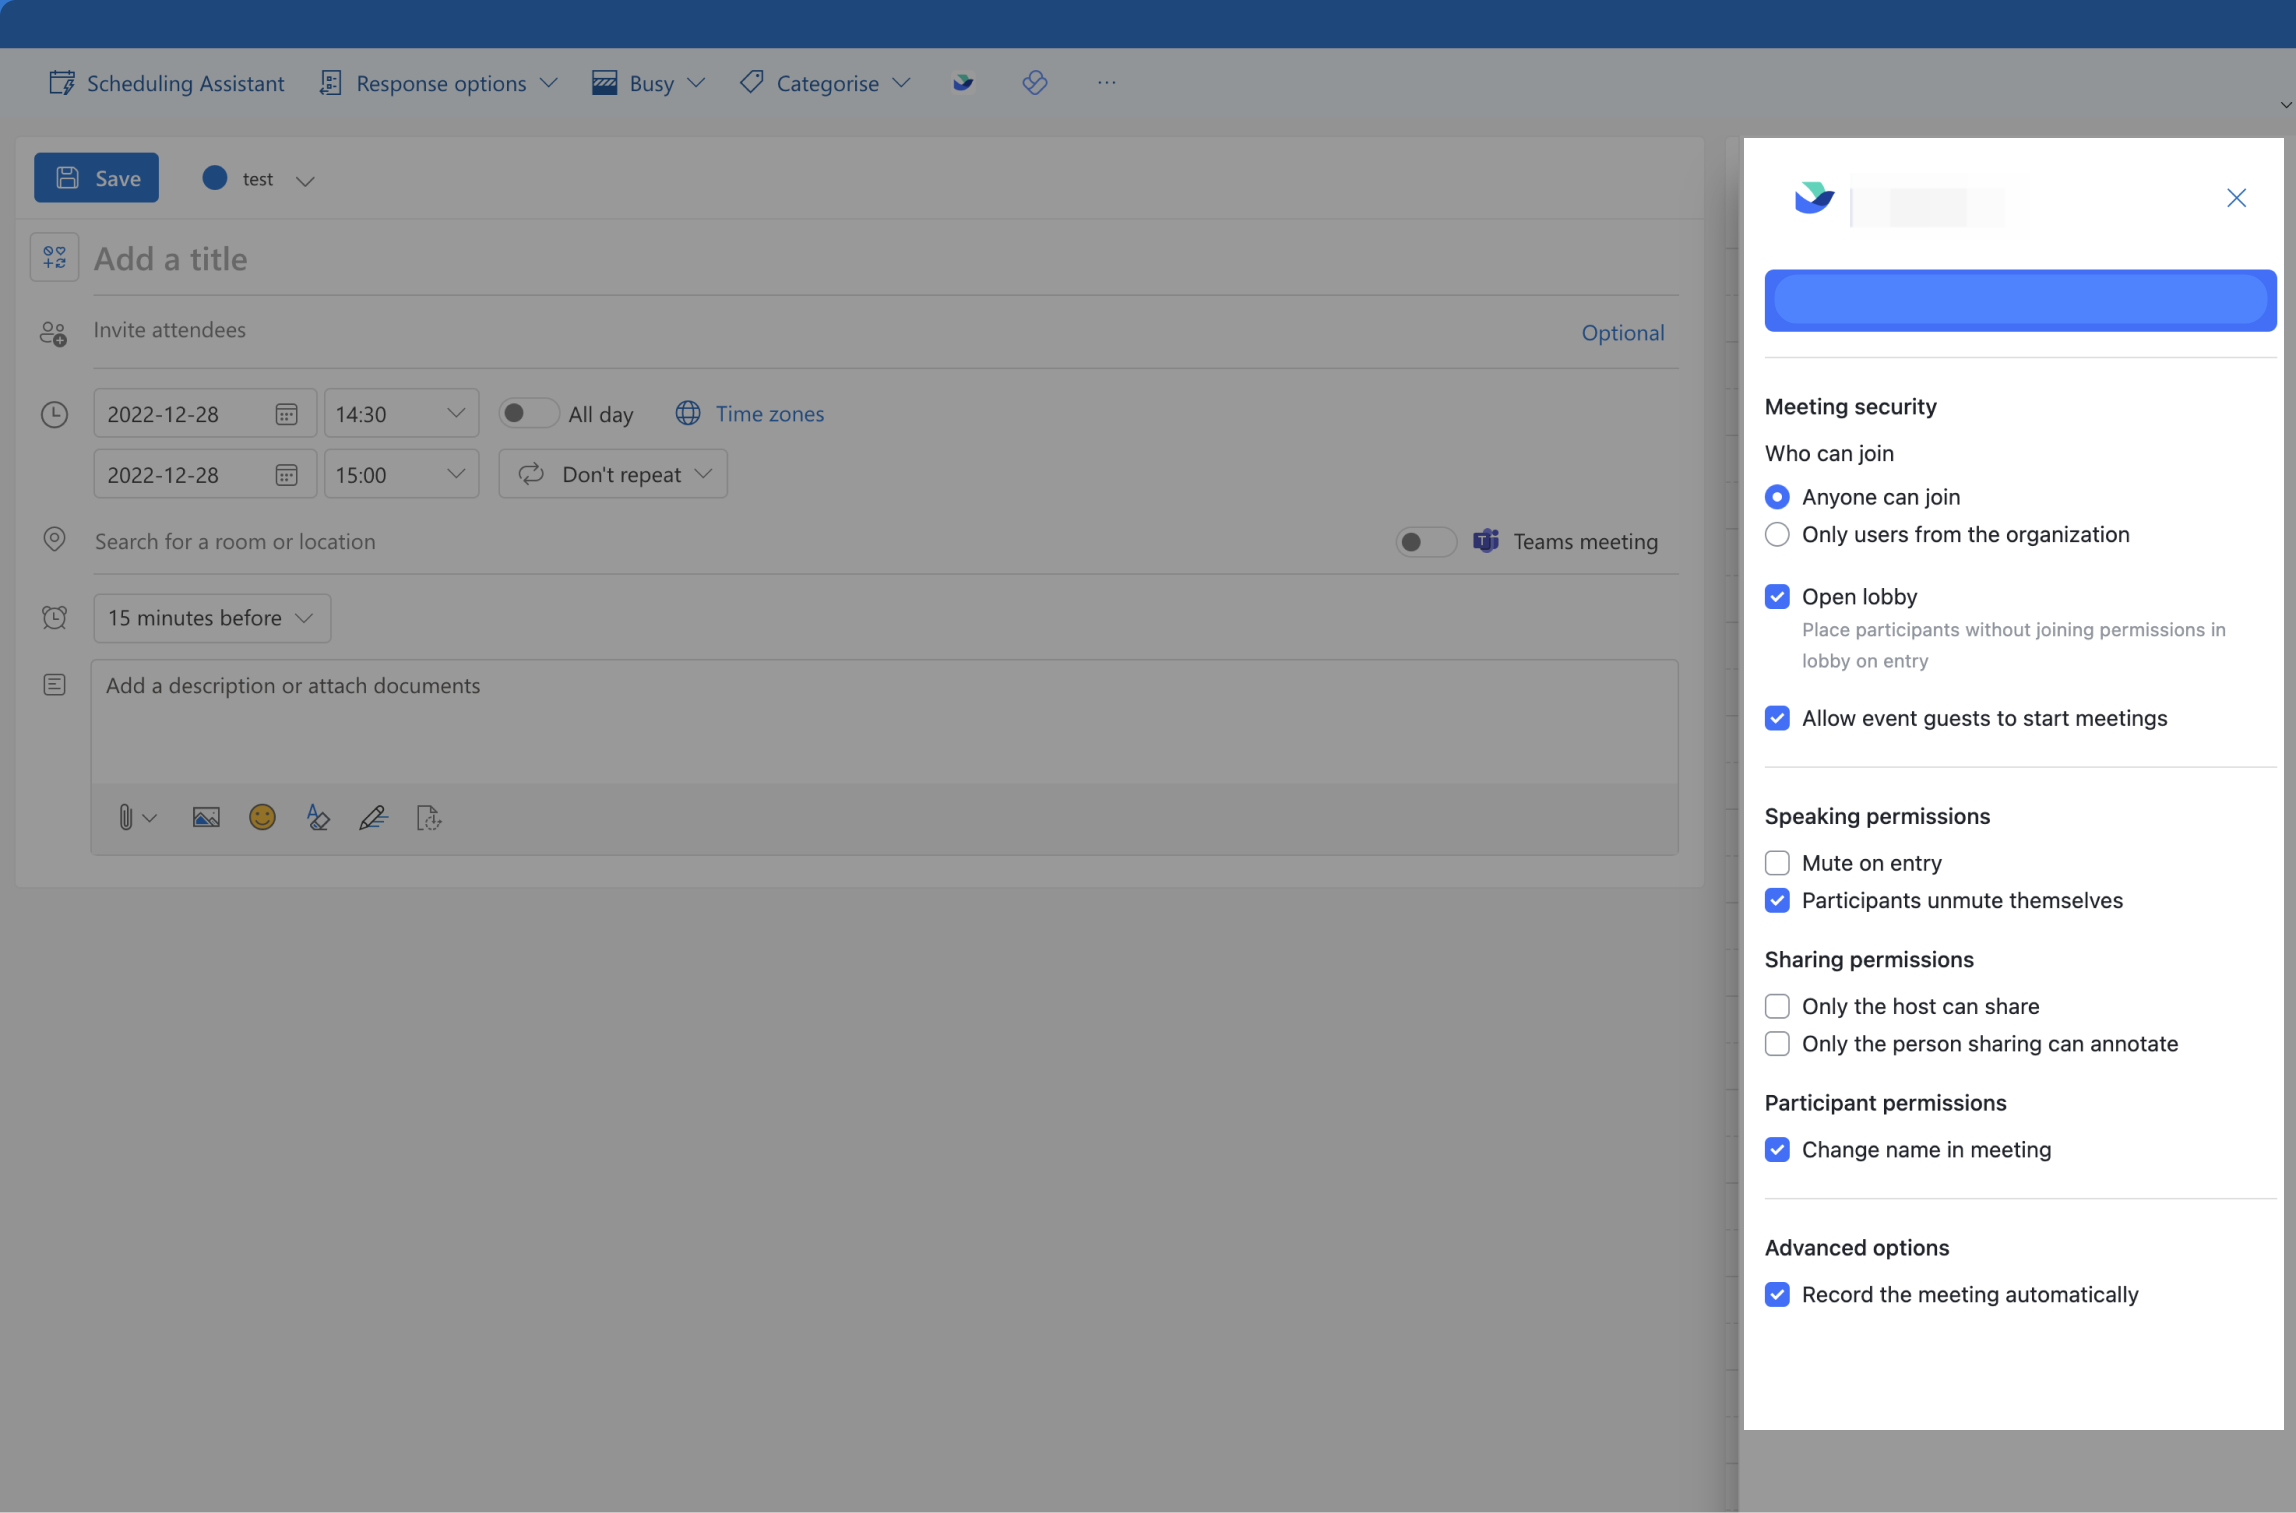
After you add a Lark meeting, the meeting settings will automatically display on the right side of the event editing page. You can set the Meeting security, Speaking permissions, Sharing permissions, and Participant permissions. You can also select whether to enable automatic recording for this meeting.
250px|700px|reset
Meeting Security
Who can join
- If you select Anyone can join, any user can join the meeting.
- If you select Only users from the organization, only users within the event organizer's company can join the meeting.
Open lobby
If you select Open lobby, participants without joining permission will enter the lobby after the meeting starts. The host can choose to admit or remove them.
Note: The meeting lobby feature is only available to Enterprise and Premium users.
Allow event guests to start meetings
If you deselect Allow event guests to start meetings, only the event organizer can start the meeting. Before the meeting starts, people will see a notification Please wait for the organizer to start the meeting when they try to join the meeting. When the organizer starts the meeting, waiting participants and meeting Rooms with permission will automatically join.
Speaking permissions
If you select Mute on entry, all participants will be set to mute when they join the meeting except for the first participant who joins the meeting.
If you select Participants unmute themselves, participants can control whether to turn on their microphones or not. If you deselect it, only the host can control whether to turn on or off the participants' microphones.
Note: After the meeting starts, the host can change the participant microphone settings by clicking Security on the control bar.
Sharing permissions
If you select Only the host can share, only the host can start sharing during the meeting. If you deselect it, all participants can start sharing in the meeting.
If you select Only the person sharing can annotate, only the participant who starts sharing can annotate the shared file. If you deselect it, all participants can annotate the shared file.
Participant permissions
If you select Change name in meeting, the participants can modify their names during the meeting.
Record the meeting automatically
If you select Record the meeting automatically, automatic recording will be enabled every time the scheduled meeting starts. All participants will receive a recording reminder, and the main video area will automatically display REC to indicate that the meeting is being recorded.
After the settings are completed, click Update at the top to save the current meeting settings.
Note: For Lark meetings that you have already created, if you want to modify the meeting settings, click Lark Meeting > Settings at the top of the schedule editing interface to open the Lark meeting settings interface. After modifying the settings, click Update at the top to complete the modification.
- Complete the settings
After the meeting organizer completes event creation, the corresponding event will appear on the Outlook Calendar of the participants. The participants can directly join the Lark meeting through the meeting link on the event card.
III. FAQs