Available with these plans:
Starter
Basic
Pro
Enterprise
To upgrade your Lark Plan or for more information, contact Support or your Customer Success Manager. The Lark Basic plan supports only specific countries and regions.
I. Intro
Who can perform these steps: Primary administrators or administrators with Email permissions.
An outbound email gateway is a type of mail server that filters and verifies all outgoing emails from the organization. Its role is to check the security and compliance of the email content. It also supports advanced features such as IP address rotation, IP reputation management, and limitations on the number of emails that can be sent through remote servers.
To utilize this functionality, Mail administrators need to configure DNS settings in advance and add Lark IP addresses to the allowlist in the outbound gateway. They also need to set up routing hosts to ensure that all outgoing emails are correctly routed through the gateway and received by the recipients. Once complete, administrators can set up rules in the outgoing gateway, select the sending scope and hosts, and verify that all emails are correctly routed to the recipients.
II. Steps
Notice:
- The following settings may take some time to take effect. To ensure that you can send and receive emails successfully, it is recommended to perform email testing before using it officially.
- After setting up the outbound email gateway, the processing time for outgoing emails may increase to some extent depending on the performance of the gateway.
- Emails sent between accounts under the same domain will also be routed through the outbound and inbound gateways.
- Configure the DNS
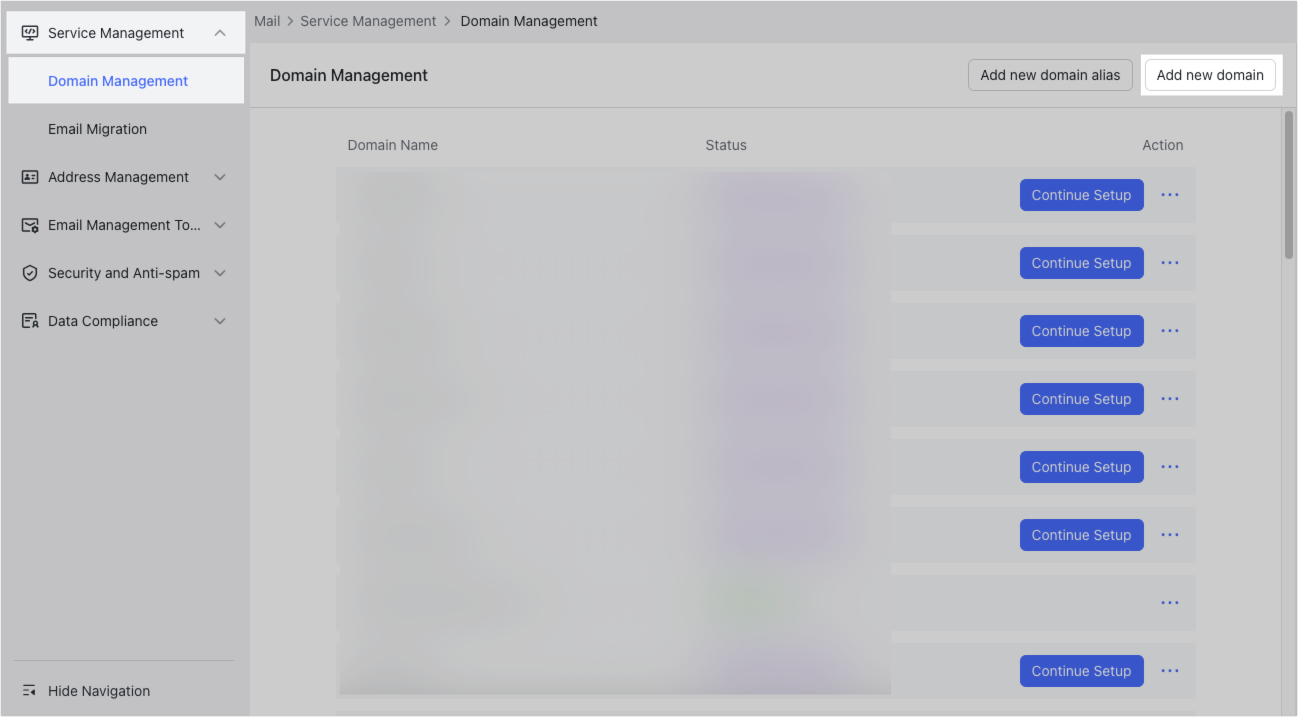
Open the Lark Admin Console and go to Product Settings > Mail > Service Management > Domain Management. Click Add new domain in the upper-right corner.
250px|700px|reset
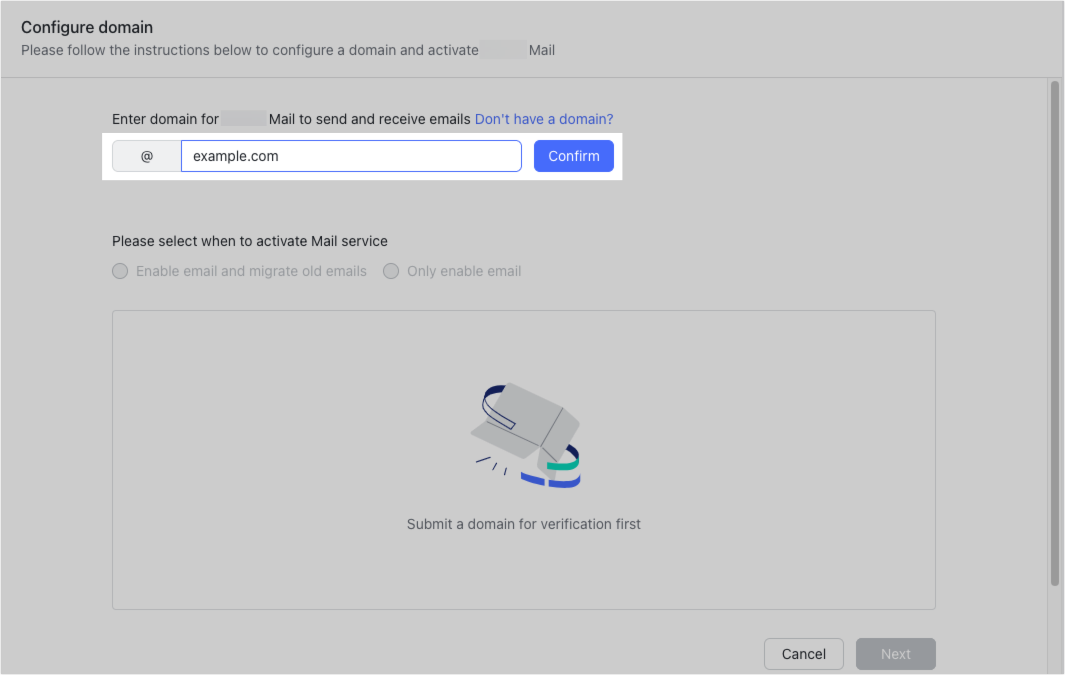
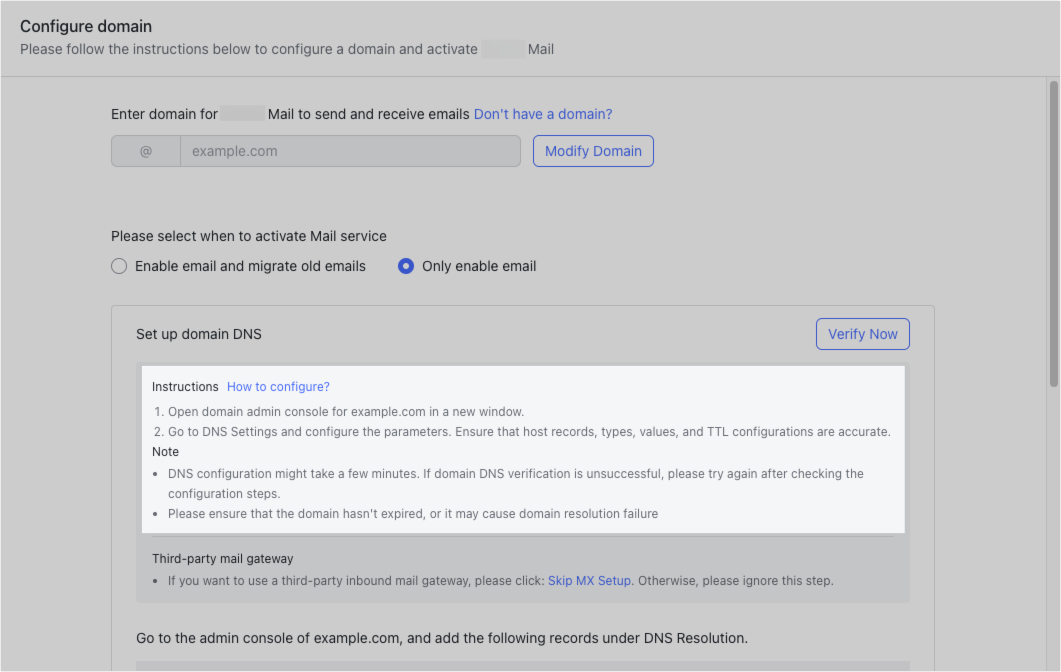
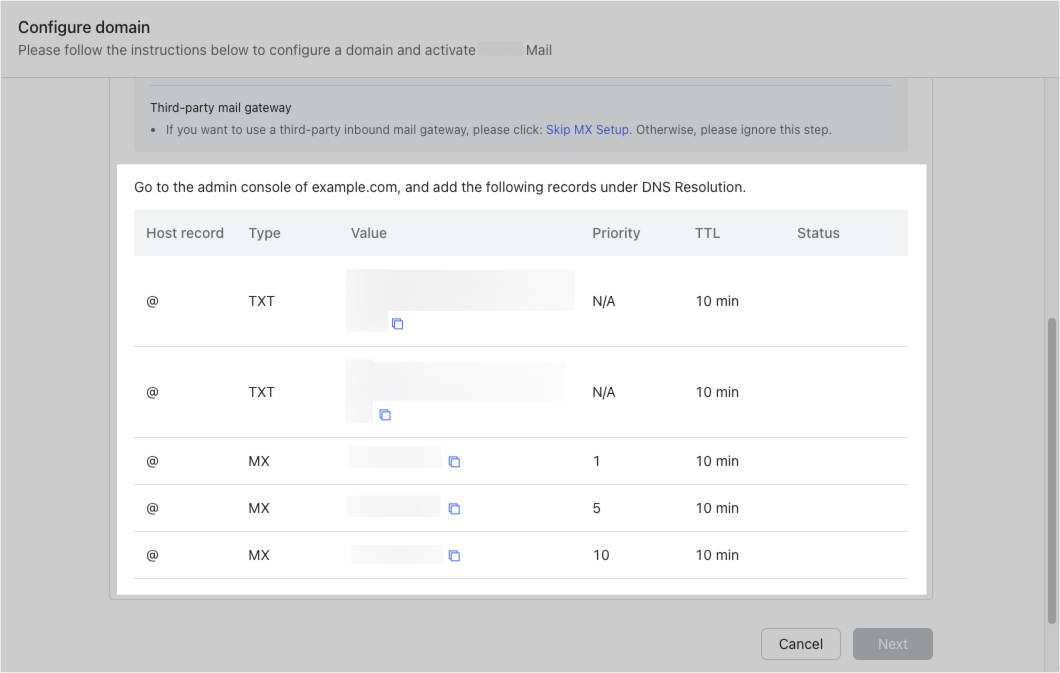
Enter the domain and click Confirm, then select Only enable email. Follow the instructions on the page to add the record values provided by your domain's DNS service provider. To learn more, visit Admin | Configure DNS settings.
250px|700px|reset
250px|700px|reset
Notice: There can only be one SPF record. If you are using other sending services, add +include:spf.onlarksuite.com to the existing SPF record. To learn more, visit Admin | Configure an SPF record containing multiple server addresses.
250px|700px|reset
- Add Lark IP to the allowlist
To prevent emails sent from Lark from being flagged as spam or malicious by the third-party outbound email gateway, add the following IP addresses to the allowlist.
- 103.149.242.200
- 220.243.131.200
- 220.243.191.101
- 209.127.230.200
- 209.127.231.200
- 71.18.16.10
- 118.26.132.200
- 118.26.132.60-61
Note: For specific allowlist settings, please refer to the documentation of the third-party gateway.
- Configure the host
Configuring the host for email routing can simplify the process of selecting the routing destination when setting up an outbound email gateway.
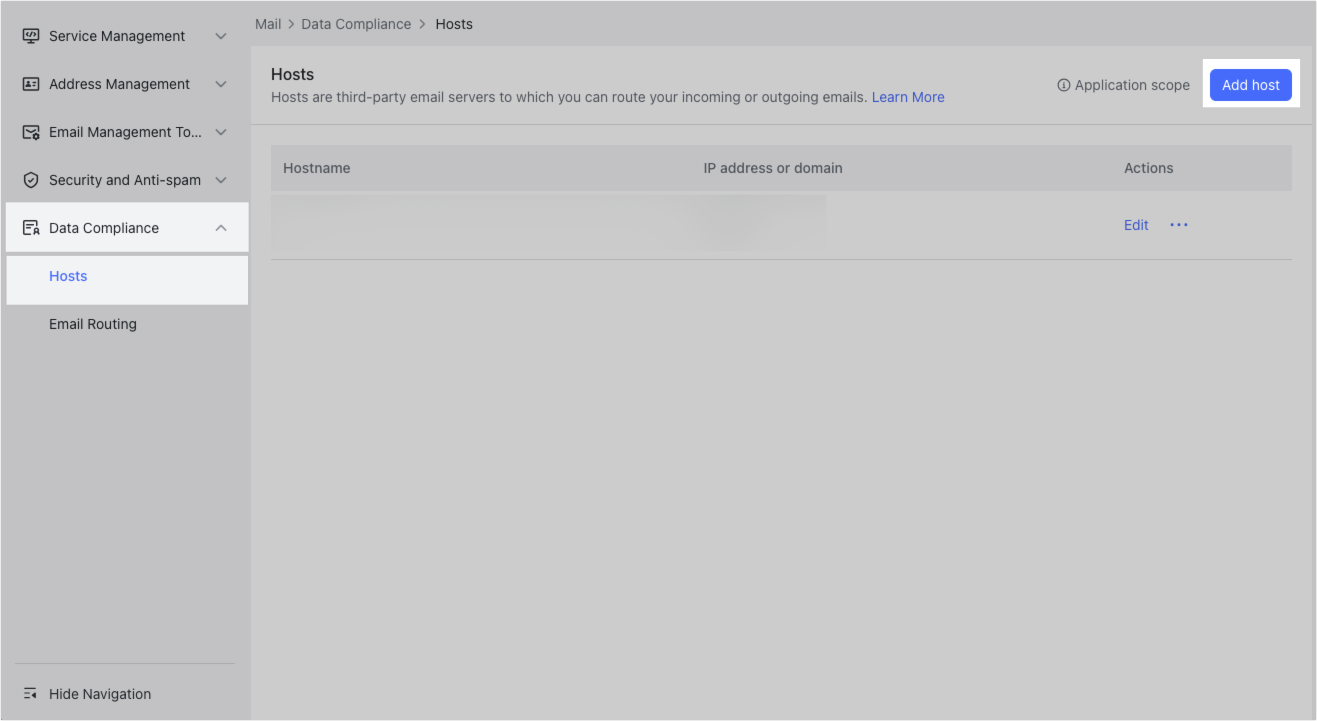
Go to Product Settings > Mail > Data Compliance > Hosts and then click Add host.
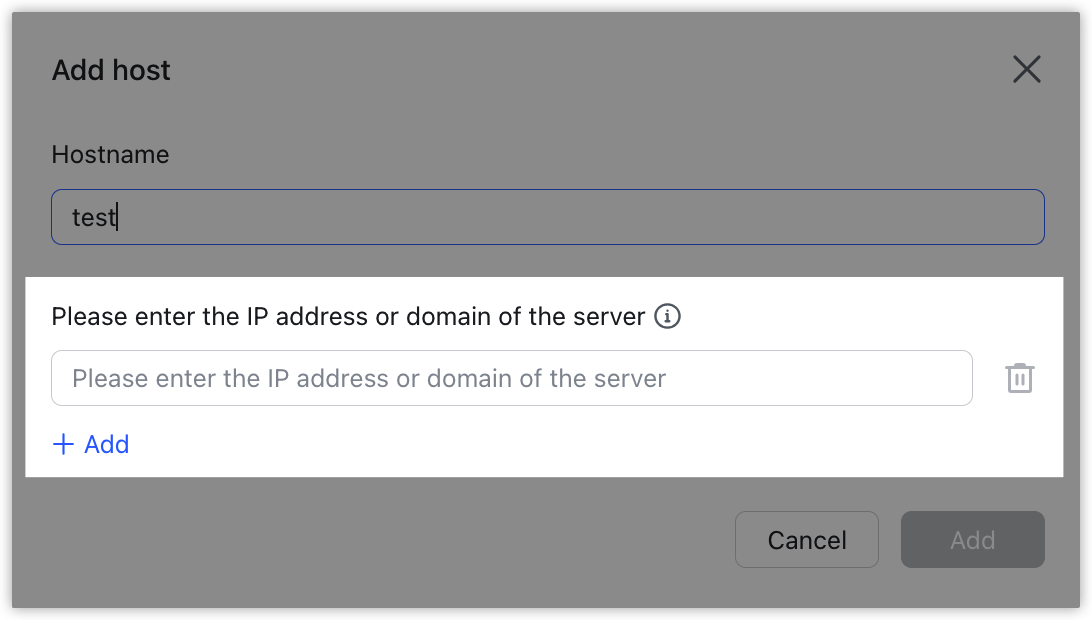
Enter the IP address or domain of the outgoing gateway (please note that IPV6 addresses are not supported). Click Add if you need to add more.
250px|700px|reset
250px|700px|reset
- Set up outbound gateway rules
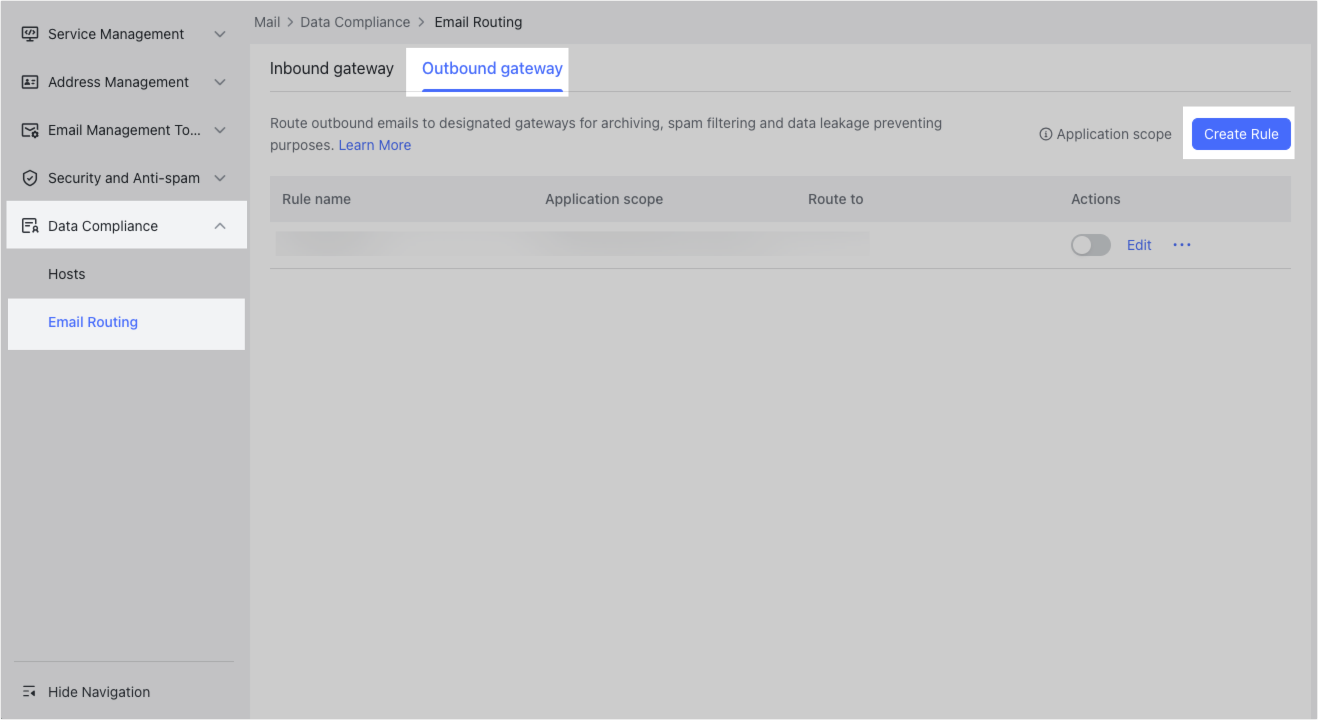
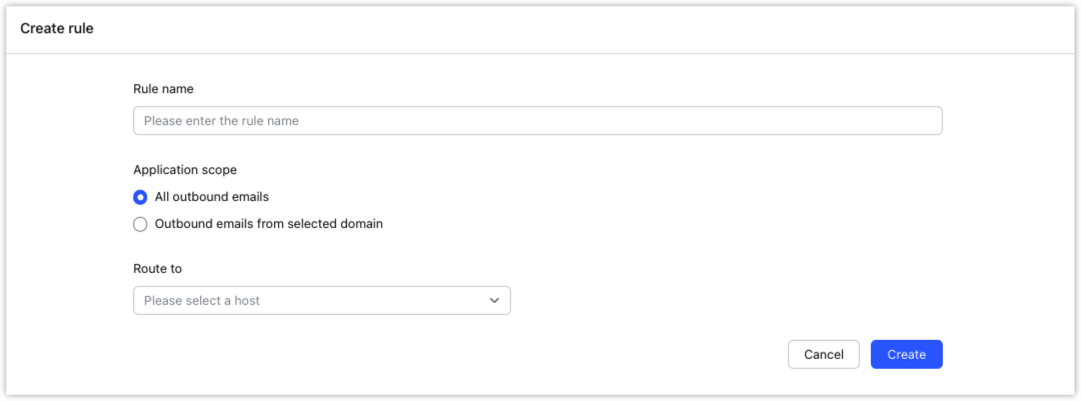
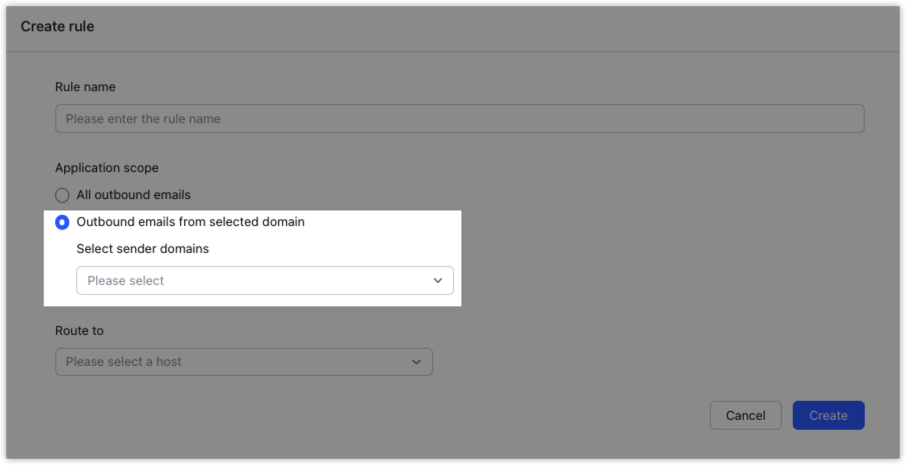
Go to Product Settings > Mail > Data Compliance > Email Routing > Outbound Gateway, and click Create Rule. Enter the rule name, select the application scope and the routing host you previously configured.
250px|700px|reset
250px|700px|reset
Notes:
- In Application scope, if you choose All outbound emails, all emails sent through Lark Mail will be delivered to the specified gateway server first.
- If you choose Outbound emails from selected domain, you need to select sender domains in the drop-down menu. All emails sent from the selected sender domains will be routed through the outbound gateway before being sent out.
250px|700px|reset
