
I. Intro
In Base, form view is a view type in the format of a form, which can be used to collect information. The collected information will be added to the base, where you can use filtering, grouping, and dashboards to analyze the data.
Use cases:
- Customer satisfaction surveys: Share forms to gauge customer satisfaction and needs.
- Customer relationship management: Use forms to collect business opportunities, leads, and other information securely.
- Work reports: Members can use forms to submit progress reports, facilitating project management.
II. Steps
Create a form
Method 1: Generate a form from an existing table
Applicable scenario: The overall structure is already set up in a table and you just need to convert it into a form.
Steps:
- In grid view of the table, add the information you want to collect as fields. If you want to add single-select or multi-select questions, add the options in those fields in advance. If you've referenced options in those fields, those options will be available in form view as well.
- Note: Referencing options is not supported on Lark Forms.
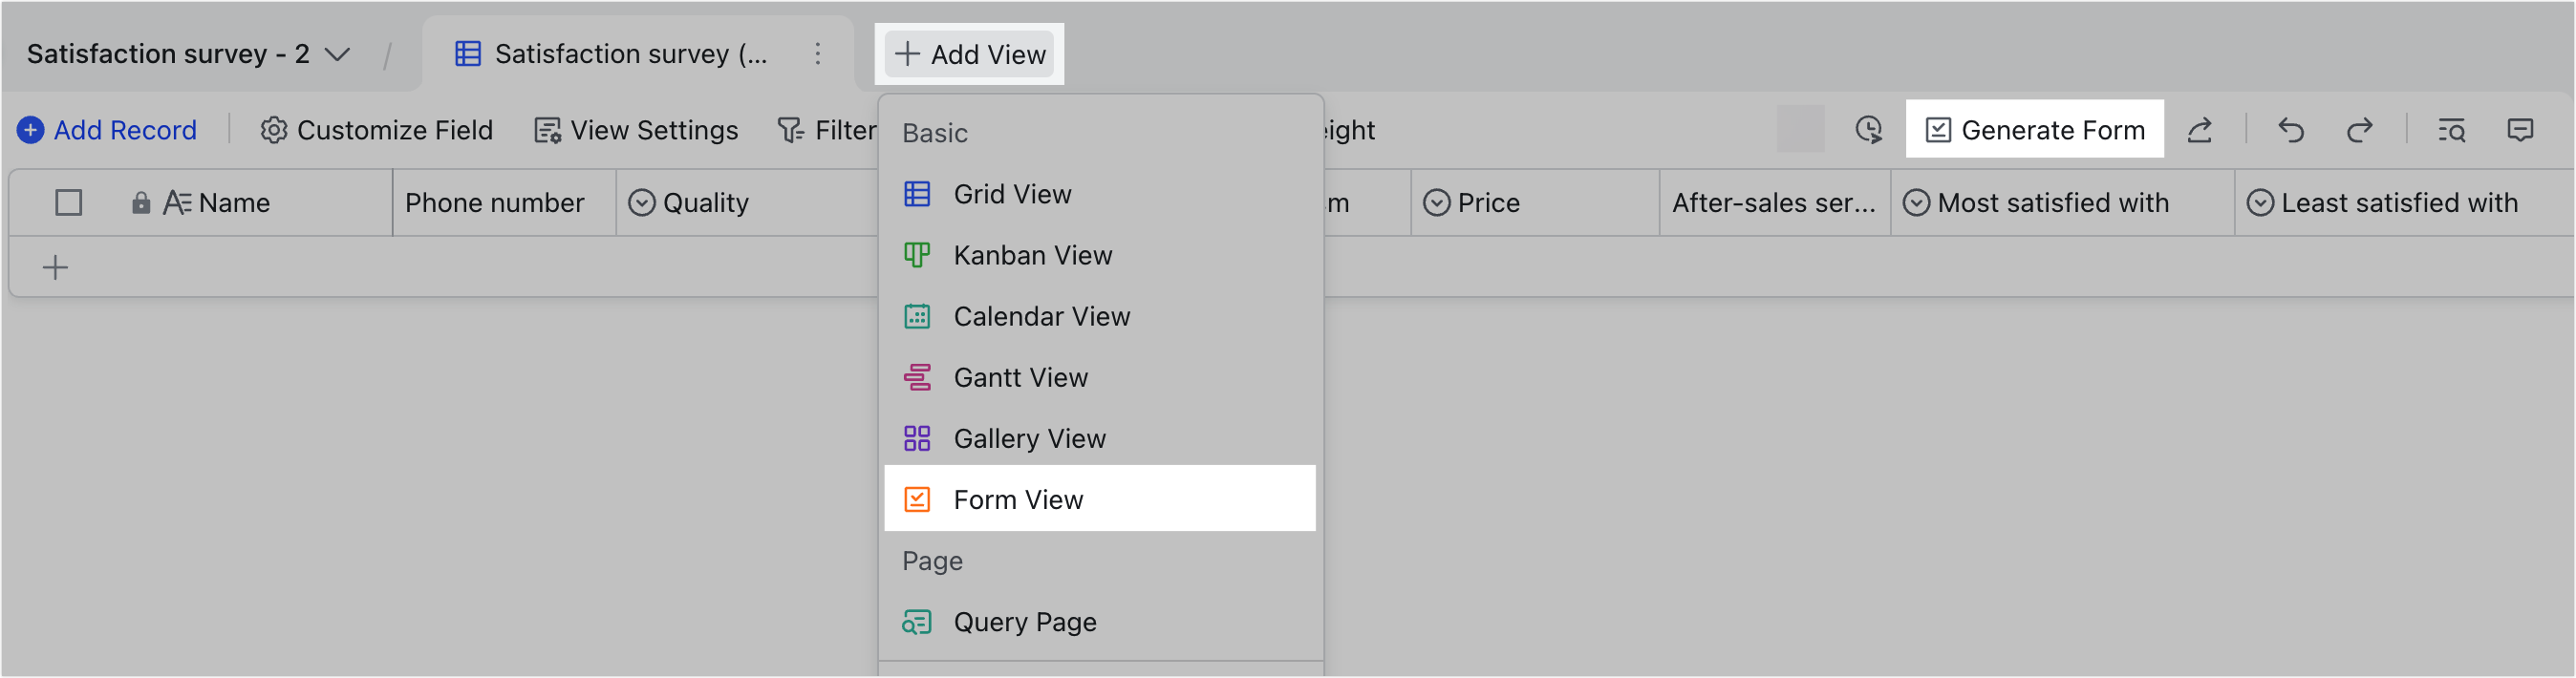
- Click Generate Form at the top toolbar or click Add View > Form View and enter a name for the form. A form will be created based on the content in the table.
250px|700px|reset
Method 2: Create a blank form
Applicable scenarios: You need to collect information first and then adjust the overall structure based on the information collected.
Steps:
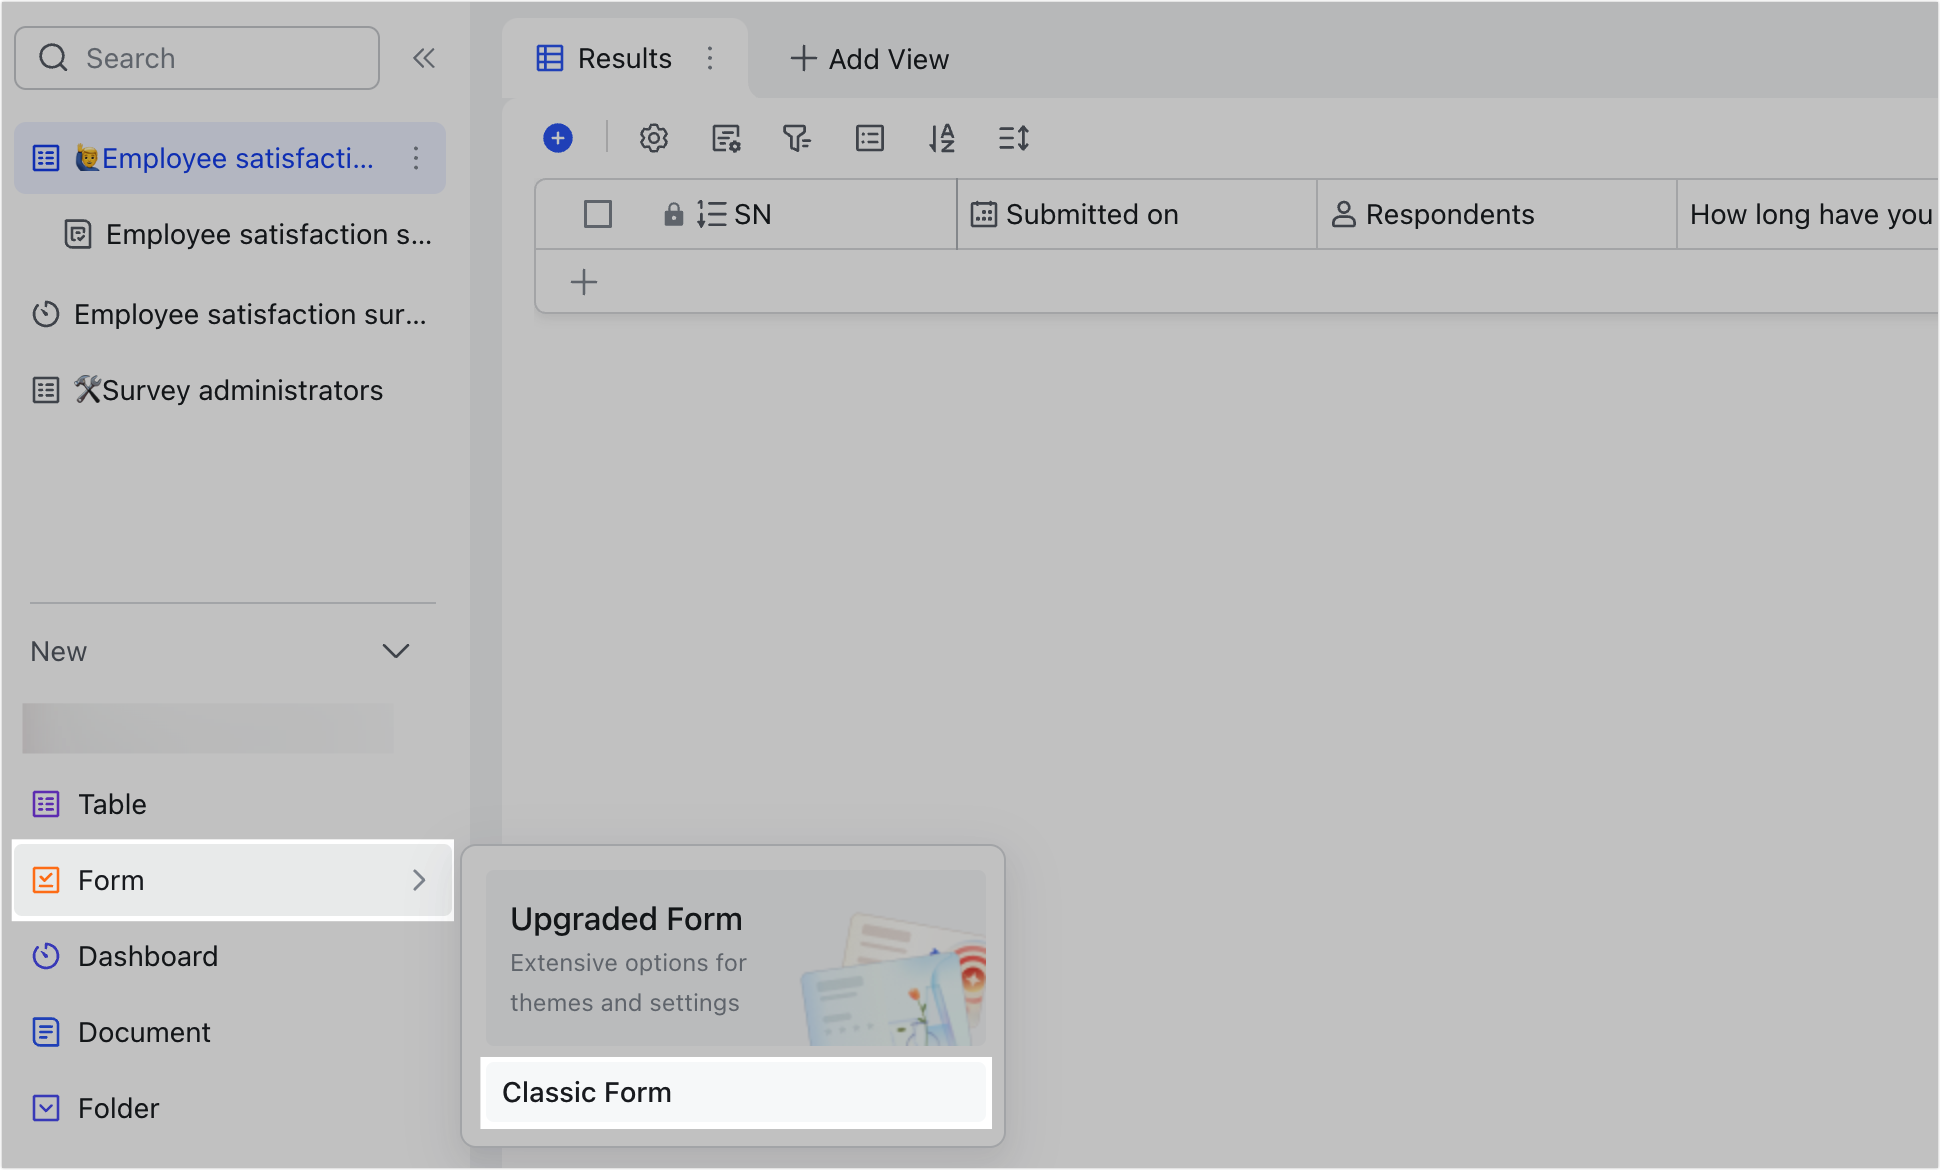
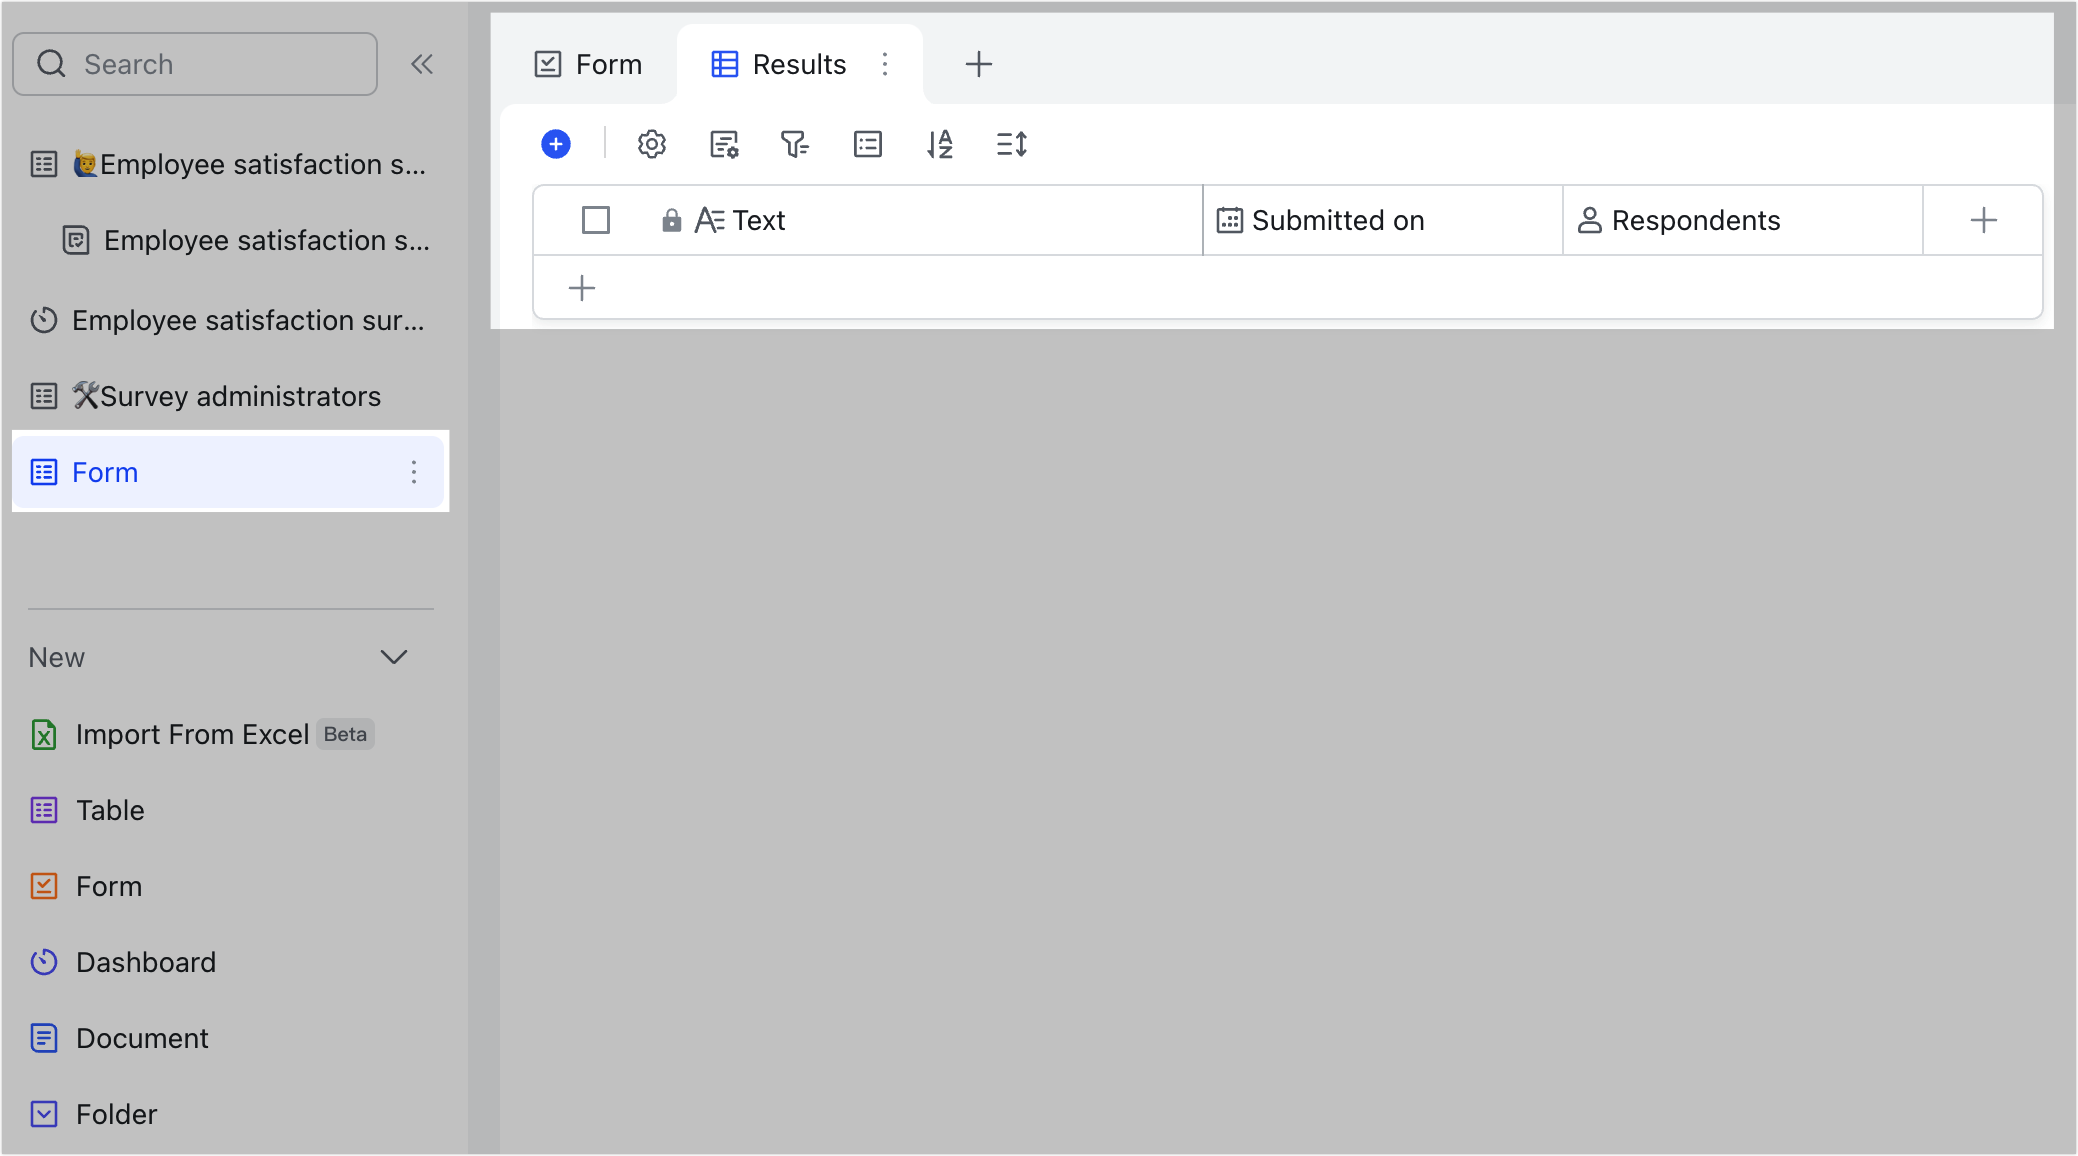
- Click Form in the lower-left corner and select Classic Form and a table called Form will be generated. The table contains two views: a form view named Form and a grid view named Results.
- Go to the form view and add and edit questions as needed.
Note: Two fields named Submitted on and Respondents are automatically added to the grid view for record-keeping. These two fields will not appear as questions in the form itself.
250px|700px|reset
250px|700px|reset
Edit the form
The following actions should be performed on the editing page by clicking Edit below the view name.
Change the form title
The view name is also the title of the form and any change to one will be synced to the other. You can change the form title using the following methods:
Method 1: Click the form title and enter a new name.
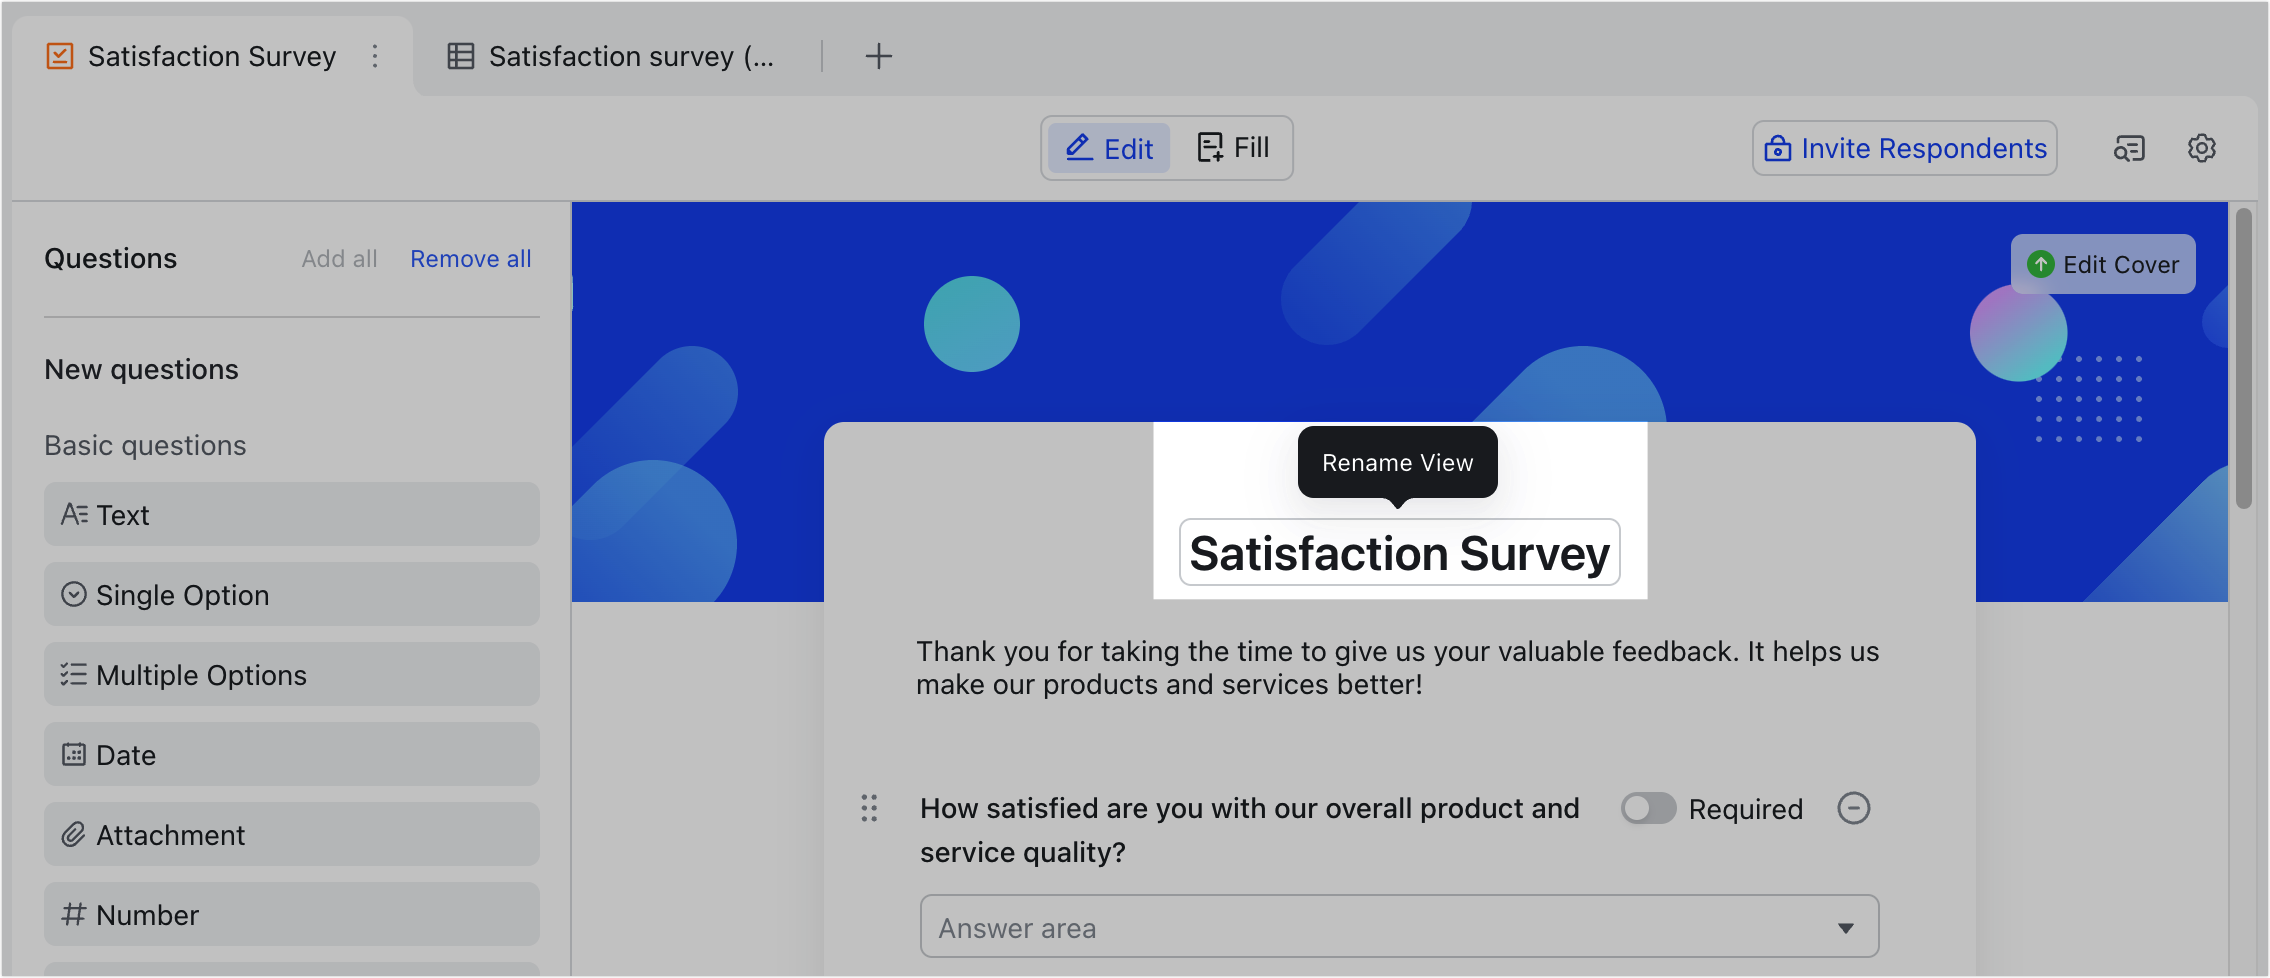
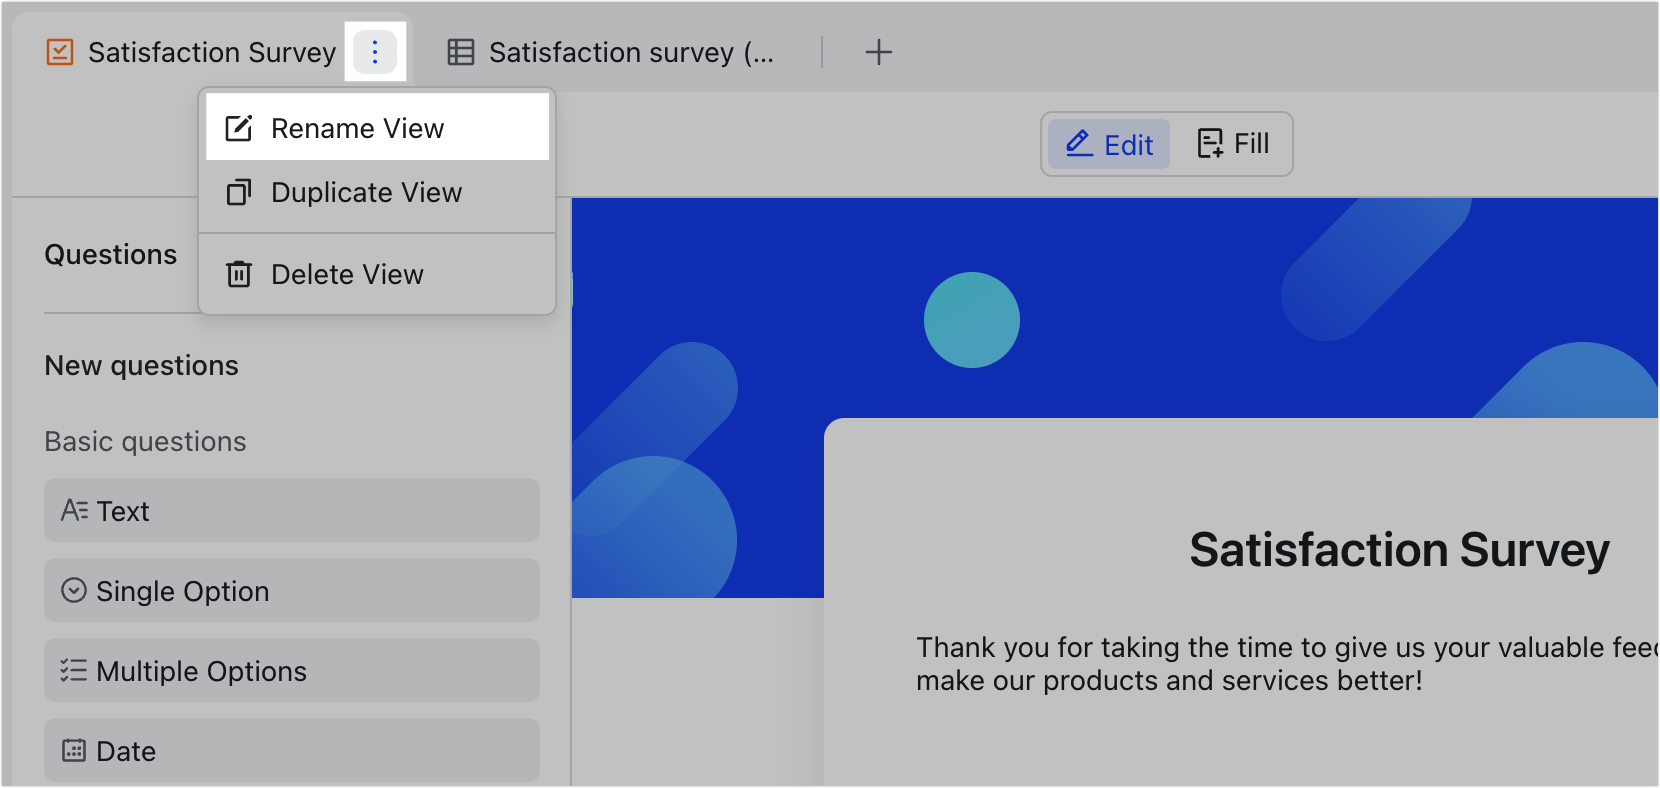
Method 2: Double-click the view name or click the ⋮ icon next to the view name and select Rename View. Enter a new name.
250px|700px|reset
250px|700px|reset
Add a form description
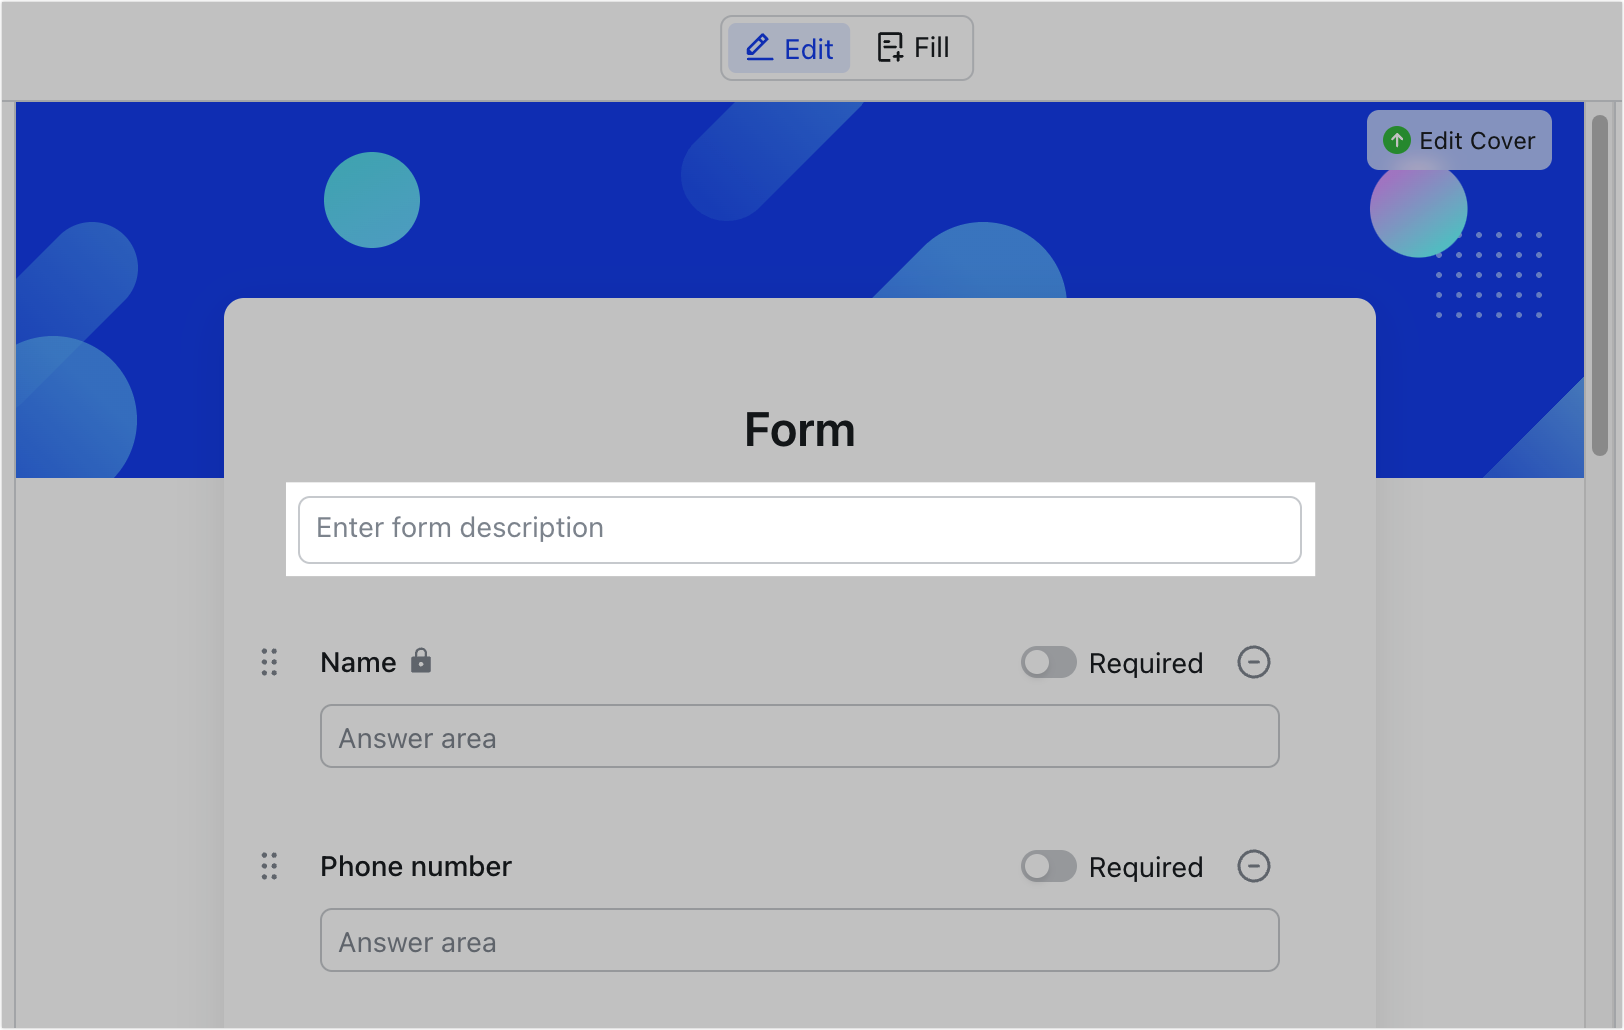
Click the Enter form description field and enter a description. To change the field description later, click this field again.
The form description can include text and links, but not images.
250px|700px|reset
Manage form questions
Fields and form questions are related, with each question in the form corresponding to a specific field in the table.
Note: Field types that are not supported in form view: flow, button, auto-numbering, created by, modified by, date created, and last modified date.
Add a new form question
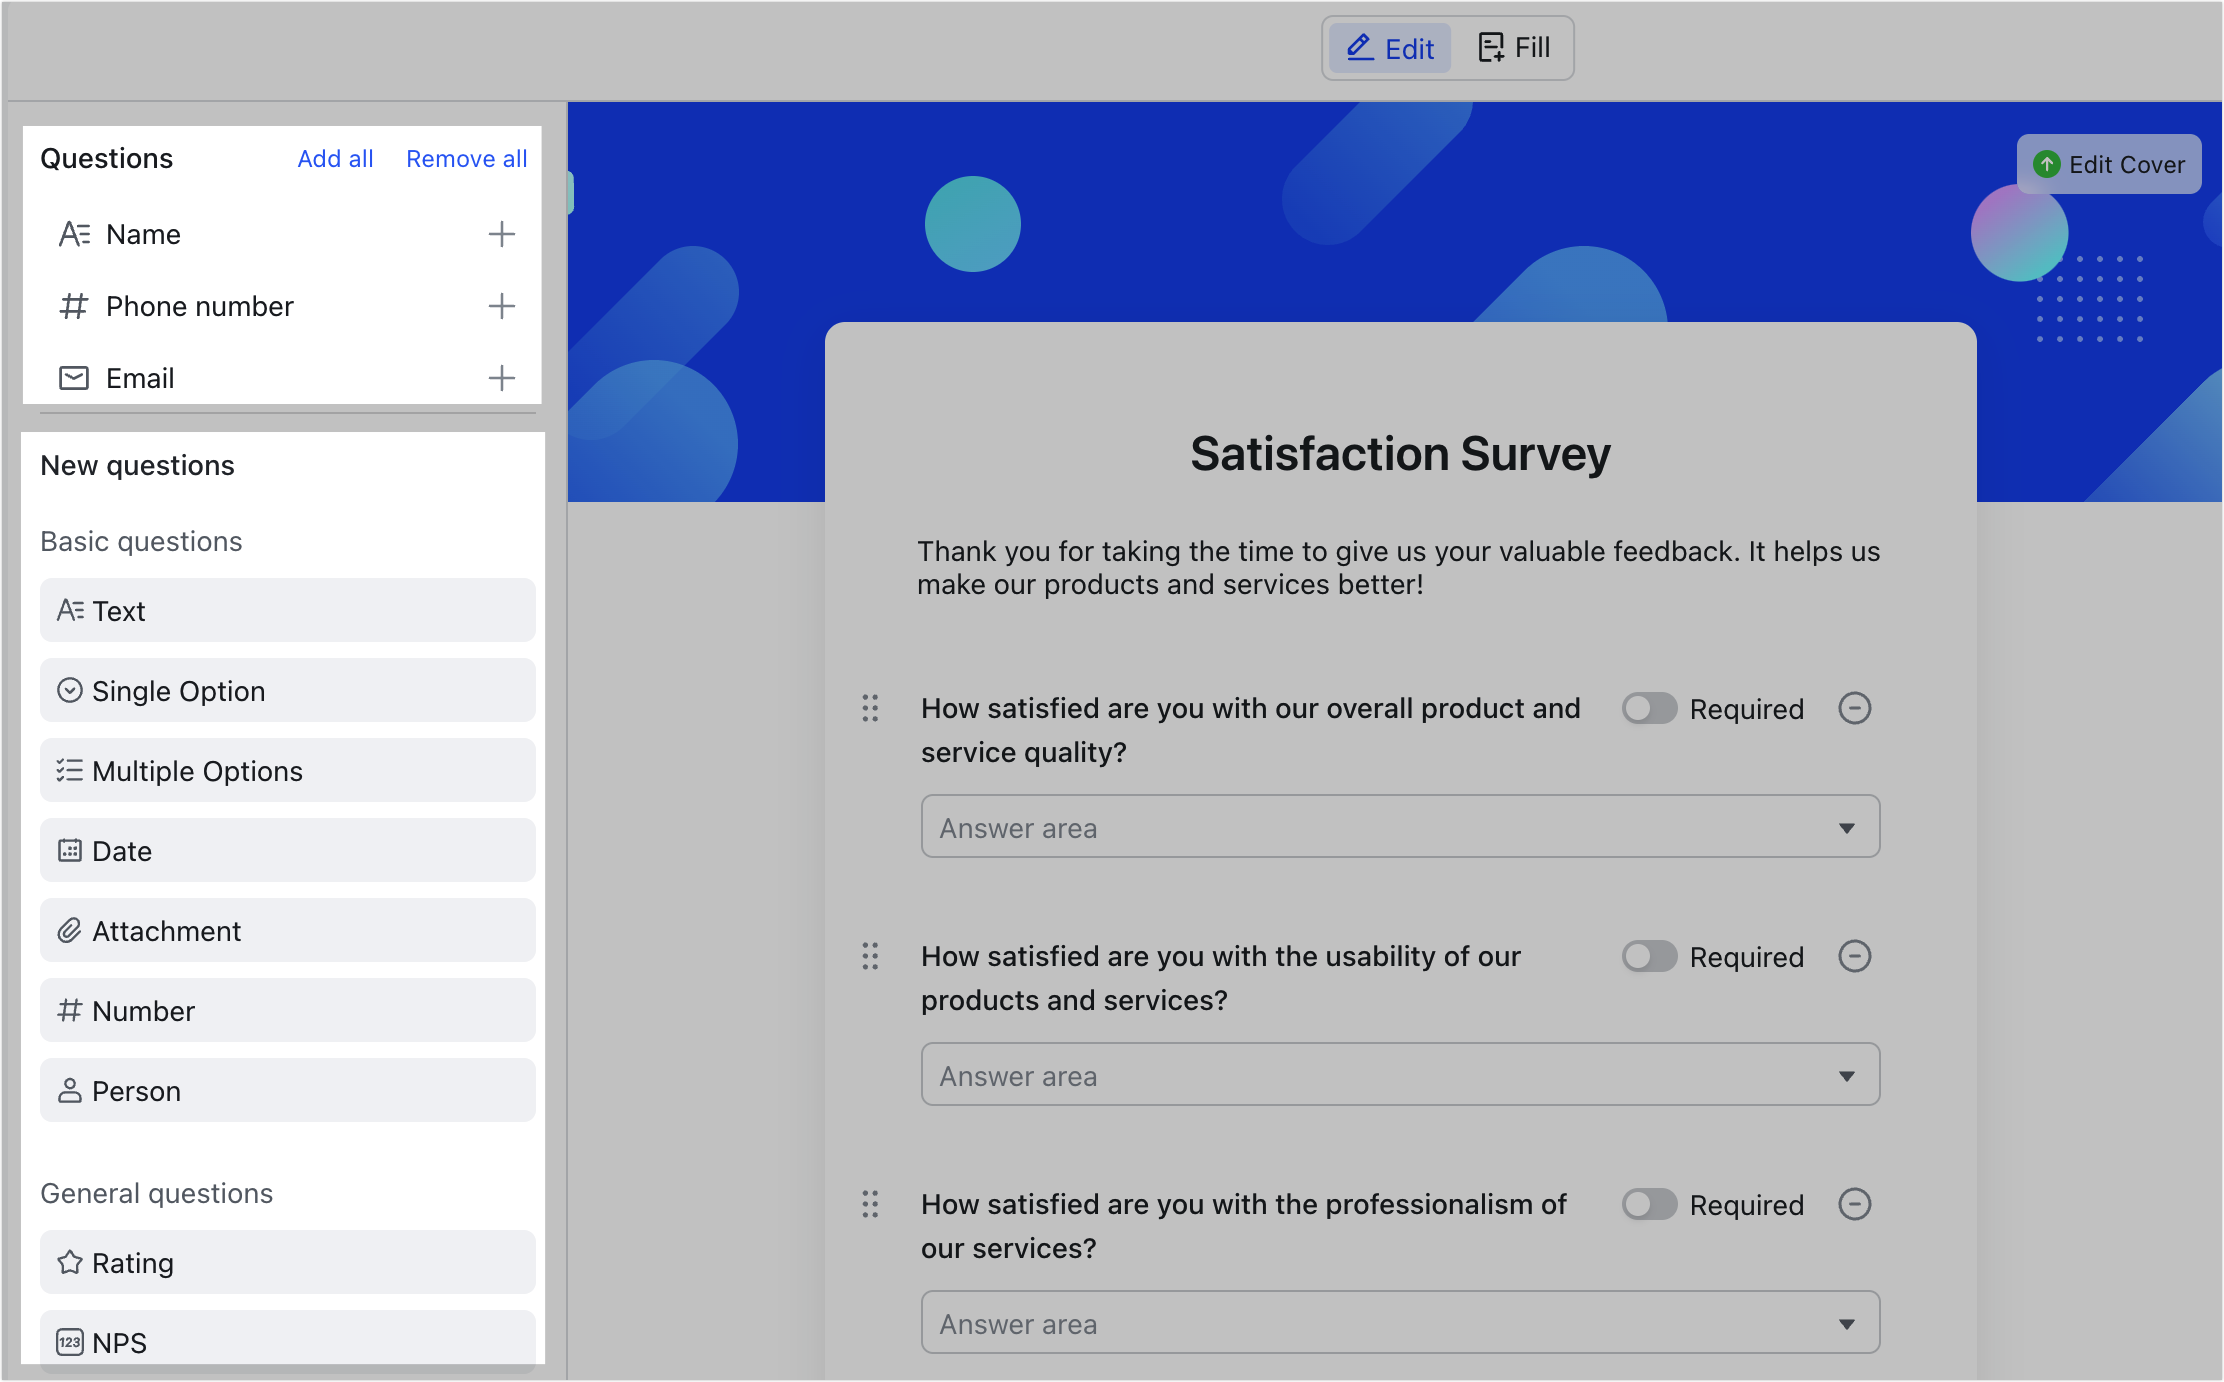
On the left side of the editing page is a pane with a section called Questions and another section called New questions.
The Questions section contains fields that are already in the table but not on the form. Click the + icon on the right side of each field, or drag the field into the form to add it as a question. You can also click Add all or Remove all as needed.
The New questions section contains all the supported question types. Click a question type to add it to the bottom of the form. You can also drag a question type and drop it to where you need it on the form.
250px|700px|reset
Modify form questions
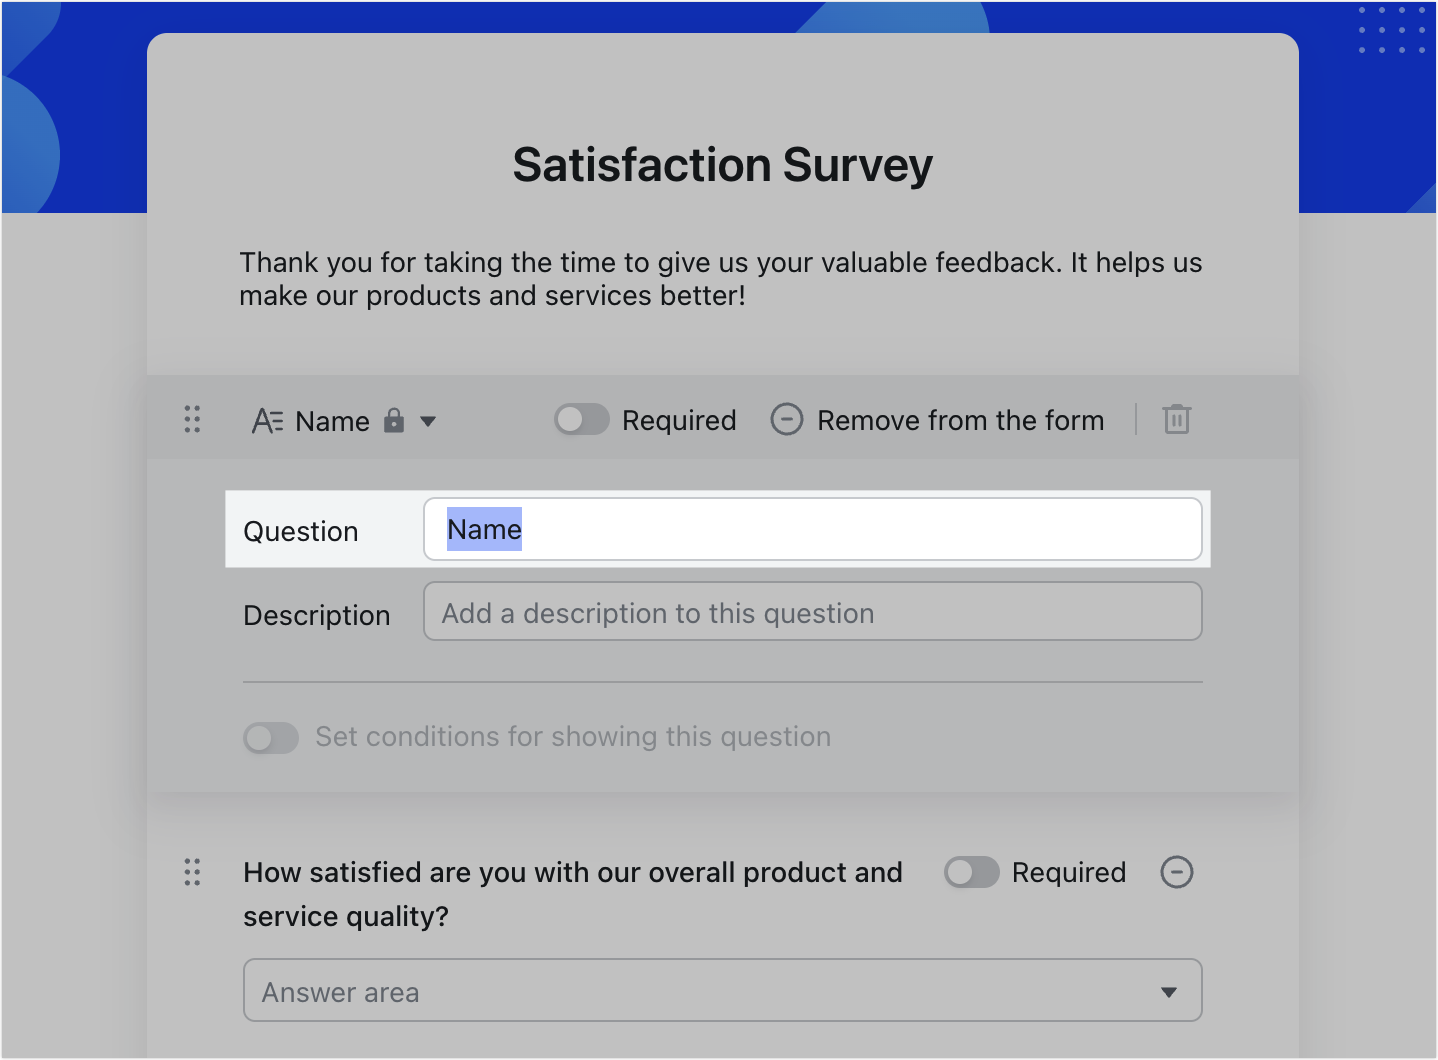
- Edit form questions: Click the question, edit it in the Question box, and click anywhere on the page to save.
250px|700px|reset
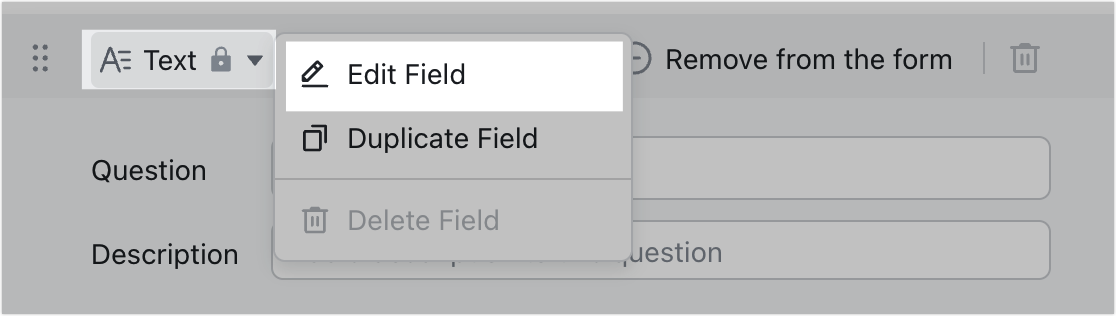
Note: Editing the questions in the form will not change the field names in the table and vice versa. As shown in the image above, the field name is Text, and the form question is Name. To modify the field name, click the field name and select Edit Field.
250px|700px|reset
- Change the question type: Click the question, click the field name, and select Edit Field. Change the field type and click Confirm.
250px|700px|reset
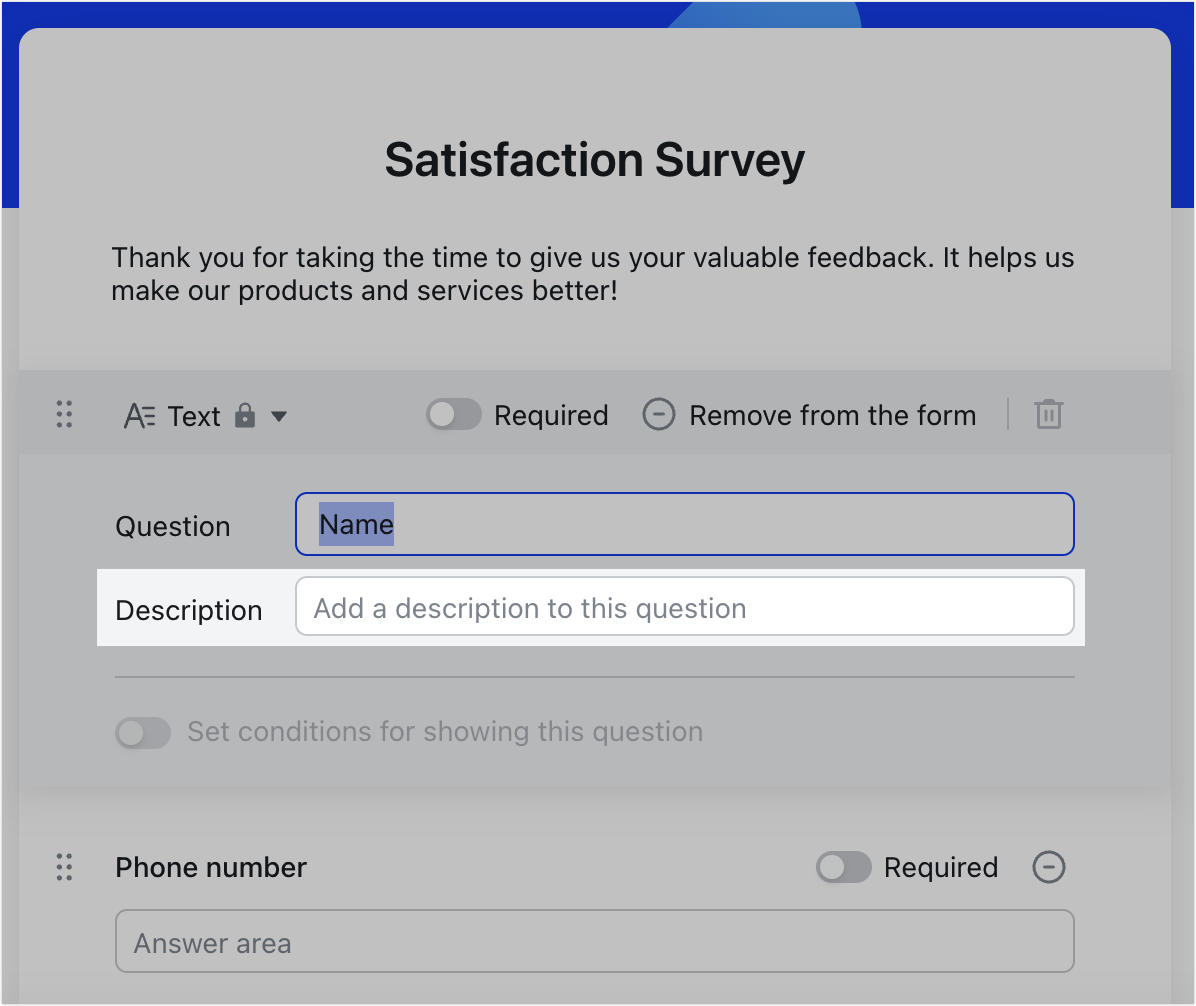
- Add or modify the question description: You can add or modify the question description in the form using the following methods.
- Method 1: In form view, click the question, enter a description in the Description box, and click anywhere on the page to save.
250px|700px|reset
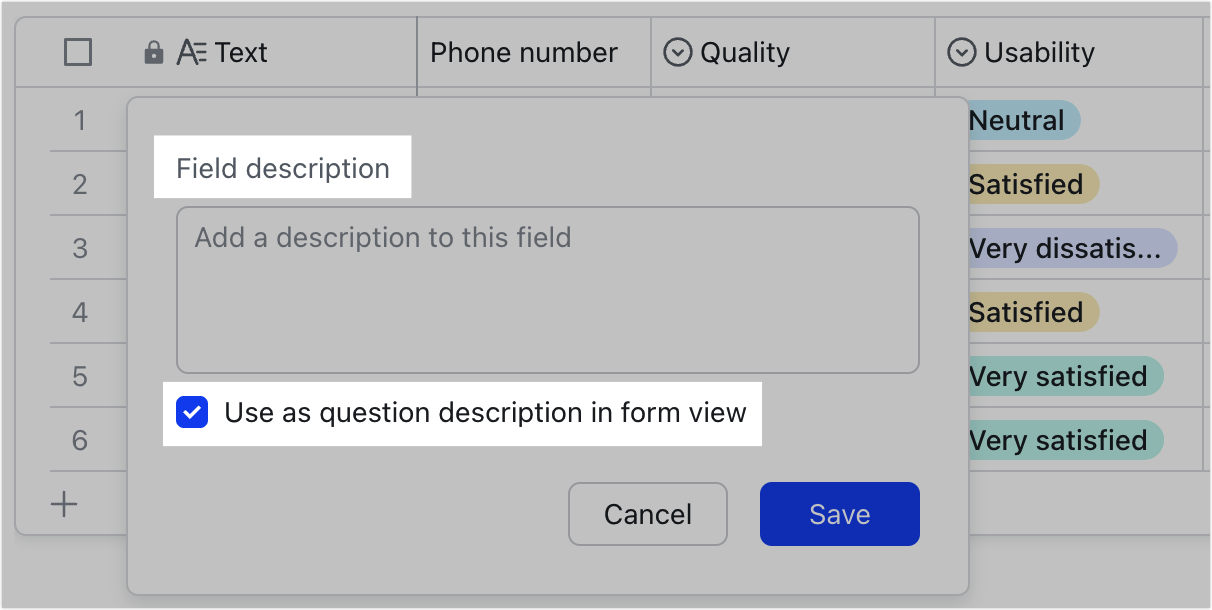
Method 2: In grid view, locate the field corresponding to the form question and right-click the field name. Click Edit Field Description and select Use as question description in form view, and the field description will be used as the question description.

250px|700px|reset
250px|700px|reset
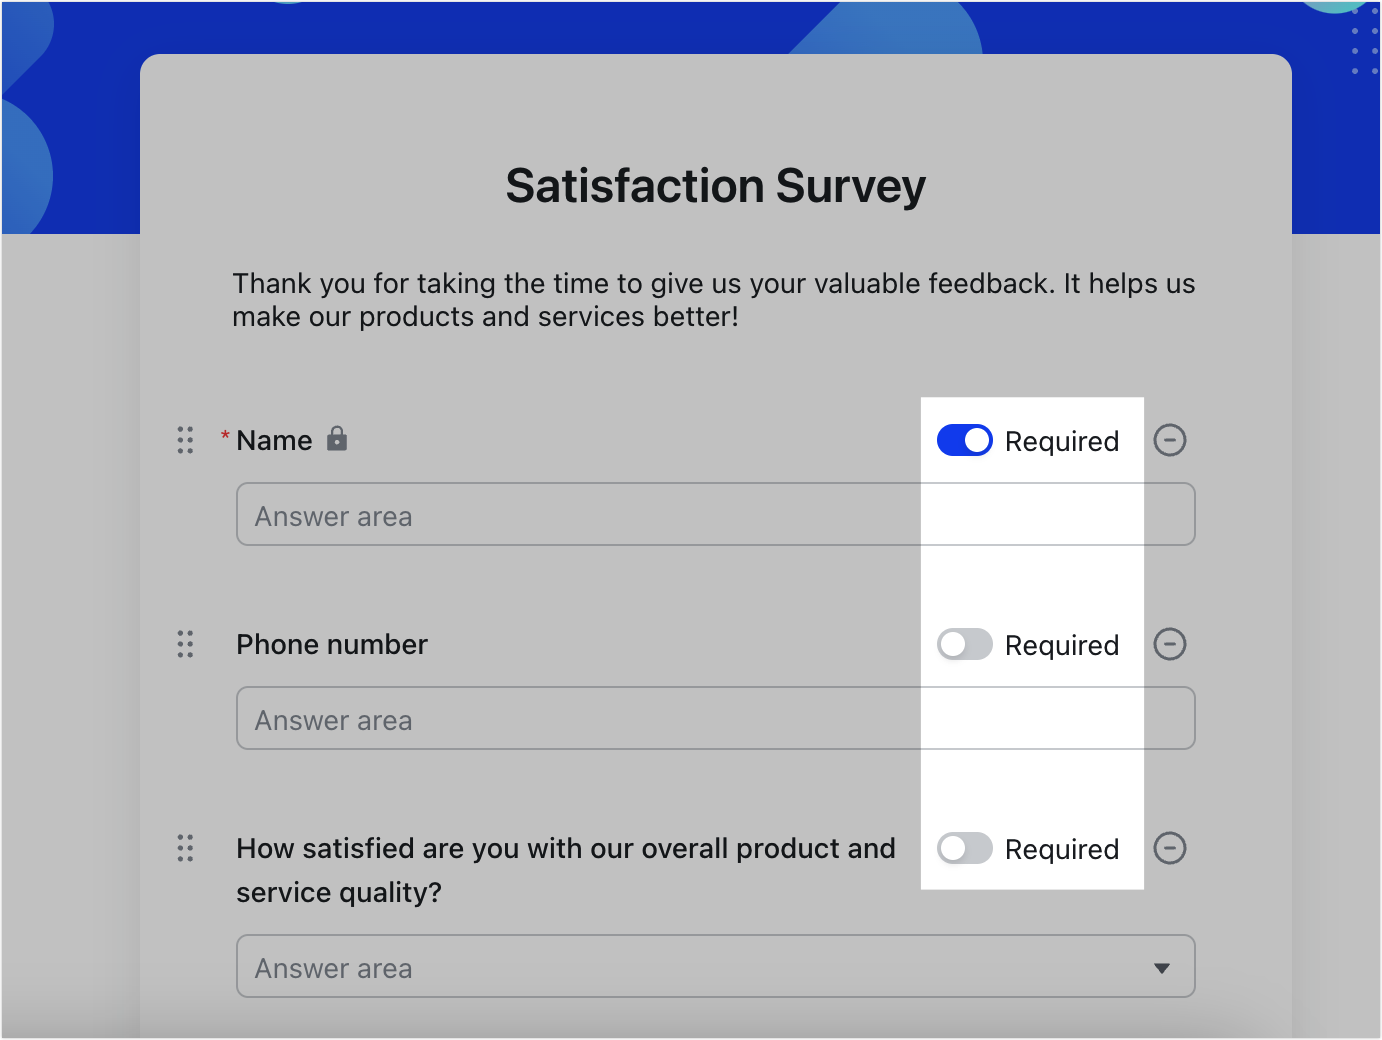
- Make questions mandatory: Turn on Required on the right of the questions you want to make mandatory. Turn Required off to make the question optional.
250px|700px|reset
- Rearrange the order of questions: Drag the ⋮⋮ icon on the left side of the form question to where you need it.
- Note: Rearranging the order of questions in the form does not change the order of the fields in the table.
250px|700px|reset
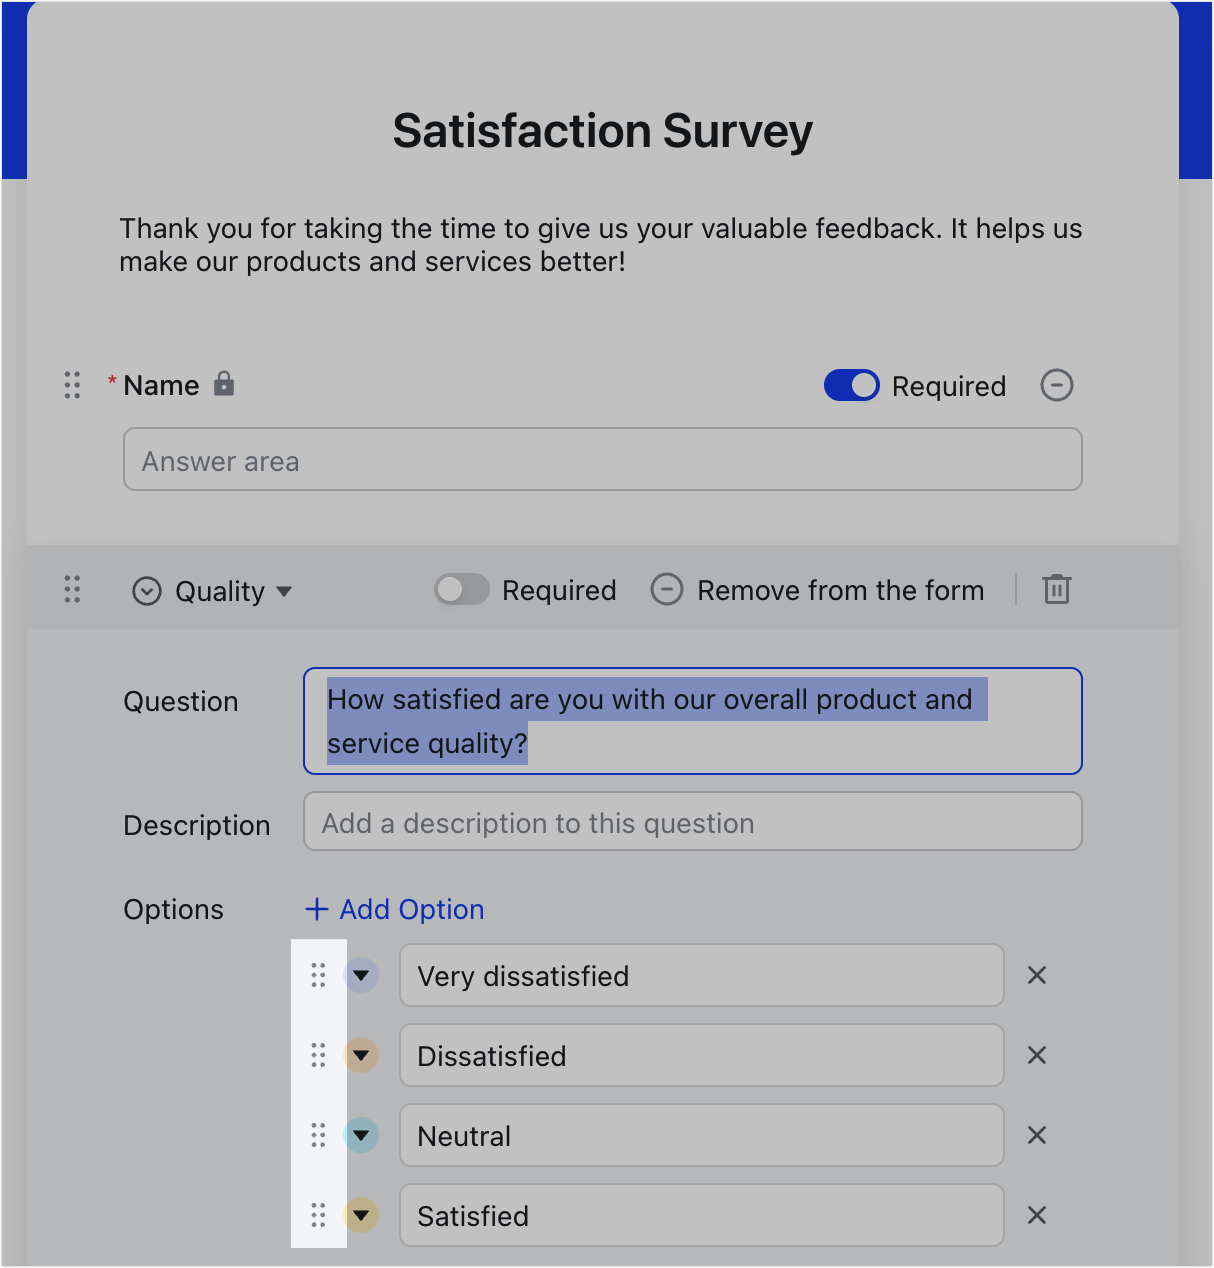
- Rearrange the order of options in questions: Click the single option or multiple options question you want to modify, drag the ⋮⋮ icon on the left side of the options to where you need it, and click anywhere on the page to save.
250px|700px|reset
Remove and delete form questions
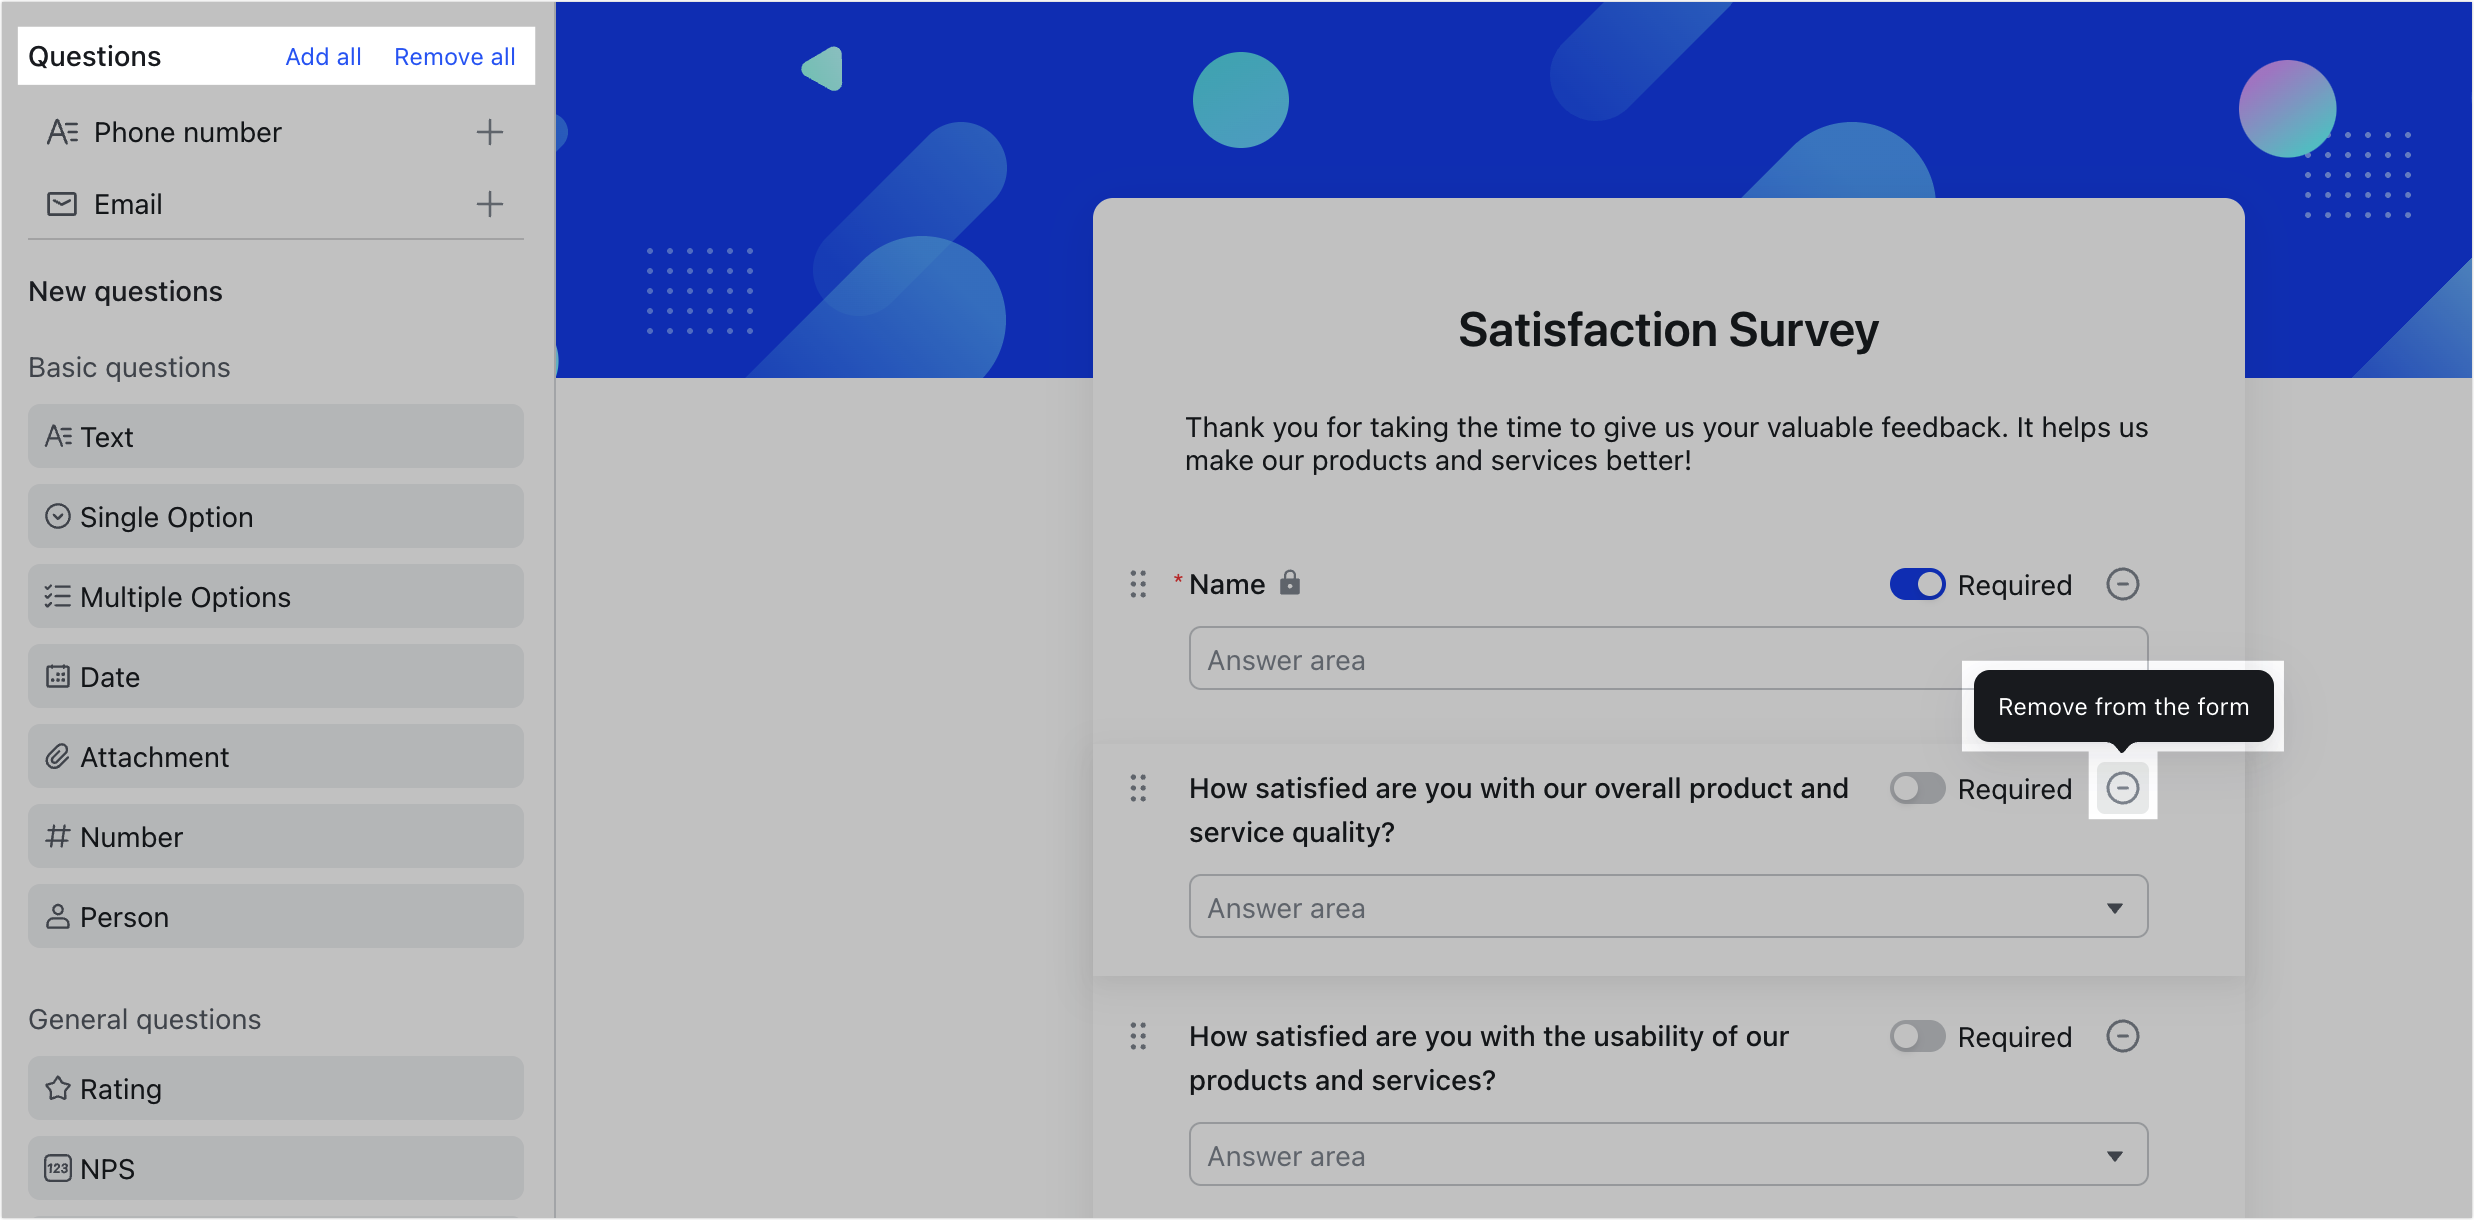
- Remove form questions: Click the Remove from the form icon on the right of the question.
- The question will only be removed from the form. You can still find the corresponding field in the Questions section and in grid view.
250px|700px|reset
- Delete form questions: Click the question, then click the Delete question icon on the right of the question.
- The question is deleted from the form along with the corresponding field and data collected in grid view.

250px|700px|reset
How form questions and fields are related
- Form questions and field settings are synced, including but not limited to: field type, adding, deleting, modifying, and reordering of options for single option and multiple options fields, numerical and graph settings for rating fields, and more.
- Modifying questions in the form will not change the field name in grid view. Similarly, changing the field name in grid view will not affect questions in the form.
- Rearranging the order of questions in the form does not affect the order of fields in grid view. Likewise, rearranging the order of fields does not affect the order of questions.
- If you add a new field in grid view, it will not appear directly in the form but will be available under Questions in the left pane, from which you can click to add to the form.
- If you add a new question to the form, regardless of its position in the form, it will be displayed on the rightmost side in grid view.
- If you delete a question from the form, the corresponding field and collected results will also be deleted.
Configure related questions
You can add display conditions to the questions in the form to show questions based on the user's input. We will use a satisfaction survey below, where we will show the "Reasons for dissatisfaction" question when a user gives a "dissatisfied" or "very dissatisfied" rating.
Note: You can't add display conditions to the first question in the form.
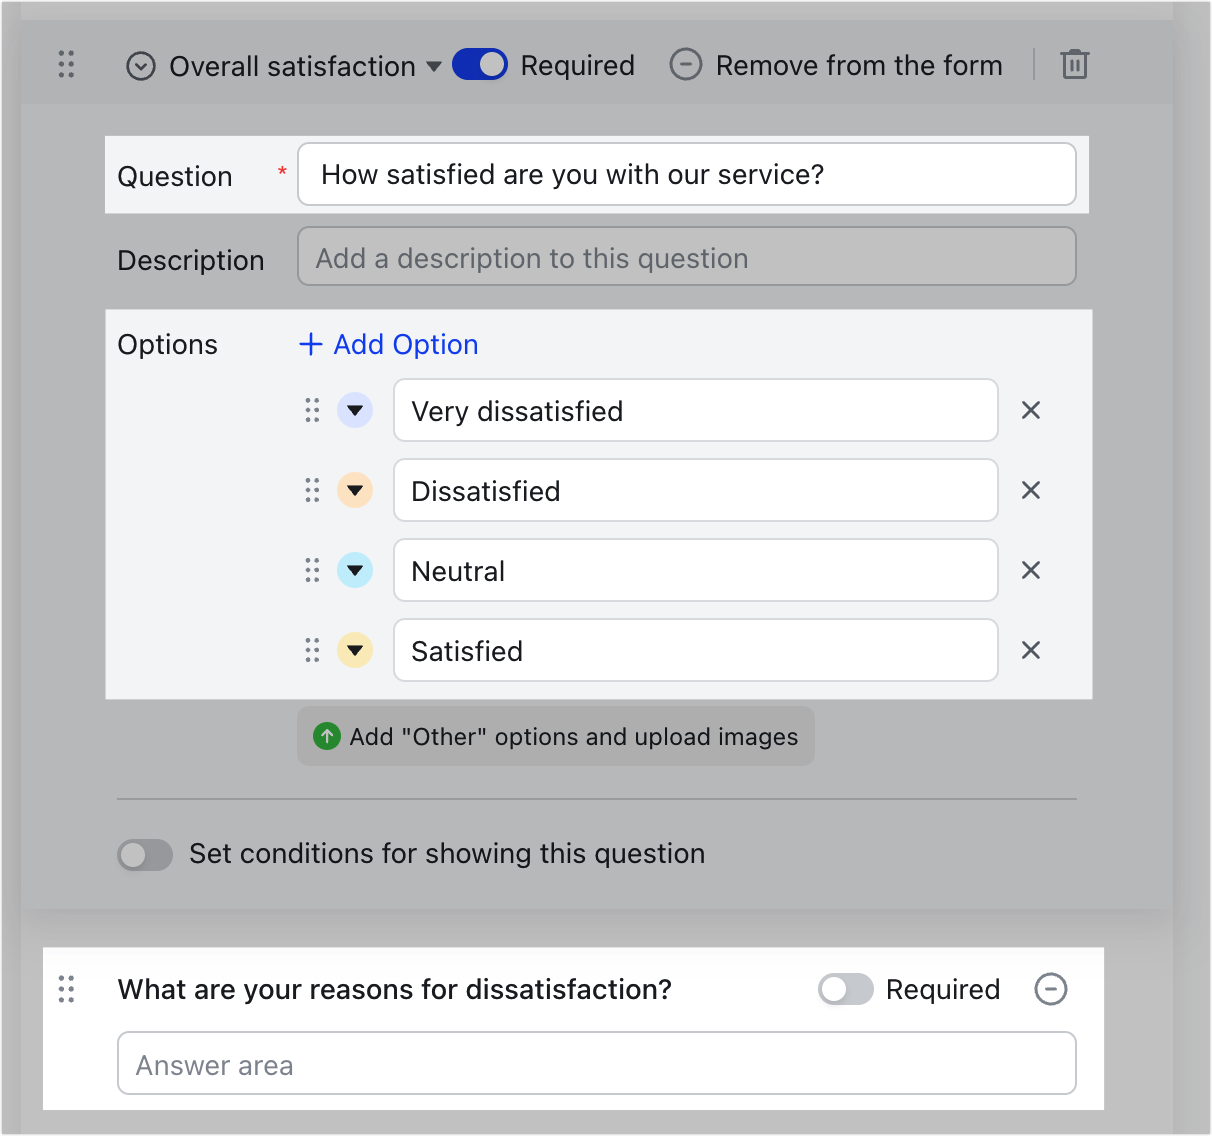
- Add two questions to the form: "How satisfied are you with our service?" (single option question) and "What are your reasons for dissatisfaction?" (text question). The order of the questions is important as the second question will only appear if the specified options are selected for the first question.
250px|700px|reset
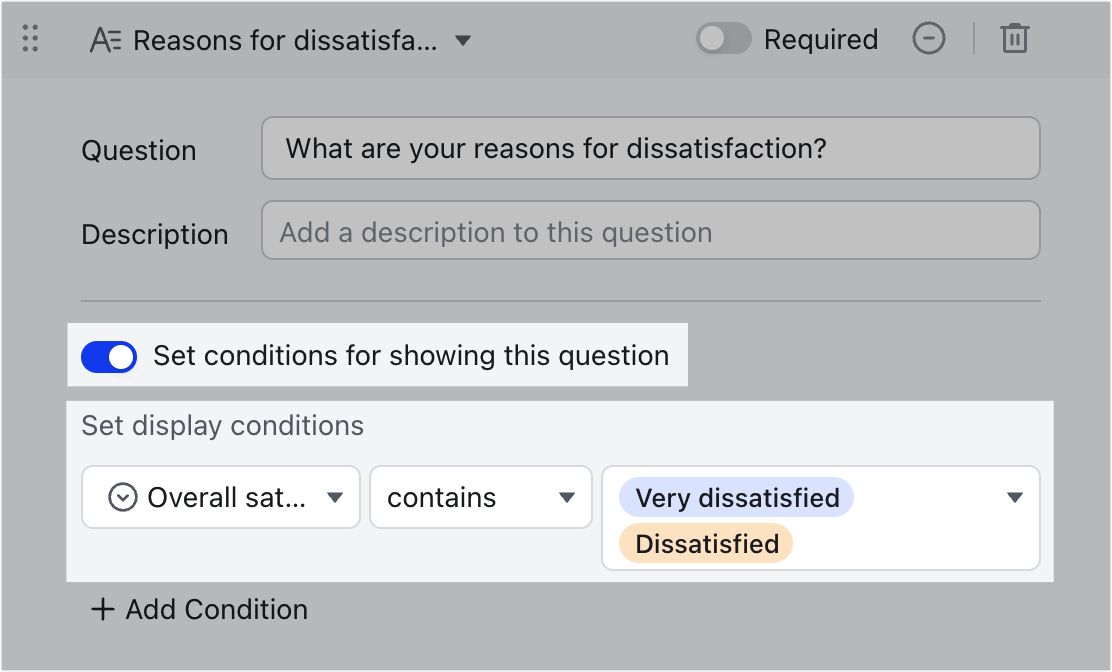
- Click the question you wish to set display conditions for and turn on Set conditions for showing this question.
- Configure the display conditions. In this example, we set the condition to: Overall satisfaction, contains, Very dissatisfied and dissatisfied. This question will appear when a user selects Very dissatisfied or dissatisfied in the previous question.
250px|700px|reset
- Click Fill at the top to preview the effect as needed.
250px|700px|reset
Configure submission settings
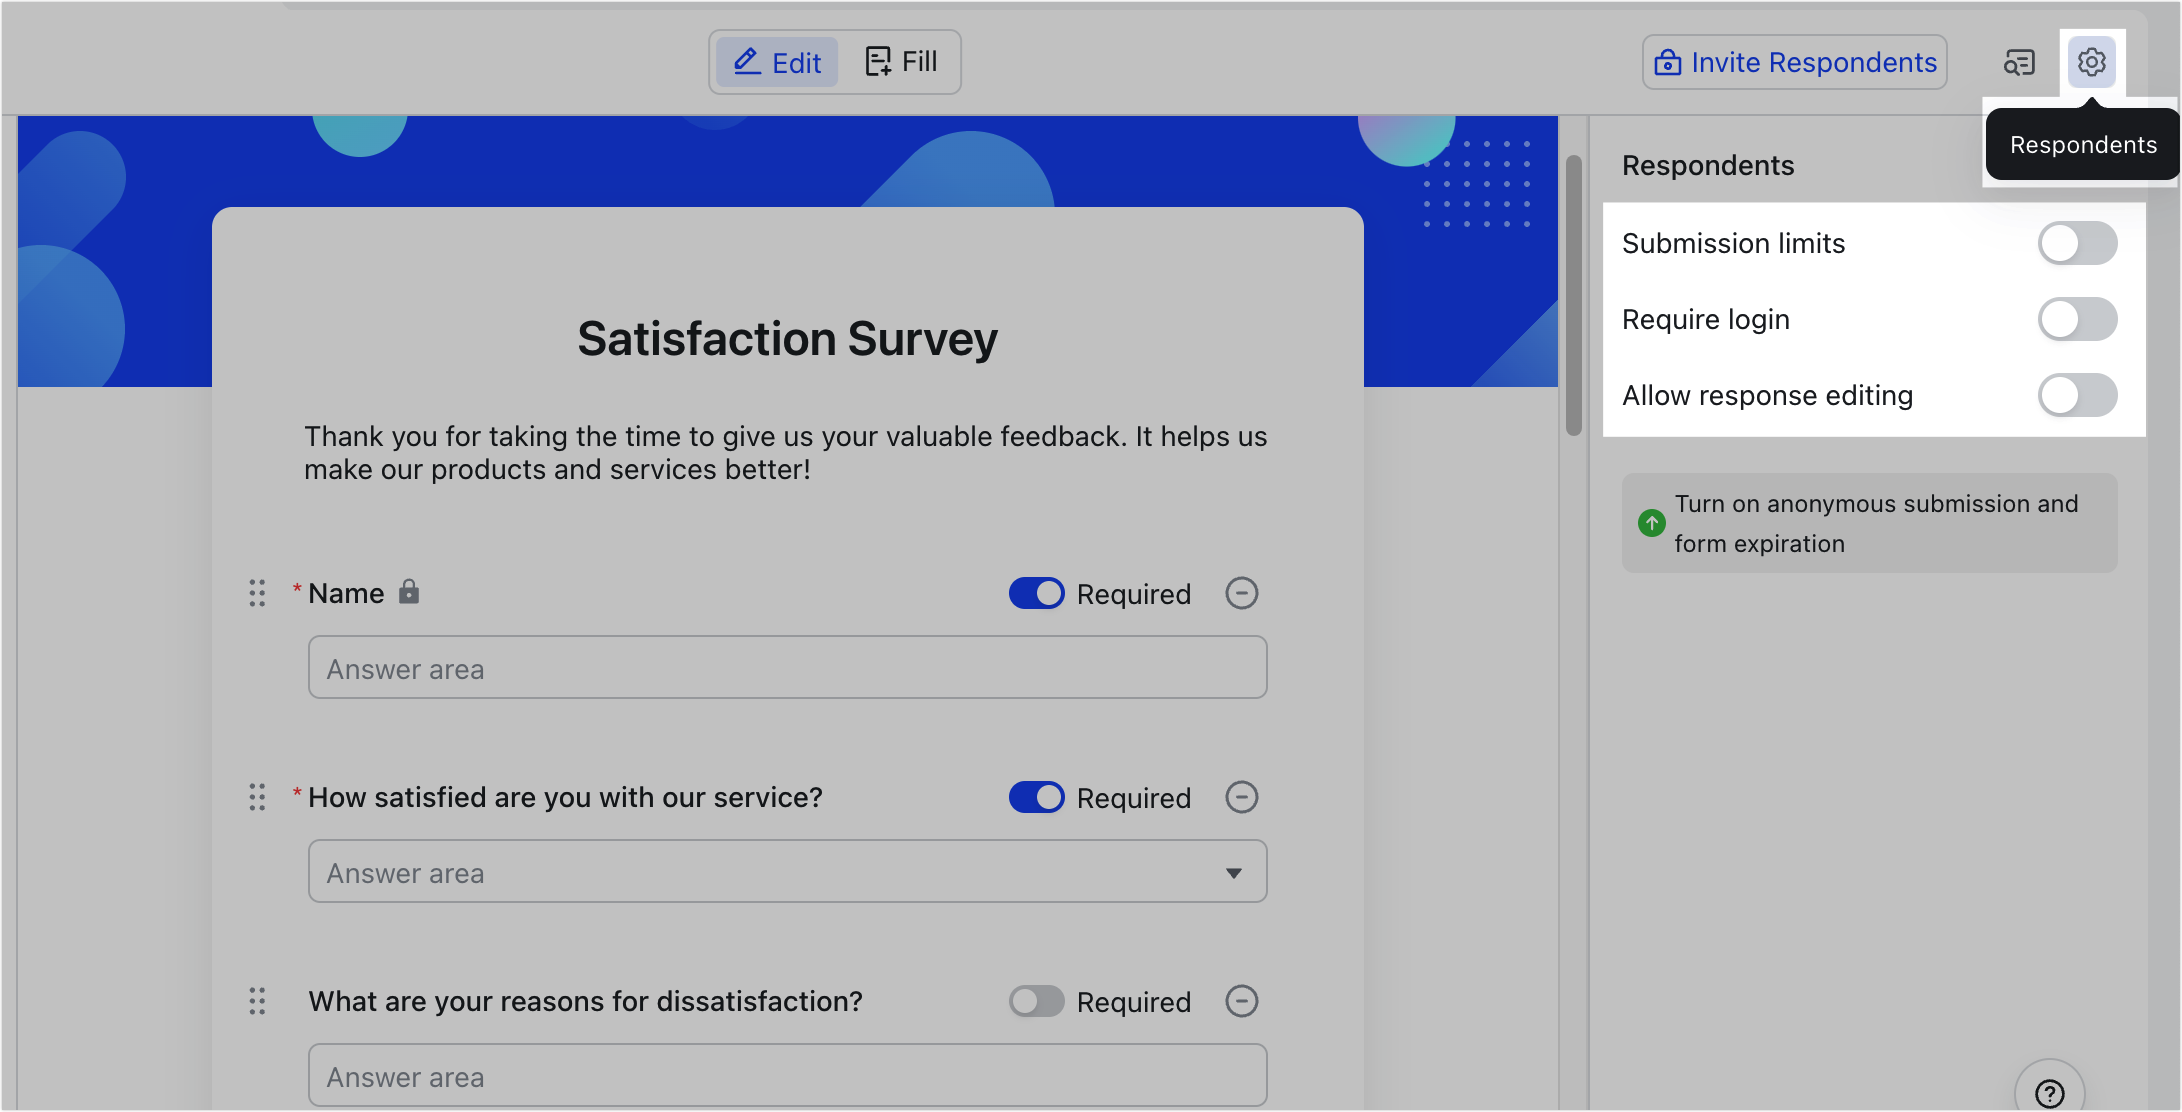
On the form editing page, click the Respondents icon in the upper-right corner to configure Submission limits, Require login, and Allow response editing.
250px|700px|reset
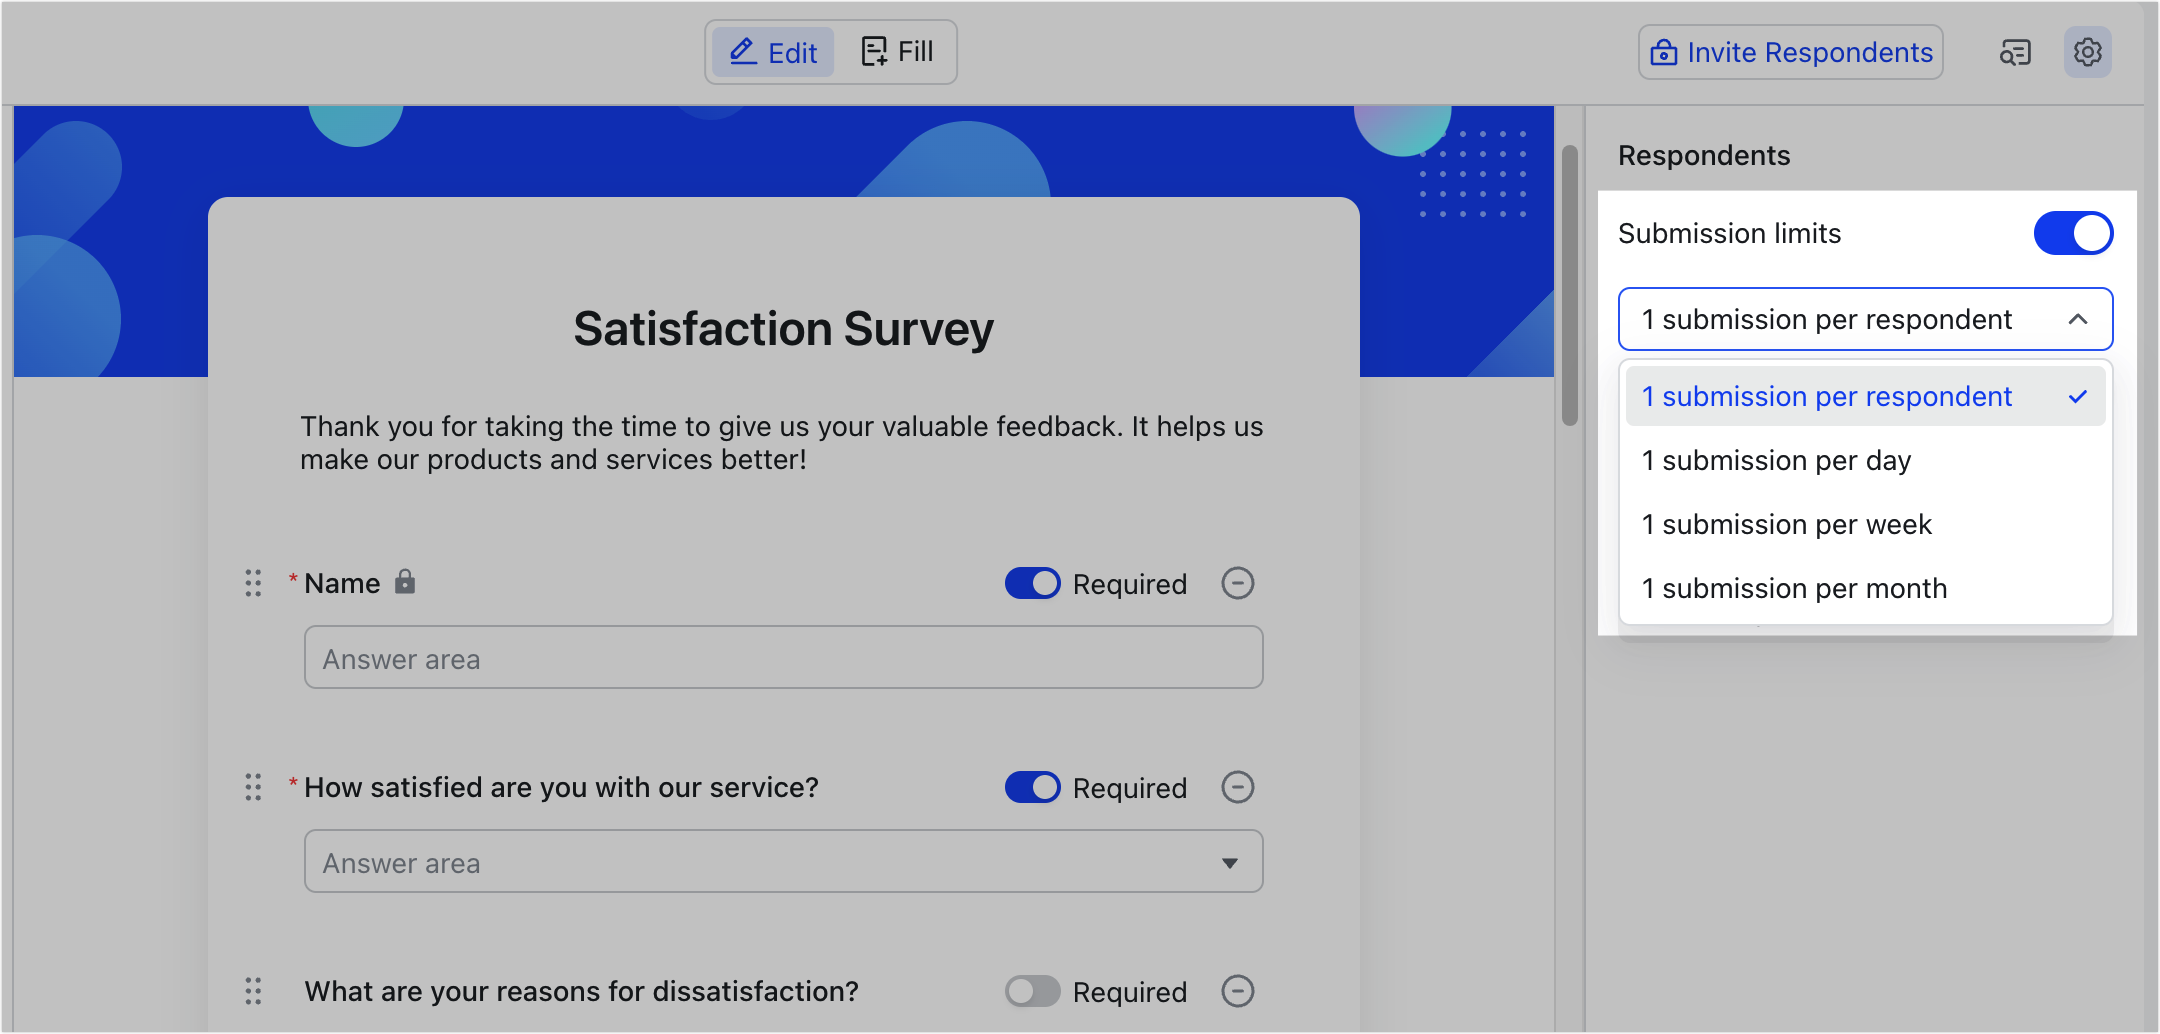
- Submission limits: This limits the number of times a user can submit the form. When this option is turned on, you can select from 1 submission per respondent, 1 submission per day, 1 submission per week, or 1 submission per month.
- If you choose 1 submission per respondent, all recipients will only have one chance to fill out and submit the form.
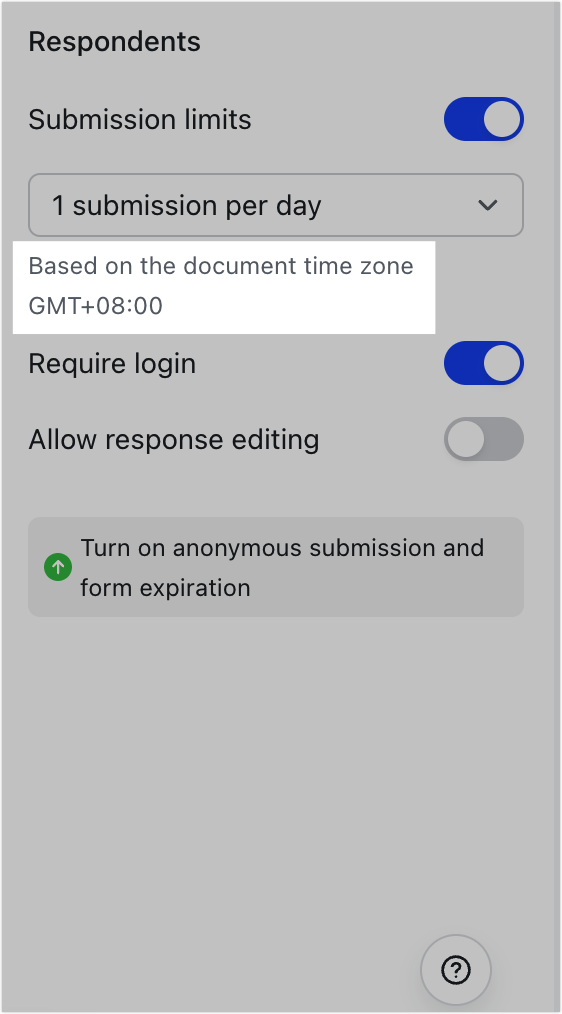
- For the other options, the day/week/month will be determined based on the document's time zone.
250px|700px|reset
250px|700px|reset
- Require login: When this option is turned on, respondents must log in to Lark to fill out and submit the form. This is suitable for scenarios such as gift redemption, registration, and more where respondents need to be identified.
- Allow response editing: When this option is turned on, all respondents can view and modify their own submitted records. Otherwise, respondents can only view their own submissions but can't make any changes.
- Note: Form respondents can only see their own submissions and not the submissions of others.
Share the form
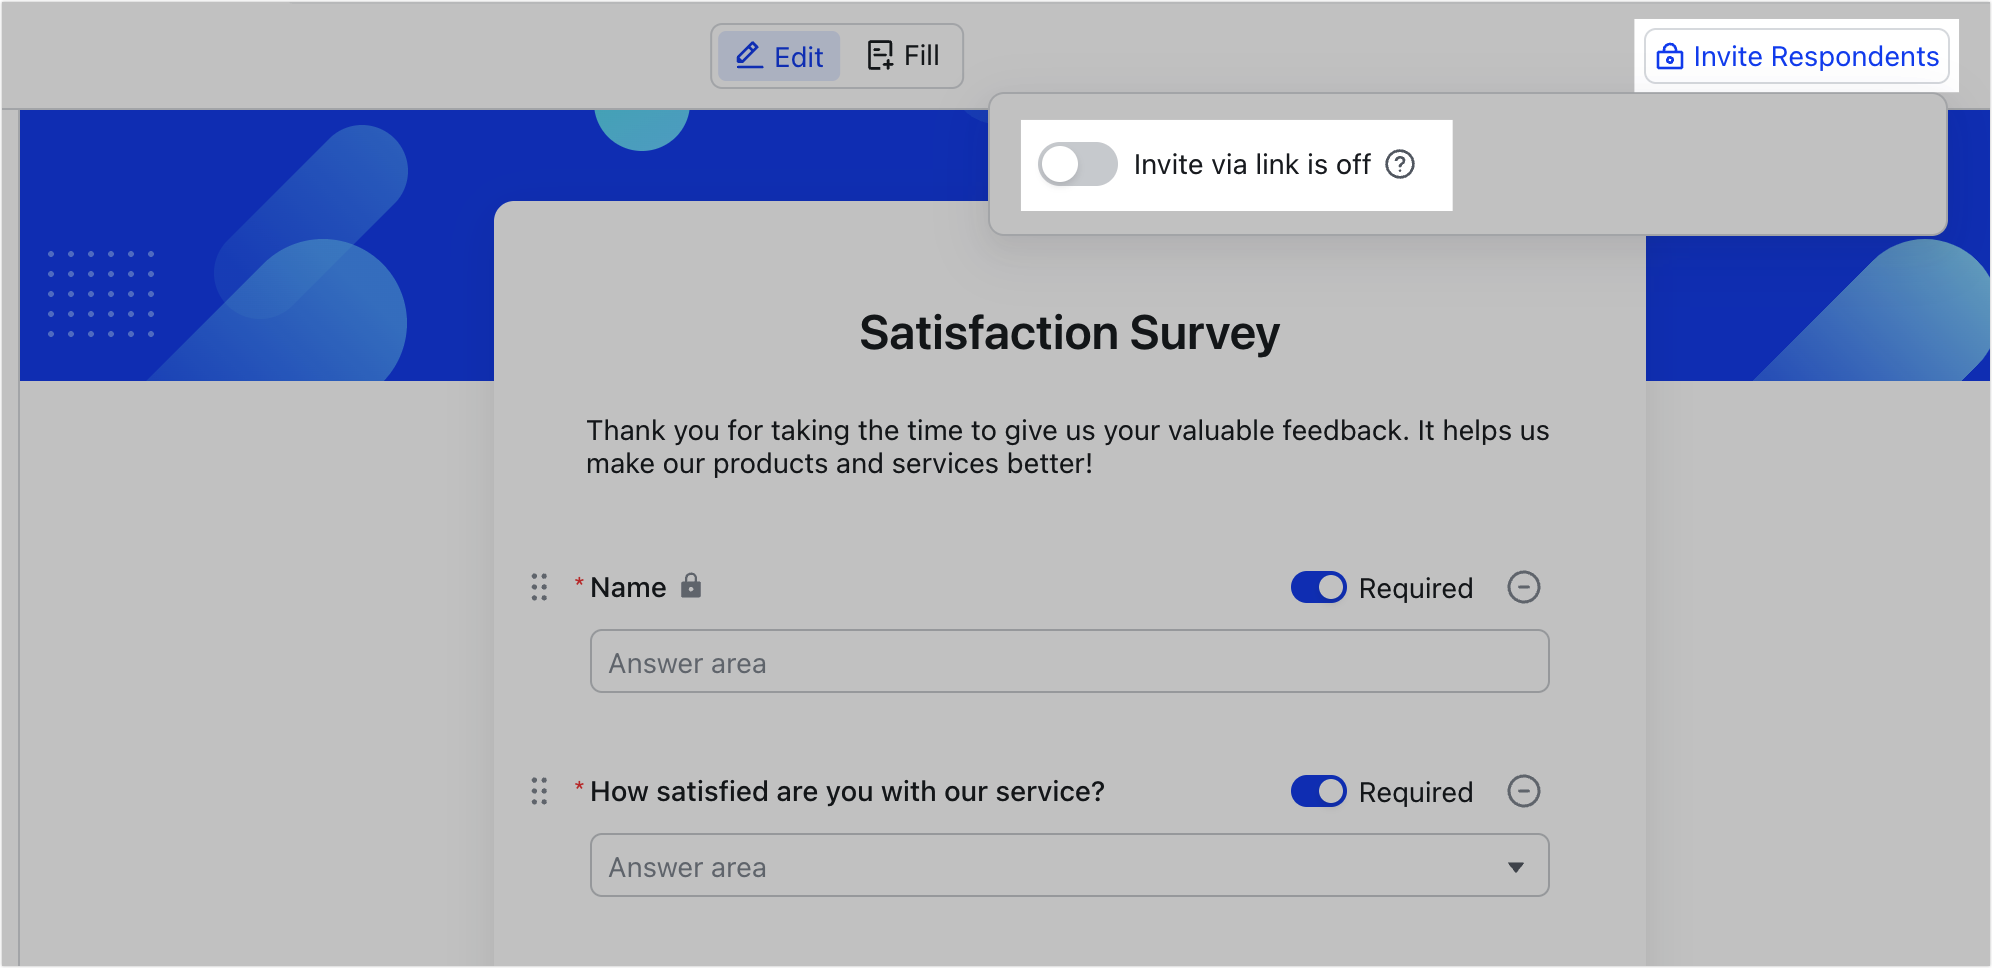
You can turn on form sharing to get a link, which you can share with recipients. They can then open the link to fill out the form.
- Click Invite Respondents in the upper-right corner and turn on Invite via link is off.
250px|700px|reset
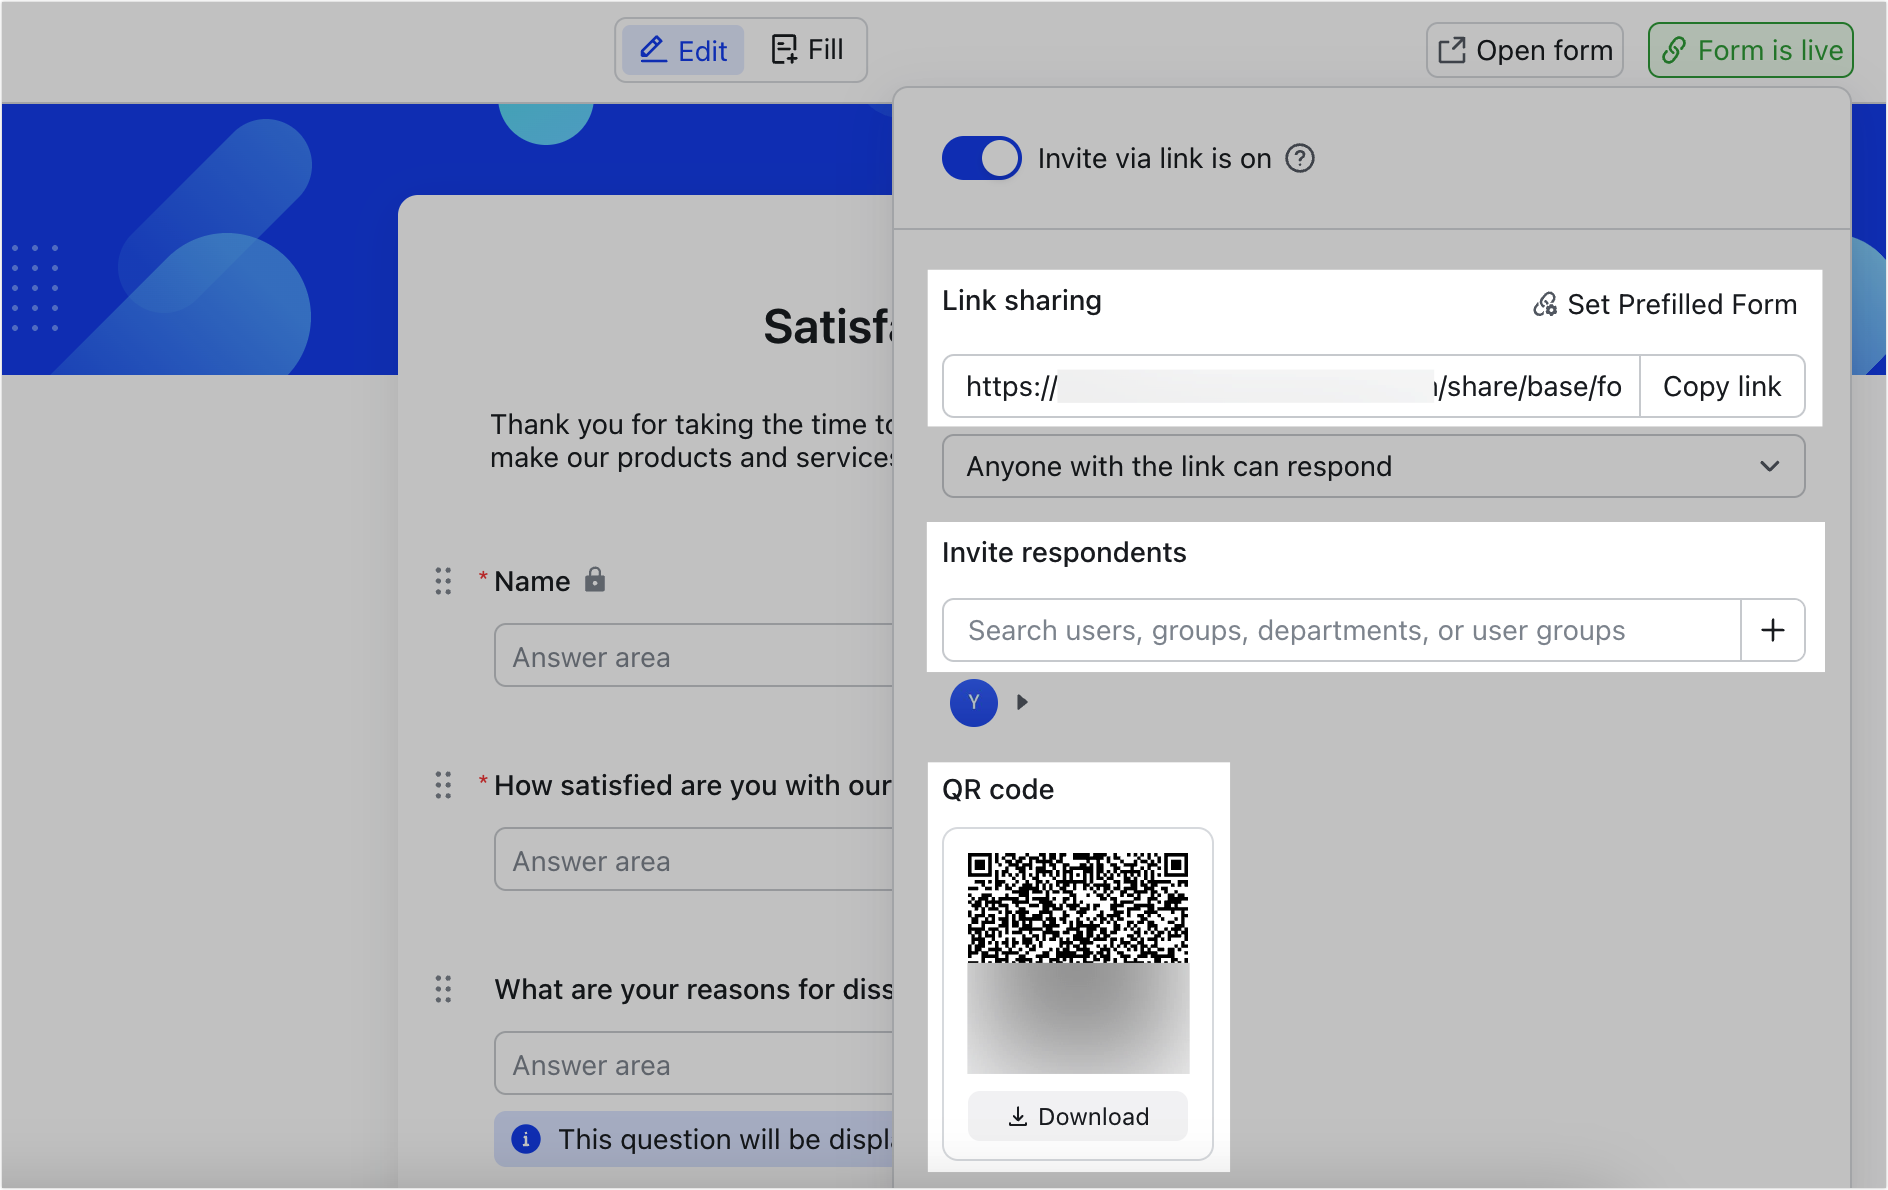
- Select a permission option:
- Only invited people can respond: Only those who are invited can fill out and submit the form.
- People in the organization with the link can respond: Members in the organization can fill out and submit the form.
- Anyone with the link can respond: Anyone with the sharing link can fill out and submit the form.
- Note: If Anyone with the link can respond is selected, person-type questions will be hidden from external users. External users who accessed the form through the link can upload attachments, but the attachments will use the storage space of the base owner.
250px|700px|reset
To stop accepting submissions, click Form is live on the edit page, and turn off Invite via link is on. Users will no longer be able to fill out and submit the form.
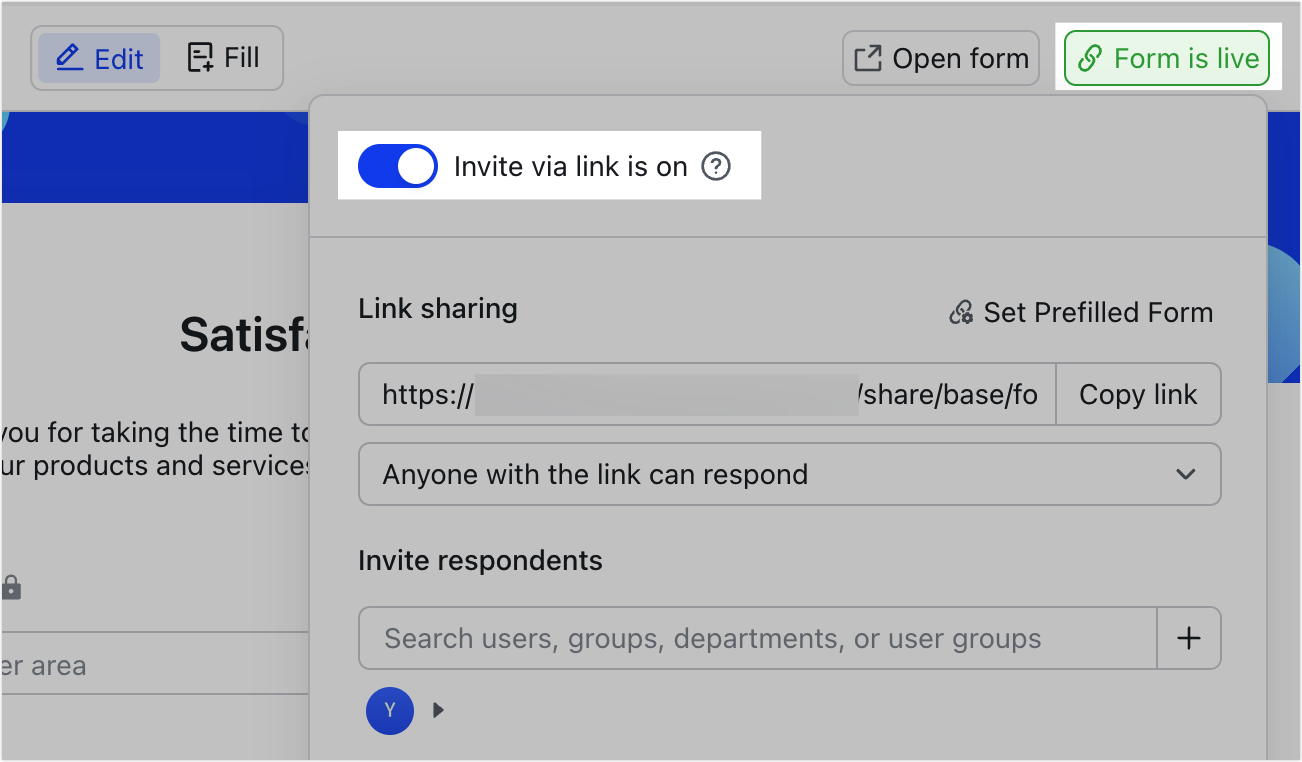
250px|700px|reset
Preview the form
As a form manager, you can preview the form using the following methods:
Method 1: Click Fill at the top of the form to preview the form. You can fill out the form, and submit it while previewing.
Method 2: After turning on sharing, click Open form in the upper-right corner to preview the form. You can fill out the form, and submit it while previewing.
If you submit a form while previewing, your submissions will appear in the results view.

250px|700px|reset
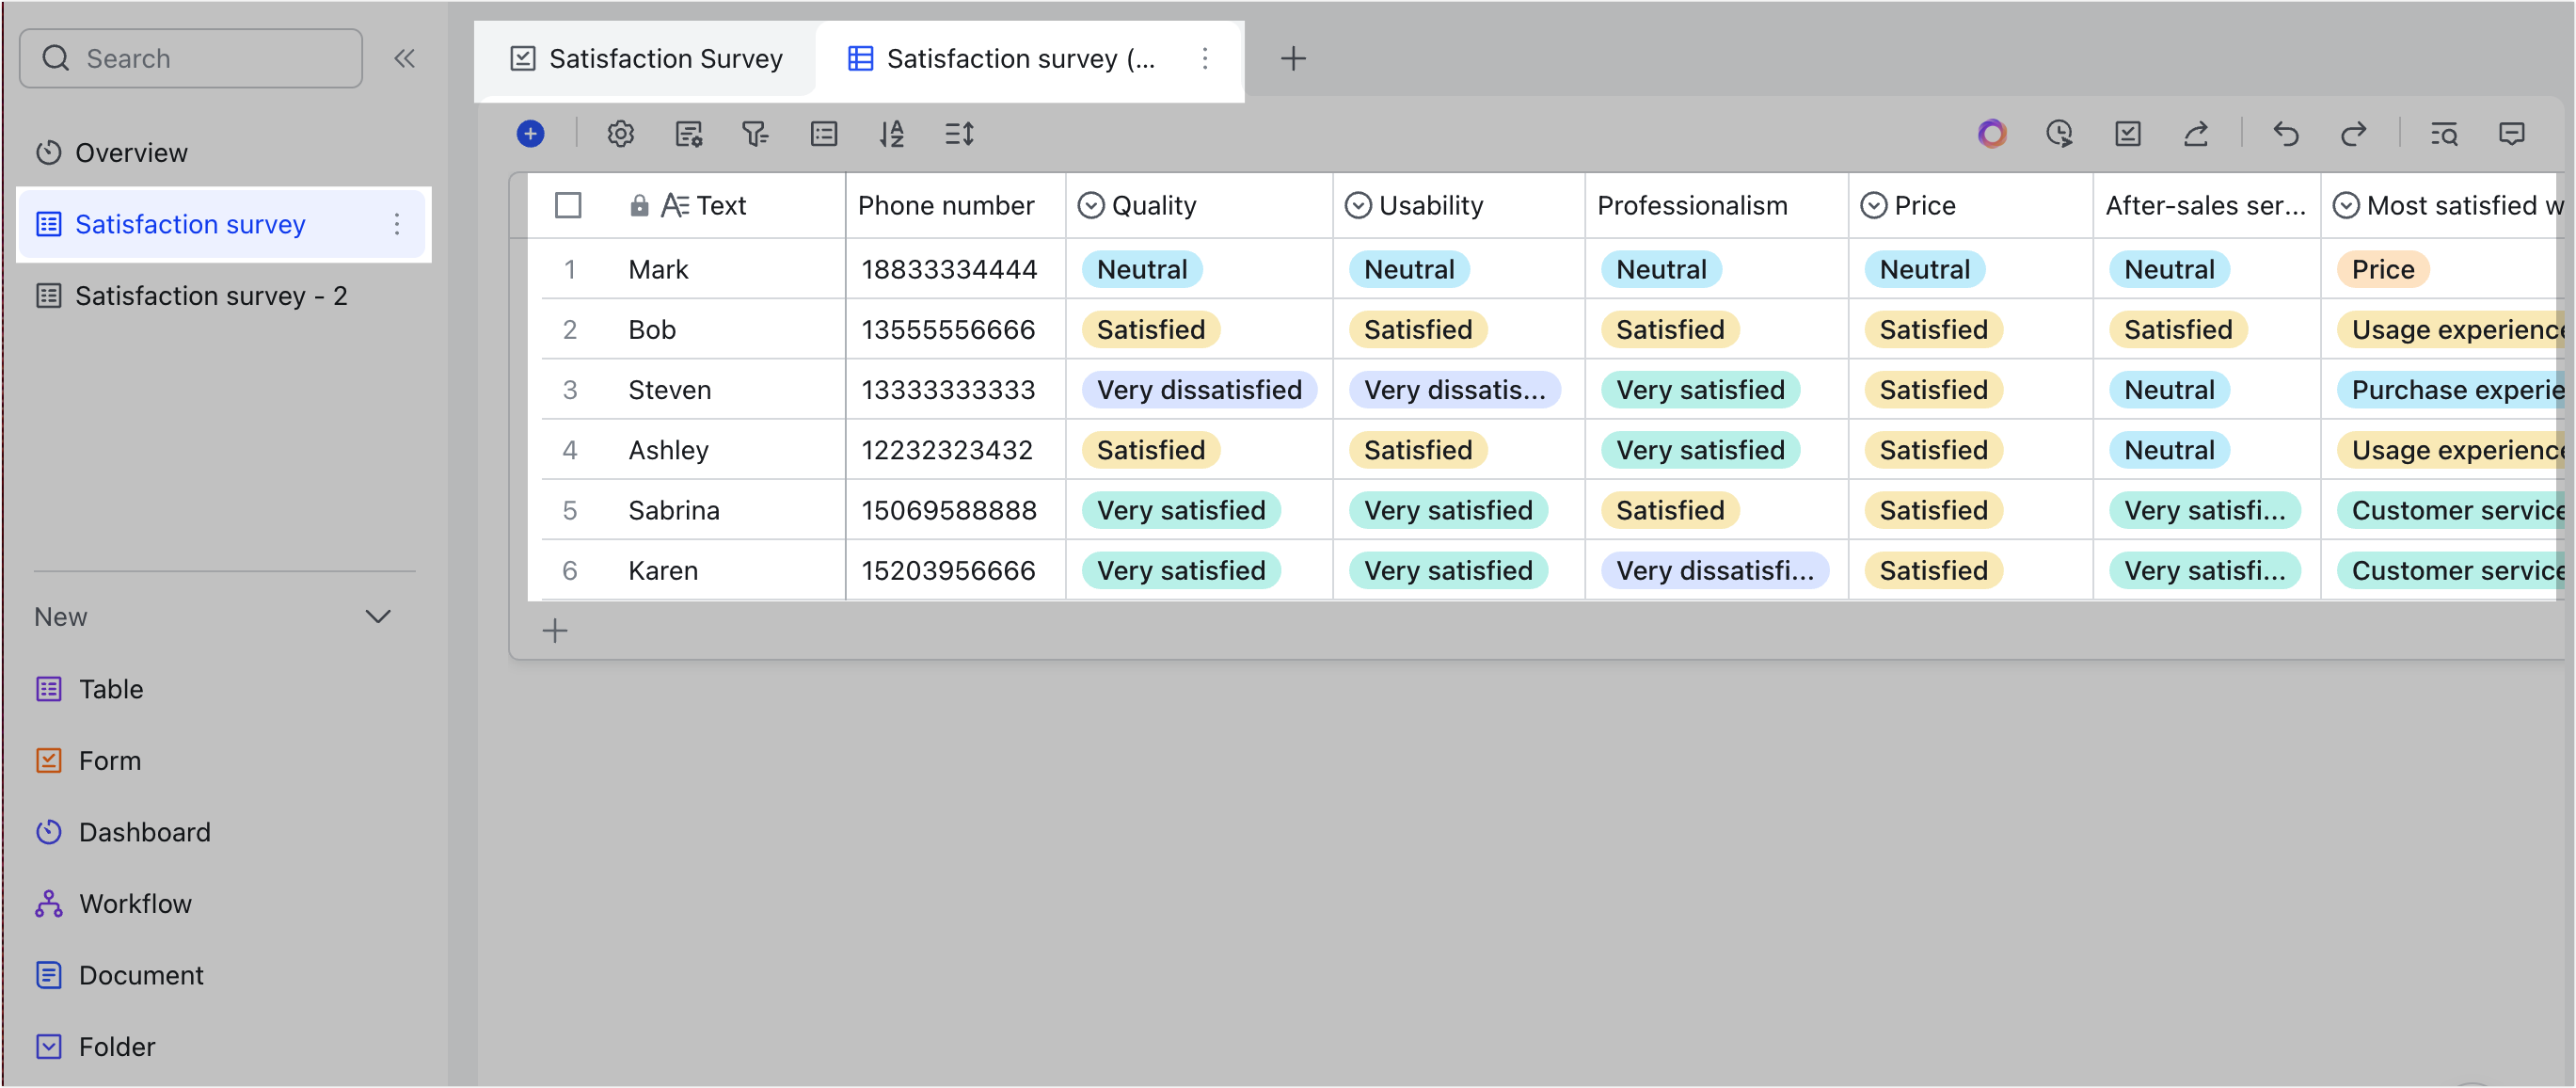
View submissions
The information submitted through the form will be added to the corresponding grid view in the table, where you can view and organize the data as needed.
The permission to view and edit the data depends on the permission settings of the base. Users must have at least view permission for the table to see all the submission results. Users with only the form's sharing link won't be able to see the submission results.
250px|700px|reset
III. FAQs