

I. Intro
Field shortcuts allow you to create specialized fields for different business scenarios in Base. With field shortcuts, you can quickly build a table that covers all your objectives and processes.
There are two types of field shortcuts: AI and formula. In this article, we'll introduce AI field shortcuts, which can help you quickly translate, classify, and summarize the information in the base.
II. Steps
Get your OpenAI API Key
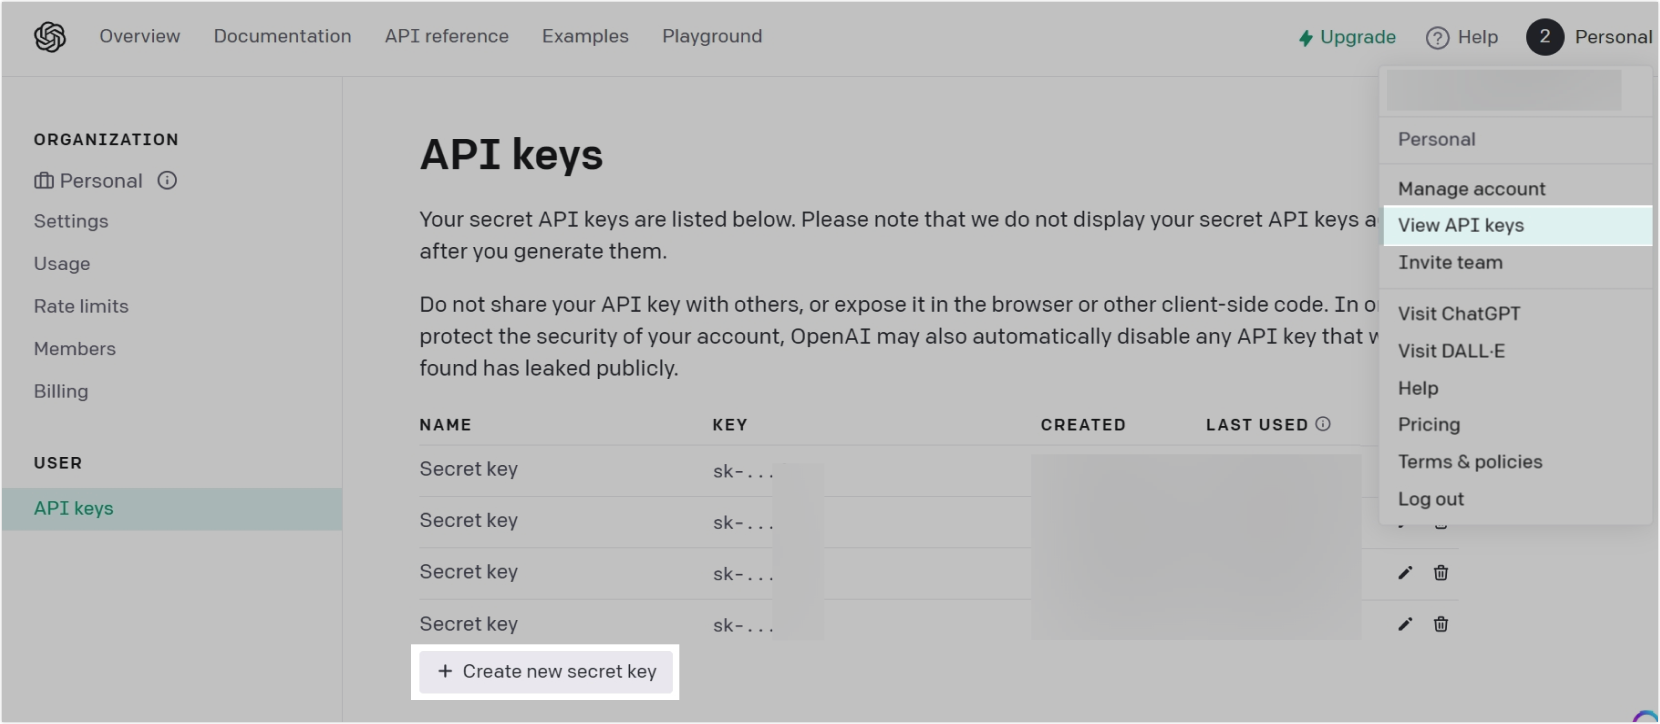
To use AI field shortcuts, you need to obtain your OpenAI API key by following these steps:
- Visit the official OpenAI website: https://platform.openai.com. Register or log in to your account.
- Once you're logged in, click the profile photo in the upper-right corner and select View API keys.
- Click Create new secret key and name the key in the pop-up (optional). After confirming, you'll get your API key. Click the Copy icon on the right, and paste it into the Base AI configuration interface.
250px|700px|reset
Note:
- Once you bind an OpenAI API key to a base, it will only be applied to that base. You can use the same key to bind to multiple bases separately.
- If you make a copy or use a template, the API key will not appear in the new base.
- AI field shortcuts generate content row by row, with one row of data corresponding to one OpenAI call.
- To use AI features in Base, the user binding the API key needs to have the following permissions in the base:
- If advanced permissions are not turned on, the user needs to have edit permission.
- If advanced permissions are turned on, the user needs to have manage permission for all tables.
Go to the Shortcut Center
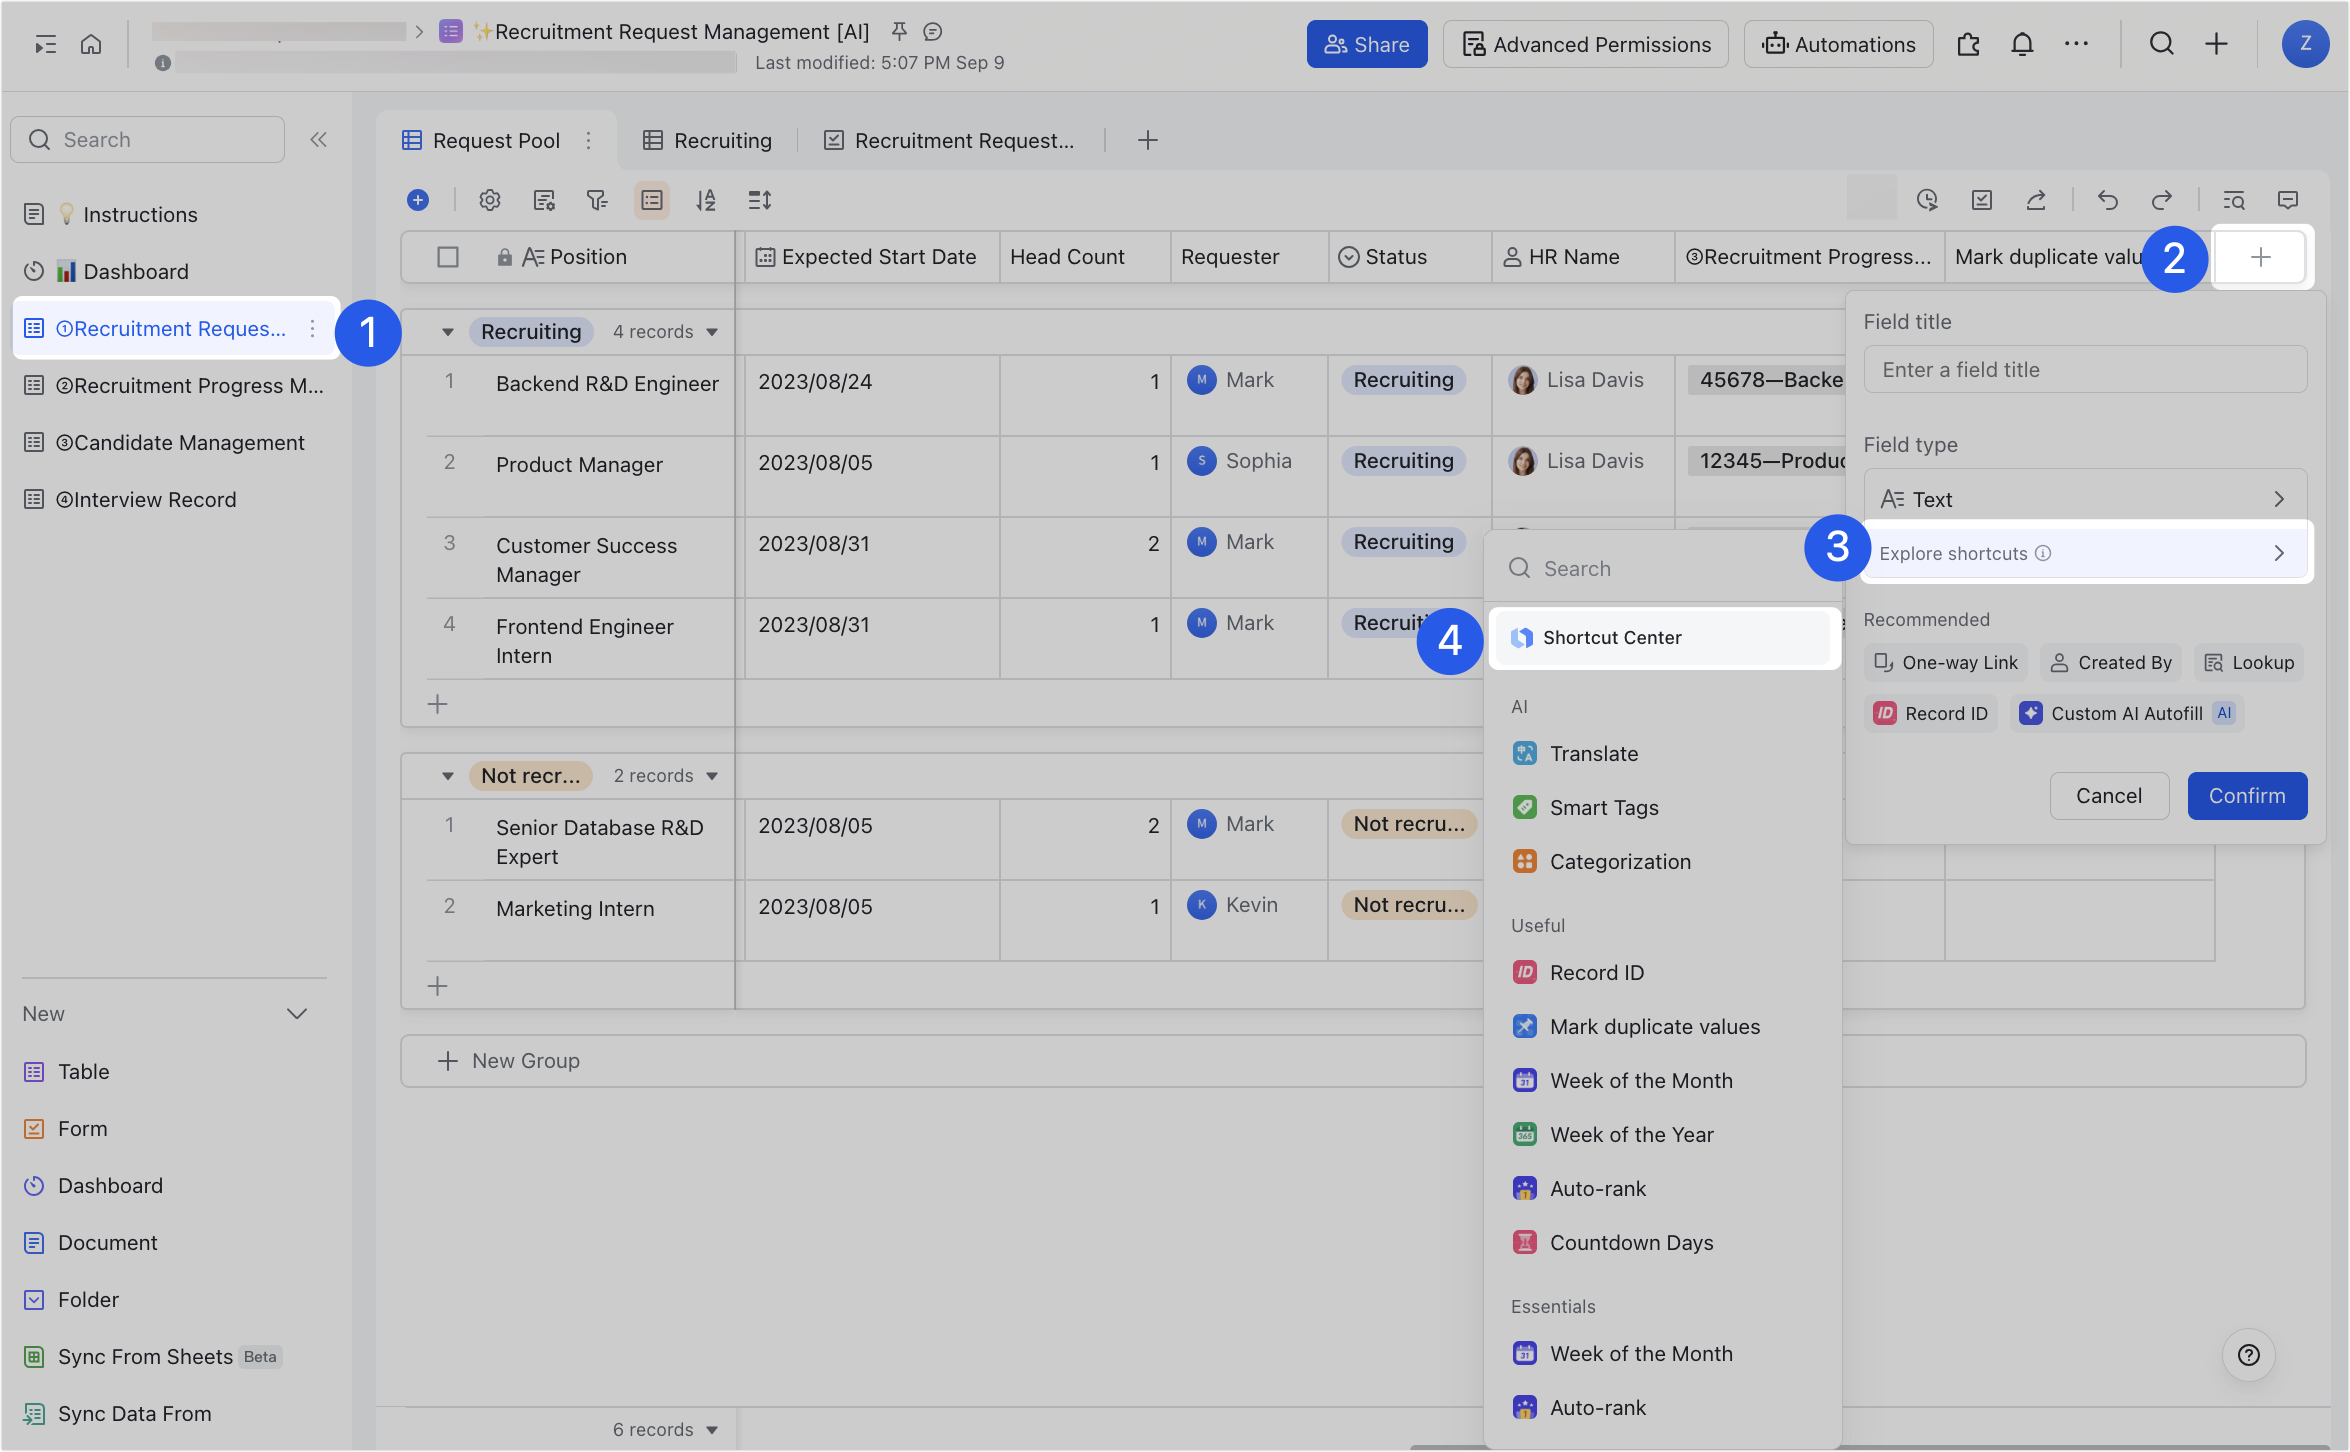
- Open the base and click the table in the left navigation pane.
- In the grid view of the table, click the + icon on the right side of the last field to create a new field or click Edit Field on an existing field.
- Hover over the Explore shortcuts under Field type and click Shortcut Center.
250px|700px|reset
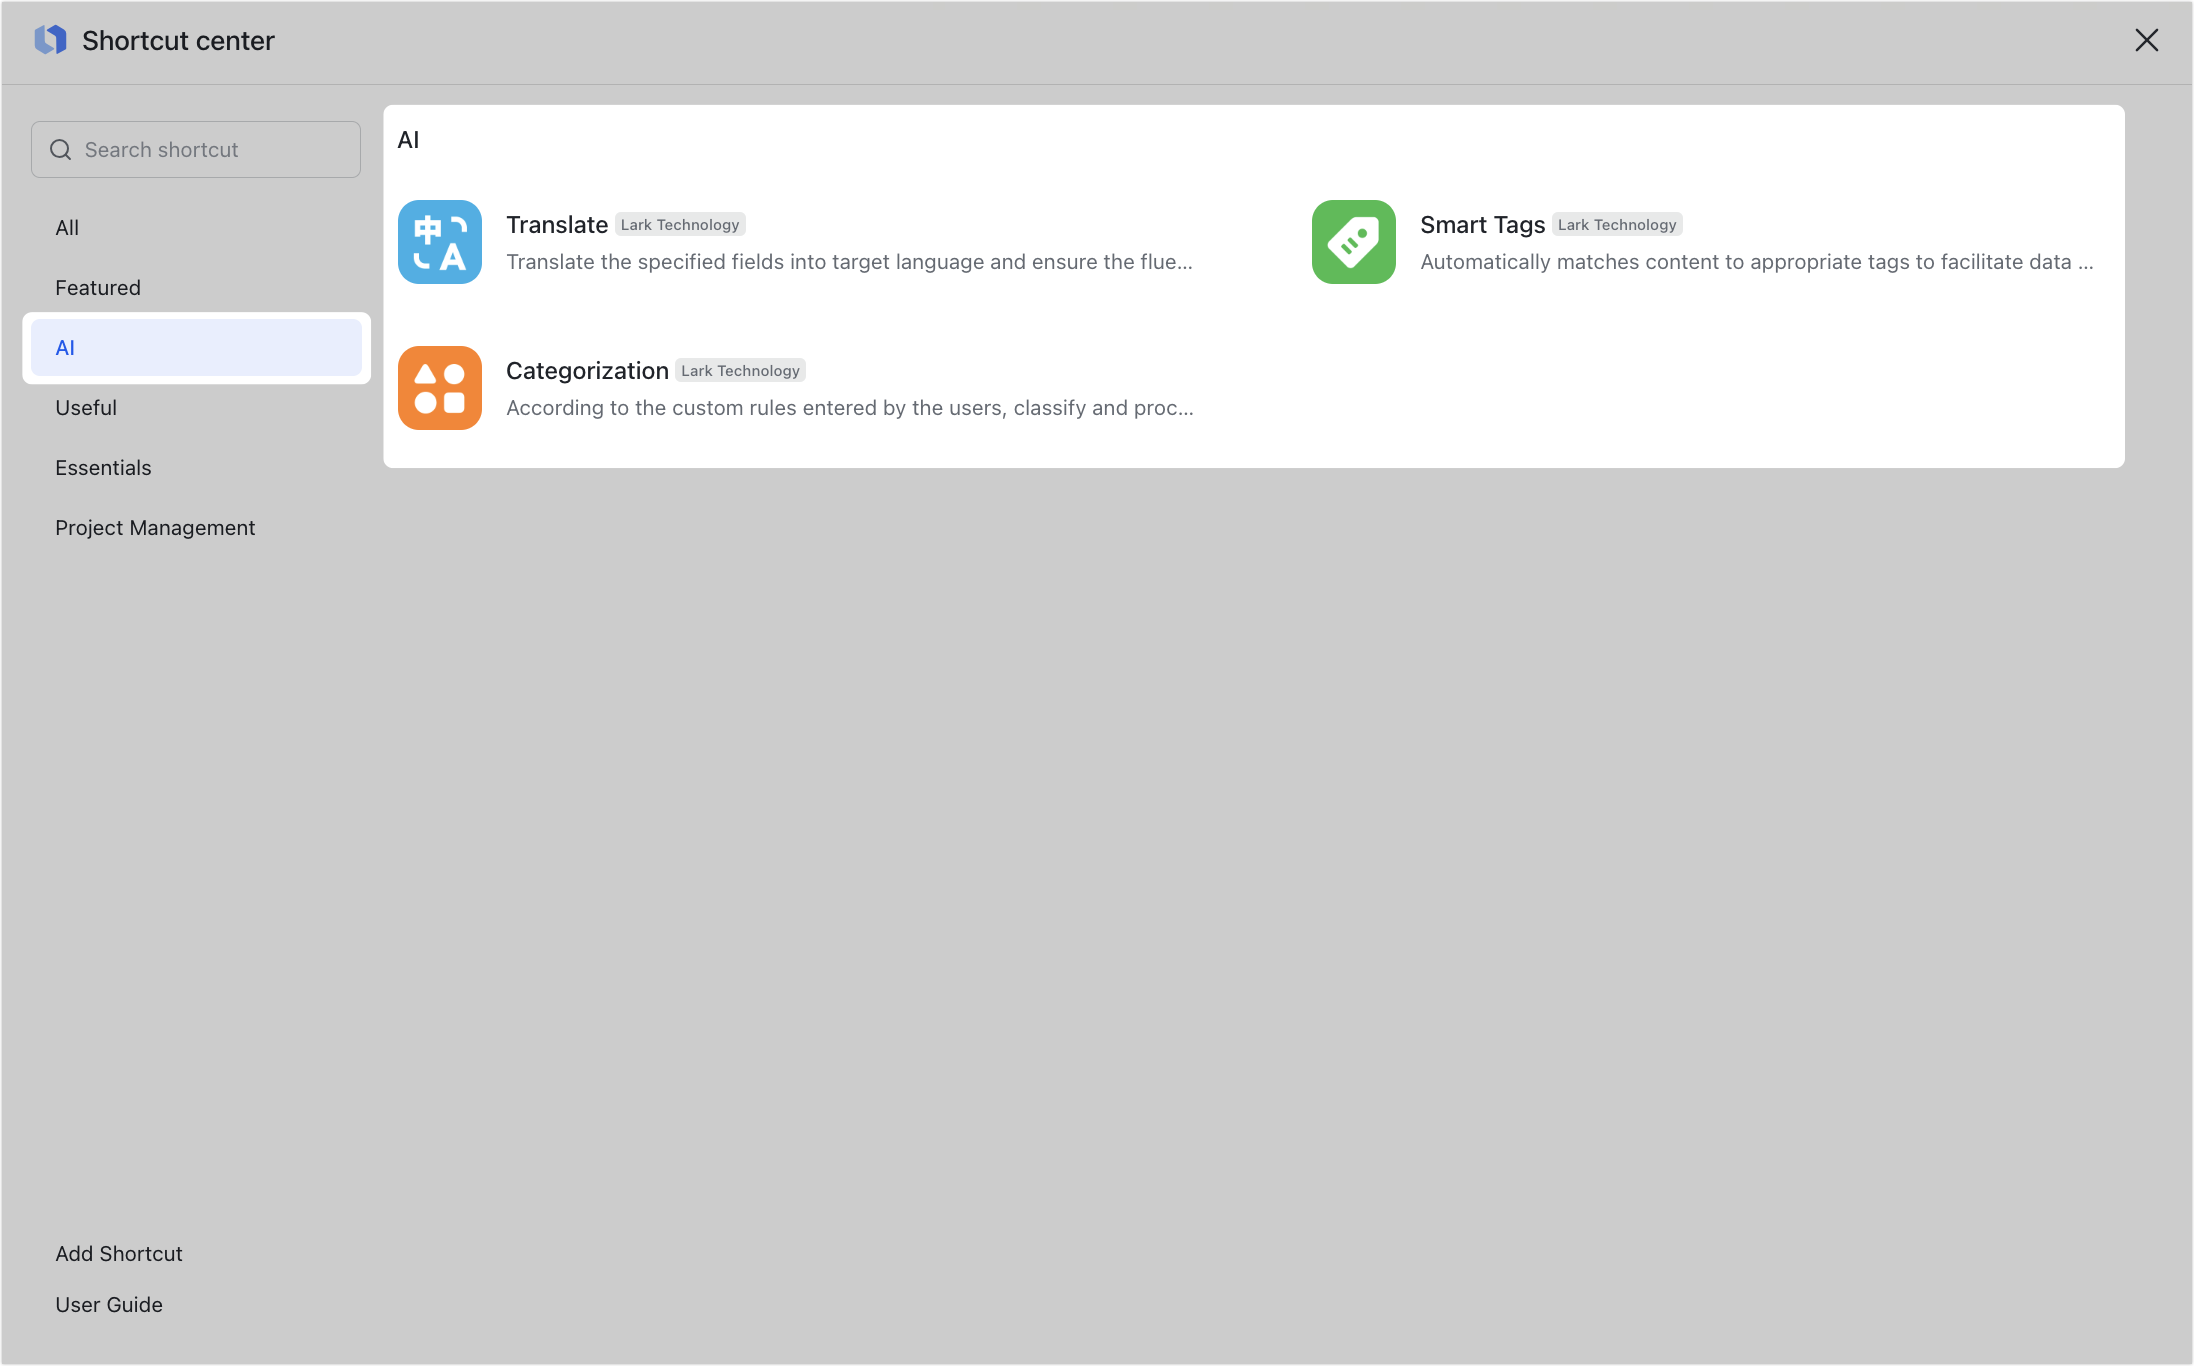
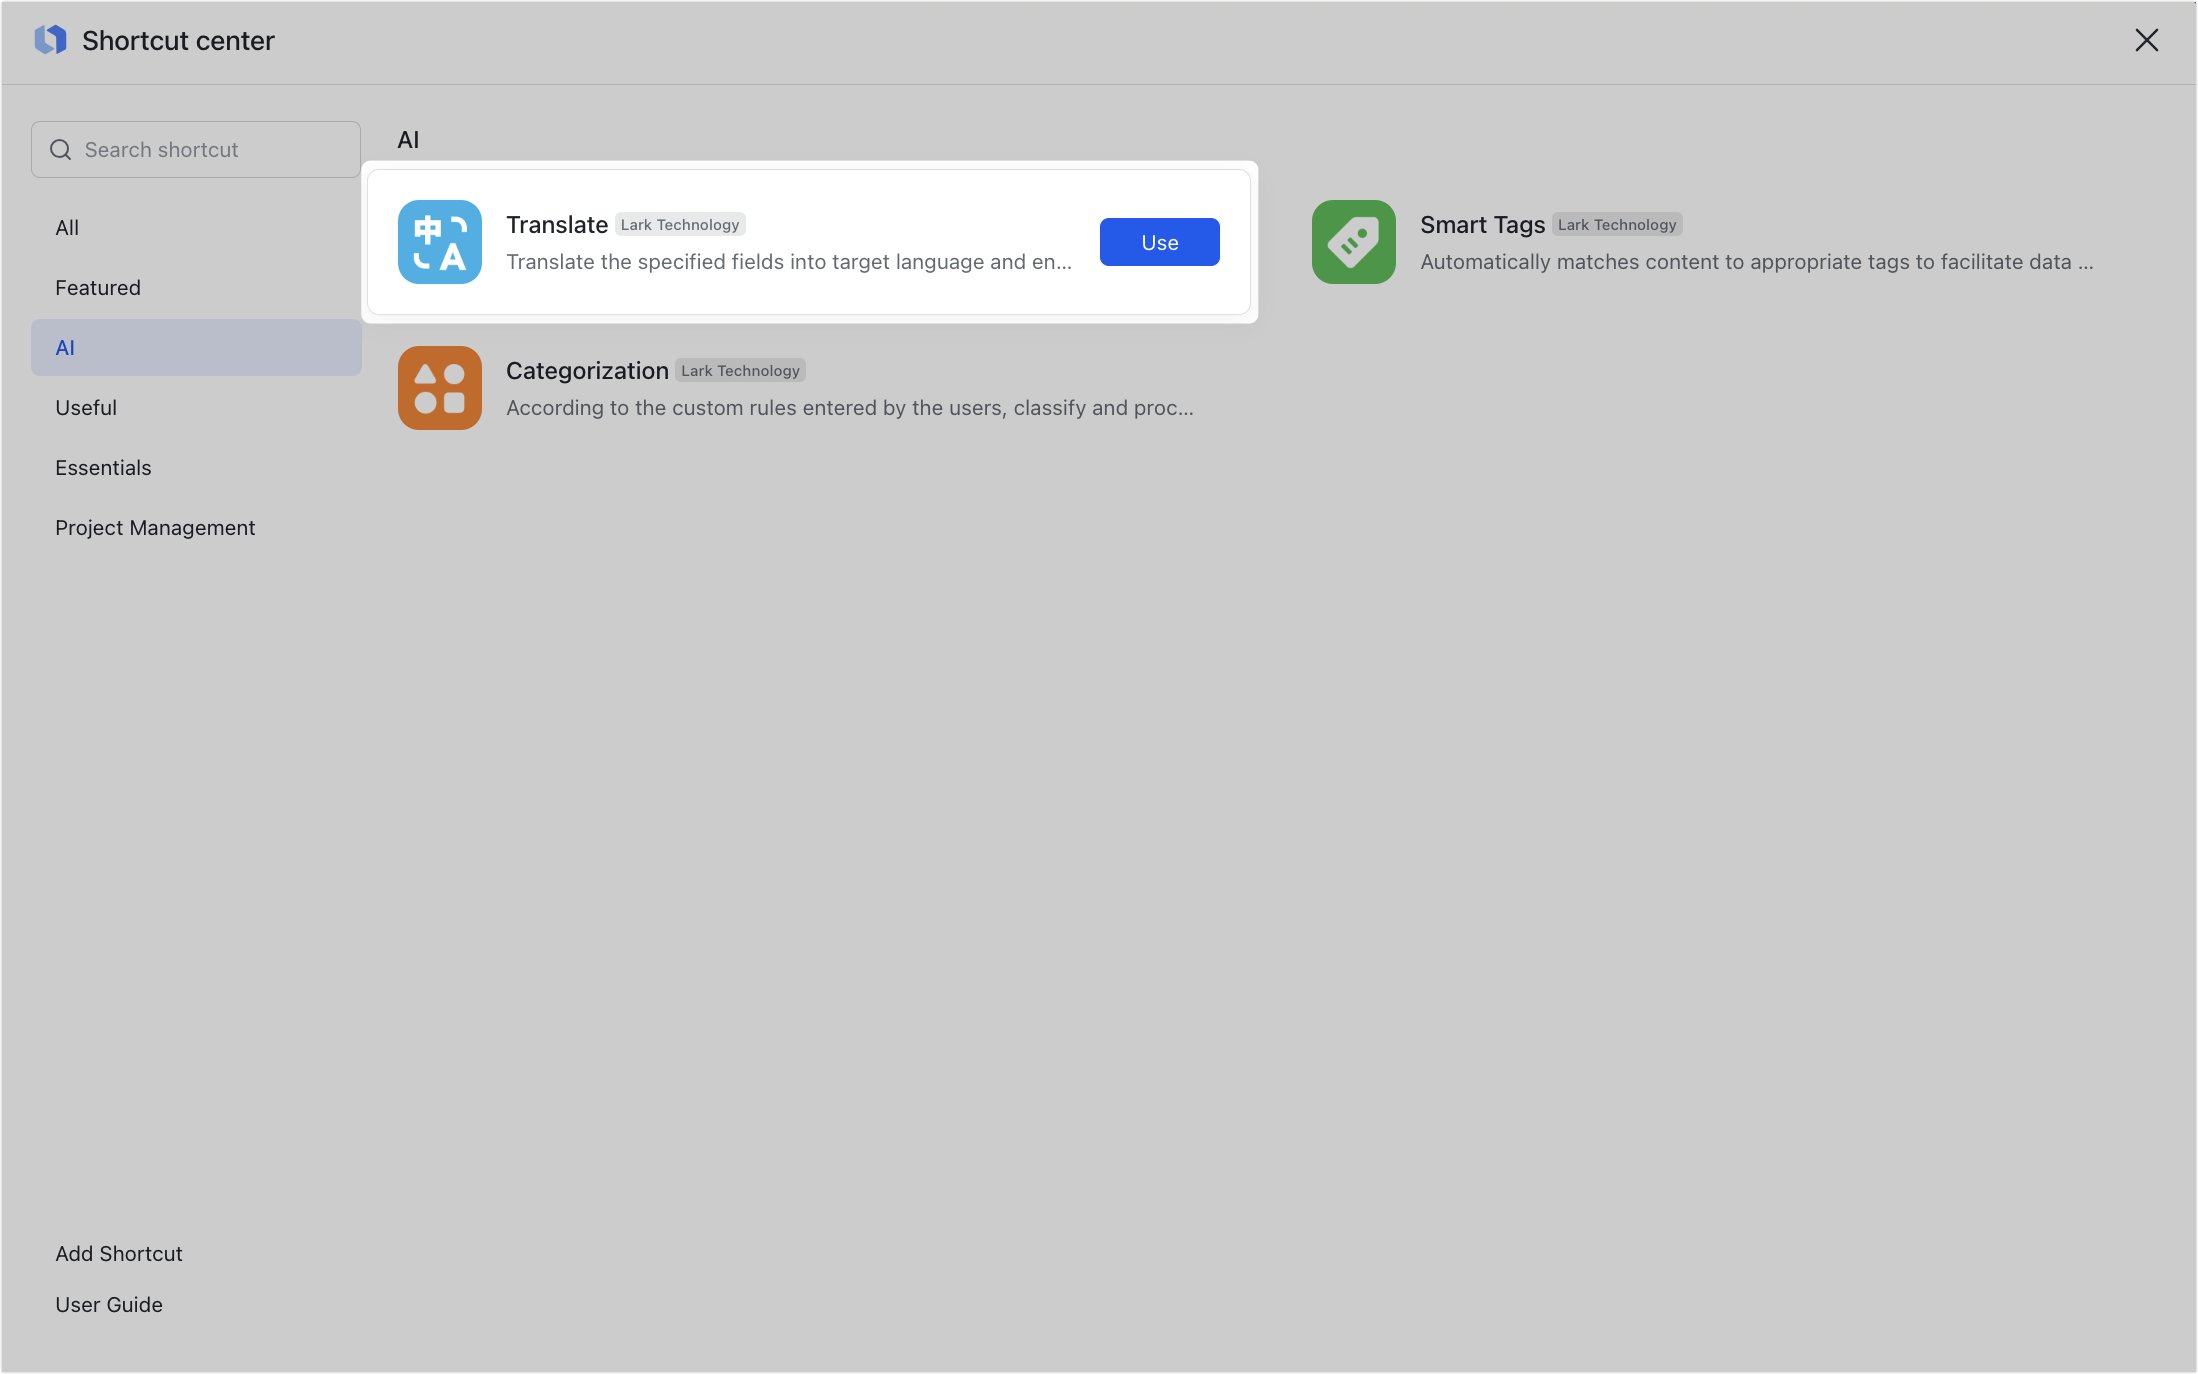
- Click AI on the left. Hover over the field shortcut, click Use, and configure the field shortcut as needed.
250px|700px|reset
Use the Categorization field shortcut
This field shortcut can categorize and classify data according to the rules you specify, which can be used for data management and analysis.
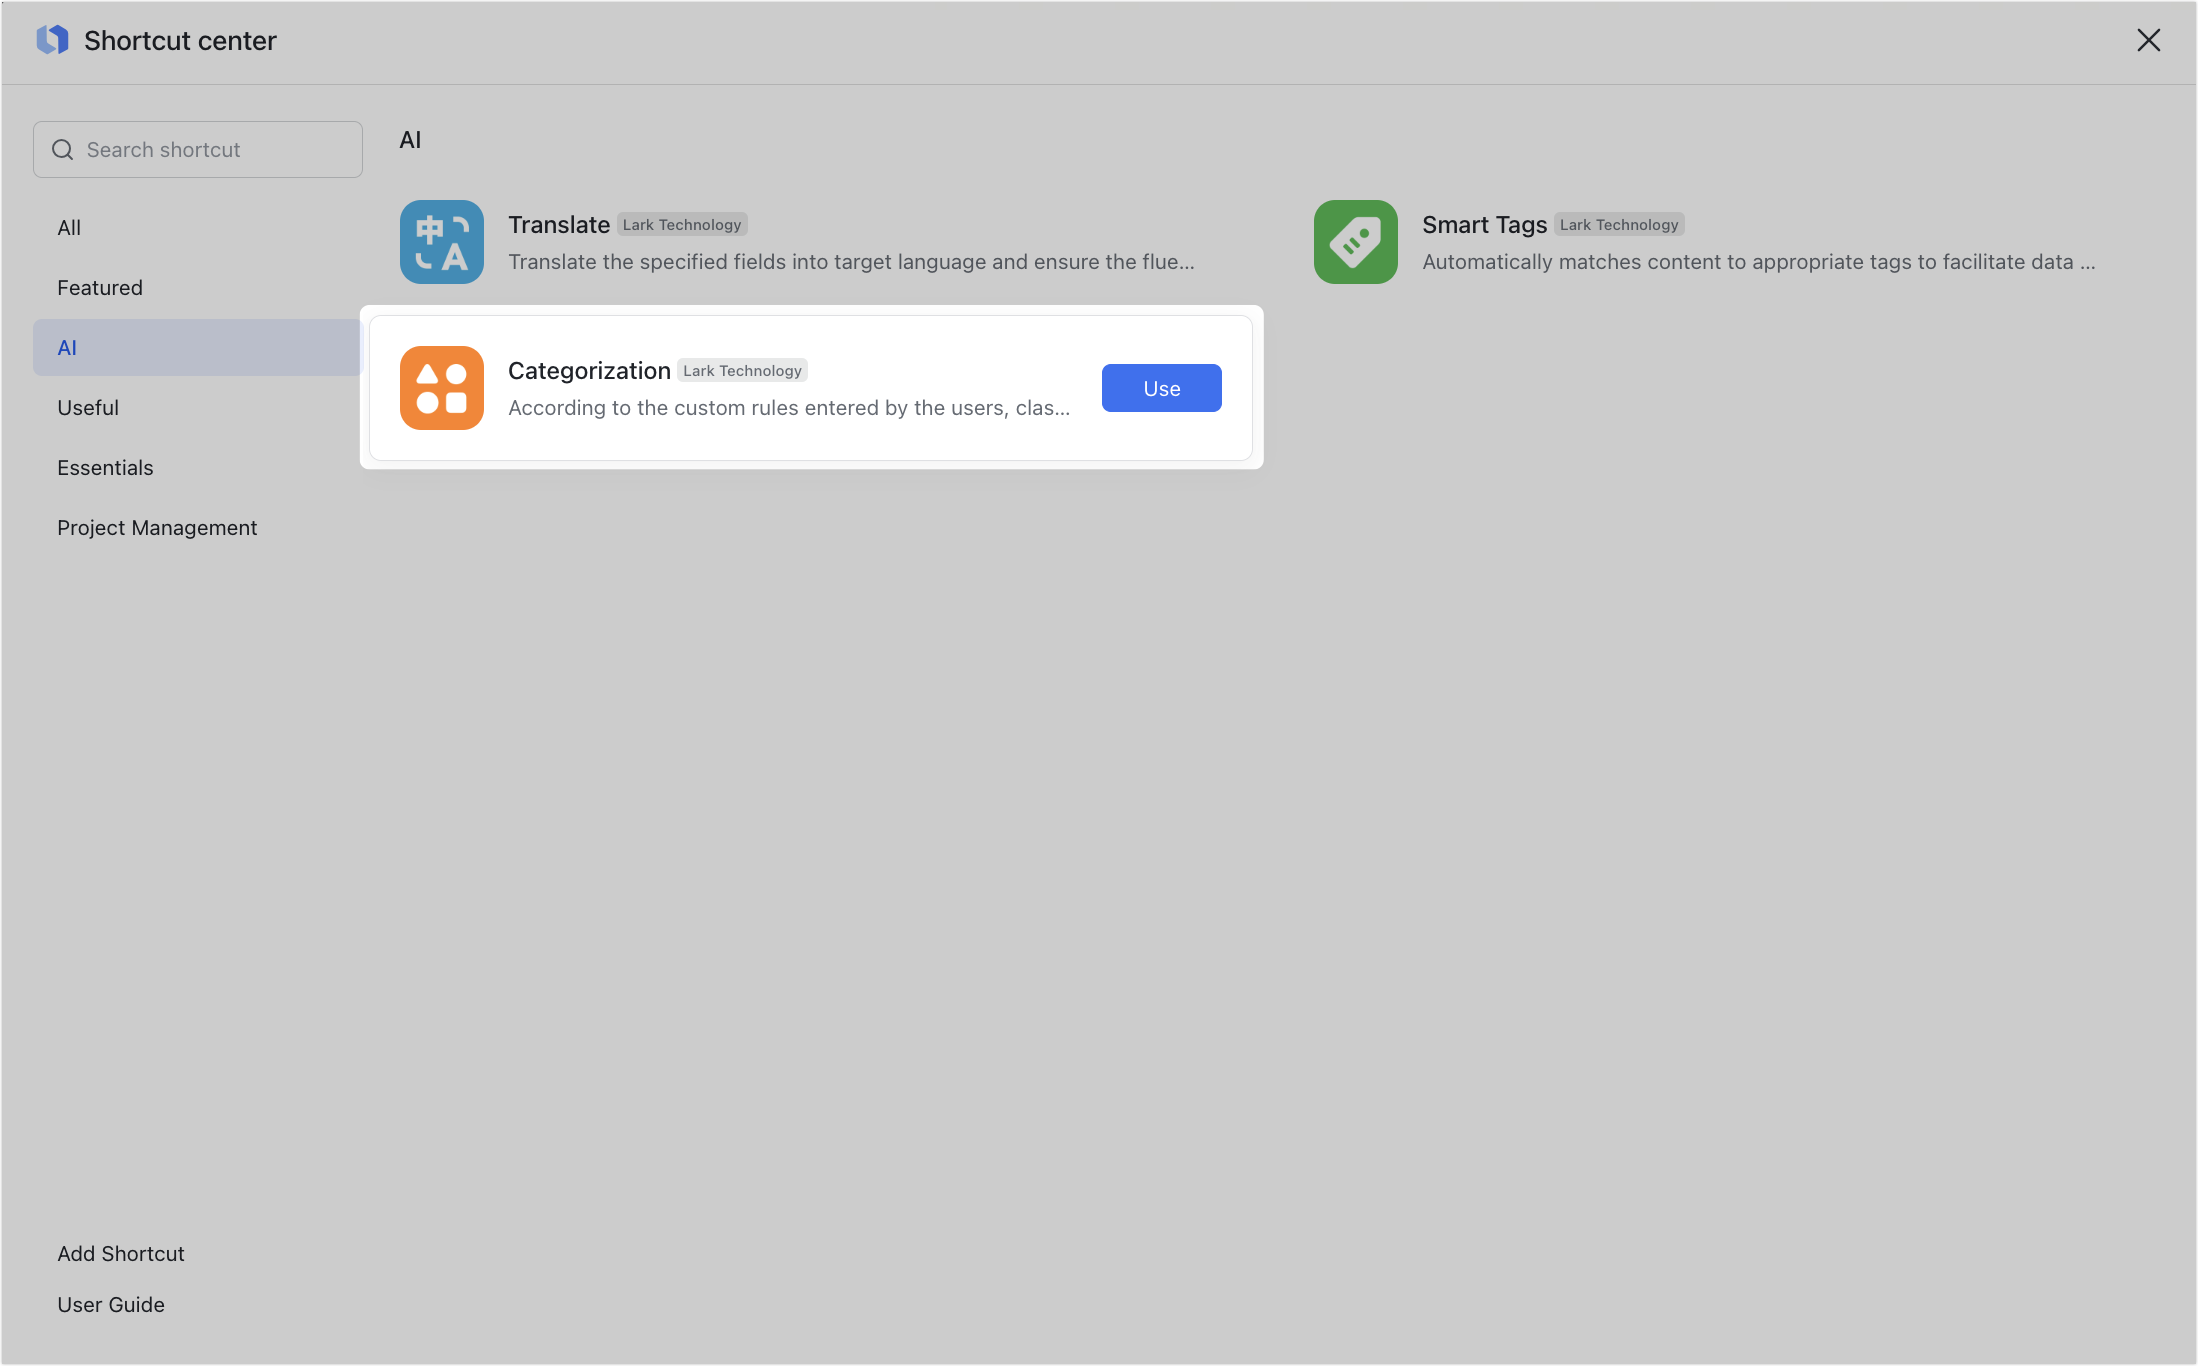
- In the Shortcut Center, hover over the field shortcut, and click Use.
250px|700px|reset
- In the field configuration panel, fill in or configure the following:
- Field title: Enter a field title. The name of the field shortcut is used by default.
- Classification: Click Add category to add a category. You can select Reference Options to reference single option or multiple options fields from other tables. For more details, see Create hierarchical relationships with single and multiple options fields.
- Configure:
- Fields to be classified: Required.
- Examples: Optionally, enter reference examples to make the AI output more aligned with your requirements.
- Classification requirements: Optionally, enter your custom requirements to make the AI output more personalized.
- Select model: Required. You can select OpenAI GPT-4 or OpenAI GPT-3.5 as the model for AI generation.
- API key: Required.
- Auto-update: On by default, and can be turned off as needed. When turned on, the content generated by the field shortcut will update when the specified content is updated.
- Generate First 5 Rows: Click Generate First 5 Rows to generate and view the results of the first five rows to determine whether you want to apply the field shortcut to the entire table.

250px|700px|reset
- Click Confirm in the lower-right corner, then click Generate in the pop-up window and a single option field will be generated.
If there is content in the field already, the new content generated by the field shortcut will overwrite the existing content, which can't be recovered. To not overwrite existing content in the field, you should create a new field first and then choose an AI field shortcut.
Use the Translate field shortcut
This field shortcut can translate specified fields into the target language, helping break down communication barriers.
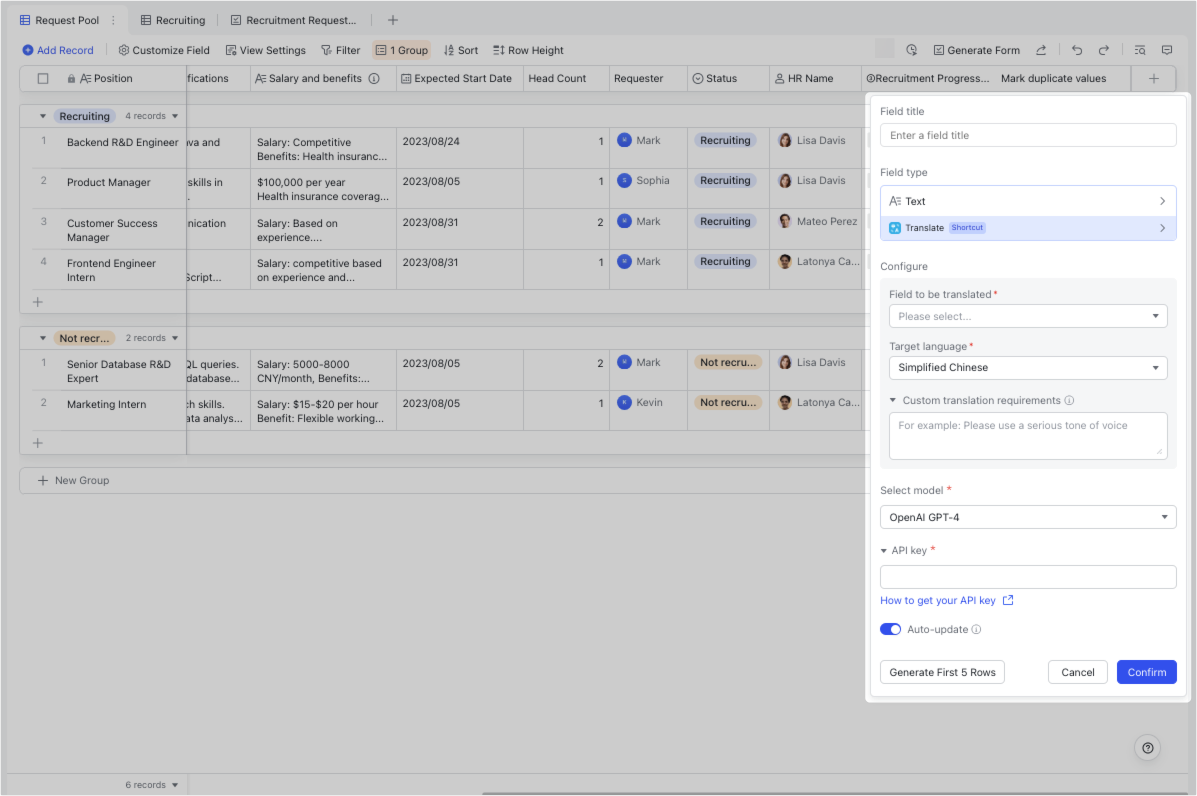
- In the Shortcut Center, hover over the field shortcut, and click Use.
250px|700px|reset
- In the field configuration panel, fill in or configure the following:
- Field title: Enter a field title. The name of the field shortcut is used by default.
- Configure:
- Field to be translated: Required.
- Target language: Required. 12 languages are supported, including English, Simplified Chinese, Traditional Chinese, Spanish, Arabic, Hindi, Portuguese, Bengali, Japanese, Korean, Russian, German.
- Custom translation requirements: Optionally, enter your custom requirements to make the AI output more personalized.
- Select model: Required. You can select OpenAI GPT-4 or OpenAI GPT-3.5 as the model for AI generation.
- API key: Required.
- Auto-update: On by default, and can be turned off as needed. When turned on, the content generated by the field shortcut will update when the specified content is updated.
- Generate First 5 Rows: Click Generate First 5 Rows to generate and view the results of the first five rows to determine whether you want to apply the field shortcut to the entire table.
250px|700px|reset
- Click Confirm in the lower-right corner, then click Generate in the pop-up window and a text field will be generated.
If there is content in the field already, the new content generated by the field shortcut will overwrite the existing content, which can't be recovered. To not overwrite existing content in the field, you should create a new field first and then choose an AI field shortcut.
Use the Smart Tags field shortcut
This field shortcut can tag records according to your requirements, facilitating data management and statistical analysis.
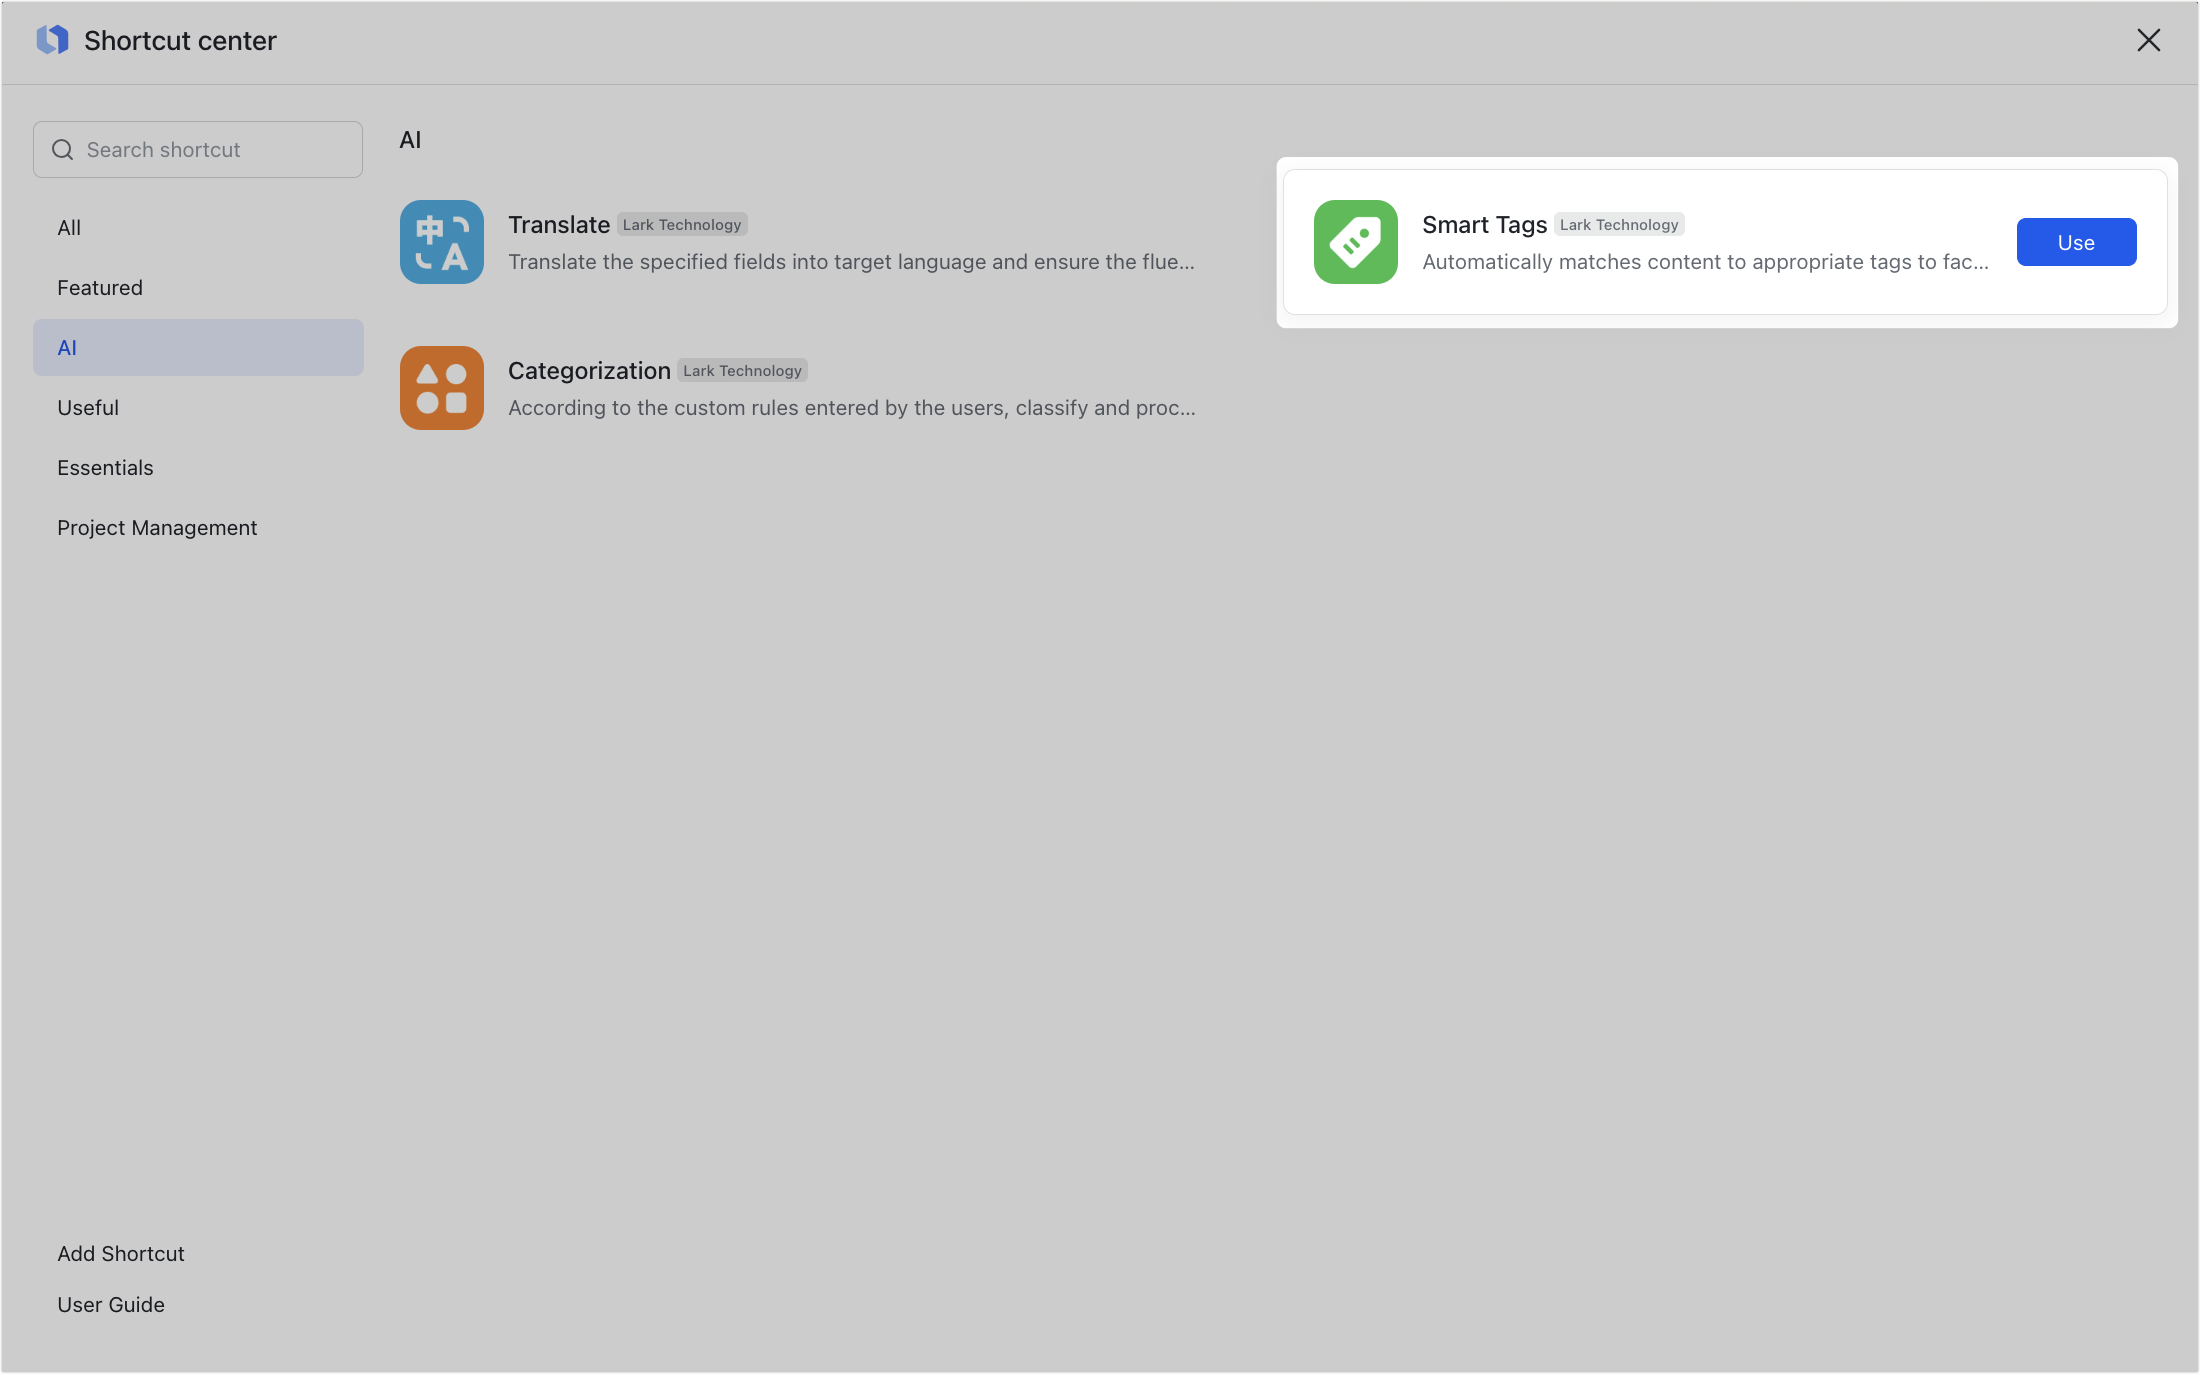
- In the Shortcut Center, hover over the field shortcut, and click Use.
250px|700px|reset
- In the field configuration panel, fill in or configure the following:
- Field title: Enter a field title. The name of the field shortcut is used by default.
- Tag: Click Add tag to add tags and customize their names.
- Configure:
- Field to be tagged: Required.
- Examples: Optionally, fill in the reference examples to make the AI output more aligned with your requirements.
- Custom tag requirements: Optionally, enter your custom requirements to make the AI output more personalized.
- Select model: Required. You can select OpenAI GPT-4 or OpenAI GPT-3.5 as the model for AI generation.
- API key: Required.
- Auto-update: On by default, and can be turned off as needed. When turned on, the content generated by the field shortcut will update when the specified content is updated.
- Generate First 5 Rows: Click Generate First 5 Rows to generate and view the results of the first five rows to determine whether you want to apply the field shortcut to the entire table.

250px|700px|reset
- Click Confirm in the lower-right corner, then click Generate in the pop-up window and a multiple options field will be generated.
If there is content in the field already, the new content generated by the field shortcut will overwrite the existing content, which can't be recovered. To not overwrite existing content in the field, you should create a new field first and then choose an AI field shortcut.
III. Common AI generation errors
IV. FAQs