
00:00
/
00:00
Audio/video is not supported
Please TryRefresh
Play
Fullscreen
Click and hold to drag
I. Intro
Wiki is a knowledge management system designed for organizations, empowering members at any level to collaboratively contribute their valuable skills and insights into a shared knowledge base.
Organizations can set up different wiki spaces to cater to different purposes, whether it's building a strong company culture or creating a dedicated space for departments. Team members can also create their own wiki spaces to keep track of their projects, organize their documents, or whatever they need.
A team can create more than one wiki space, and each wiki space can consist of a wide variety of files, including documents, spreadsheets, bases, and mindnotes.
II. Get to know the Wiki interface
Wiki homepage
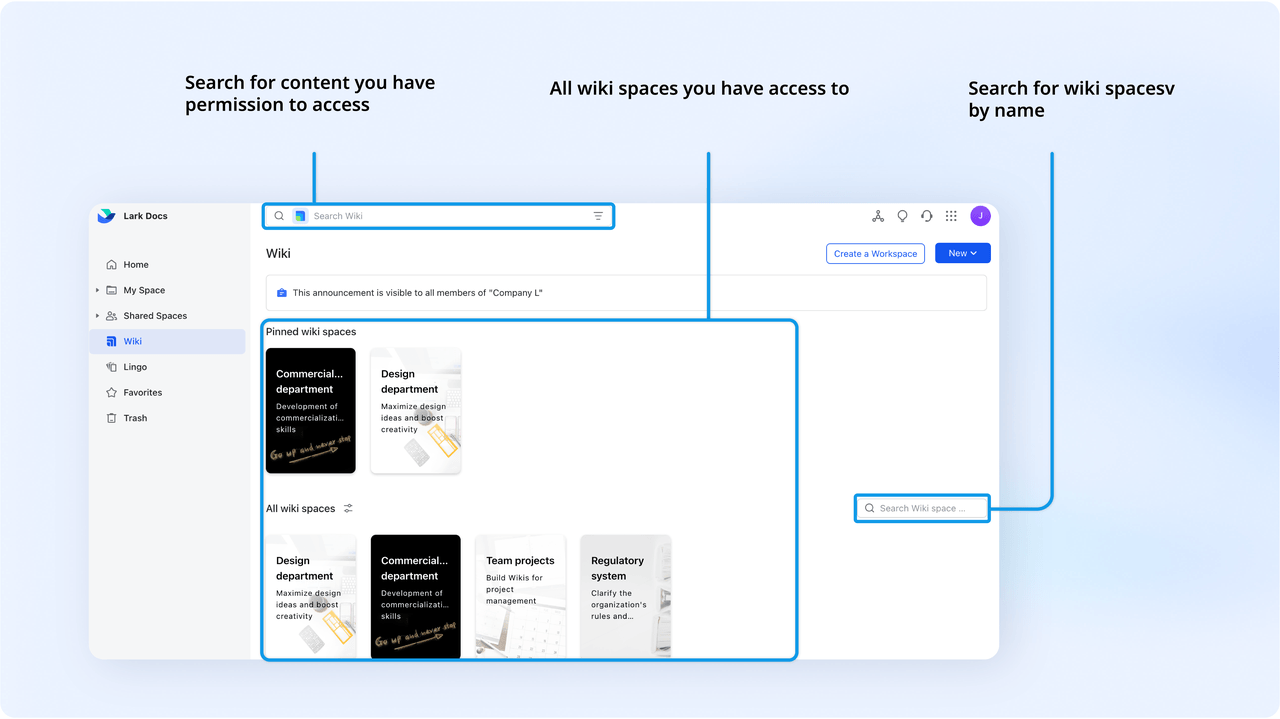
250px|700px|reset
Note: Your content can be stored in the following locations.
- Wiki space: Multiple wiki spaces with different themes can be created within an organization, and each wiki space can have its own name, members, access permissions, and more.
- My Space: All content owned by your account, including documents, spreadsheets, bases, mindnotes, files, and folders. Except for folders, content in My Space and the Wiki can be moved between the two.
- Shared Space: Content shared with you by others, including documents, spreadsheets, bases, mindnotes, files, and folders.
A wiki space
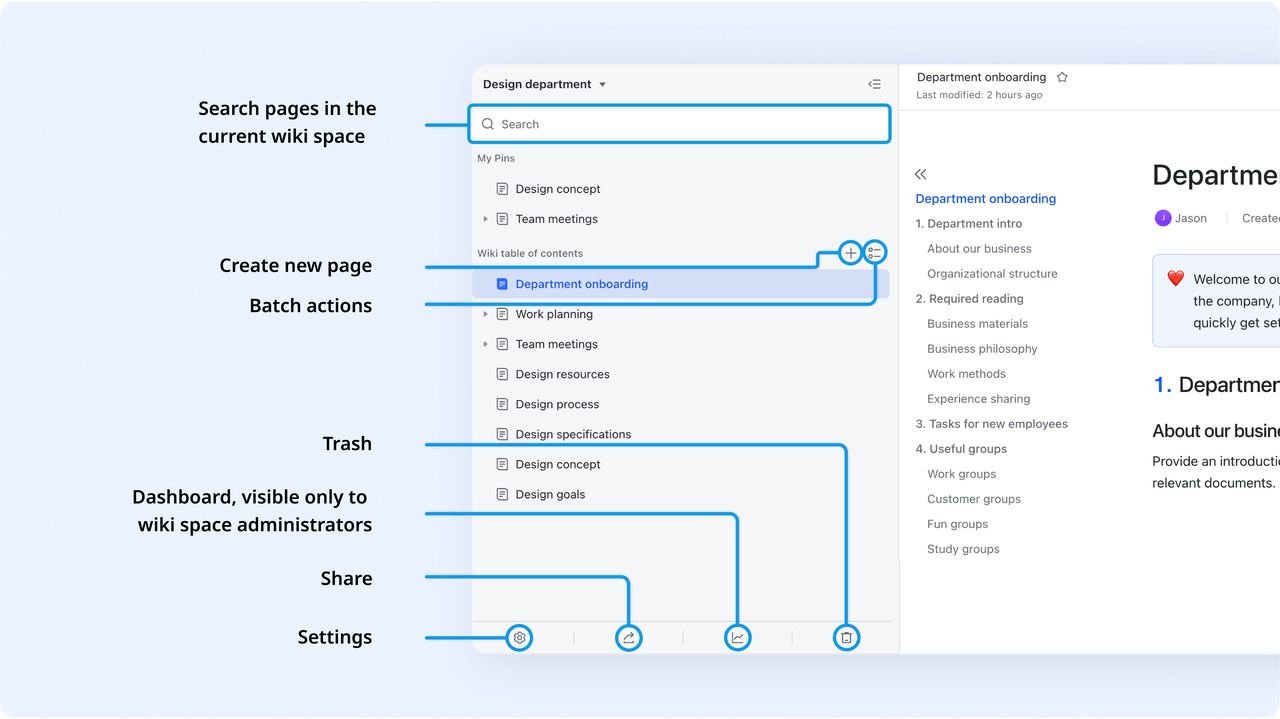
250px|700px|reset
III. Steps to build your own Wiki
Step 1: Create a wiki space
- Enter the Lark Docs homepage, click Wiki on the left navigation bar, and click Create a Wiki Space in the upper-right corner.
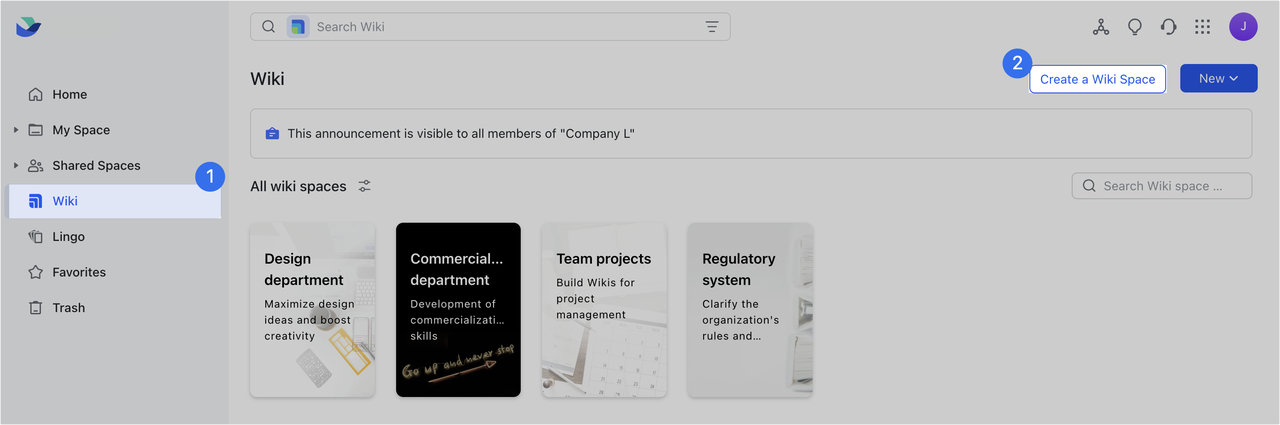
250px|700px|reset
- Select a template or create a blank wiki space.
- Enter a name, description, and set its availability, then click Create.
As the creator of the wiki space, you are automatically the administrator of the wiki space as well.
Important: If you can't see the Create a Wiki space button, a primary administrator may have restricted the creation of wiki spaces. For more details, see Create a wiki space.
Step 2: Add a page
After creating a wiki space, you can start adding various types of pages. Click the + icon on the wiki space directory, and make one of the following selections:
- Select Docs, Sheets, MindNotes, or Base to create a blank page.
- Select Upload or Import to upload a file or import a file as a Lark Docs file.
- Select Migrate Docs to Wiki to move existing Lark Docs files to the current wiki space.
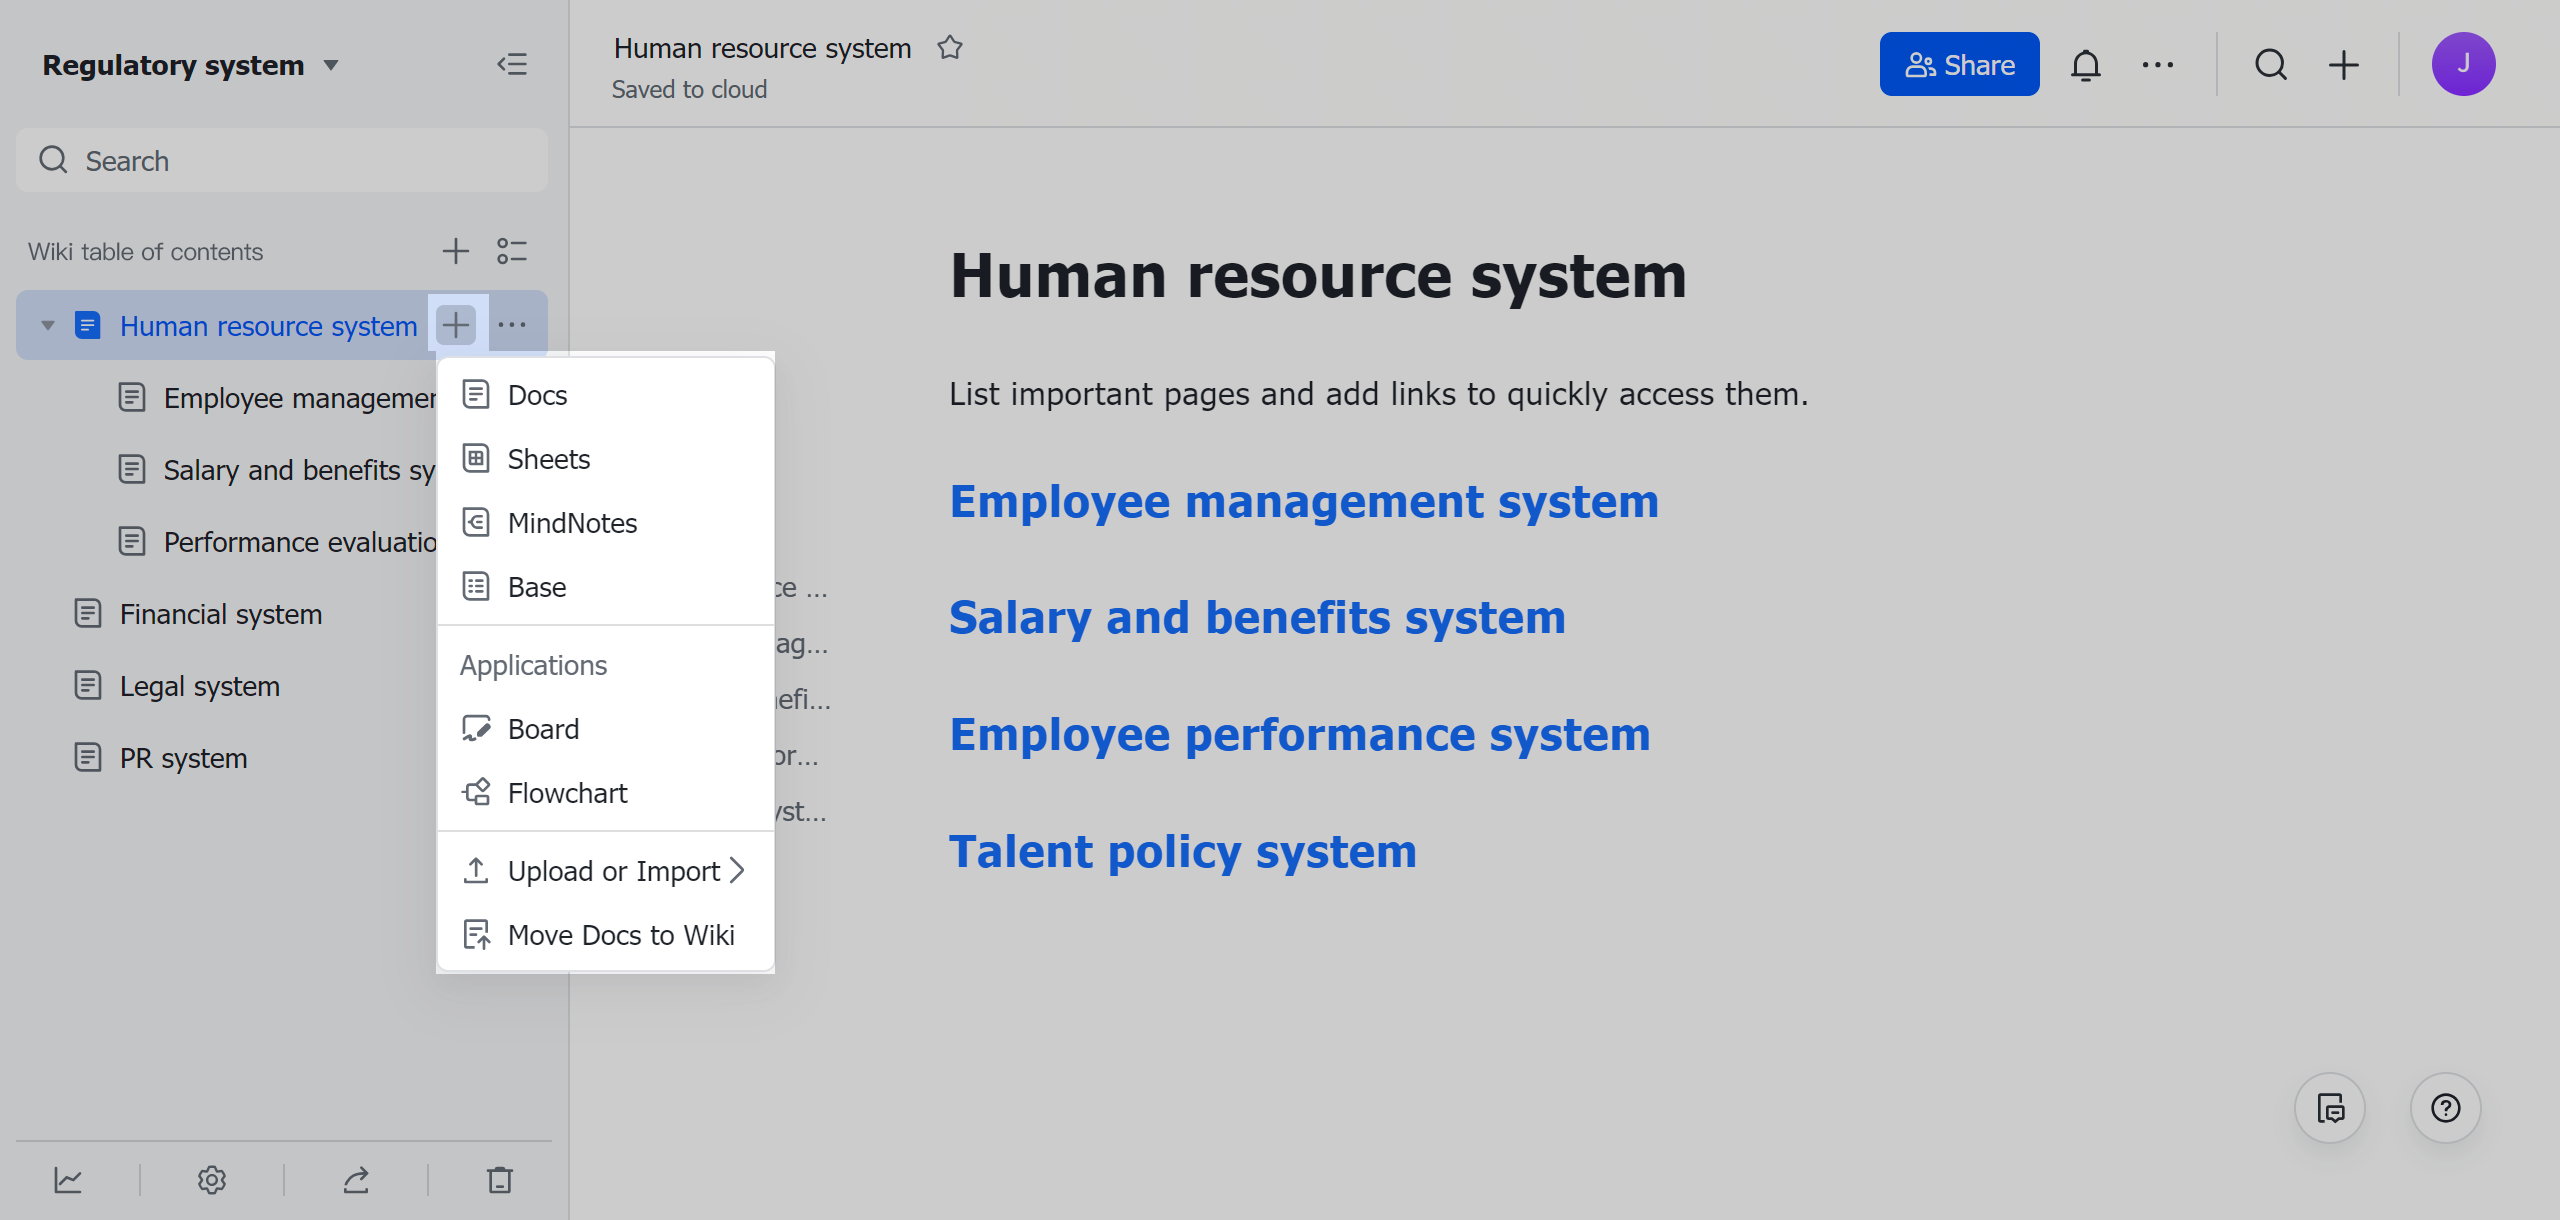
250px|700px|reset
Step 3: Organize pages
After adding pages to a wiki space, it's time to organize the directory to make it easy to navigate.
- Simply drag a page in the directory to move it. If the background of the target page's heading turns blue when you drag a page to it, the moved page will become a sub-page of the target page.
250px|700px|reset
- The headings of sub-pages are indented in the directory. In the example below, OKR formulation and OKR review are both sub-pages of Work planning.
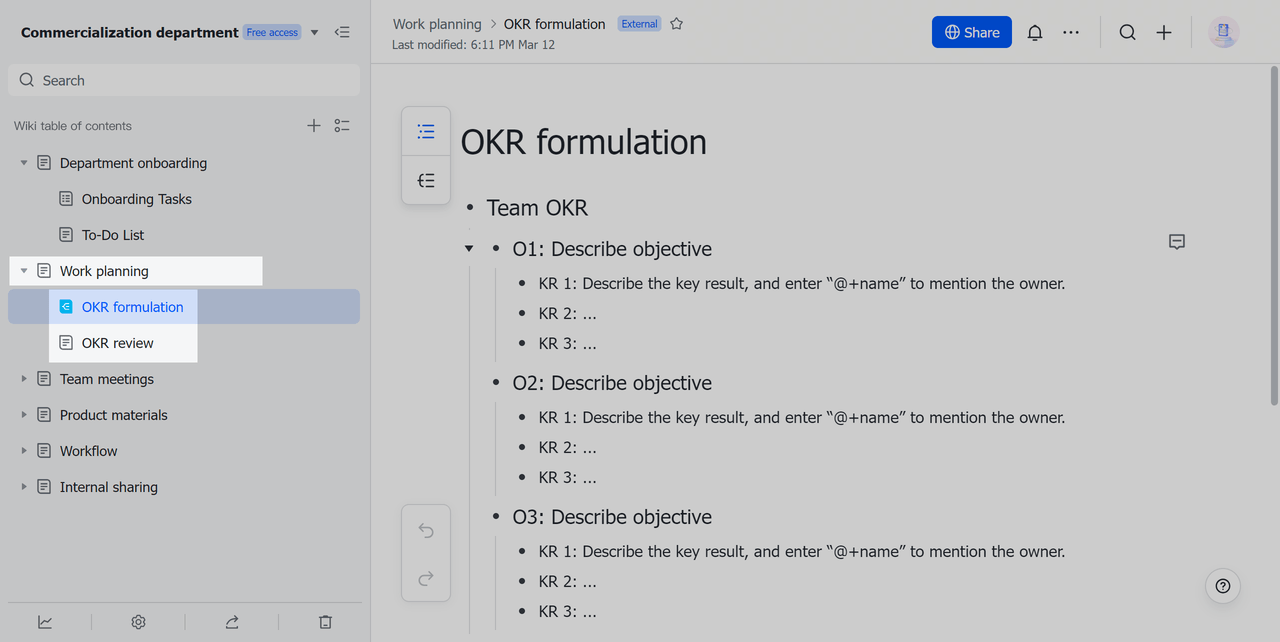
250px|700px|reset
- Click the ··· More icon on the right side of a page heading to open its action menu, where you can:
- Open in a new tab, copy link, make a copy, move the page, or add a shortcut.
- 250px|700px|reset
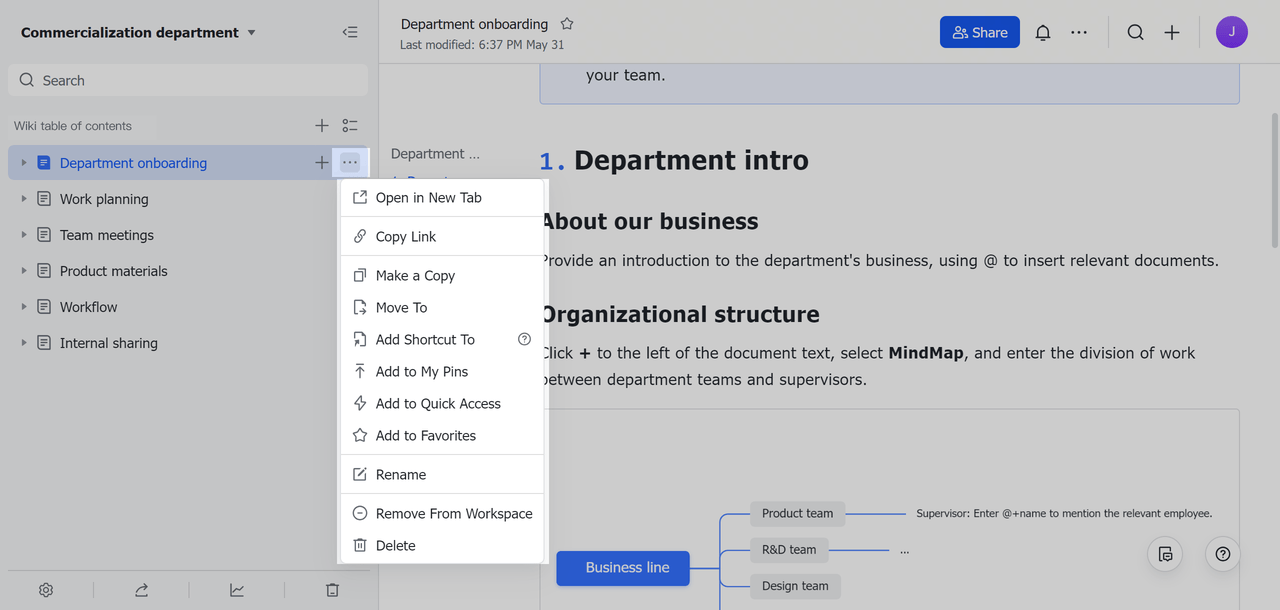
- Add frequently used pages to My Pins, Quick Access, or Favorites.
- My Pins: The page will appear at the top of the current wiki space directory.
- Quick Access: The page will appear in the Quick Access section on the Lark Docs homepage.
- Favorites: The page will appear in the Lark Docs homepage > Favorites.
- Remove or delete unwanted pages.
- Click Remove From Wiki space and the page will go to the page owner's My Space.
- Click Delete and the page will go to the current wiki space's Trash. The page can still be restored within 30 days, after which it will be deleted permanently. For details, see Delete and restore wiki space pages.
Step 4: Share wiki space or pages within the wiki space
After completing the first three steps, you'll have a well-structured wiki space. Share the wiki space or only specific pages to start collaborating together.
You can grant users view or edit permission for the entire wiki space, or give them permission to specific pages separately.
Share the wiki space
- Add administrators and members
As the wiki space administrator, you can add more wiki space administrators as well as members by clicking the Settings icon at the bottom of the directory, then selecting Members. Click Admin or Members and add wiki space administrators and members as needed.
- Share with the organization
The wiki space visibility can be set to members only or everyone in the organization. You can select a visibility option when you first create the wiki space or click the Settings icon > Members and make a selection under Wiki space visibility. For details, see Configure a wiki space to be public.
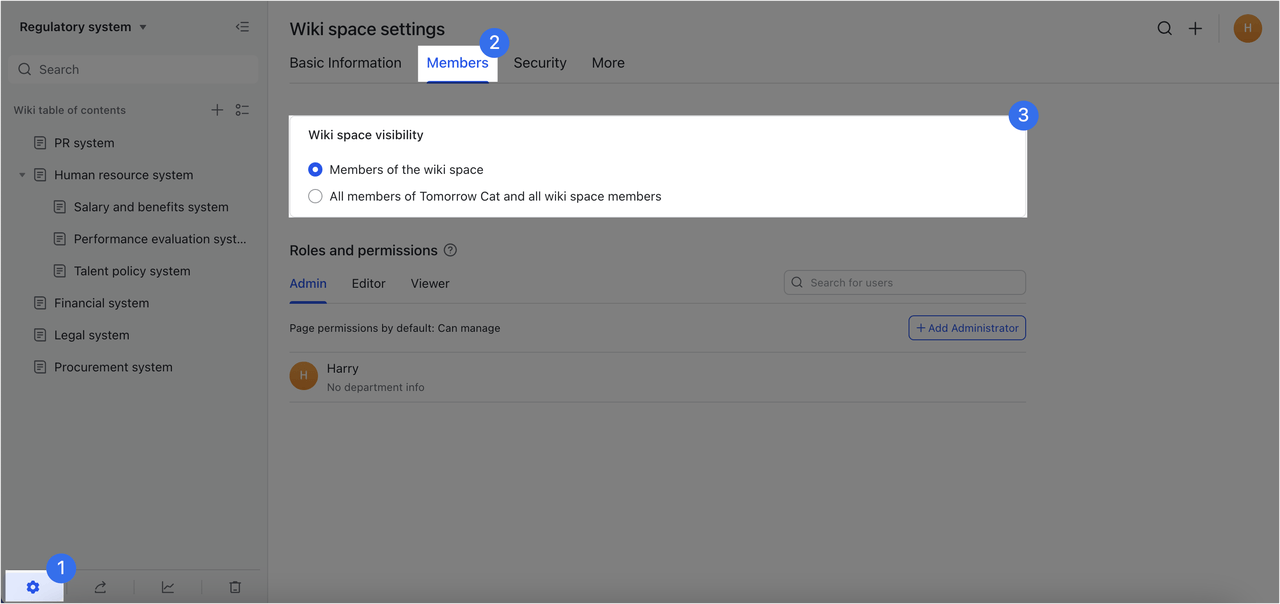
250px|700px|reset
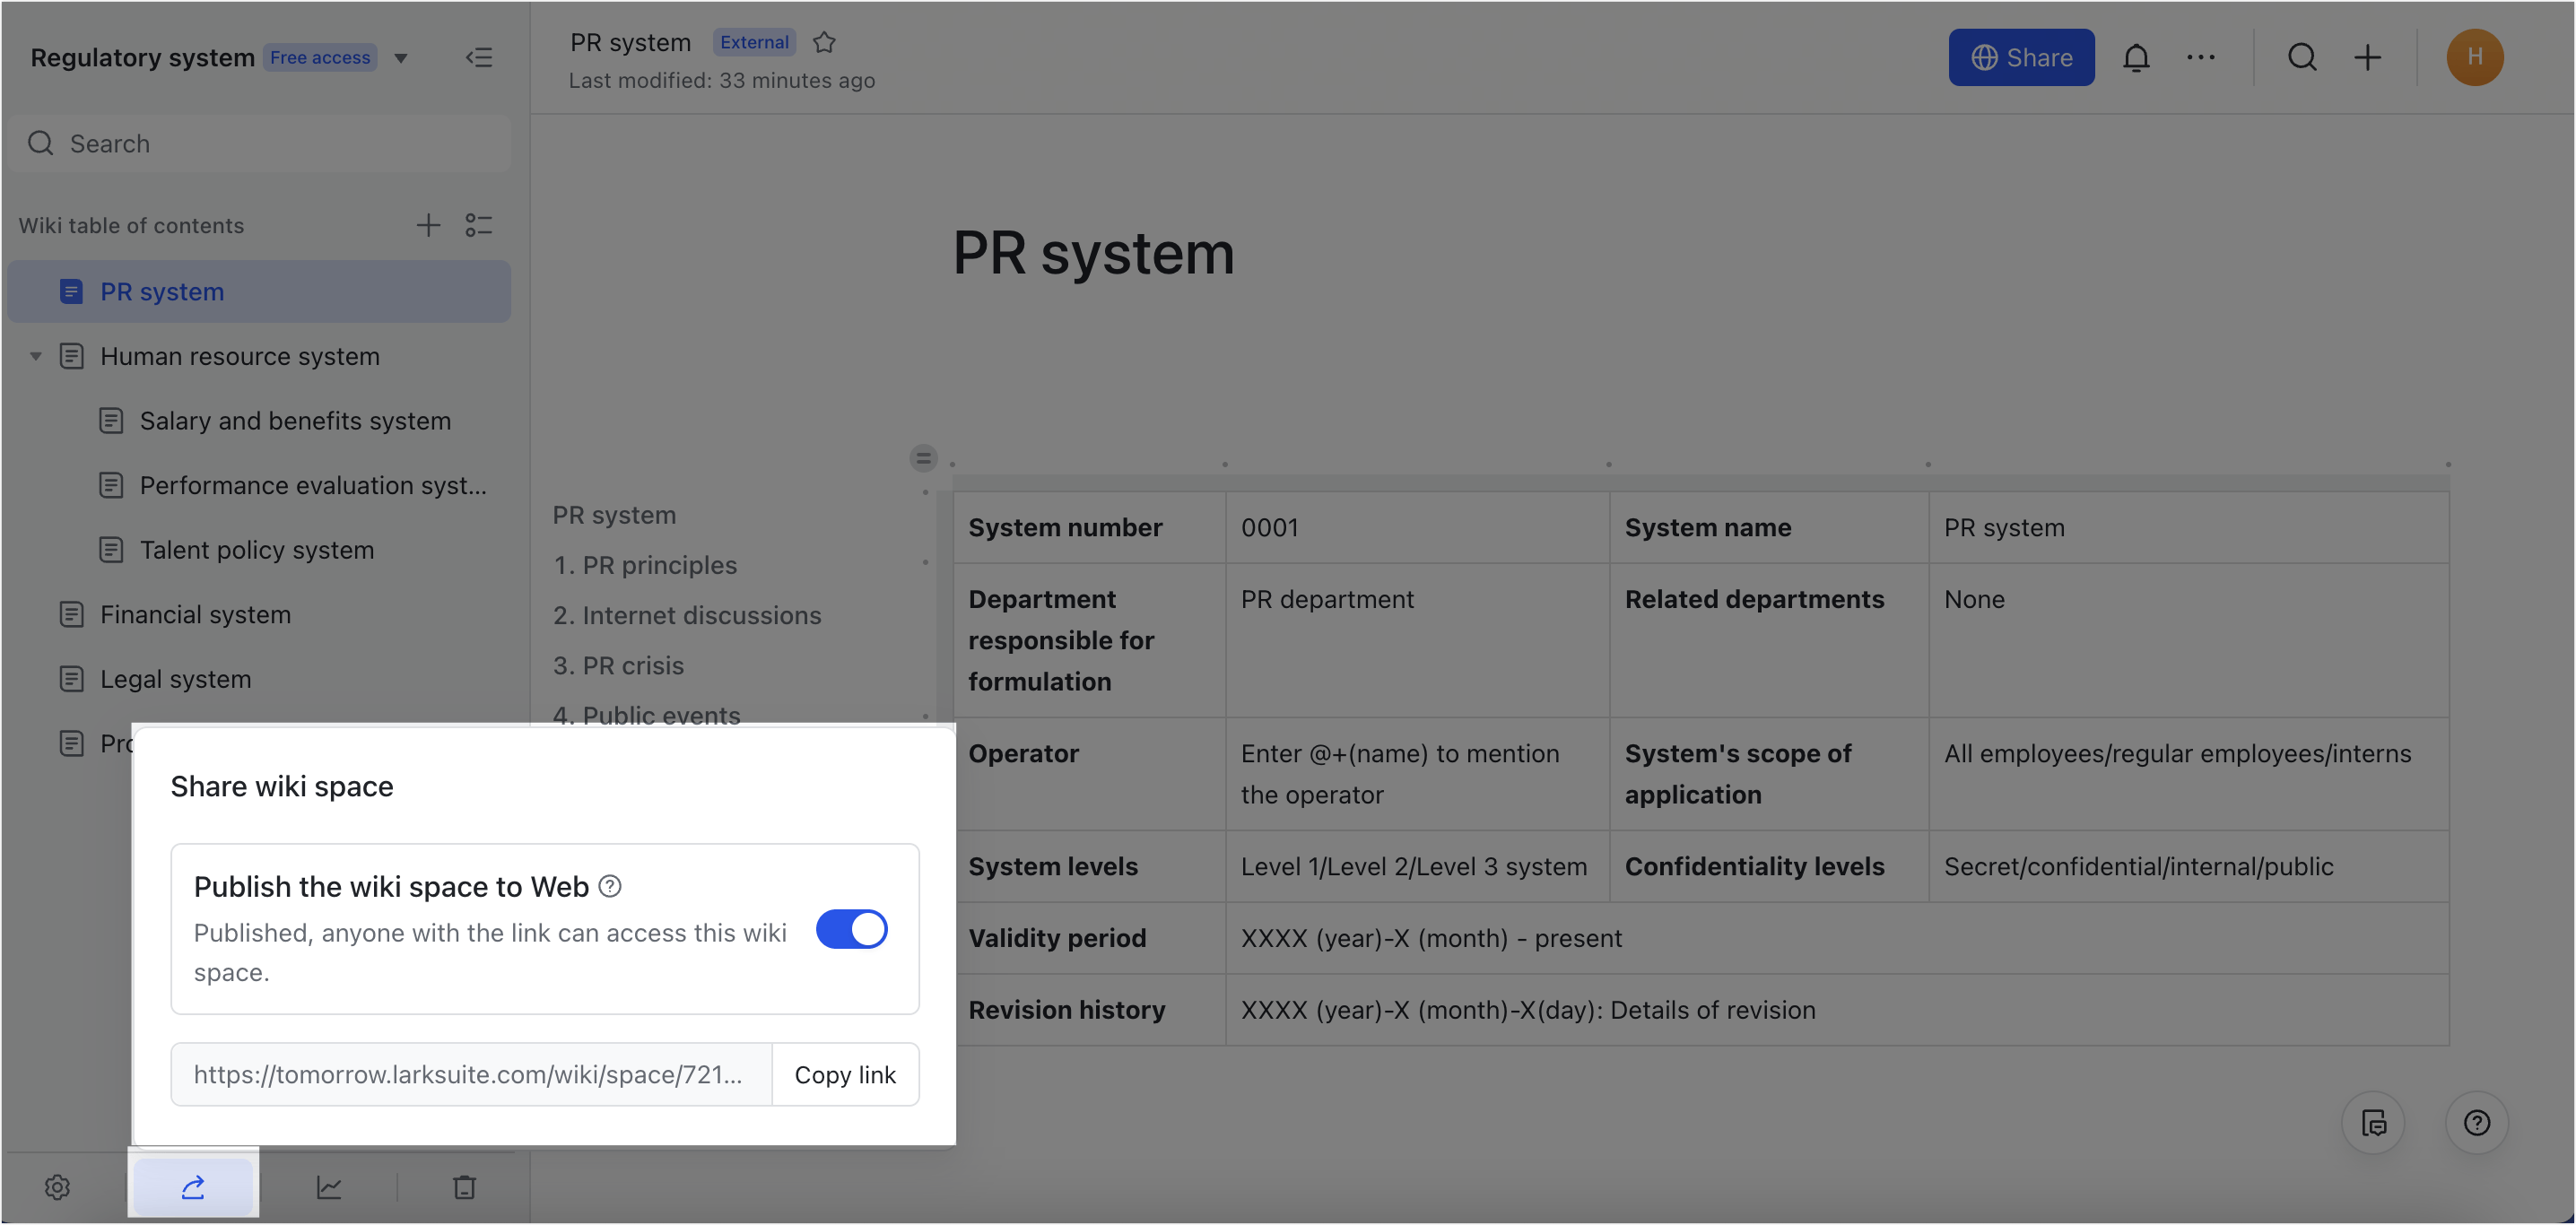
- Share with external users
You can also share the wiki space with external users. Click Share wiki space, turn on Publish wiki space to Web, and send the link the person you want to share with. External users can view the wiki space on the web without logging into Lark. For details, see Share an entire wiki space externally.
250px|700px|reset
Share a page
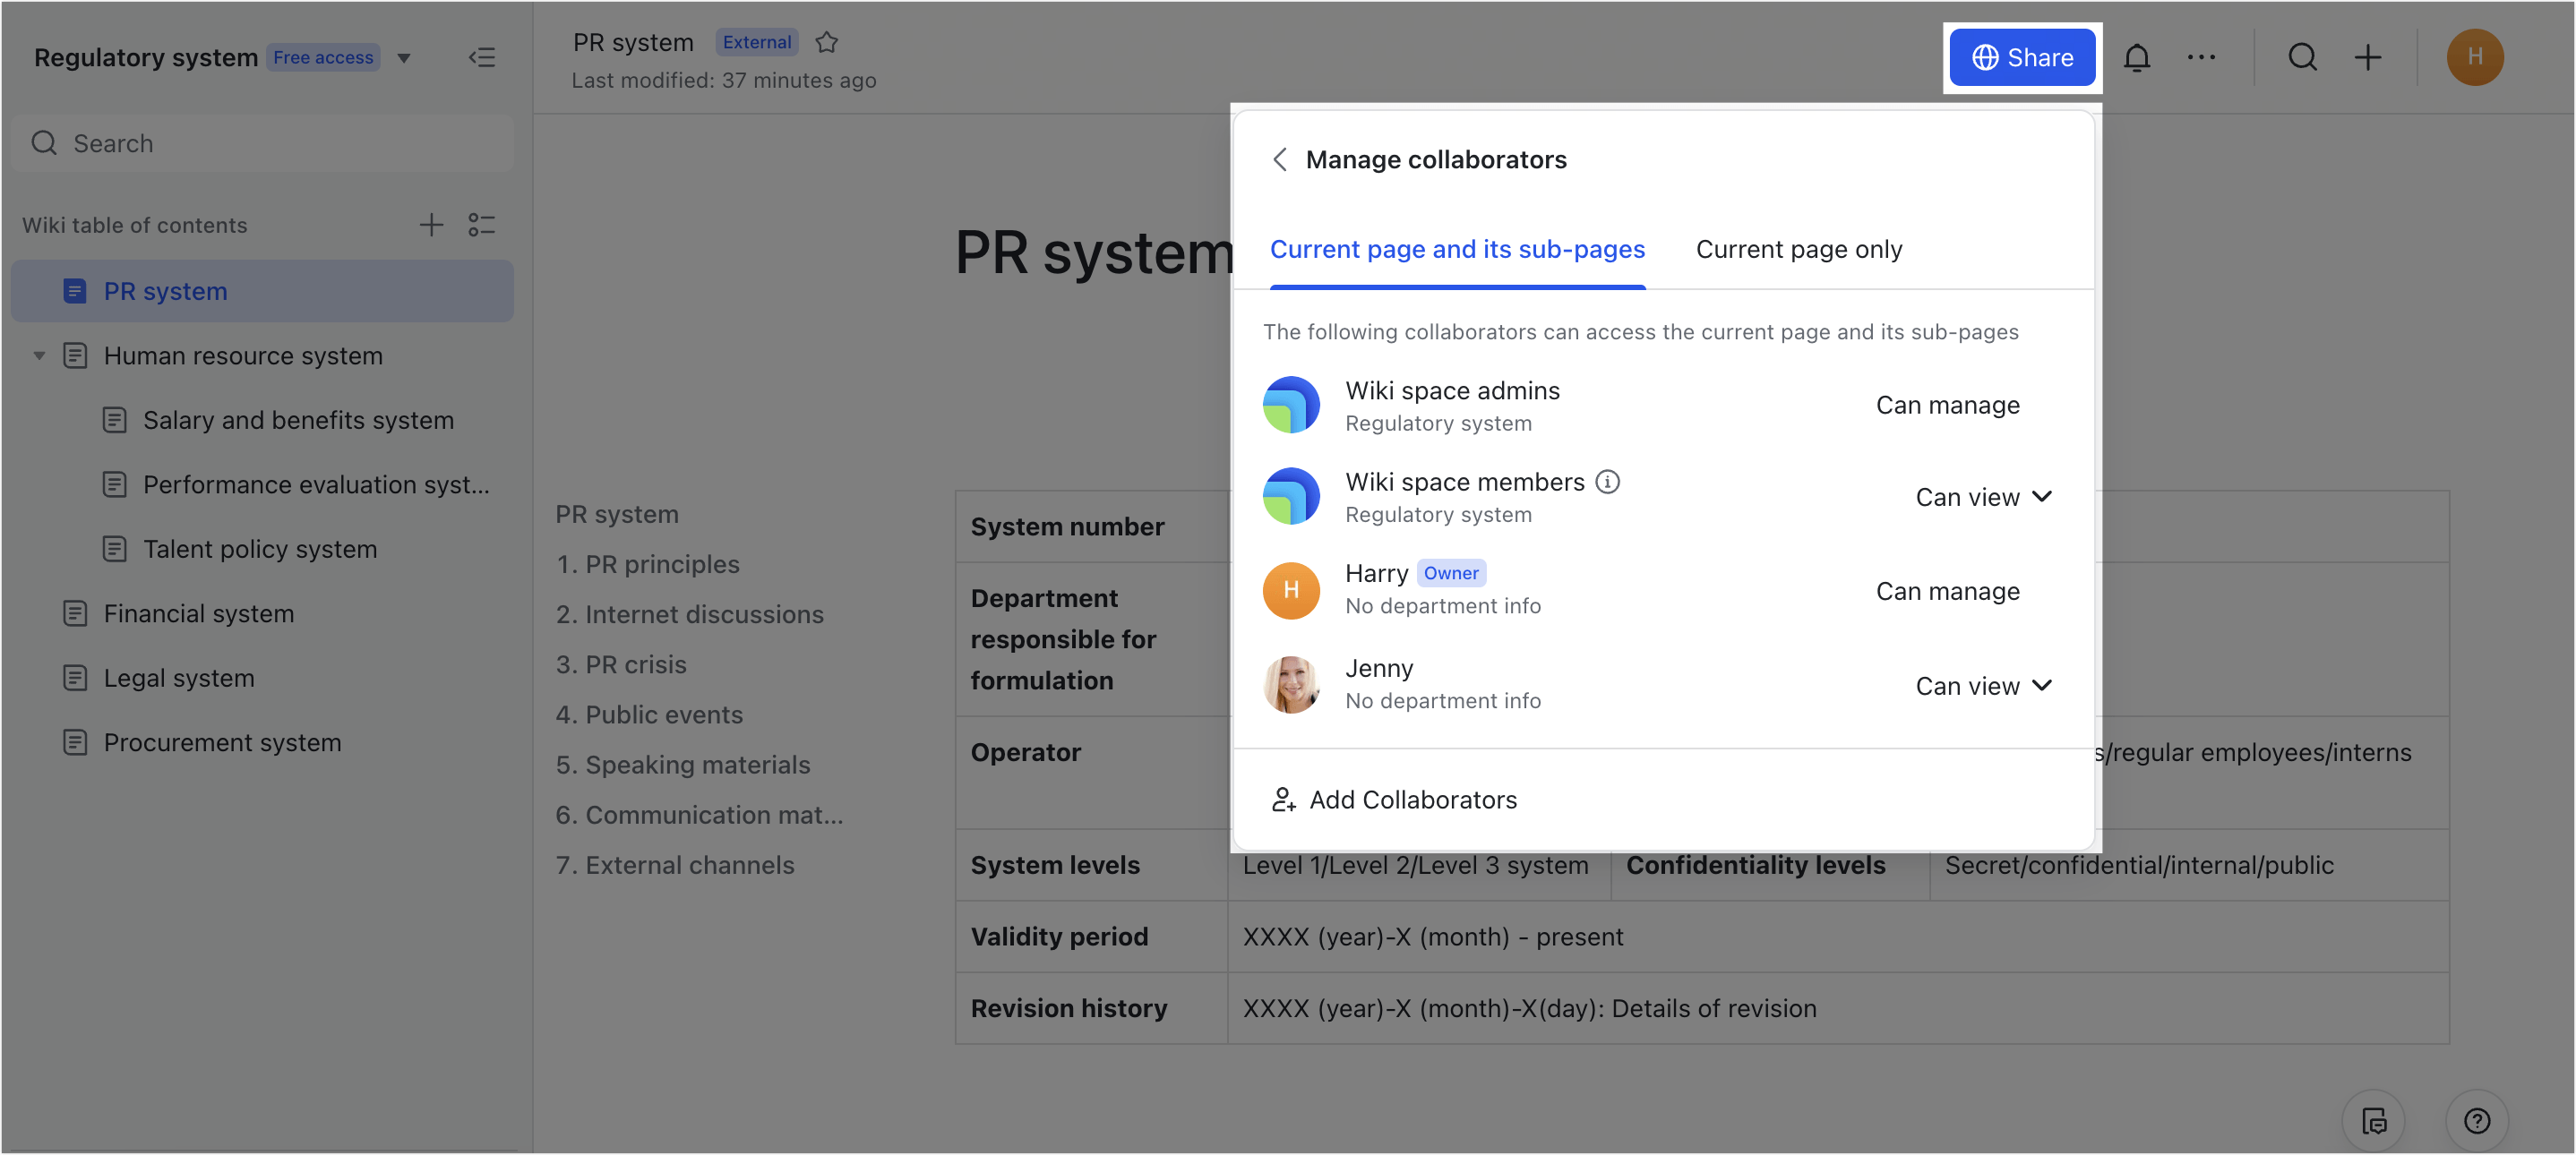
You can share only individual pages with other users as well. Go to the page you want to share, click Share, and add collaborators as needed. For more details, see Share documents.
Notice: When sharing a page, you need to choose whether to share the parent page and sub-pages together or only the current page. You can see collaborator permission details in Share > Collaborator list.
250px|700px|reset
Step 5: Manage a wiki space
- Configure security settings
In addition to modifying basic wiki space information, and adding administrators and members, wiki space administrators can click the Settings icon > Security to configure the following permissions:
- External sharing: Specify whether external users can become page collaborators and whether Anyone with the link can view and Anyone with the link can edit options are available for users in link sharing settings.
- Create top-level pages: Specify whether non-administrators can create, move, or delete top-level pages.
- Who can view wiki space information: Specify who can click the Information icon at the bottom of the directory to view the wiki space cover, description, and administrator list.
- Who can copy, make a copy, print, or export: Specify whether users with only view permission are allowed to copy, duplicate or print pages.
- Who can comment: Specify whether users with only view permission can leave comments on pages.
- Move and delete sub-pages: Specify who can move or delete pages (excluding top-level pages.)
- View data overview
Depending on your Lark plan, wiki space administrators can view usage metrics such as views and new pages created by clicking the Graph icon at the bottom of the directory. For more details, see Access wiki space data overviews.
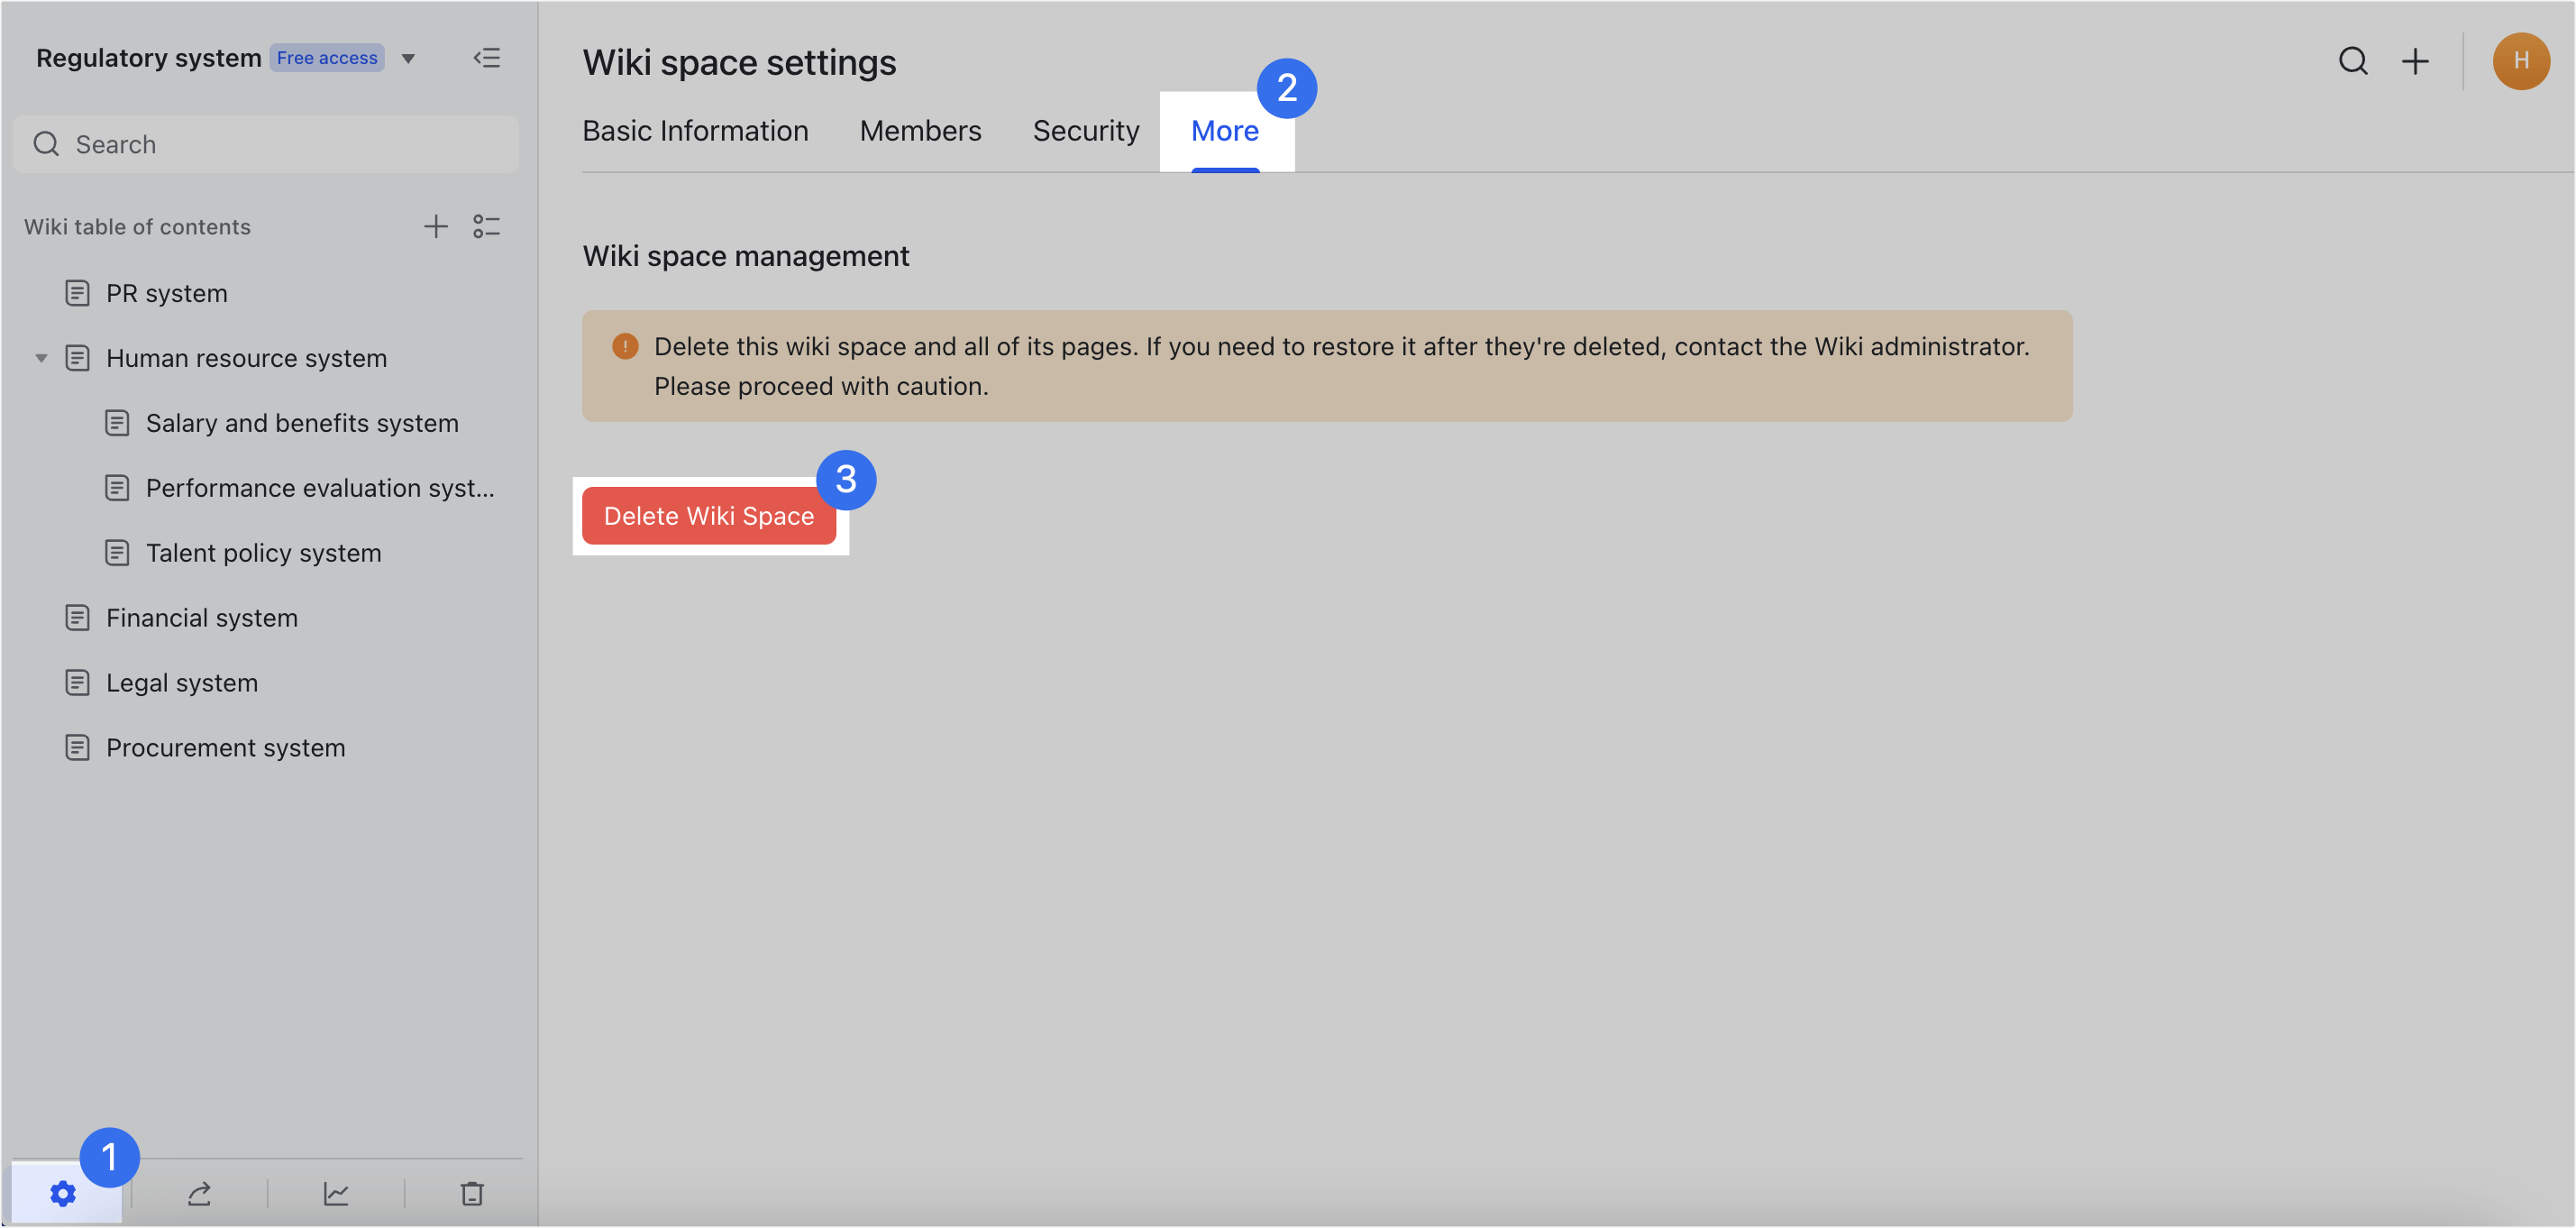
- Delete the wiki space
Wiki space administrators can click the Settings icon > More > Delete Wiki Space to delete the wiki space. All pages will be deleted, and Wiki administrators can restore it from the Lark Admin Console if necessary.
250px|700px|reset
IV. Next steps
Now that you have a grasp of the key features of Wiki, you can start building your very own. To continue exploring what Wiki has to offer, check out the links below.
- To learn more about managing your own wiki space, see Wiki administrator guide.
- For more on permission in the Wiki, see Overview of Wiki permissions.
- To see how to contact a wiki space administrator, visit Wiki and Wiki space administrators.