I. Intro
Who can perform these steps: Primary administrators or administrators with "Meeting Rooms" permission.
Administrators can enable and deploy QR codes which members can use to check in to events, book new events, or see a meeting room's availability.
II. Steps
- Select a meeting room or layer
First, open the Lark Admin Console. In the left navigation bar, click Meeting Rooms > Room Management.
To enter the settings page for an individual room or a meeting room layer, use one of the two following methods.
Method 1: Select an individual room
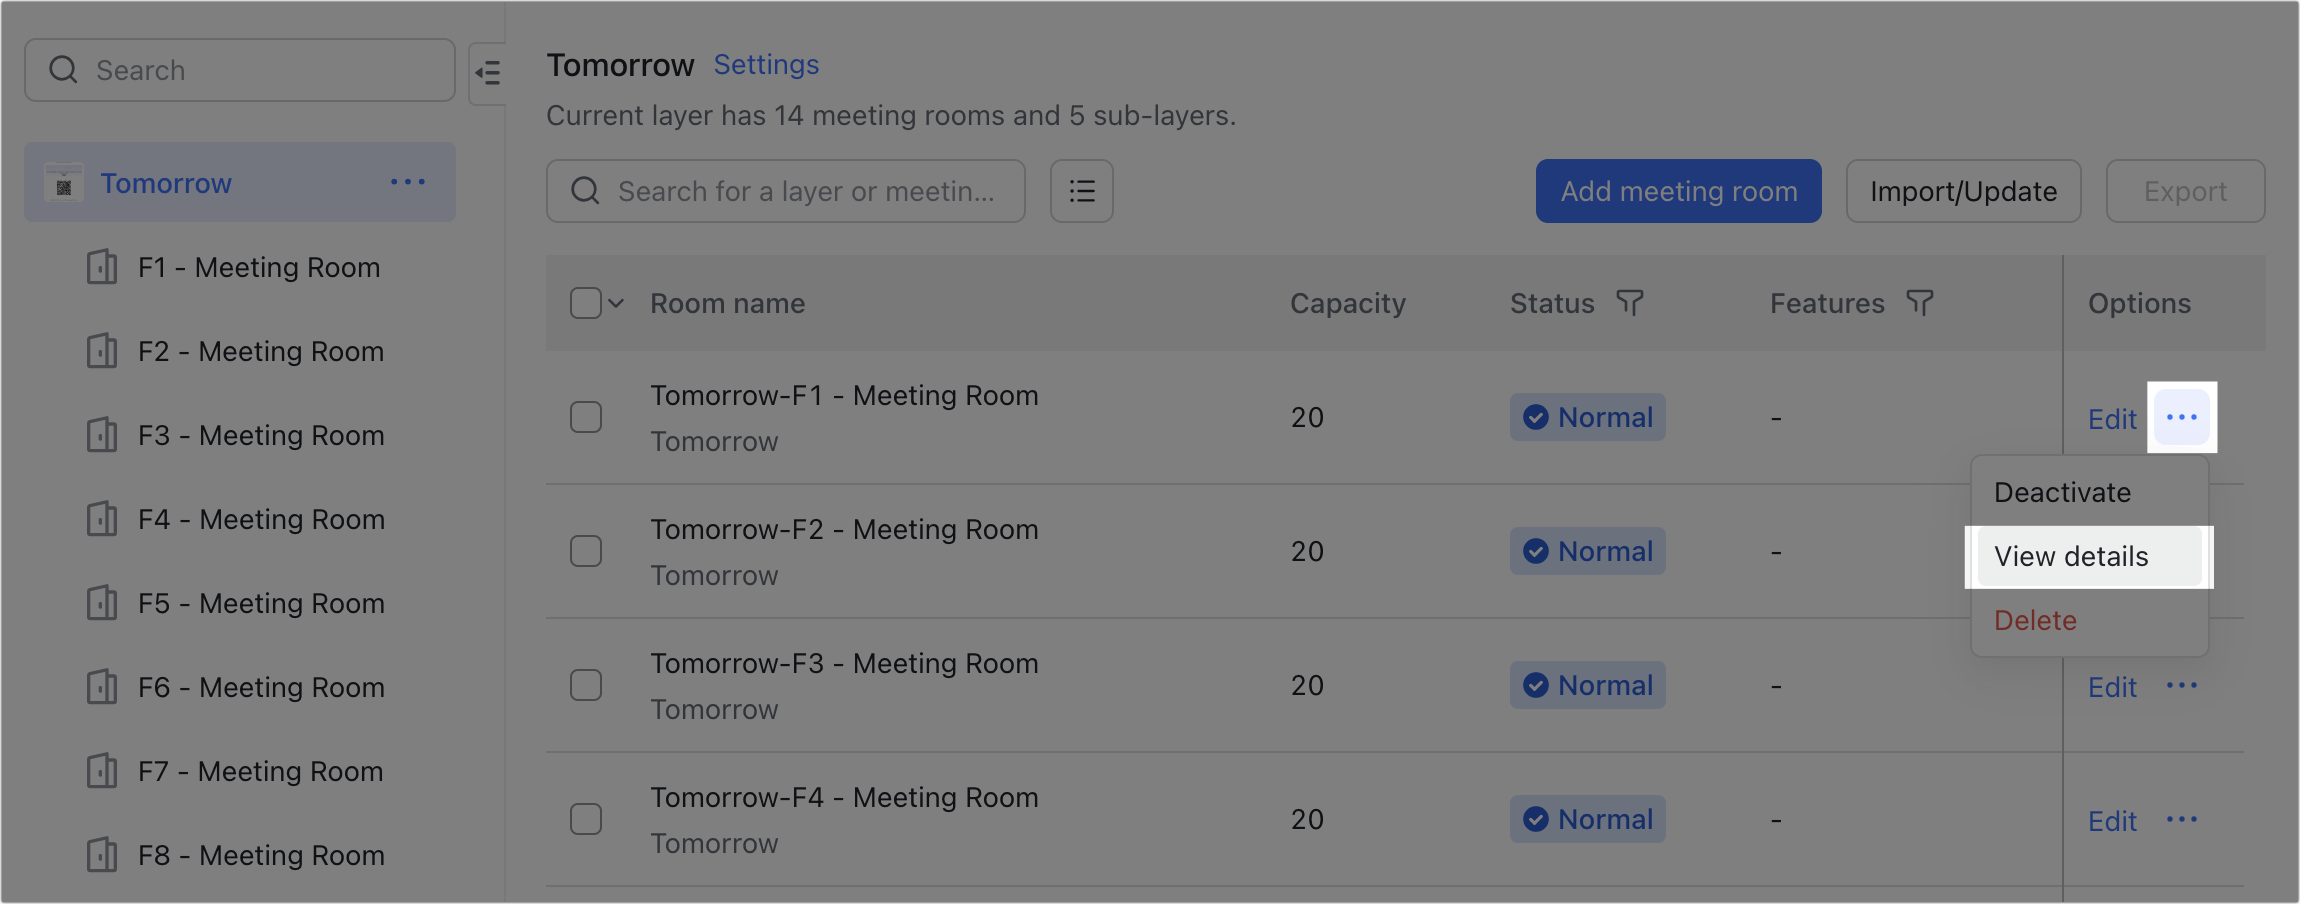
Find the meeting room that needs to be set up. If your organization has a lot of meeting rooms, you can use the list on the left side to find the room in question. Once you've found the room, click the ··· More icon to the right of its name and click View details to enter the settings page.
250px|700px|reset
Method 2: Select a layer
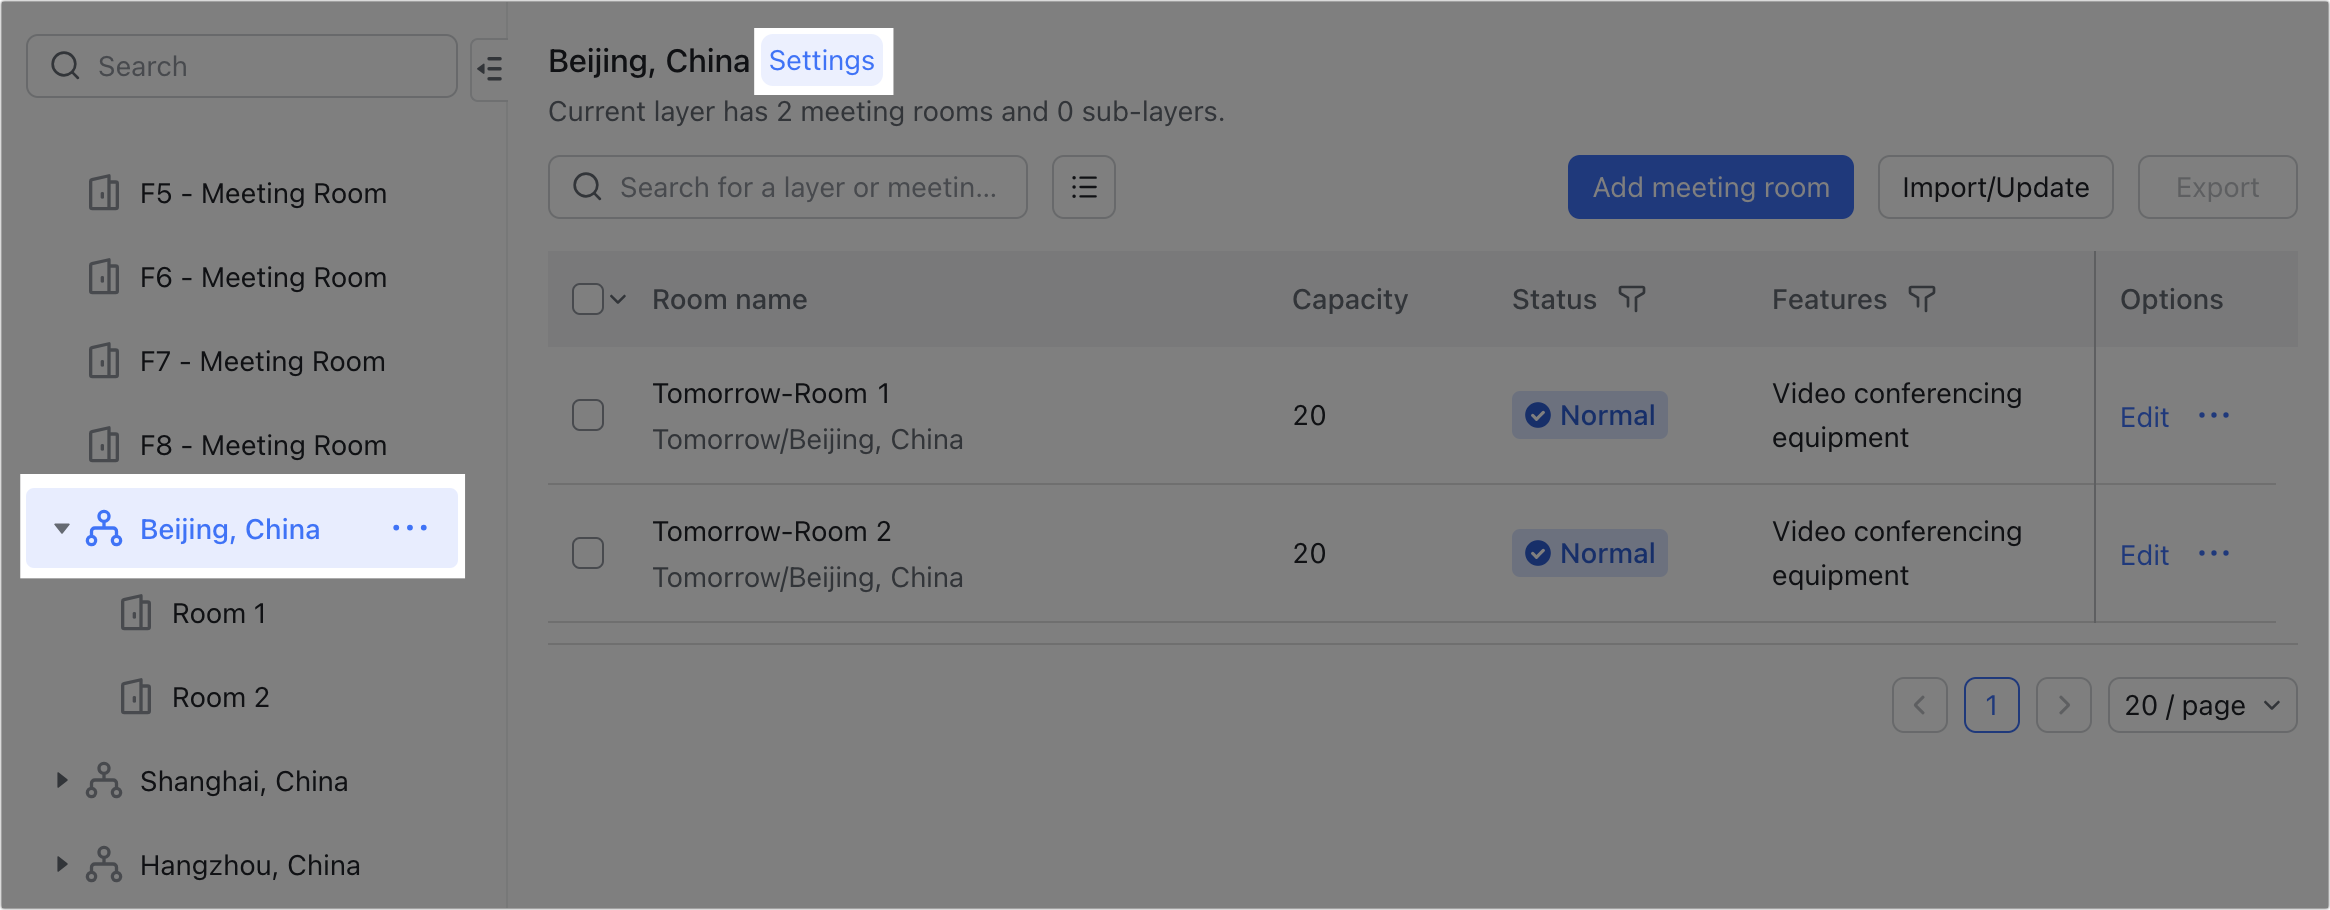
In the list on the left side of the management page, find the layer you wish to configure. Click the ··· More icon beside its name, then Settings.
250px|700px|reset
- Set meeting room check-in
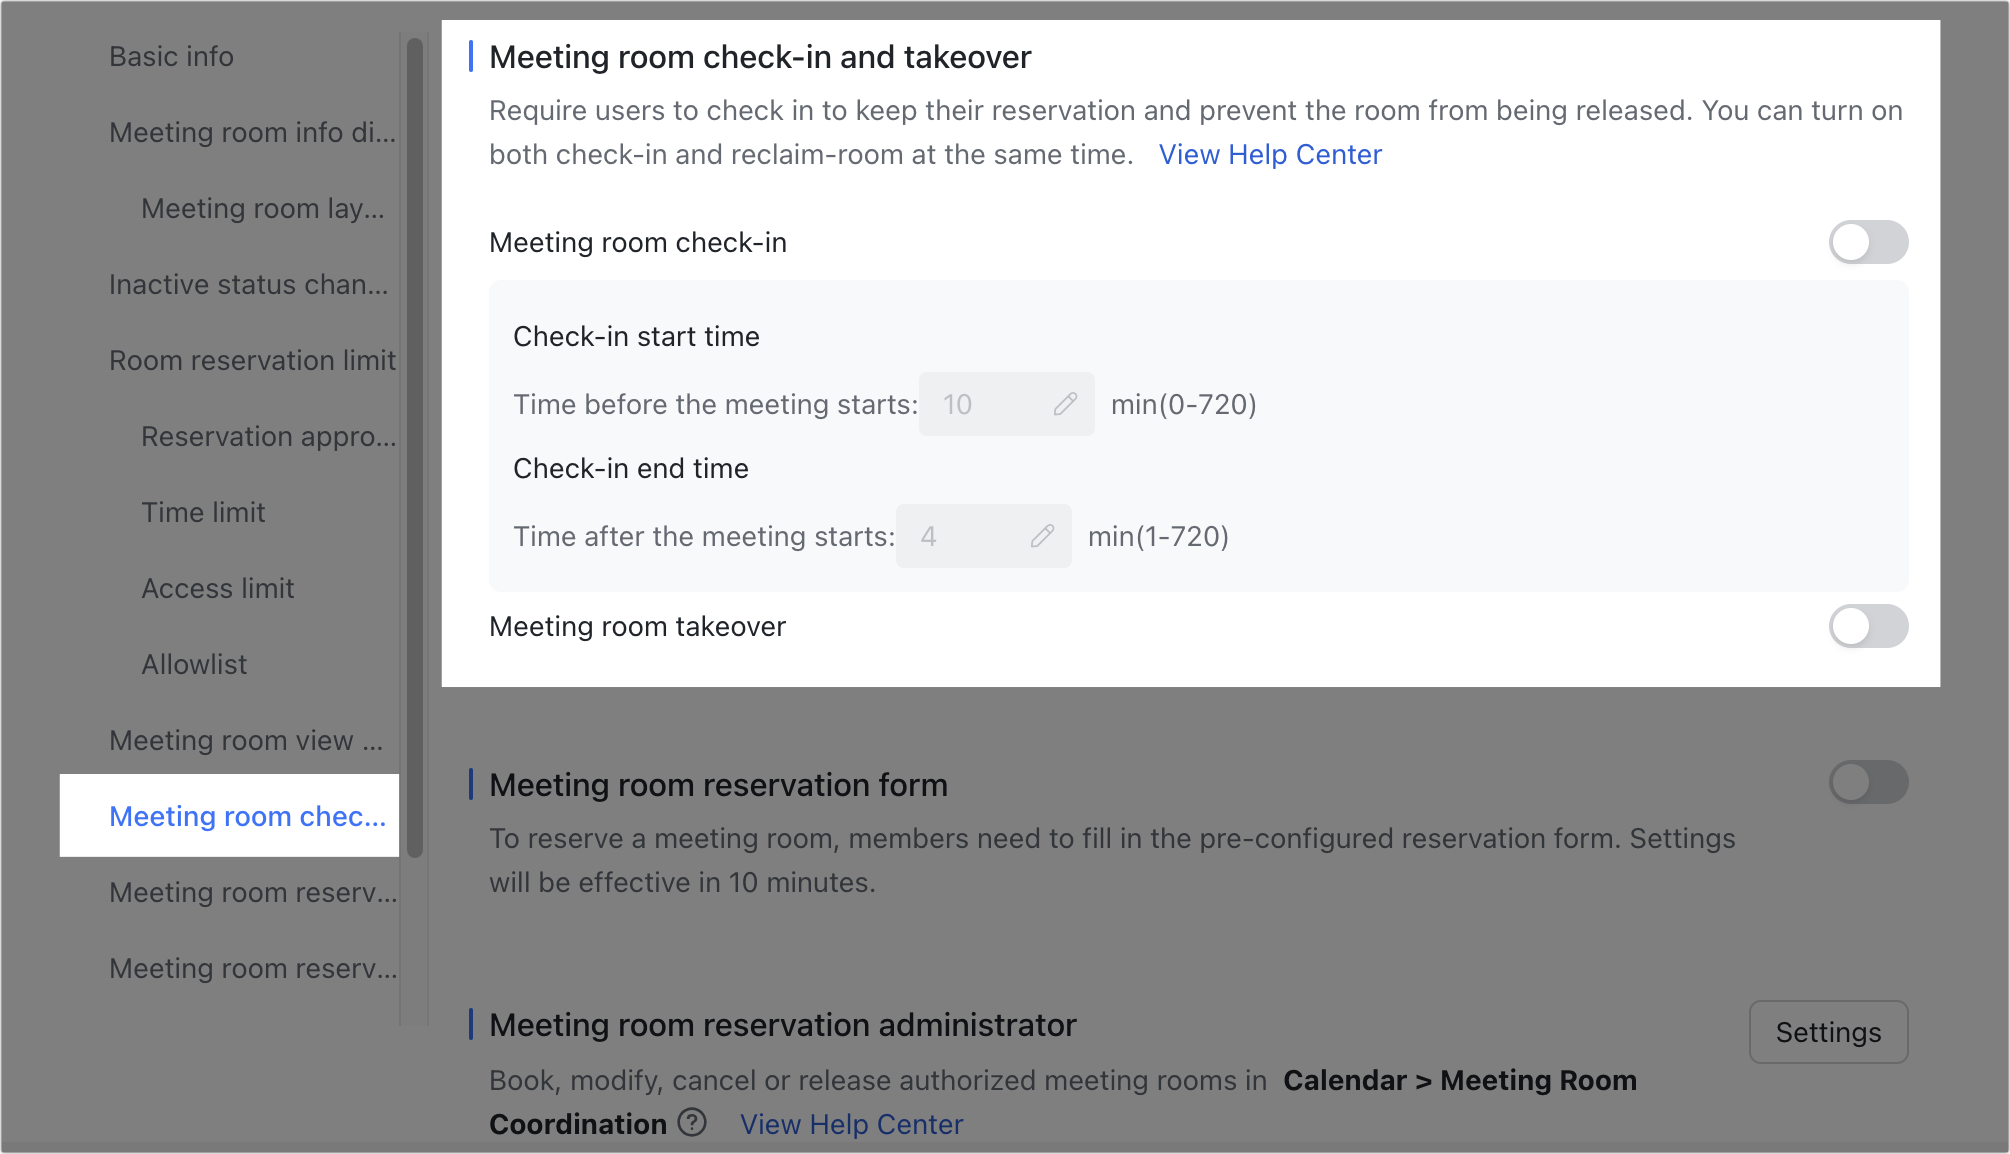
On the Basic Info page, click Meeting room check-in and takeover on the left, and select the Meeting room check-in switch. Administrators can set the start and end times for check-in.
Note: If a company has both Lark Rooms and Lark Rooms Display deployed, this check-in time will also be applied to both.
250px|700px|reset
- Download QR code
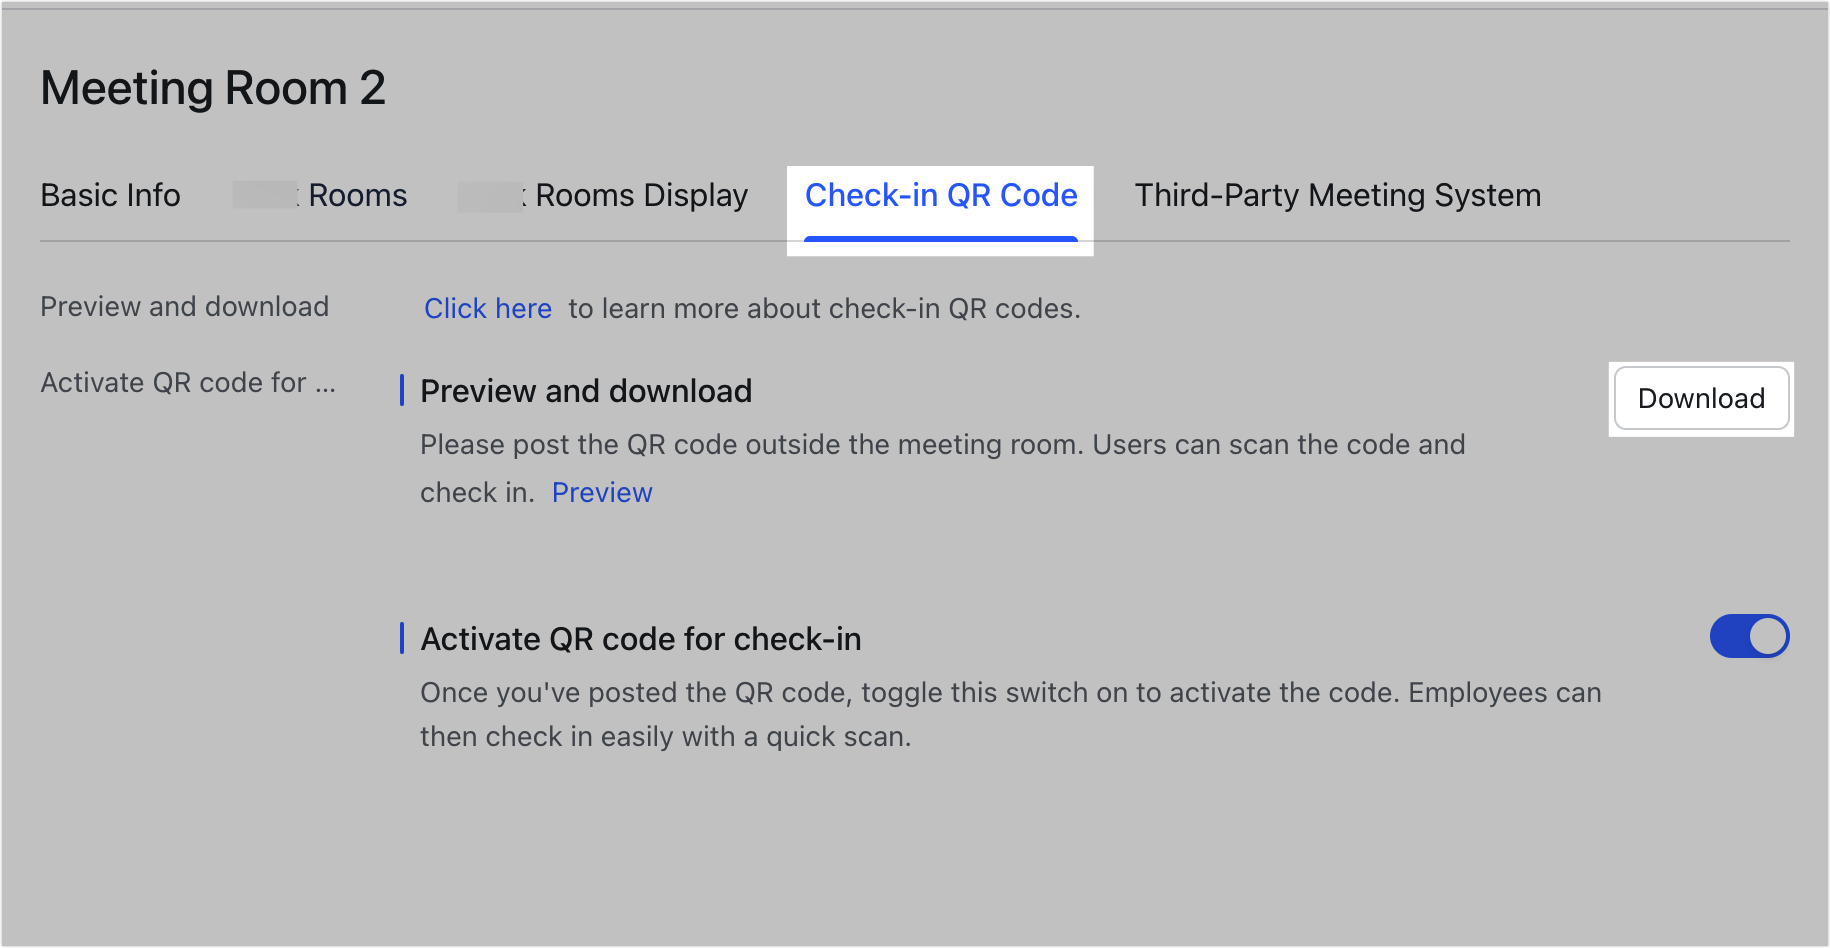
To generate a preview of a check-in QR code or to download the code, navigate to the Check-in QR code tab of a layer or meeting room's settings page.
If you click Download on a layer's settings page, you'll download the QR code for every meeting room within the layer's scope. If you do so on a meeting room's setting page, you'll just download the QR code for that room.
250px|700px|reset
- Activate QR code and complete deployment
Before a check-in QR code can be used, an administrator must enable it in any of the following ways.
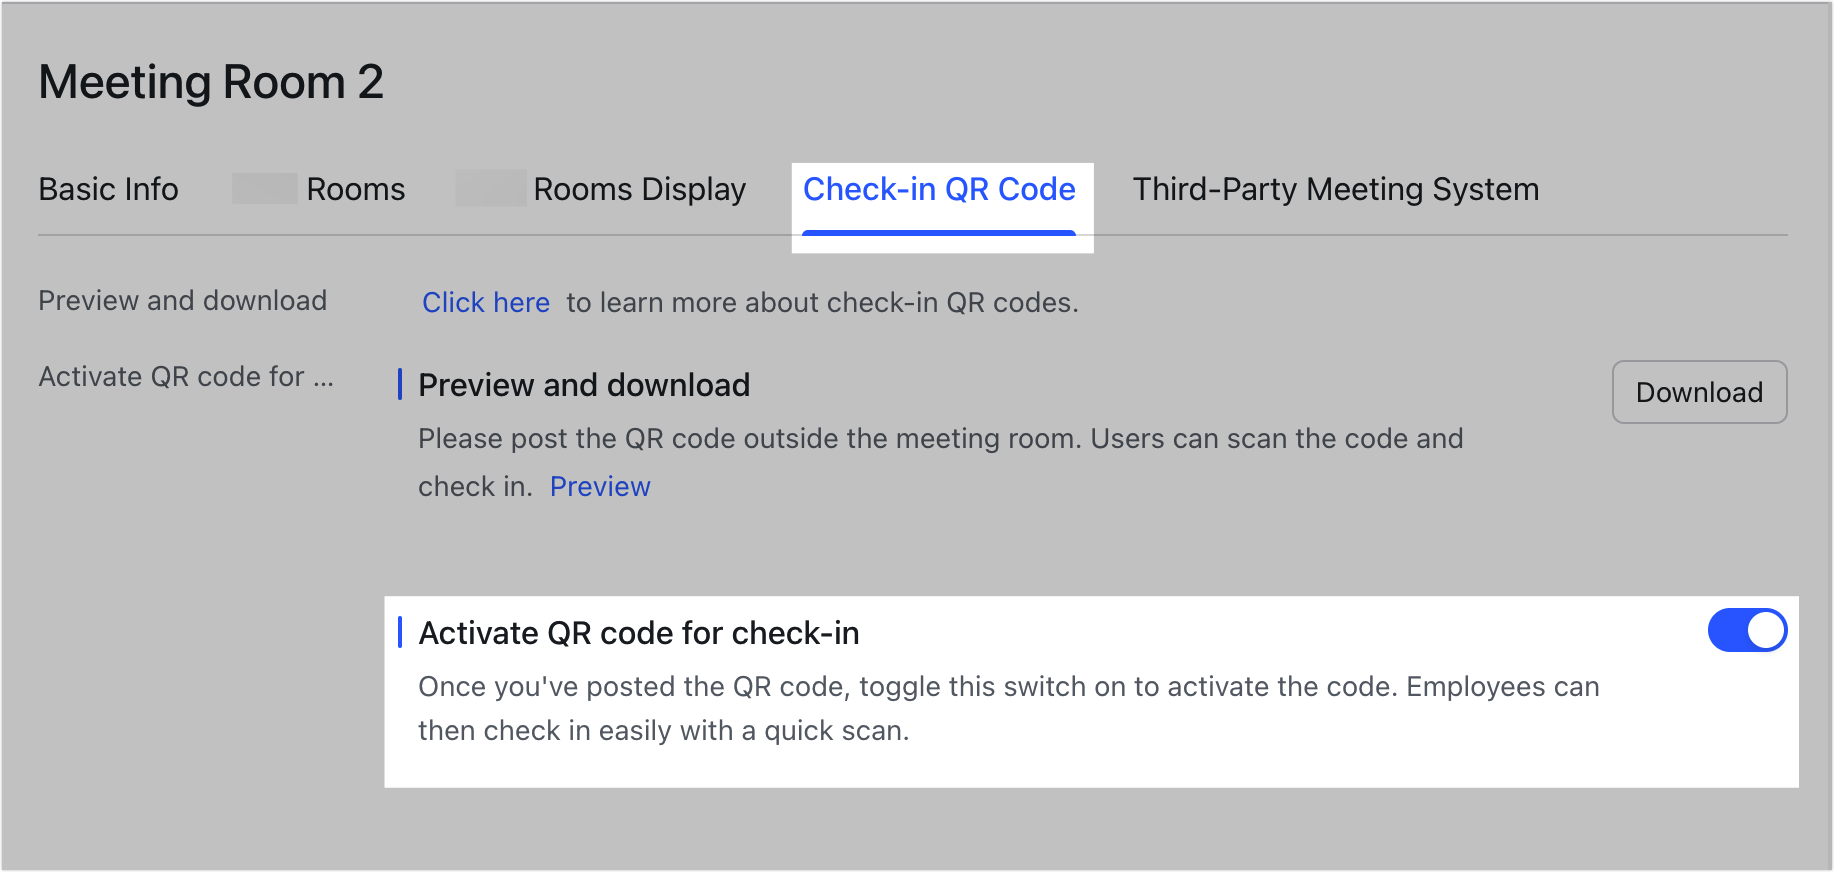
Method 1: On the Check-in QR Code tab, turn on Activate QR code for check-in, and click OK in the pop-up window.
250px|700px|reset
Method 2: Activate with access code.
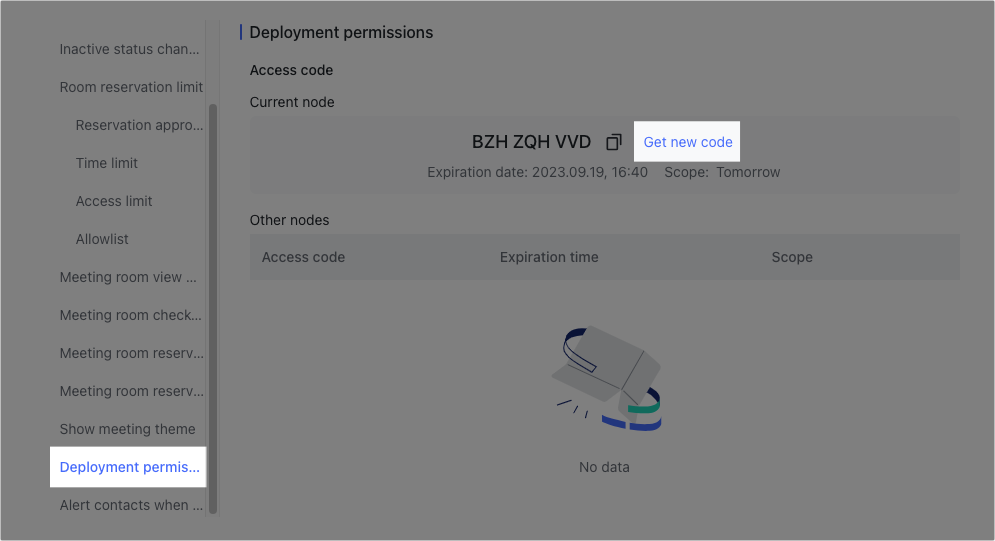
On the Basic Info page, go to Deployment permissions > Access code, click Generate Access Code or Get new code, and select for how long the code will be valid.
250px|700px|reset
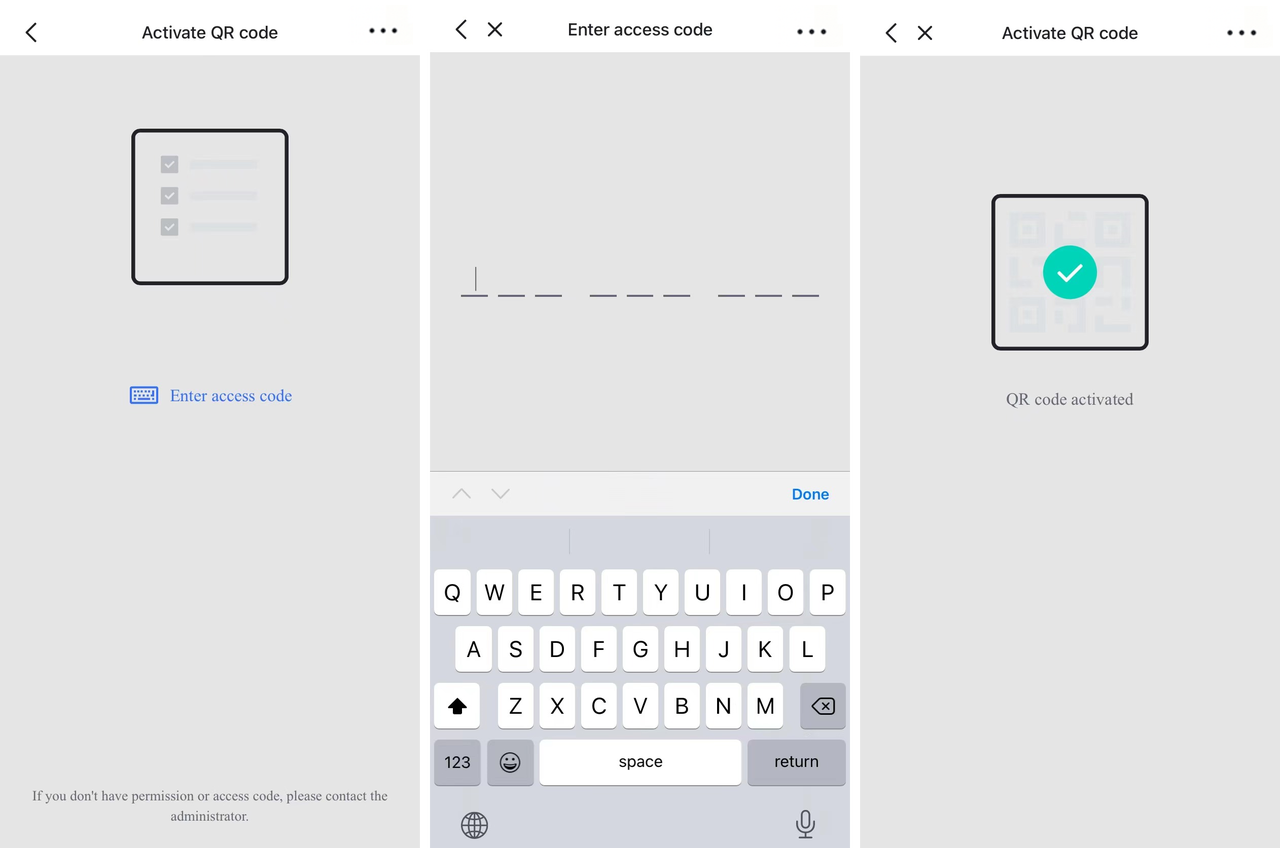
To complete the deployment process, the QR code should be printed out and scanned with Lark on a mobile device. Then, enter the access code.
250px|700px|reset
Method 3: Activate through a designated deployment member.
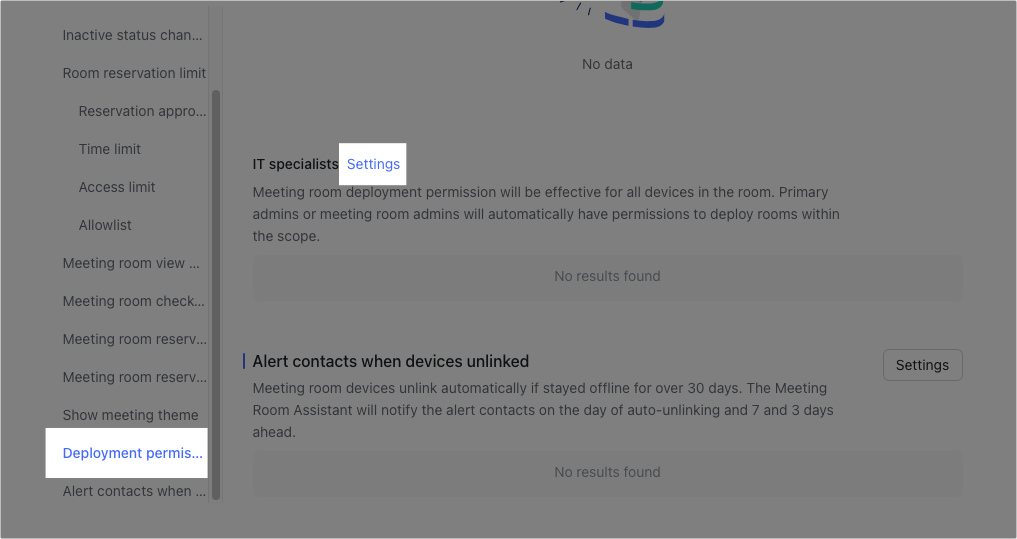
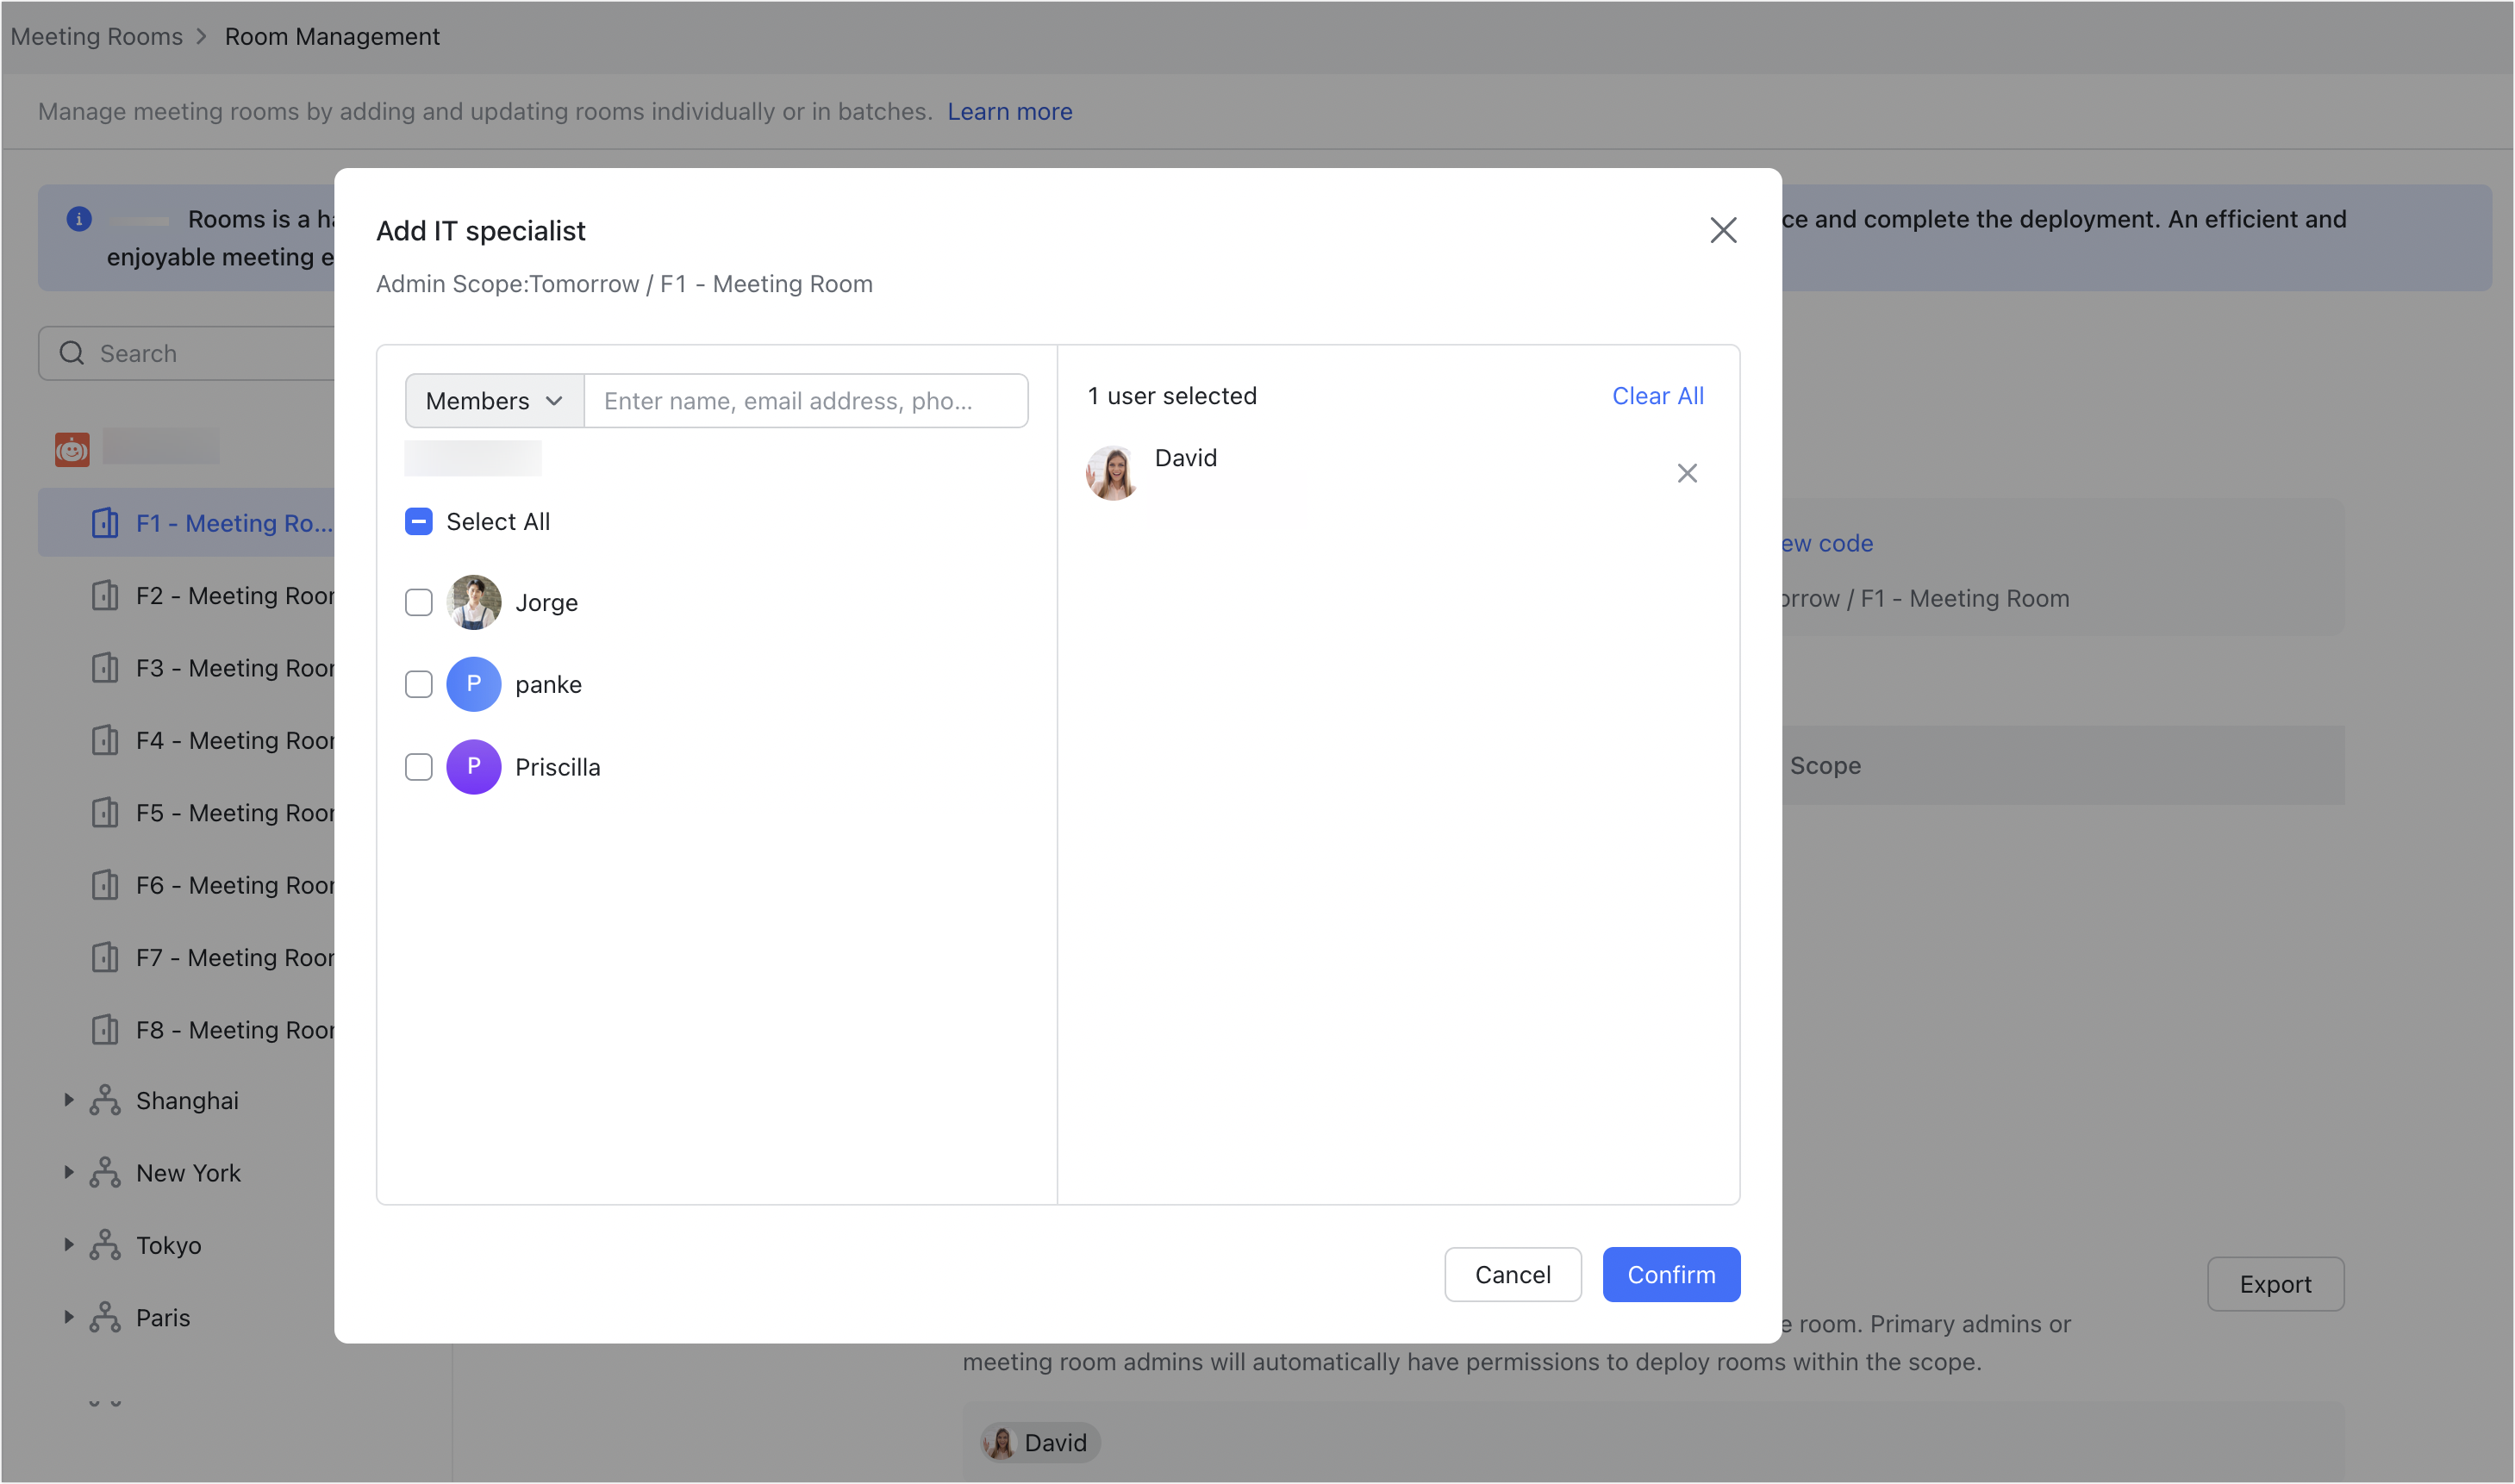
Administrators can delegate deployment permissions to specific members. On a layer or meeting room's setting page, go to Deployment permissions > IT specialists > Settings.
Note: Primary administrators or administrators with Meeting Rooms permissions also have deployment permissions for meeting rooms within their management scope. There is no need to add them as IT specialists.
250px|700px|reset
Enter the specialist's name, email address, or phone number in the pop-up window, select the member, and click Confirm.
Designated IT specialists can use Lark to scan the QR code of the meeting room to complete its deployment.
250px|700px|reset
III. Related
IV. FAQs
