I. Intro
Important: If you don't have permission to create an account, you'll need to request it from your Subscriptions app administrator.
You can create two account types in the Subscriptions app:
- Broadcasters:
- Designed for organizations or departments to send important notifications.
- Notifications are directly sent to users in Lark Messenger, making it easier to read important notifications.
- Subscriptions:
- Designed for organizations or individuals to share and promote content.
- Content published can be found in the Subscriptions app.
- Users can click accounts to view their corresponding content.
II. Steps
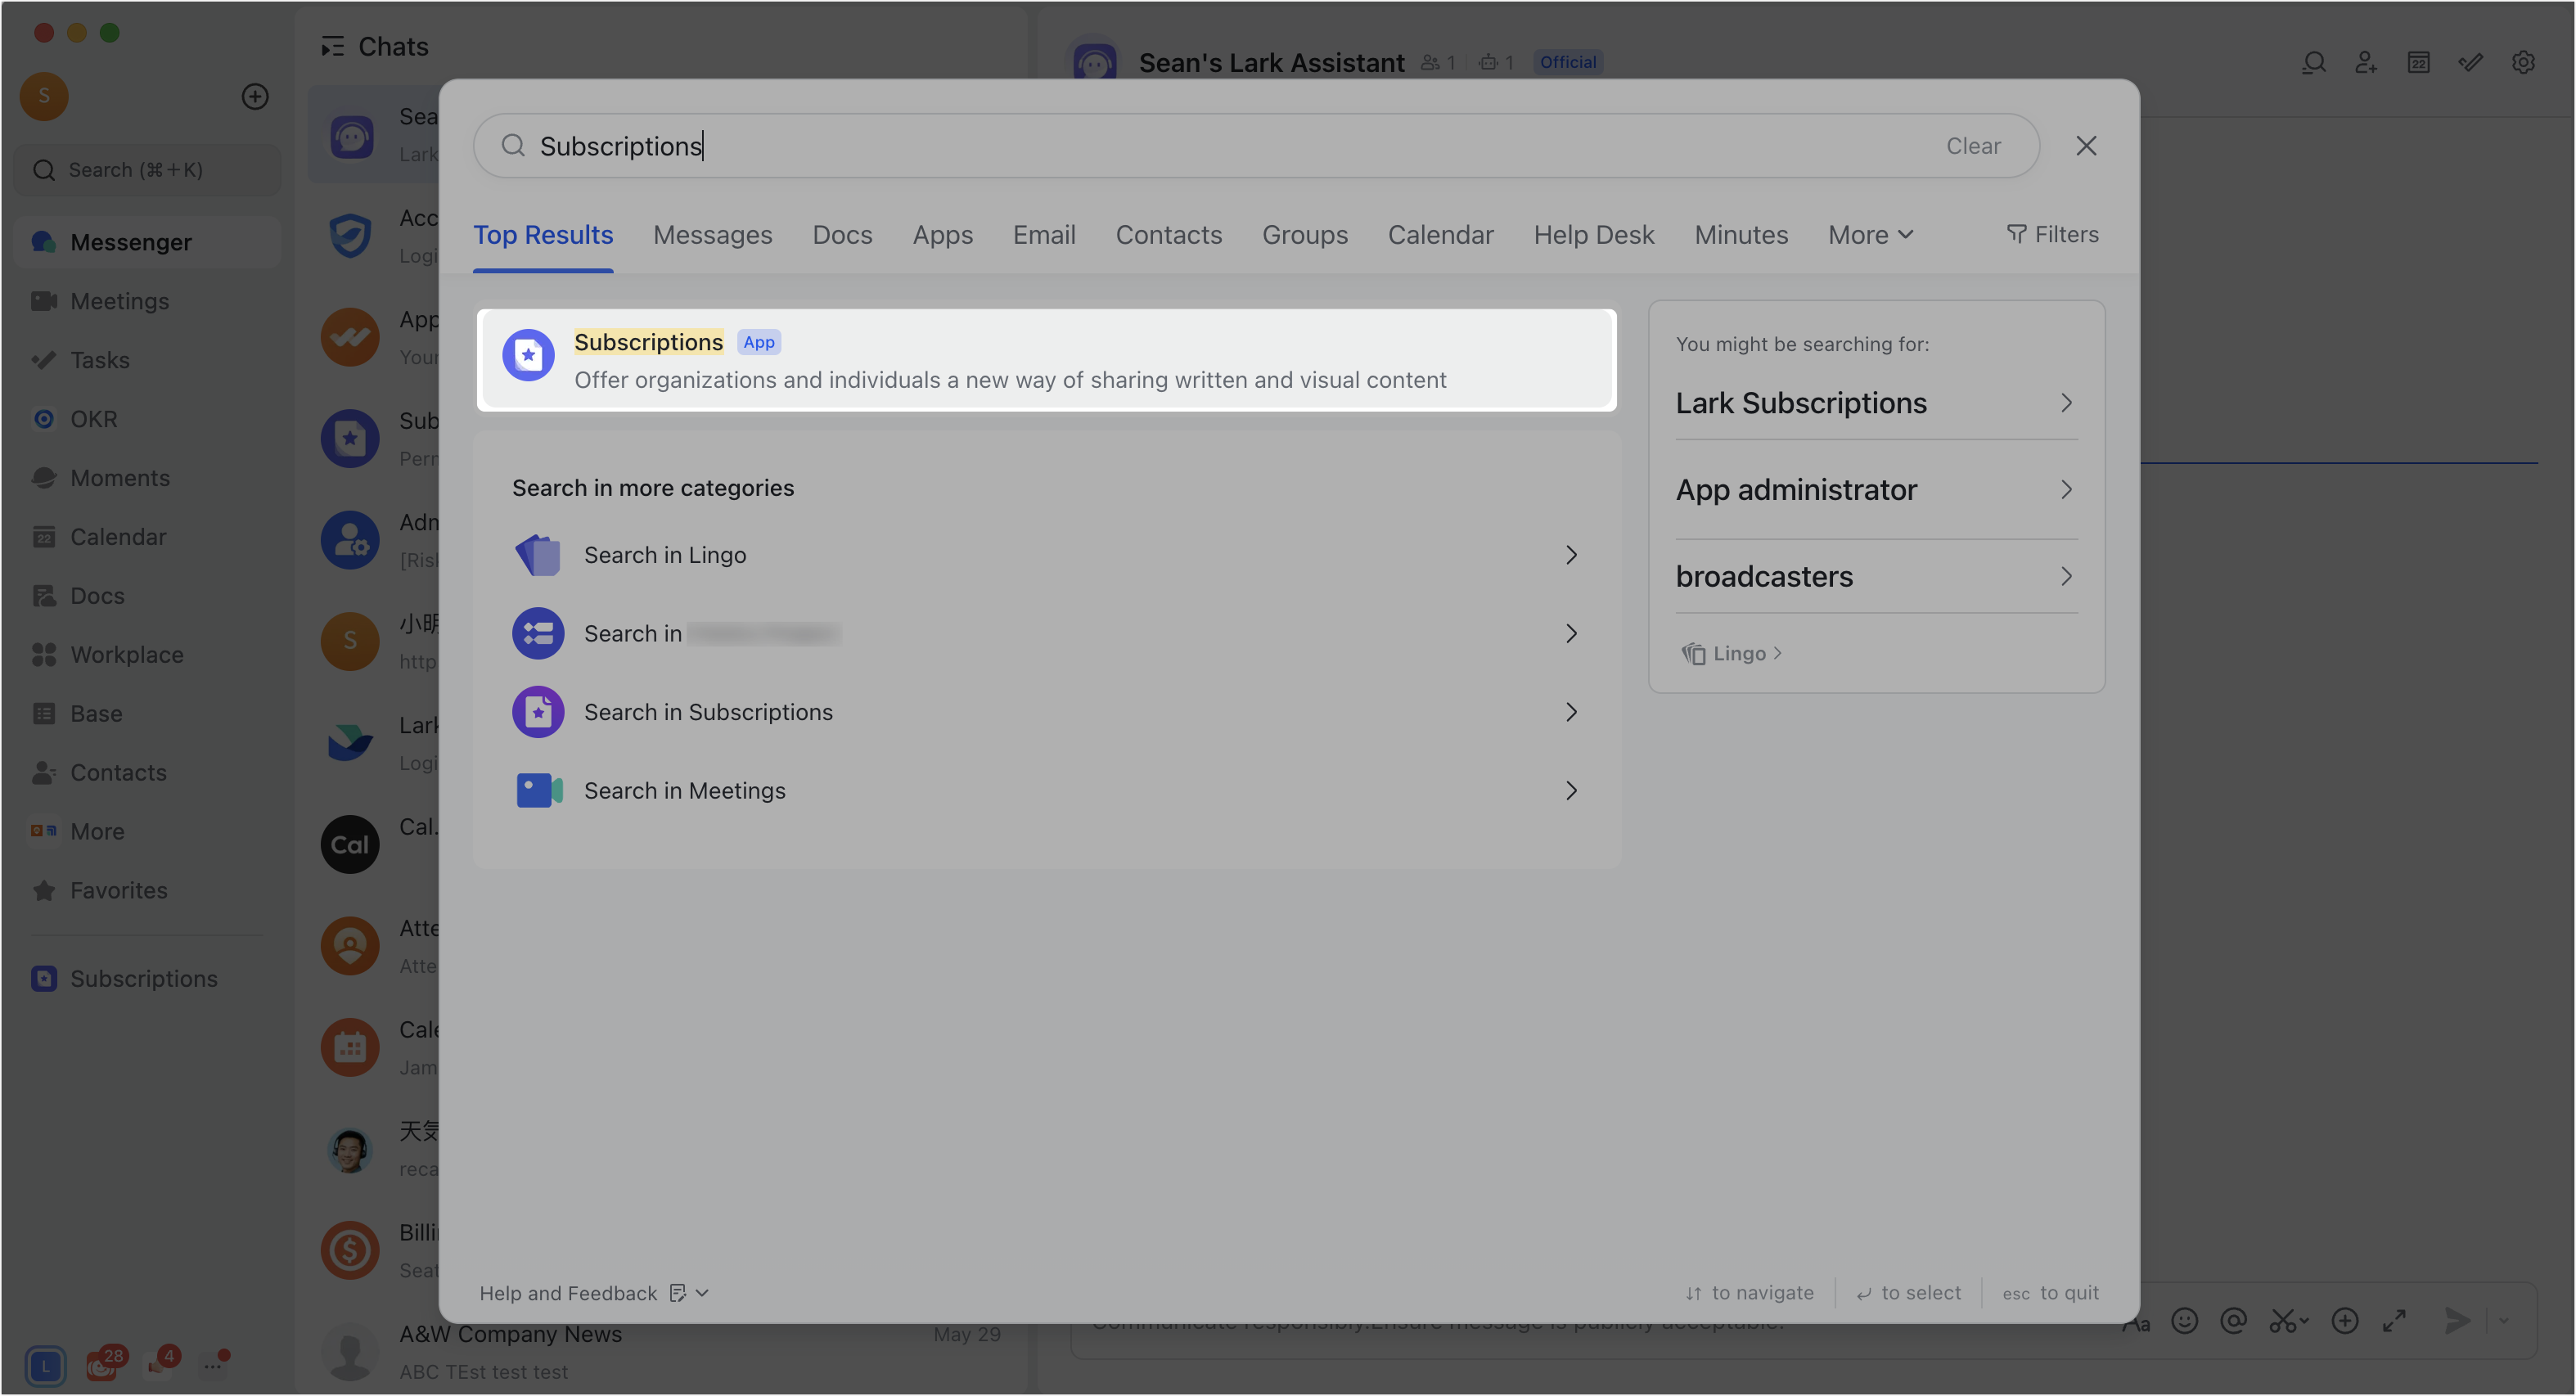
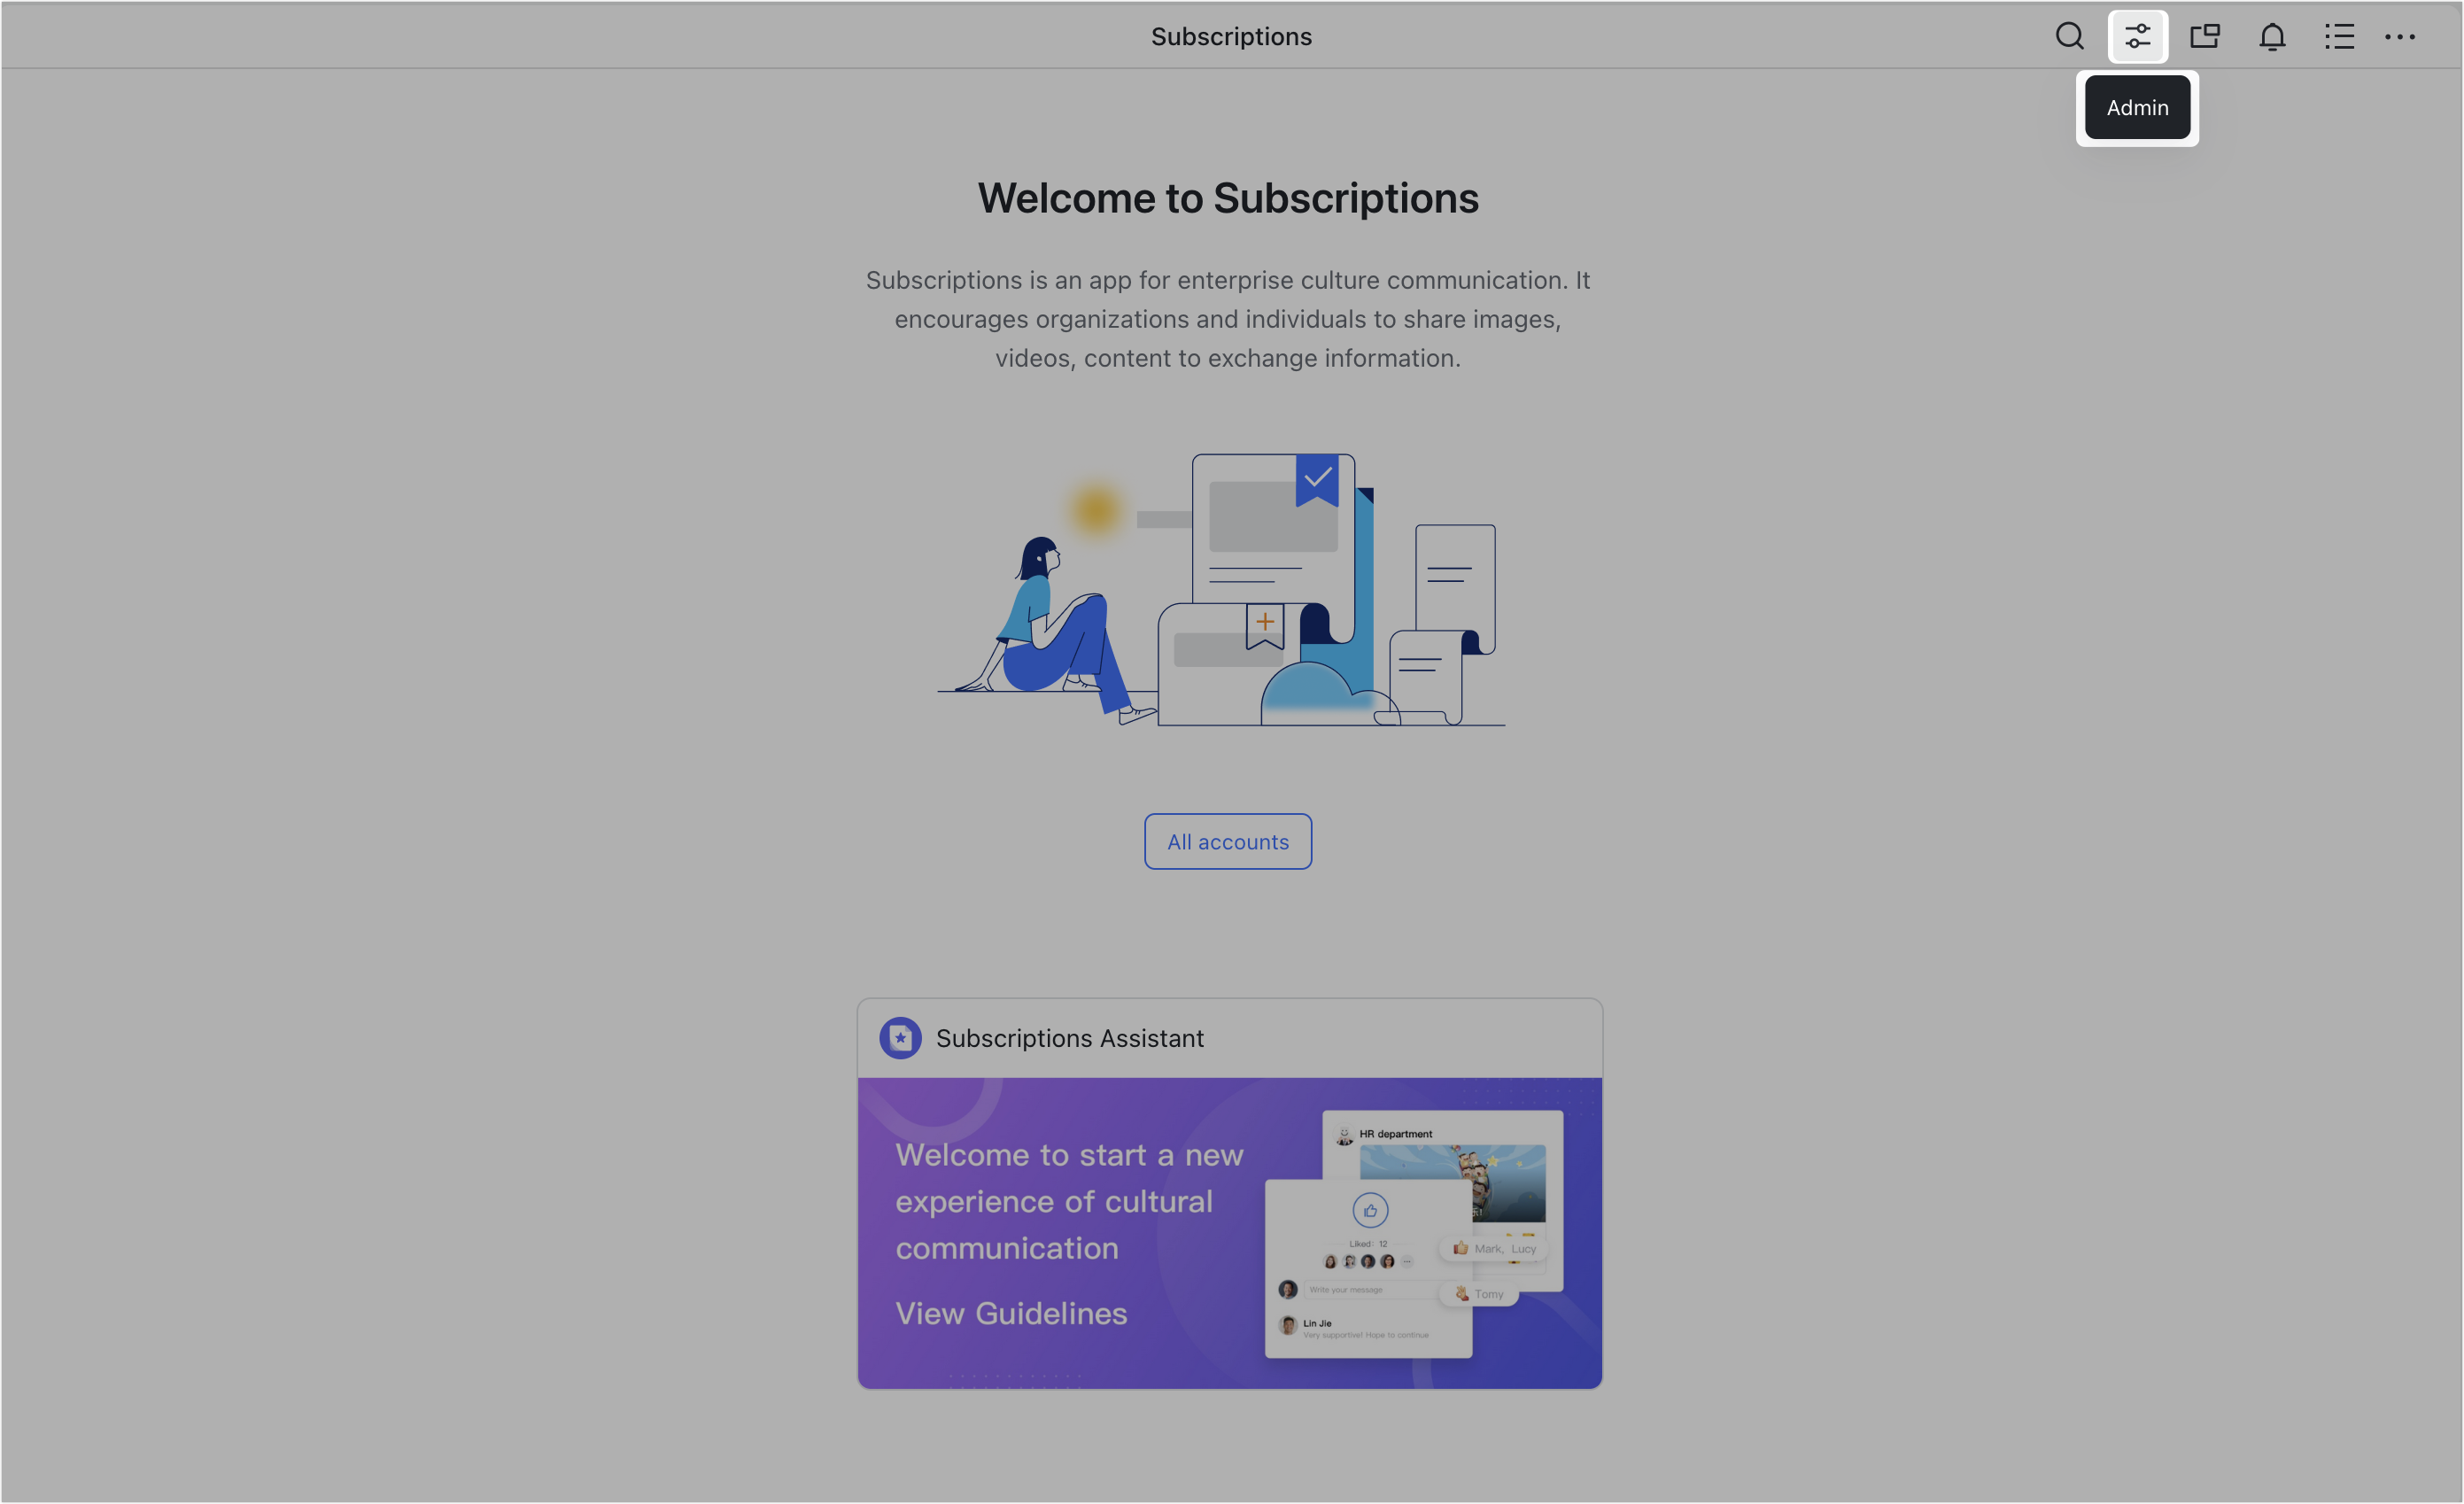
- Go to the Subscriptions admin console
Search for the Subscriptions app in Lark and go to the app's homepage. Click Admin in the upper-right corner to access the Subscriptions admin console.
Note: If you have both app administrator and account administrator permissions, the entrances for both roles will be displayed in Subscriptions admin console.
250px|700px|reset
250px|700px|reset
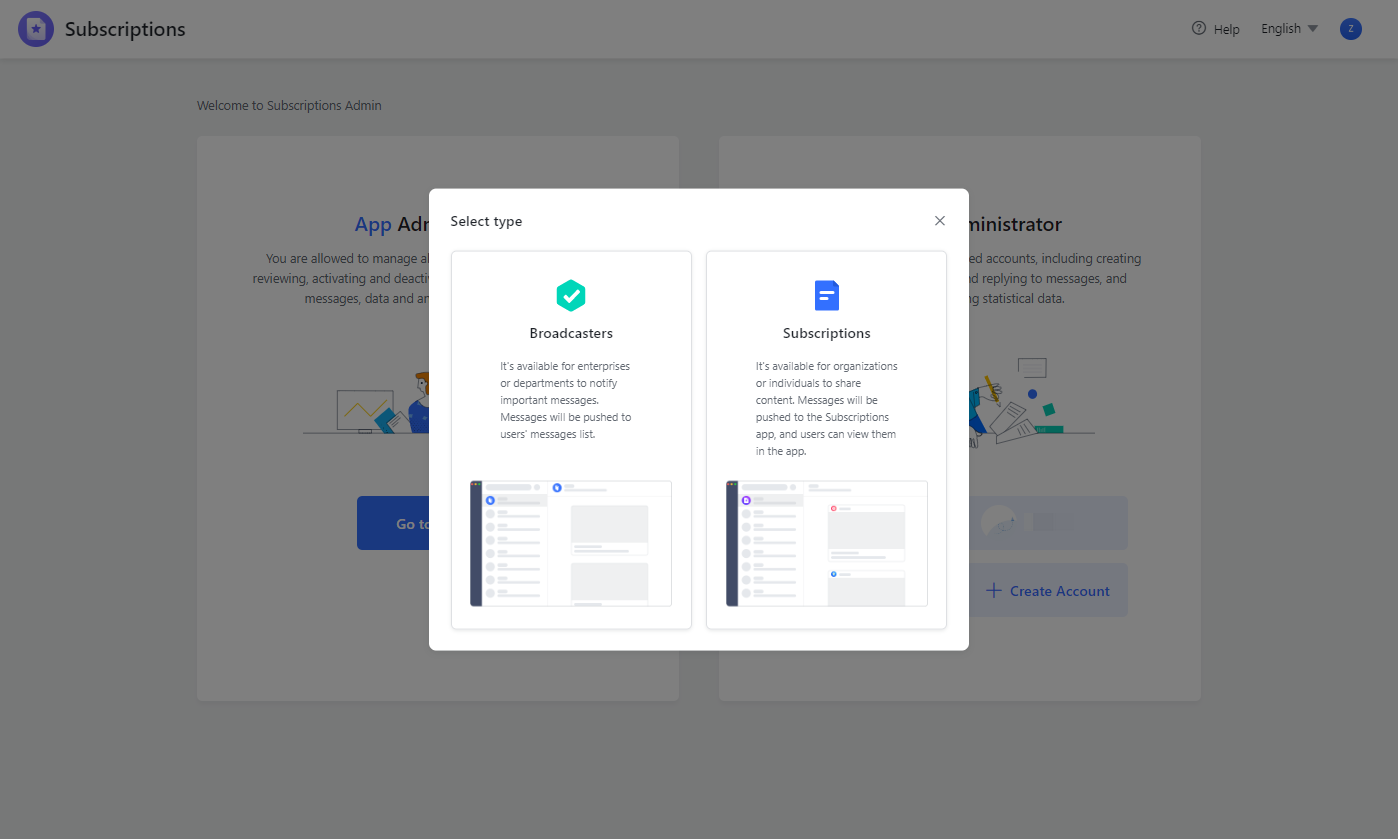
- Create an account
Under Account Administrator, click Create Account to open the account creation window. Here you can choose whether to create a Subscriptions or a Broadcasters account. If you're unsure which account to create, see The differences between Broadcasters and Subscriptions.
250px|700px|reset
- Enter account information
Next, fill in the required information about the account:
Basic info | Subscriptions account | Broadcasters account |
Profile photo | We recommend uploading a square photo | |
Name | No more than 24 characters | |
Intro | No more than 200 characters | |
Account type and owner (You cannot change the account type once you've selected it) | You can choose between Department, Individual, and Other.
| You can choose between Enterprise and Department.
|
Follow settings | You can only turn on default following for Department accounts. | Default following must be turned on. |
Approval to send content | You can choose whether to require approval before content is sent. | Approval to send content is required. |
Screenshots for reference | 250px|700px|reset | 250px|700px|reset |
After you fill in the information, click Submit for review. A designated account approver must review and approve your account before you can use it. You'll receive a notification informing you whether your account was approved. If the account is not approved, you can revise the account information based on the feedback given and submit your request again.
To check the approval status, go to the Approval app in Lark, then go to Approval Center > Submitted to view the progress of the approval.
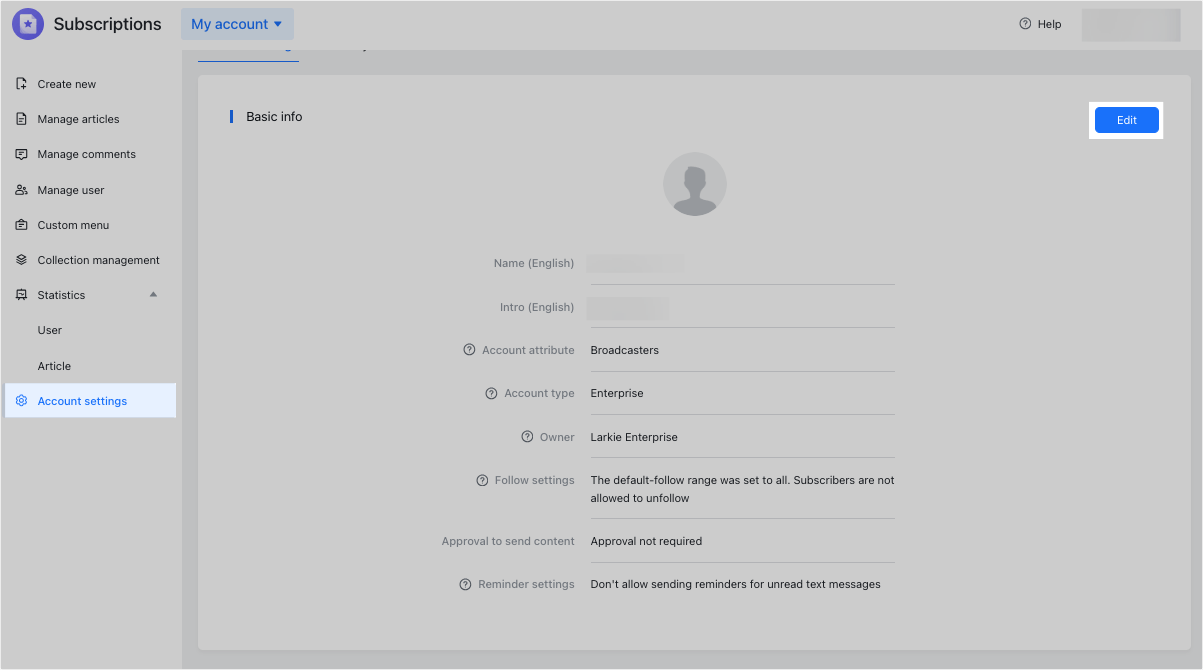
- Edit account information
After creating an account, you can go to Account settings and click Edit in the upper-right corner to edit the account information.
250px|700px|reset
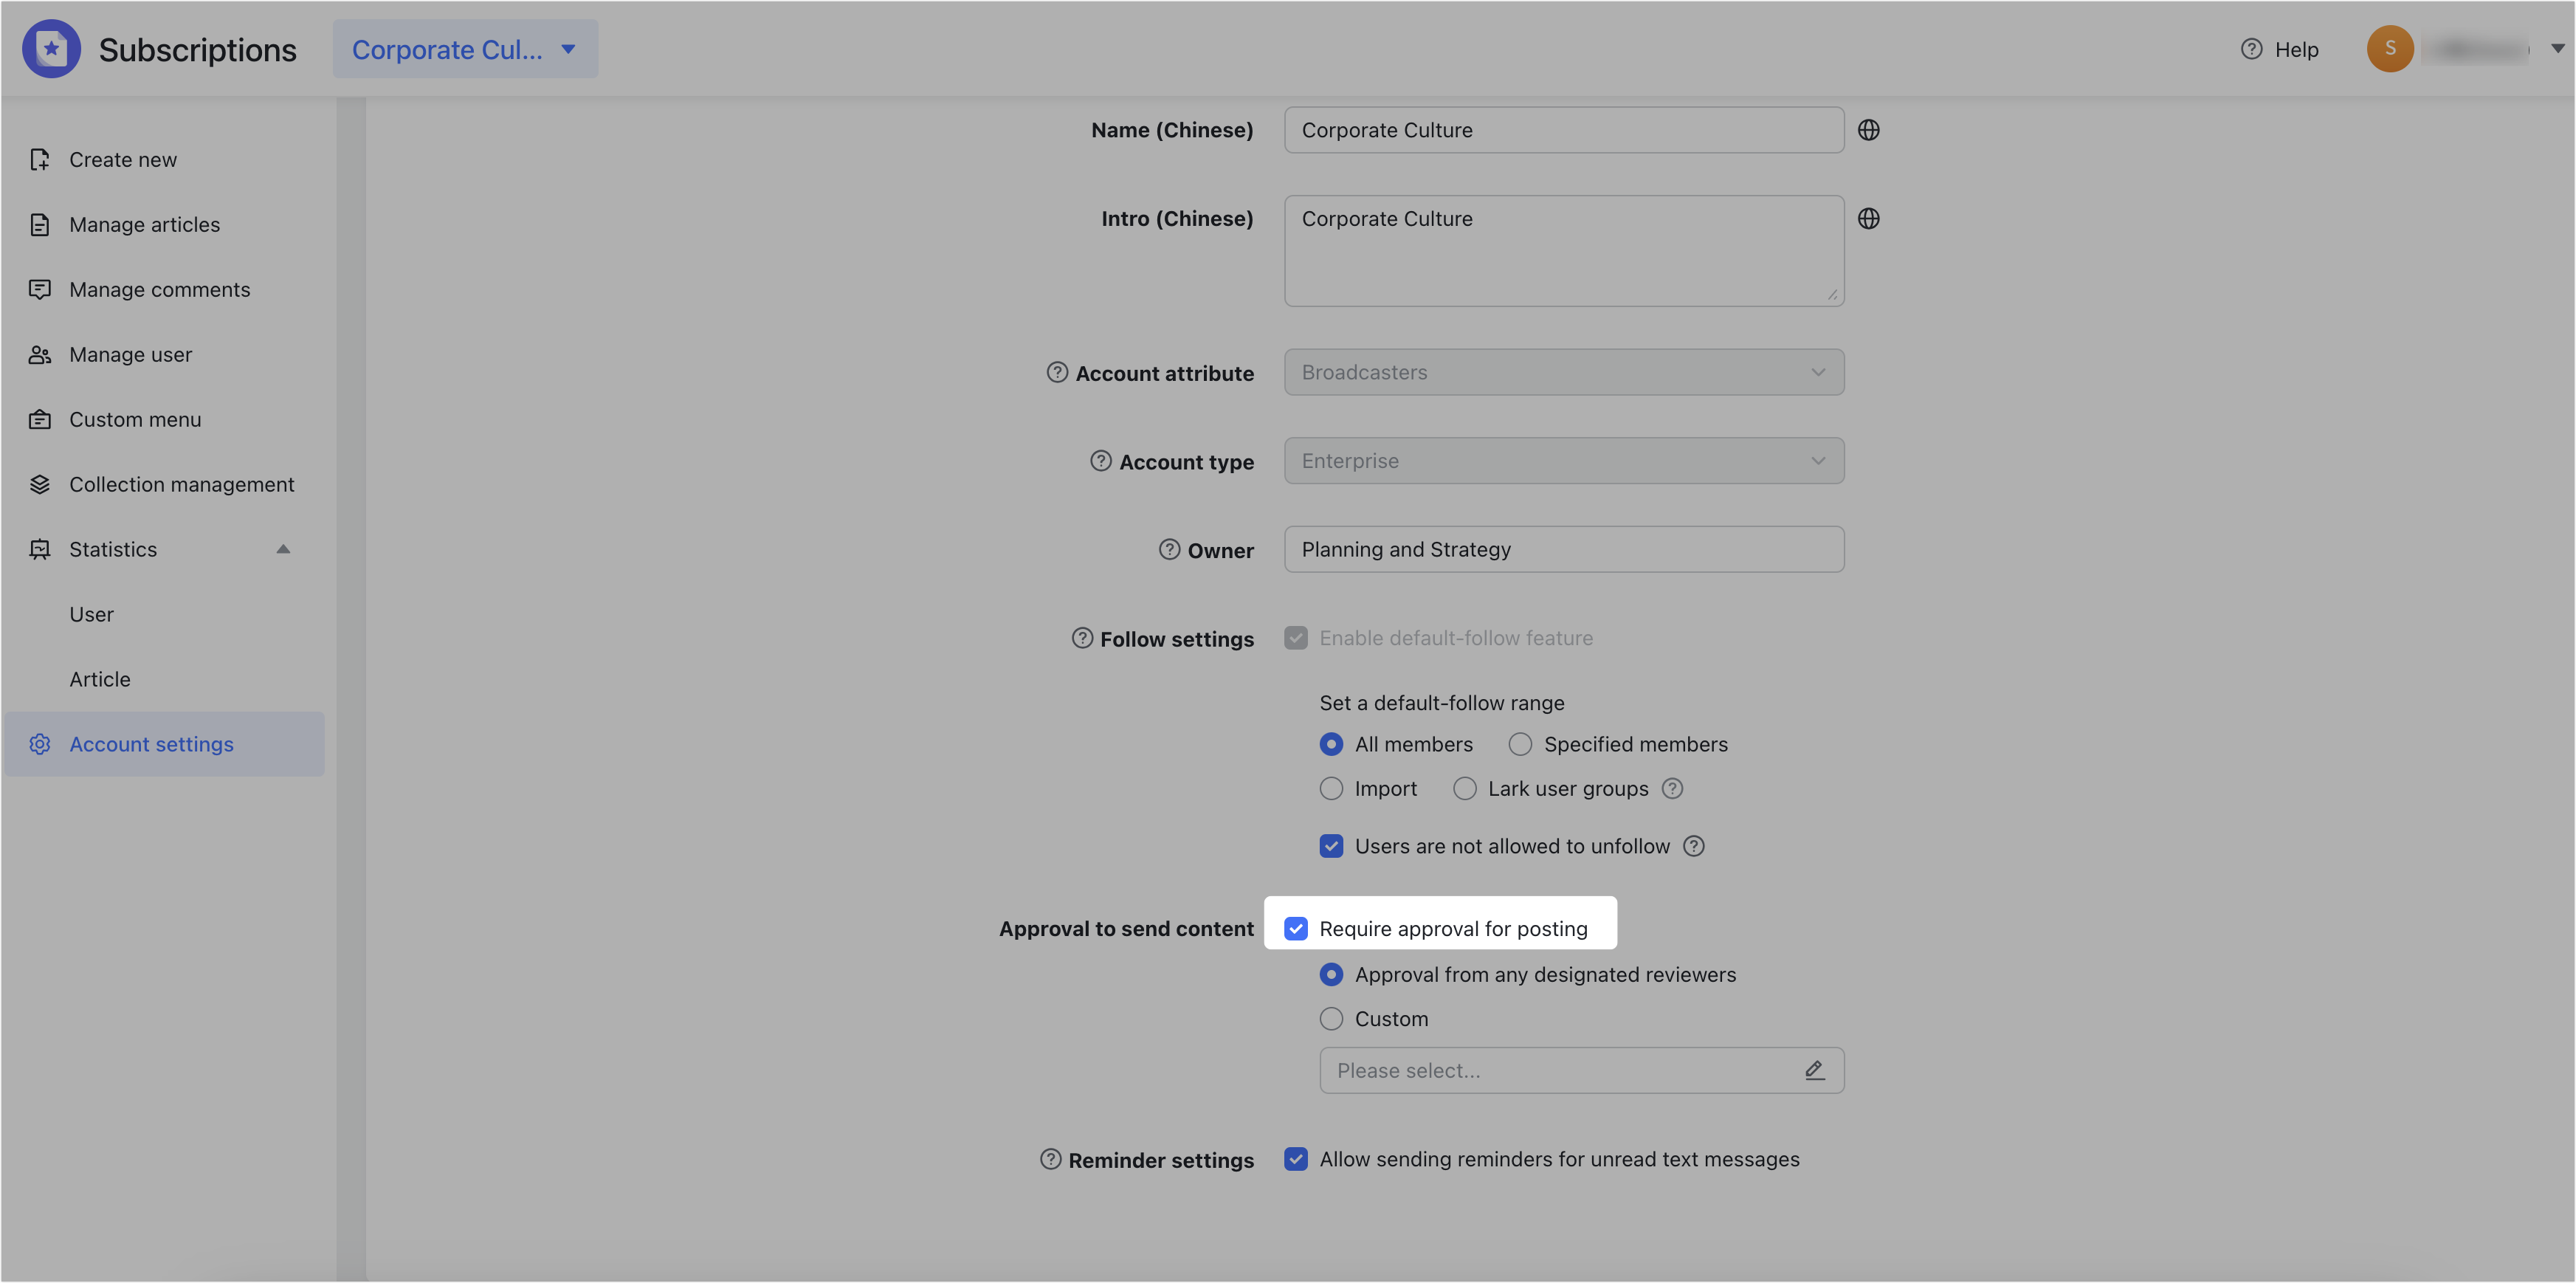
If you want content to be reviewed before it's shared with members, go to Approval to send content and select Require approval for posting.
250px|700px|reset
If you select Approval from any designed reviewers, you can choose who will be responsible for reviewing content in your organization.

250px|700px|reset
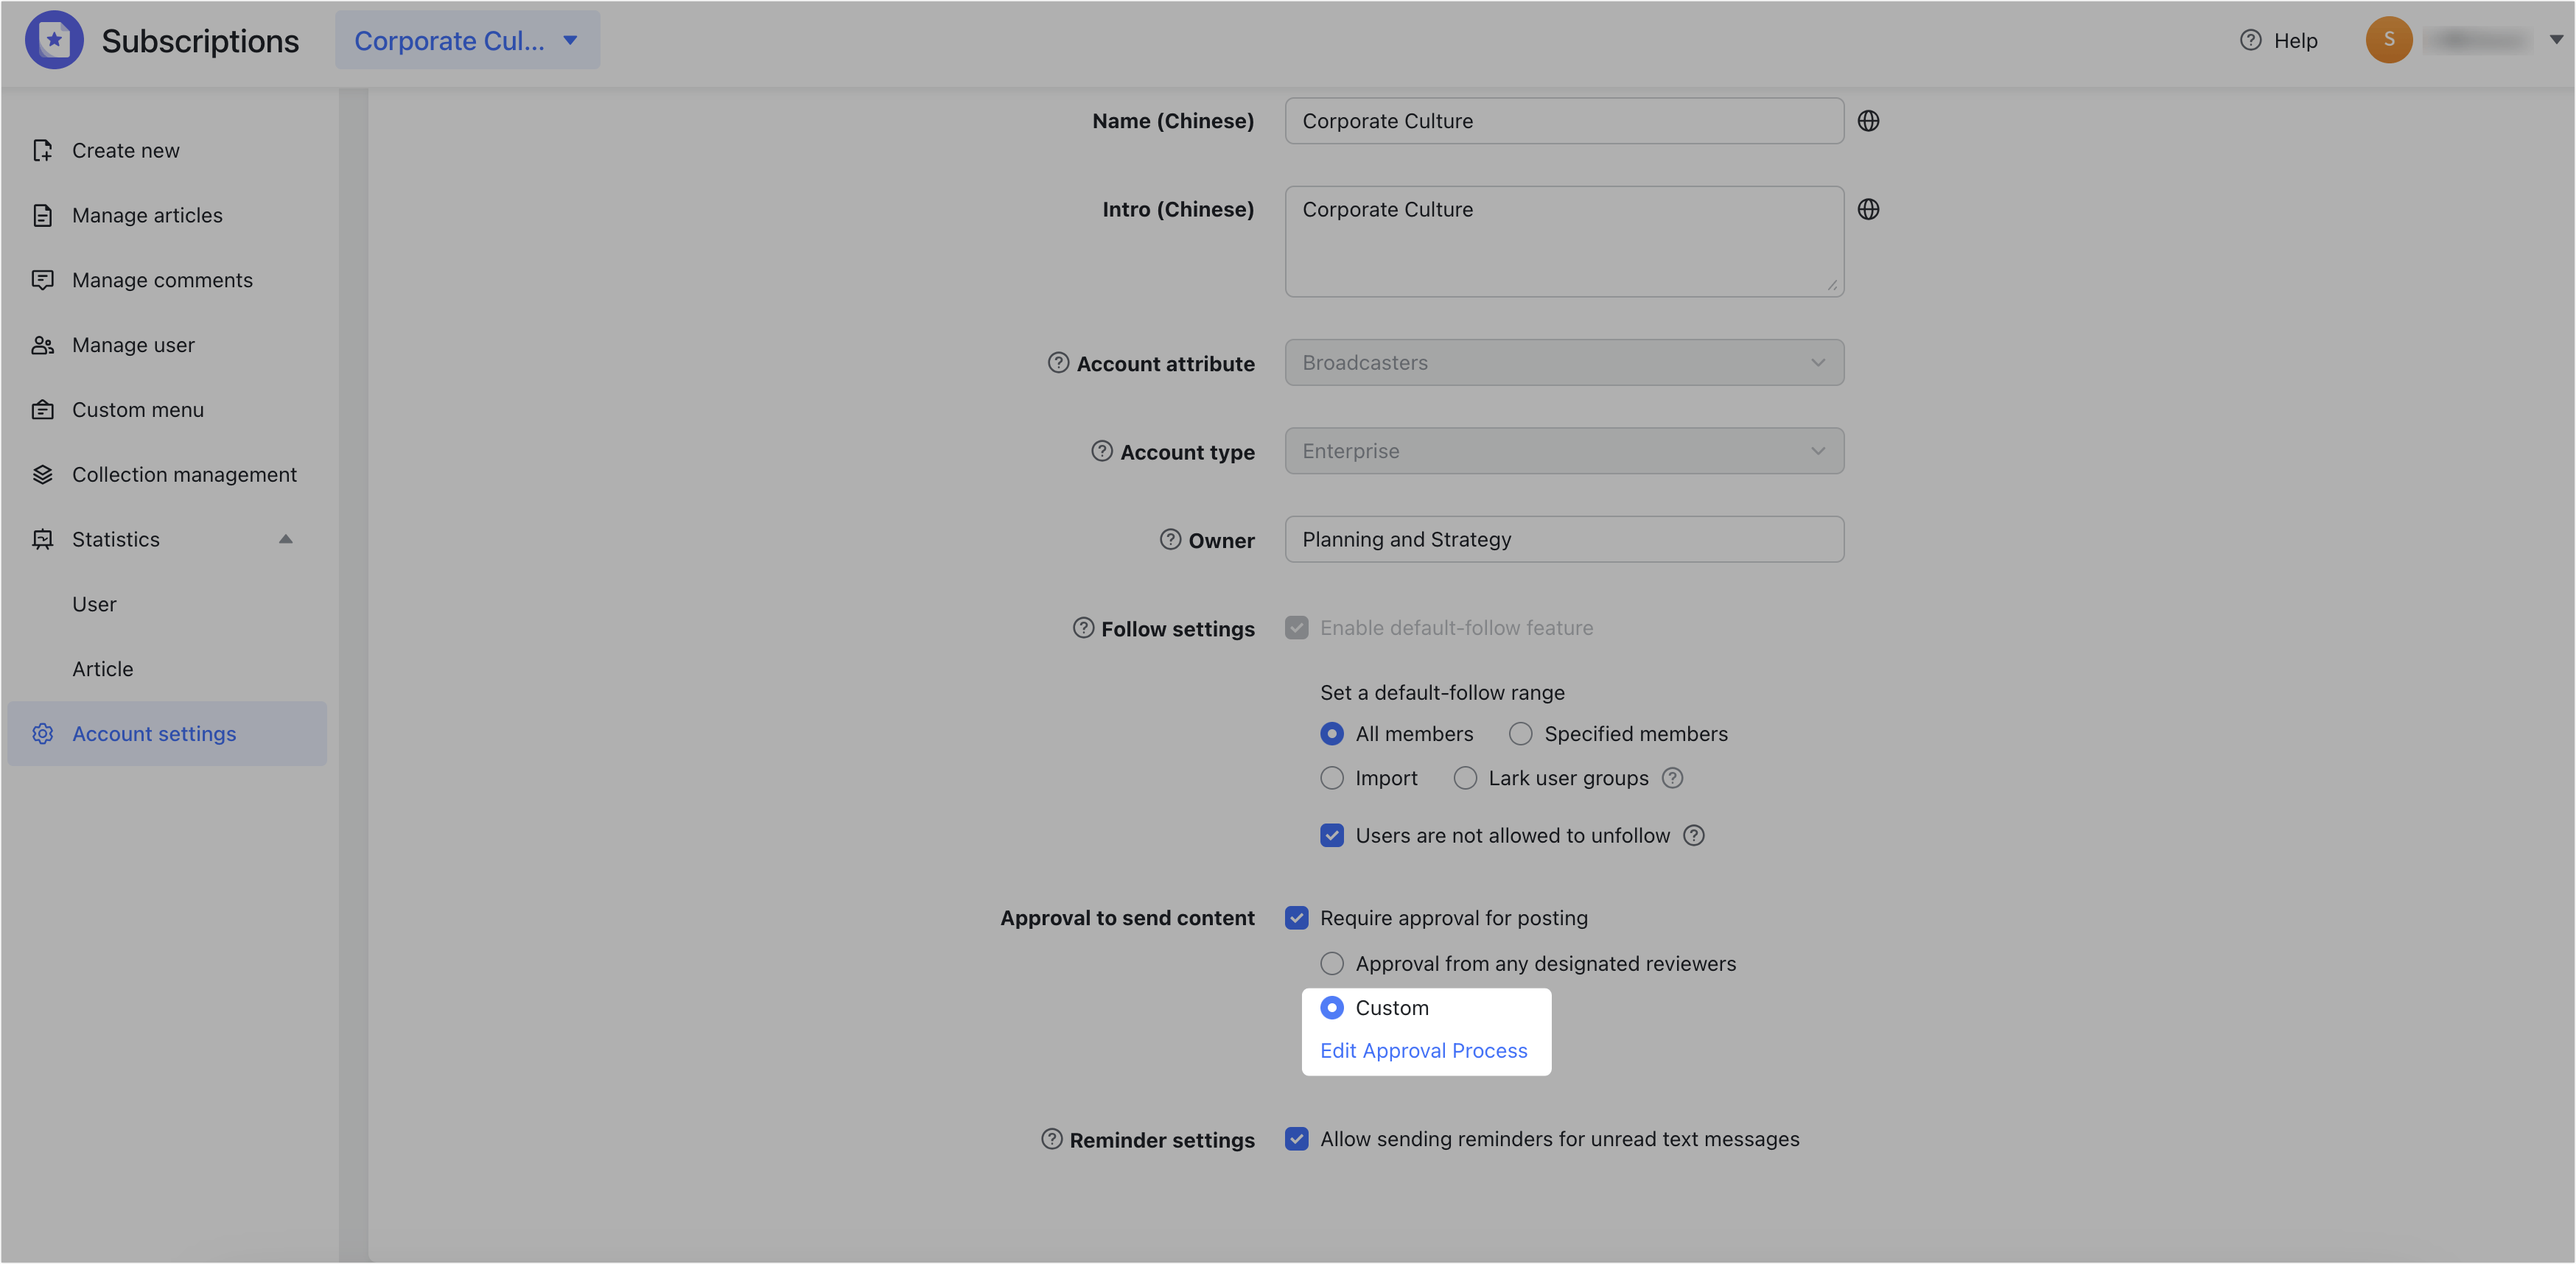
If you select Custom, click Edit Approval Process. This will take you to Lark Approval, where you can create a unique approval process based on your needs.
Notice:
- Only one custom approval process can be created for a Subscriptions account.
- If the original setup before selecting Custom was one of the following, the account administrator can set an approval process:
- Require approval for posting was not selected.
- Approval from any designated reviewers was selected.
- If custom approval has already been set up, the account administrator cannot modify the approval process and can only view it and its administrators. Only the account reviewer can change the approval process.
250px|700px|reset
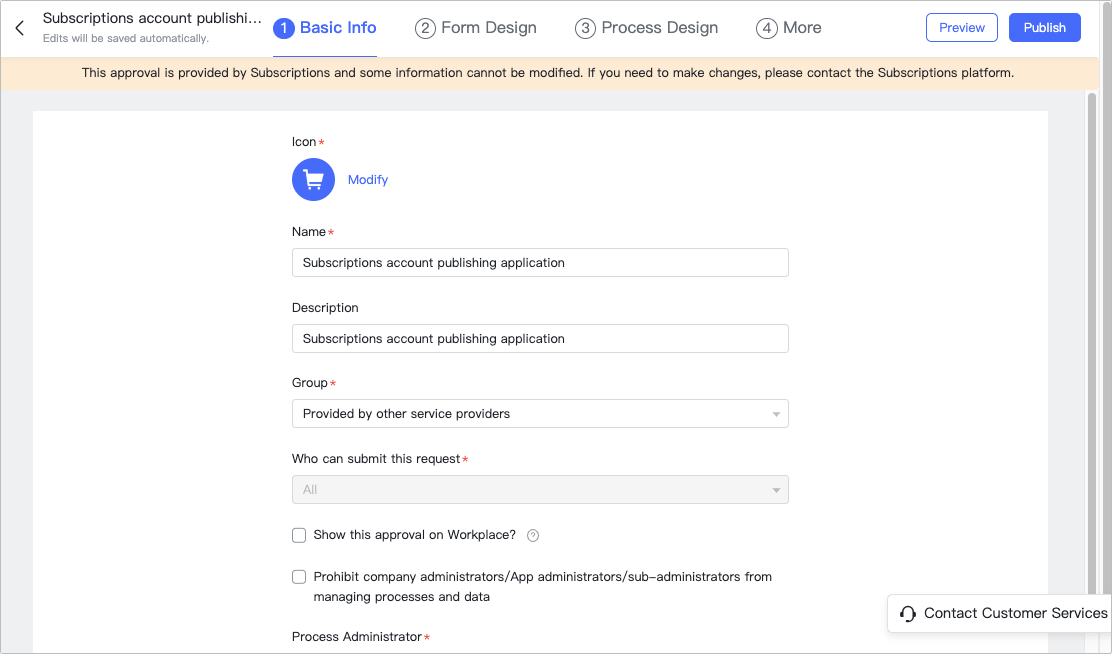
After entering the Subscriptions approval process, you can customize the icon, name, description, group, and other related information in Basic Info.
250px|700px|reset
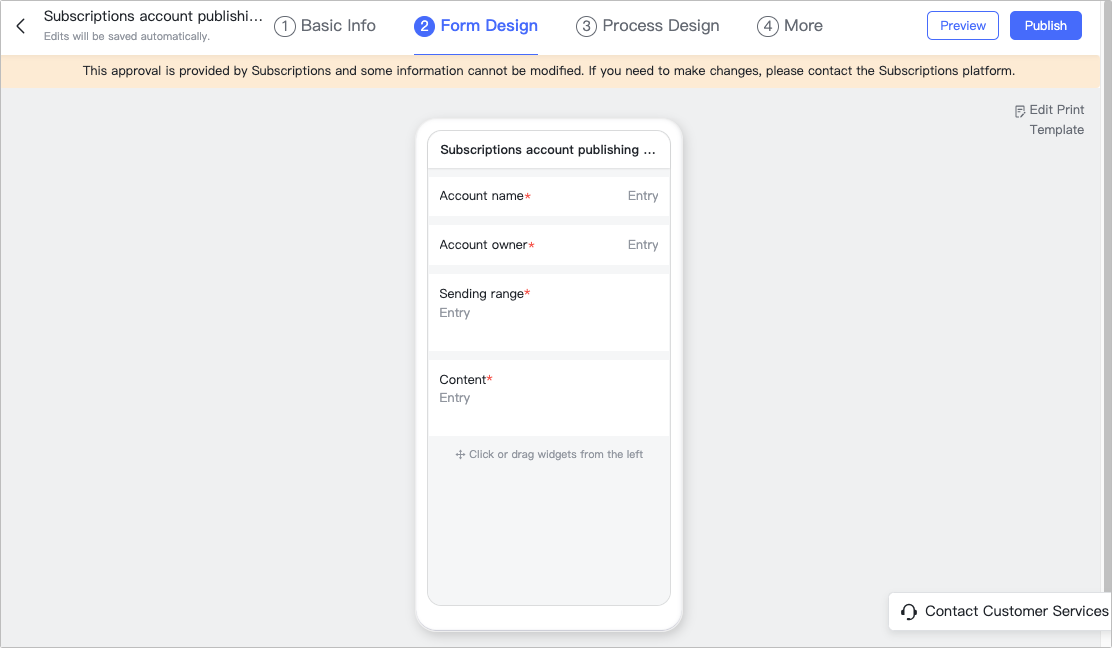
Click Form Design to view the content that the initiator needs to fill in.
Note: You cannot make changes to the content on the Form Design page.
250px|700px|reset
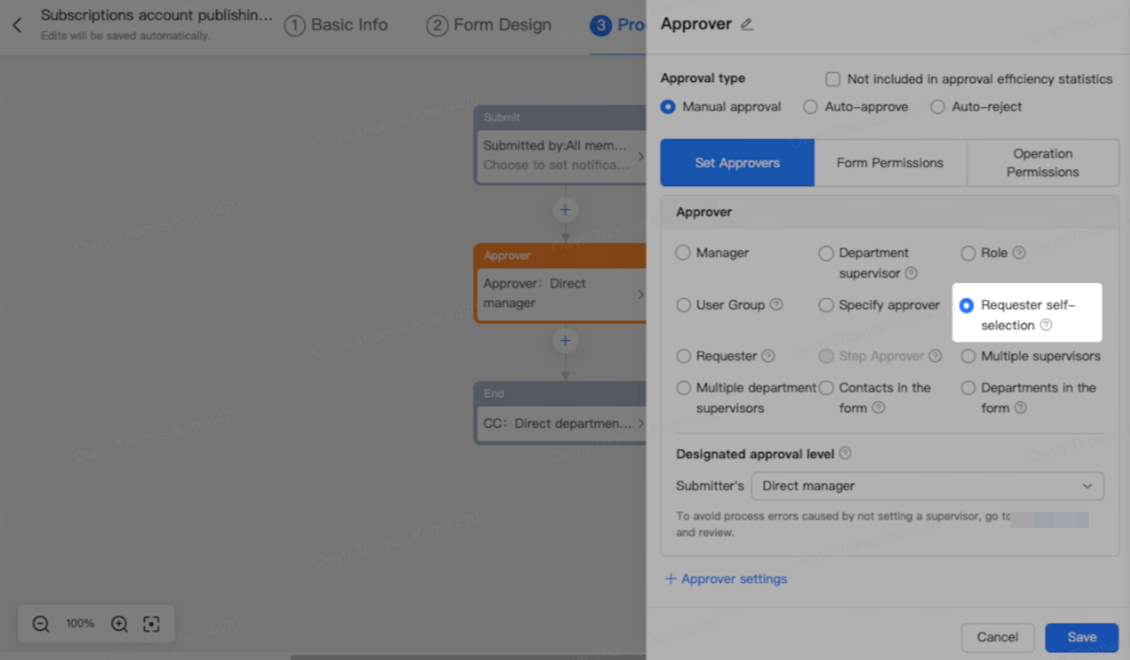
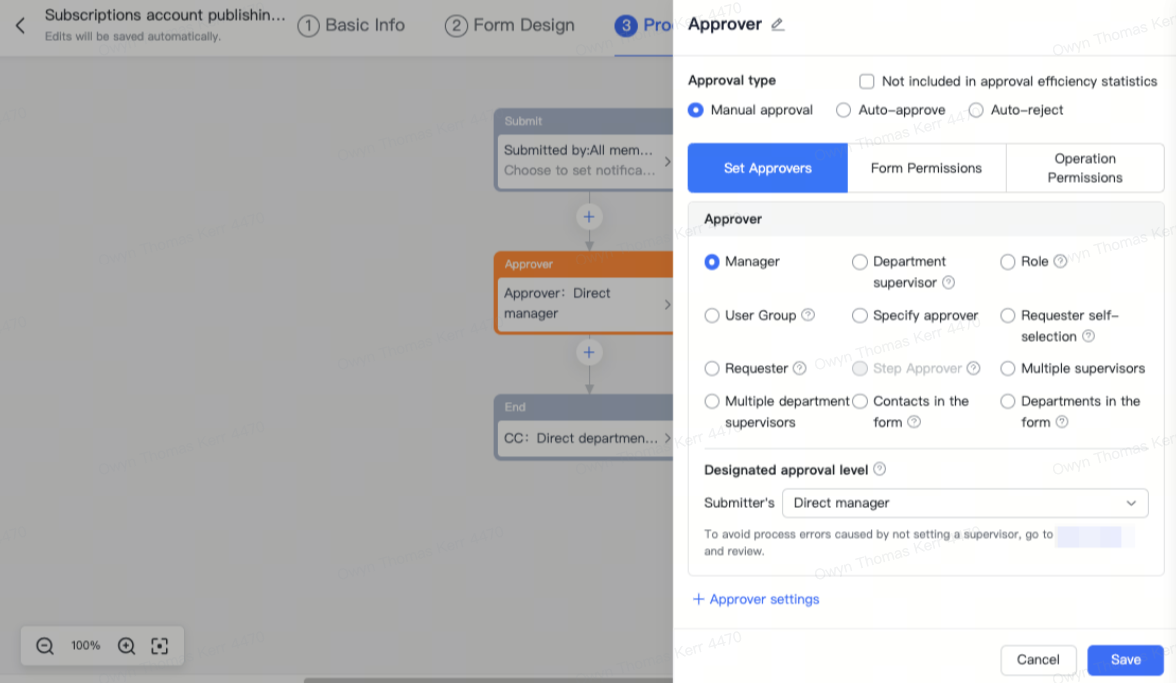
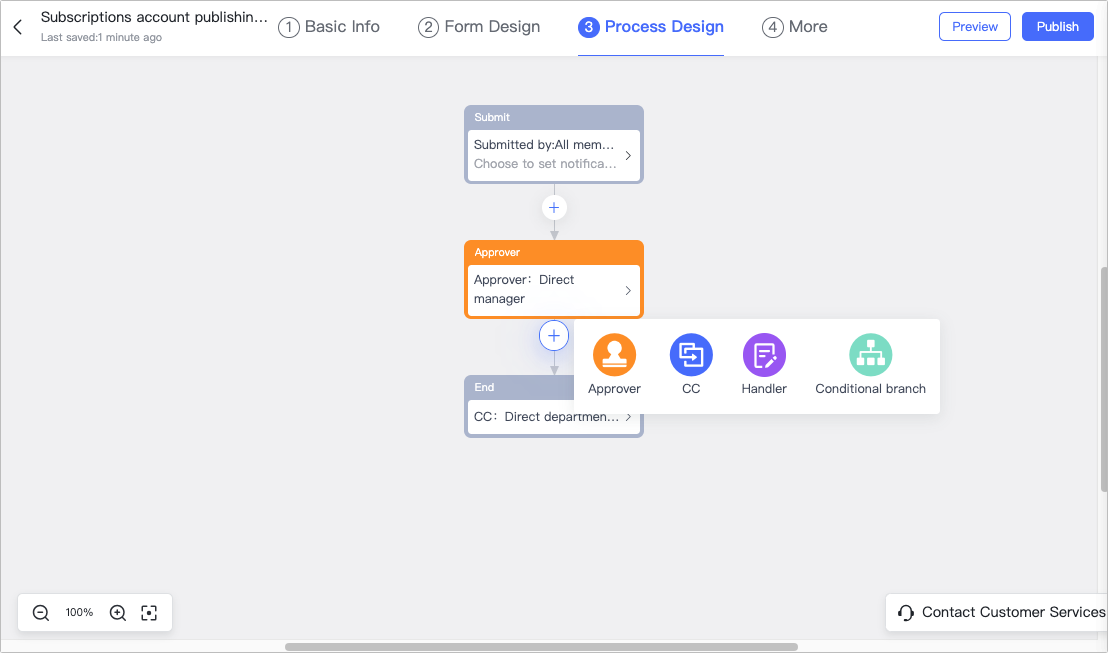
Click Process Design to design the approval process. To learn how to do this, see Admin | Set up an approver step.
Note: If Requester self-selection is selected as the approver, then that approval step will automatically pass.
250px|700px|reset
250px|700px|reset
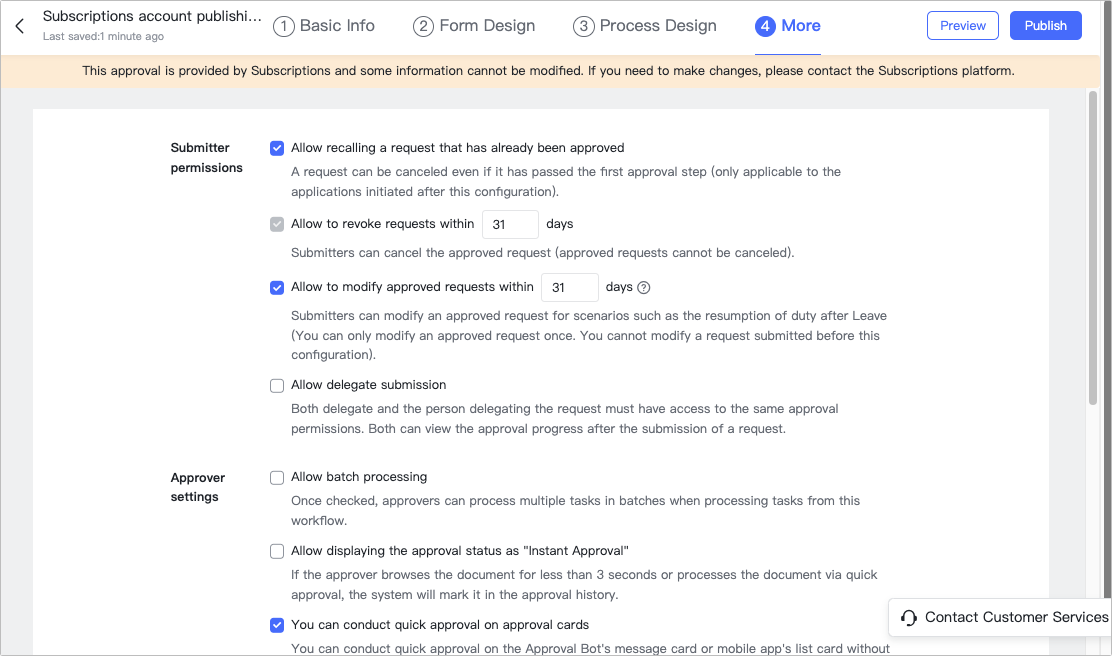
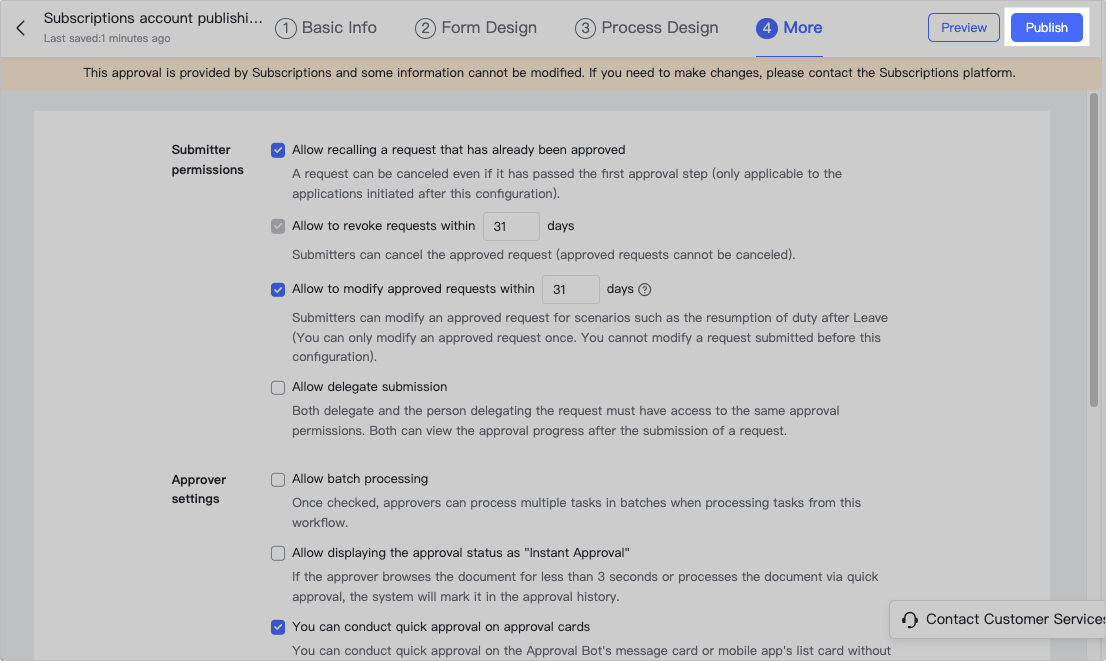
Click More to set up Submitter permissions, Approver settings, and more if necessary.
250px|700px|reset
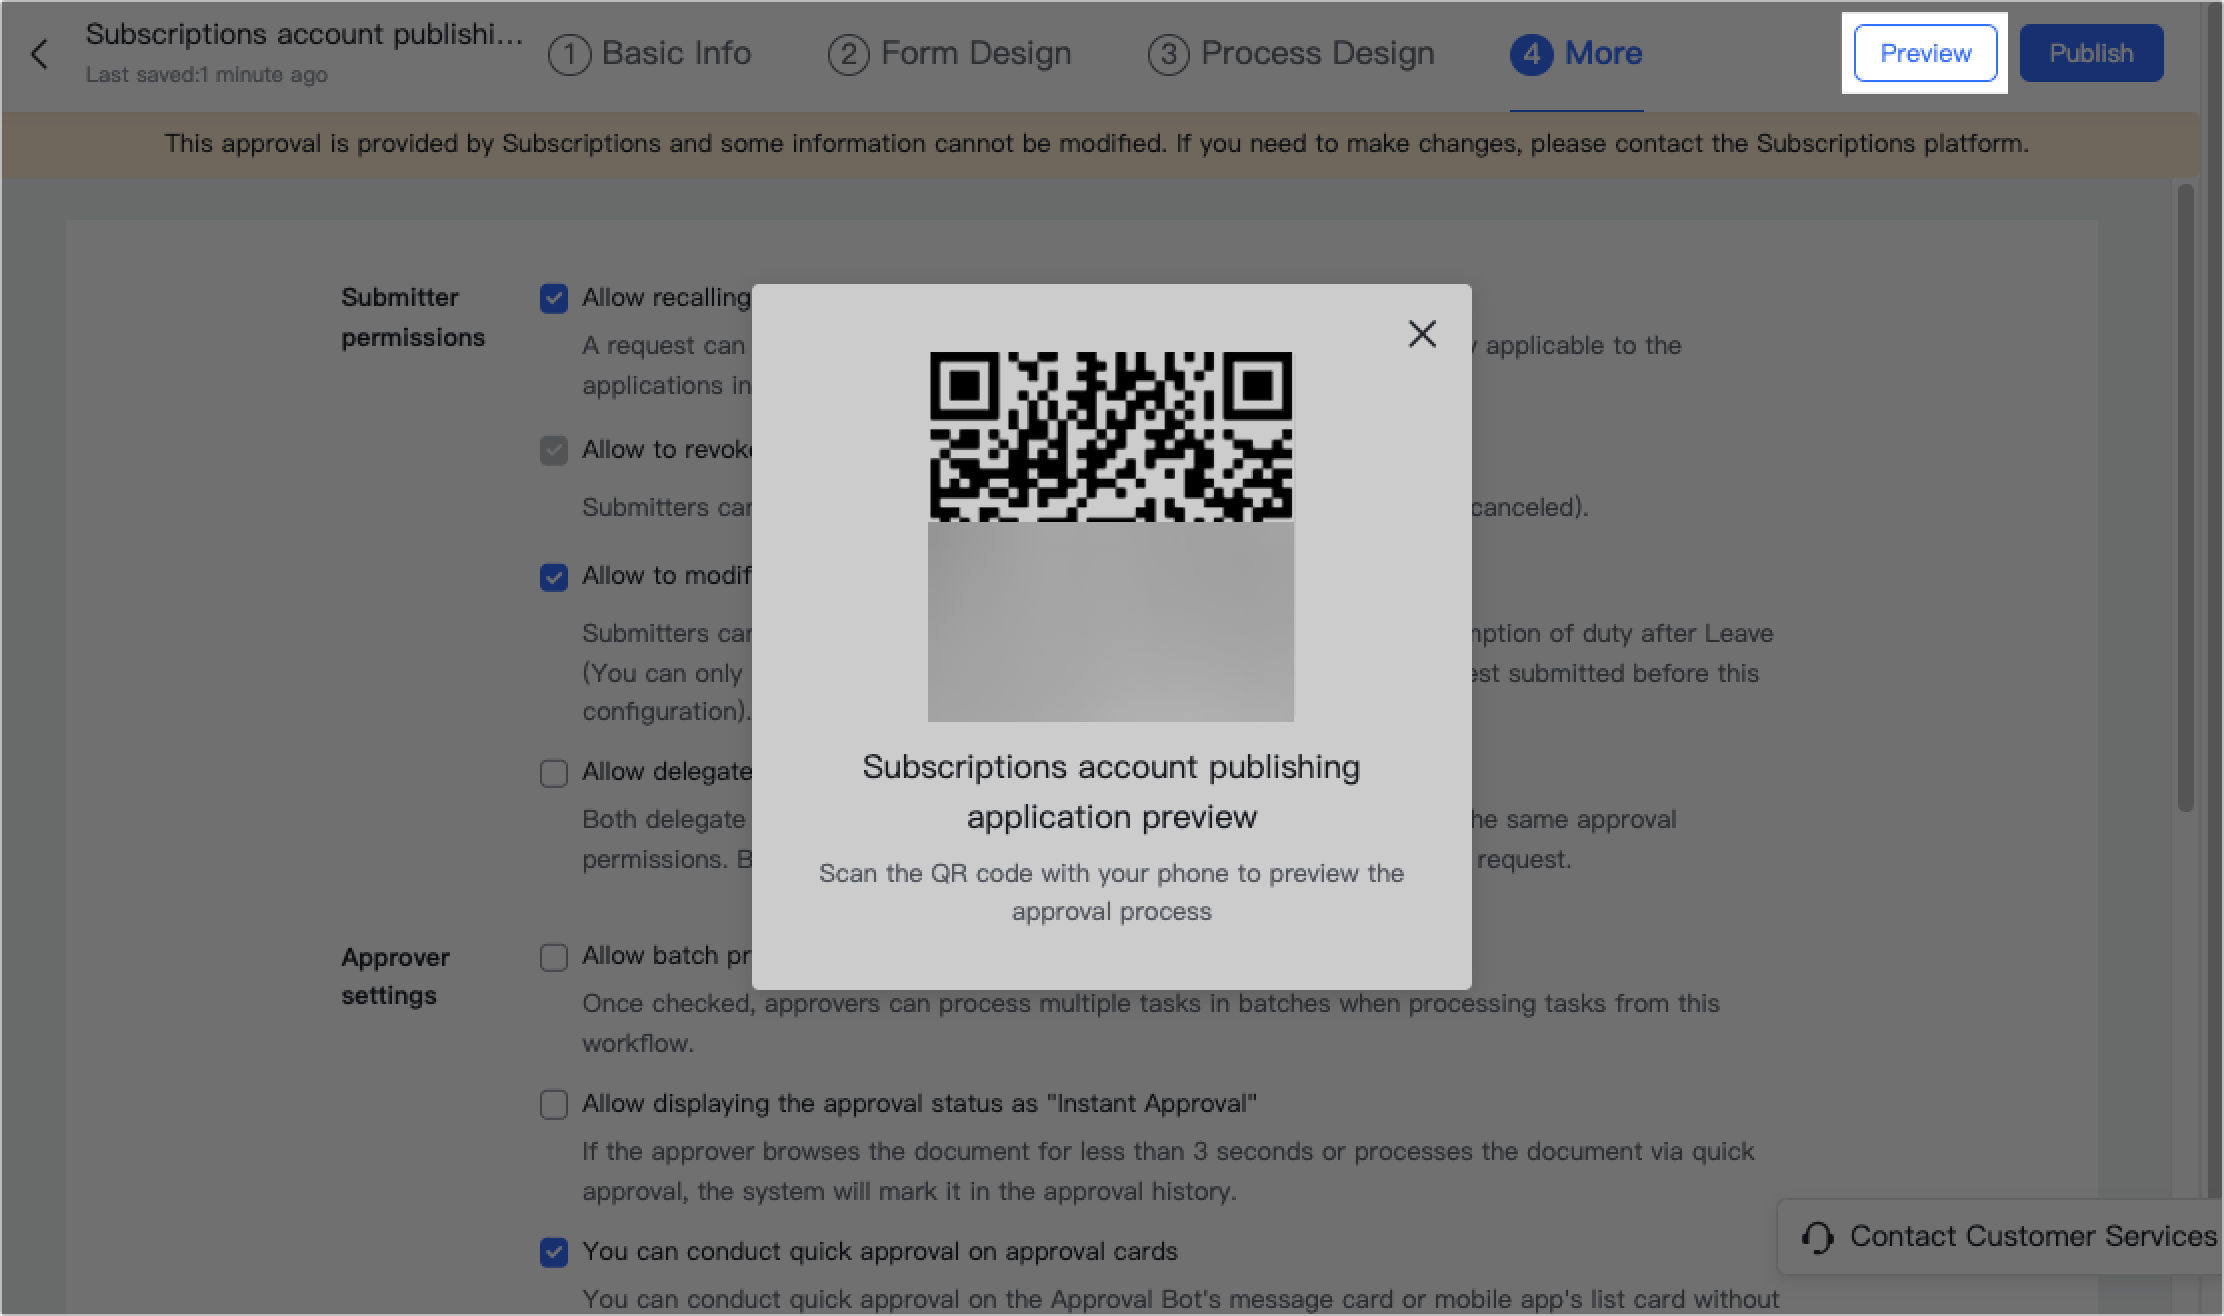
After completing the above steps, click Preview in the upper-right corner and scan the QR code to preview the approval process.
250px|700px|reset
Click Publish to activate the approval process.
250px|700px|reset
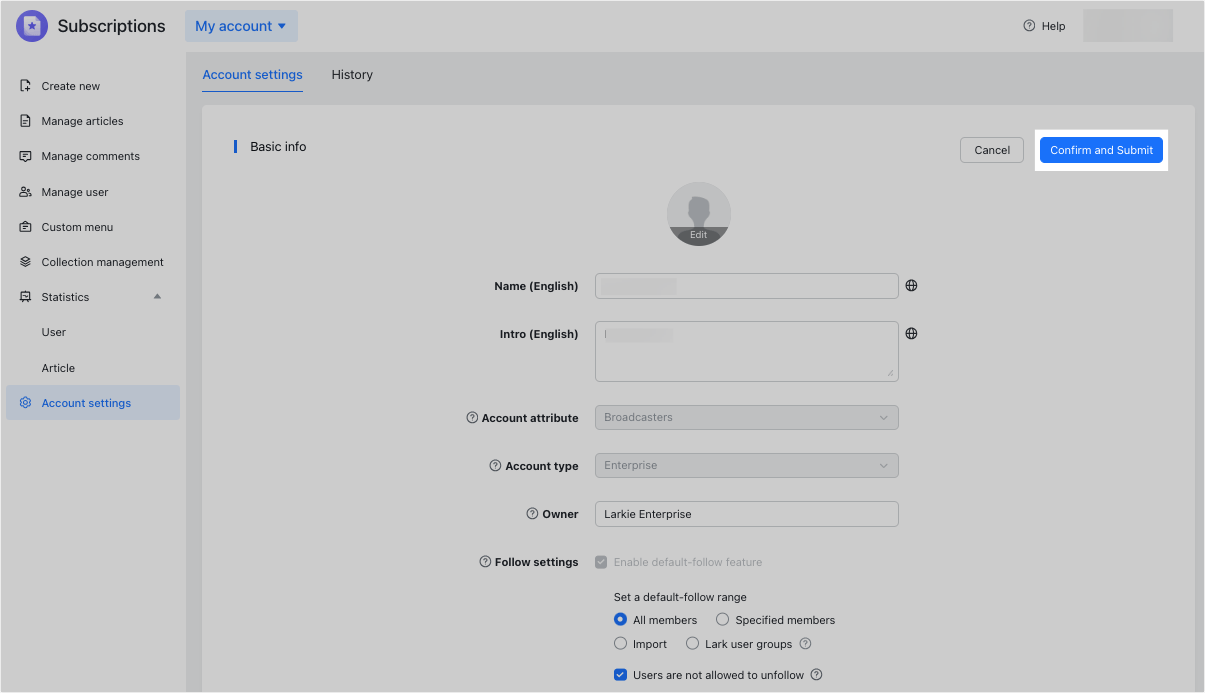
After you have finished making changes to your account, click Confirm and Submit. Once submitted, your account changes will be reviewed by a designated account approver. If the approval is successful, you will receive a notification from the approval bot. If it is not approved, you will receive a rejection notification. If this happens, you can make the suggested adjustments and resubmit.
250px|700px|reset
III. FAQs