I. Intro
As a Lingo administrator, you can create entry categories in the Lingo Admin Console based on your organization's needs. For example, you could create categories based on departments or business areas. After creating categories, you can manage entries by category.
II. Steps
Create a category
- Enter the Lingo Admin Console and go to Manage Entries > Category in the left sidebar.
- Click Add a category to create a new category, or Add a subcategory to create a new subcategory.
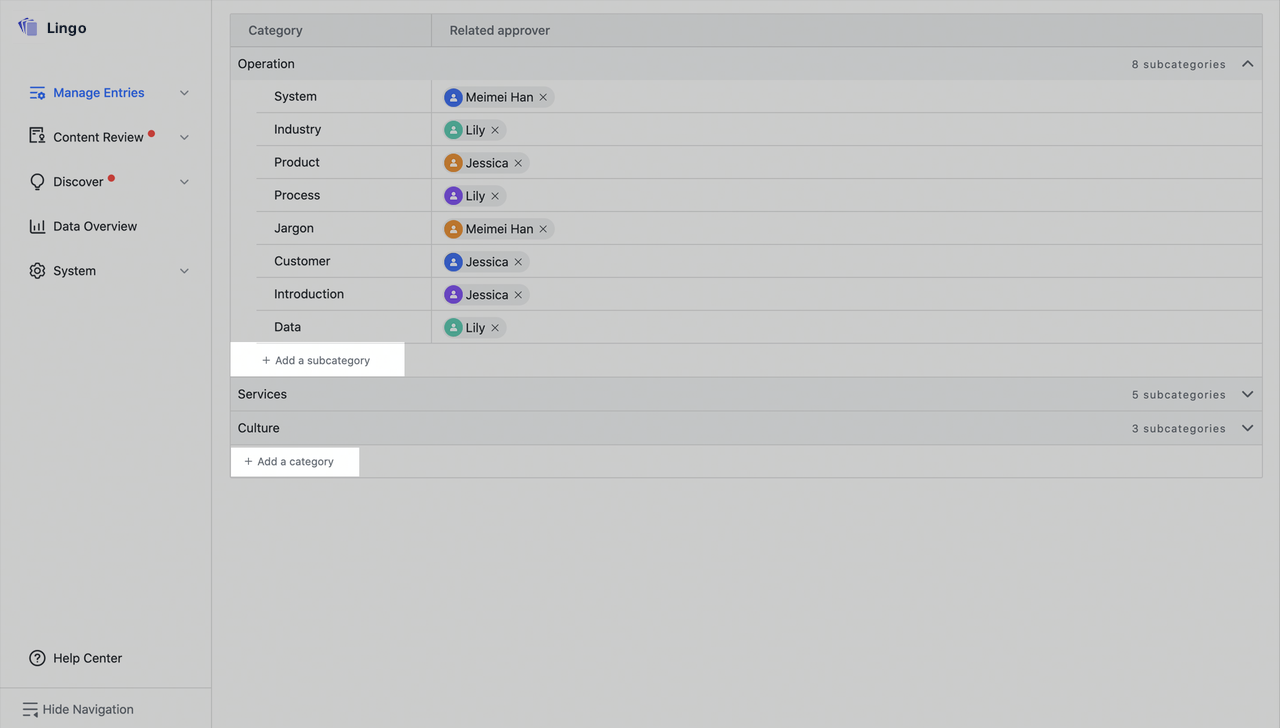
250px|700px|reset
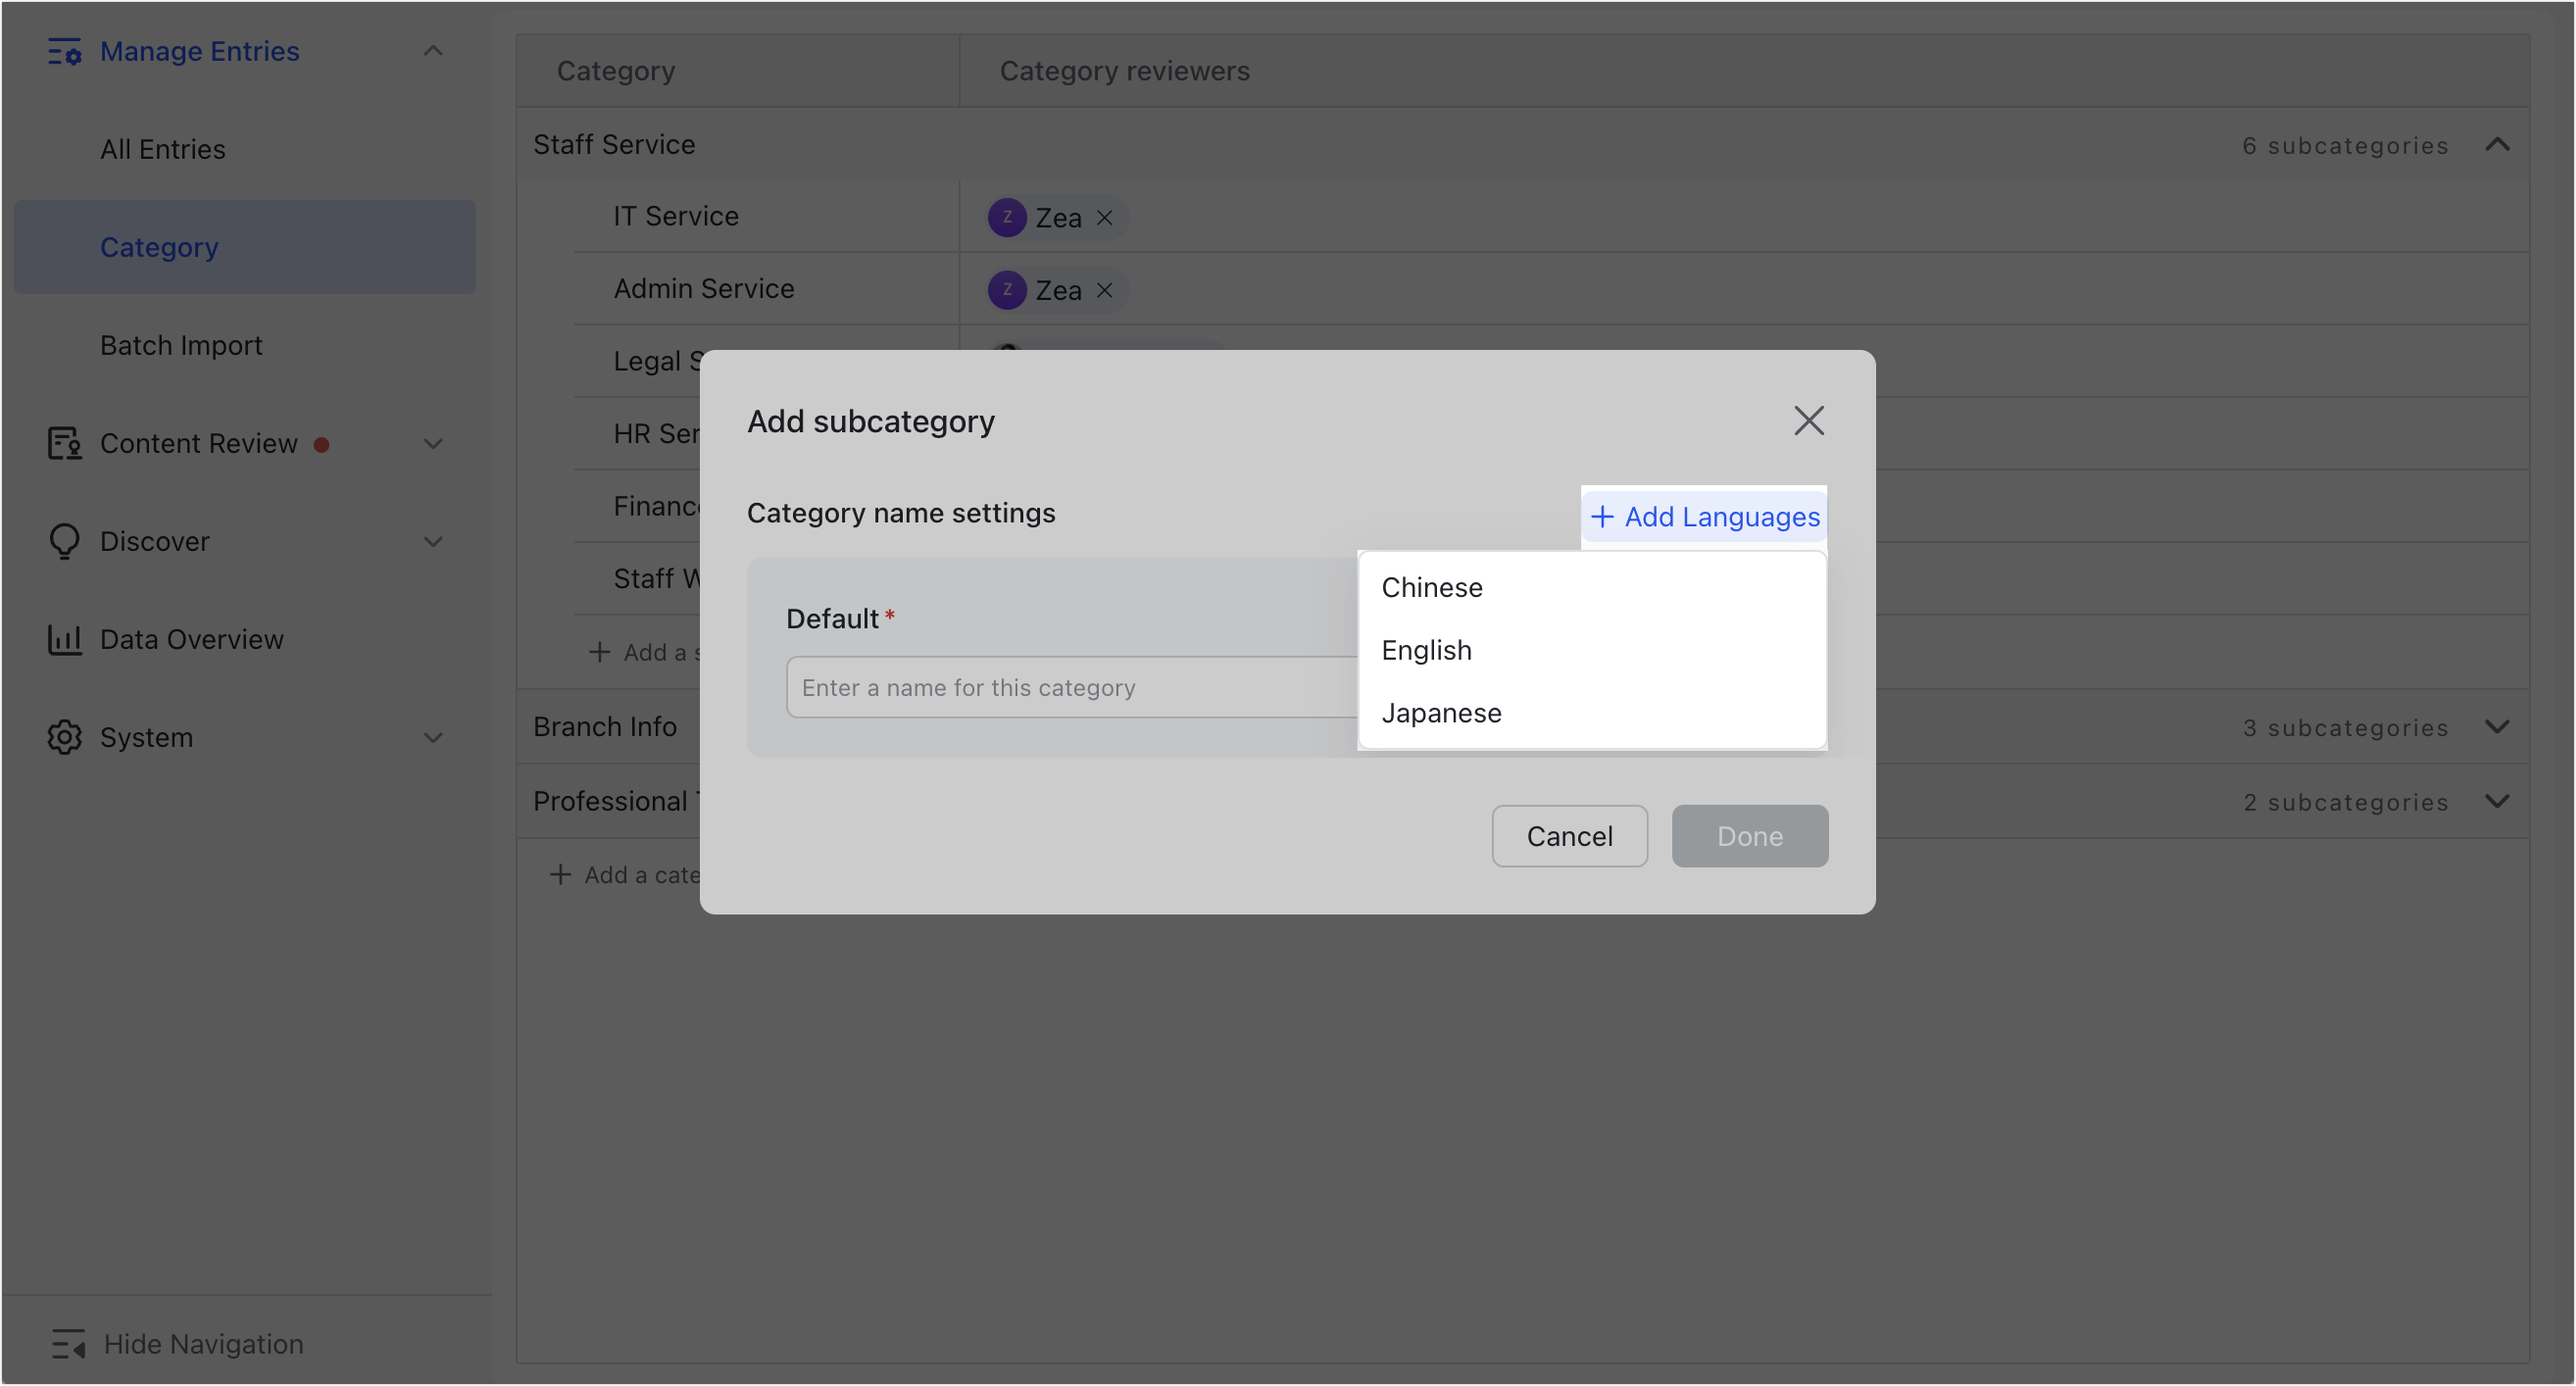
- Enter a name for the category. If your organization is multilingual, you can click Add Languages to provide localized names for the category in different languages (Chinese, English, and Japanese are available).
- Note: The display language of the category will be consistent with the display language set in the Lingo Admin Console or Lark app. If the category does not have a name that matches the display language set in the console or app, the default language name (the first name edited when creating the category) will be displayed.
250px|700px|reset
Edit a category
- Enter the Lingo Admin Console and go to Manage Entries > Category in the left sidebar.
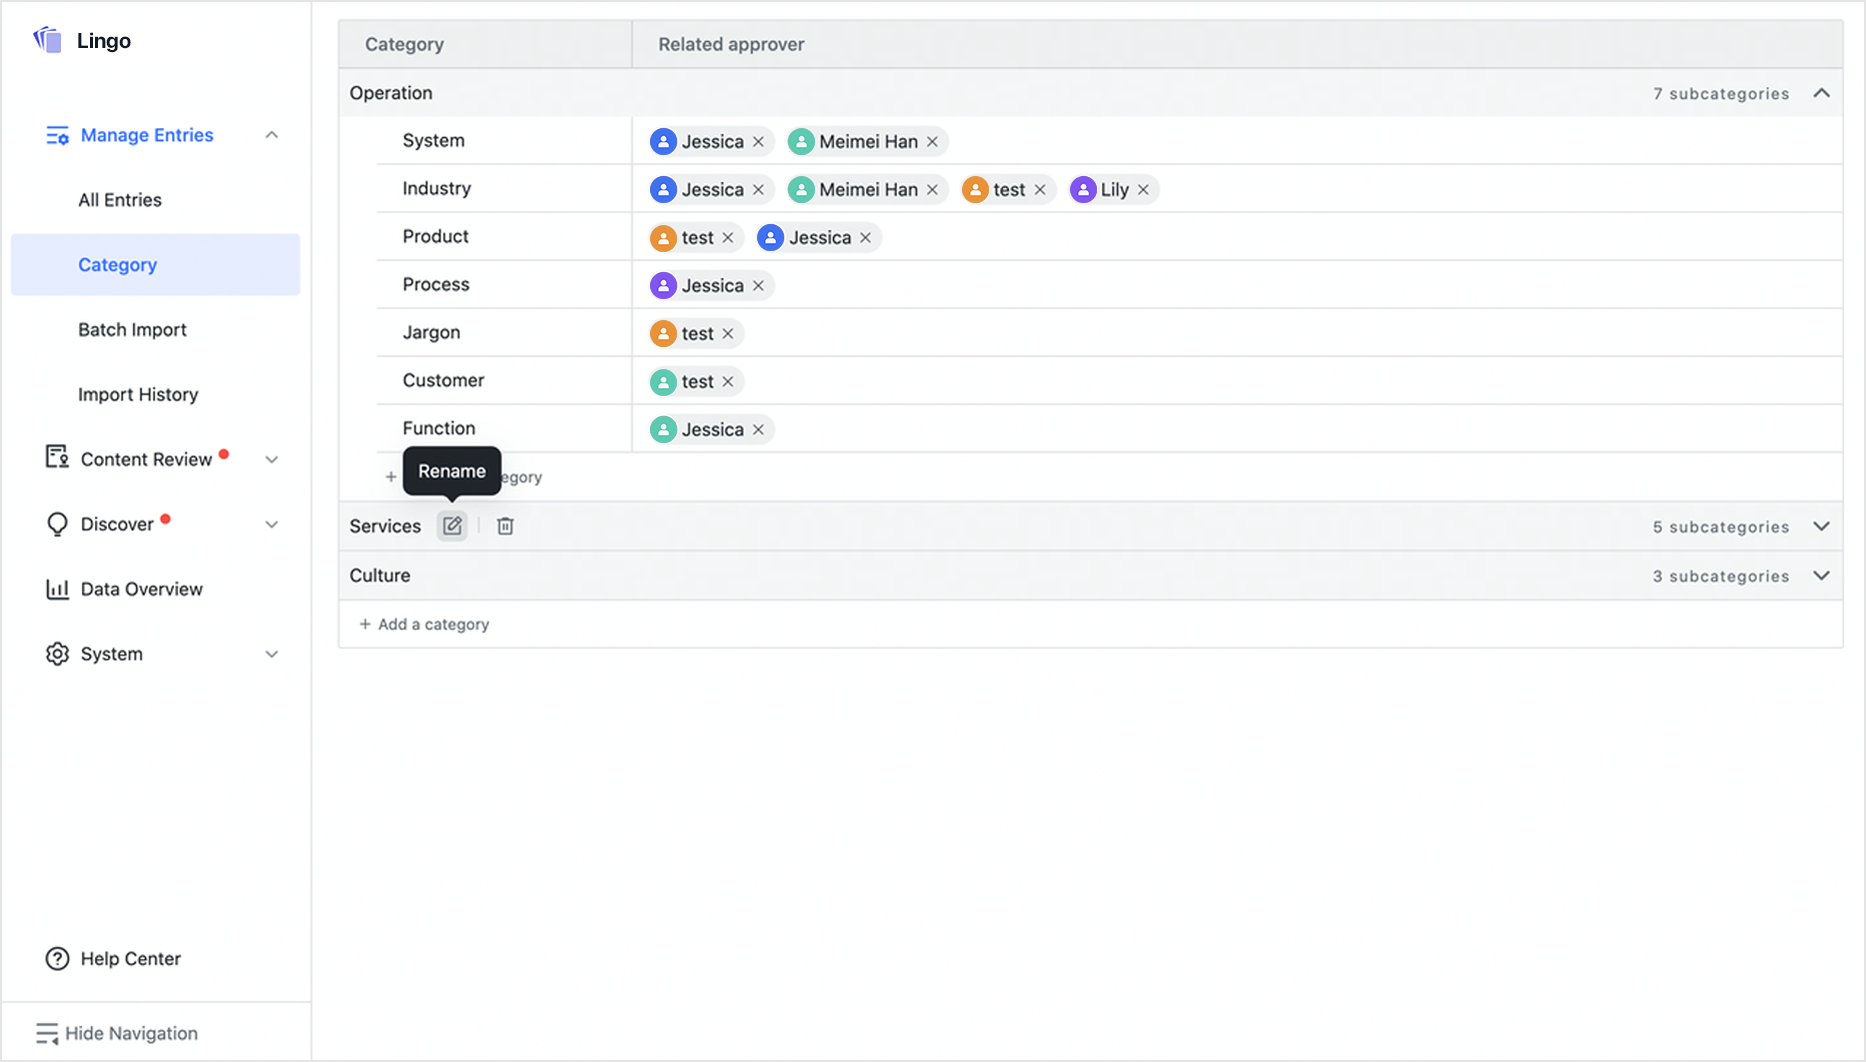
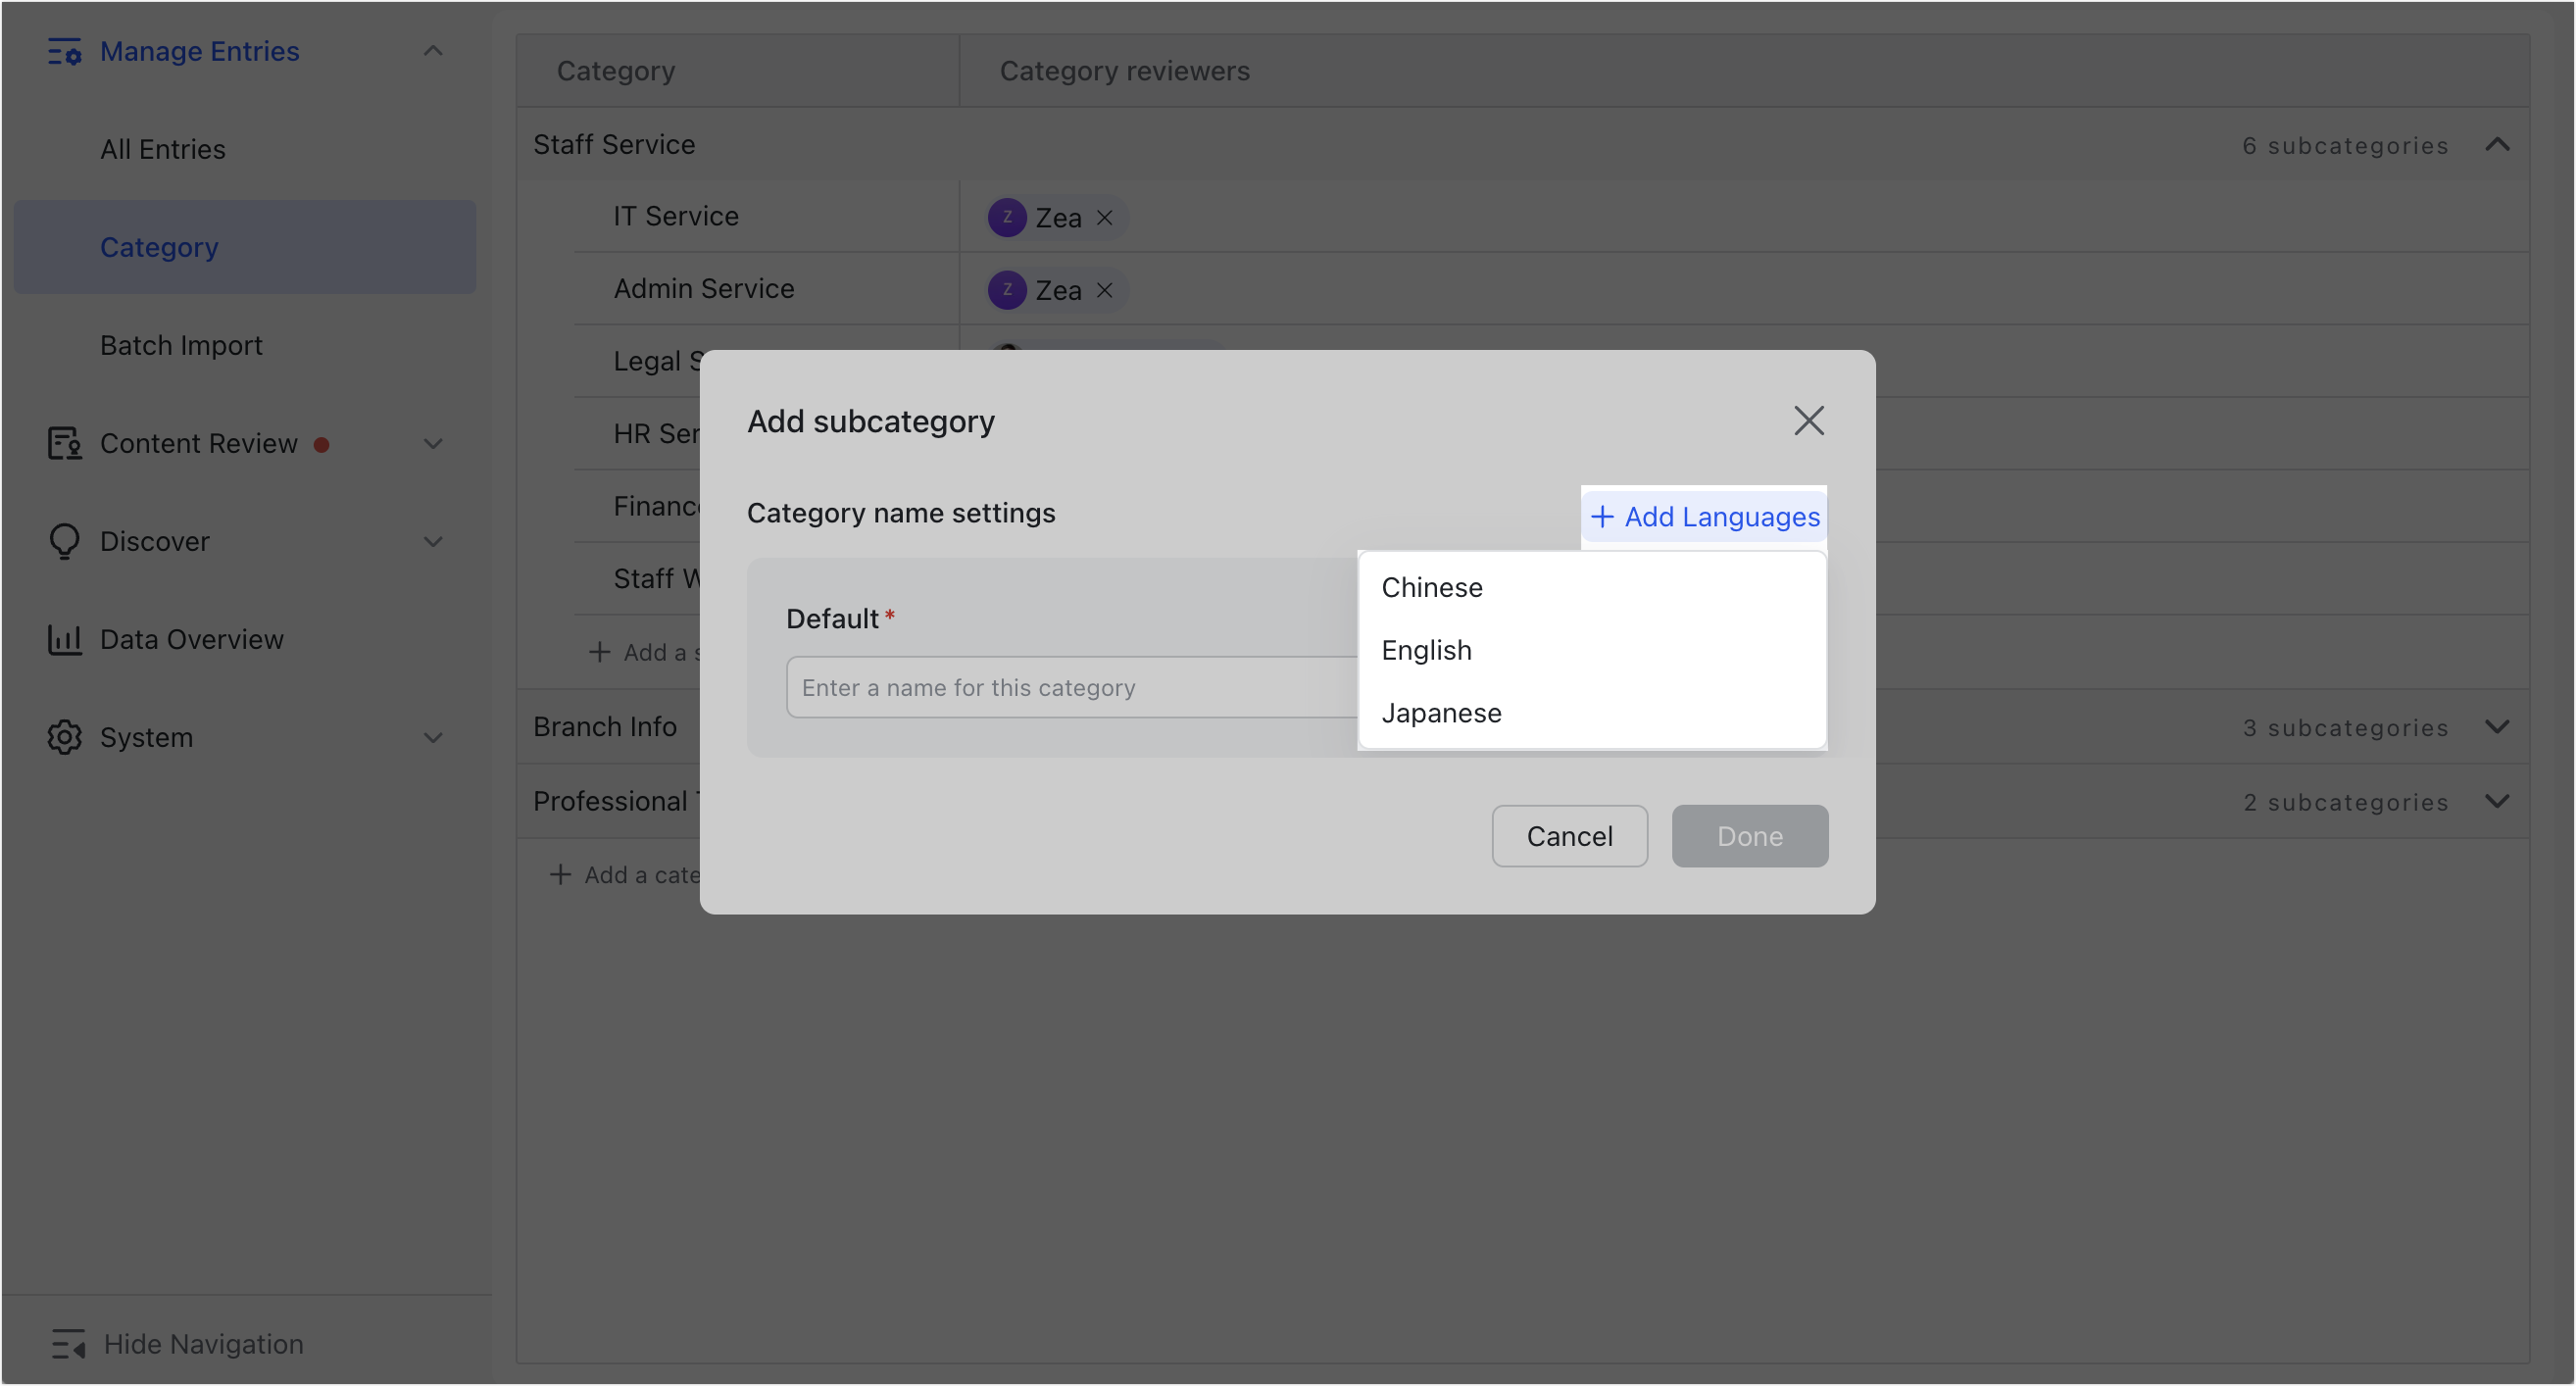
- Hover over the entry category name and click the Rename icon. Click Add Languages to provide localized names for the category if needed.
250px|700px|reset
250px|700px|reset
Note: The display language of the category is consistent with the display language set in the Lingo Admin Console or Lark app. If the category does not have a language name that is consistent with the language set in the console or app, the name for the default language (the language name first edited when creating the category) will be displayed.
For example, if you add an English name for the category:
- If the display language set for the Lingo Admin Console is English, you will see the English category name on the Category and All Entries pages, as well as on Lingo cards.

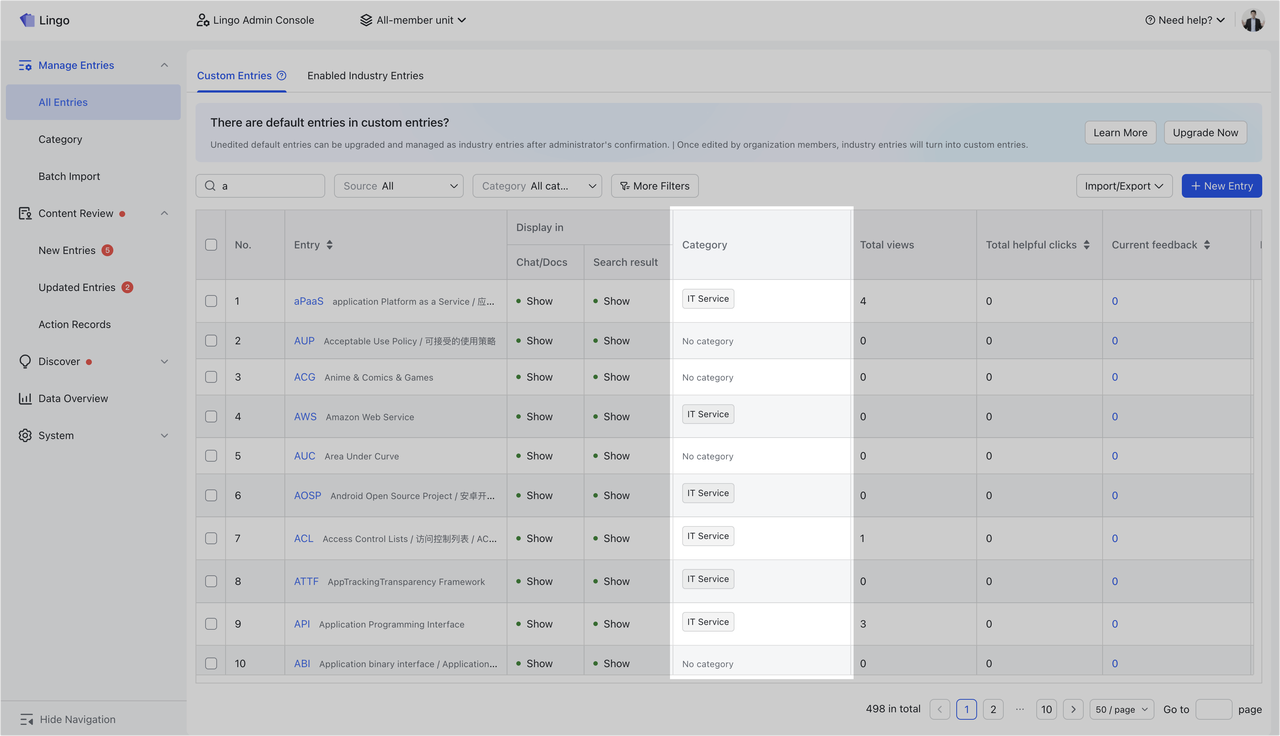
250px|700px|reset
250px|700px|reset
- If the display language for the Lark app is set to English, members will see the English category name on the Lingo homepage and on Lingo cards.
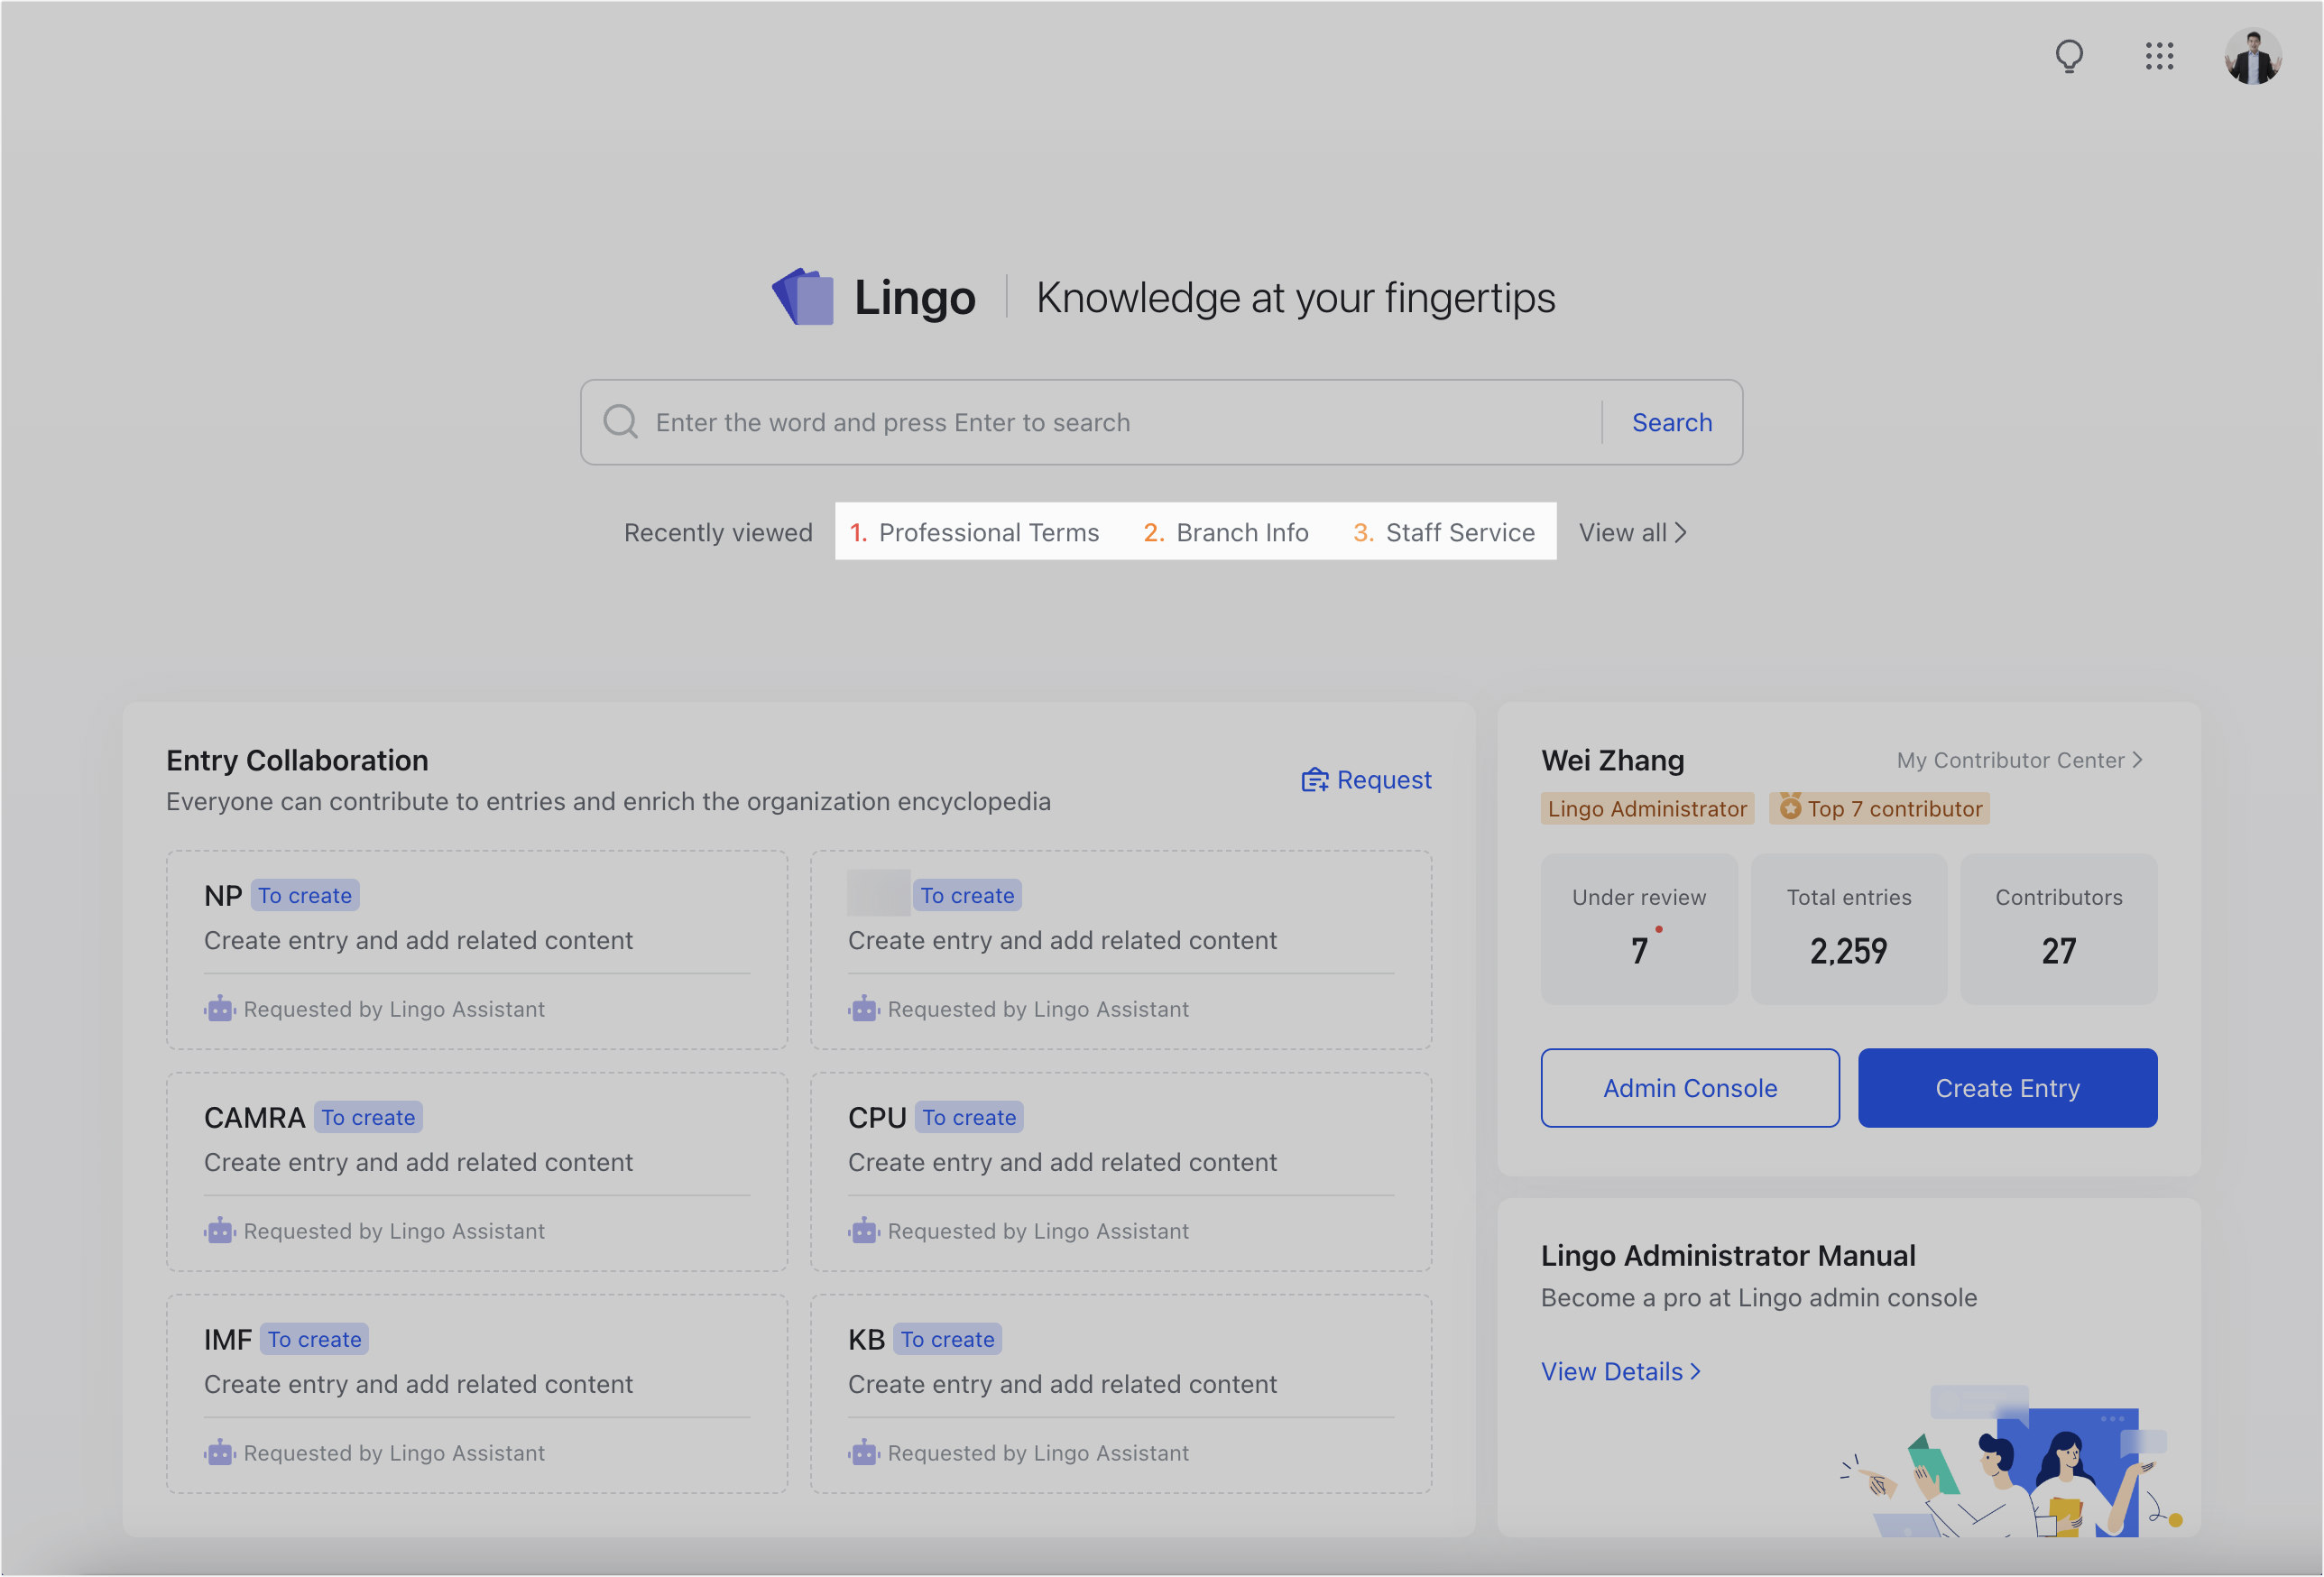
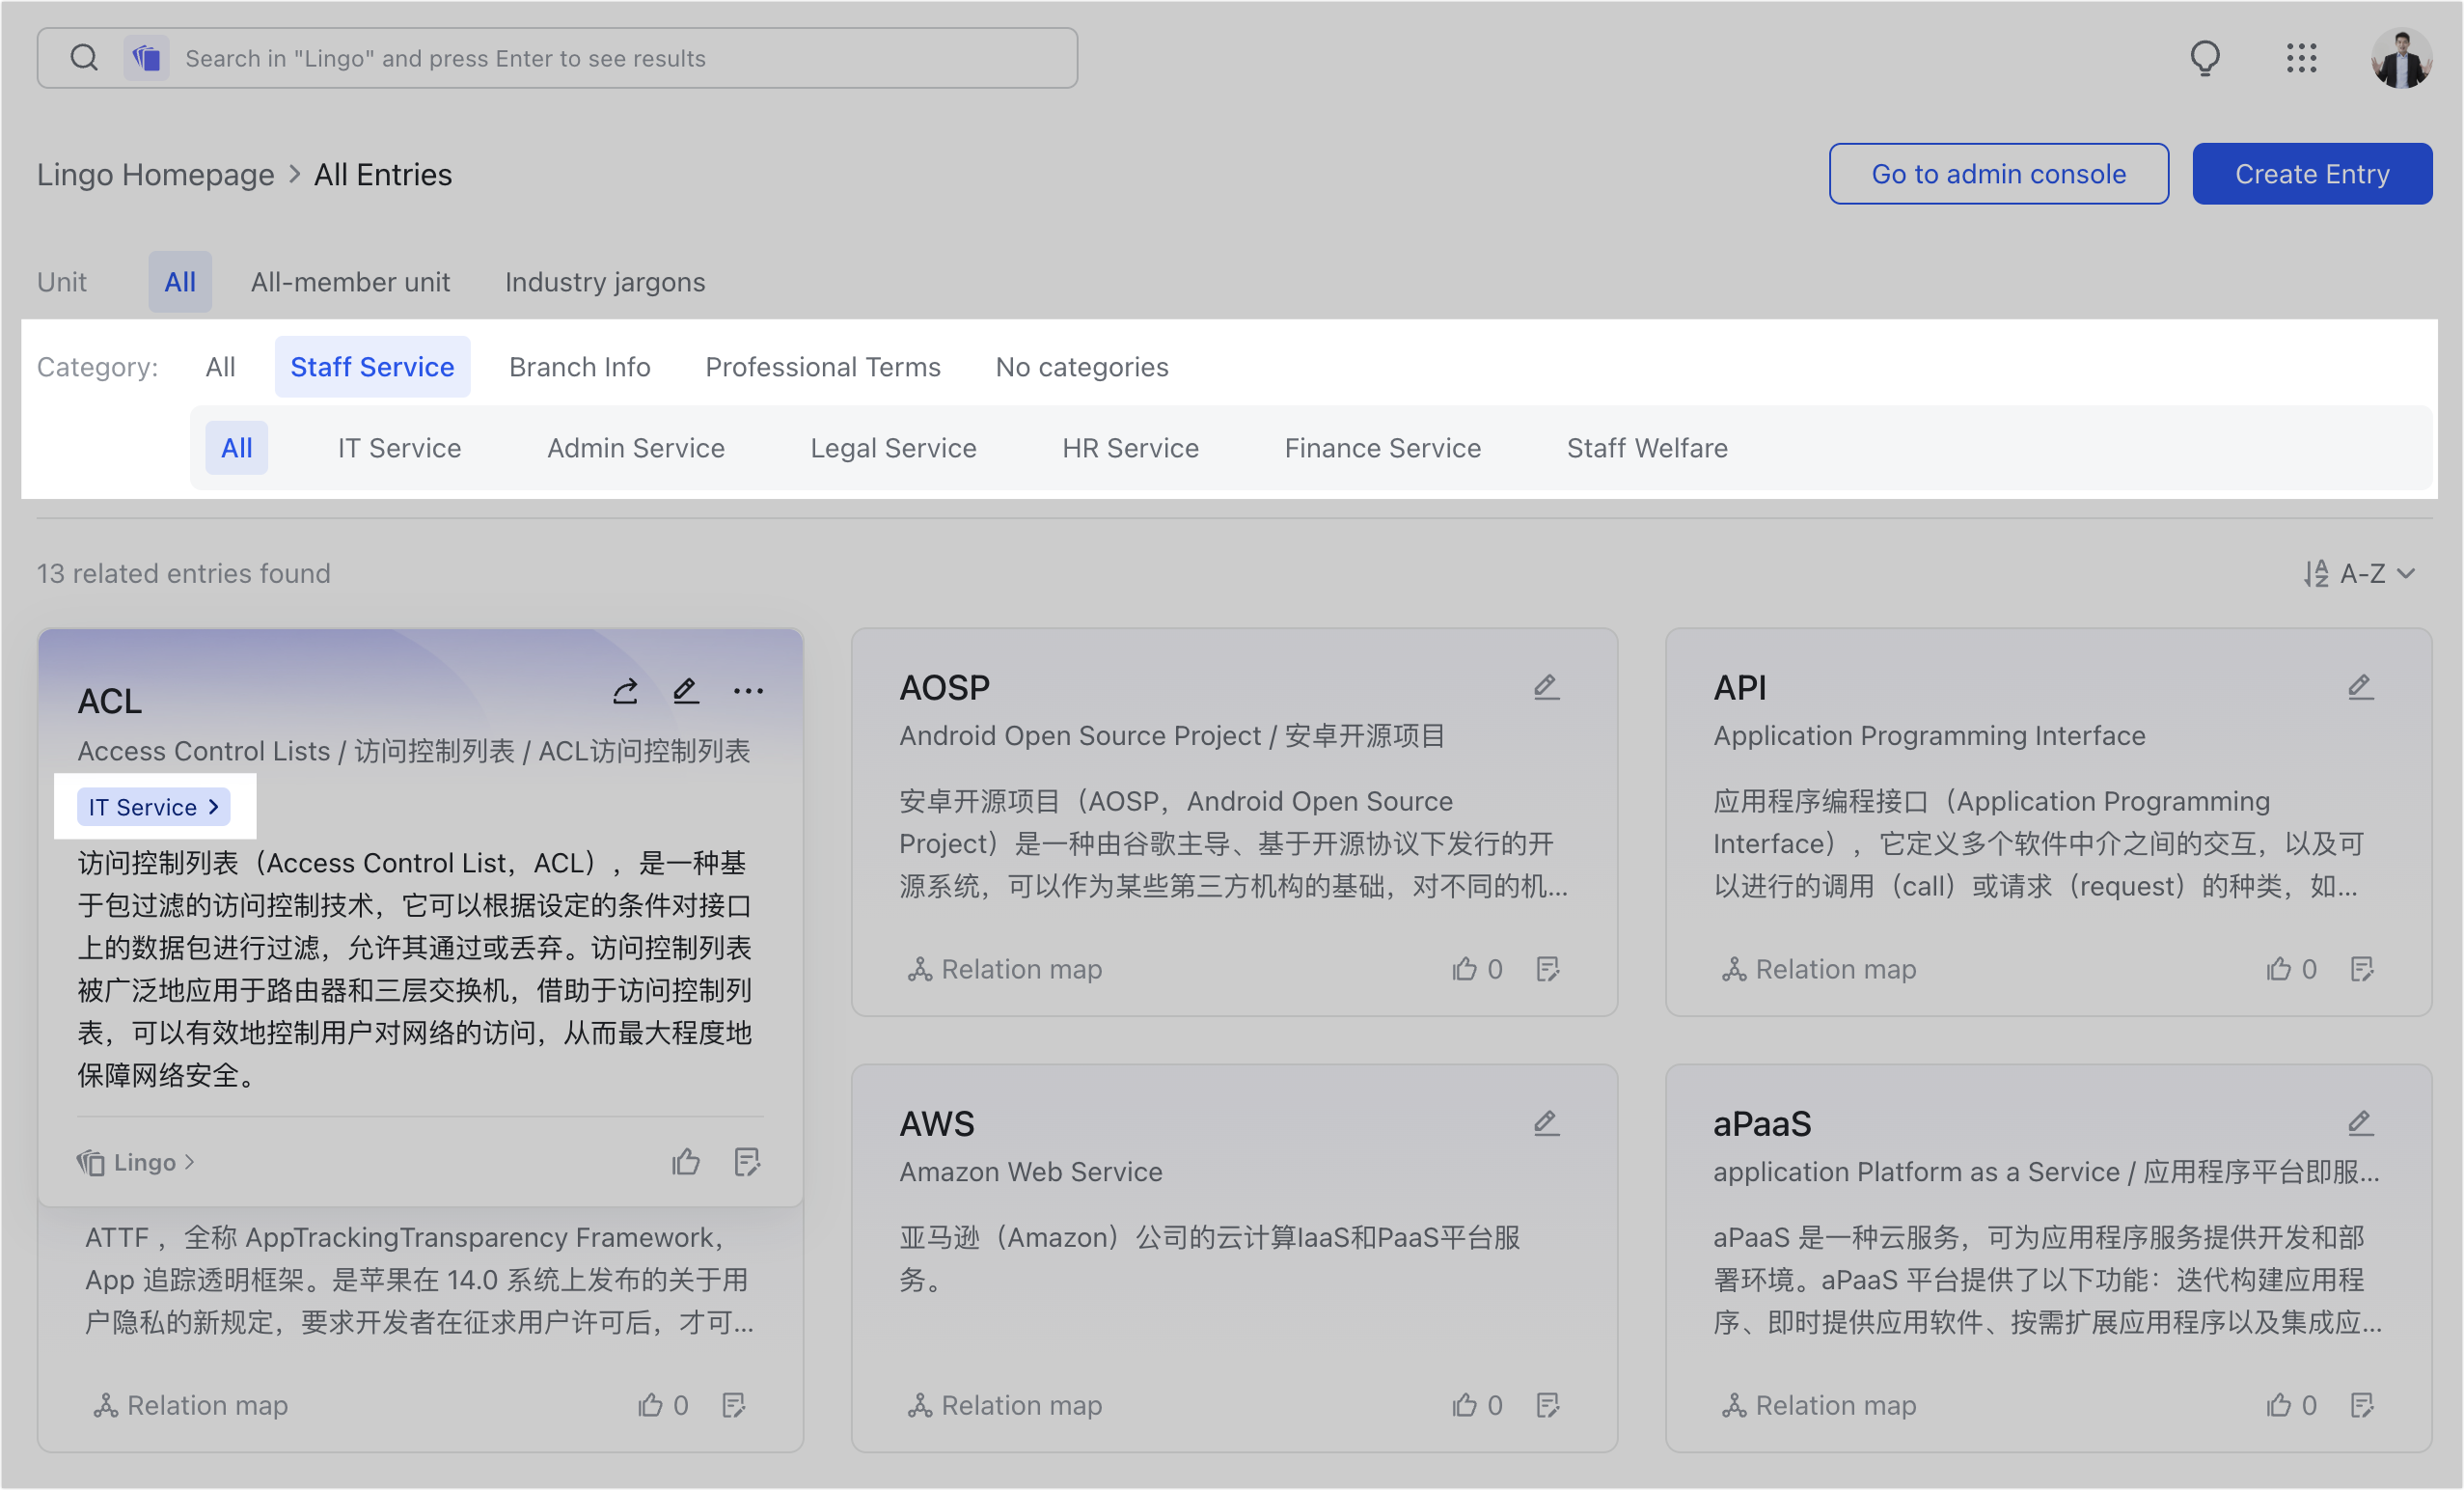
250px|700px|reset
250px|700px|reset
Besides renaming categories, you can also assign or remove reviewers for subcategories. Members will receive a notification from Lingo if you add or remove them as reviewers. To learn more, see Add and delete related approvers for entry categories.
Delete a category
- Enter the Lingo Admin Console and go to Manage Entries > Category in the left sidebar.
- Hover over the category name and click the Delete icon.
- Click Delete in the confirmation window.

250px|700px|reset
Add existing entries to a category
- Go to Manage Entries > All Entries.
- Select the entries you want to add a category for.
- Click Set Category at the bottom of the page.
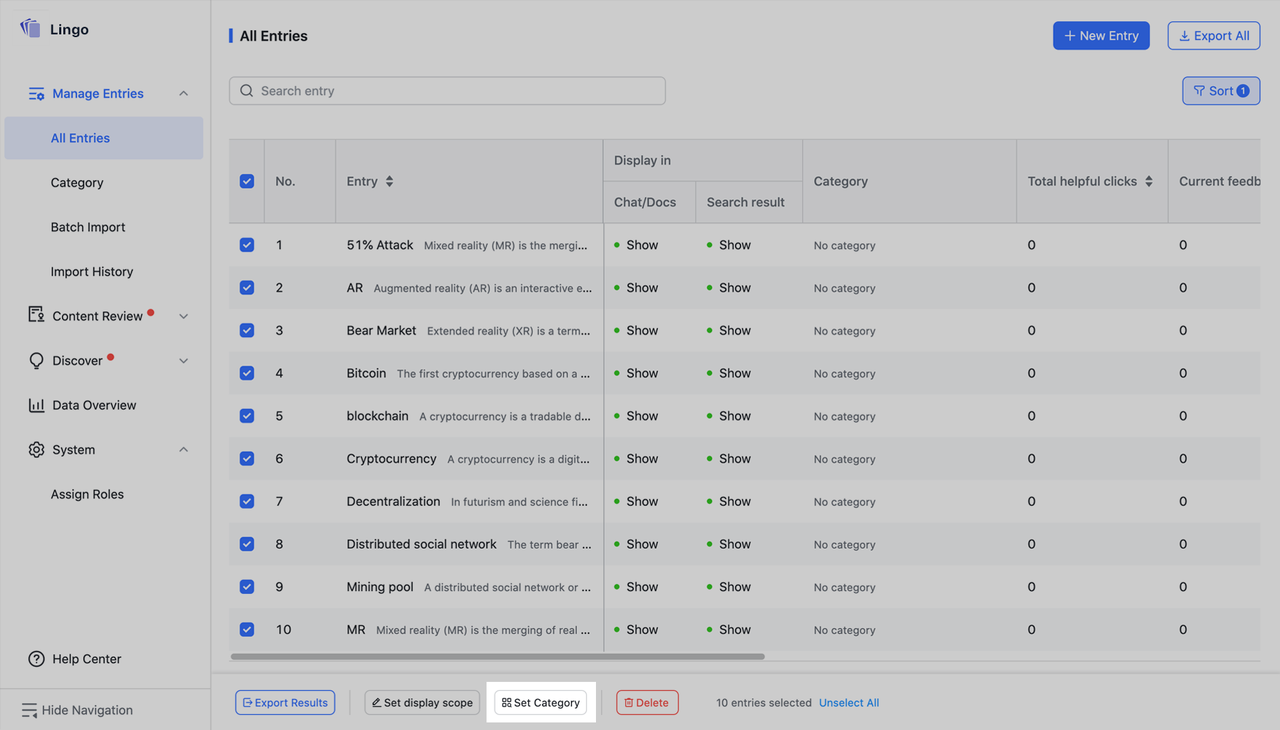
250px|700px|reset
- Search for a category by name, select the one you want, then click Save.

250px|700px|reset
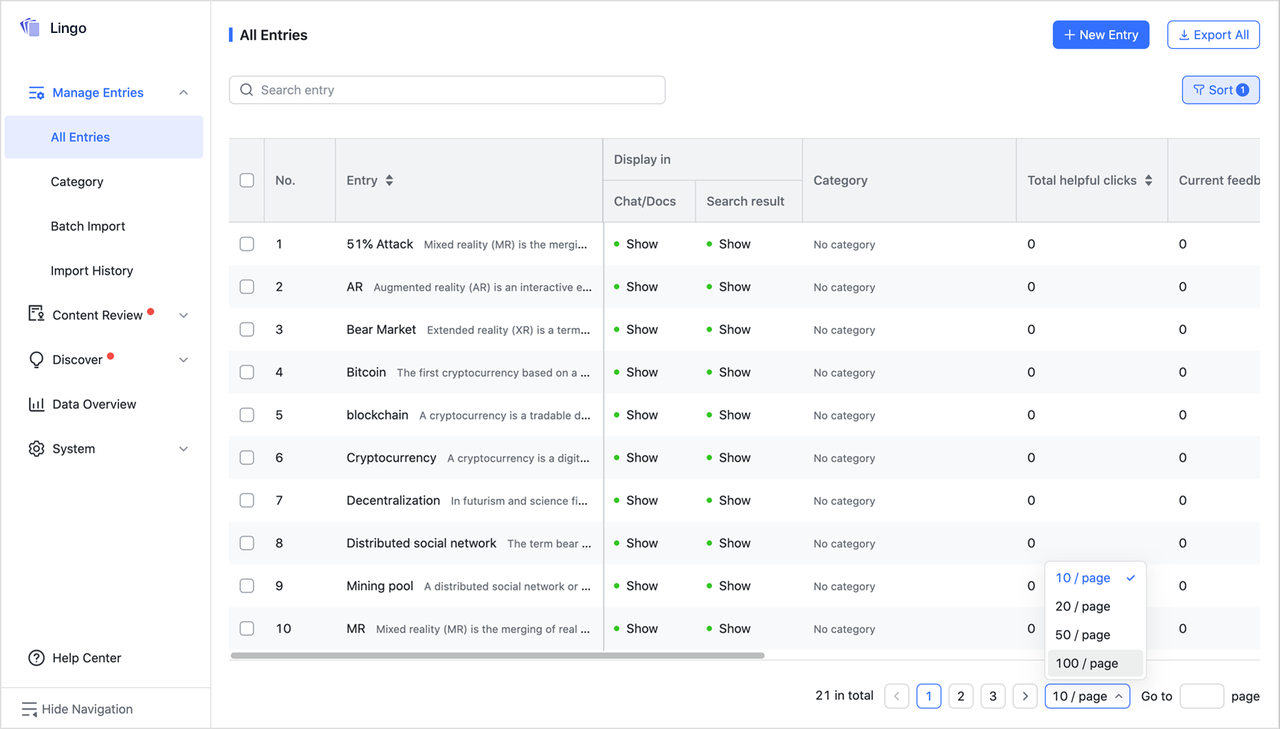
If you need to batch select more entries or want to see more entries per page, click [number of entries] / page in the lower-right corner of the page and select how many entries to display per page.
250px|700px|reset
III. FAQs
