
I. Intro
Who can perform these steps: Primary administrators or administrators with Attendance management permissions.
Lark Attendance provides two types of attendance reports to help manage your attendance data:
- Default reports: Automatic daily and monthly reports that cannot be deleted. Every administrator can edit the content.
- Custom reports: Tailored reports with customized fields and permissions. The Attendance administrators can create, view, edit, and delete custom reports. Every custom report has its own administrators. Custom report A's administrator won't be able to access custom report B if they are neither a primary administrator nor selected in custom report B's settings.
II. Steps
Default reports
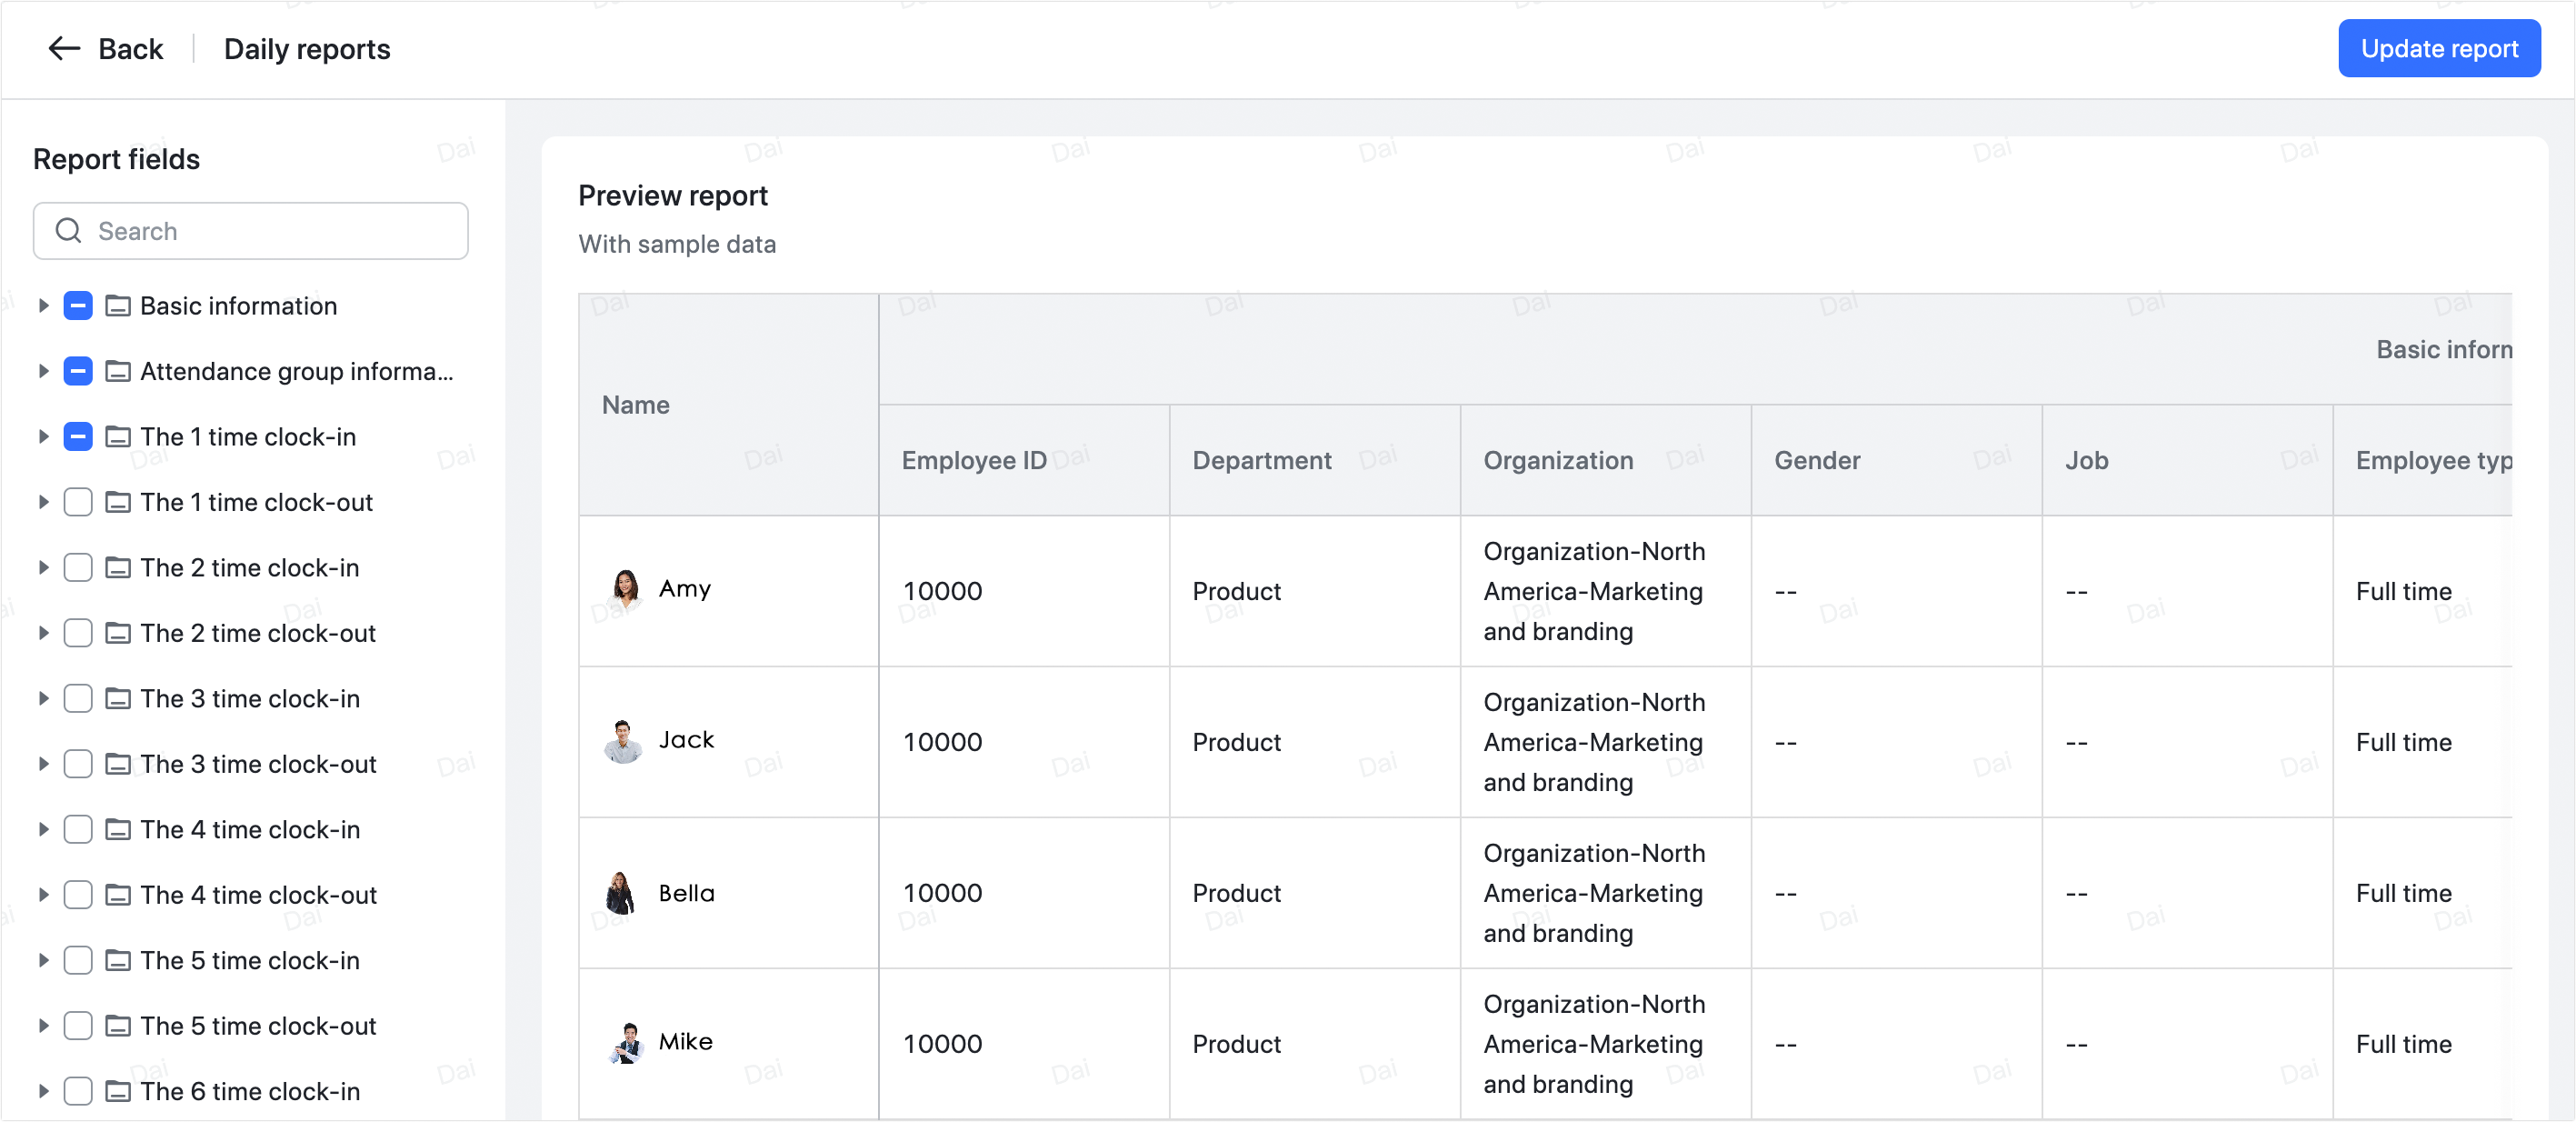
Attendance will automatically create daily statistics and monthly summary reports. Administrators can view these default reports and edit which fields appear, but cannot delete them.
Note: Every administrator has permission to view and edit these two reports.
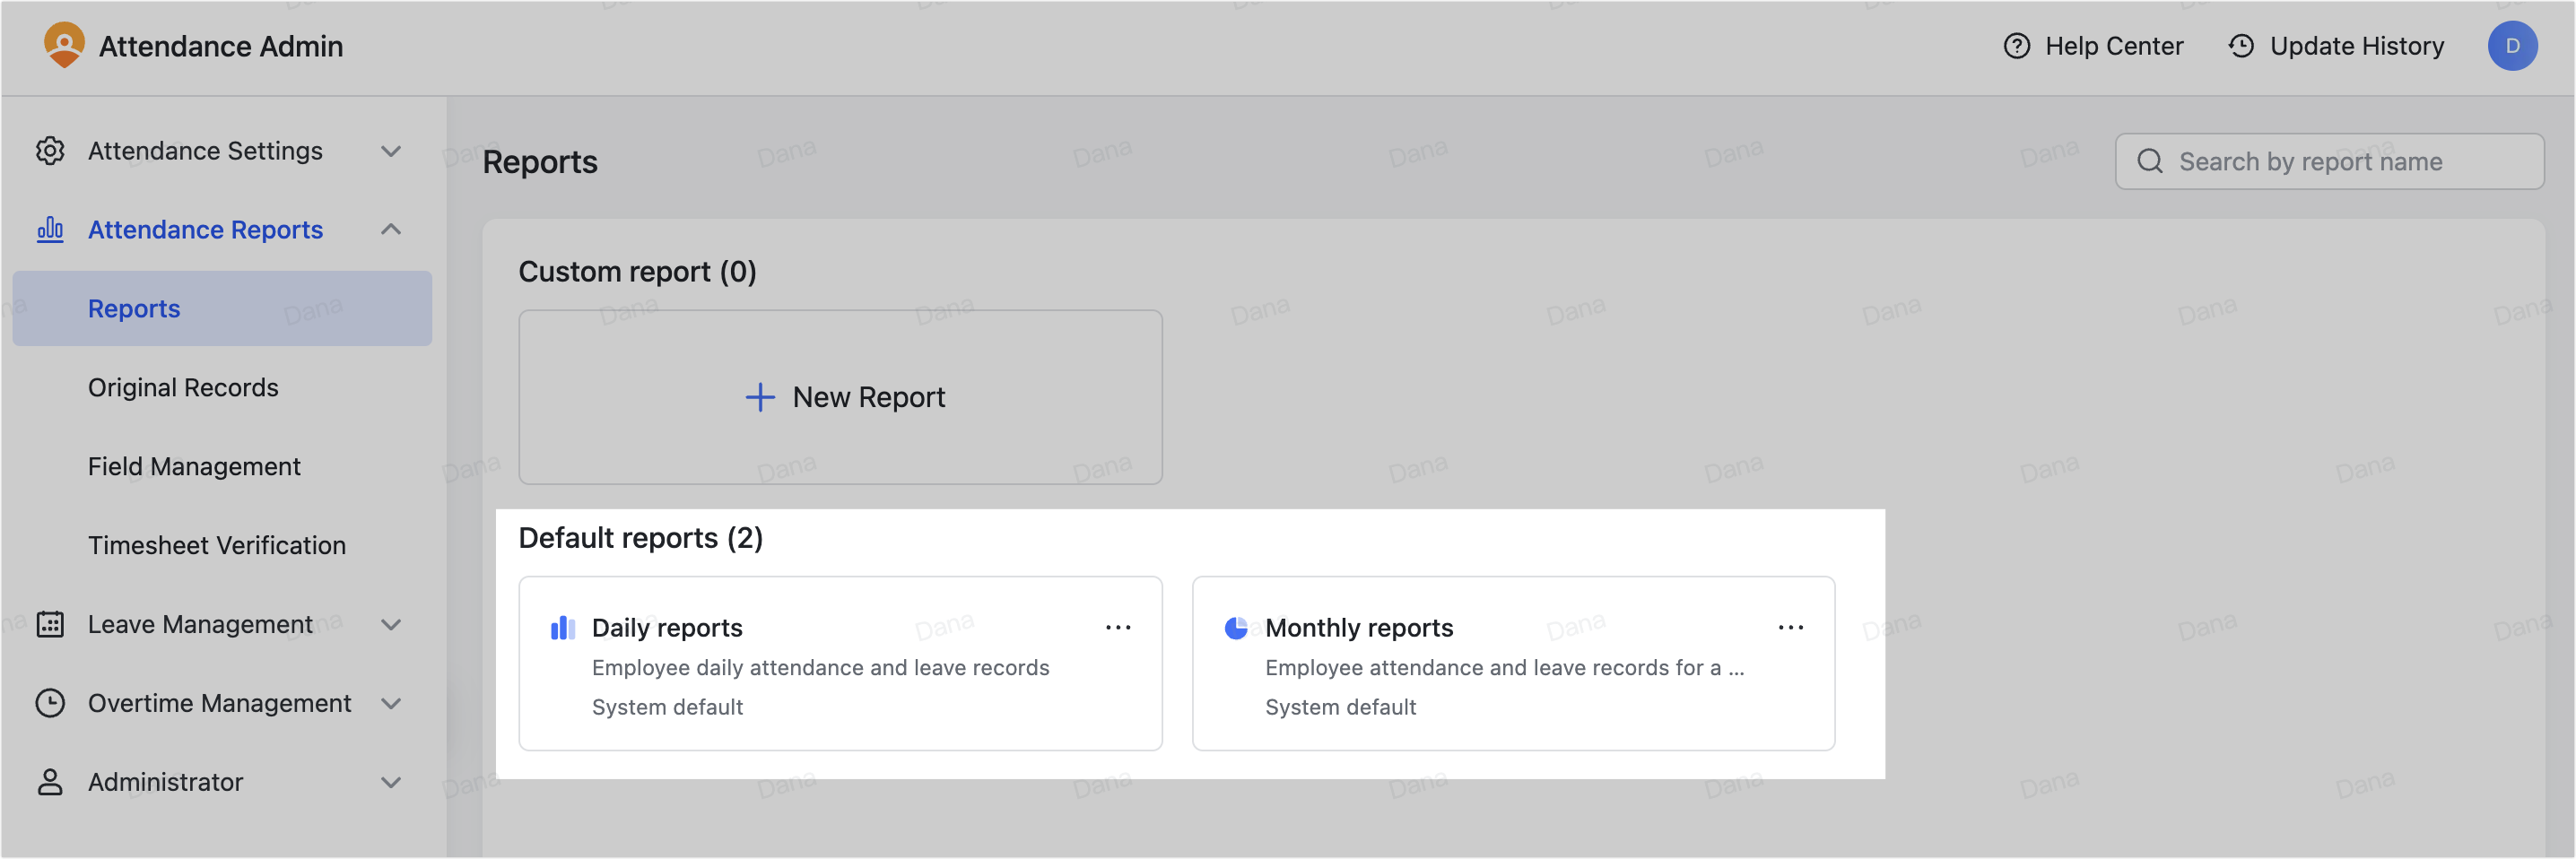
View and export default reports
- Open the Attendance admin console and go to Attendance Reports > Reports.
- Select Daily reports or Monthly reports.
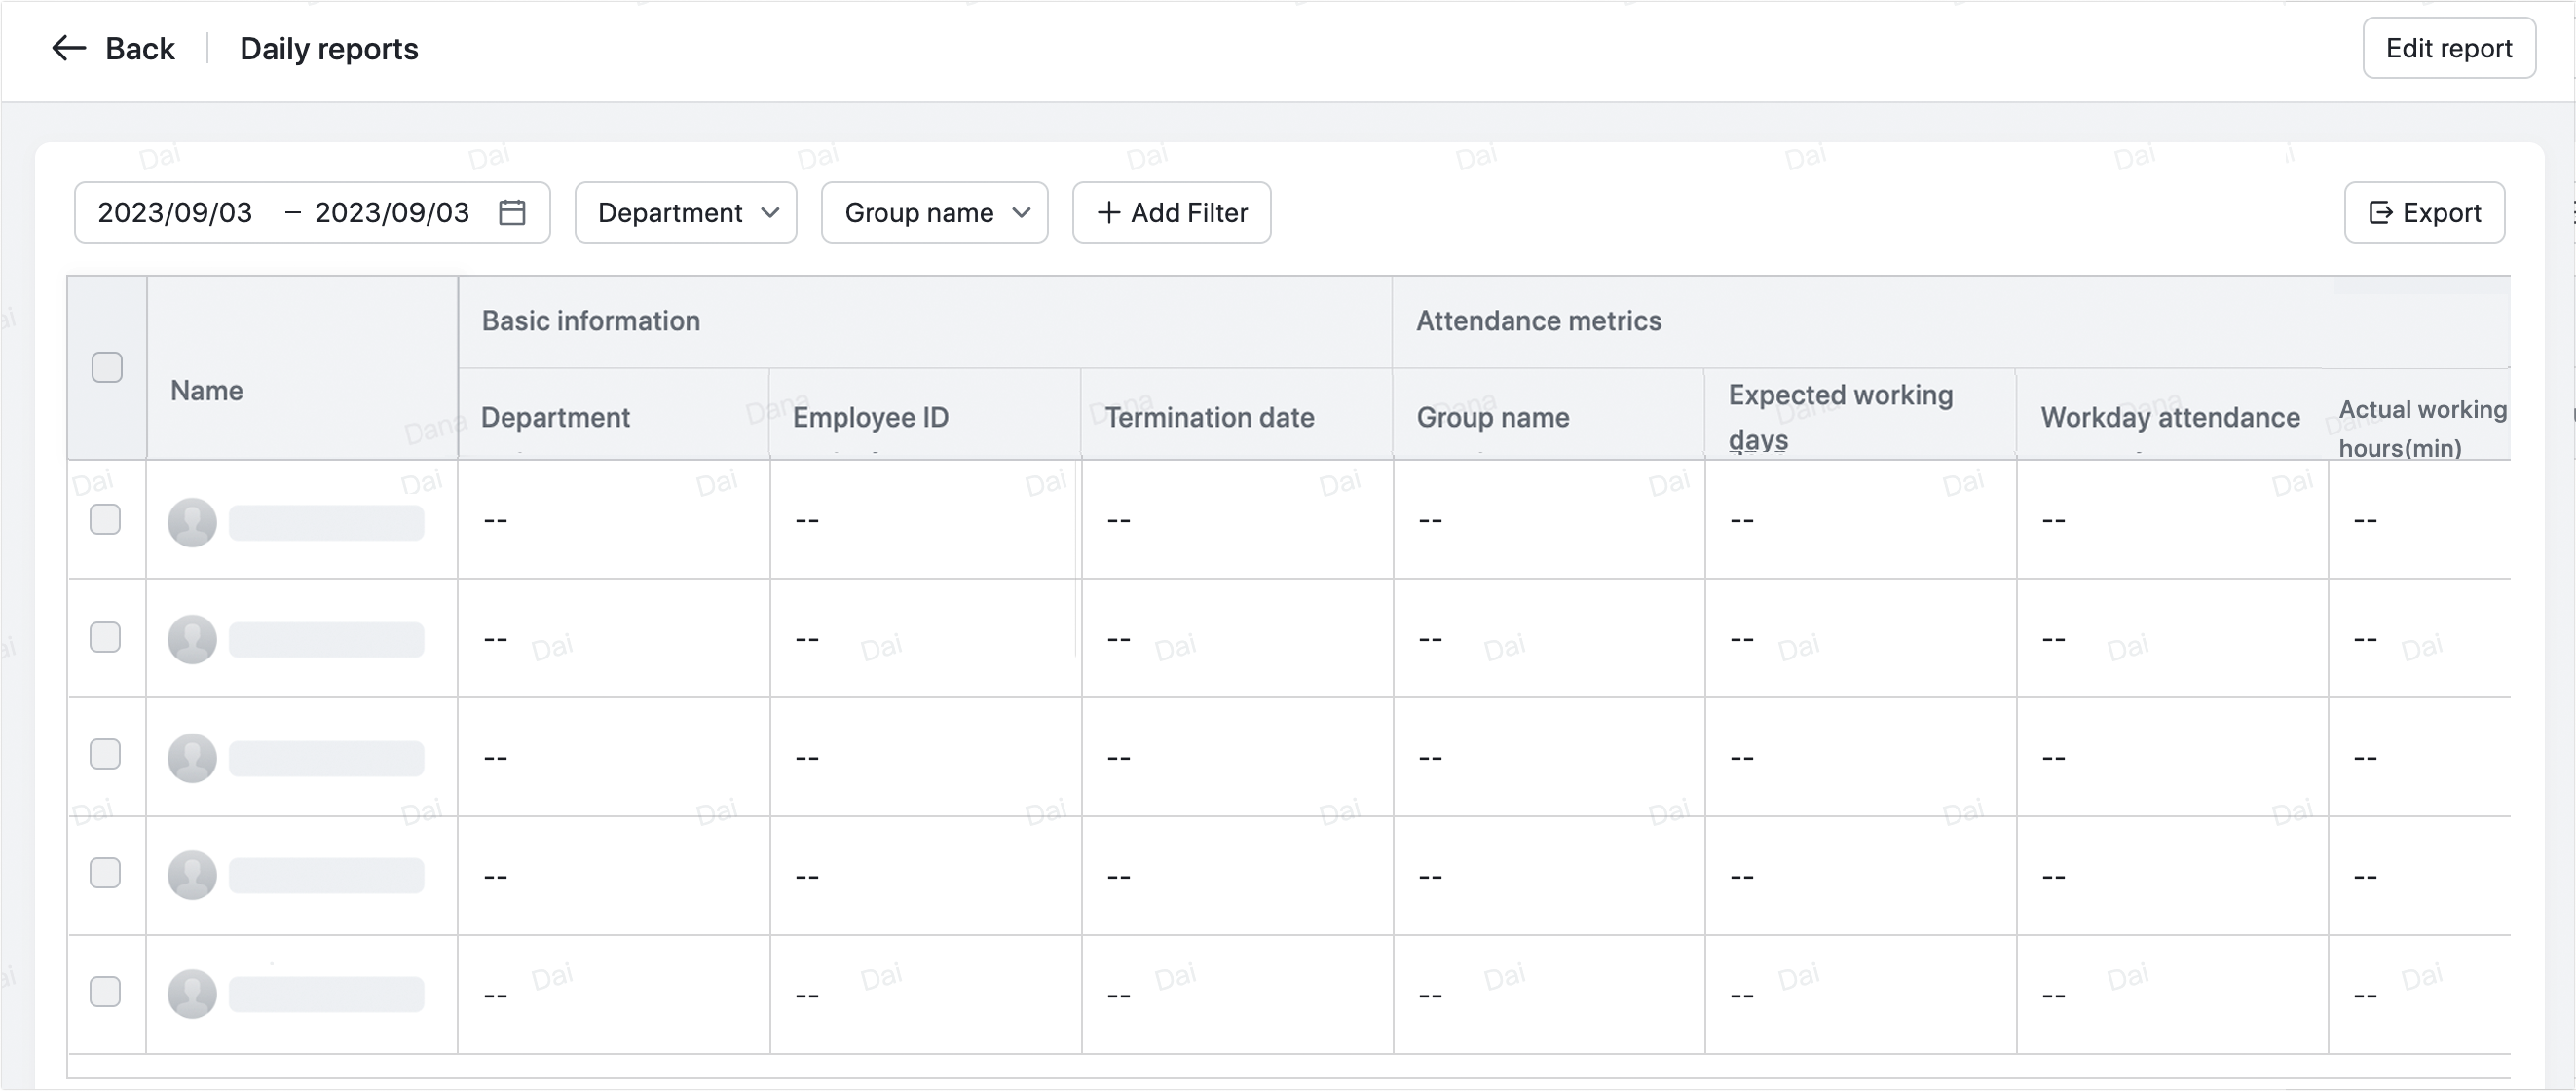
You can filter the report by date, department, group names and so on, or click Export to download the report.
250px|700px|reset
250px|700px|reset
Edit default reports
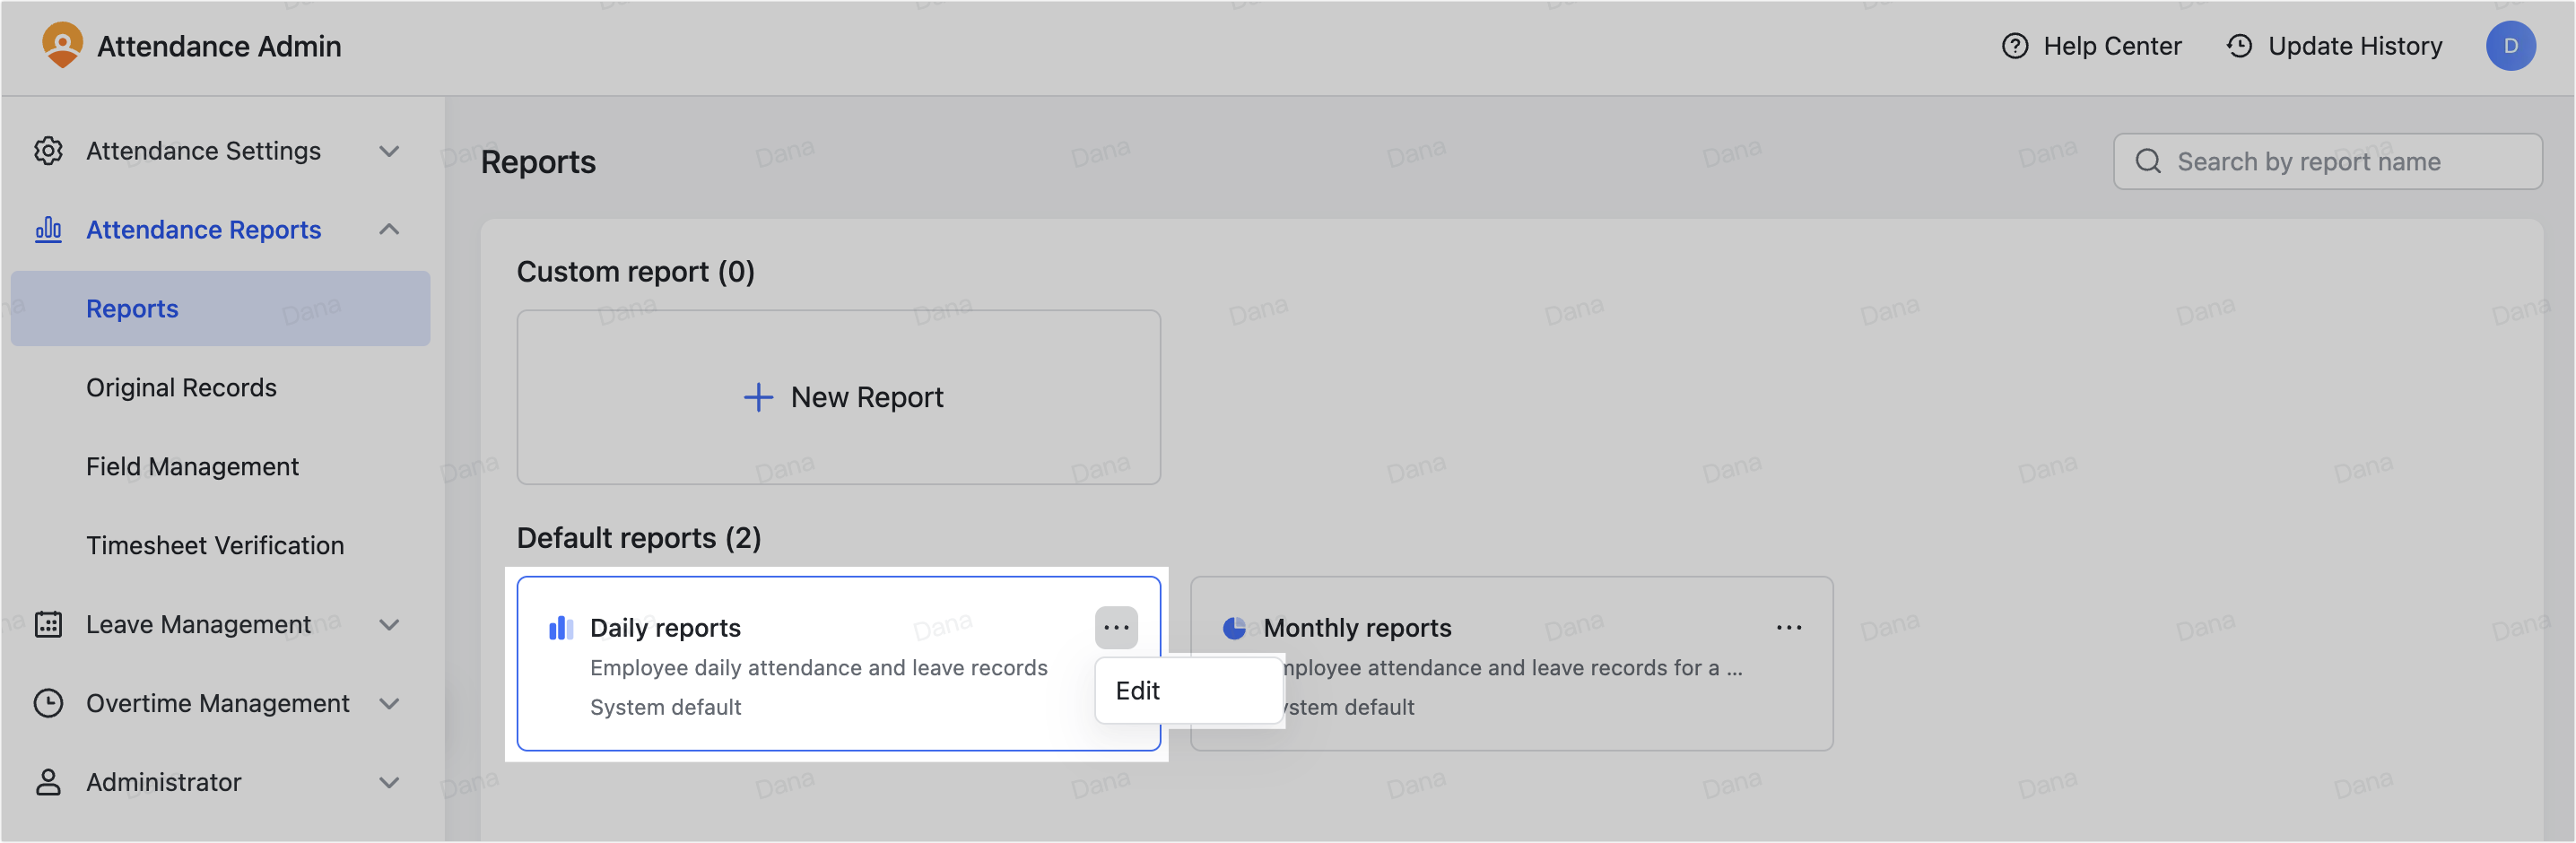
There are two ways to enter the edit page:
- Click the ··· More icon on a default report, then click Edit.
- Enter a default report, then click Edit report in the upper-right corner.
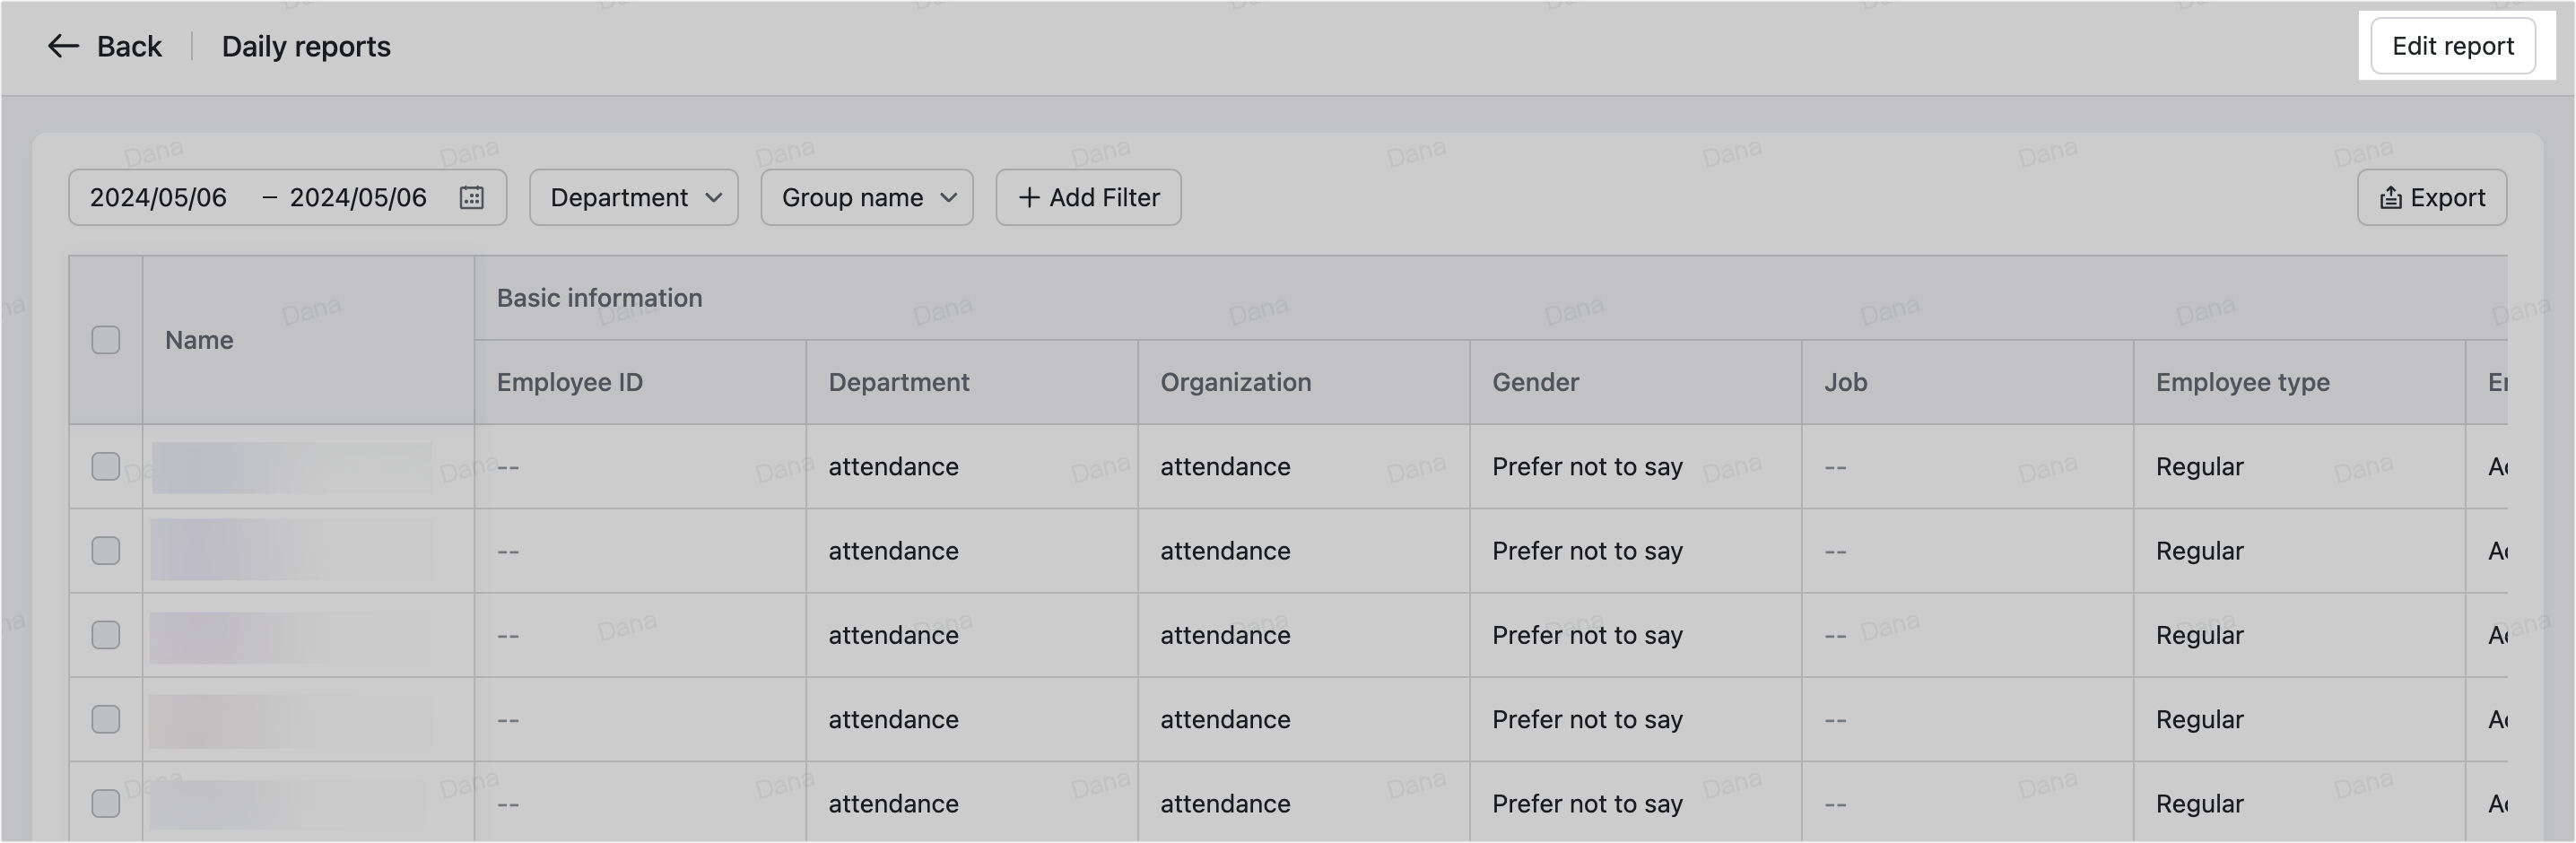
You can select the fields that you would like to display in the report from the list on the left, with the preview on the right. For more information about the fields, see Step 5 of the "Create custom reports" section.
250px|700px|reset
250px|700px|reset
Click Update report in the upper-right corner to save the changes.
Note: If any administrator makes changes to the default report, other administrators will also see the modified report content.
250px|700px|reset
To download the report, click Export.
Custom reports
Custom reports offer greater flexibility in presenting attendance data, as well as allowing different administrators to only see the reports relevant to their role.
Create custom reports
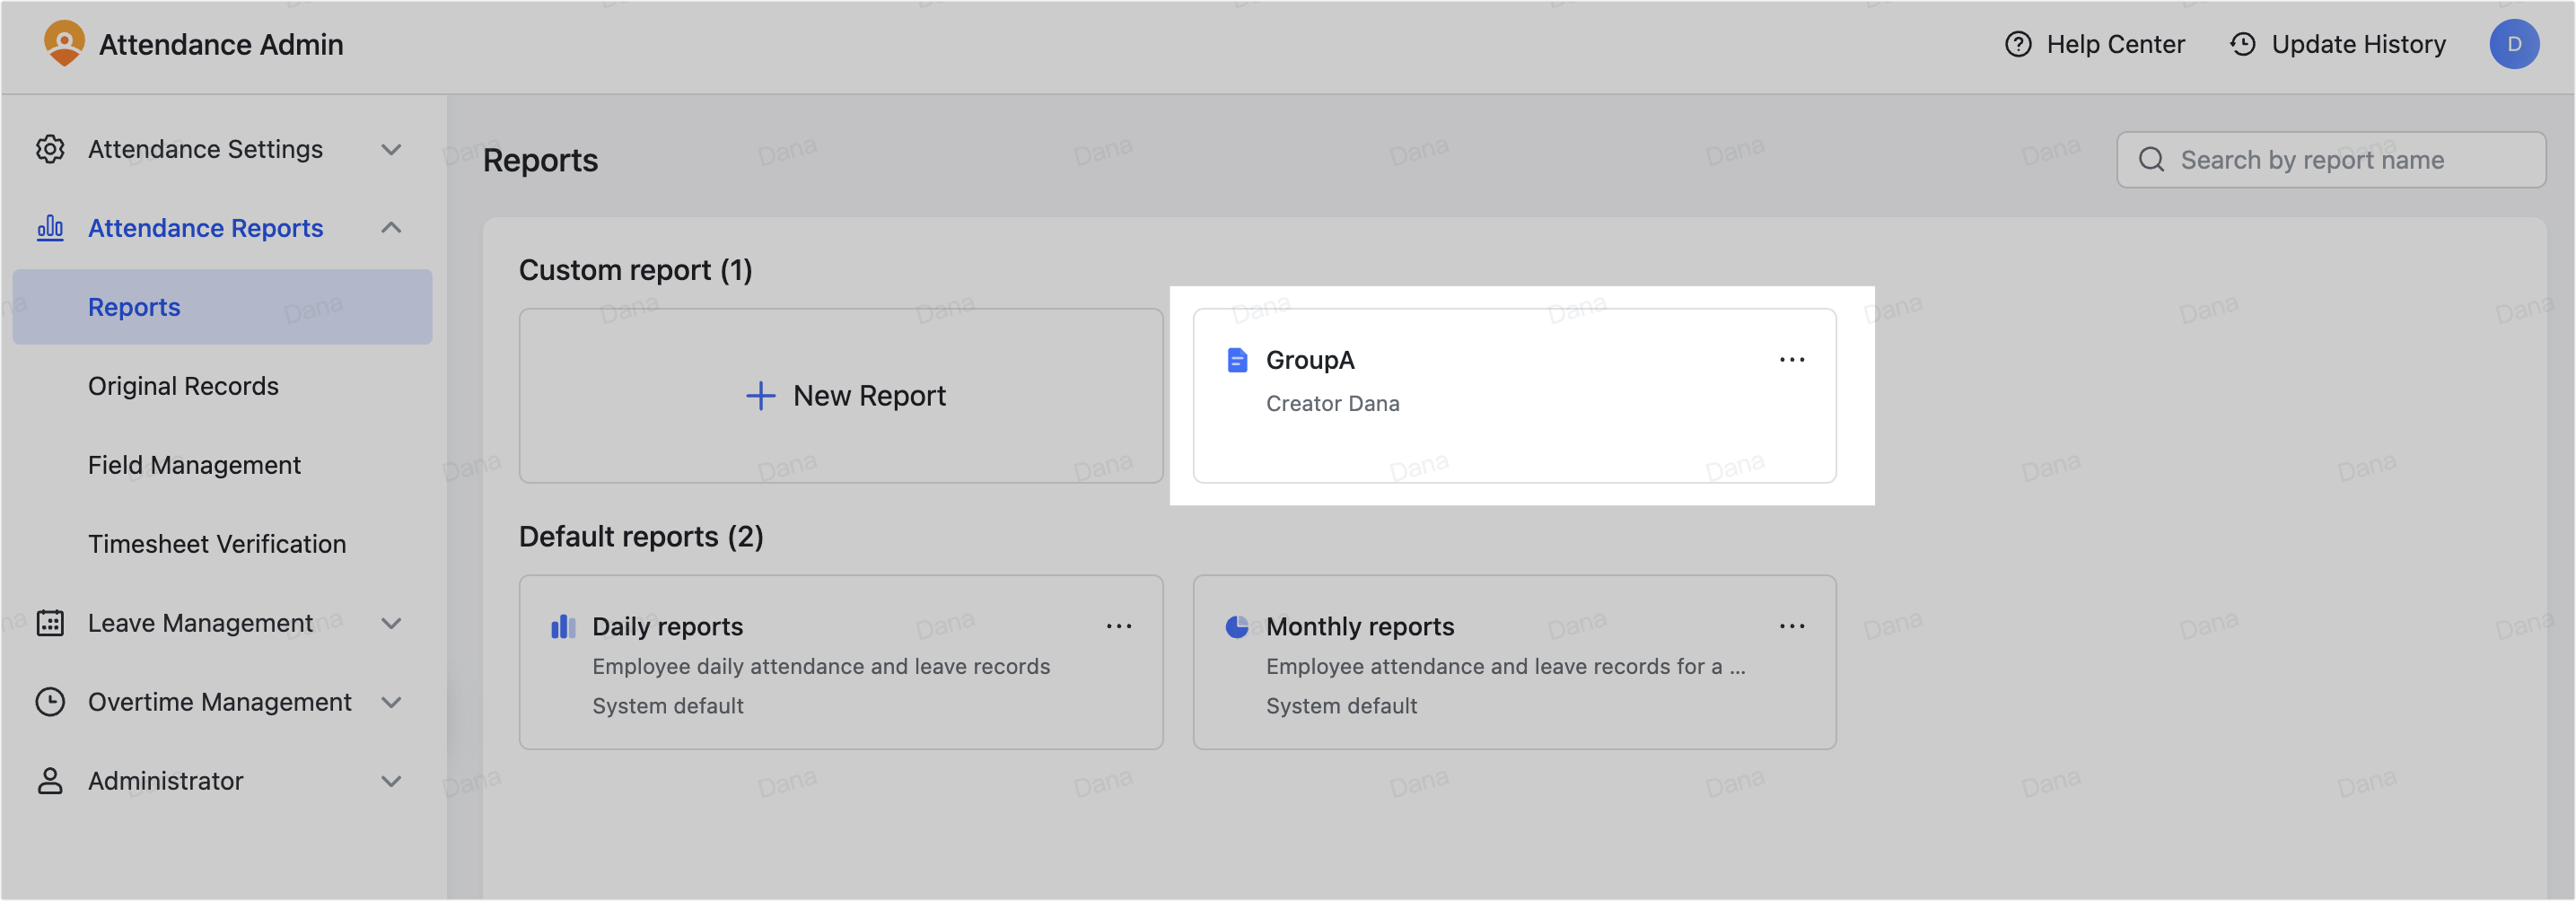
- Open the Attendance admin console and go to Attendance Reports > Reports.
- Click New Report.
- 250px|700px|reset
- Set the basic information in the prompted window.
- Report type:
- Daily record shows the attendance data of a member on a specific day.
- 250px|700px|reset
- Summary record shows the attendance statistics of a member in a period of time.
- 250px|700px|reset
- Who can edit/view this report: Choose from the attendance administrators. Only the specified attendance administrators can view or edit this report.
- 250px|700px|reset
- Click Confirm.
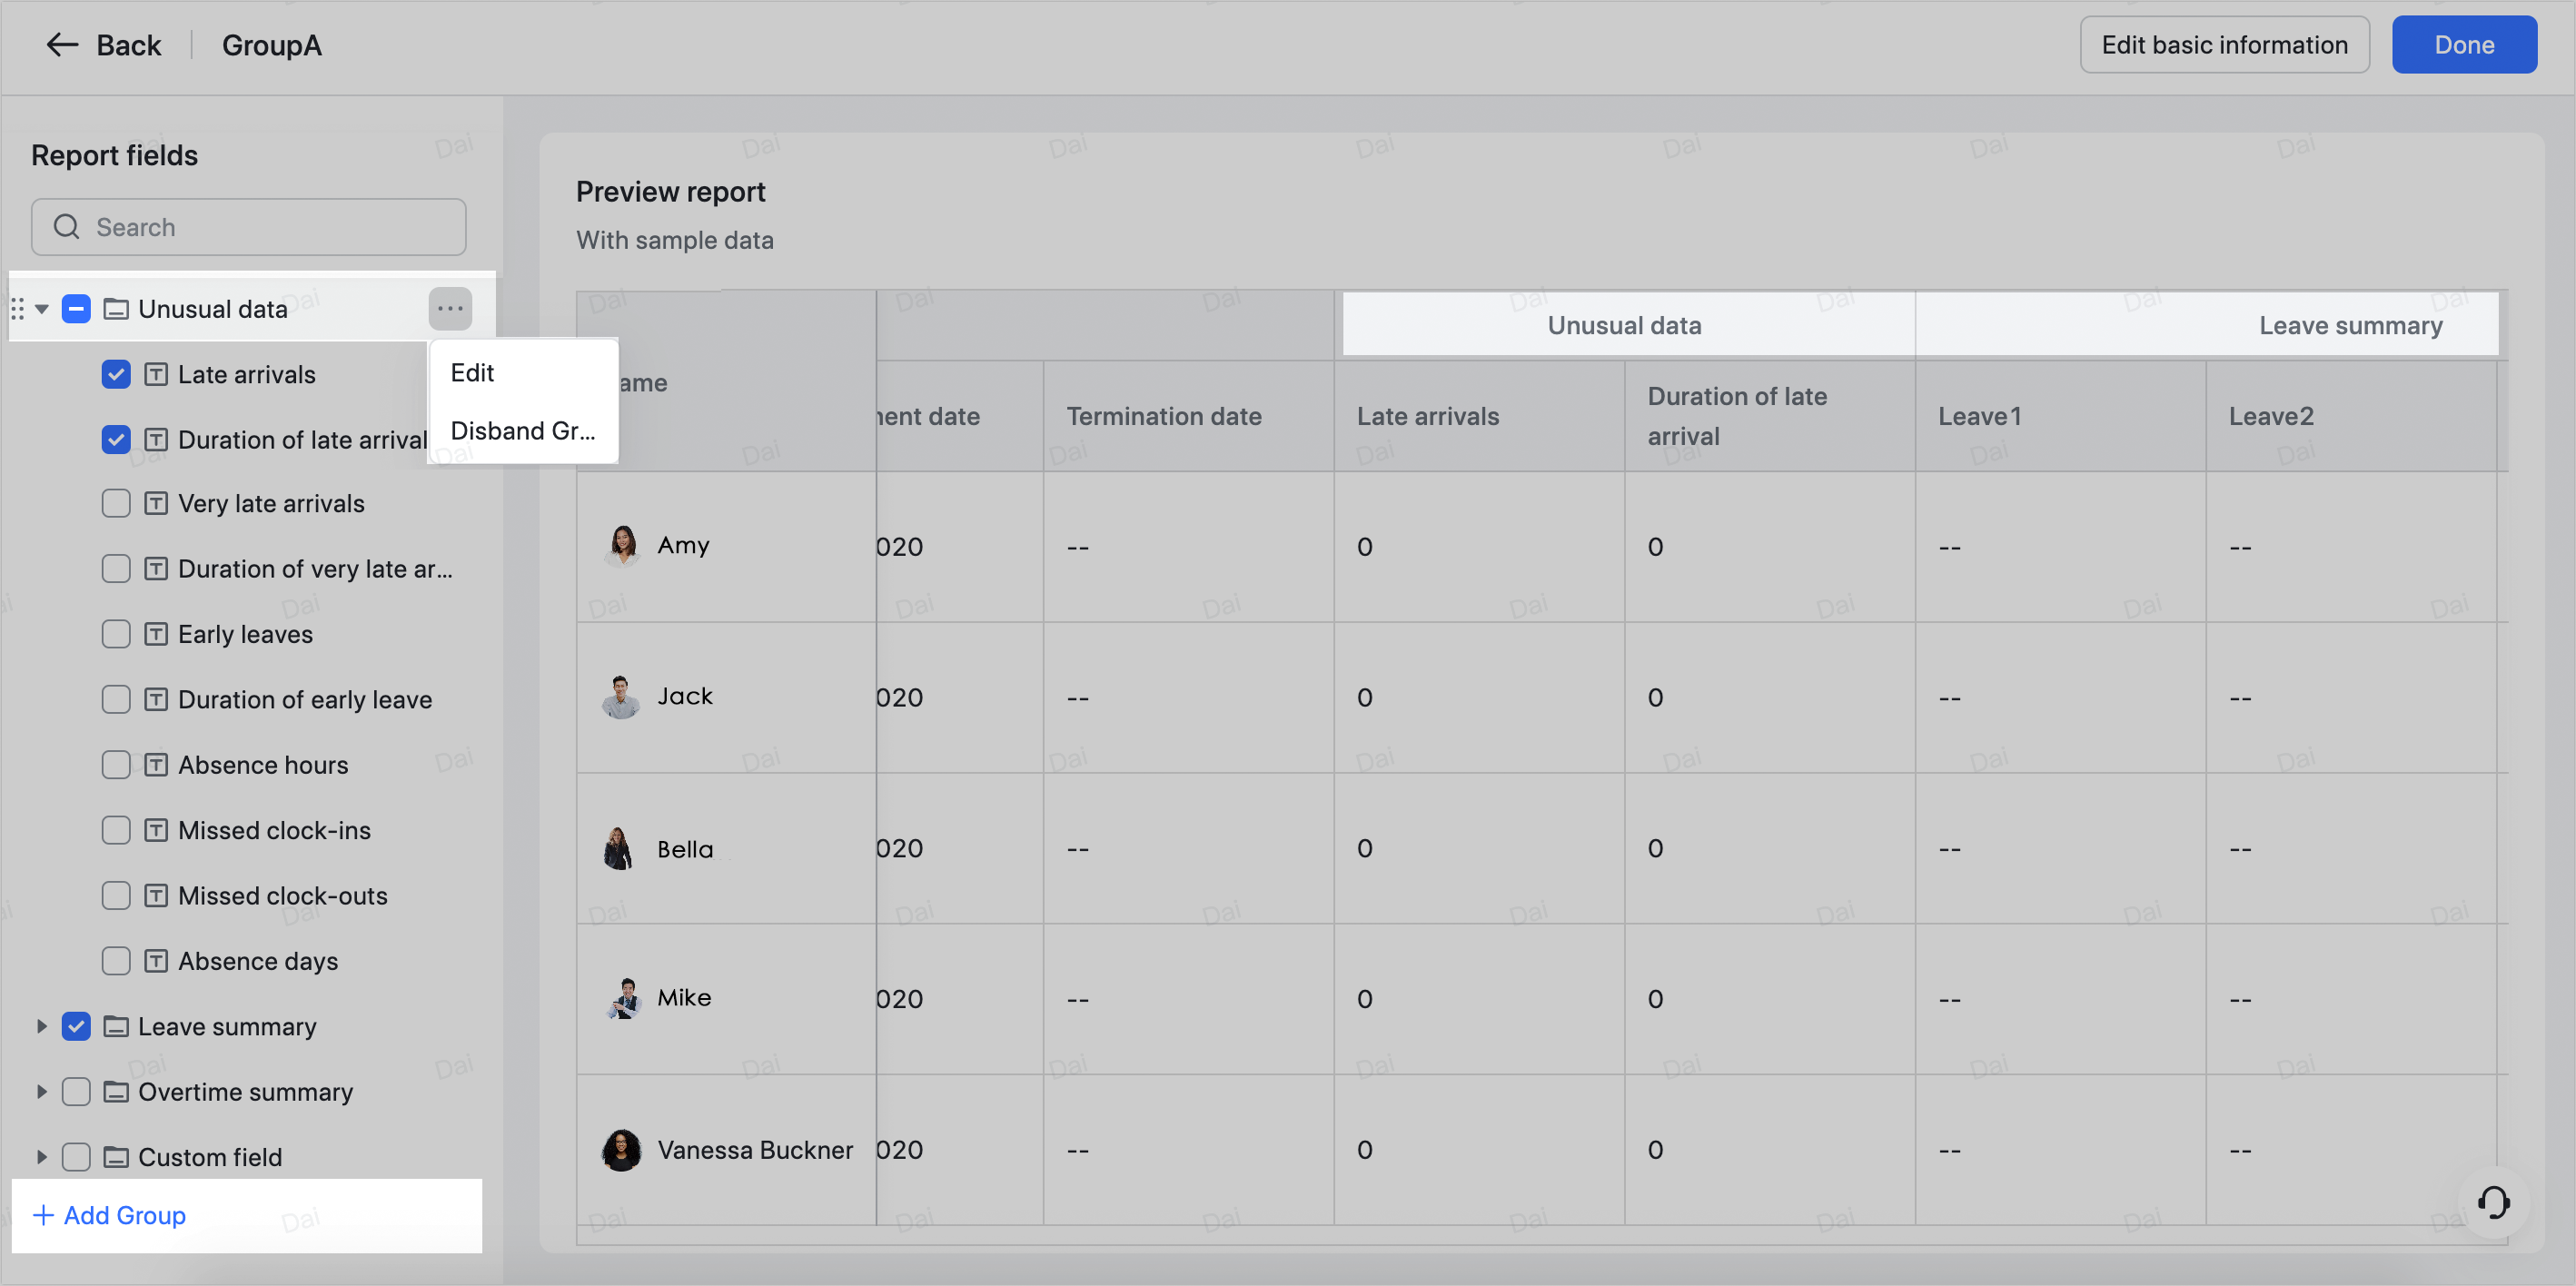
- Set the report's fields and groups, which will show up as the second and first row of the header of the corresponding report. The fields are grouped by default, click the icon at the front of each group to expand the field list.
- 250px|700px|reset
- The following actions are supported:
- Display or hide: Select or deselect a field or group.
- Adjust the order: Click and drag a field or group up and down. You can drag a field across groups.
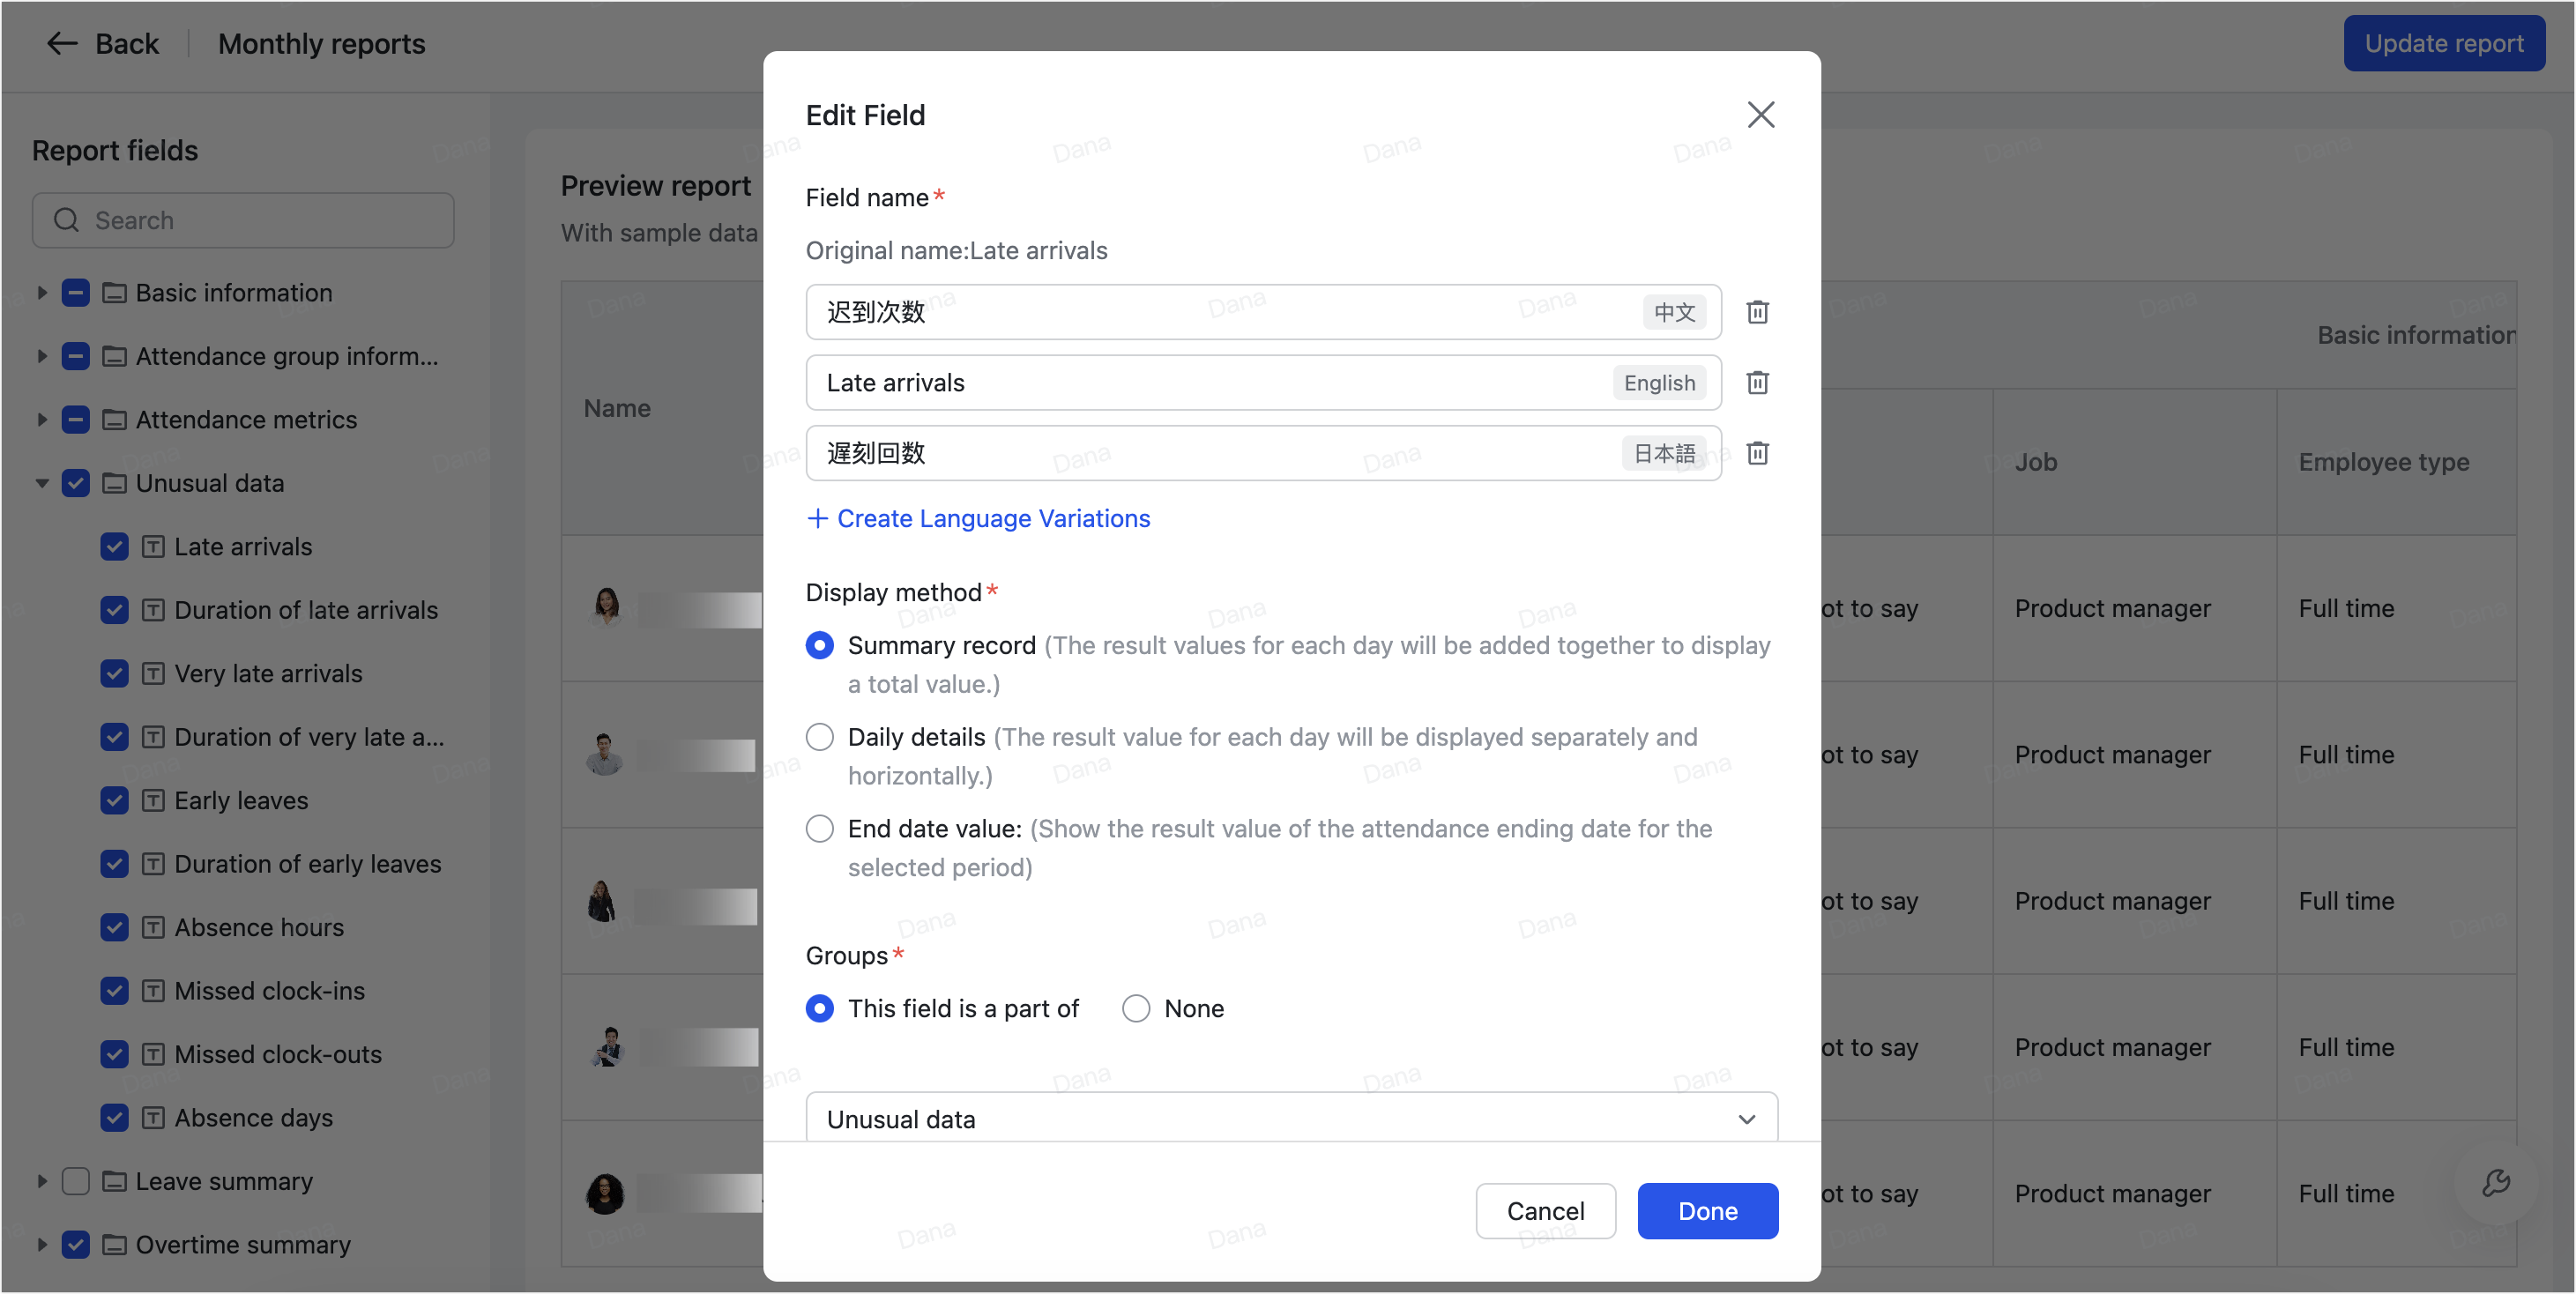
- Edit: Hover over a field or group and click the ··· More icon, then click either the icon or Edit.
- Fields without a group will be displayed as their own group and thus the first and only row of the corresponding header column.
- Display method is only available in summary record type of reports.
-
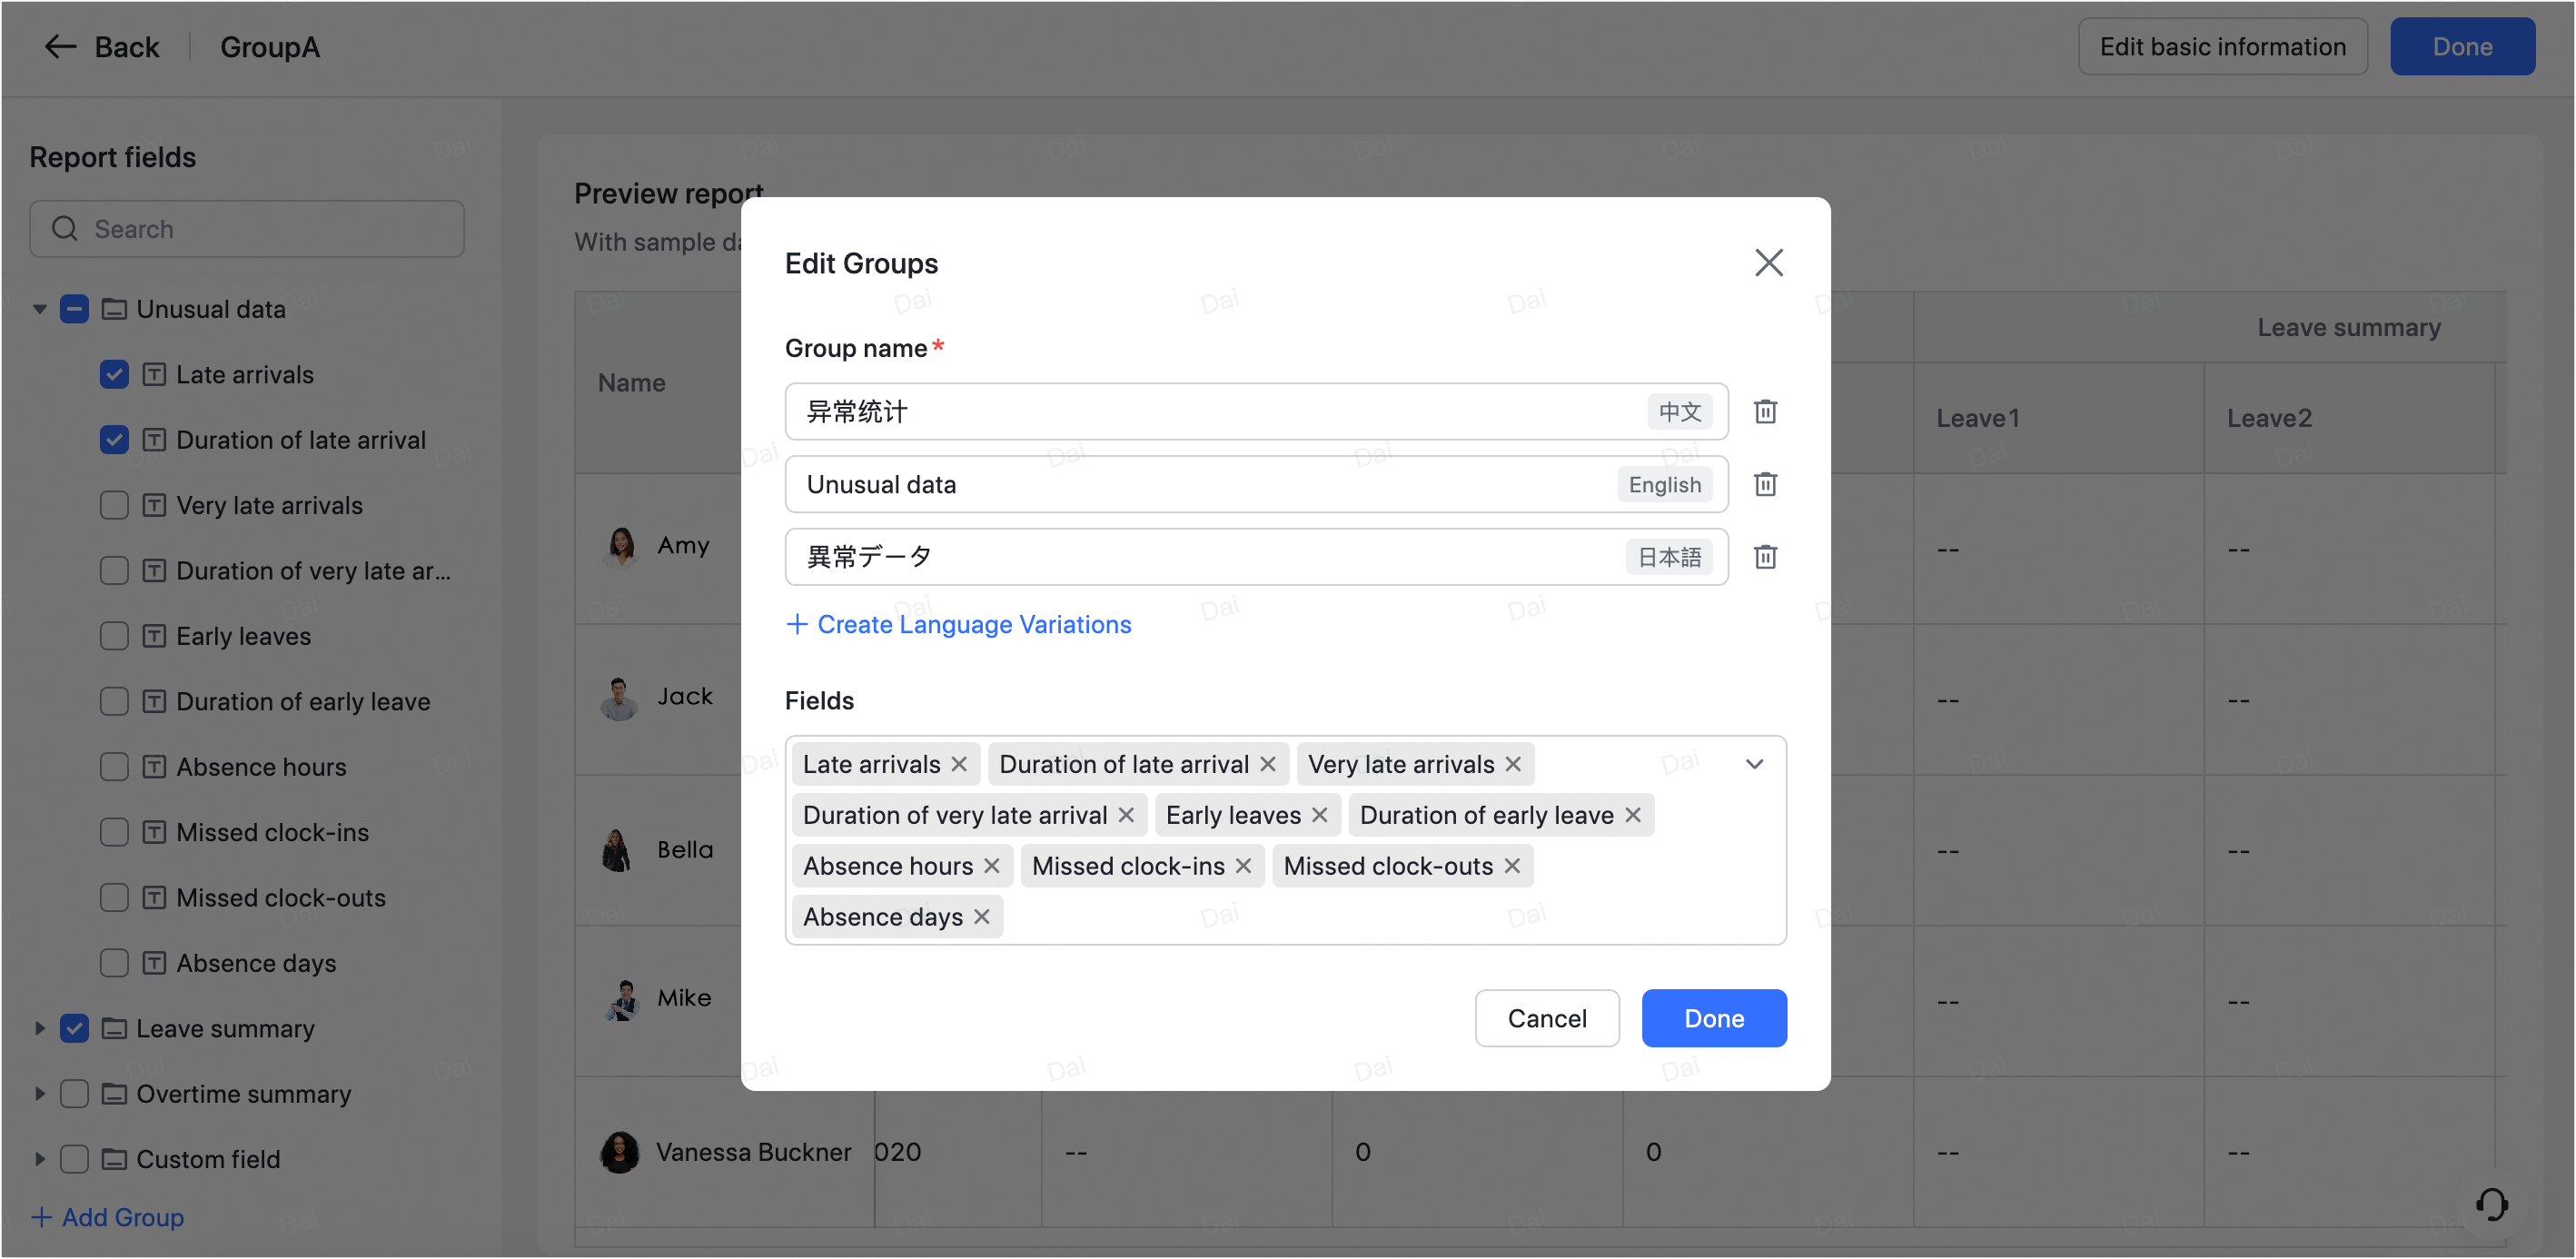
- Disband a group: Hover over a group and click the ··· More icon > Disband Group. The fields in a disbanded group will not be deleted.
- Create a new group: Click Add Group at the bottom of the list, set the group name and fields within the group.
250px|700px|reset
250px|700px|reset
250px|700px|reset
- Note: Administrators can go to the Attendance admin console > Attendance Reports > Field Management page to customize how each field is calculated. All the fields in Field Management can be applied to the reports. For more information, see Admin | Create custom fields.
- Click Done at the upper-right corner of the page.
View and export custom reports
After a report is created, it will be displayed in Custom Report. Administrators with the view or edit permission of this report can click to enter the details.
One can filter by fields such as the date, department and attendance group. To download the report, click Export.
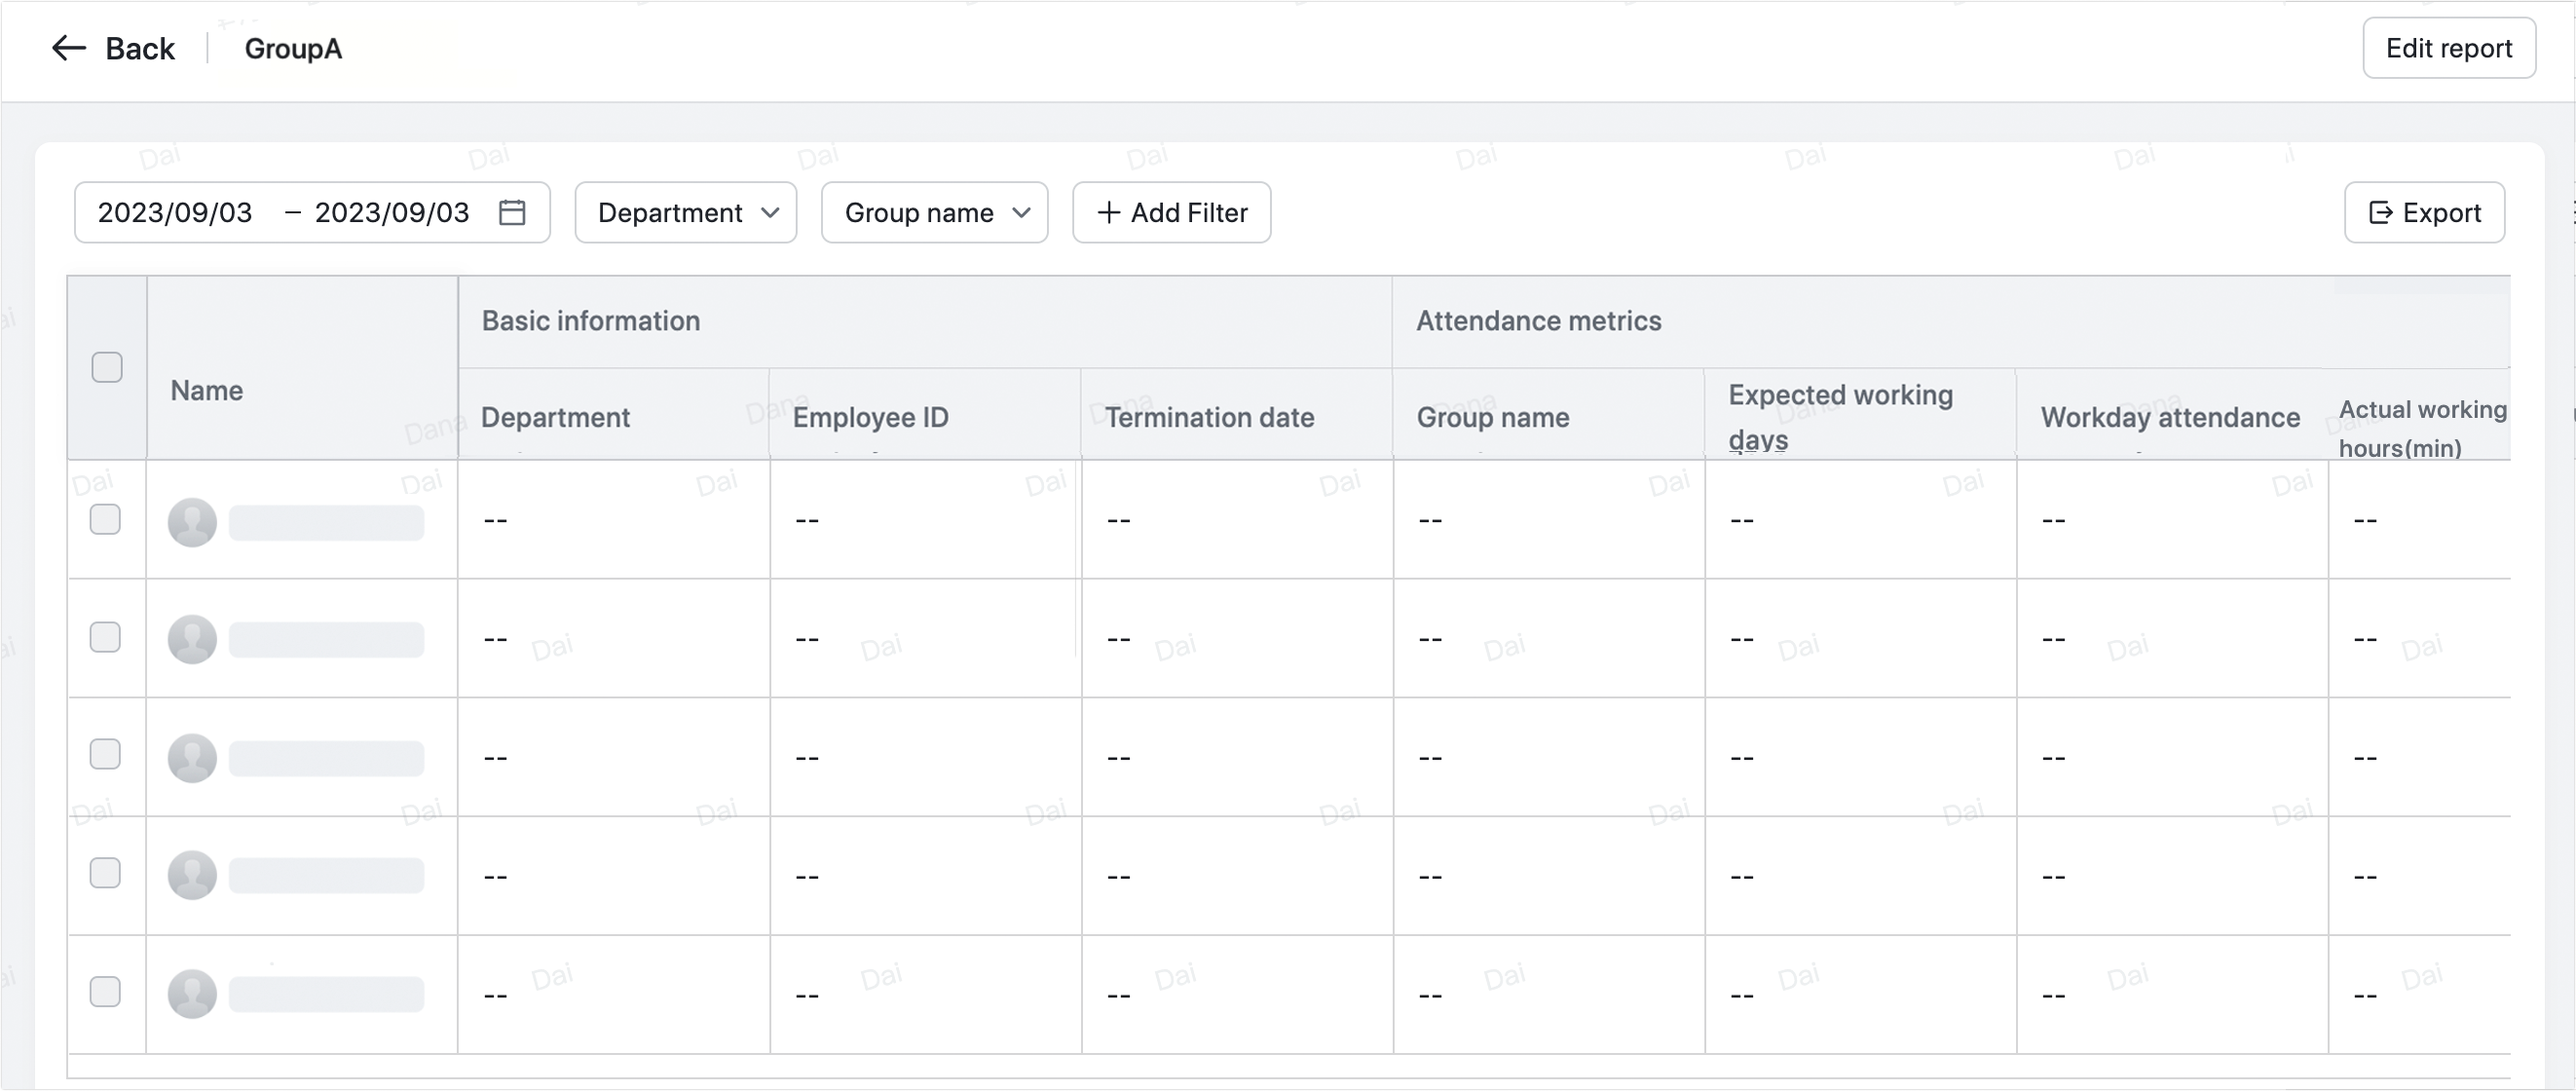
250px|700px|reset
250px|700px|reset
Edit custom reports
You can modify a report's basic information, fields, and groups.
- Enter the details page in either of the following ways:
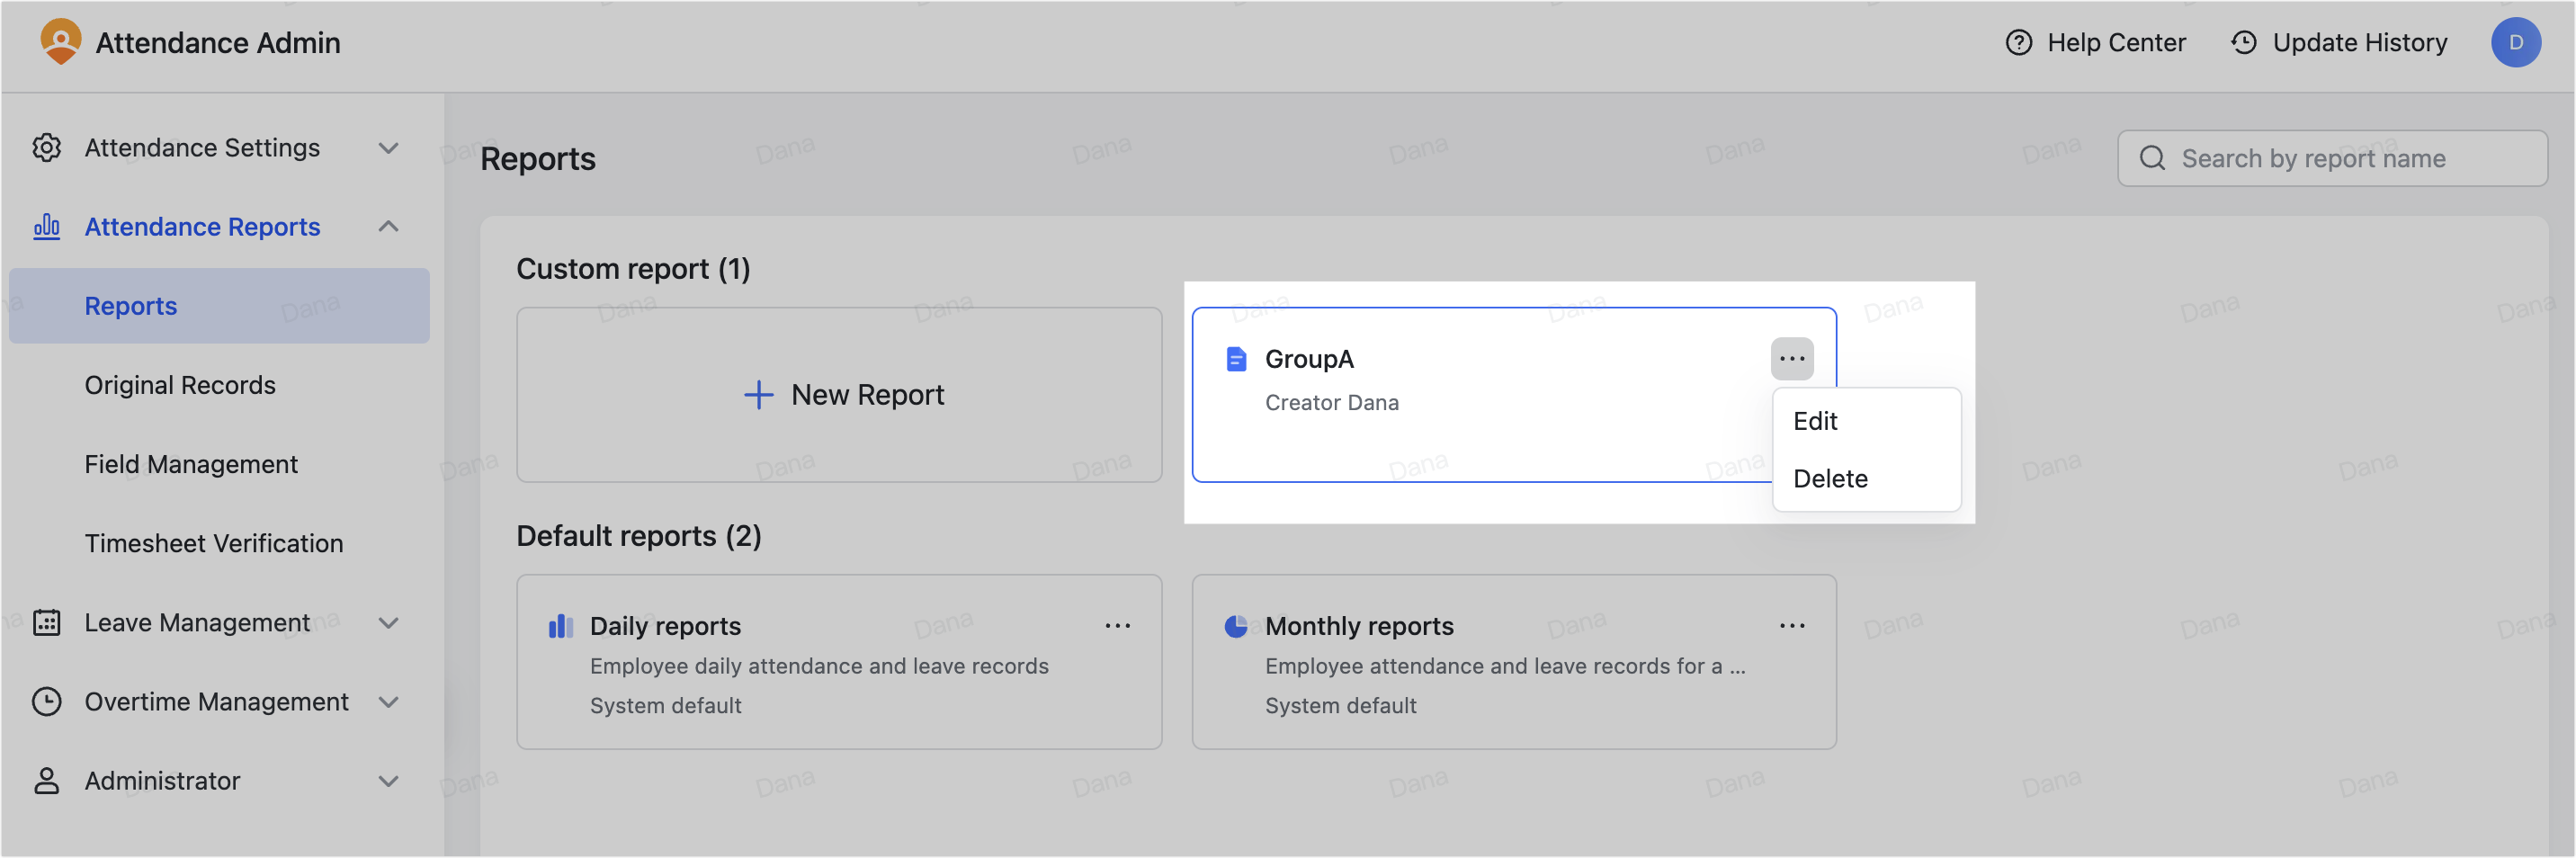
- On the Reports page, click the ··· More icon at the upper-right corner of each report > Edit.
- Click a report and then Edit report in the upper-right corner of the report.
- Click the Edit basic information or adjust the fields and grouping on the left.
- Click Update report in the upper-right corner.
Delete custom reports
On the Reports page, click the ··· More icon at the upper-right corner of each report > Delete.
Note: Once deleted, a report cannot be recovered.
250px|700px|reset
III. FAQs