I. Intro
Who can perform these steps: Primary administrators or administrators with "Attendance" permission.
Your organization may adopt a shift-based attendance mechanism, where members have different clock-in and clock-out schedules. As an administrator, you can set up shift-based attendance rules in the Attendance admin console, and then assign shift schedules for the members.
II. Steps
- Create an attendance group on a scheduled shift
If your organization doesn't have an attendance group with a scheduled shift yet, you must create one.
- Open the Attendance admin console, go to Attendance Settings > Group Settings, and click New to create a new attendance group.
- 250px|700px|reset
- Enter an attendance group name and other basic information, such as owners, time zone, and members.
- Go to Shift > Shift type, and select Scheduled Shift. You can also set the following options:
- When a shift is not scheduled: Set how members clock in or out when a shift is not scheduled.
- Statutory holidays: Choose a holiday calendar that will be associated with the shift schedule.
- 250px|700px|reset
- Complete other settings as you need and click Confirm.
You'll find the attendance group in the list on the Group Settings page.
- Schedule the shift
Shifts are needed for editing schedules, setting shift cycles, and allowing members to set their own shifts.
- Find the attendance group with the scheduled shift type that you just created in Attendance Settings > Group Settings.
- Click Schedule to the right of the entry. This option is only available to attendance groups with scheduled shifts.
- 250px|700px|reset
- Click Shift Configuration to bring out the pane with a shift list, select the ones you need, or click Create Shift in the upper-right corner of the pane to create a new one.
- 250px|700px|reset
- Click Submit.
- Schedule shifts for members
You can set the schedule for each member of the attendance group in three ways.
Note: When editing the schedule, click the calendar box to change the month shown.
Schedule by shift
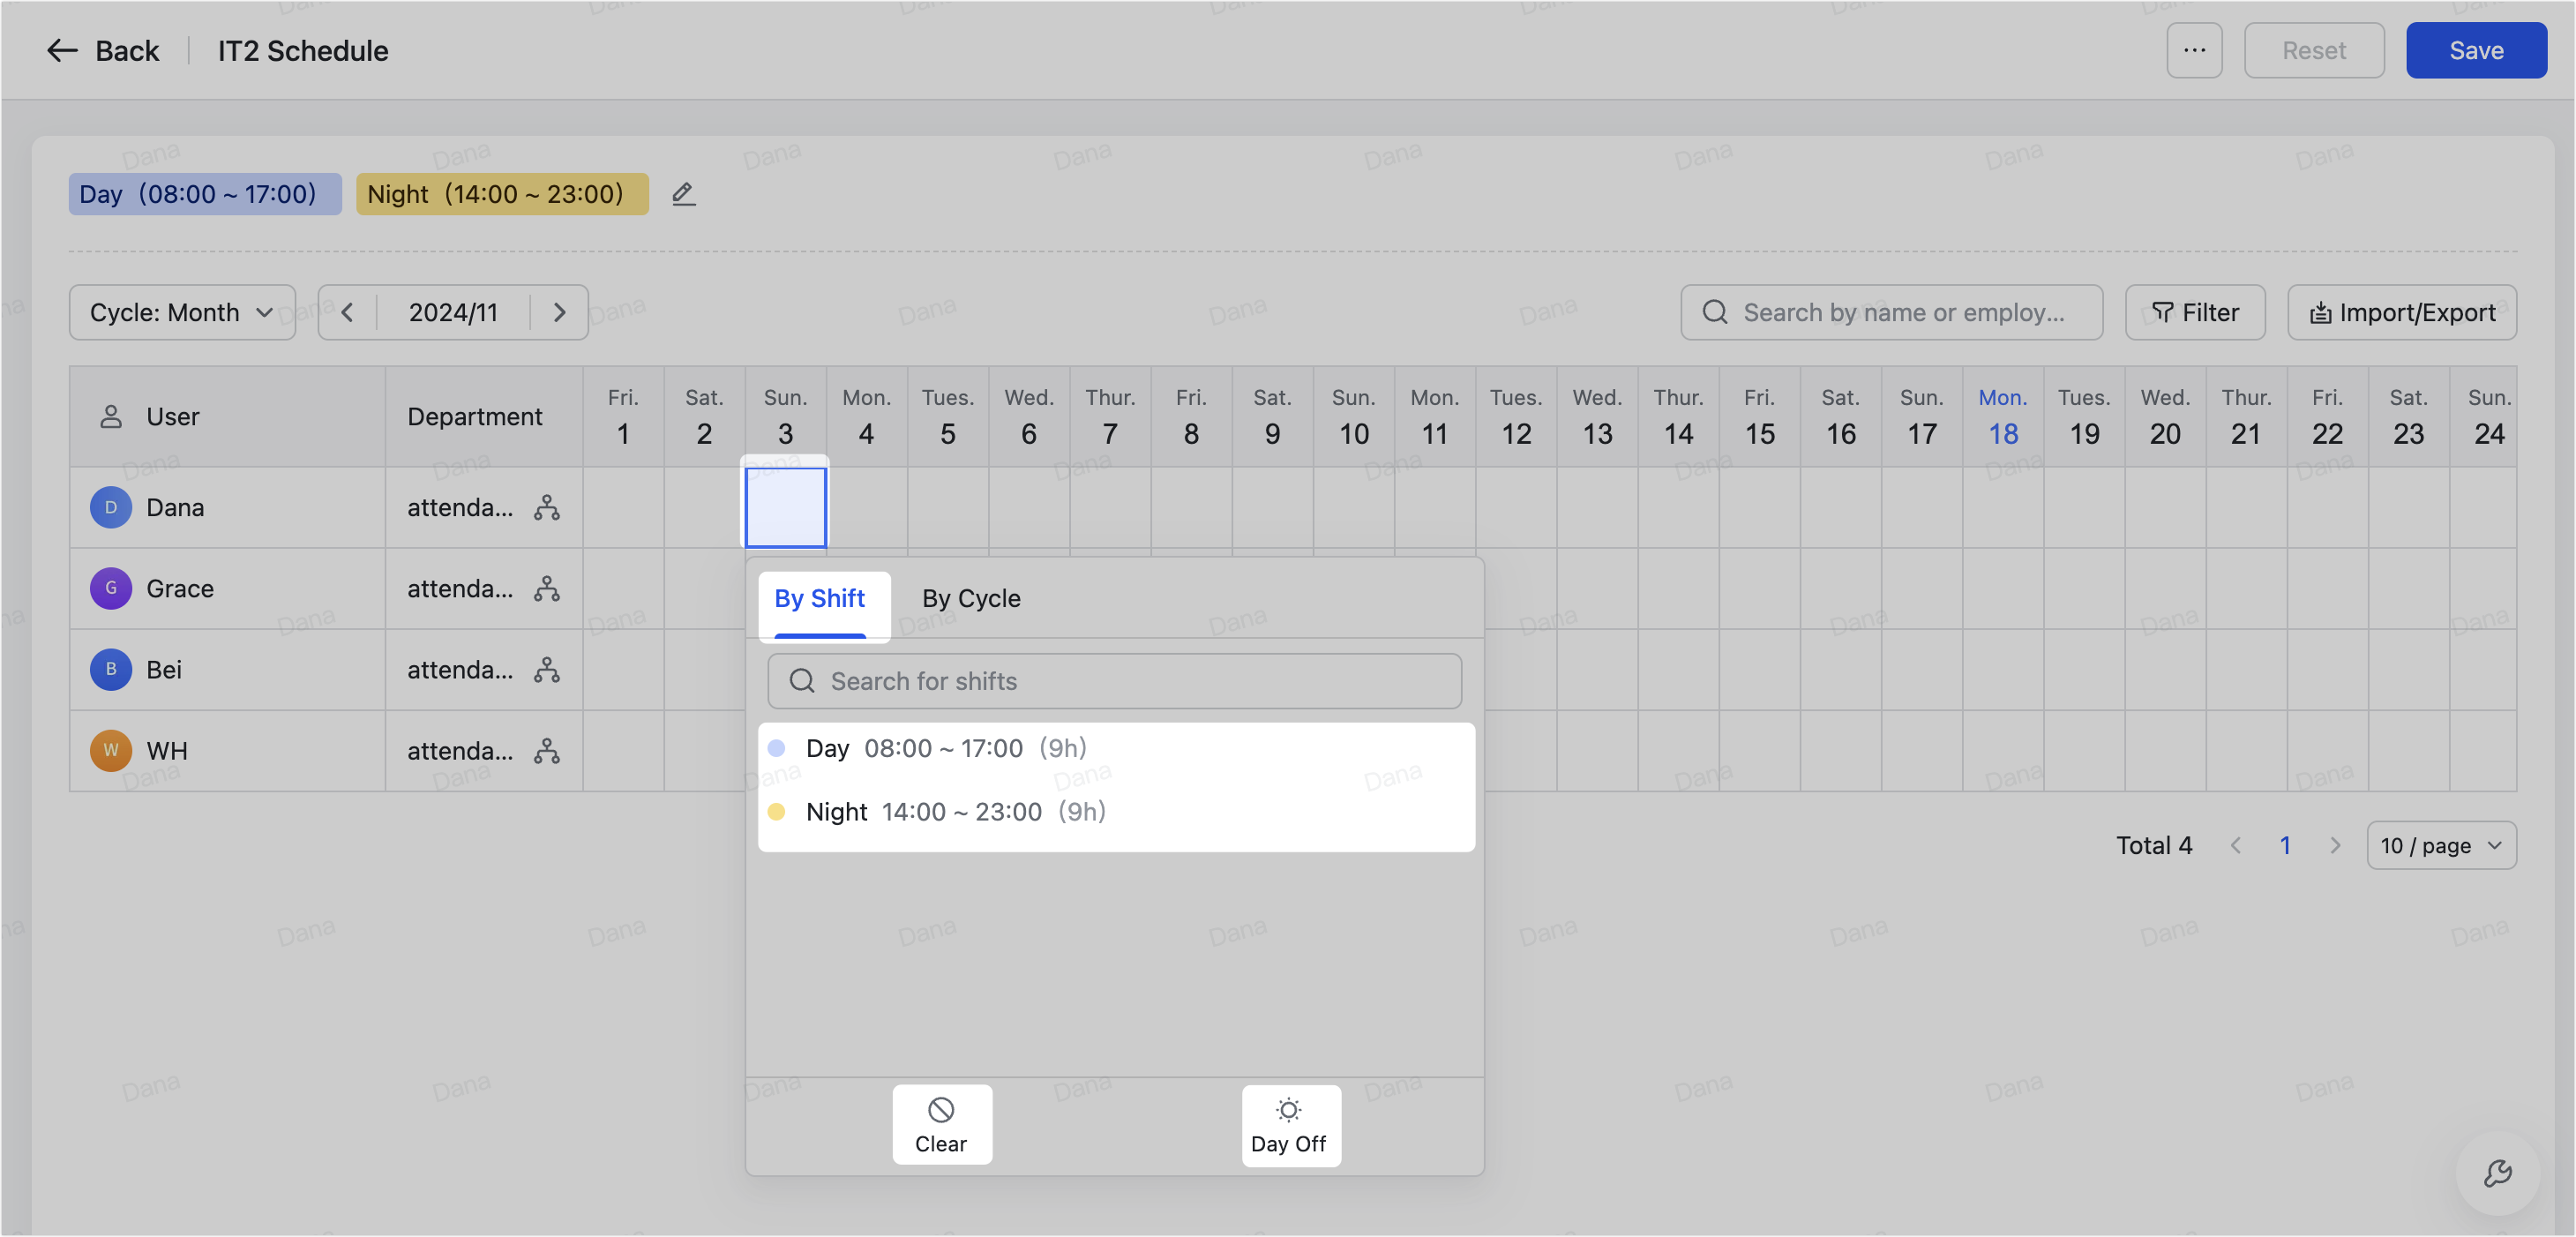
On the schedule page, click a cell in the calendar to bring out the options. You can do either of the following:
- Select a shift from the By Shift tab.
- Click Day Off to make it a non-working day.
- Click Clear to remove the schedule for today.

250px|700px|reset
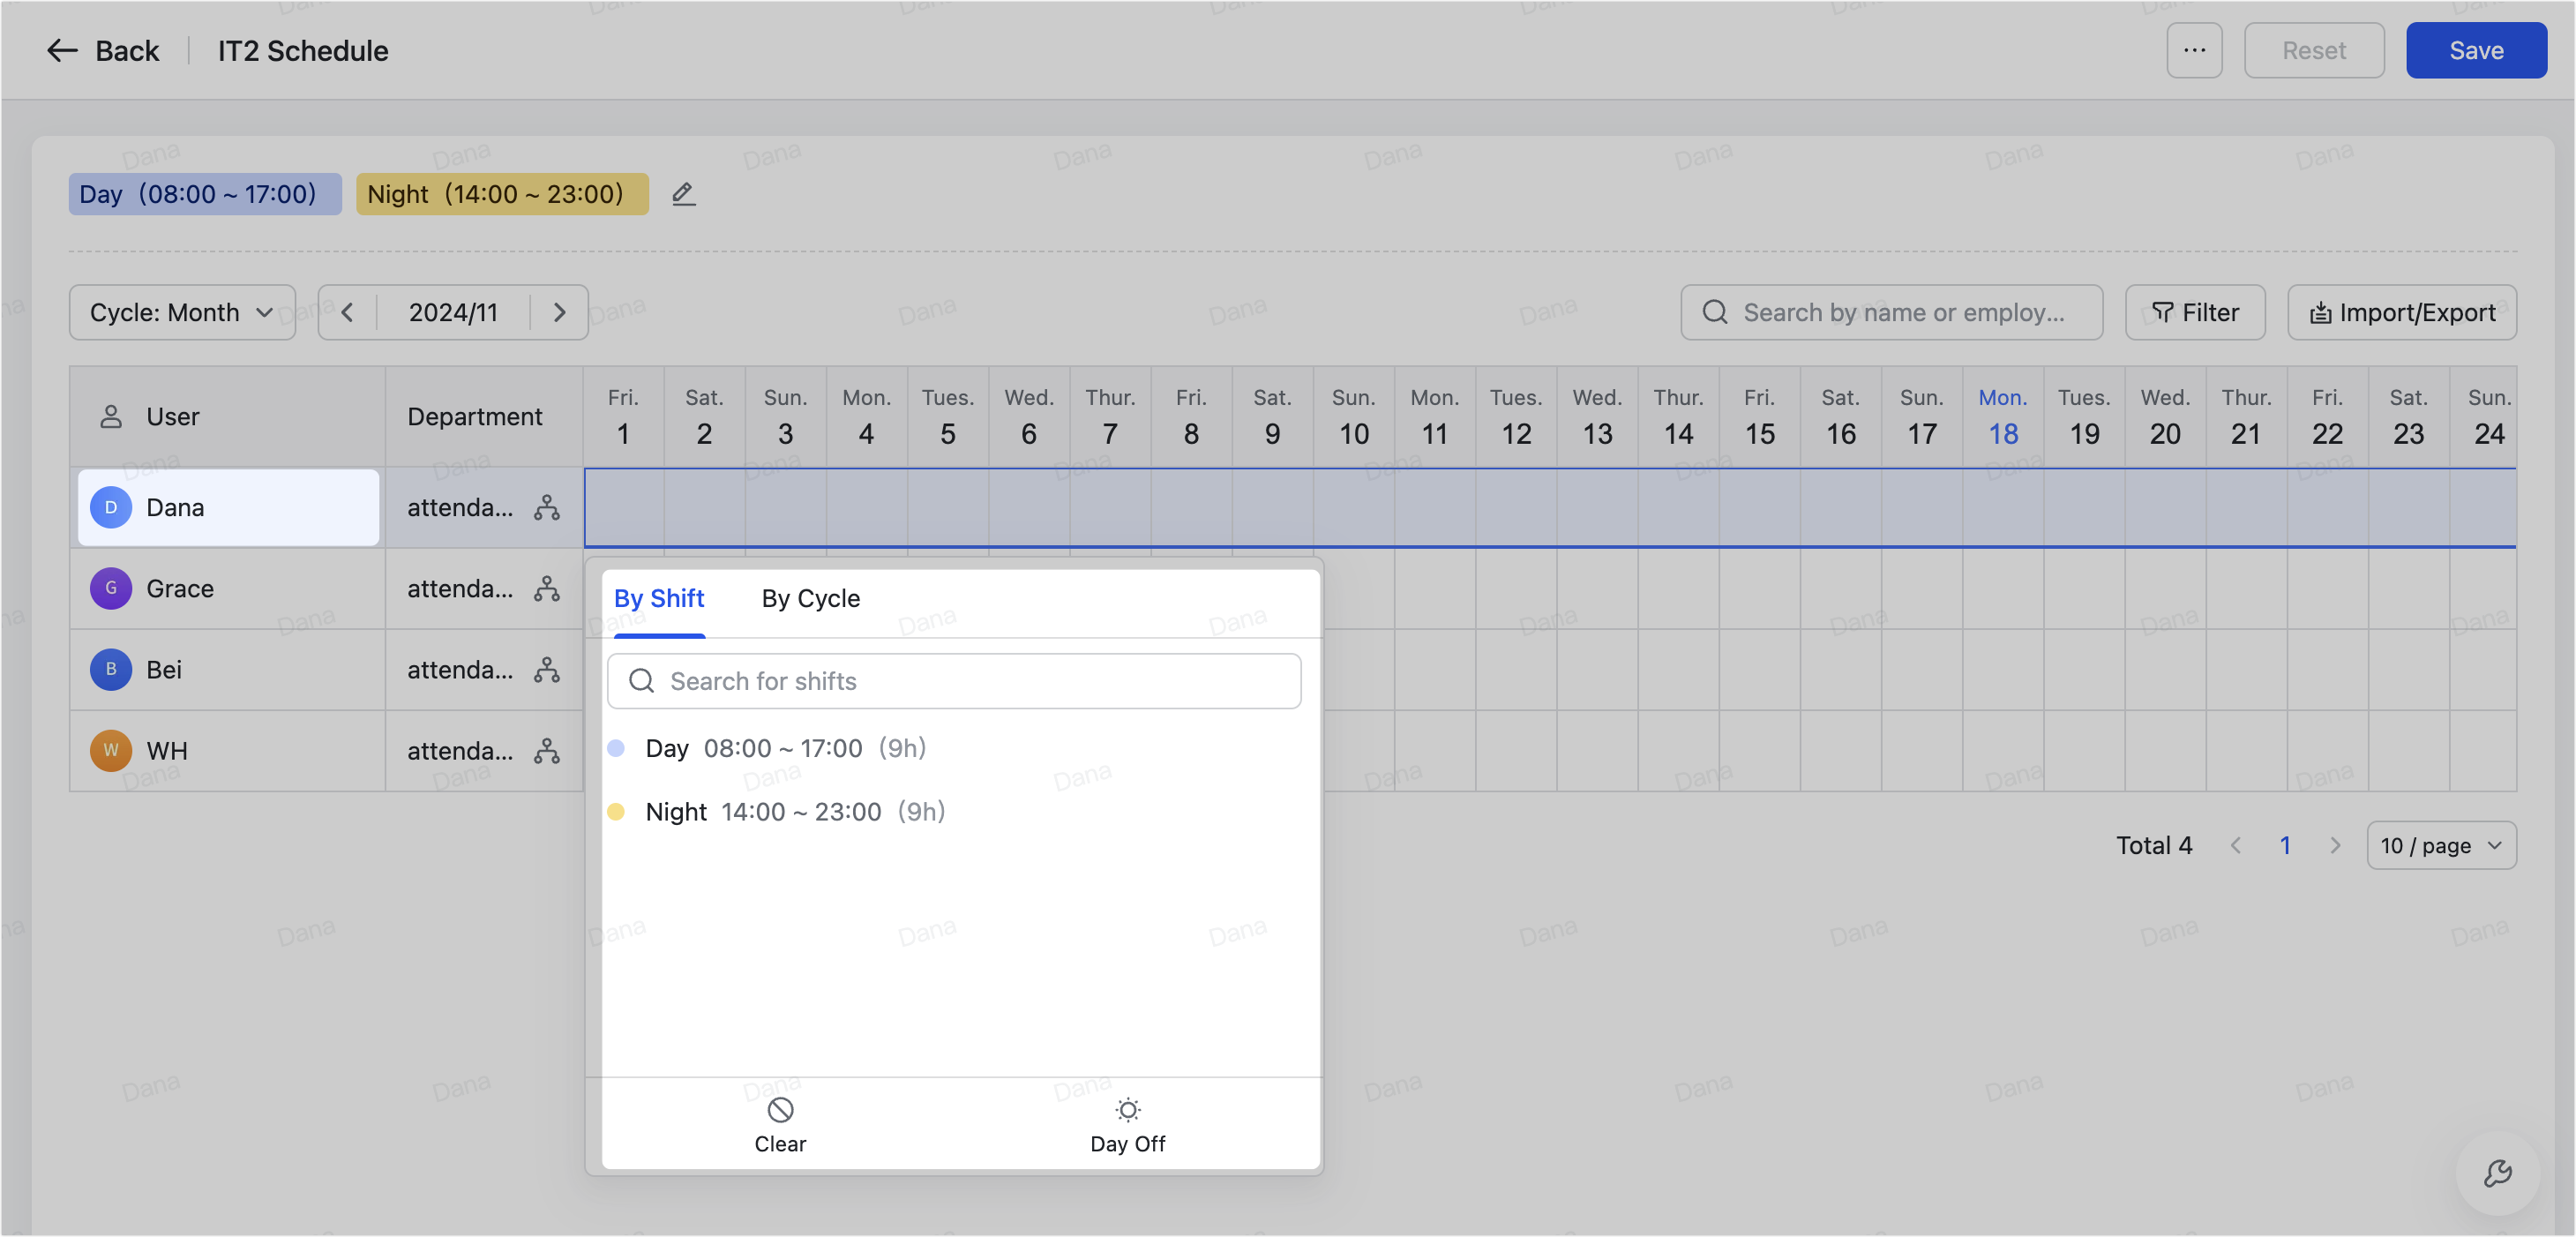
You can also schedule shifts in batches:
- To schedule the shifts of the displayed calendar for a member, click the member's name.
- Note: You can switch the cycle from Month to Week above the schedule calendar to change its view.
- To schedule the shift of a day for multiple members, click the date.


250px|700px|reset
250px|700px|reset
Schedule by cycle
For rotating shifts, you can set shifts by cycle.
- On the schedule page, click the ··· icon in the upper-right corner of the page > Shift cycle settings, then click Create new shift cycle in the prompted pane.
- 250px|700px|reset
250px|700px|reset
- Enter a cycle name, set the cycle as Loop by day or Loop by week, and decide how the shift goes in the first cycle. Click Confirm.
- 250px|700px|reset
- Go back to the schedule page, click a cell, go to the By Cycle tab in the pop-up, and select a cycle.
- 250px|700px|reset
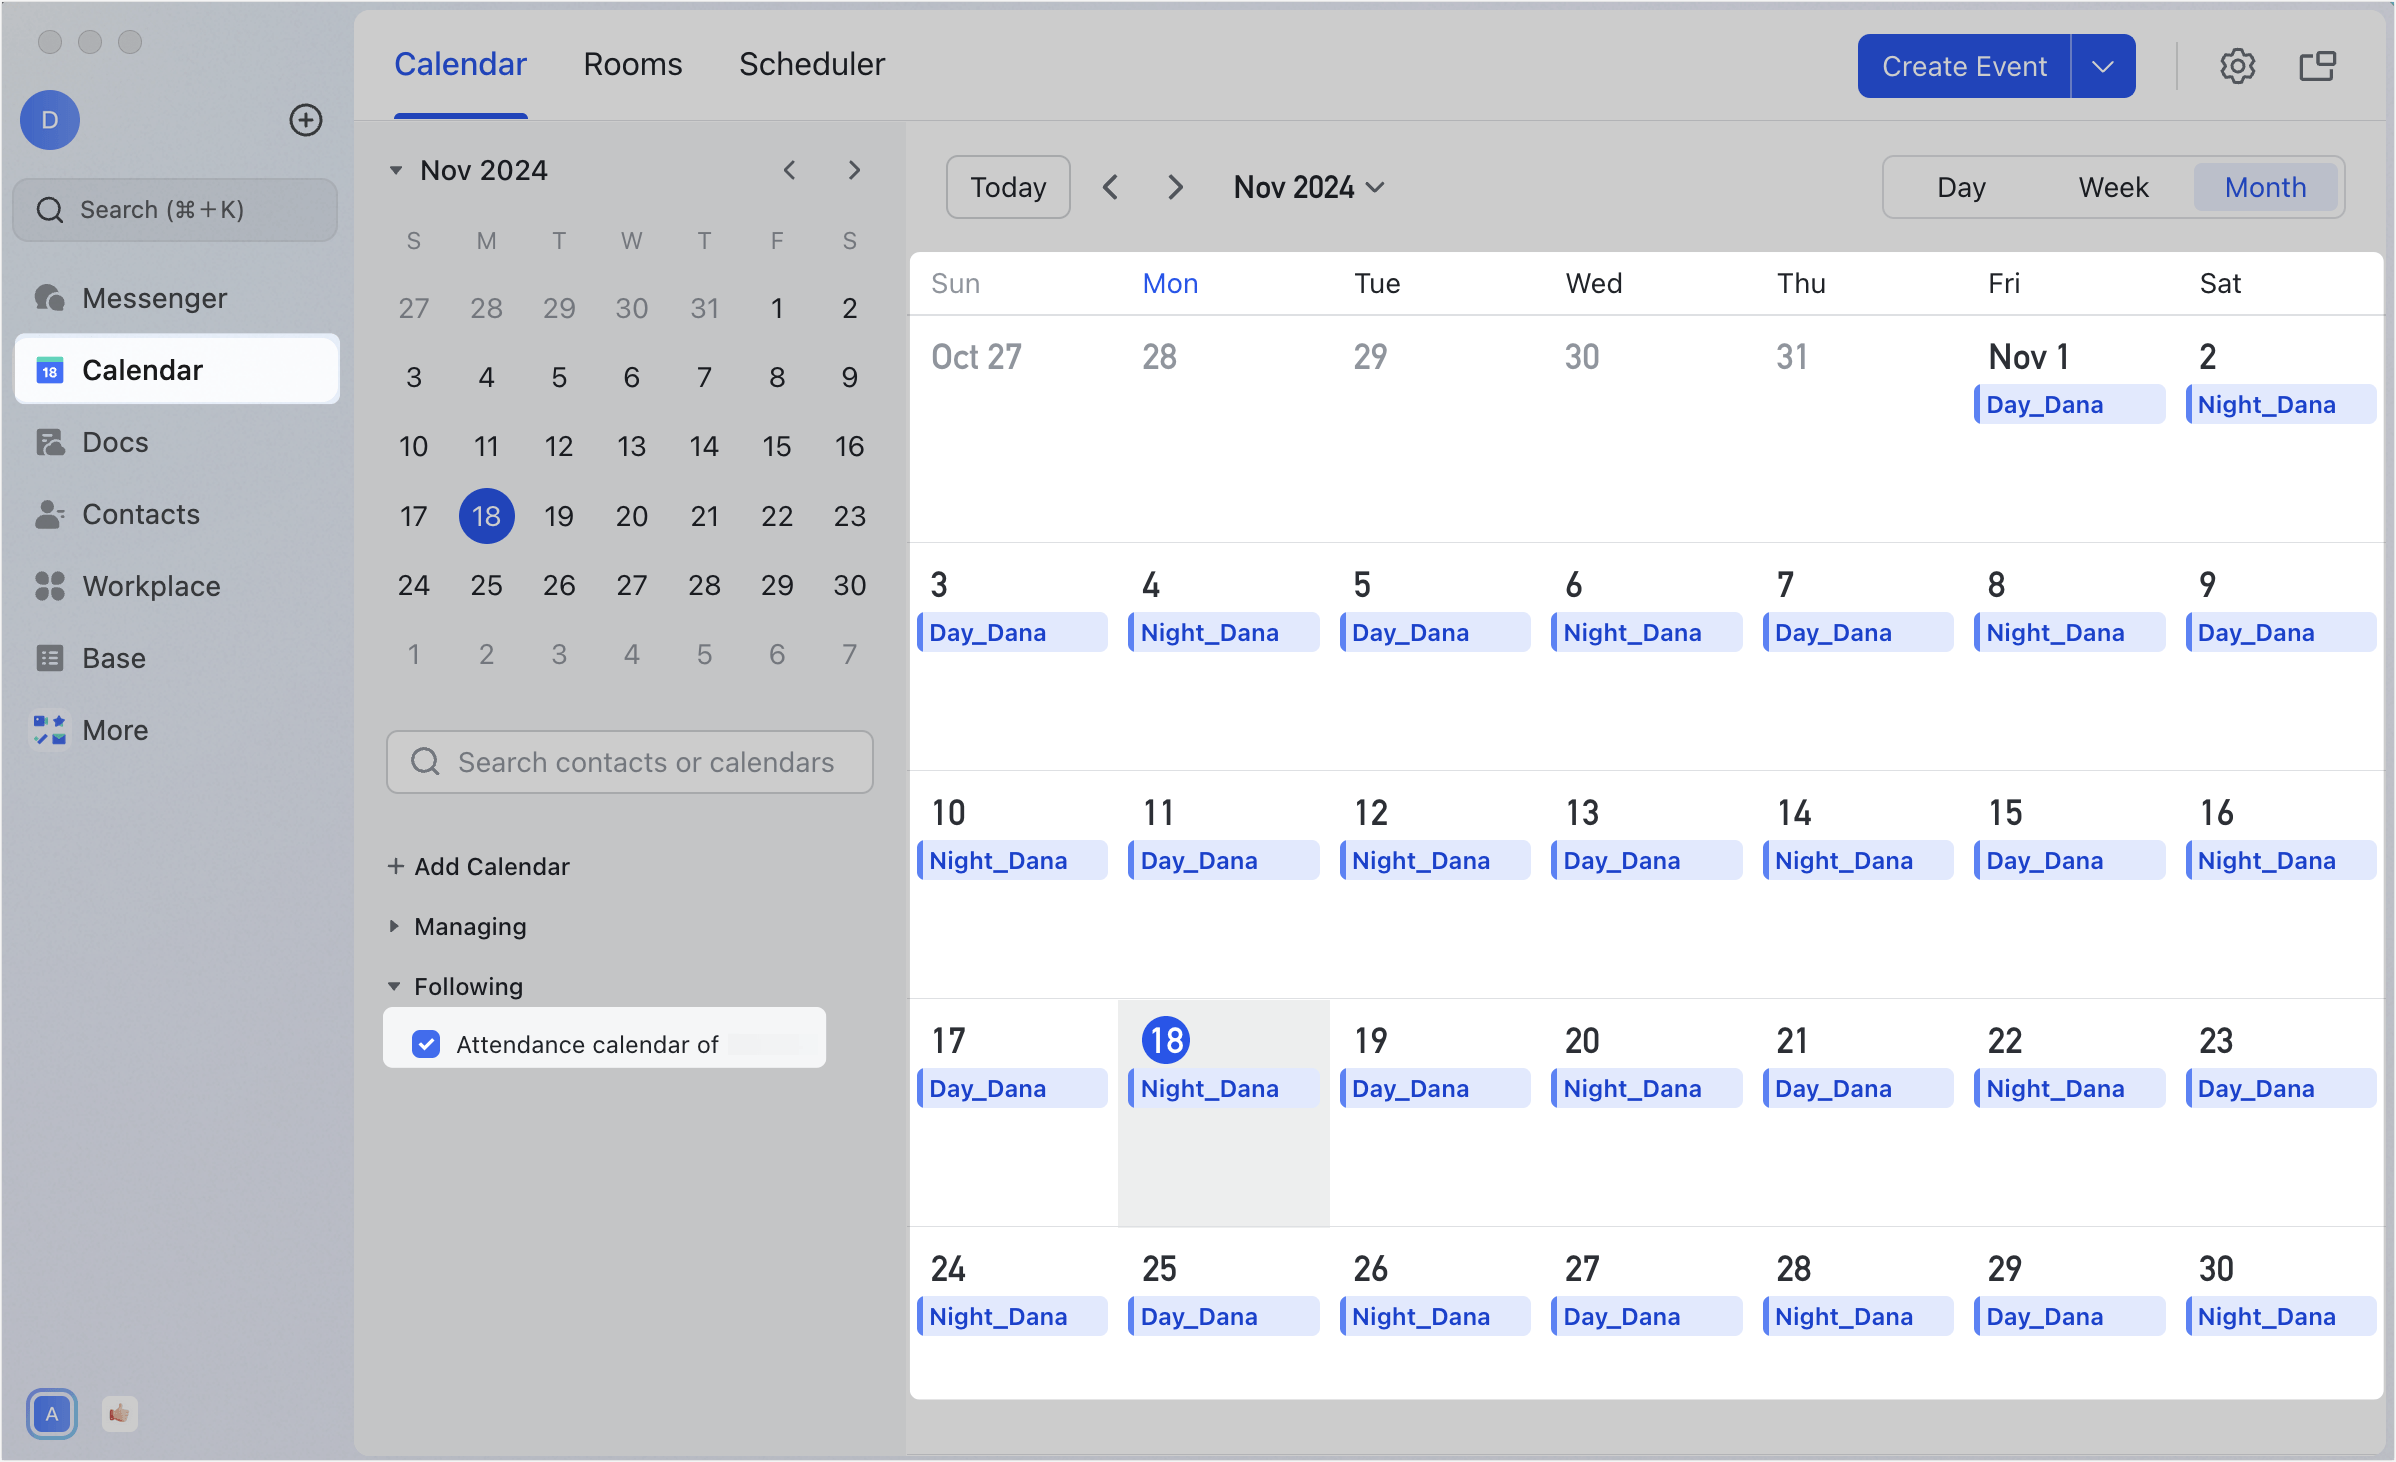
The schedule of the month for that member will be populated according to the cycle you choose.
Schedule by Excel
You can manually set the detailed schedule through an Excel table, but you must add attendance shifts first. They will appear as shift options in the downloaded Excel table.
- On the schedule page, click Import/Export in the upper-right, and click the Current shift schedule link in the pop-up to download the template.
- 250px|700px|reset
- Fill in all the relevant information, then upload the file and click Confirm.
- 250px|700px|reset
III. FAQs

