I. Intro
Who can perform these steps: Primary administrators can perform all the steps mentioned in the article. Administrators with Attendance or Approval management permissions can perform some of the following steps.
As an administrator, you can configure overtime rules in the Attendance admin console, such as the calculation and settlement methods for overtime. Attendance then calculates overtime for members according to the corresponding rules.
II. Steps
- Create overtime rules
Who can perform these steps: Primary administrators or administrators with Attendance management permissions.
- Open the Attendance admin console and go to Overtime Management > Overtime Rules.
- Click New to create a new overtime rule, or click Edit to modify an existing overtime rule.
- 250px|700px|reset
- On the Basic info page, set the name, owner, and applied range of the overtime rule.
- Rule owner: Click the box to set the rule owners. Rule owners are specific to the current rule, which means they can edit the current overtime rule, but cannot edit other rules or create new rules.
- Applied range: Use conditions to set the applied range of the overtime rule, such as department, member name, country, or workforce type. For example, a rule with the range of "Dept/Member contains IT" will only apply to the IT department.
- Note:
- The options in Dept/Member, Country/Region, Member type and other conditions are associated with the settings in the Lark Admin Console. For details, go to the Lark Admin Console.
- You can set up at most 10 condition sets, with a maximum of 10 conditions for each set.
- The "does not contain" condition filters results from the "contains" condition. Therefore, if you need to set a "does not contain" condition, you must set at least one "contains" condition.
- 250px|700px|reset
- Click Next to go to the Overtime rule page and set different overtime rules for workdays, non-workdays, and holidays.
- Whether to allow overtime on workday/non-workday/holiday: Choose whether to allow overtime on workdays, non-workdays, and holidays. If you select Not allowed, you can skip the rest settings of this rule.
- Unit: You can choose from Hour, Minute, or Day. If you select Hour or Day, you can configure how to round the overtime hours or days in case of decimals.
- Duration calculation: Set the number of hours that will be counted as one day of overtime.
- Overtime hours calculation: You can choose from the following options:
- approved overtime hours: Members must submit an overtime approval request, and overtime is calculated based on the duration entered in the request.
- clocked-in hours within approved overtime hours: Members must submit an overtime approval request and clock in, and overtime is calculated based on the clocked-in hours within the approved overtime hours.
- clock in/out duration: Members do not need to submit an overtime approval request, and overtime is calculated according to the actual clock-in and clock-out time.
- Allow overtime (workday only): Set the time periods during which overtime is allowed in a day. You can select Before work, During break, and After work, and configure the start time under Overtime begins at.
- Important: If Allow overtime is not selected, overtime hours will not be calculated even if the member does work overtime during this period.
- 250px|700px|reset
- Minimum overtime hours: Choose whether to set a minimum overtime duration. Overtime hours below this threshold will not be counted as overtime.
- Exclude break time: If you select to exclude break time, overtime during the breaks will not be counted.
- Compensation: You can choose from the following options:
- Settlement as overtime pay.
- Convert overtime hours to compensatory leave at a specified ratio.
- Allow members to choose the compensation method when submitting their overtime request (not available when Overtime hours calculation is set as clock in/out duration).
- Only record overtime hours.
- 250px|700px|reset
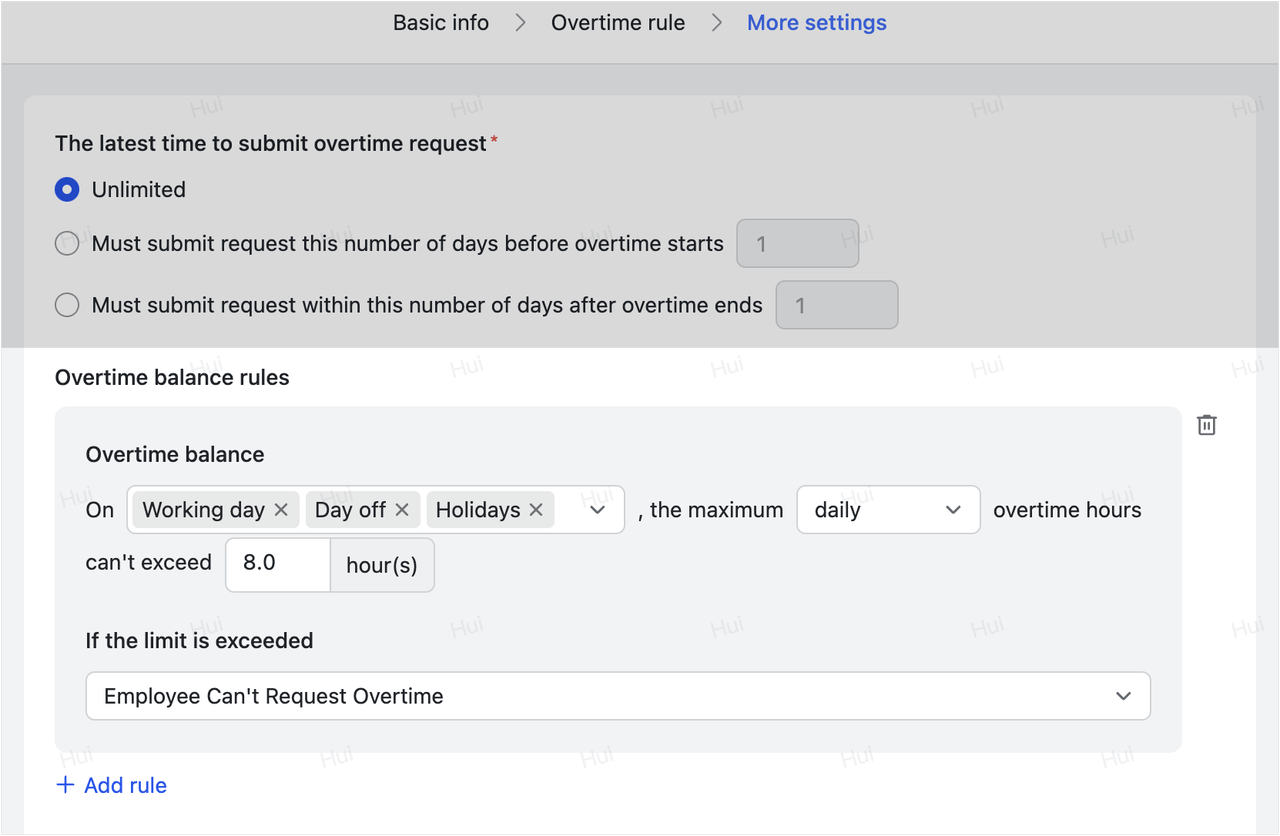
- Click Next to go to the More settings page, where you can configure additional settings:
- The latest time to submit overtime request: If you limit the time and set that the member must submit a request 0 days before overtime starts or after overtime ends, the request must be submitted on the day of overtime.
- Overtime balance rules: Set the upper limit for overtime and choose which action to take when the limit is exceeded.
- 250px|700px|reset
- Click Submit.
2. Configure attendance groups
Who can perform these steps: Primary administrators or administrators with Attendance management permissions.
You must add the members to an attendance group to apply overtime rules to them. In addition, overtime is only calculated for time periods outside of working hours.
- Open the Attendance admin console and go to Attendance Settings > Group Settings.
- Click New to create a new attendance group, or click an existing attendance group to enter the details page and click Edit to modify the relevant settings.
- 250px|700px|reset
- On the Basic info page, select the members you need in Members (time tracking required). Note that they should be within the Applied range in the overtime rule you set in the section of "Create overtime rules".
- 250px|700px|reset
- If the overtime calculation method is set to clocked-in hours within approved overtime hours, you can also select Record attendance at the start and end of overtime in Attendance Settings.
- If you select this option, when a member requests overtime that does not start immediately after regular working hours, they need to clock in or out at the start and end of both work time and overtime, four times in total. For example, when the work period is from 9:00 to 18:00 and the overtime request is from 19:00 to 21:00, the members need to clock in around 9:00 and 19:00 as well as clock out around 18:00 and 21:00.
- If you don't select this option, or if a member requests overtime that starts immediately after regular working hours, they need to clock in at the start of work time and clock out at the end of overtime, twice in total. For example, when the work period is from 9:00 to 18:00 and the overtime request is from 18:00 to 20:00, the members need to clock in around 9:00 and clock out around 20:00.
- Note: This setting only applies to attendance groups of fixed shift or scheduled shift.
- 250px|700px|reset
- Associate the overtime rule with approval
Who can perform these steps: Primary administrators or administrators with Approval management permissions.
Overtime rules in the Attendance admin console can be associated with Lark Approval. In the Approval admin console, you can configure the overtime approval, approvers, and other settings. Once configured, members can submit overtime approval requests according to the overtime rules.
- Open the Approval admin console and click Create Approval to create a new approval or click the Edit icon to modify an existing overtime approval.
- 250px|700px|reset
- Go to Form Design, add an overtime widget group to the approval, and turn on Associate with overtime rules to associate the approval with the overtime rules set in the Attendance admin console.
- Important:
- You must use the built-in Overtime widget group to associate an approval with the overtime rules.
- Only one Overtime widget group can be added for each approval, but you can add other widgets to the approval.
- 250px|700px|reset
- Go to Process Design, set the approver, approval process, and other details for the approval.
- 250px|700px|reset
- Click Save or Confirm.
4. Enable overtime approval
Who can perform these steps: Primary administrators or administrators with Attendance management permissions.
After the approval is ready, you need to enable the approval in the Attendance app.
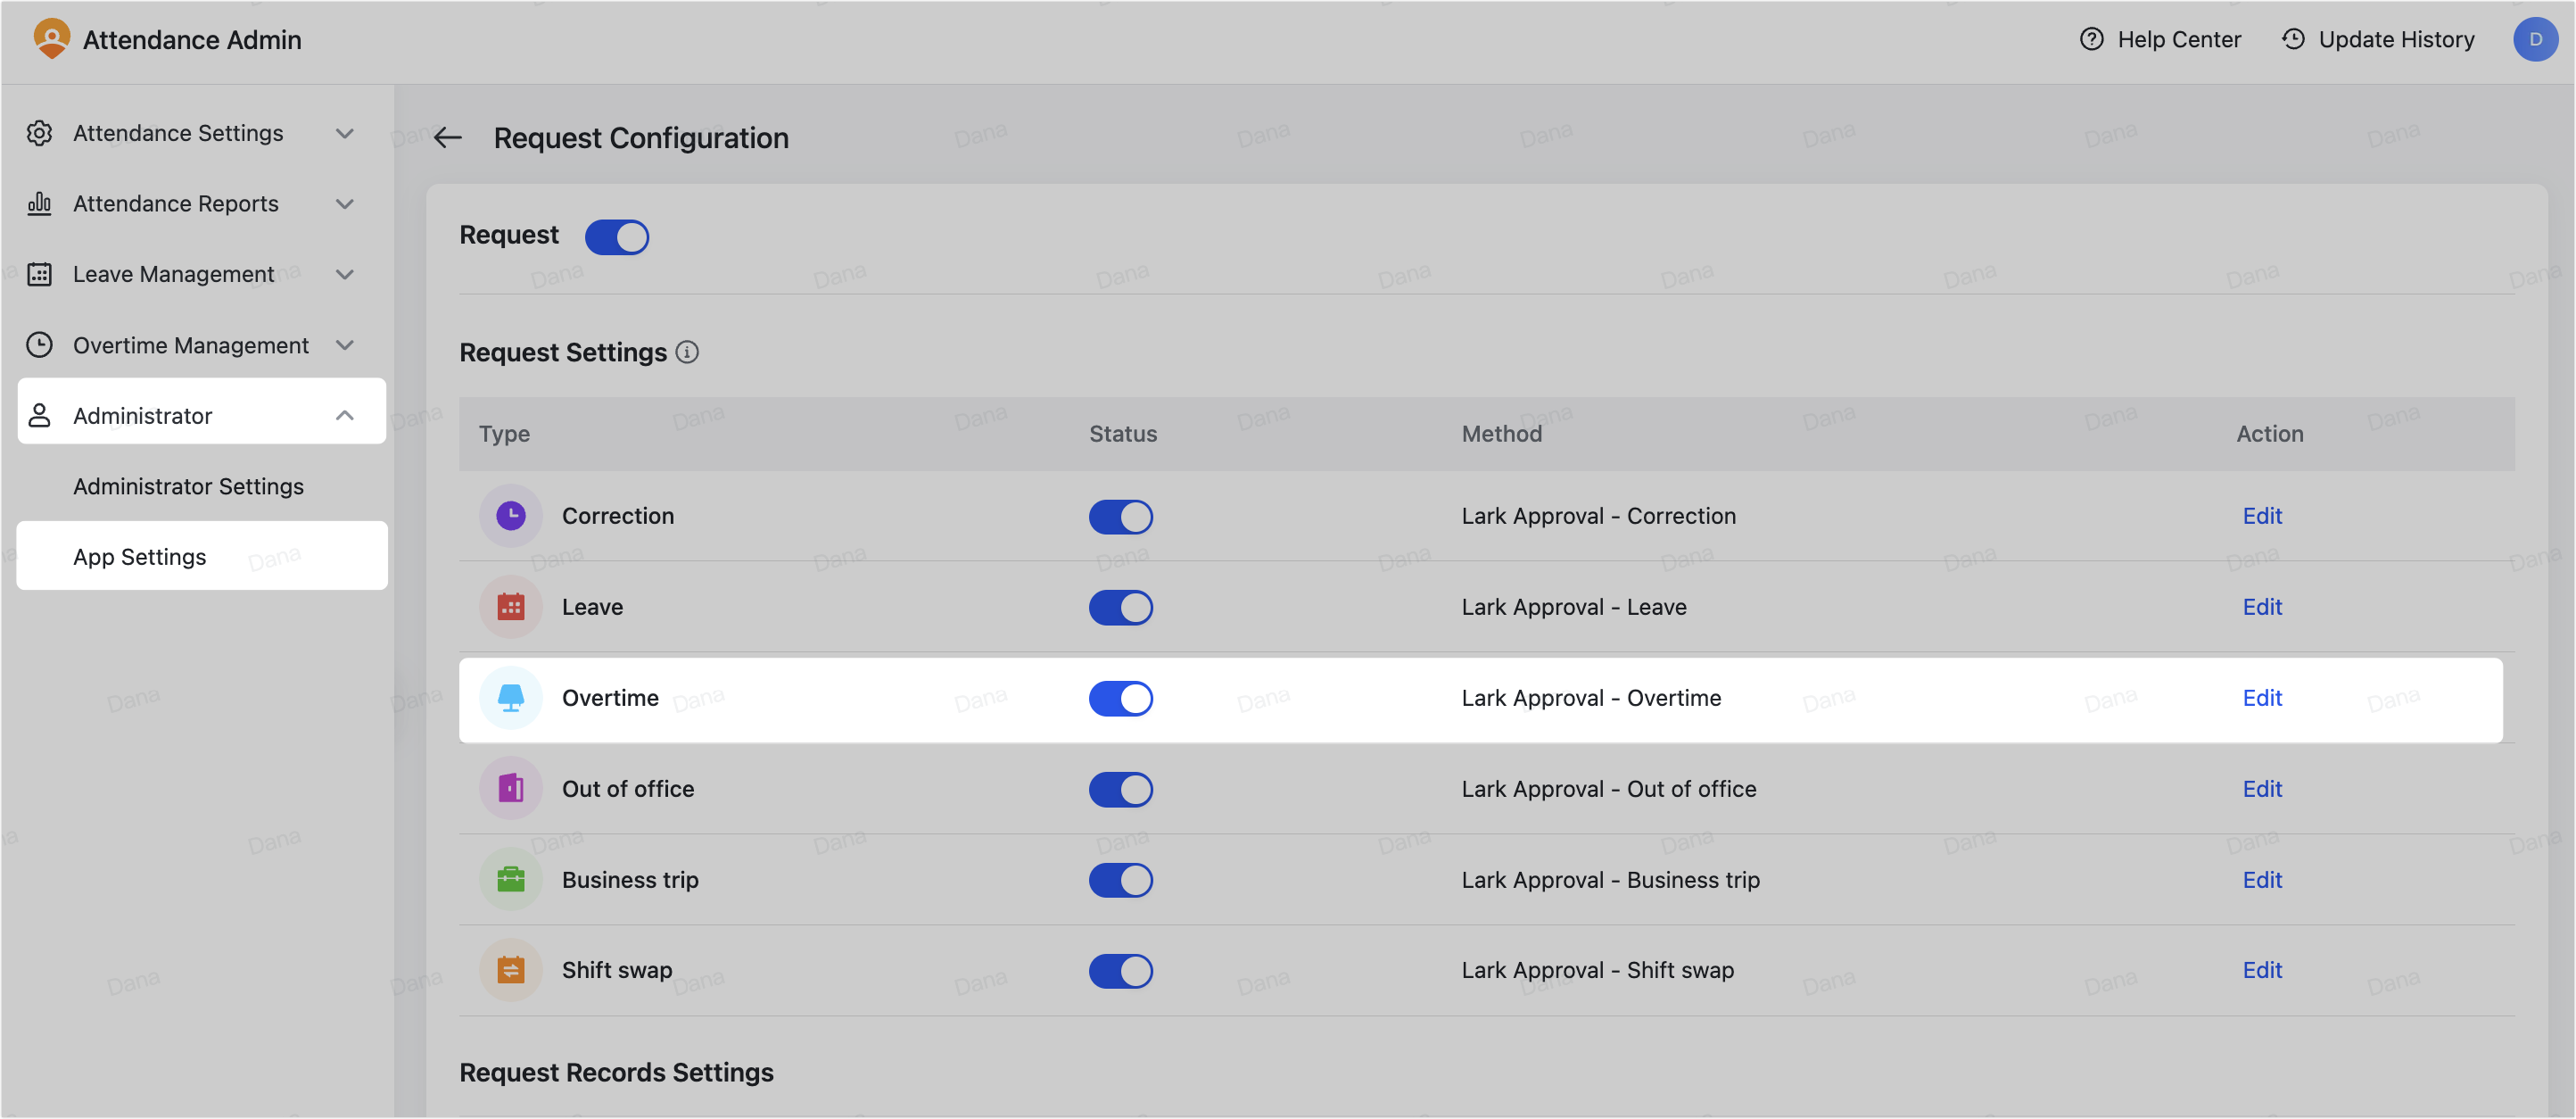
- Open the Attendance admin console and go to Administrator > App Settings.
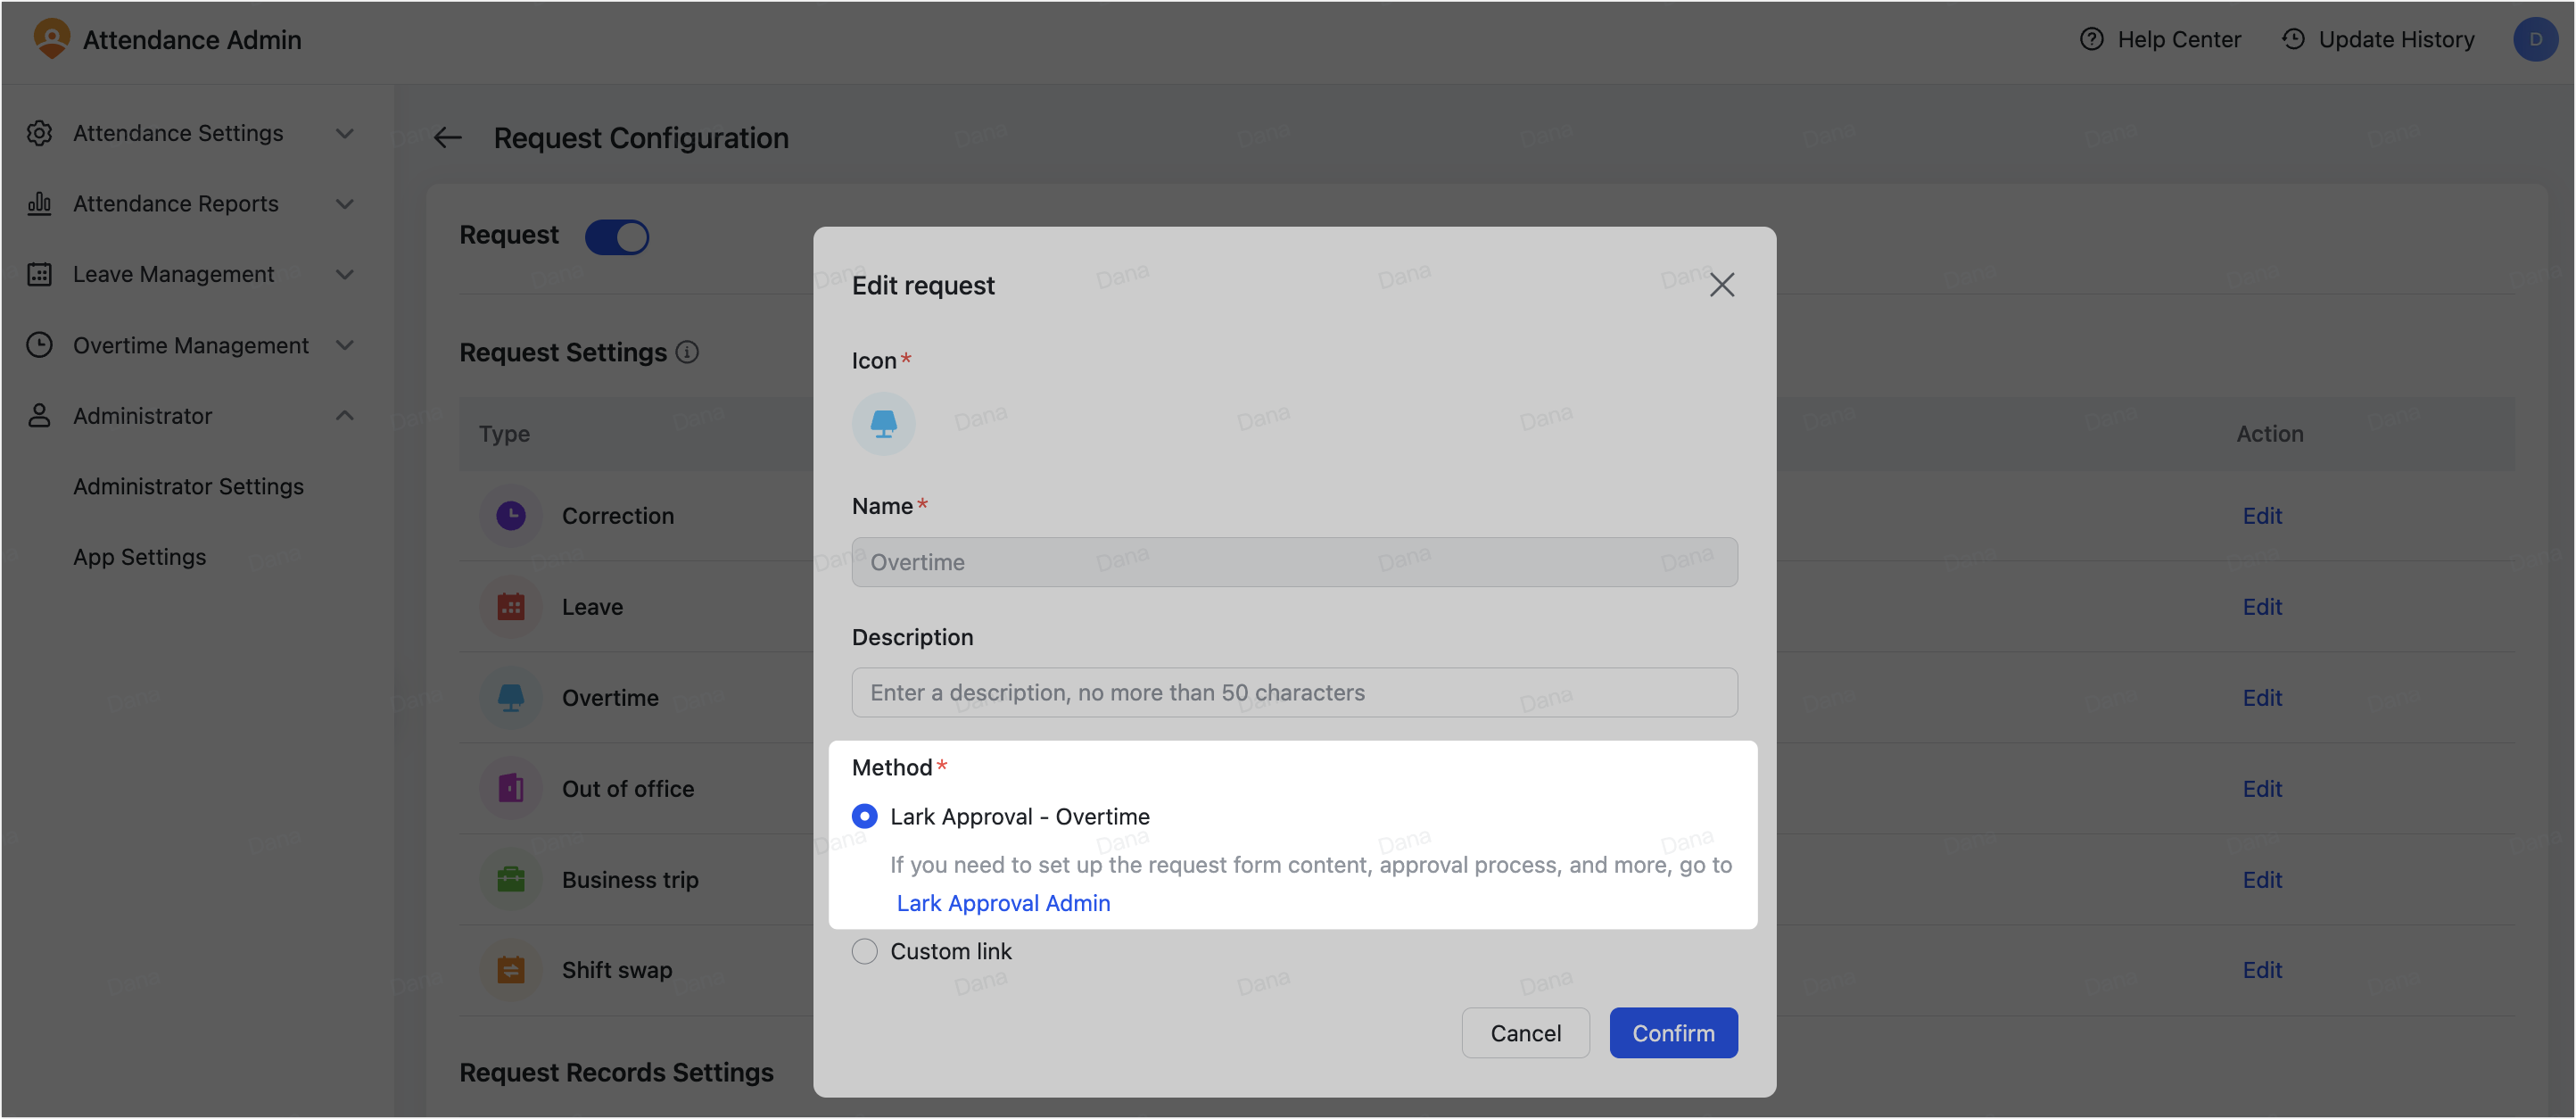
- Click Edit in the Request Settings section.
- Confirm that overtime requests have been turned on and the Method is set to Lark Approval.
250px|700px|reset
250px|700px|reset
Once you've configured the settings, members can submit an overtime request in either the Attendance app or the Approval app. For more information, see Getting started with using Attendance and Get started with requesting approval.
III. FAQs