
Note: For all teachers, please:
- Upgrade your Lark app to the latest version (V3.18.3 or above for desktop app) in advance.
- Make sure your device is properly connected to the internet. Desktop app is preferred for course offering purposes.
- Test your camera before starting a course to make sure that both the camera and the microphone function properly.
I. Start an online course
1. Download Lark and get logged in
Once the installation is completed, launch Lark and enter your email address or phone number to log in.
Note: Administrators shall complete the initialization setup in Lark admin interface and enter the information of faculty members and students. For specific administrator actions, see Admin | Use the Contacts feature.
2. Create a course group
Click the + icon in the upper part of the message list and select New Group. Select a group profile photo, select members to add into the group, and then click Create.
250px|700px|reset
3. Initialize an online course
First, create a group for teachers and students. Then click the camera icon in the upper right corner, and click New Meeting to start a video course in the group.

250px|700px|reset
Alternatively, you can click the + icon on Lark homepage and select New Meeting.
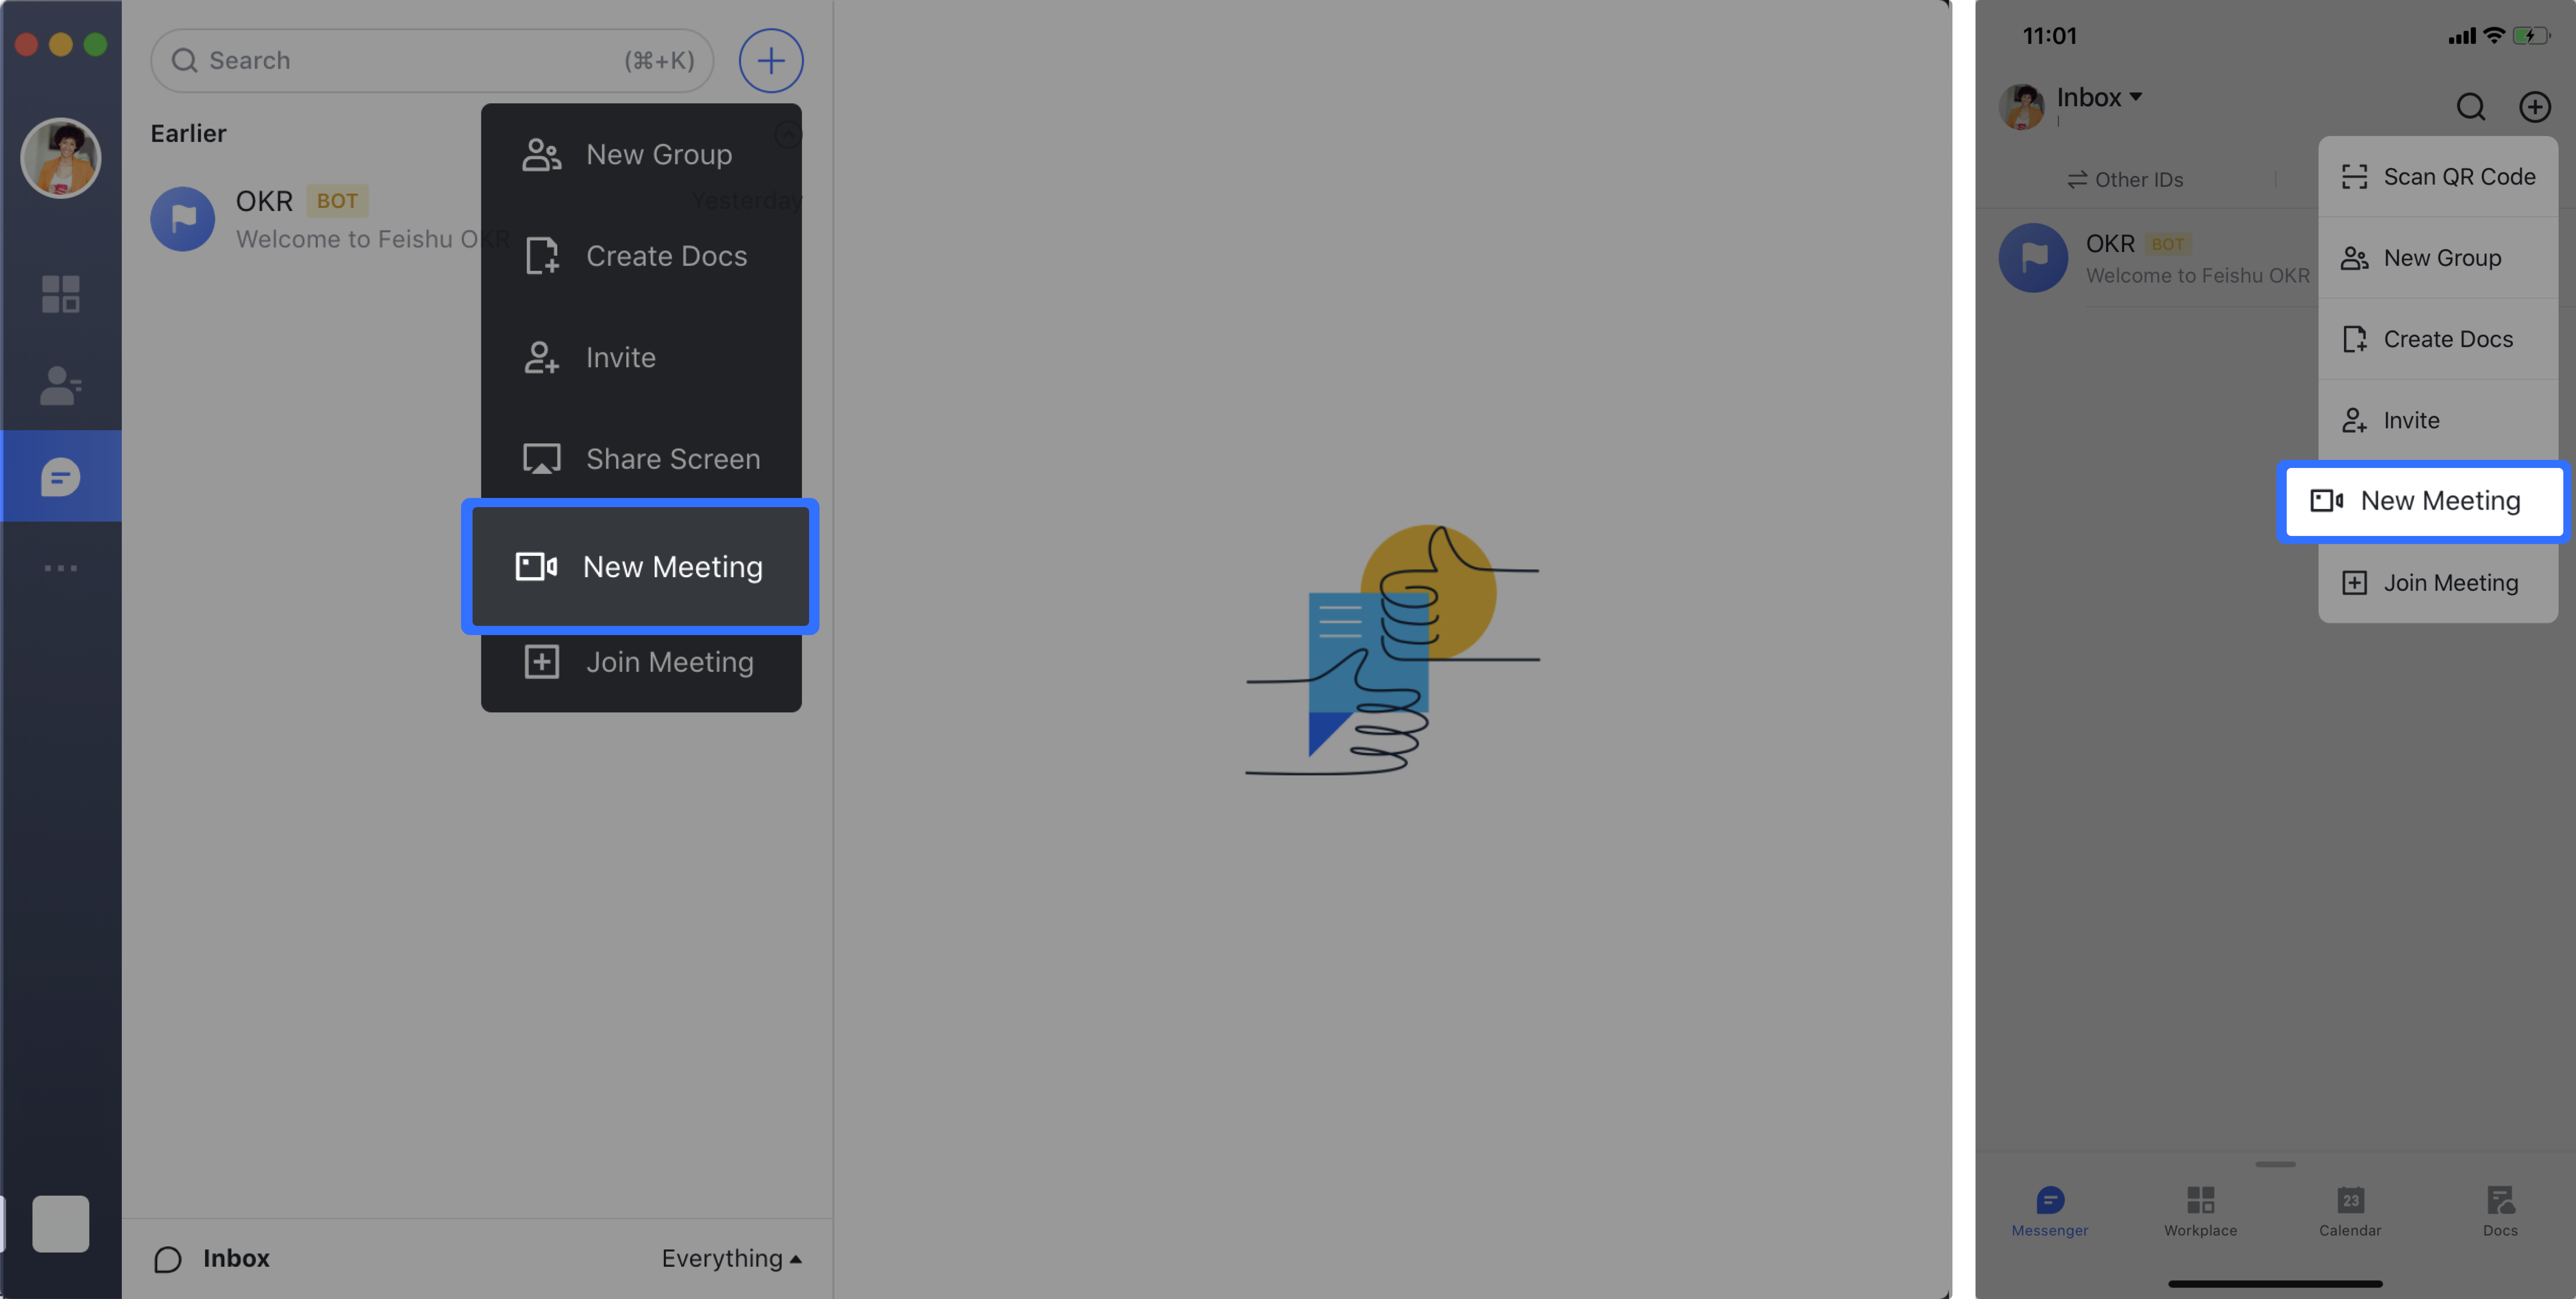
250px|700px|reset
Note: You need to authorize Lark to access the microphone and camera of your current device when initiating or joining a meeting for the first time.
After you've launched a video course, you can invite students, assistants or other teachers to the course through one of the following three methods:
- Search for contacts in the search box.
- Click the Share button to share the meeting card to other contacts or groups.
- The meeting ID is displayed at the top left corner. You can click it to copy and share the meeting ID to other contacts or groups.
250px|700px|reset
II. Deliver a course using audio-video features
You can choose one of the following three modes to deliver a course:
1. Deliver a course by screen sharing
In a video course, participants can click the Share icon to share their own desktop or mobile app window.
To avoid teachers or students having choppy or delayed videos because of poor network connections, it's recommended that teaching materials are shared with students in advance when video recordings or PPTs containing video clips are used in the course, so students can access the resources from their local drives whenever needed.

250px|700px|reset
2. Deliver a course by document sharing
You can share a document in Lark during an online course. Document sharing features highlight the following advantages:
- Tracking of the presenter's view: Students can select View with presenter to closely follow the presenter's mouse and explanations in the document.
- Free view: Students can click View on your own whenever they wish to view the document at their own pace.
- Real-time collaborative editing: With View on your own option, the teacher and students can simultaneously edit the document being shared on the screen.
- Teachers can change permissions for all documents shared in a course.
Note:
When Readable while being shared only is selected, the document is only available for participants to read while it is being shared, that is, students have no permission to read the document after the session is over.
When Readable is selected, the shared document is readable even after the sharing session is over.
250px|700px|reset
III. Common actions in video courses
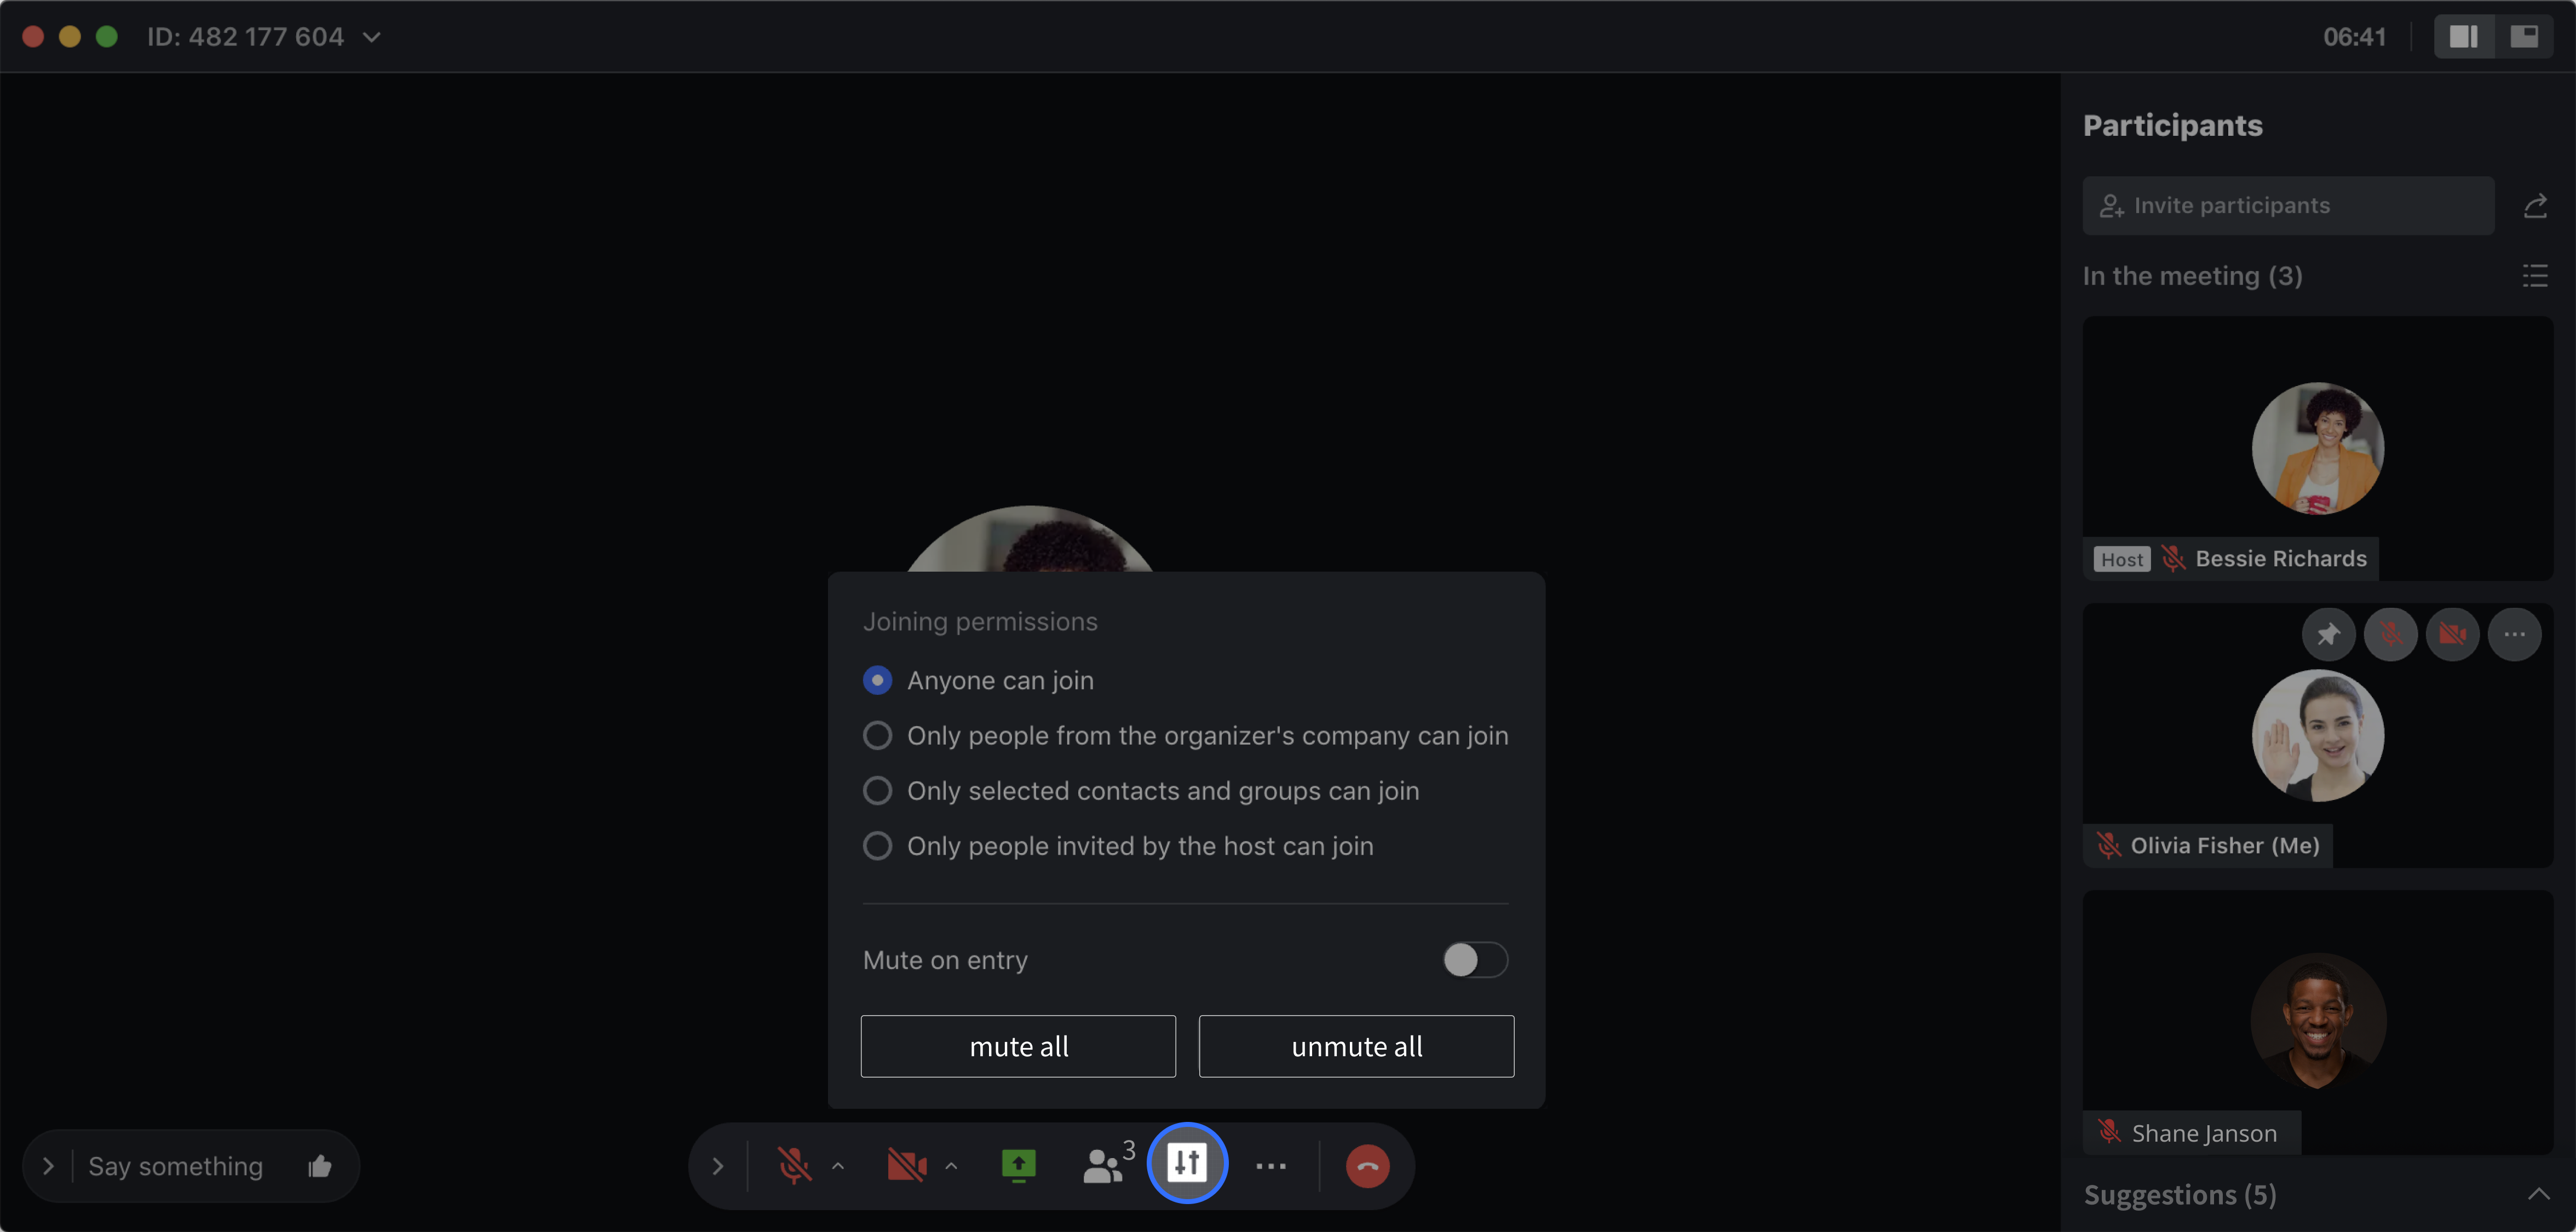
1. Mute all and Unmute all
The meeting host can click the Host controls button to mute or unmute all microphones.
- After the presenter selects Mute all, the microphones of all participants will be muted.
- After the presenter selects Unmute all, the previously muted participants will receive a prompt asking whether they would like to turn on their microphones.
Note: The meeting initiator is, by default, assigned as the meeting host. If the host leaves the meeting, the system will automatically assign a new host.
250px|700px|reset
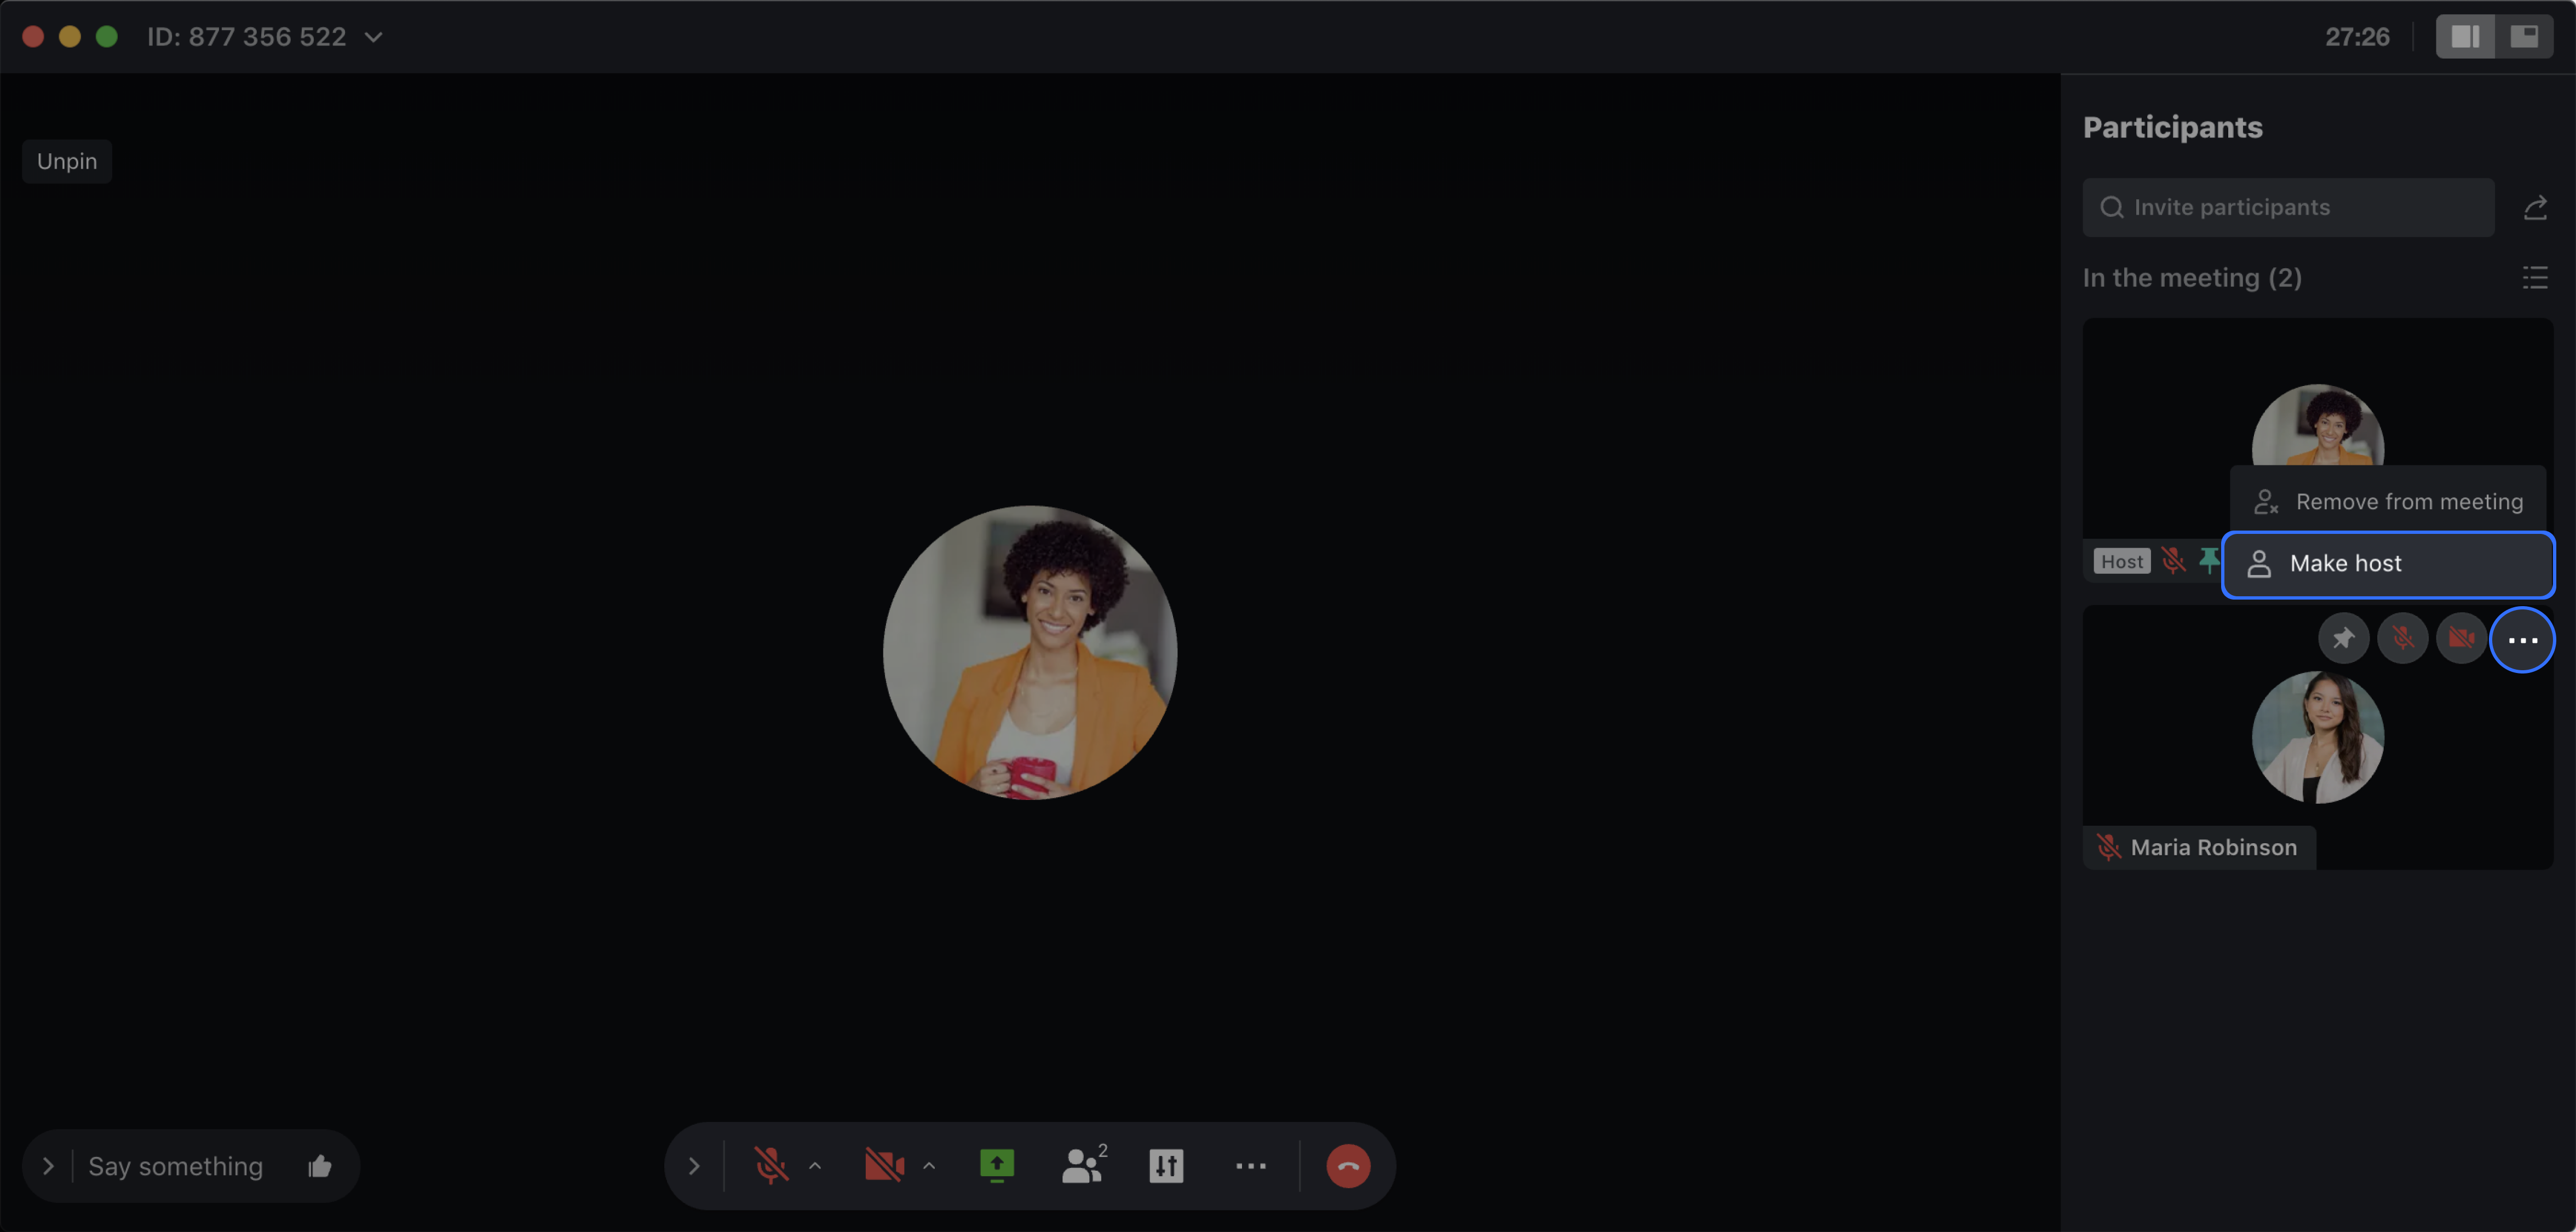
2. Transfer the meeting host or remove a participant
The host can hover the mouse over a participant and then click the ... icon and select Remove from meeting or Make host as needed.
250px|700px|reset
3. Lock a meeting
The meeting locking feature serves to enhance the security of a video meeting. You can click the Host controls button and then click Lock meeting to lock a meeting.
The available features and permissions of participants will change after a meeting is locked.
Host: The host can invite teachers or students to join a meeting by calling particular users, but they cannot invite others by sharing the meeting card.
Other participants: They will not be allowed to use the Invite function and hence cannot invite others into the course.
250px|700px|reset
IV. FAQs