
I. Intro
Purchase information: Separate payment is required for this feature. For more information, contact Support or your Customer Success Manager.
Version requirement: Lark Rooms/Lark Rooms Controller version 6.0 or above.
Who can perform these steps: Primary administrators and administrators with Meeting Room permissions.
- Meeting spaces with higher levels of security and privacy: You can associate a meeting room to a member to make it their own dedicated meeting space.
- More convenient meetings: Private offices automatically sync with personal events, meaning office owners can hold meetings from their private office without needing to add it to the event.
II. Deployment
Like meeting rooms, Lark private offices need to be deployed before they can be used. Administrators can go to the Lark Admin Console and click Meeting Room > Room Management in the left navigation bar to manage the Lark Rooms app and offline private offices.

250px|700px|reset
Deployment flowchart
1. Add, edit, or delete private offices
Administrators can add and manage private offices via the Admin Console. If an office is no longer required, administrators also have the option to delete it.
1.1 Add an office
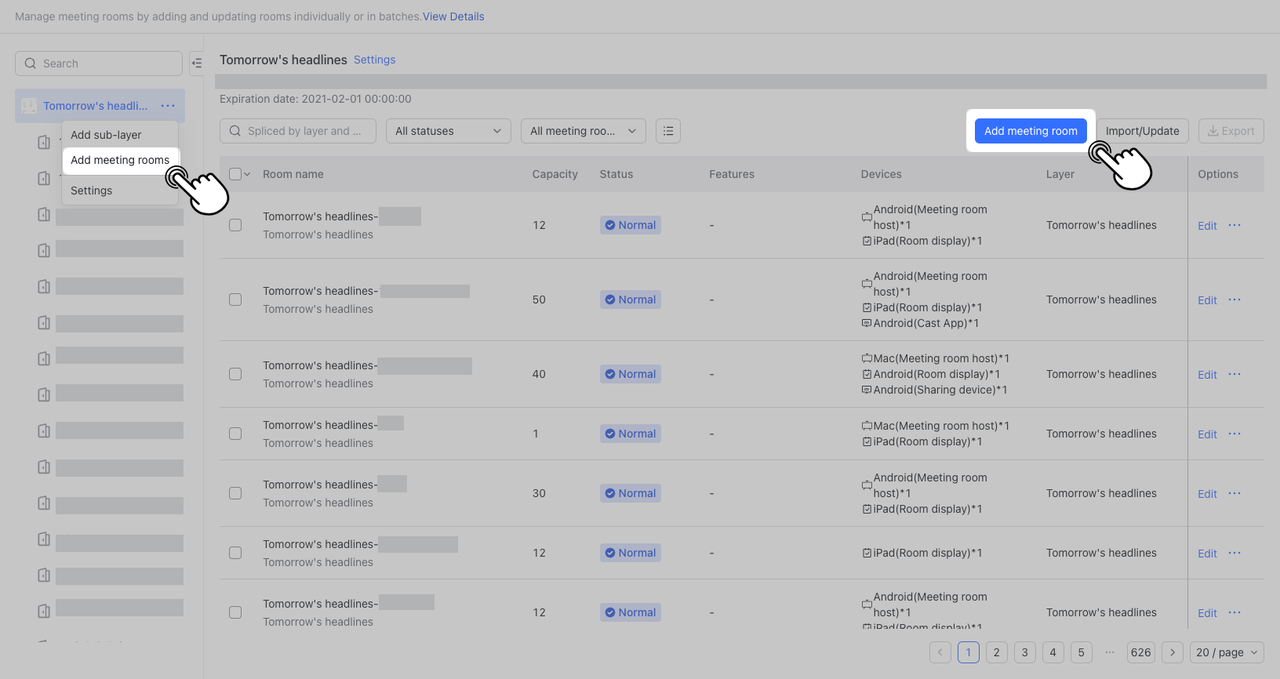
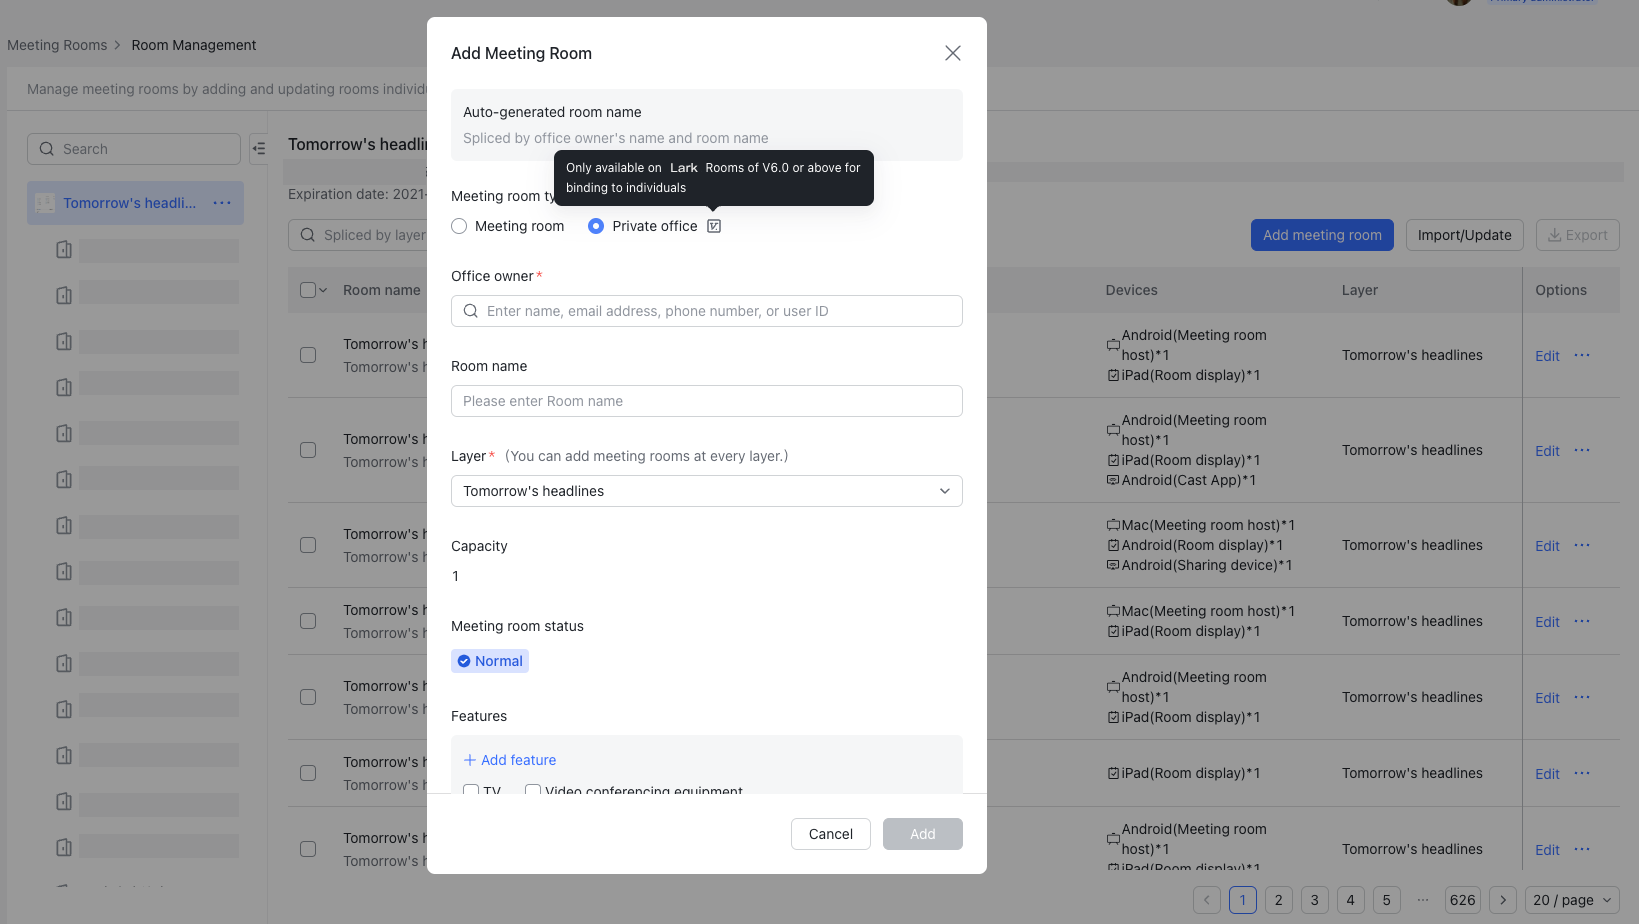
Select the meeting room layer you want to add the room to and click ... > Add meeting rooms on the right or Add meeting room in the upper-right corner of the meeting room information page. In the pop-up window, select Private office as the Meeting room type. Enter a name, then select the office owner and other information. Click Add in the lower-right corner when done.
Note: A private office can only have one owner, however an owner can have multiple private offices.
250px|700px|reset
250px|700px|reset
1.2 Edit an office
There are three ways for an administrator to modify an office's name, layer, and other information.
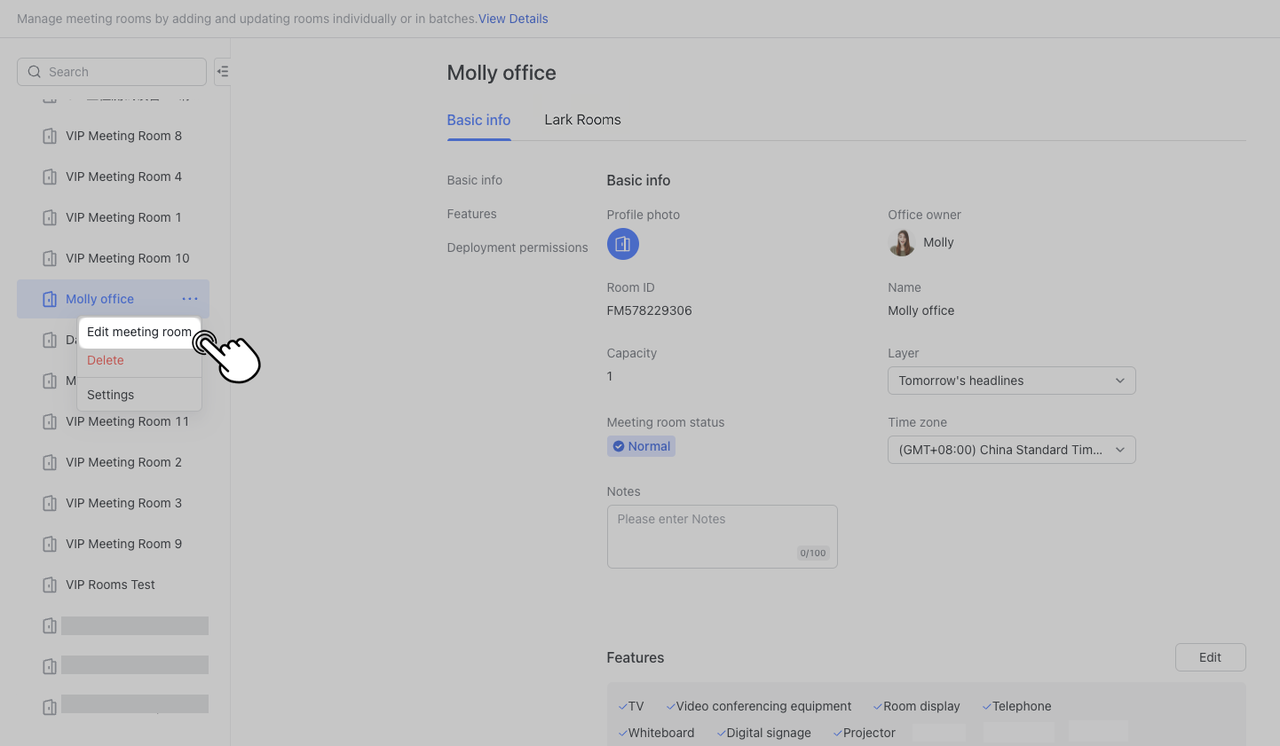
- Method 1: Click ... to the right of the office in the layer management menu and select Edit meeting room.
250px|700px|reset
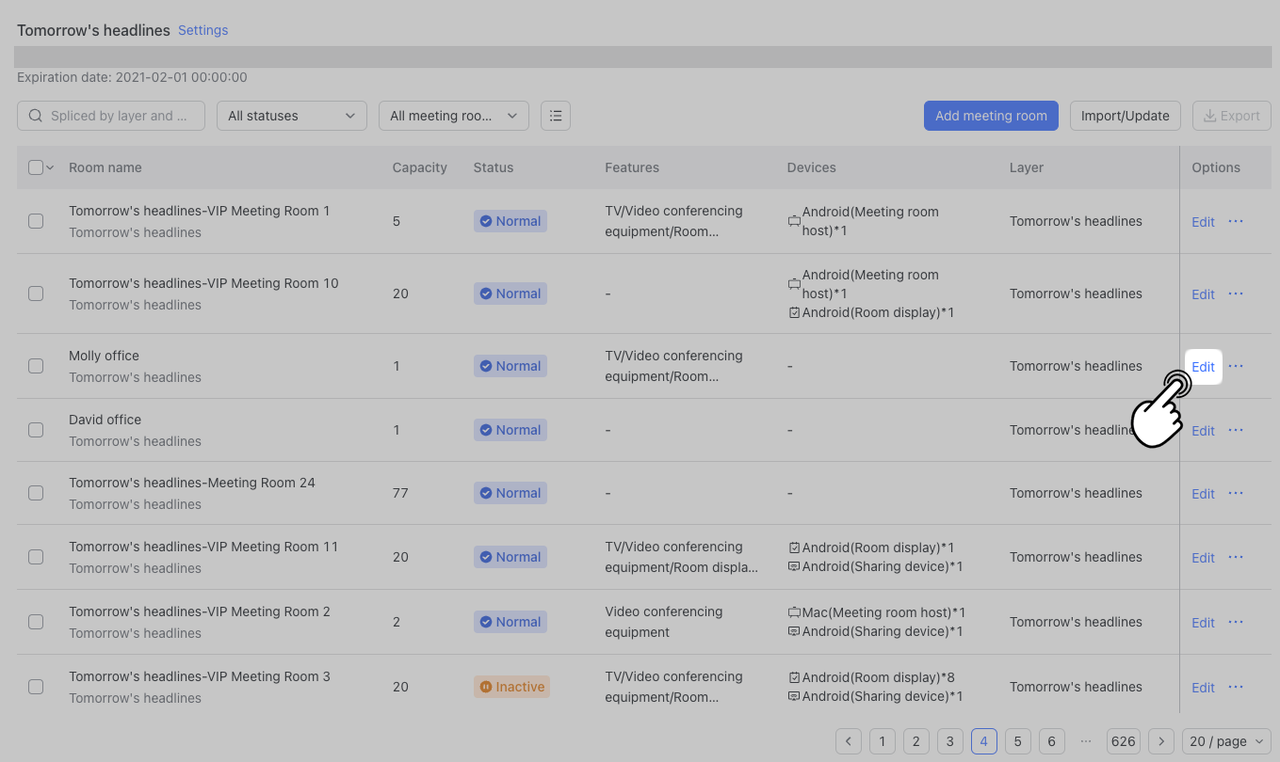
- Method 2: Find the office on the Meeting Room information page and click Edit under Options.
250px|700px|reset
- Method 3: Click the office name on the Meeting Room information page and select Edit in the window that appears on the right.

250px|700px|reset
Note: Office owners cannot be edited. If you need to change an office's owner, you must delete the office and add it again.
1.3 Delete an office
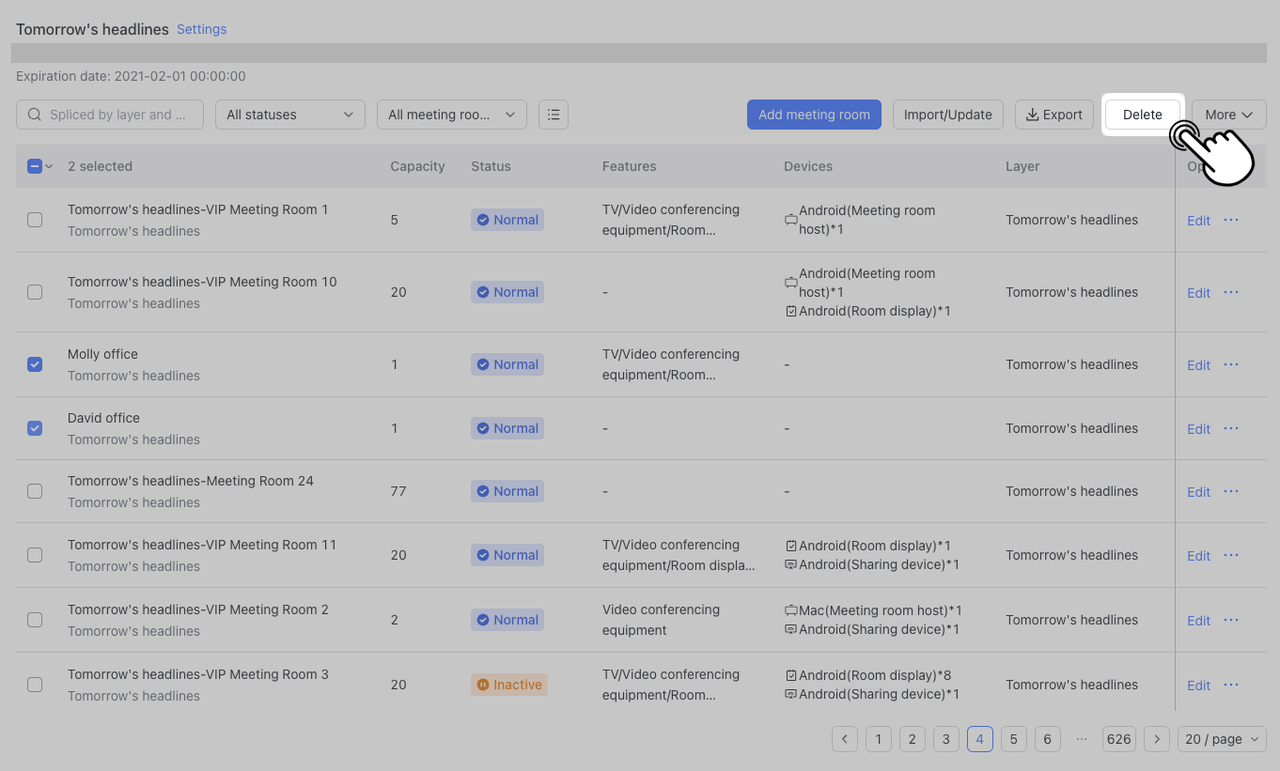
If there are offices that are no longer needed or no longer in use, administrators can delete them individually or in batches.
- Method 1: Delete individually
If you only need to delete a single office, you can click ... to the right of the individual office in the layer management menu and select Delete. Alternatively, you can find the office on the Meeting Room information page. Click ... under the rightmost Options and select Delete.


250px|700px|reset
250px|700px|reset
- Method 2: Batch delete
If you need to delete multiple offices, you can go to the Meeting Room information page, check the boxes next to the names of the offices you want to delete, and then click Delete in the upper-right corner. Click Delete again in lower-right corner of the pop-up window to confirm.
250px|700px|reset
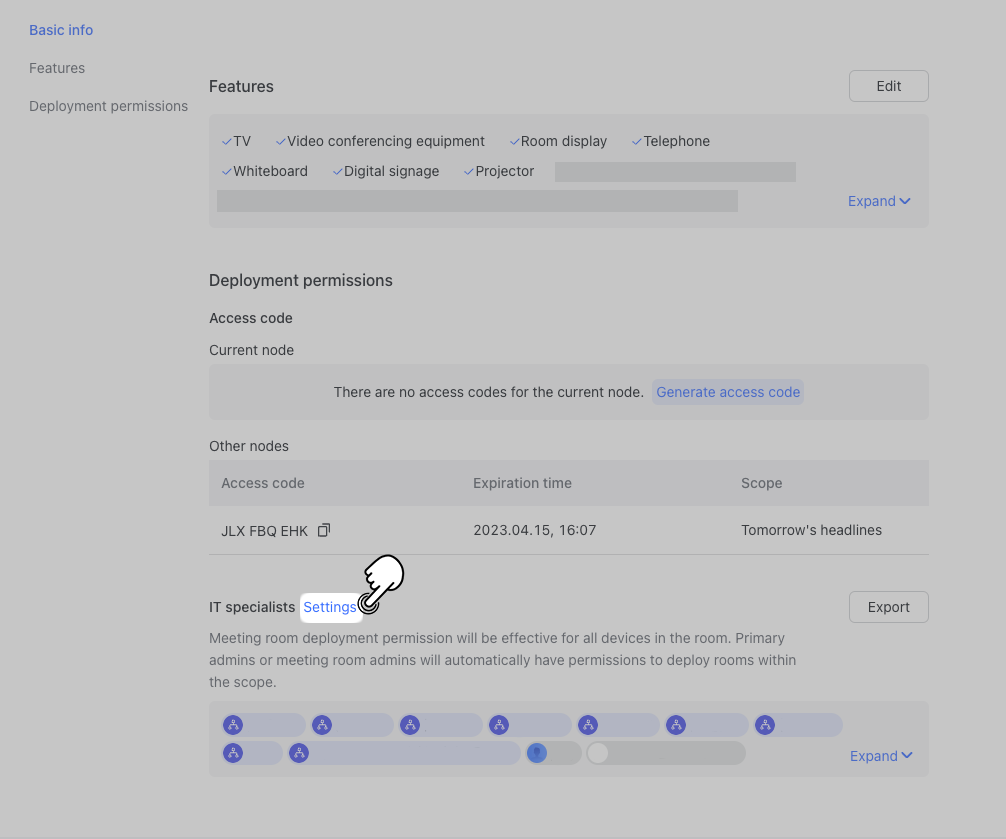
2. Configure office deployment permissions
Once an office has been added, administrators can choose to assign office deployment permissions to members.
2.1 Assign permanent permissions
Select the office that requires deployment permissions to be configured and click Basic info > Deployment permissions. Click Settings next to IT specialists. The Add Deployment Members window will pop up.
250px|700px|reset
You can search members or search departments to select the member/department you wish to configure. Click Confirm after making your selection.
Those members who are added will permanently have deployment permissions, unless later manually removed. They can open the Lark Rooms app and scan the QR code to begin the deployment process.
250px|700px|reset
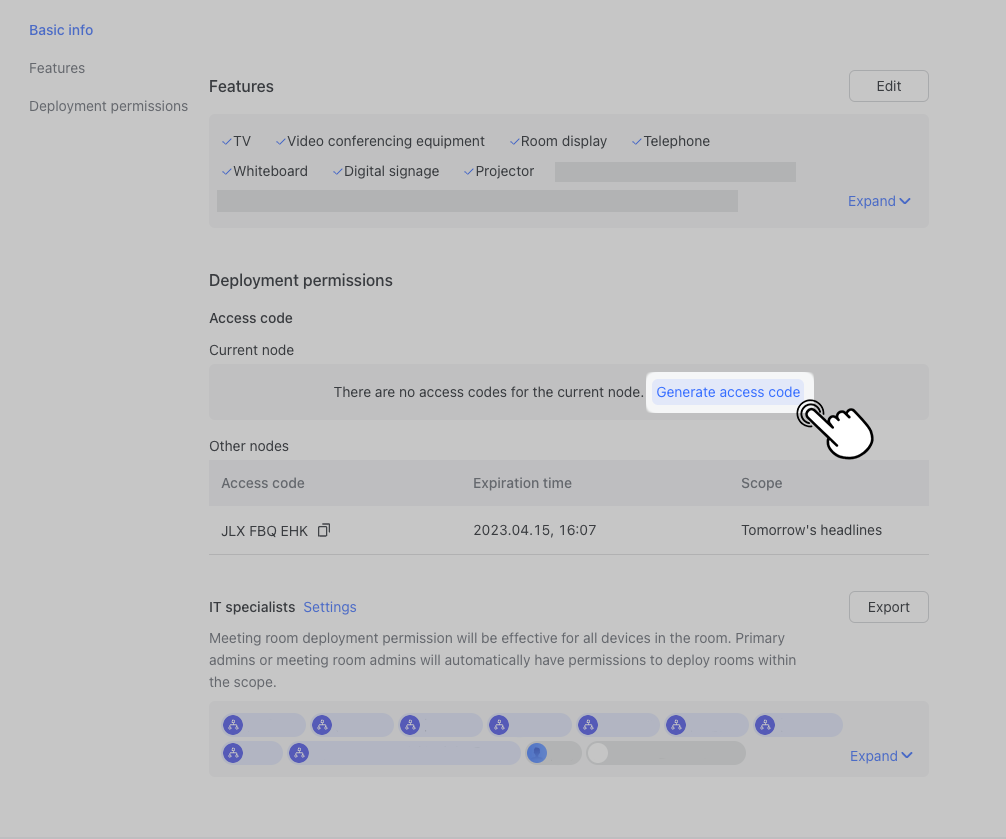
2.2 Assign temporary permissions
Select the office you want to configure deployment permissions for and go to Basic info > Deployment permissions > Generate access code. Select a validity period and then click Confirm to generate an access code for the layer. You can generate another access code here when the original one expires.
250px|700px|reset
Once the access code is generated, all members with this code will have deployment permissions for all devices in the office for the validity period. They can open the Lark Rooms app and enter the access code to complete verification and start deployment.
3. Associate offices
Once the relevant members have obtained the office device deployment permissions, they can associate offline offices. Before associating, ensure that the Lark Rooms app has been installed on the host computer and that the Lark Rooms Controller app has been installed on the controller device.
3.1 Associate the office and Lark Rooms app on the host computer
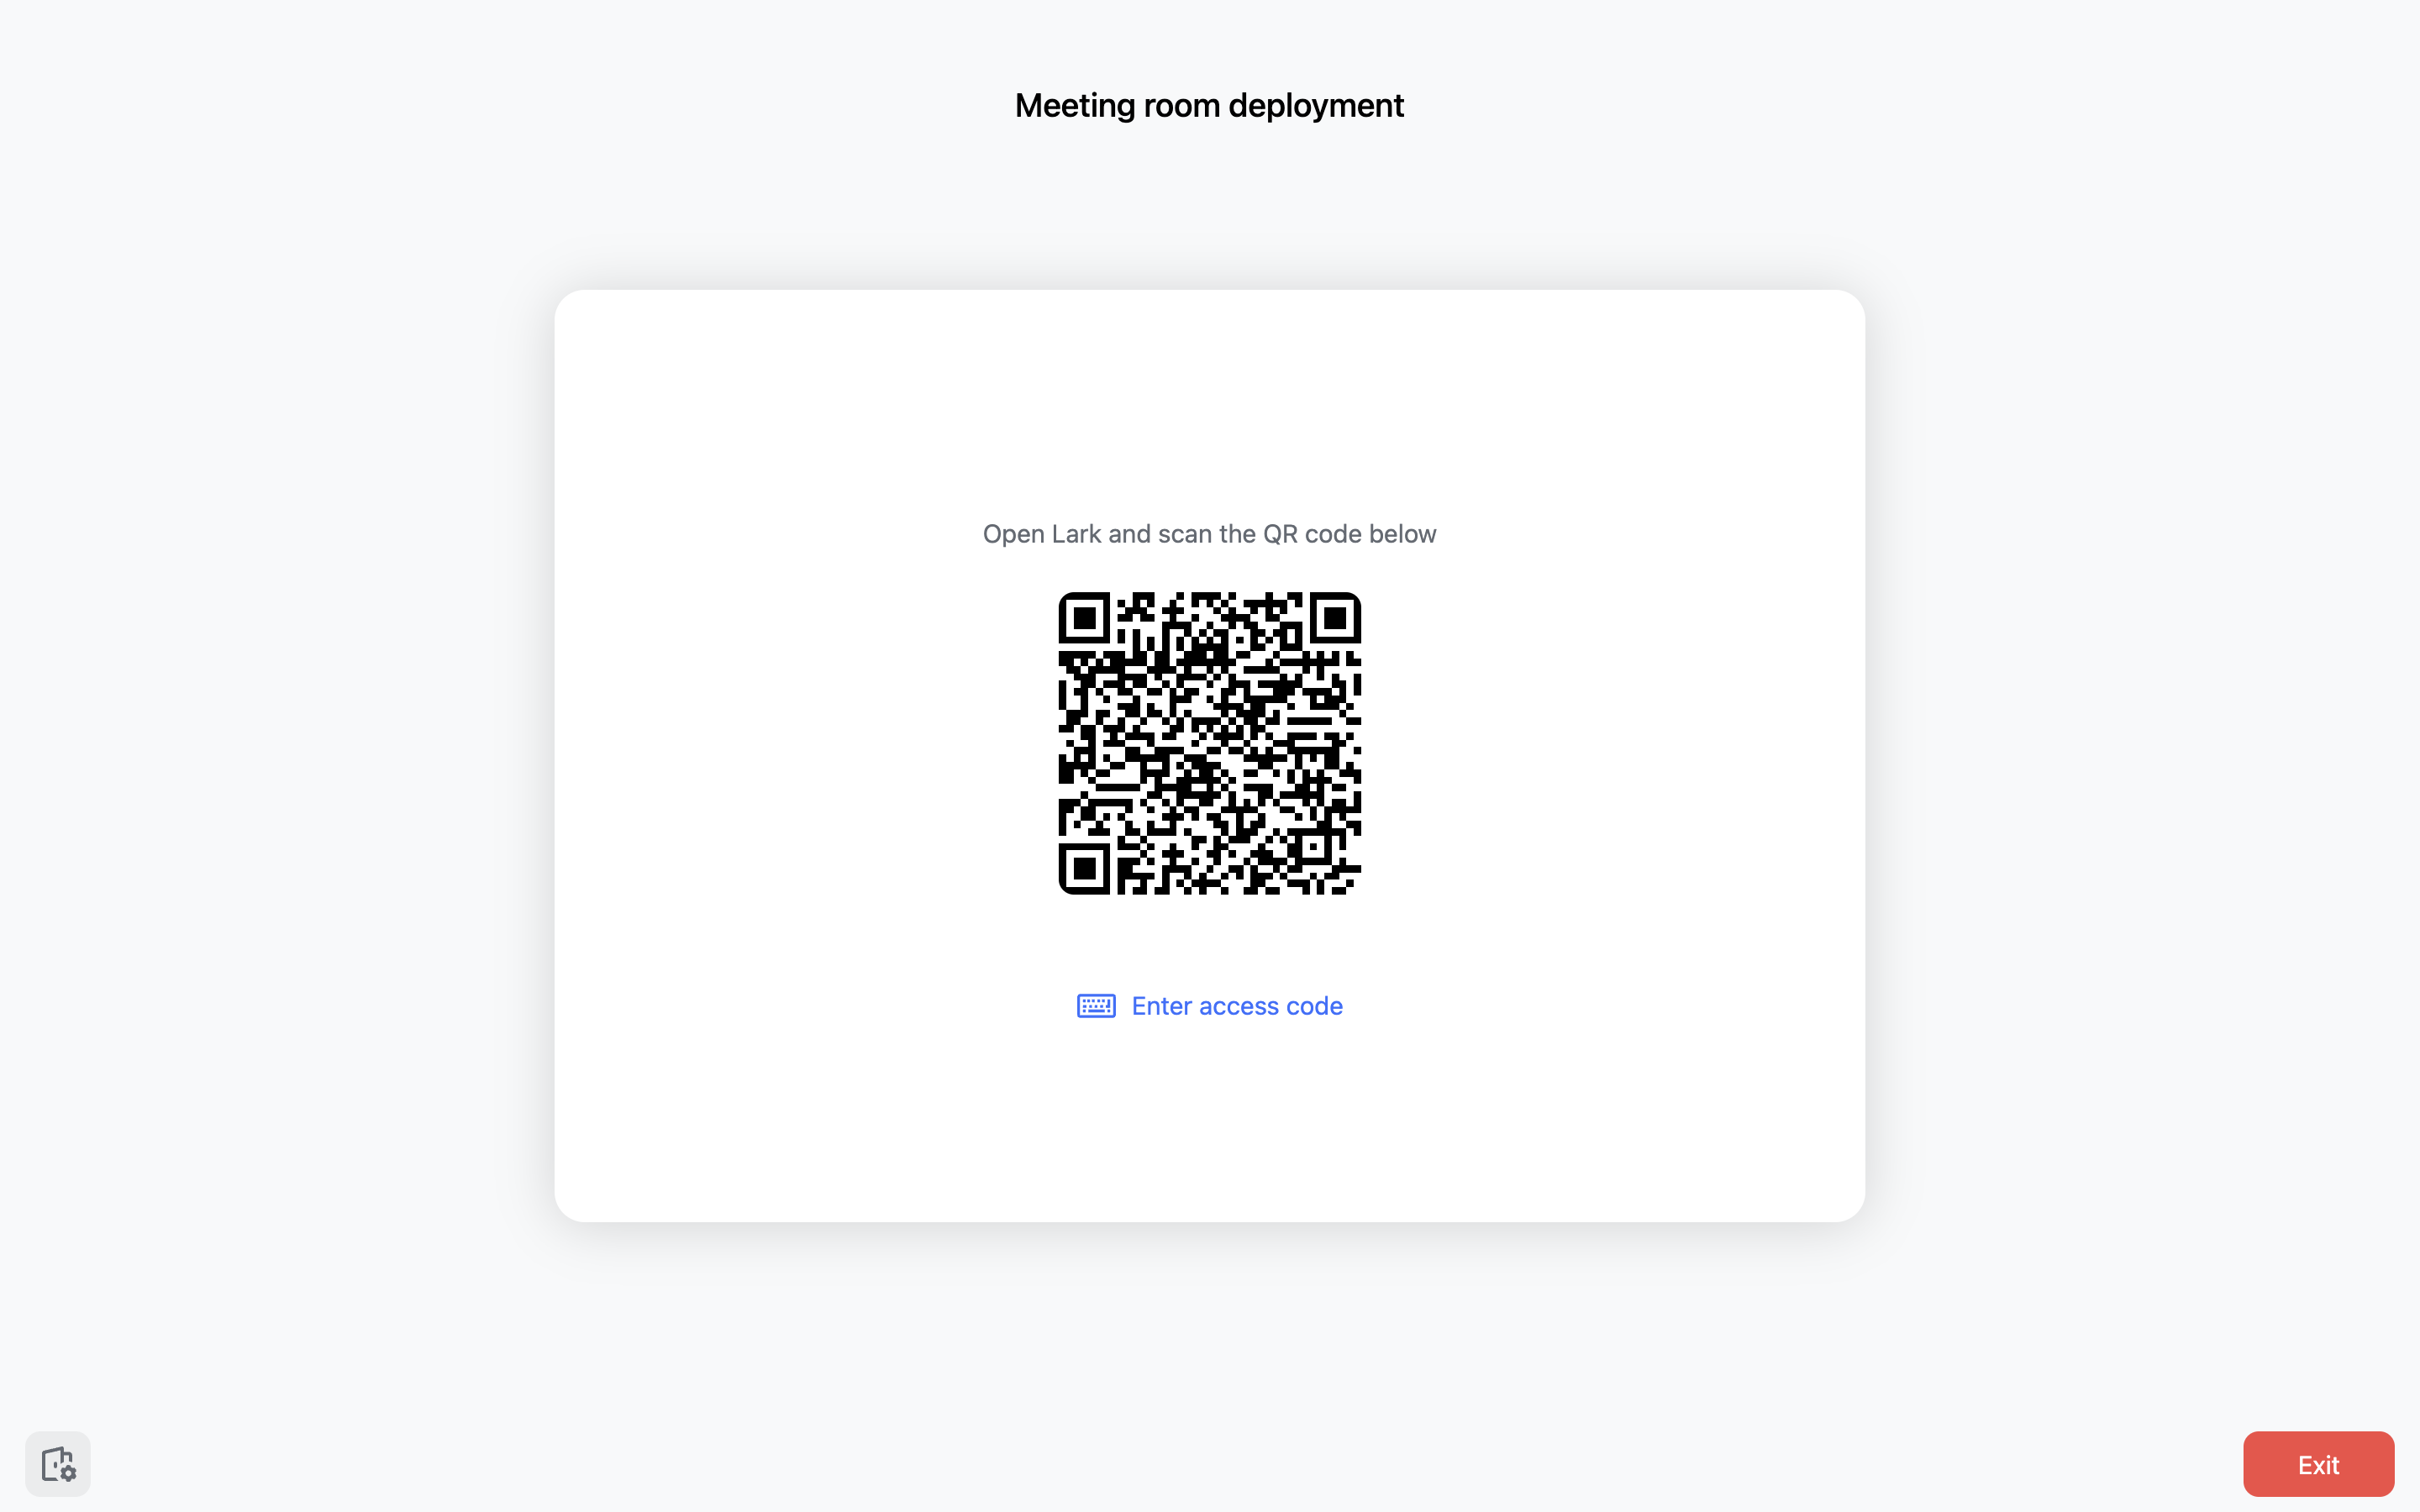
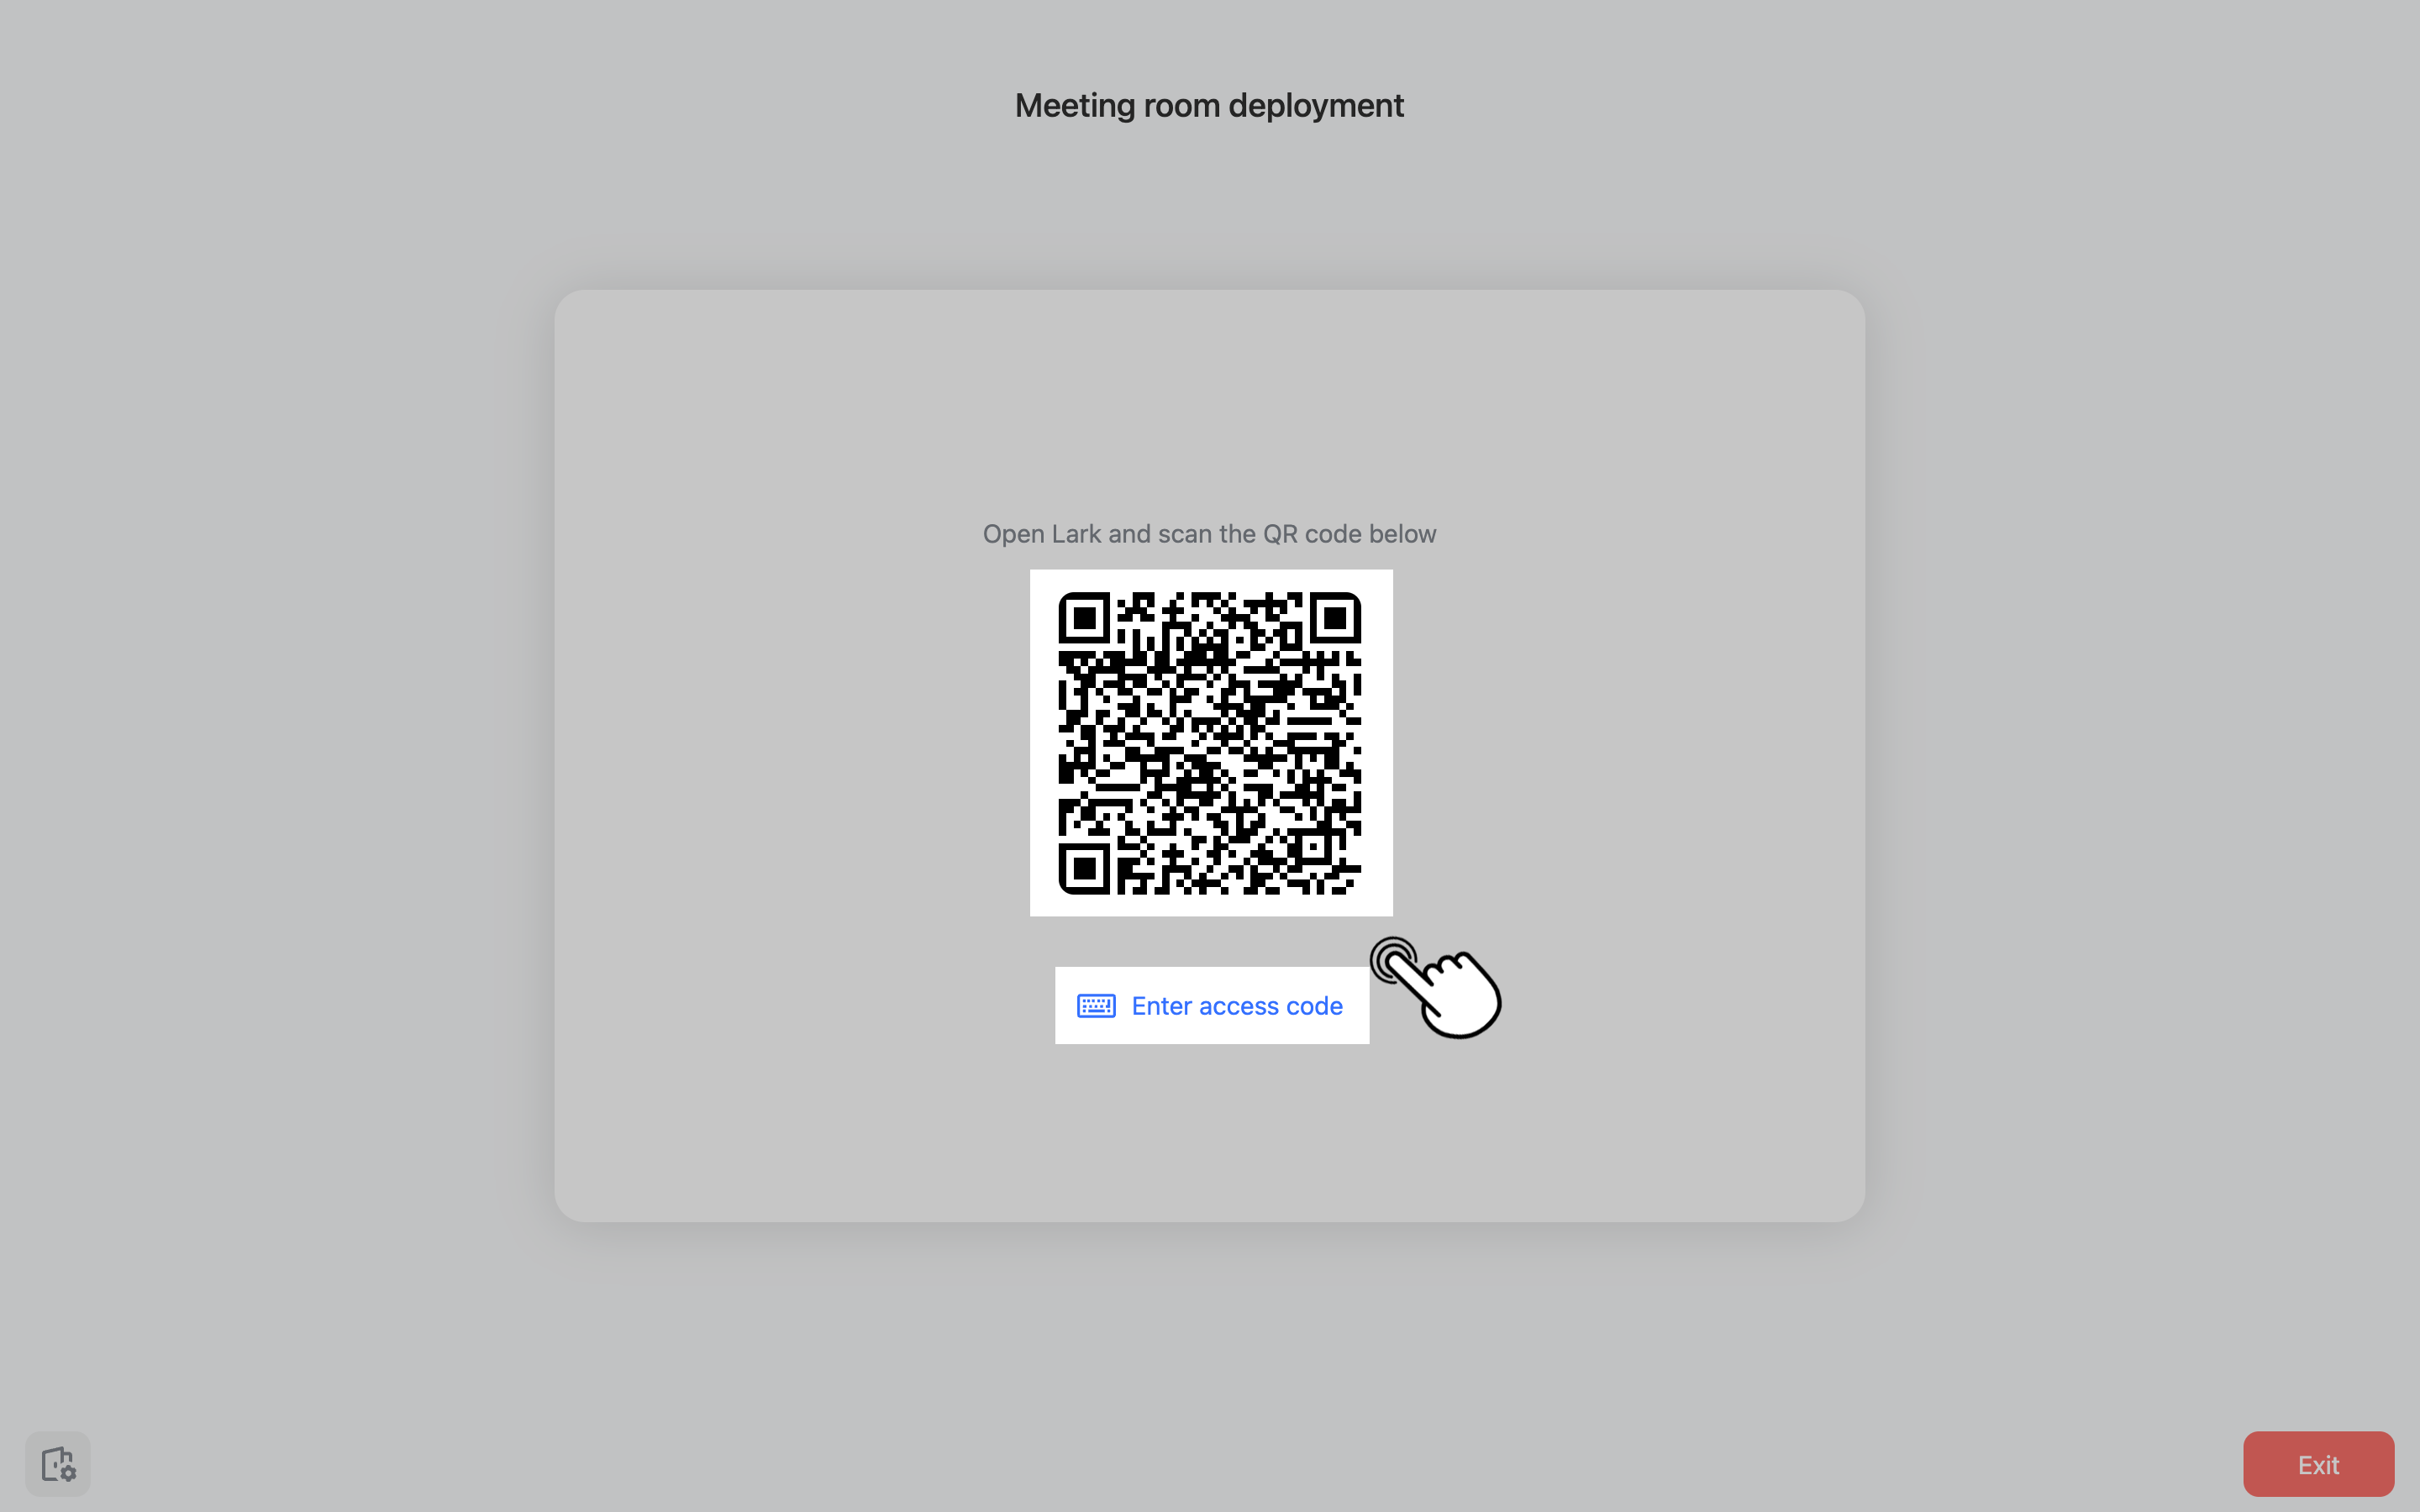
- Method 1: Scan the QR code
Open the Lark Rooms app on the host computer. Scan the QR code with a mobile device running Lark Rooms that is logged in to an account that has deployment permissions to complete identity verification. Once verification is complete, select the office you want to associate with on the mobile app and tap Associate. Once successfully associated, the mobile app will display "Successfully associated" and the office screen will show the six-digit pairing code to pair the controller.
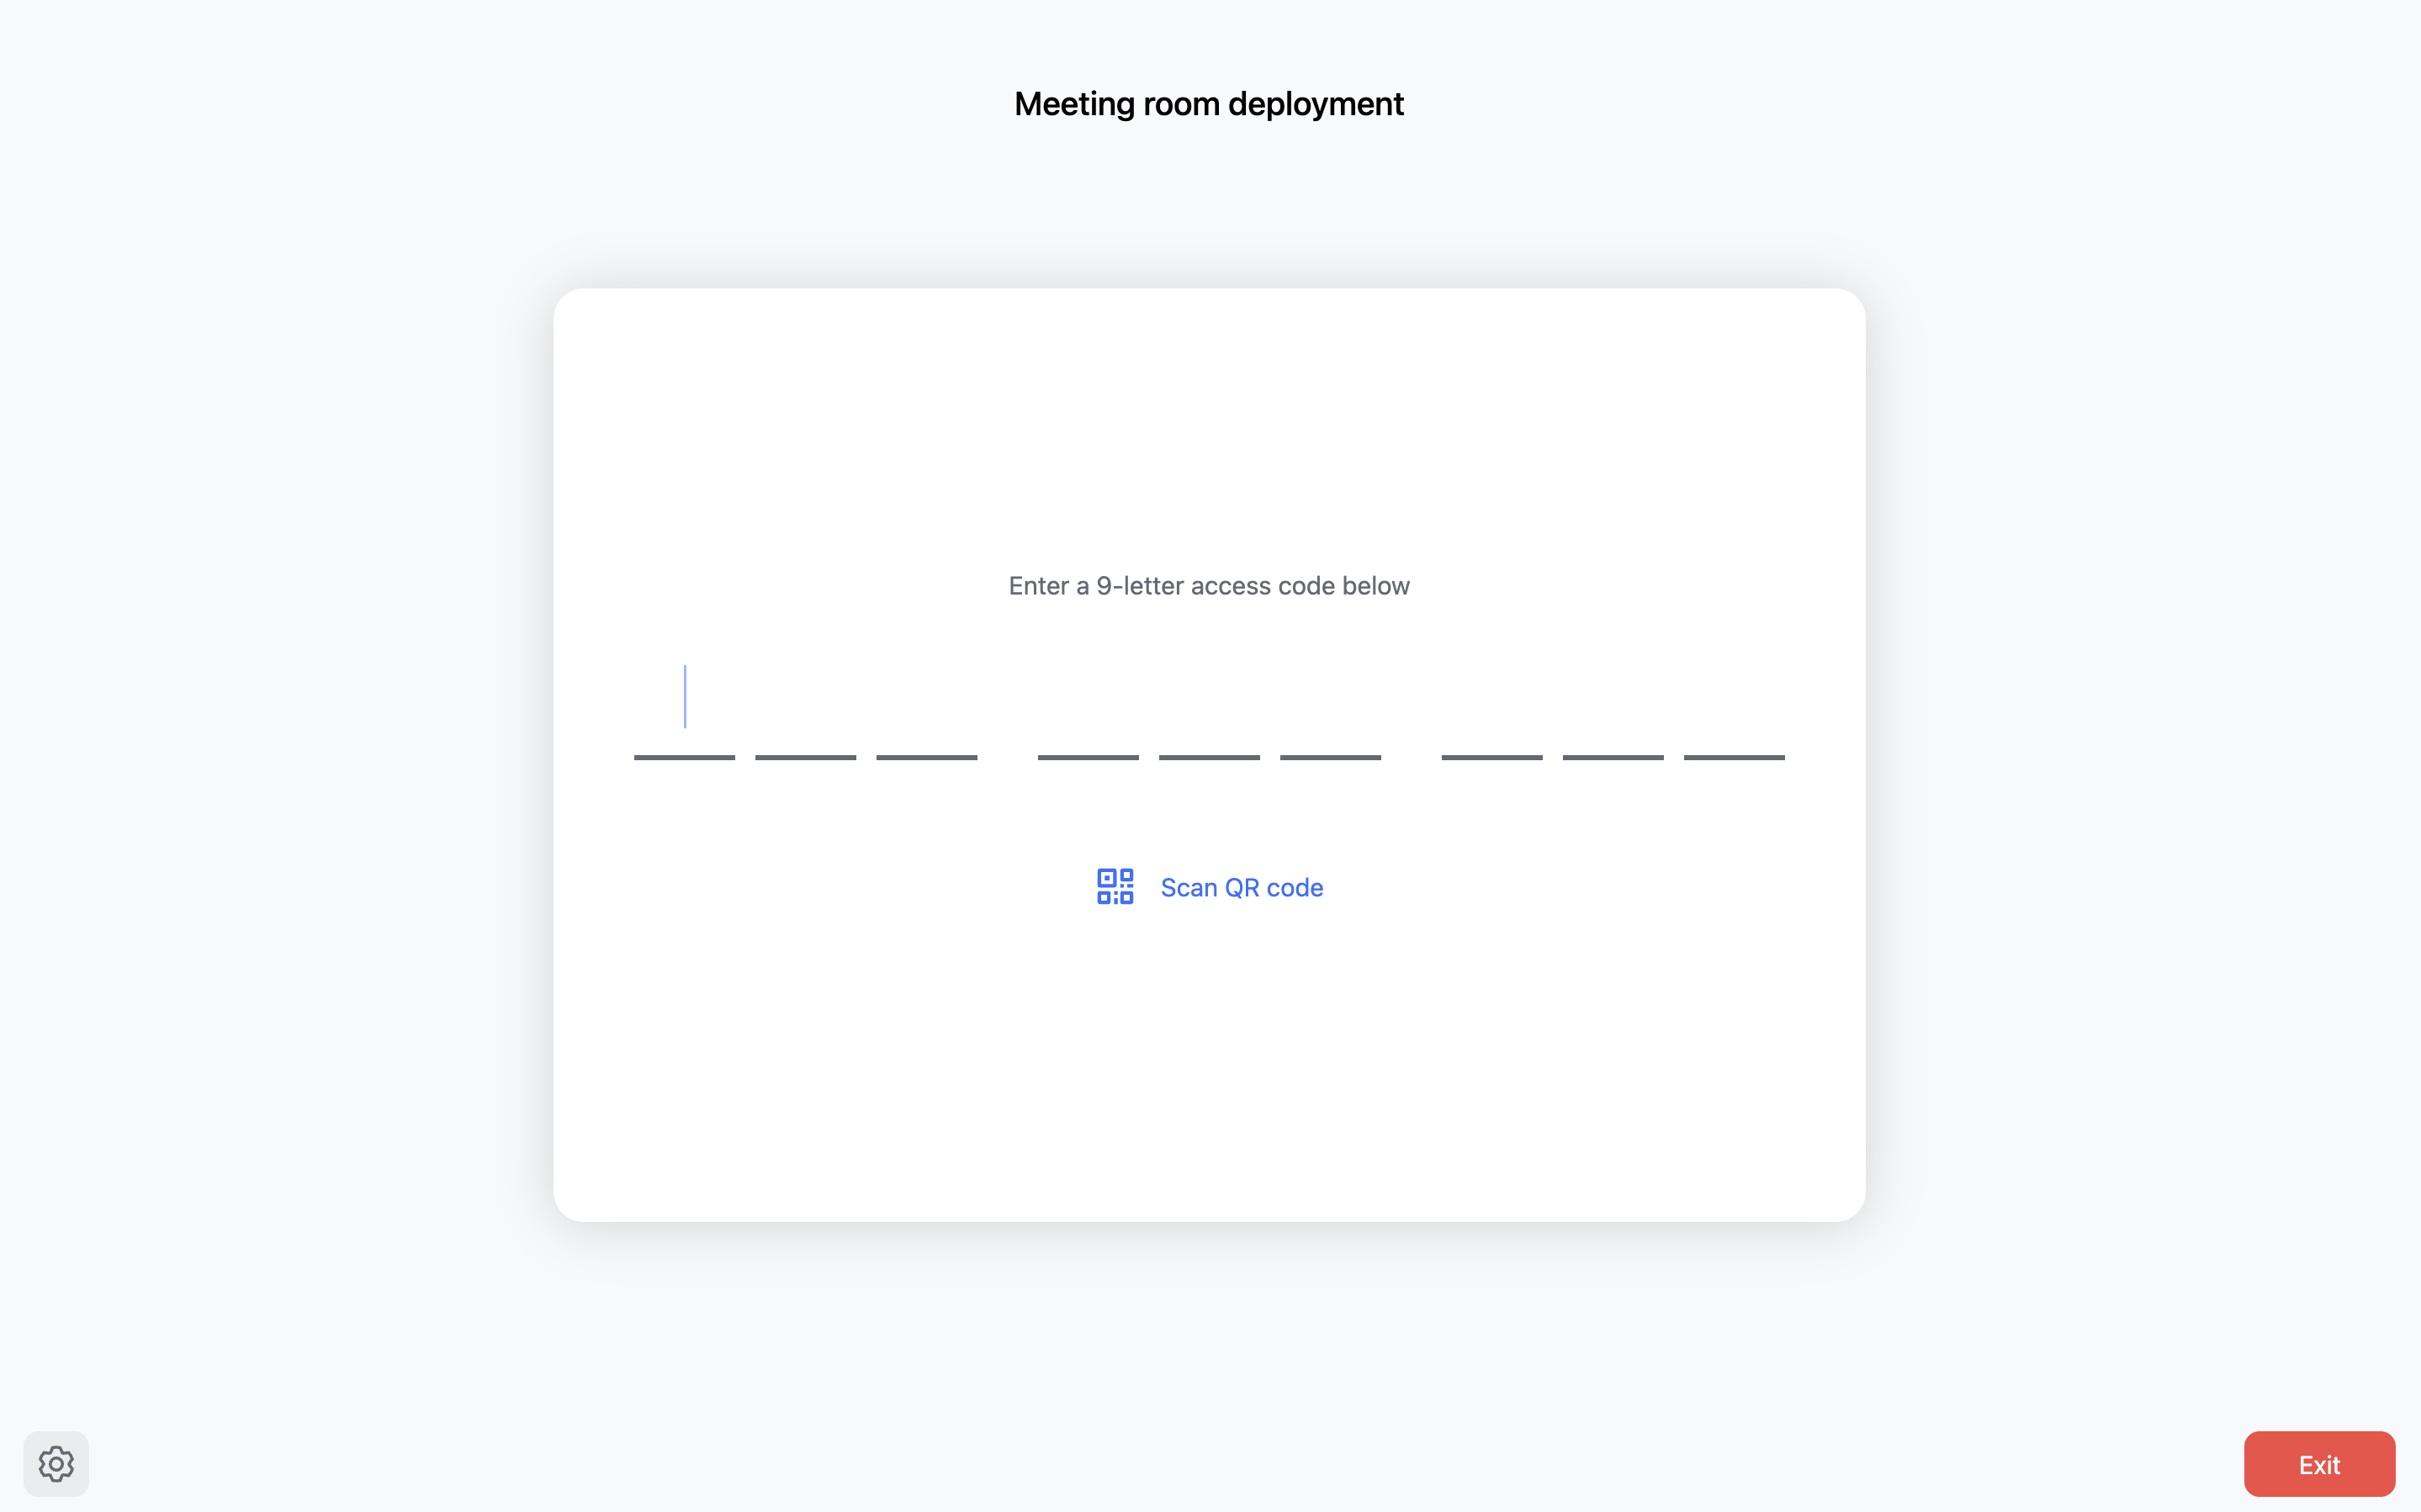
- Method 2: Enter the access code
Open the Lark Rooms app on the host computer, and click Enter access code. Enter the access code generated for deployment permissions to complete identity verification. Once validated, select the office and click Associate. The screen will show the six-digit pairing code to pair the controller.
250px|700px|reset
250px|700px|reset
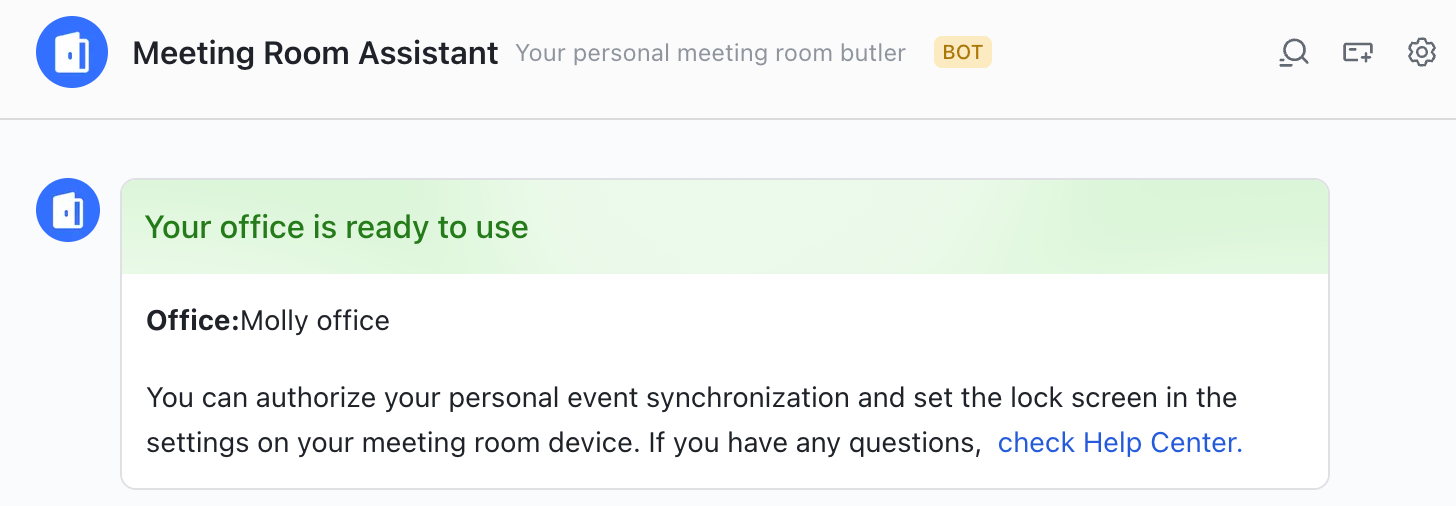
Once associated, the office owner will receive a notification from the Meeting Room Assistant informing them of the successful association.
250px|700px|reset
3.2 Pair the Lark Rooms app with the Lark Rooms Controller app on the controller
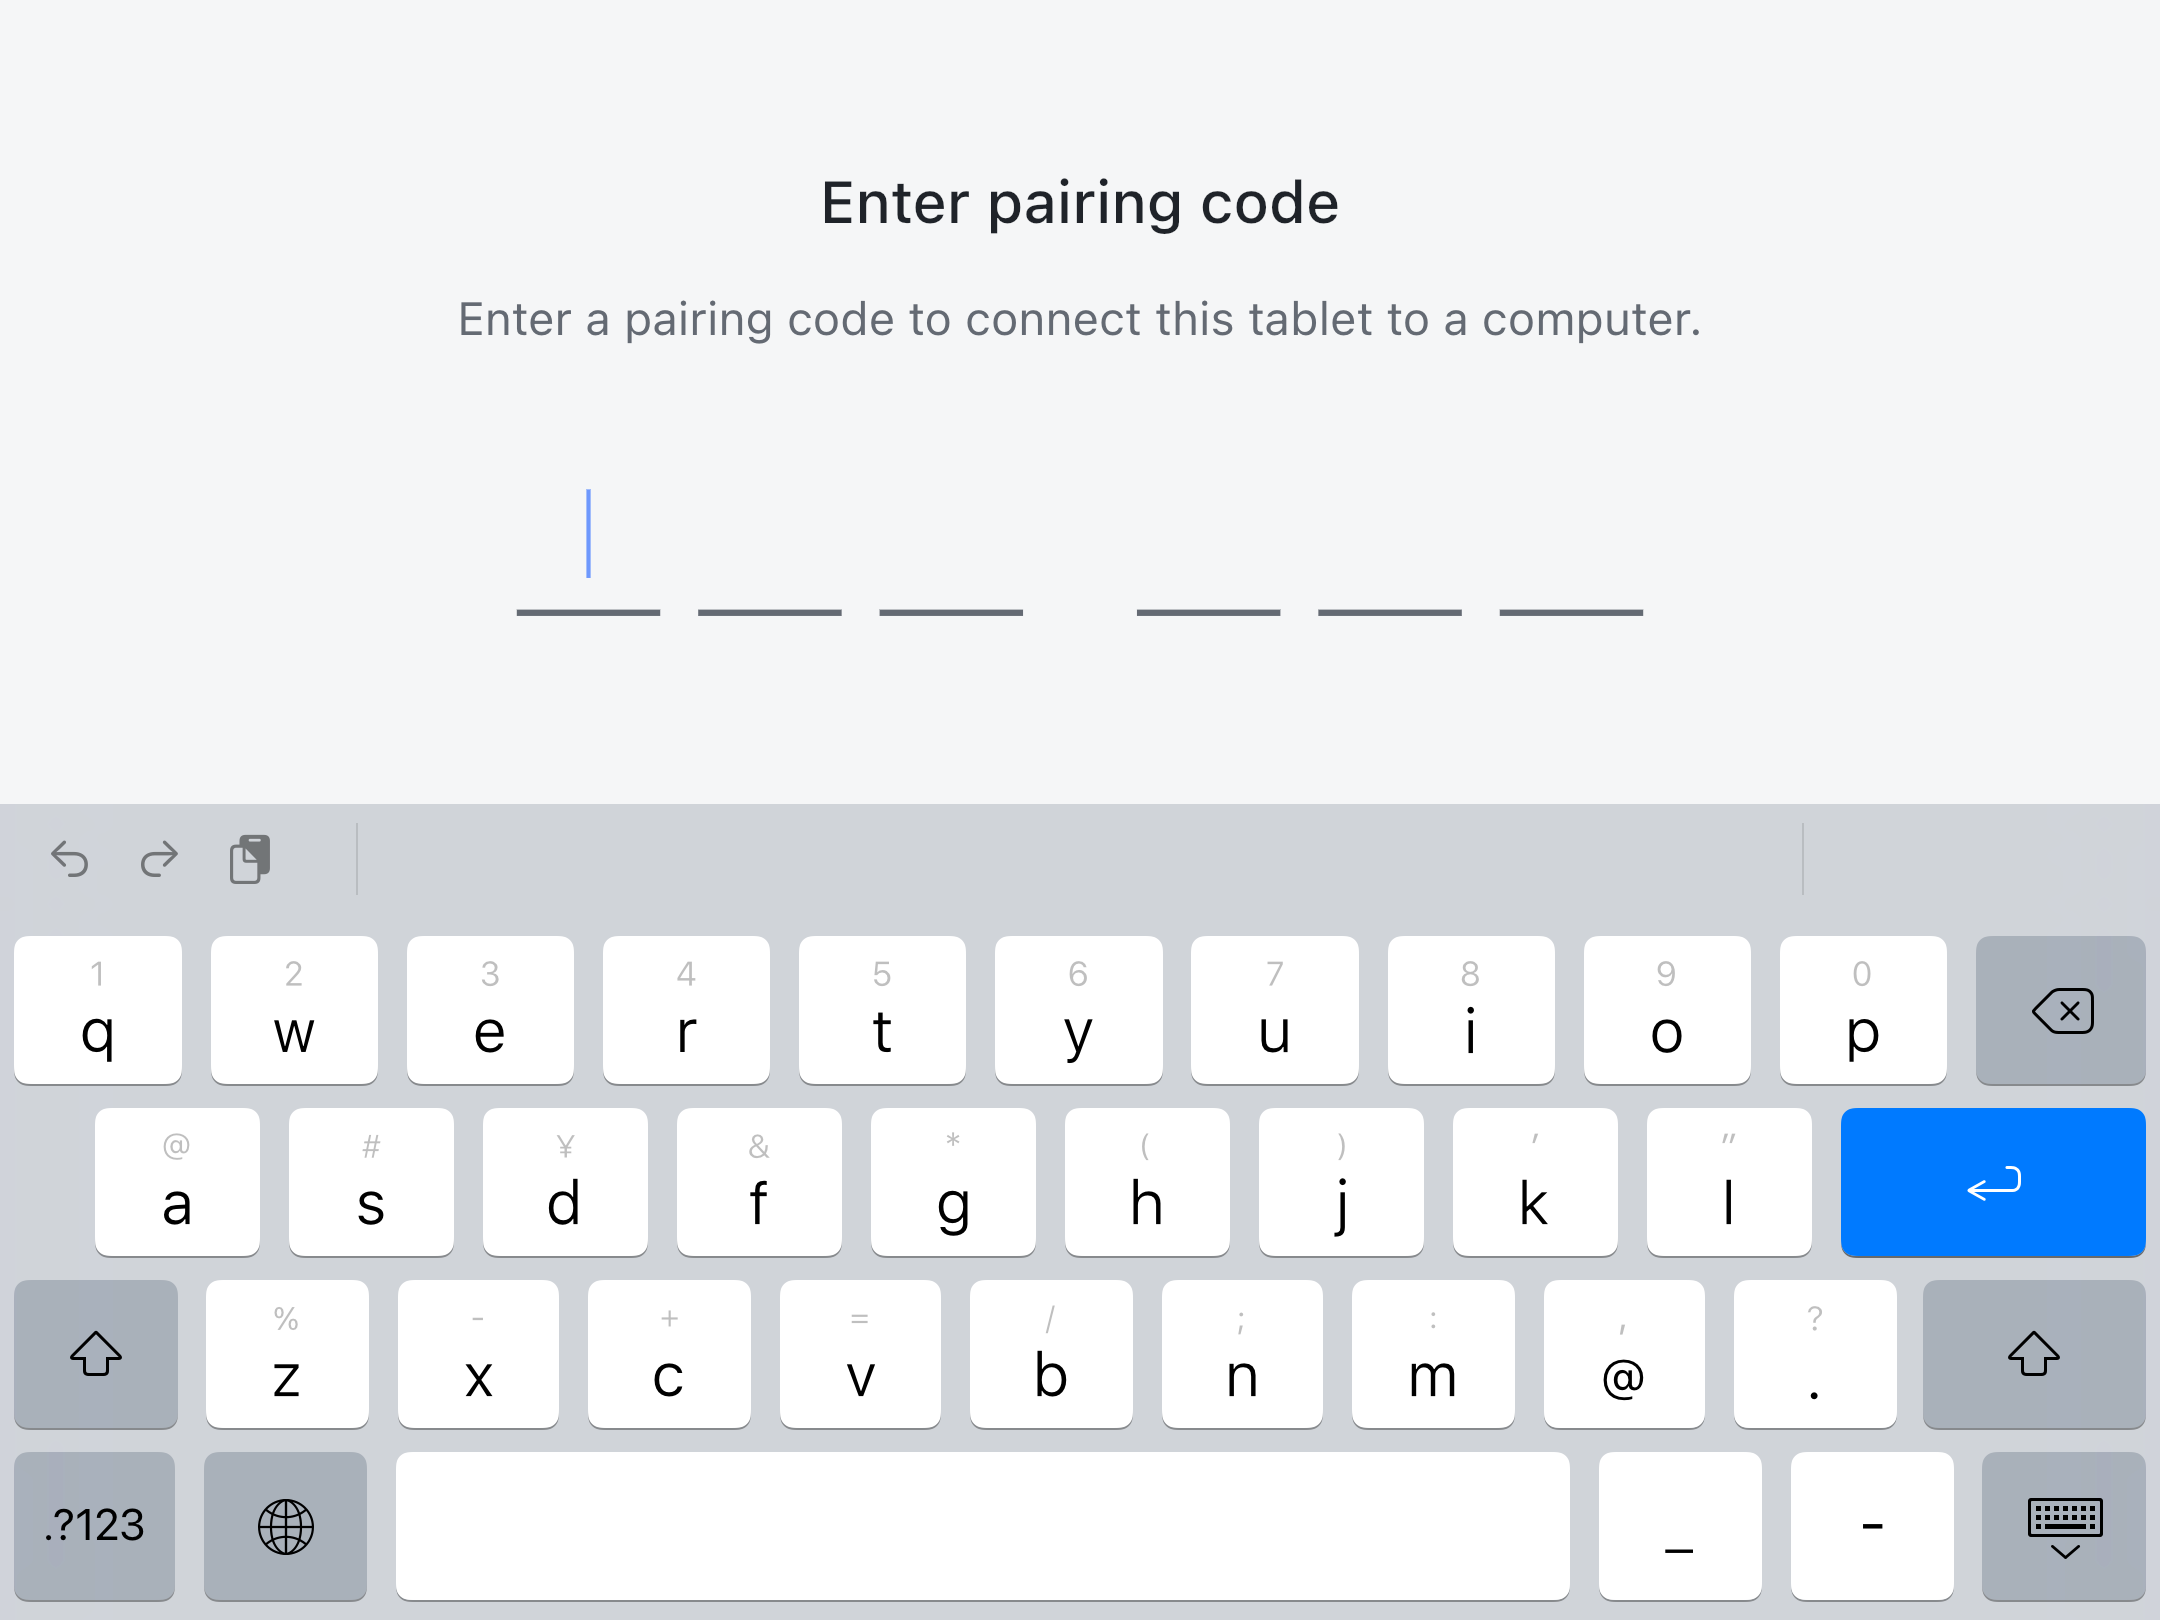
Open the Lark Rooms Controller app on the controller and enter the six-digit pairing code shown on the offline meeting room screen.
250px|700px|reset
Note: Only Lark Rooms and Lark Rooms Controller version 5.32 and above support private office associations.
4. Manage office authorizations
Once the office has been associated, the administrator needs to authorize devices, including the host computer and controller, either individually or in a batch. They can do this via the Meeting Rooms > Device & Operation list in the Admin Console. Administrators can also deauthorize devices individually or in a batch.
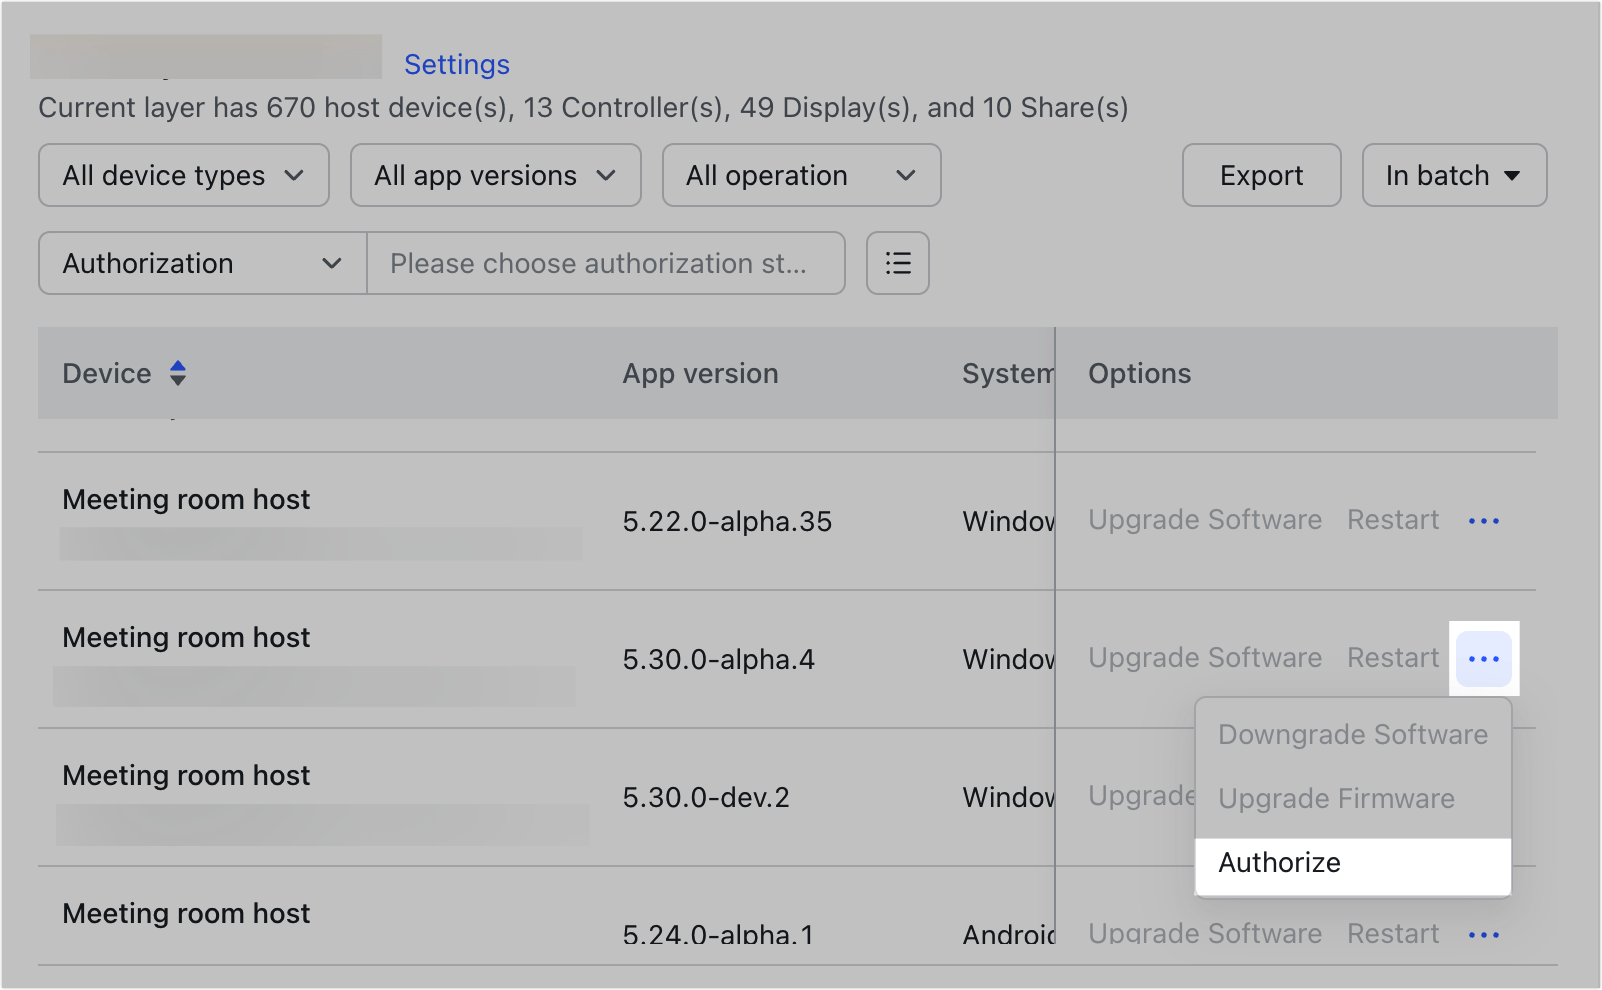
4.1 Authorize
Click ··· > Authorize under Options next to the relevant office, or click In batch in the upper-right corner and select Authorize in the drop-down menu. Select the devices you want to authorize. In the license attribution box, select whether you are using an official or trial license attribution type. Click Confirm to complete authorization.
250px|700px|reset
4.2 Deauthorize
Click ··· > Deauthorize under Options next to the relevant office, or click In batch in the upper-right corner and select Deauthorize in the drop-down menu. Select the devices you want to deauthorize. Click Deauthorize again in the pop-up window.
5. Dissociate devices from an office
A device can only be associated with one office. If the devices need to be used for a different office, a member with deployment permissions will first need to dissociate them.
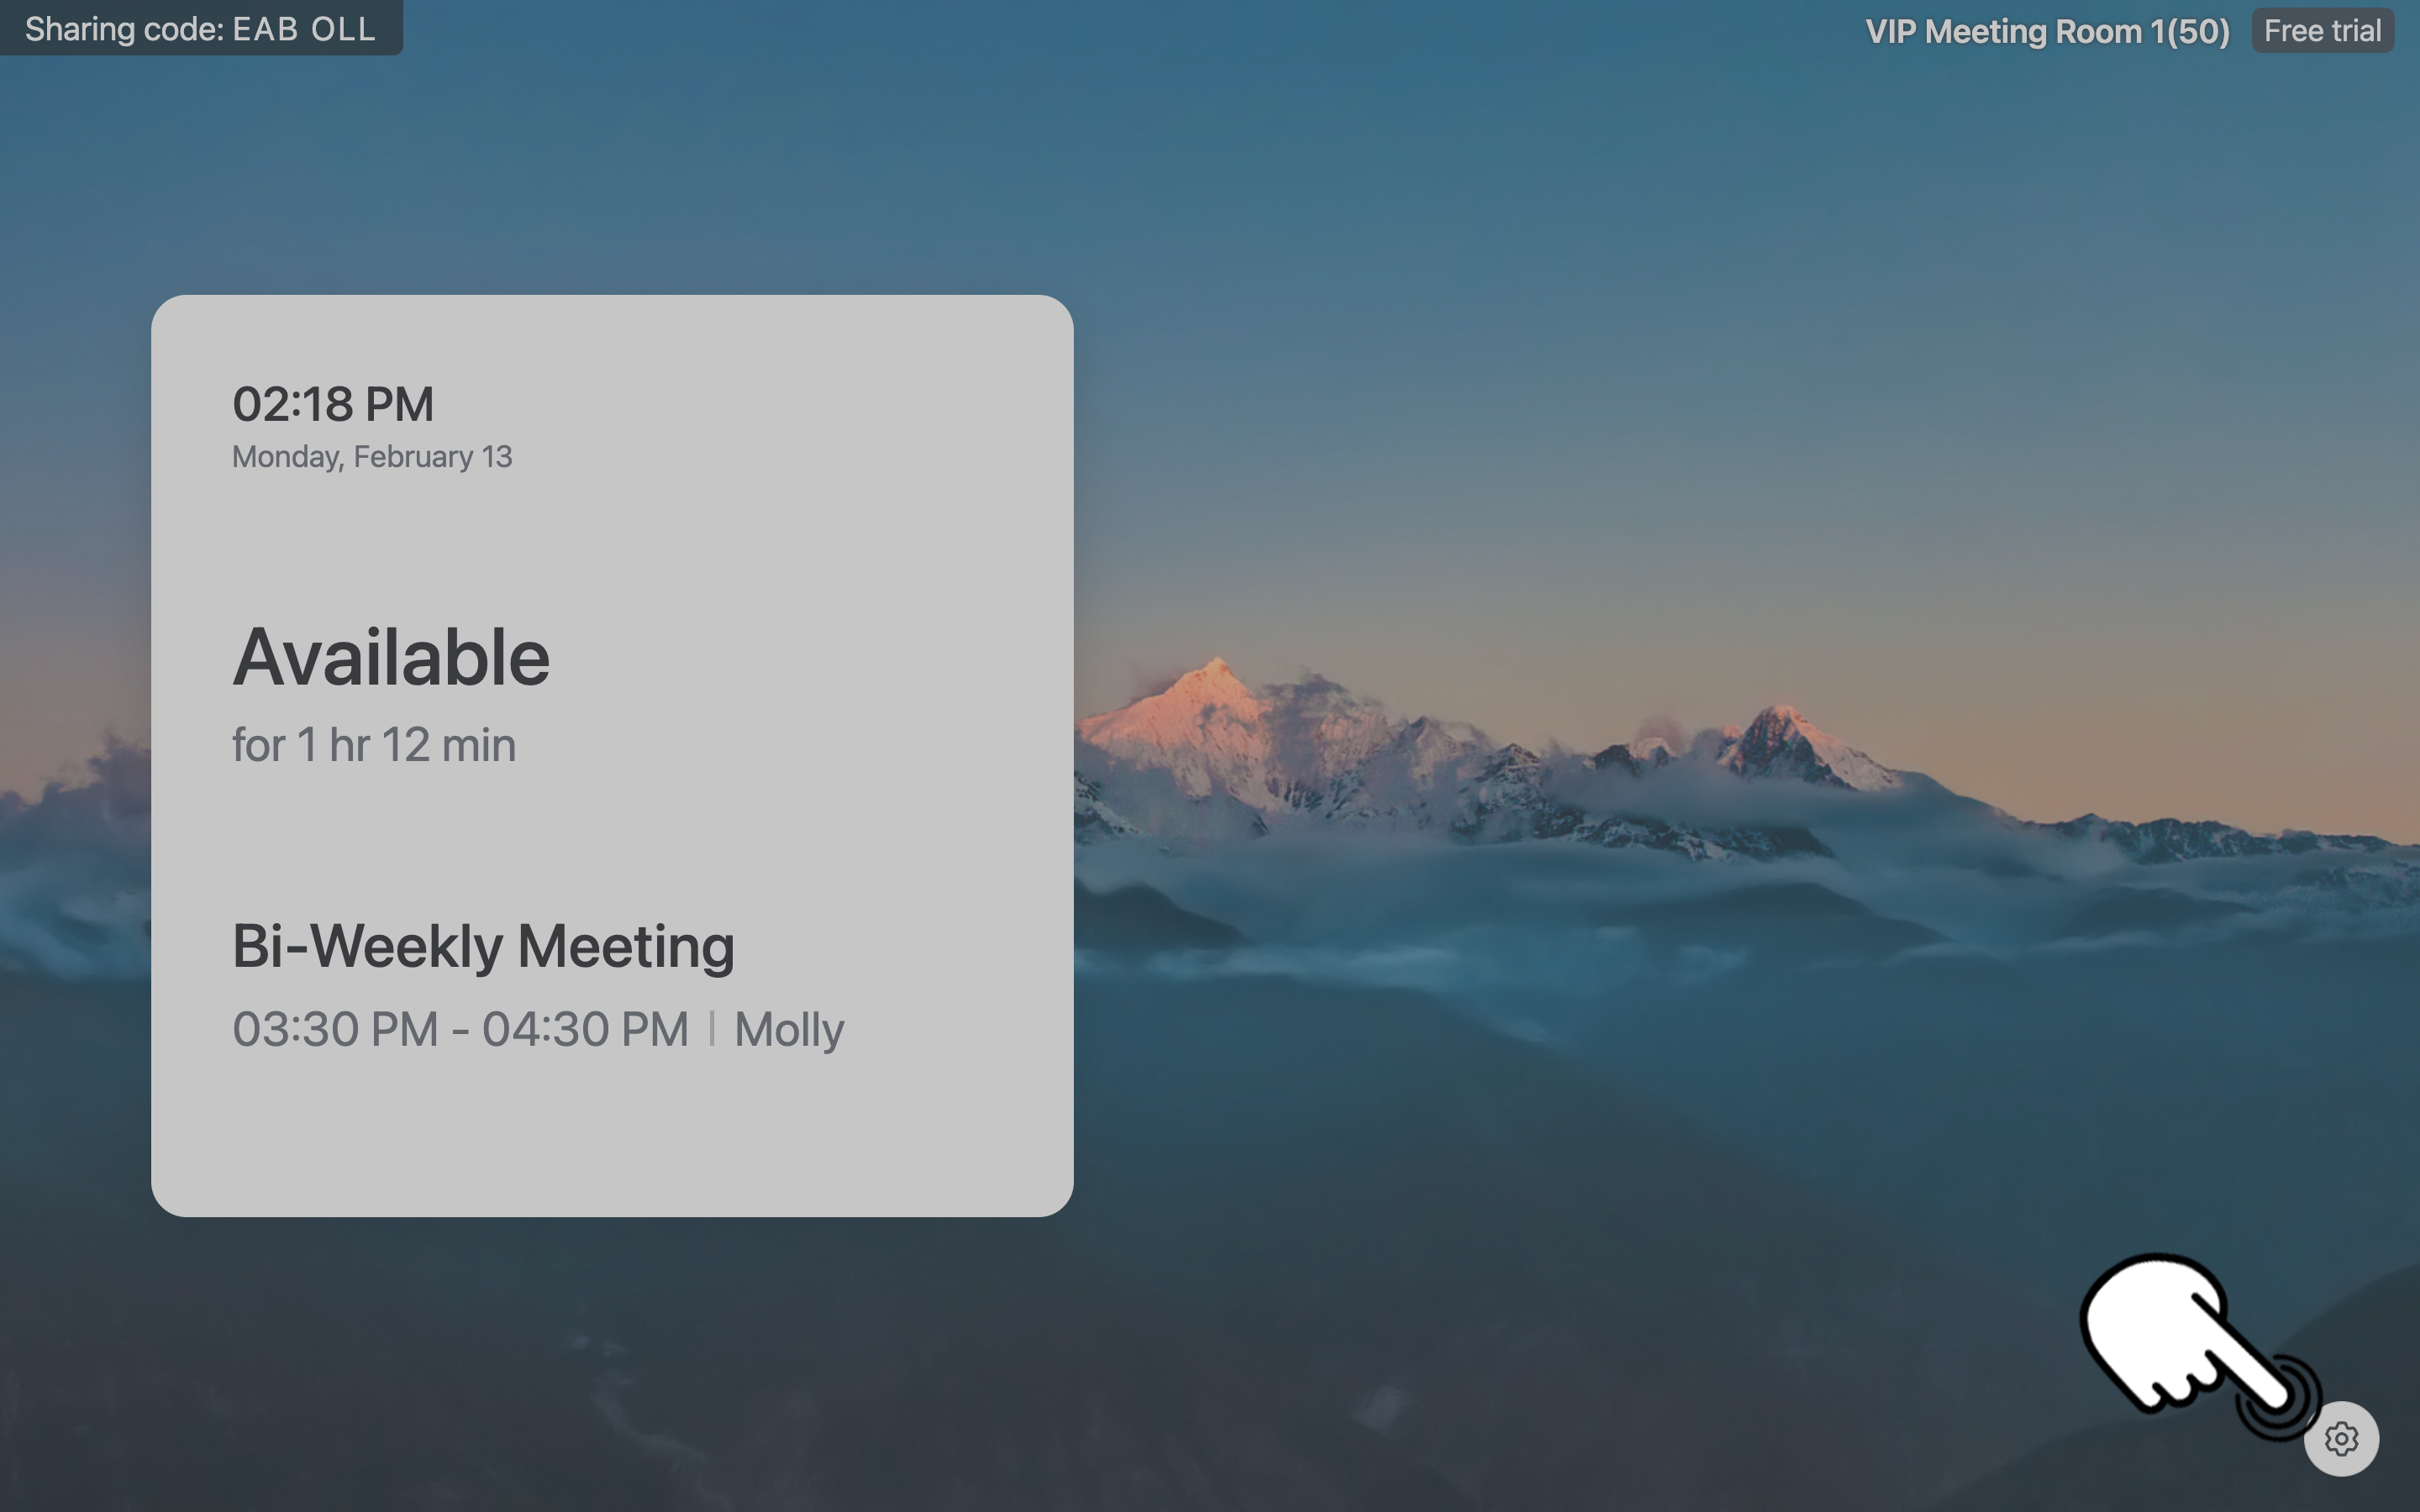
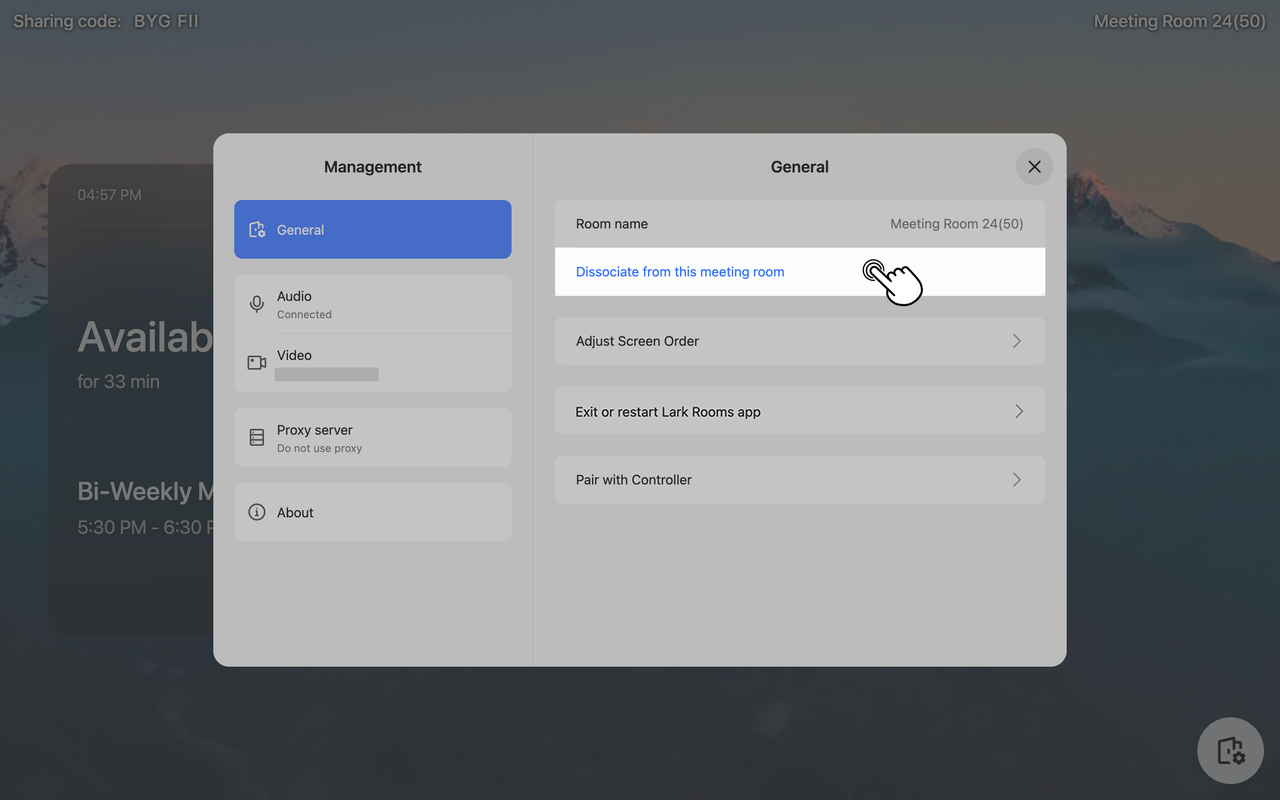
5.1 Dissociate the host computer
Open the Lark Rooms app, then in the lower-right corner click Settings > General > Dissociate from this meeting room. Enter the access code or scan the QR code with a mobile device running Lark logged in to an account with office deployment permissions to complete authentication. Next, click Dissociate from this meeting room. Click Confirm in the pop-up window.
250px|700px|reset
250px|700px|reset
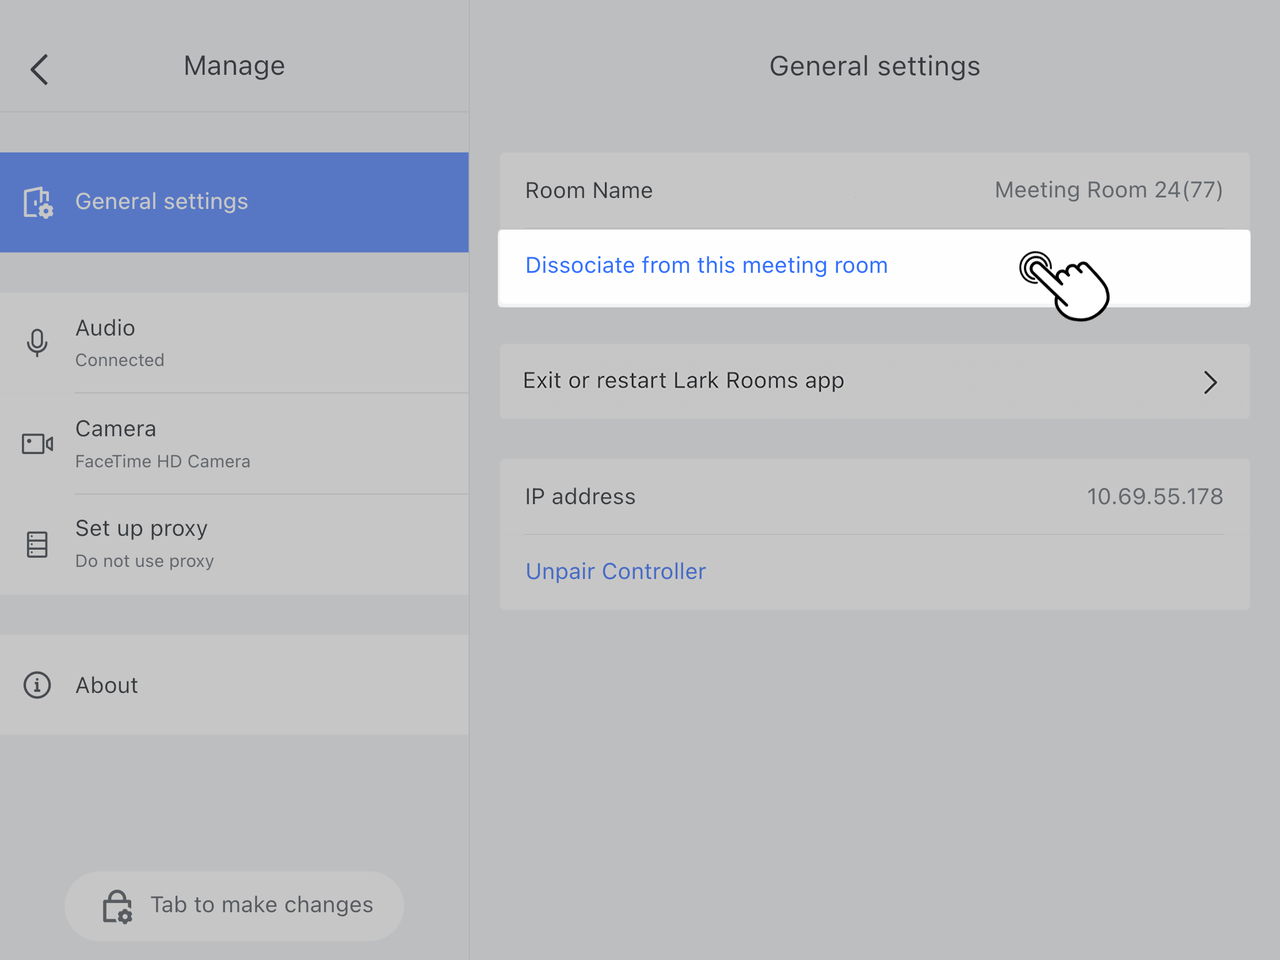
5.2 Dissociate the controller
Tap the Settings icon in the upper-right corner, then General settings > Dissociate from this meeting room. Enter the access code or scan the QR code with a mobile device running Lark logged in to an account with office deployment permissions to complete authentication. Next, tap Dissociate from this meeting room. Tap Confirm in the pop-up window.
250px|700px|reset
Once dissociated, the office owner will receive a notification from the Meeting Room Assistant informing them of the successful dissociation.

250px|700px|reset
III. Office management and operations
Administrators can set the office screen background image, ultrasonic signal screen sharing, meeting default view, on-site services, device alerts, and more.
1. Configure an office
1.1 Set homepage content settings
Administrators can set which content is displayed on the private office screen and the gallery view.
- Background image: Set a background image and the content to be displayed on the screen when the office is idle.
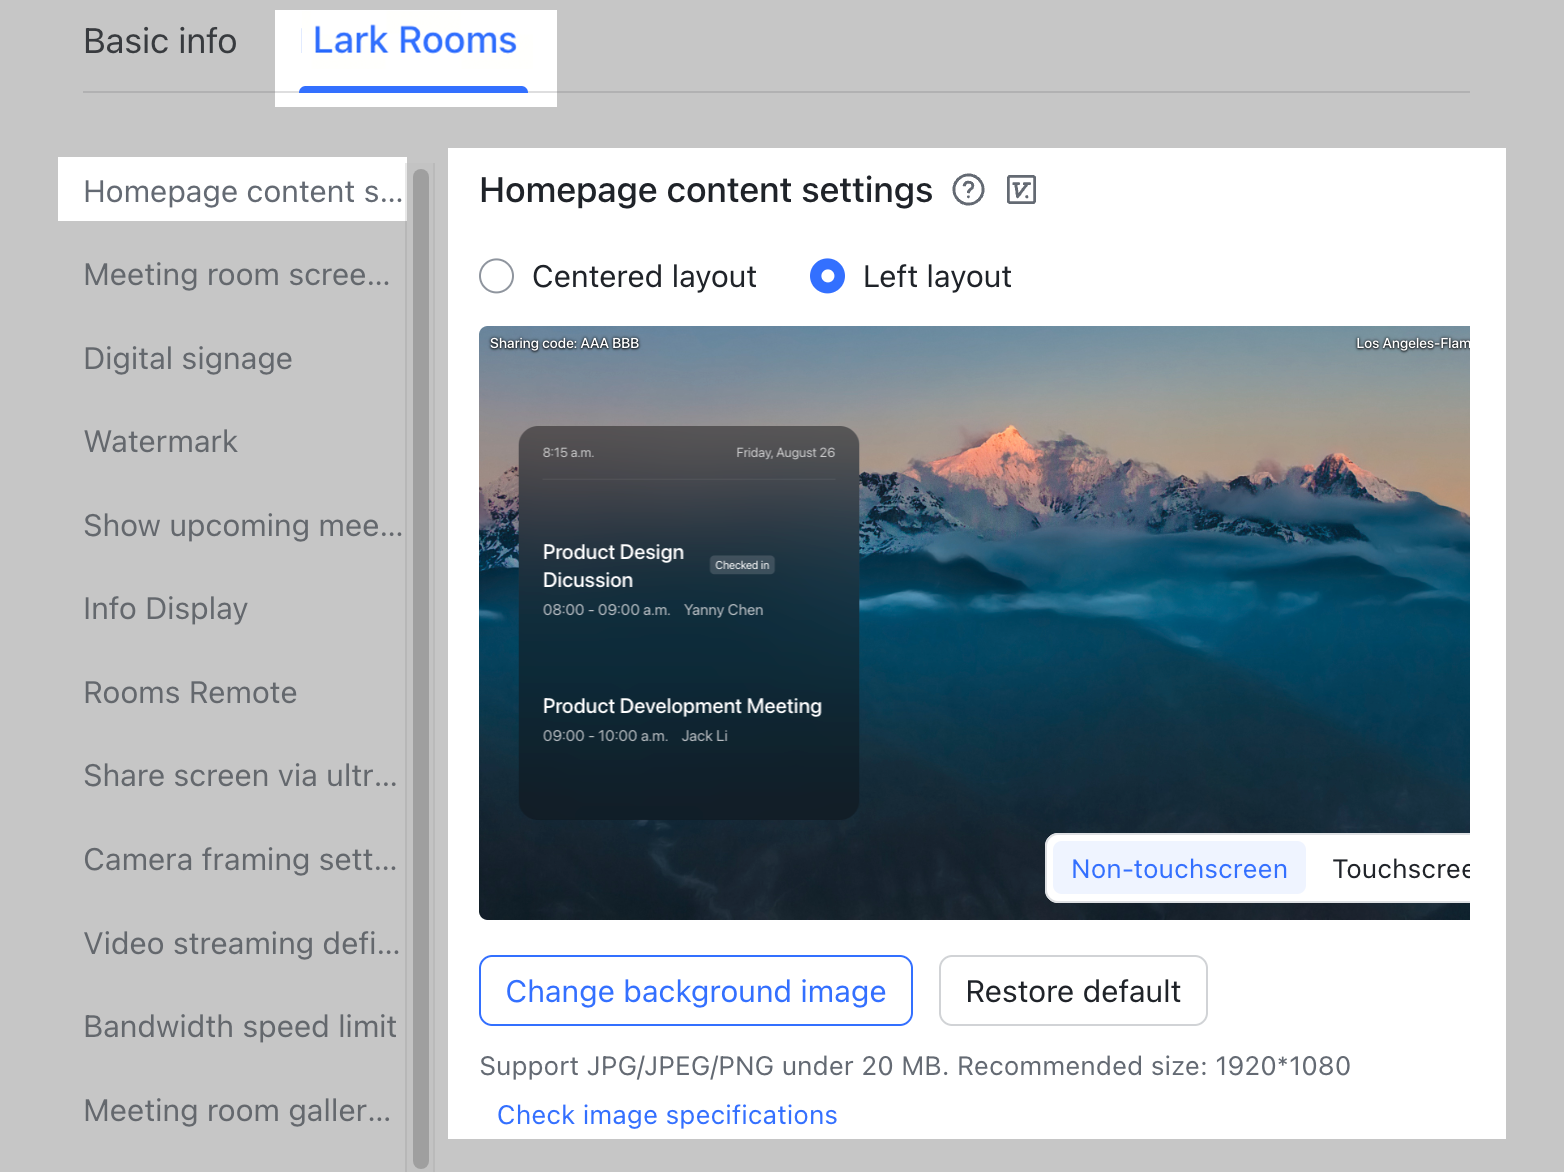
250px|700px|reset
- Digital signage: Configure the scrolling dynamic content displayed on the screen when the office is idle.
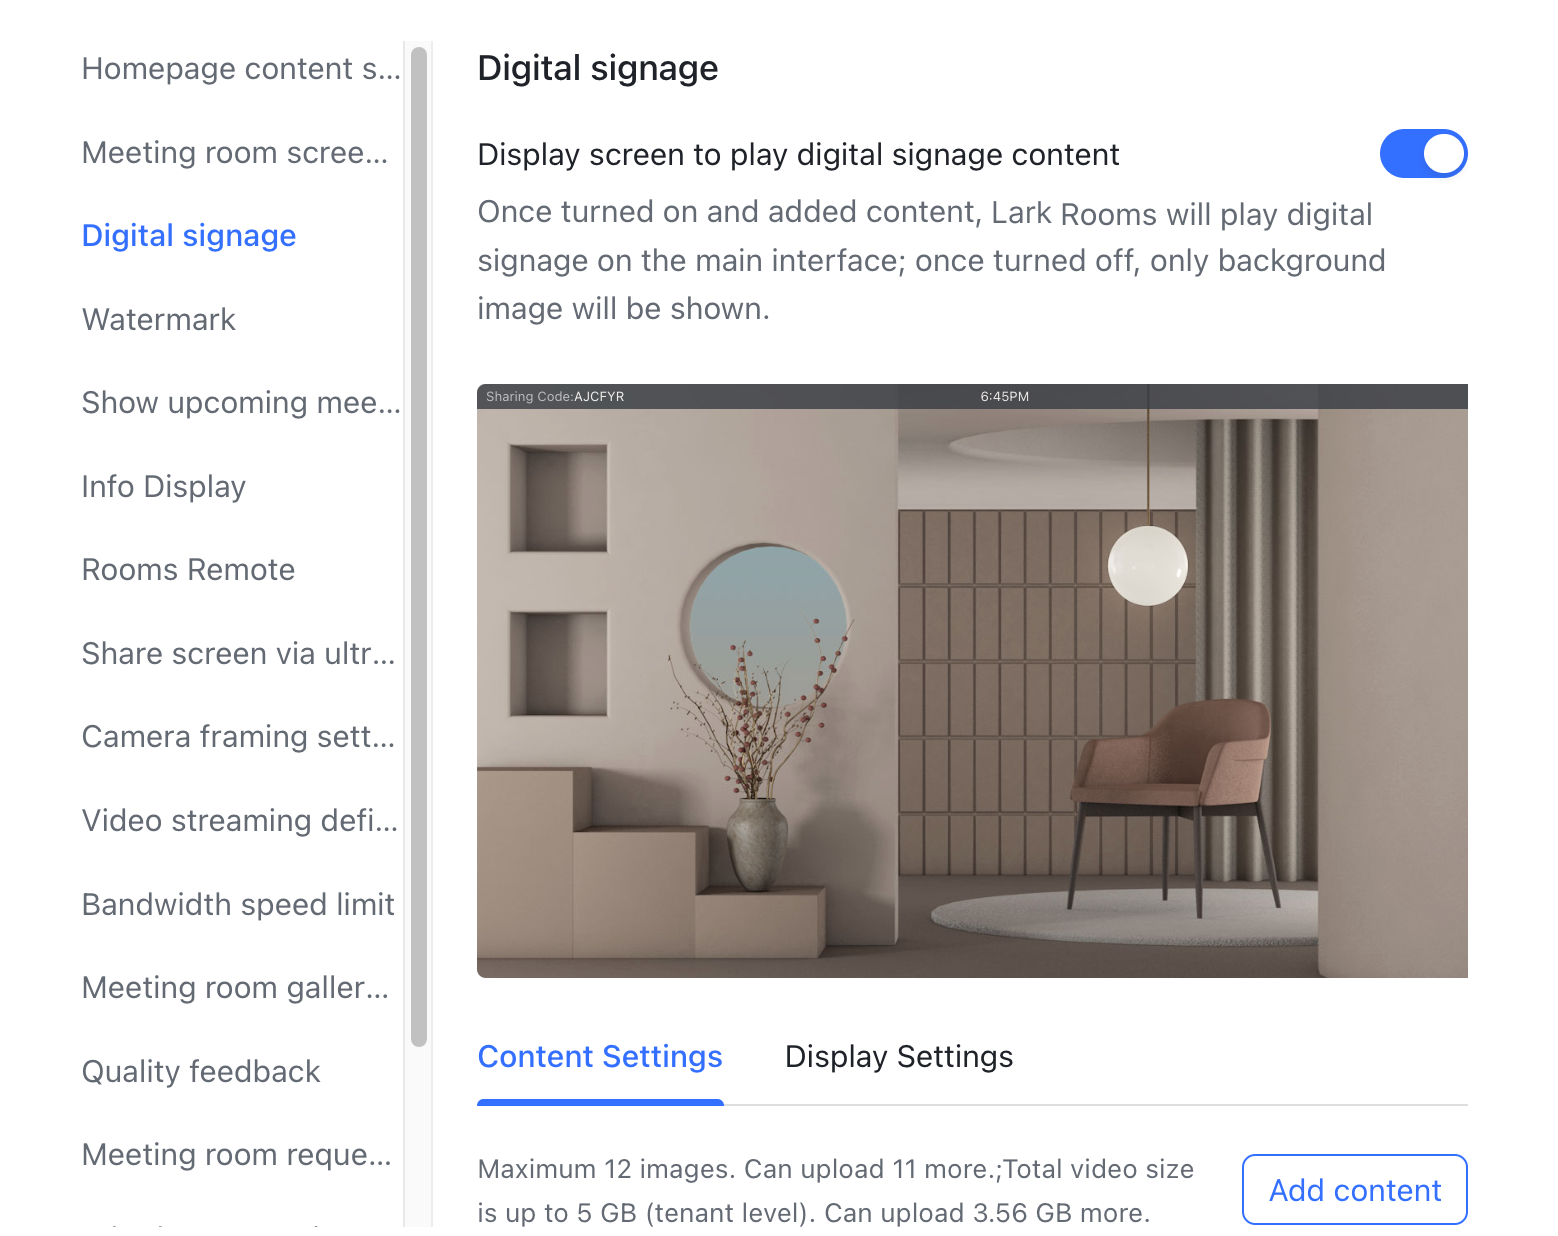
250px|700px|reset
- Meeting room gallery view: Set the default number of participants to be displayed in the gallery view.

250px|700px|reset
1.2 Set up ultrasonic signal screen sharing
Administrators can enable or disable ultrasonic signal screen sharing. When enabled, office owners can use ultrasonic waves to share the screen without needing to enter a sharing code. If this feature is turned off, office owners can only share screens via sharing codes, which can help minimize the chance of you screen sharing to the wrong device.
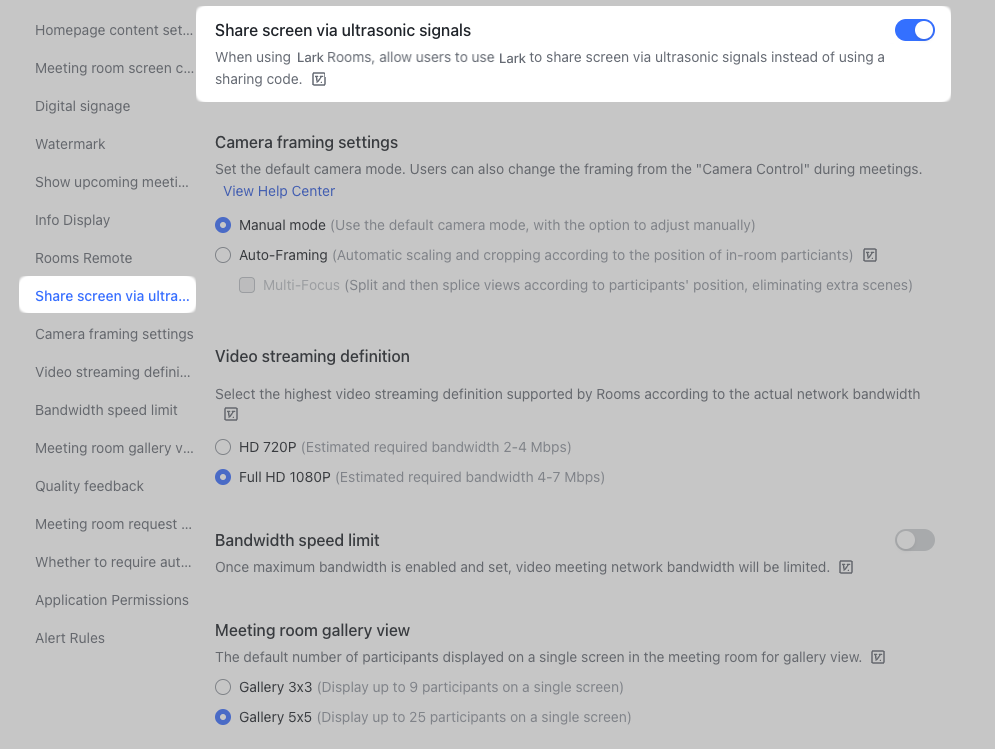
250px|700px|reset
1.3 Set up on-site services
In order to quickly and efficiently resolve any issues office owners might encounter during a meeting in their private office, administrators can enable the Meeting room request on-site service feature and configure the feature name, the service names and types for offered services, the staff who respond, and whether such services are a frequently used service. Once successfully configured, office owners will be able to raise service requests on the Meeting Room controller, which will be quickly picked up by someone who will come to the private office to help resolve the issue.
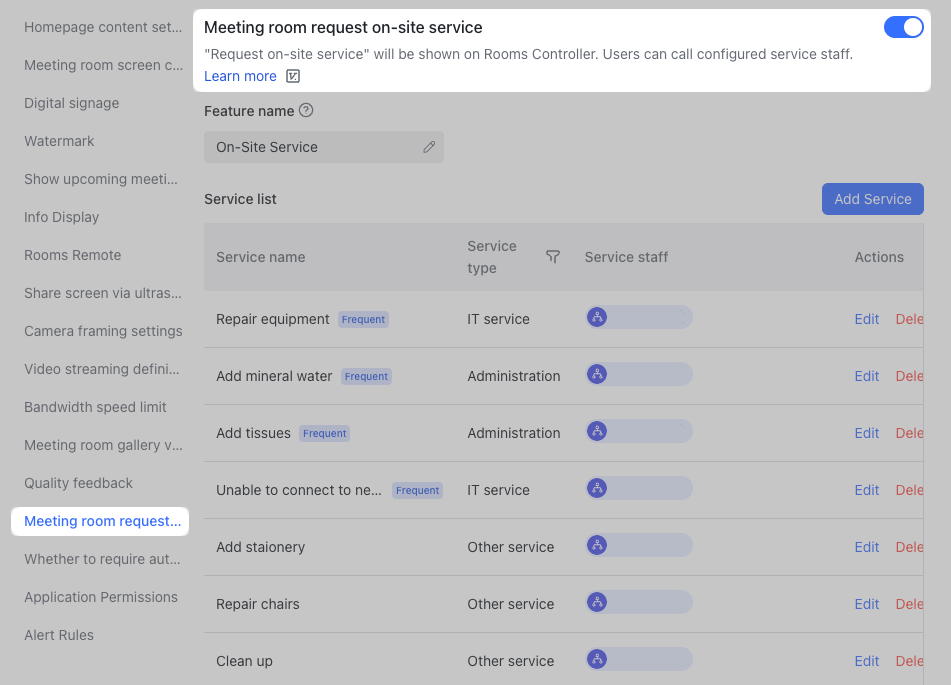
250px|700px|reset
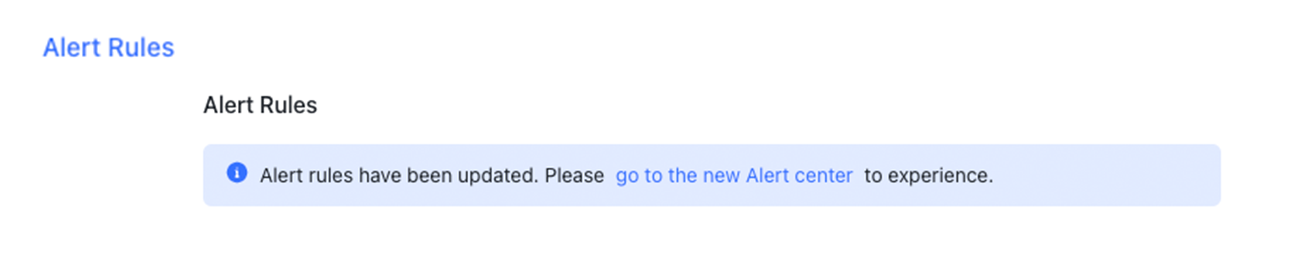
1.4 Set alert rules
Administrators can set and manage alert rules for all office devices via the Alert center, as well as view alert records and overviews to keep track of alerts occurring on the office’s meeting room devices.
250px|700px|reset
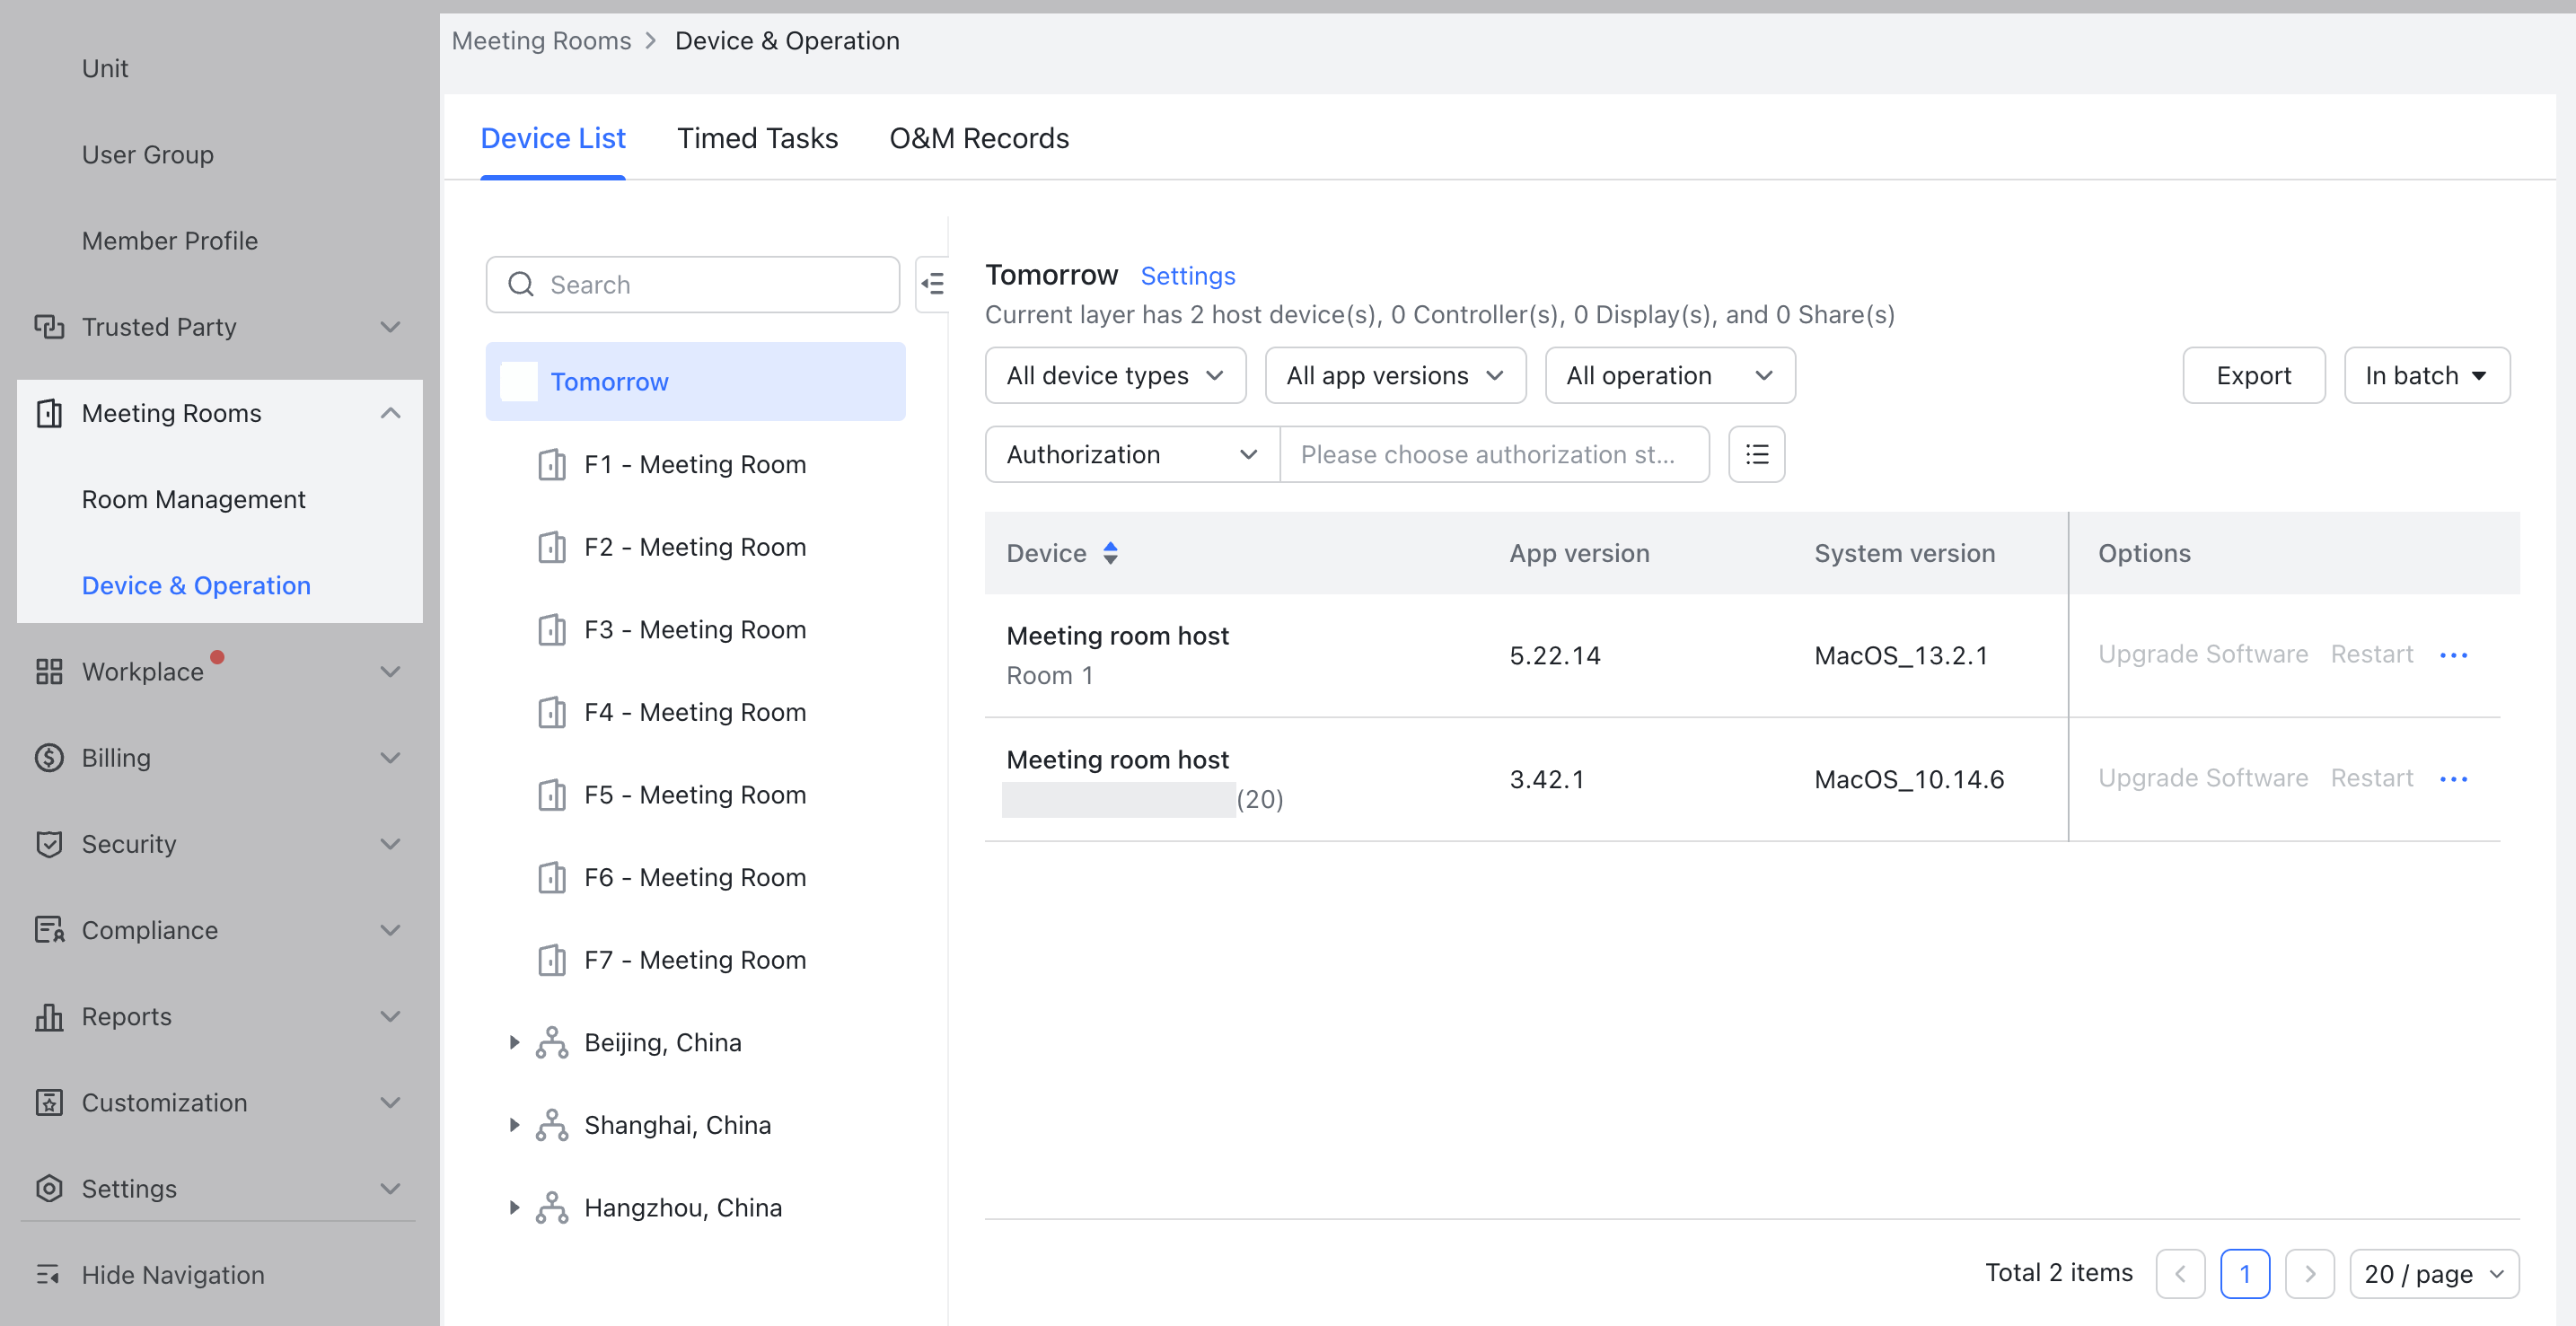
2. Office device operations
In the Meeting Rooms > Device & Operation list in the Admin Console, administrators can individually or batch upgrade device software and firmware, as well as view operation details and logs to help better manage and maintain office devices.
250px|700px|reset
IV. FAQs