
Purchase information: Separate payment is required for this feature. For more information, contact Support or your Customer Success Manager.
Who can perform these steps: Primary administrators and administrators with Meeting Room permissions.
I. Intro
Admin console offers a variety of settings and tools for administrator to efficiently manage Lark Rooms Display.
- Image: Set the background image displayed on the Lark Rooms Displays during off times;
- Meeting room check-in: Set whether meeting rooms require check-in to keep the reservation and its check-in rules;
- Instant reservations: Set whether to allow users to reserve idle meeting rooms via Lark Rooms Display;
- End event: Set whether to allow users to end the event via the display and release the meeting room resource.
II. Steps
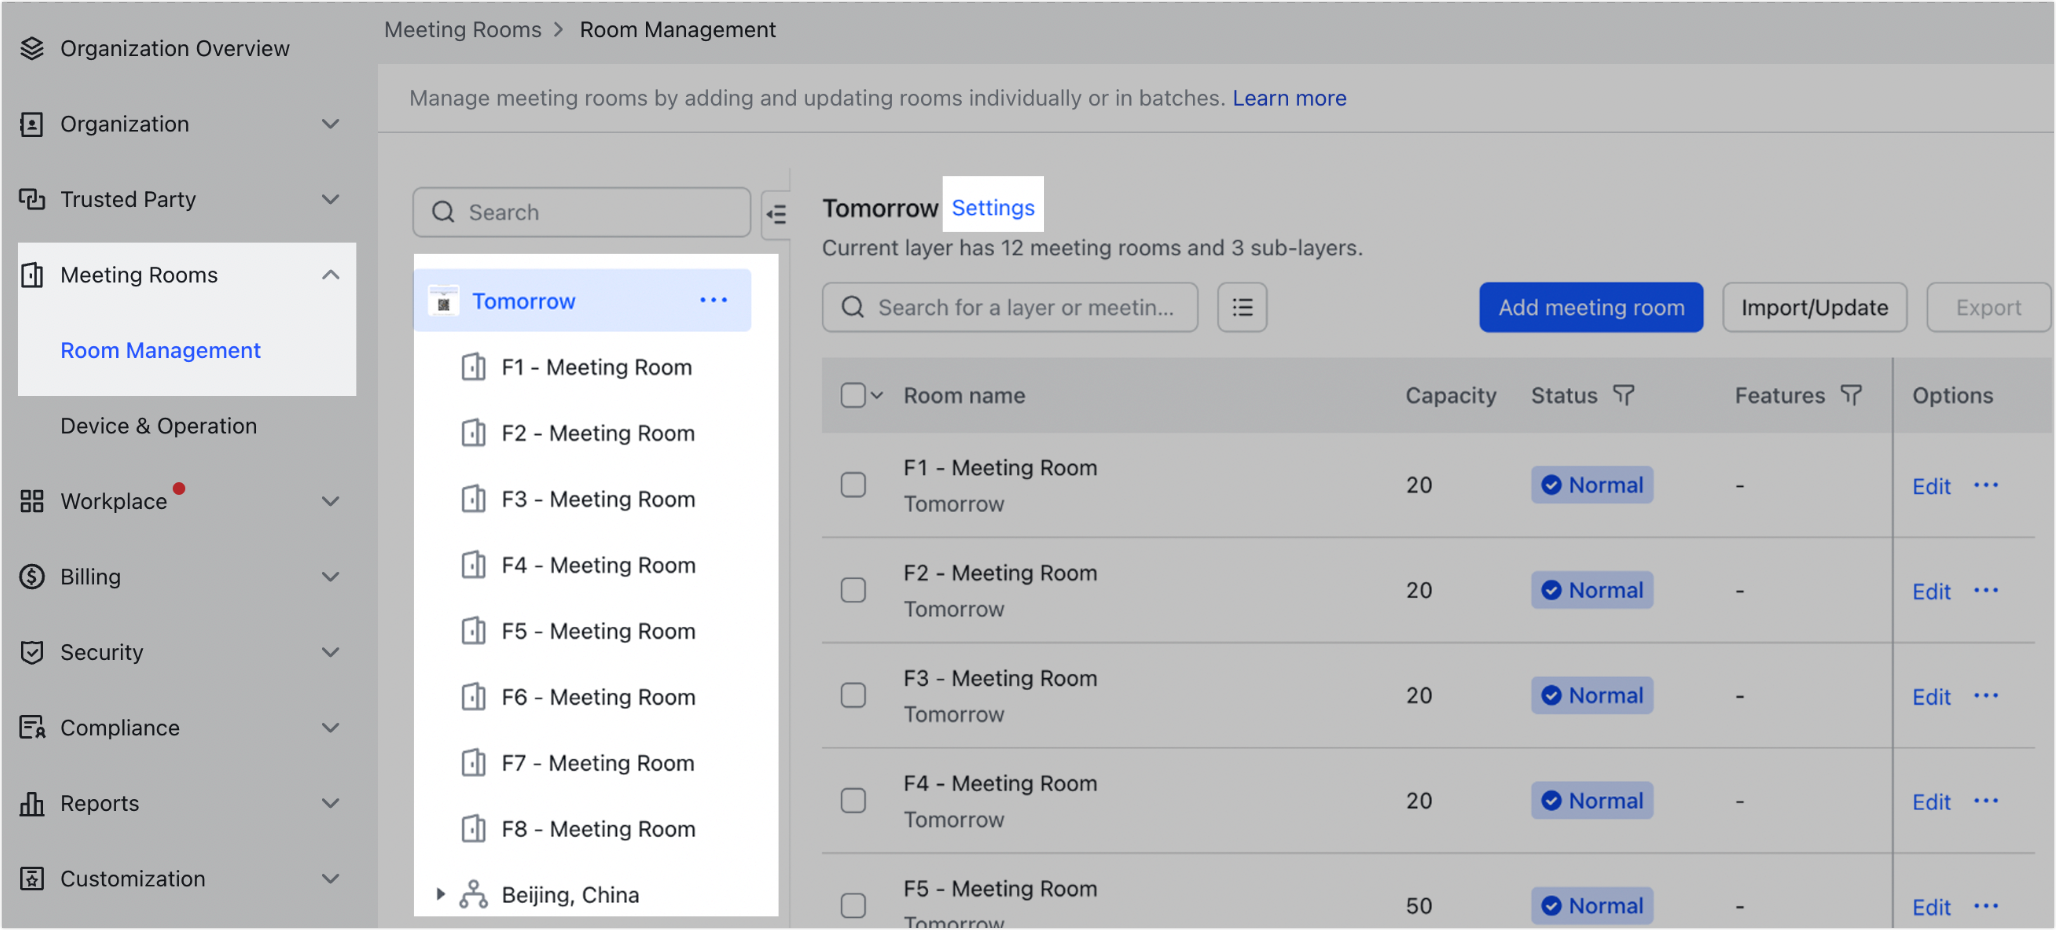
Go to the Lark Admin Console. On the left navigation bar, click Meeting Rooms > Room Management.
Your organization's meeting room layers will be listed on the left. You can configure settings for a whole level, or a specific meeting room. For more details on layers and meeting rooms, see Add, edit, and delete meeting rooms.
Find the layer or meeting room you want to configure, click ··· More > Settings.
250px|700px|reset
- Set background images
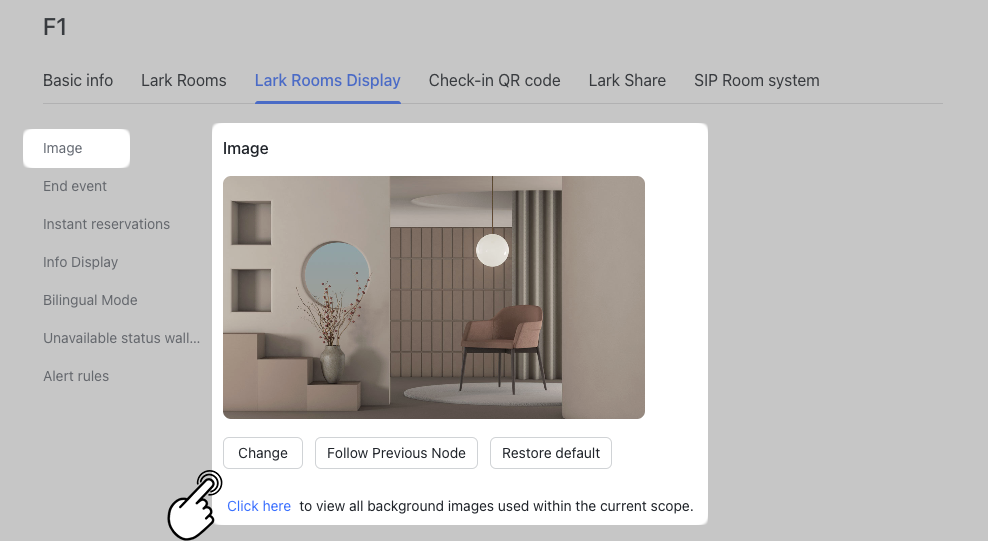
Under Settings, go to Lark Rooms Display > Image to view the background image used in meeting rooms within the currently selected node scope.
You can also select Click here to view all background images in use within the current scope.
250px|700px|reset
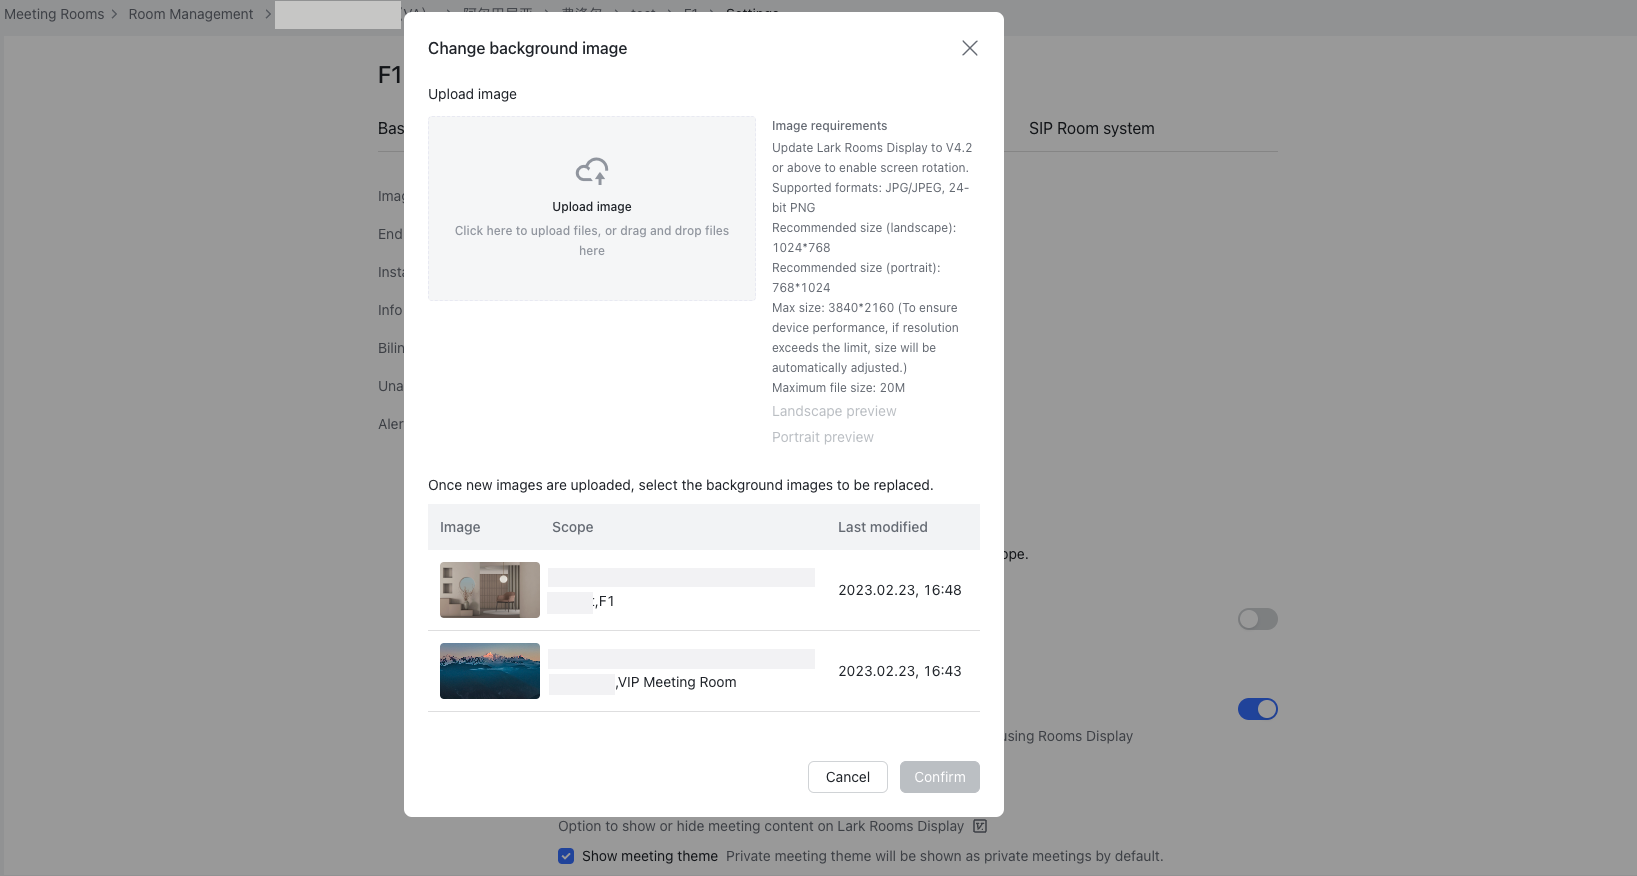
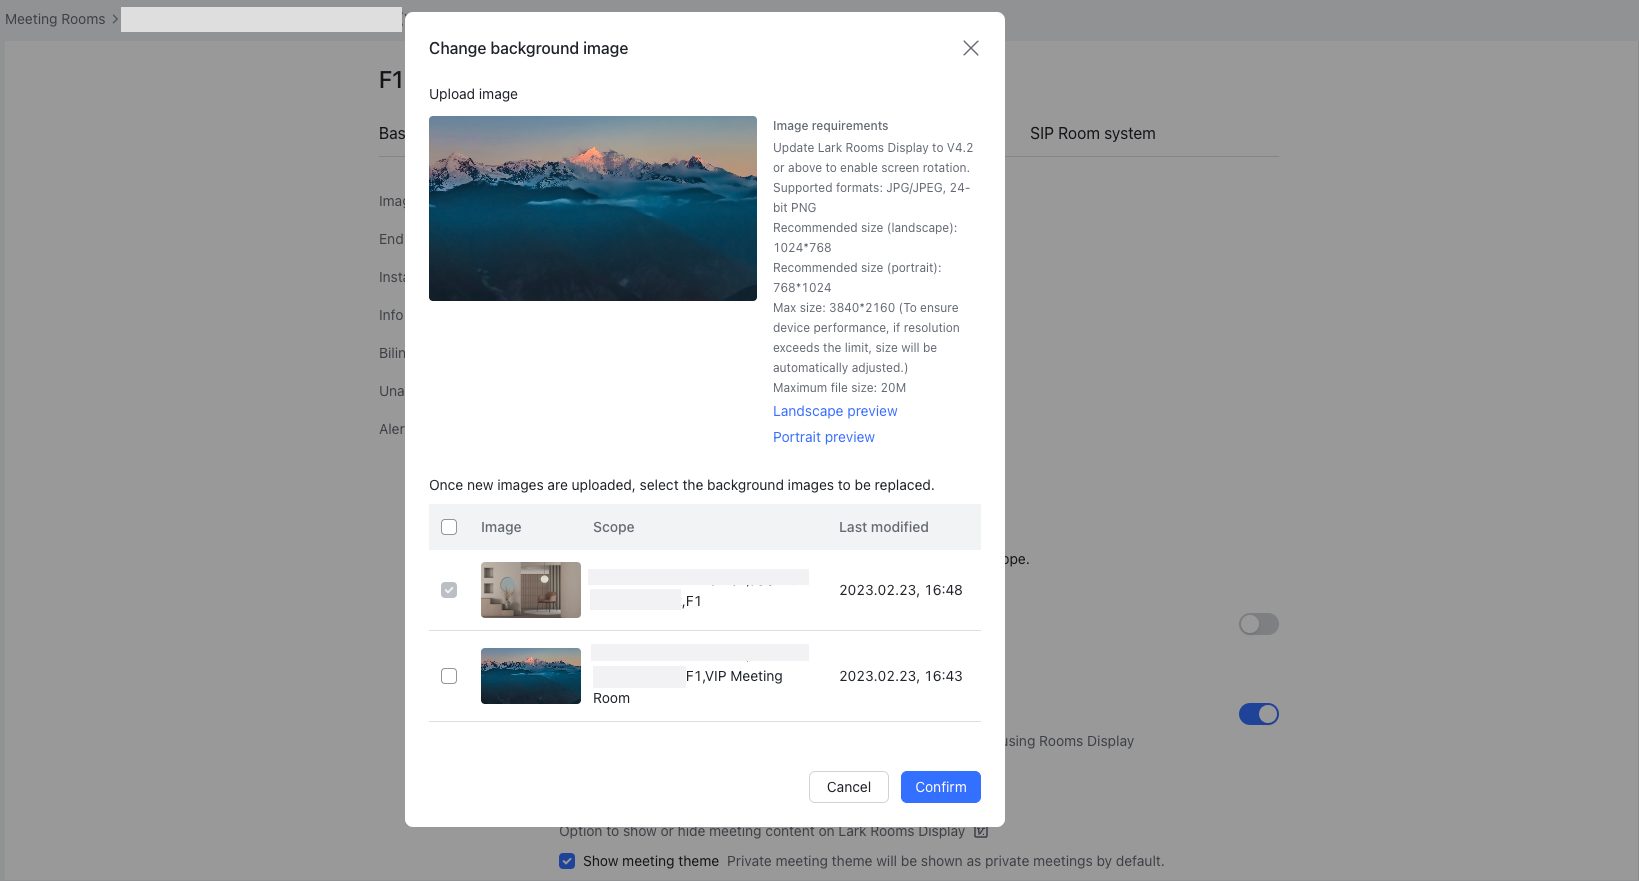
Click Change to upload an image to be the new display background.
Note: To ensure the display effect, please upload images that meet the recommended size.
250px|700px|reset
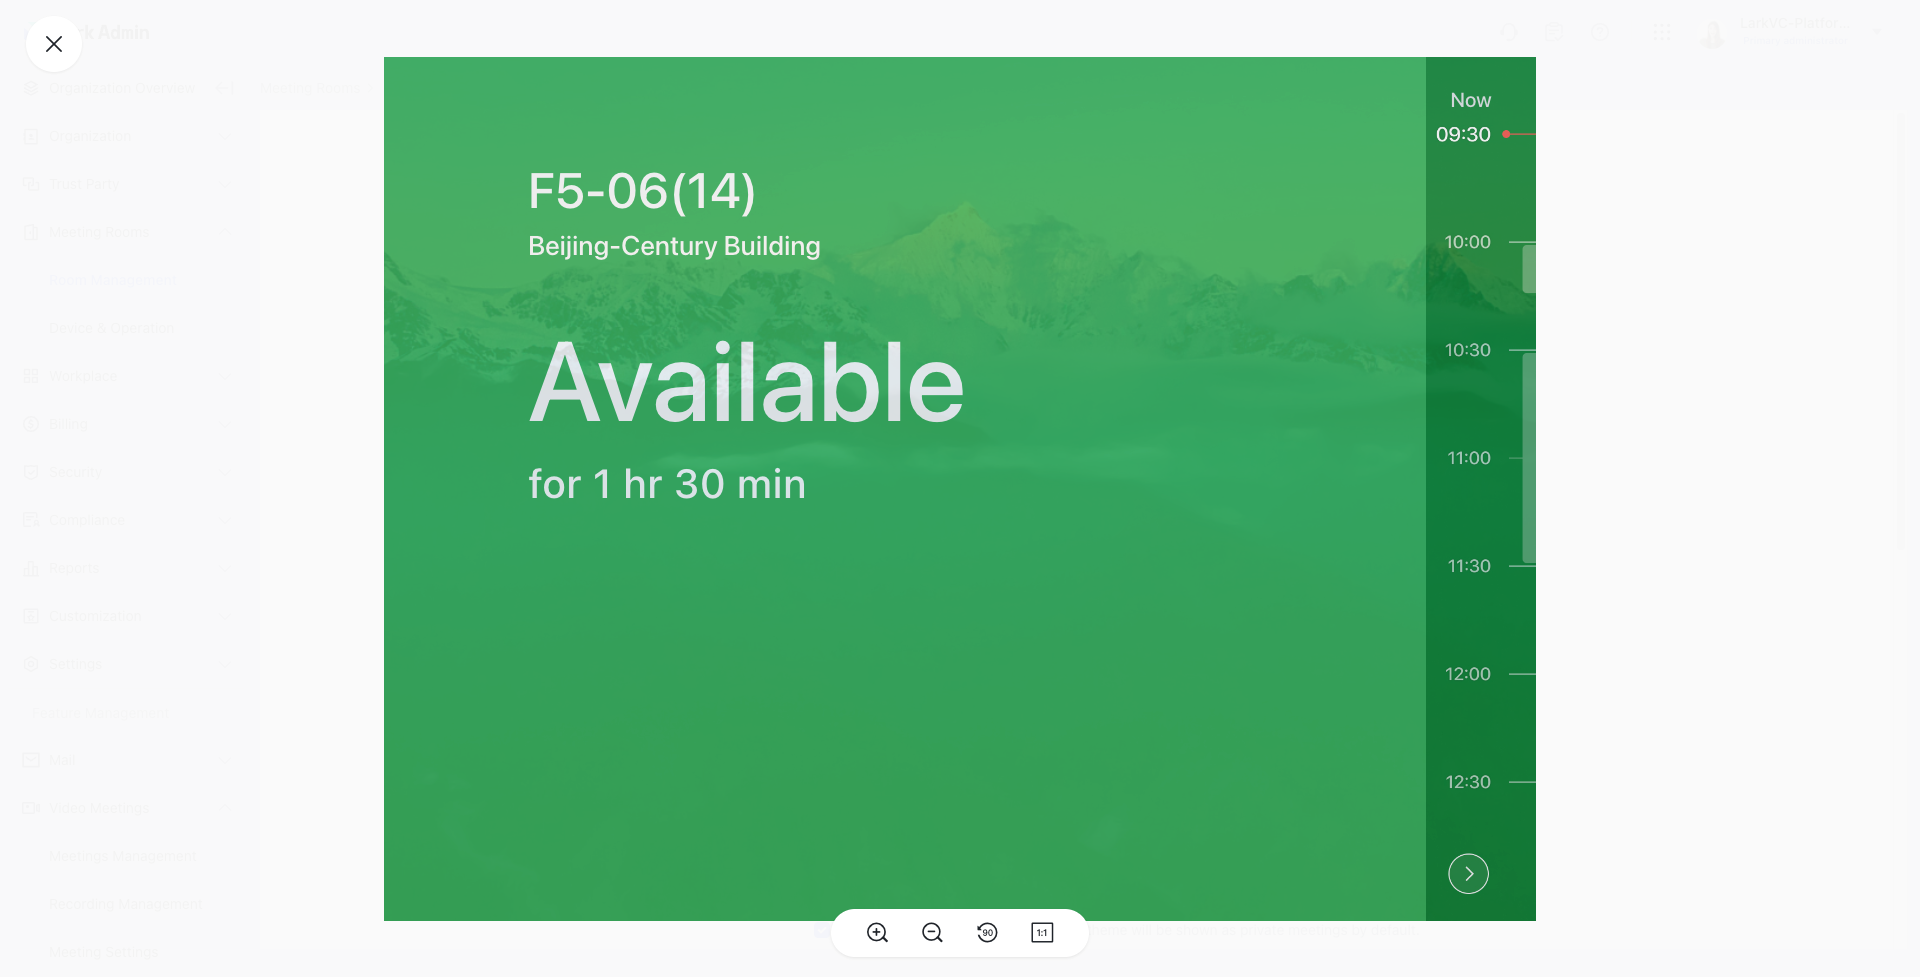
Once uploaded, click Landscape Preview or Portrait Preview to see the display in meeting room displays.
Note: There is a transparent layer of color on the top of the background image that suggests the status of the meeting room, and can't be removed. Green suggests the room is available, blue suggests the room has been booked but not checked in, while red suggests that the room is in use.
250px|700px|reset
Click Confirm to save the changes. After a moment, the background images on the meeting rooms displays will be updated.
You can also select to replace all background images with the newly uploaded images or individually check the background images that need to be replaced.
250px|700px|reset
- Set meeting room check-in
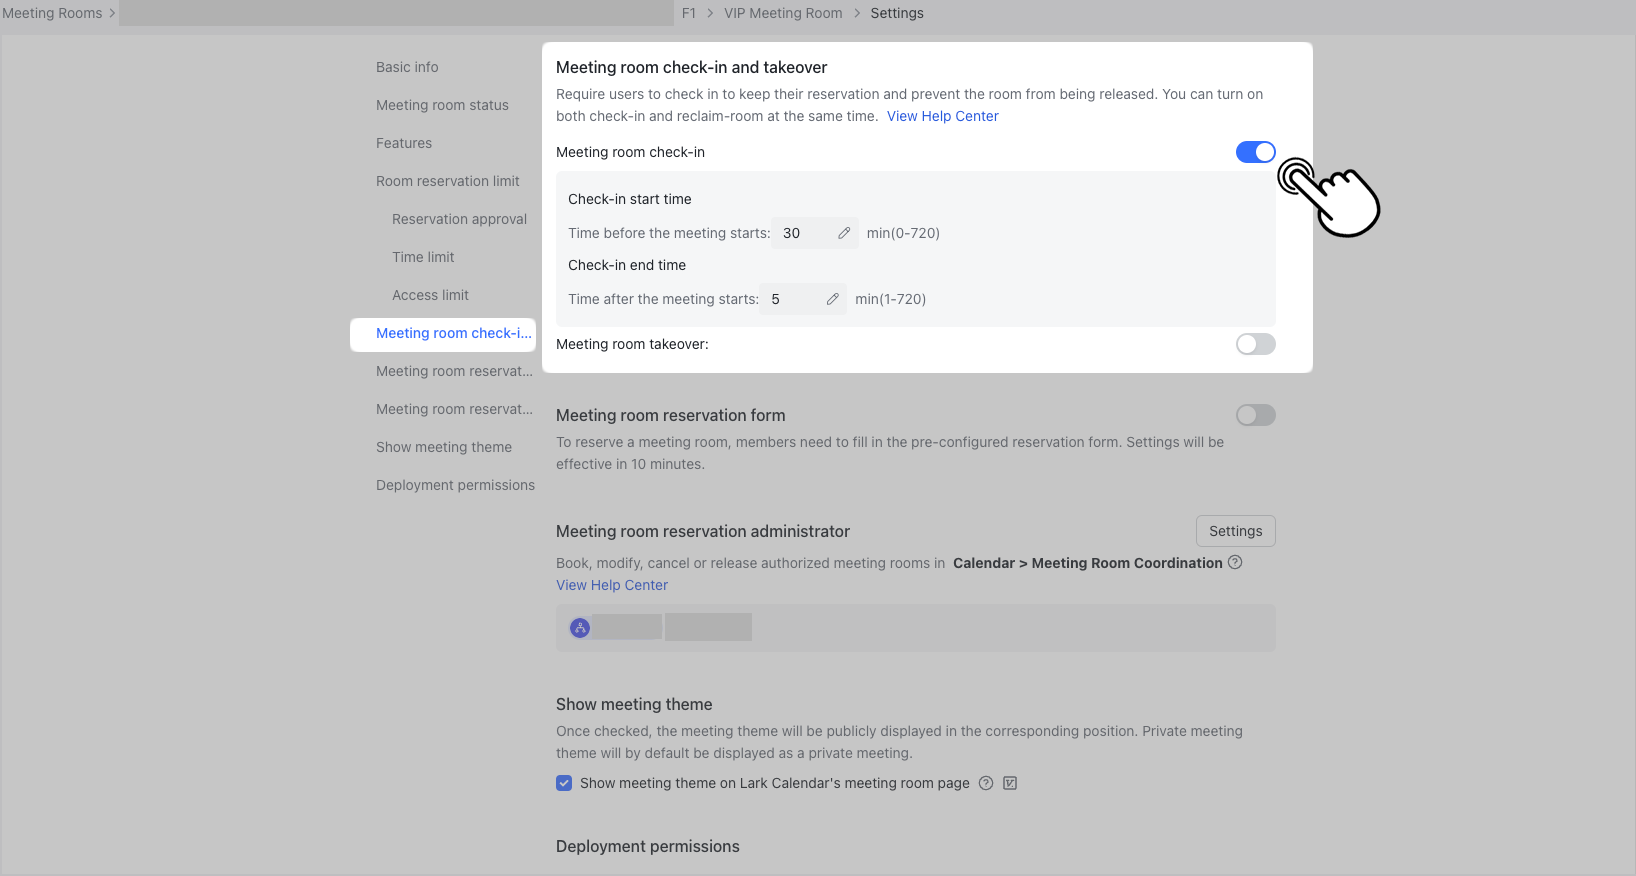
Under Settings, go to Basic info > Meeting room check-in and takeover to select whether meeting rooms require members of the organization to check-in before a meeting starts.
- When check-in is turned on: Users must check in within the specified time period to keep the reservation; otherwise, the meeting room will be released.
- When check-in is turned off: The check-in button won't be appear on the display, and all meeting room reservations will be kept.
250px|700px|reset
- Instant reservations
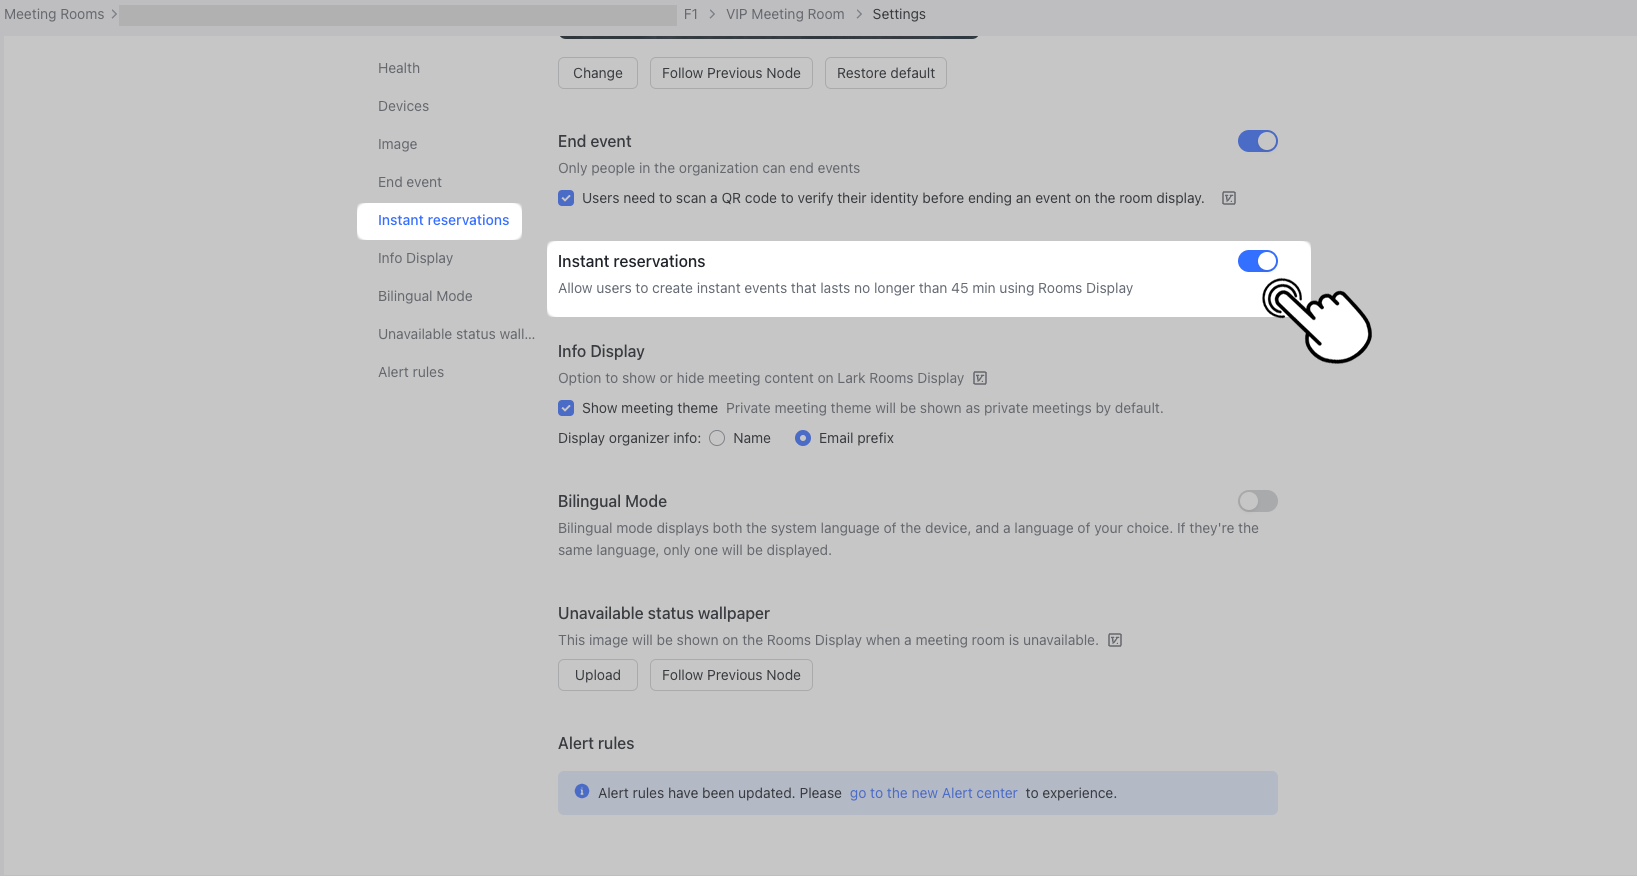
Under Settings, go to Lark Rooms Display > Instant reservations to allow organization members to instantly reserve a meeting room from the meeting room display.
- When instant reservations is turned on: Users can use the display to create instant events that last no longer than 45 minutes.
- When instant reservations is turned off: The instant reservation button won't appear on the display, and users will have to make reservations through the Lark apps.
250px|700px|reset
- End events
Under Settings, go to Lark Rooms Display > End Event to allow organization members to end events and release meeting room resources.
- When End event is turned on: Users will be required to scan the QR code that appears on the display to verify their identity as a member of the organization before ending an event. If you deselect Users need to scan a QR code to verify their identity before ending an event on the room display, anyone can end an event and release the meeting room without verifying their identity.
- When End event is turned off: There will not be Release button on Display and you cannot release the meeting room.
Note: Versions 4.1 and above allows for administrators to select whether Users need to scan a QR code to verify their identity before ending an event on the room display.
 h
h
250px|700px|reset