
I. Intro
Availability: Some of the features described in this article are in beta.
Who can perform these steps: Help Desk administrators.
The Help Desk administrator can set up and enable the Help Desk bot, allowing the bot to initially take on user inquiries and guide users to solve problems on their own. The Help Desk bot is divided into a general bot and a custom bot, which are set up similarly. For more information, see Add and configure bots in Help Desk.
II. Steps
Note:
- Depending on the product version, the User Interface button might be displayed as Bot Service. Both buttons have the same functionality.
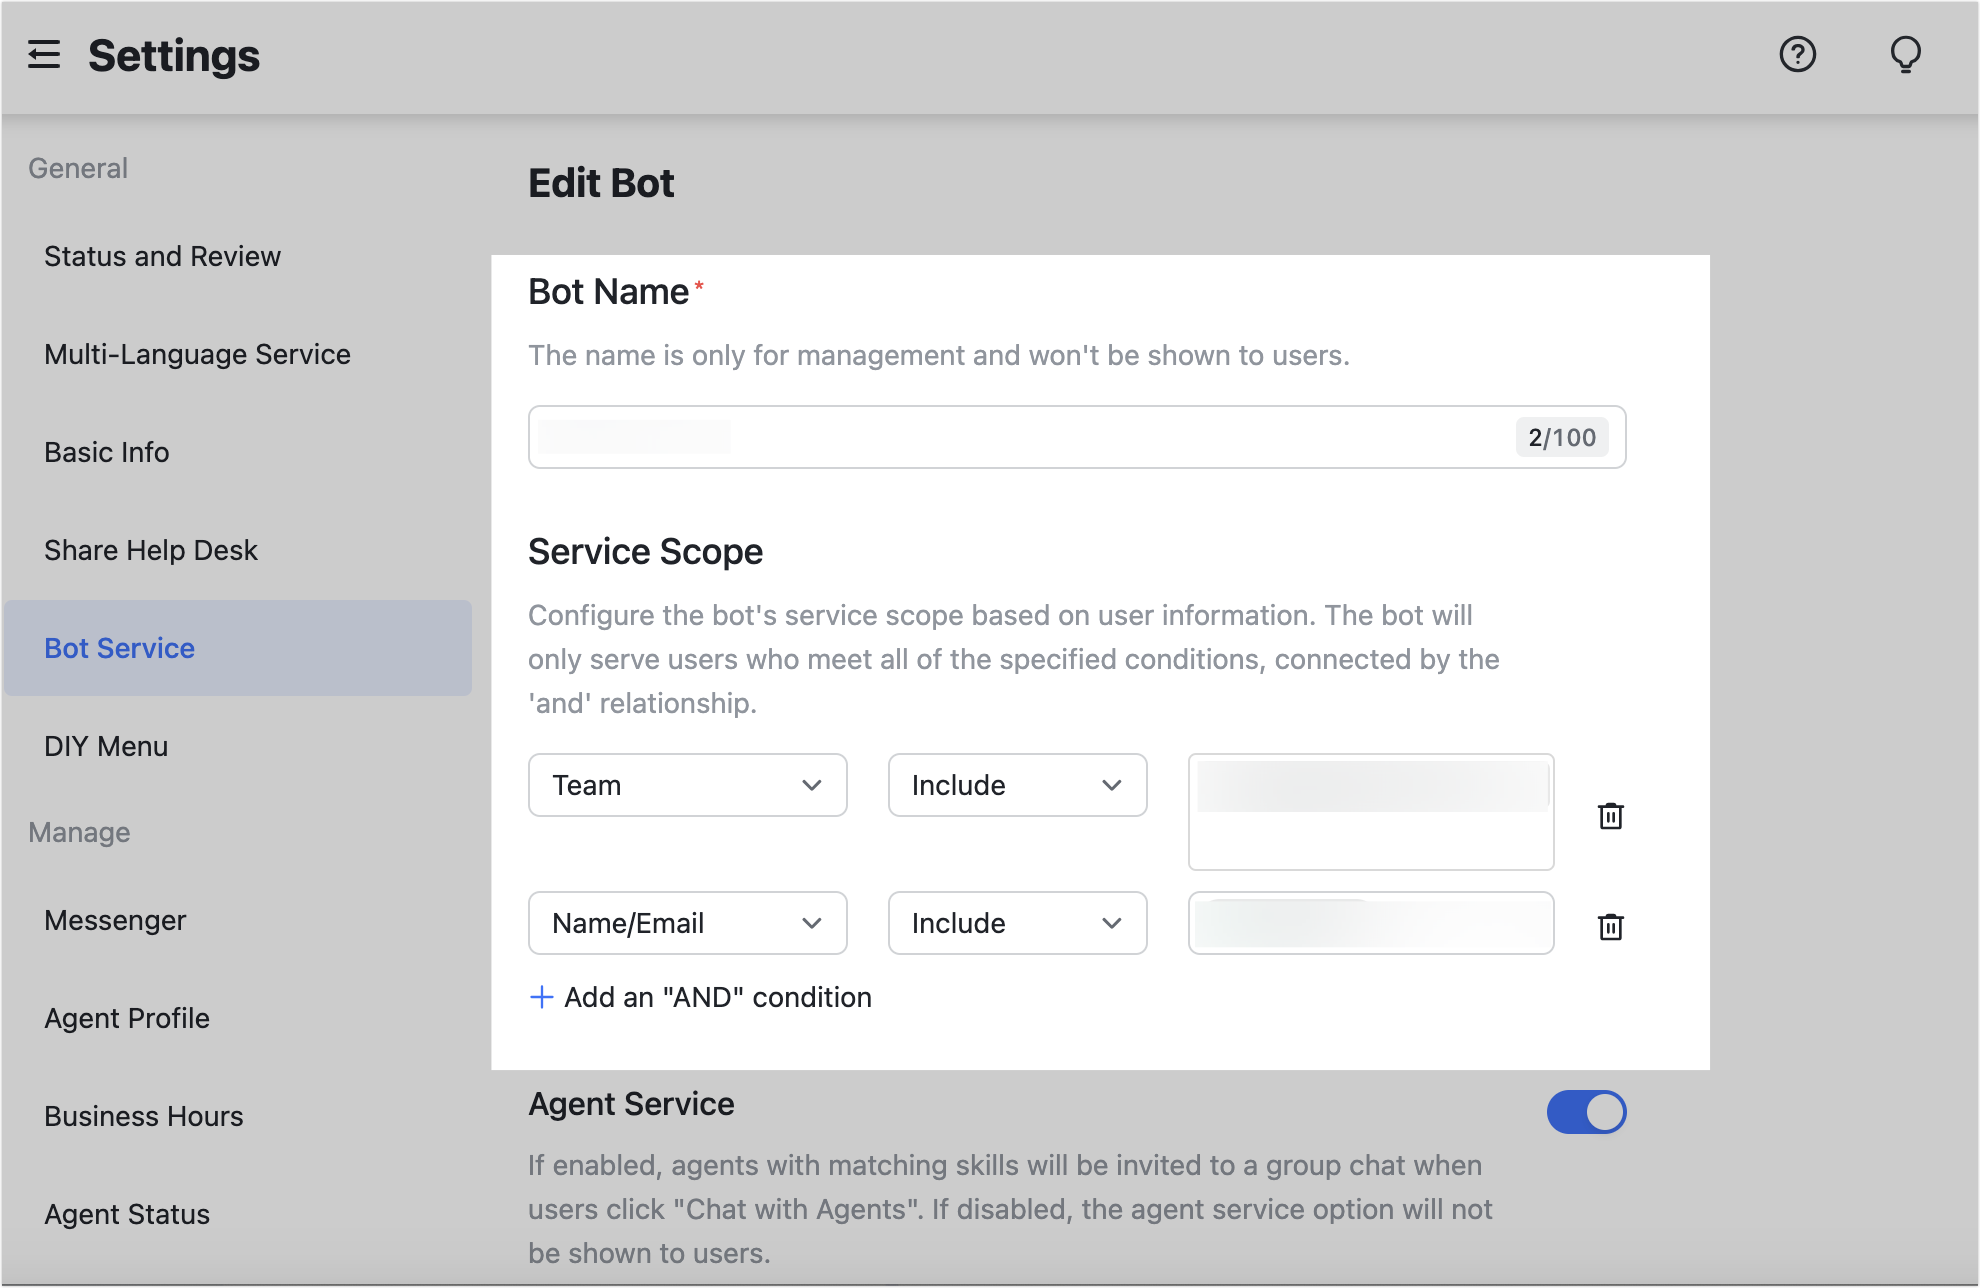
- Depending on your product version, if a bots list is displayed, select the bot that you want to adjust, and then click Edit to open its configuration window. You can configure Bot Name and Service Scope for a custom bot.
250px|700px|reset
In addition to the bot name and service scope, you can set the following configurations for the bot.
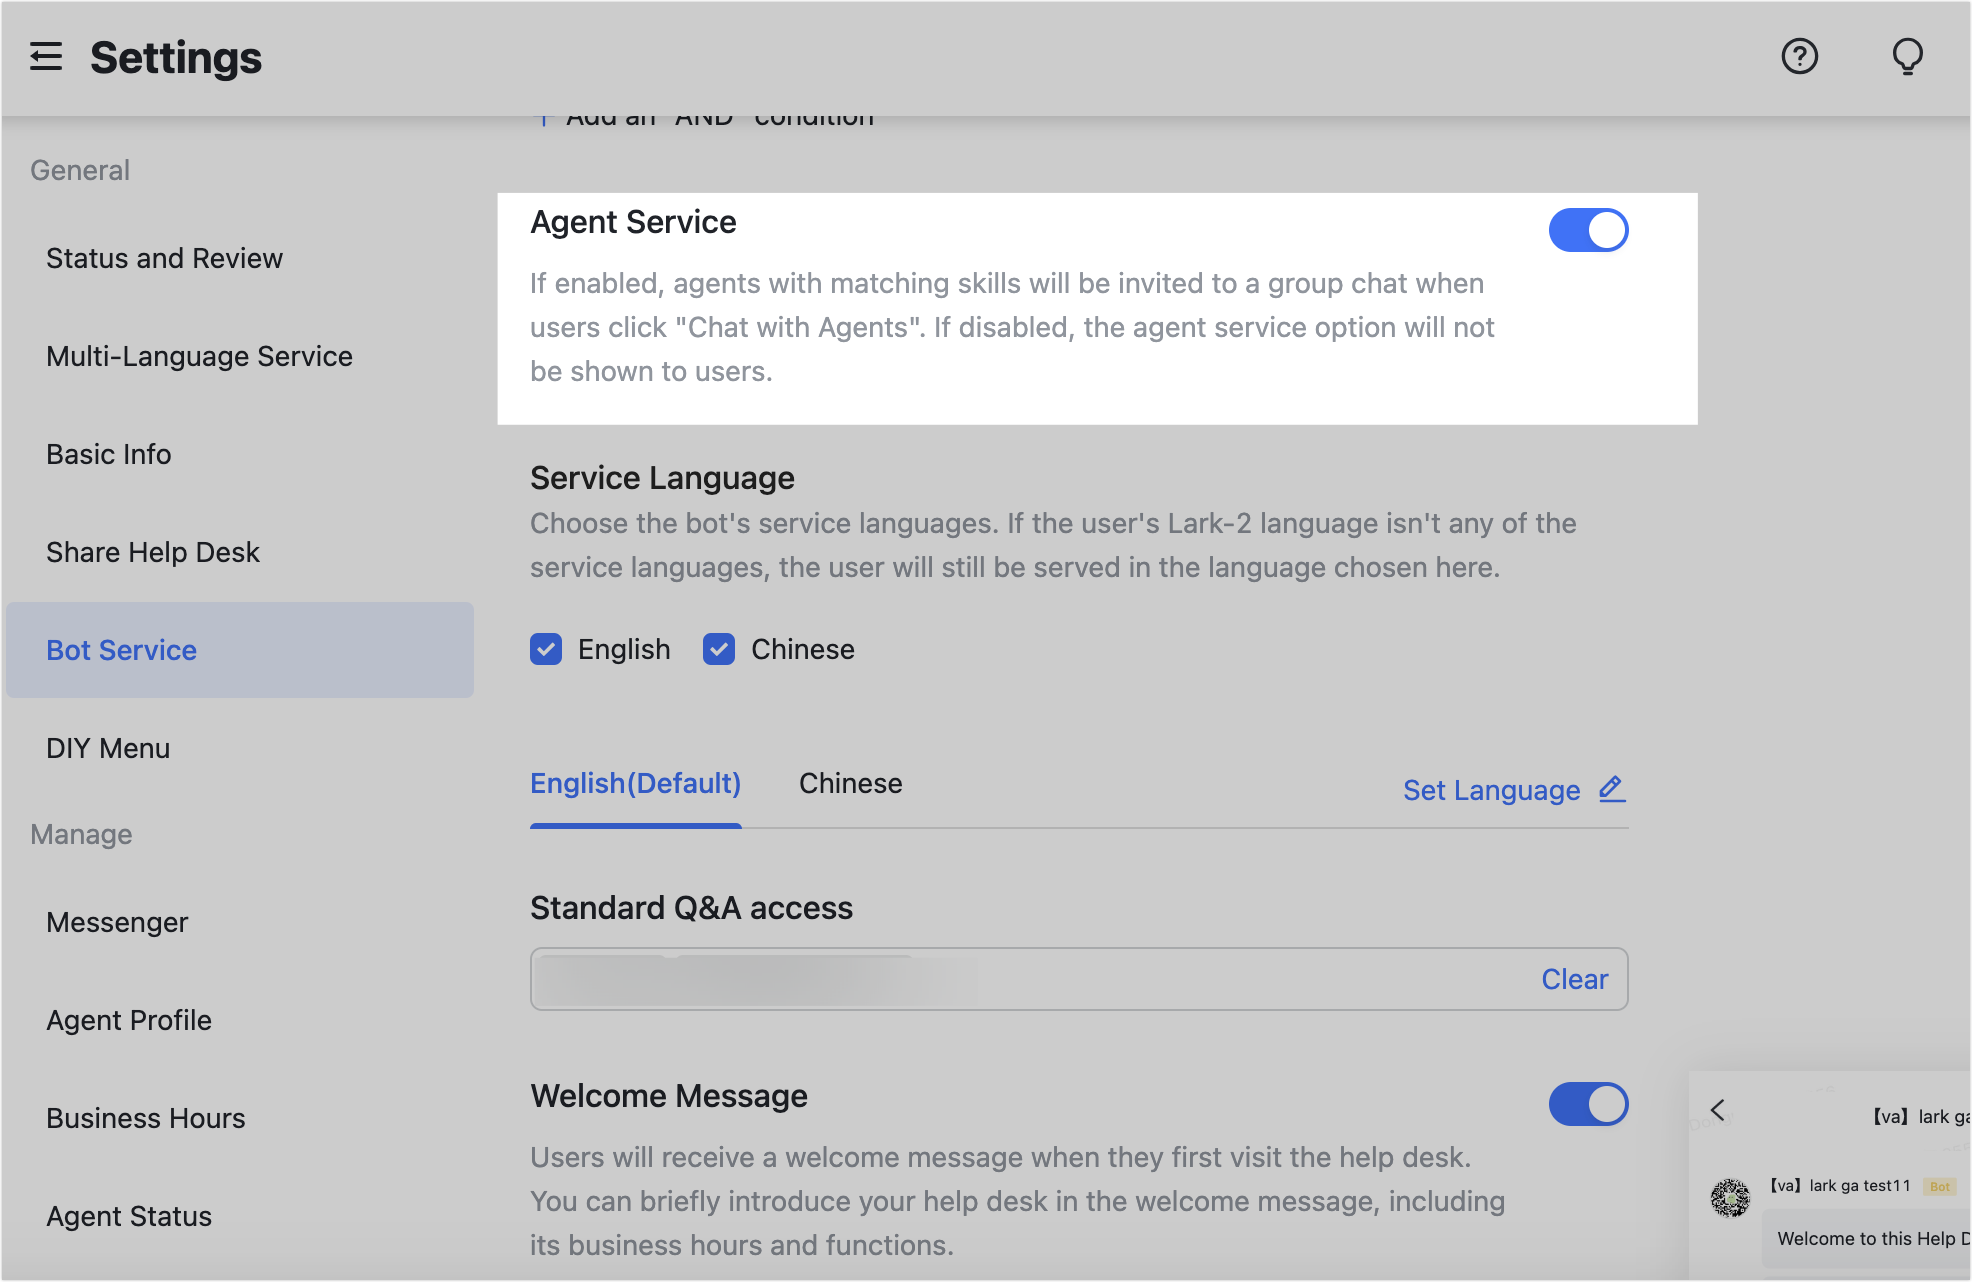
Enable or disable the agent service
The Agent Service option is enabled by default. When enabled, the entry to agent service can be triggered on the bot chat window. When users click the entry, the corresponding agent will be automatically added to the group. When it is turned off, all entries to agent service will be hidden in the chat window.
Note: If the Pre-inquiry form is enabled, users must complete the pre-inquiry form first before they can start the agent service.
250px|700px|reset
Set languages and Q&A access
After enabling the multiple bots service, you can set available languages for the bot and the standard Q&A access (Help Desk FAQs).
Note: If you need to add service languages for the bot, click Set Languages on the right to open the Multi-Languages Service page where you can activate more languages. After the multi-language service is enabled, the help desk will display information that matches the user's Fesihu app language settings.
Define the bot signature and welcome message
You can follow the guidance to add a bot signature and a welcome message for users.
- In the chat window, the bot signature will be displayed to the right of the bot's profile photo and name.
- You can enter text in the welcome message editing box, and by clicking the button in the lower-left corner, you can add an image (.jpg, .png, or .gif format) or a hyperlink. You can also paste the image directly into the editing box.
- To enable more languages, click Set Language to open the Multi-Language Service page. After activating the multi-language service, the Help Desk will display information that matches the app language of the user.

250px|700px|reset
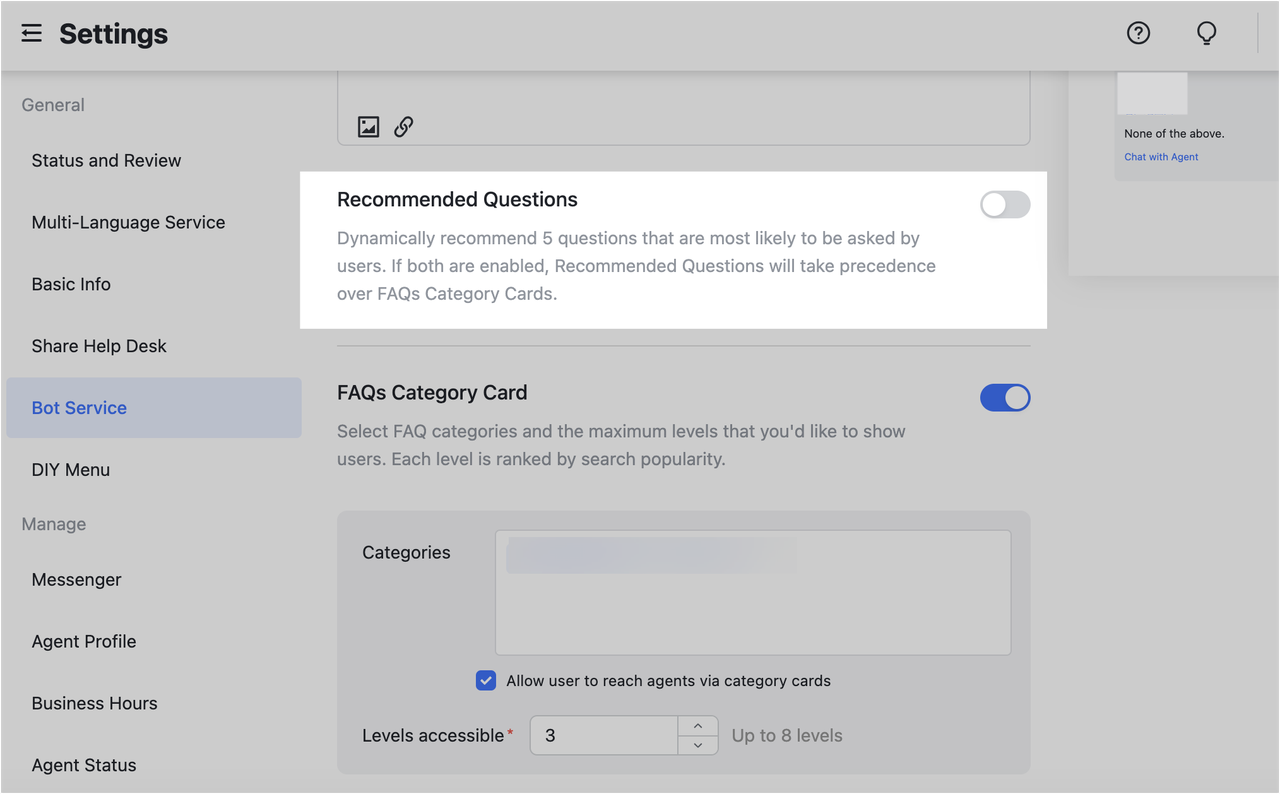
Enable or disable recommended questions
If the Recommended Questions option is enabled, the bot will dynamically recommend the top 5 questions users are most likely to ask based on popularity metrics such as hit rate and clickthrough rate of the FAQs. These questions are dynamically ordered and cannot be manually rearranged.
Note: When Recommended Questions and FAQs Category Card are both enabled, recommended questions will be displayed first.
250px|700px|reset
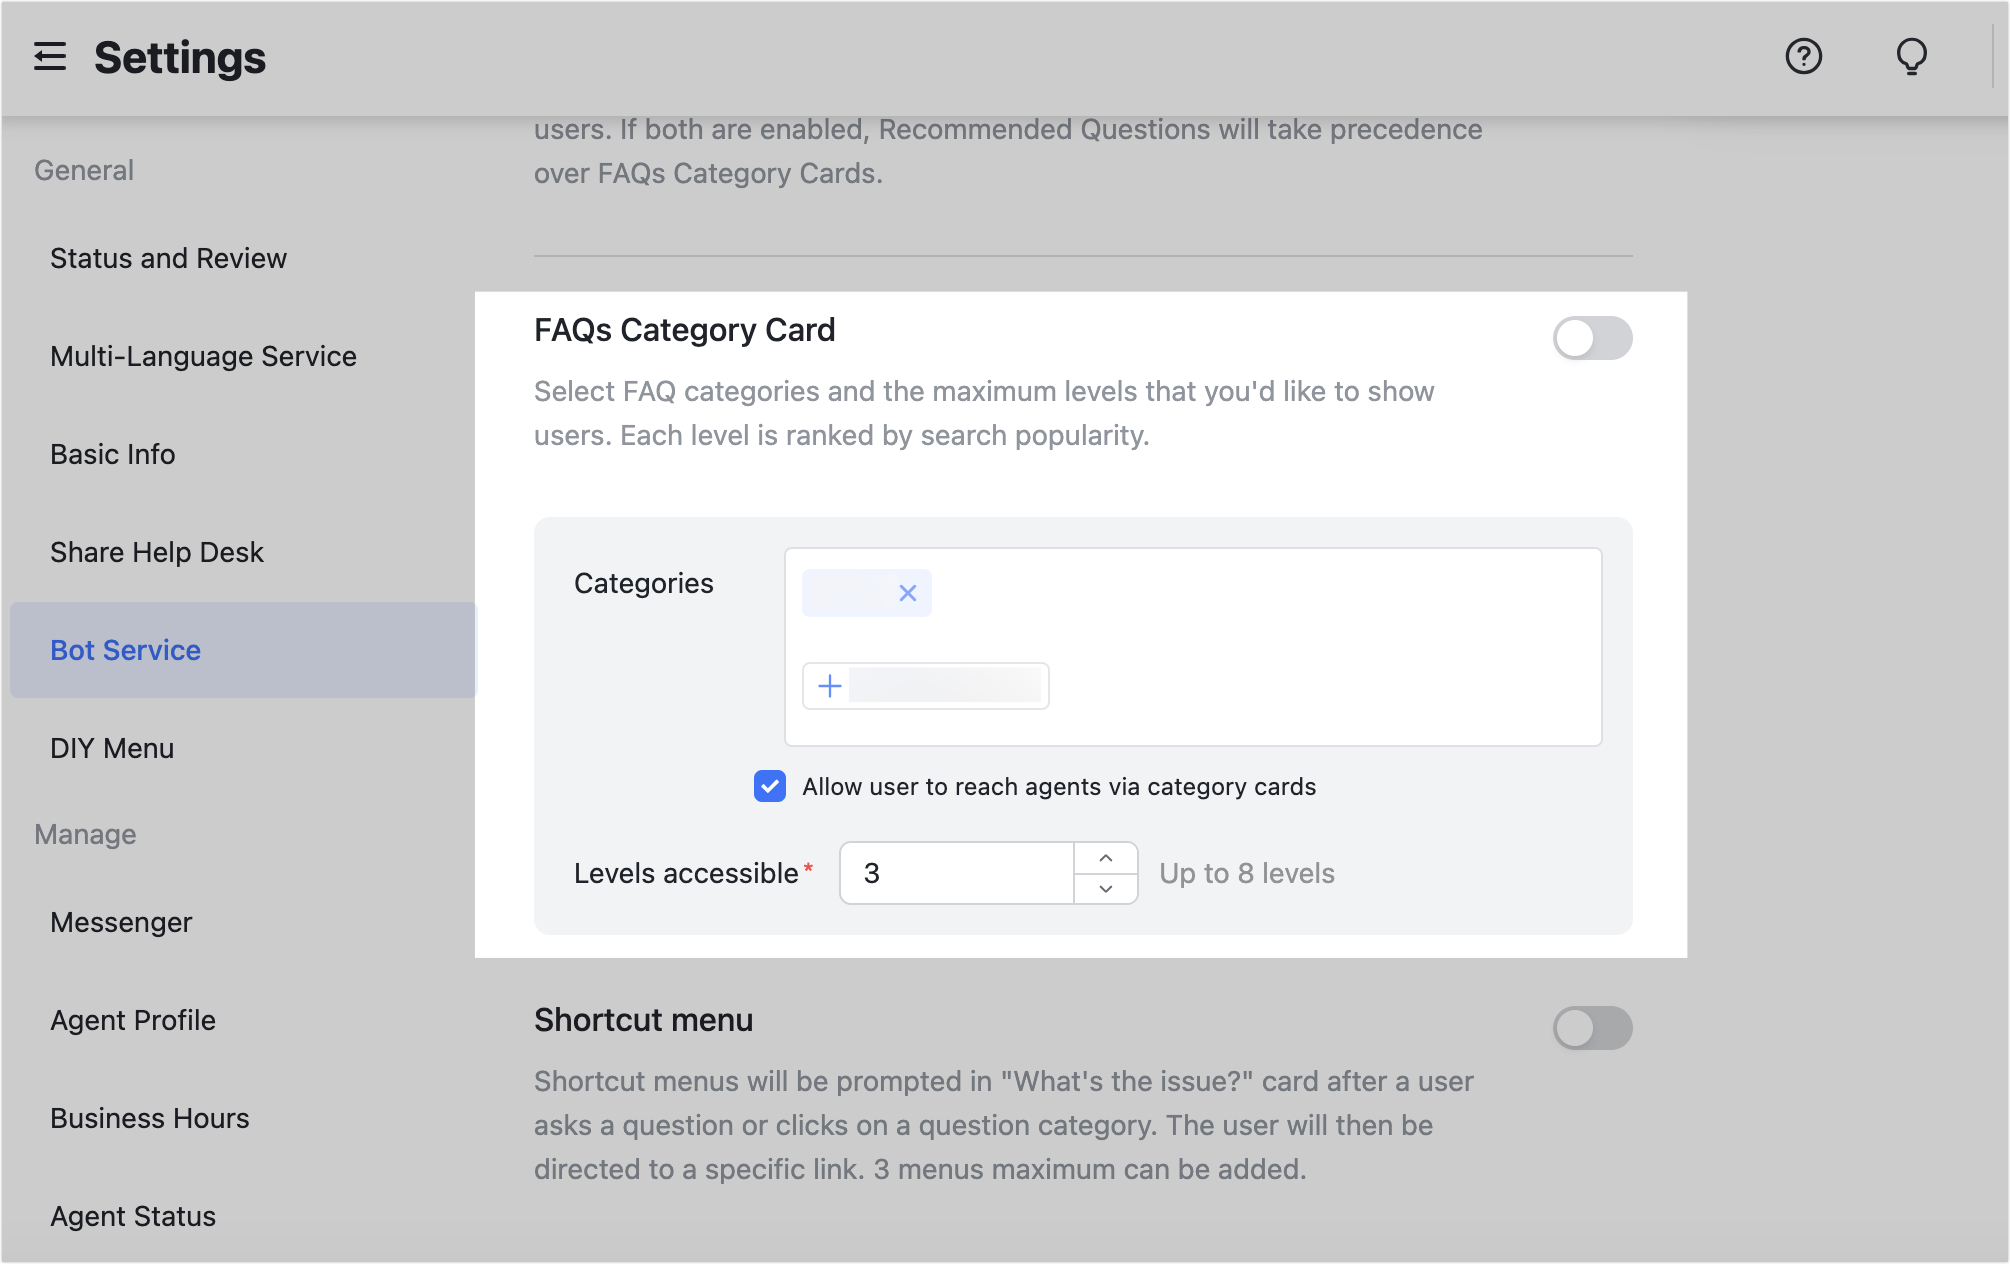
Configure the FAQs category card
Turn on the FAQs Category Card option, and then you can choose which FAQs categories to display to users and the maximum number of levels they can view. The content within each category is sorted by popularity and cannot be manually rearranged.
Note:
- If you turn on Agent Service, you can select Allow user to reach agents via category cards under Categories. Then an entry to agent service will also be displayed in the FAQs category card.
- When the Recommended Questions and FAQs Category Card options are both enabled, recommended questions will be displayed first. The FAQ categories are displayed in the help desk only if users click None of the above. Select a category.
- Before turning on the FAQs Category Card, ensure that you have configured the Standard Q&A access. If there are no categories in the Help Desk FAQs, you will not be able to turn on FAQs Category Card. You need to add categories to the FAQs first.
250px|700px|reset
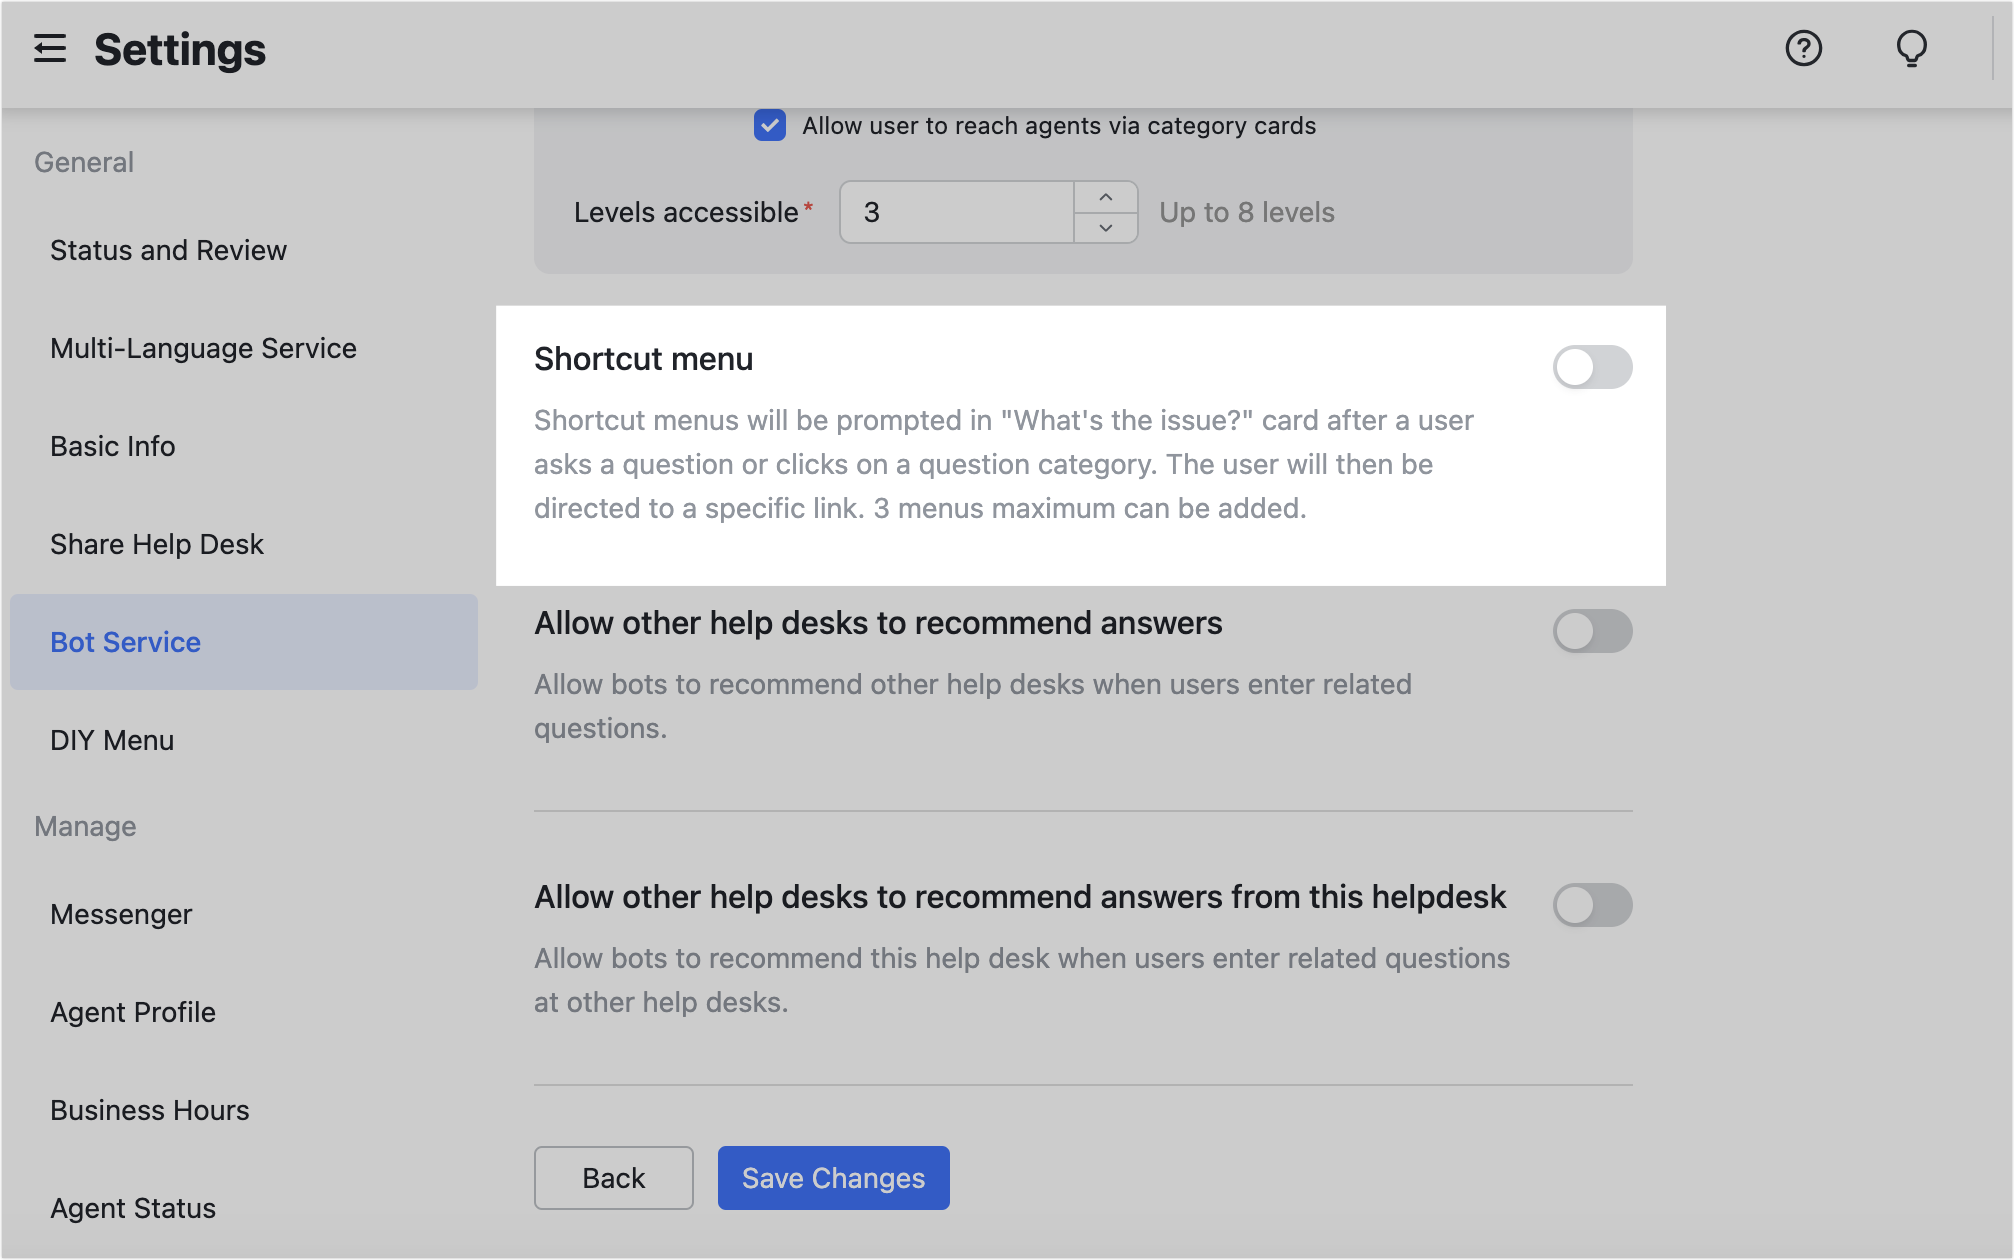
Configure the shortcut menu
You can turn on the Shortcut menu option. After users ask questions or click the question category, a shortcut menu entry will be displayed in the "What's the issue?" card, which can guide users to jump to a specified link. A maximum of 3 shortcut menus can be added.
250px|700px|reset
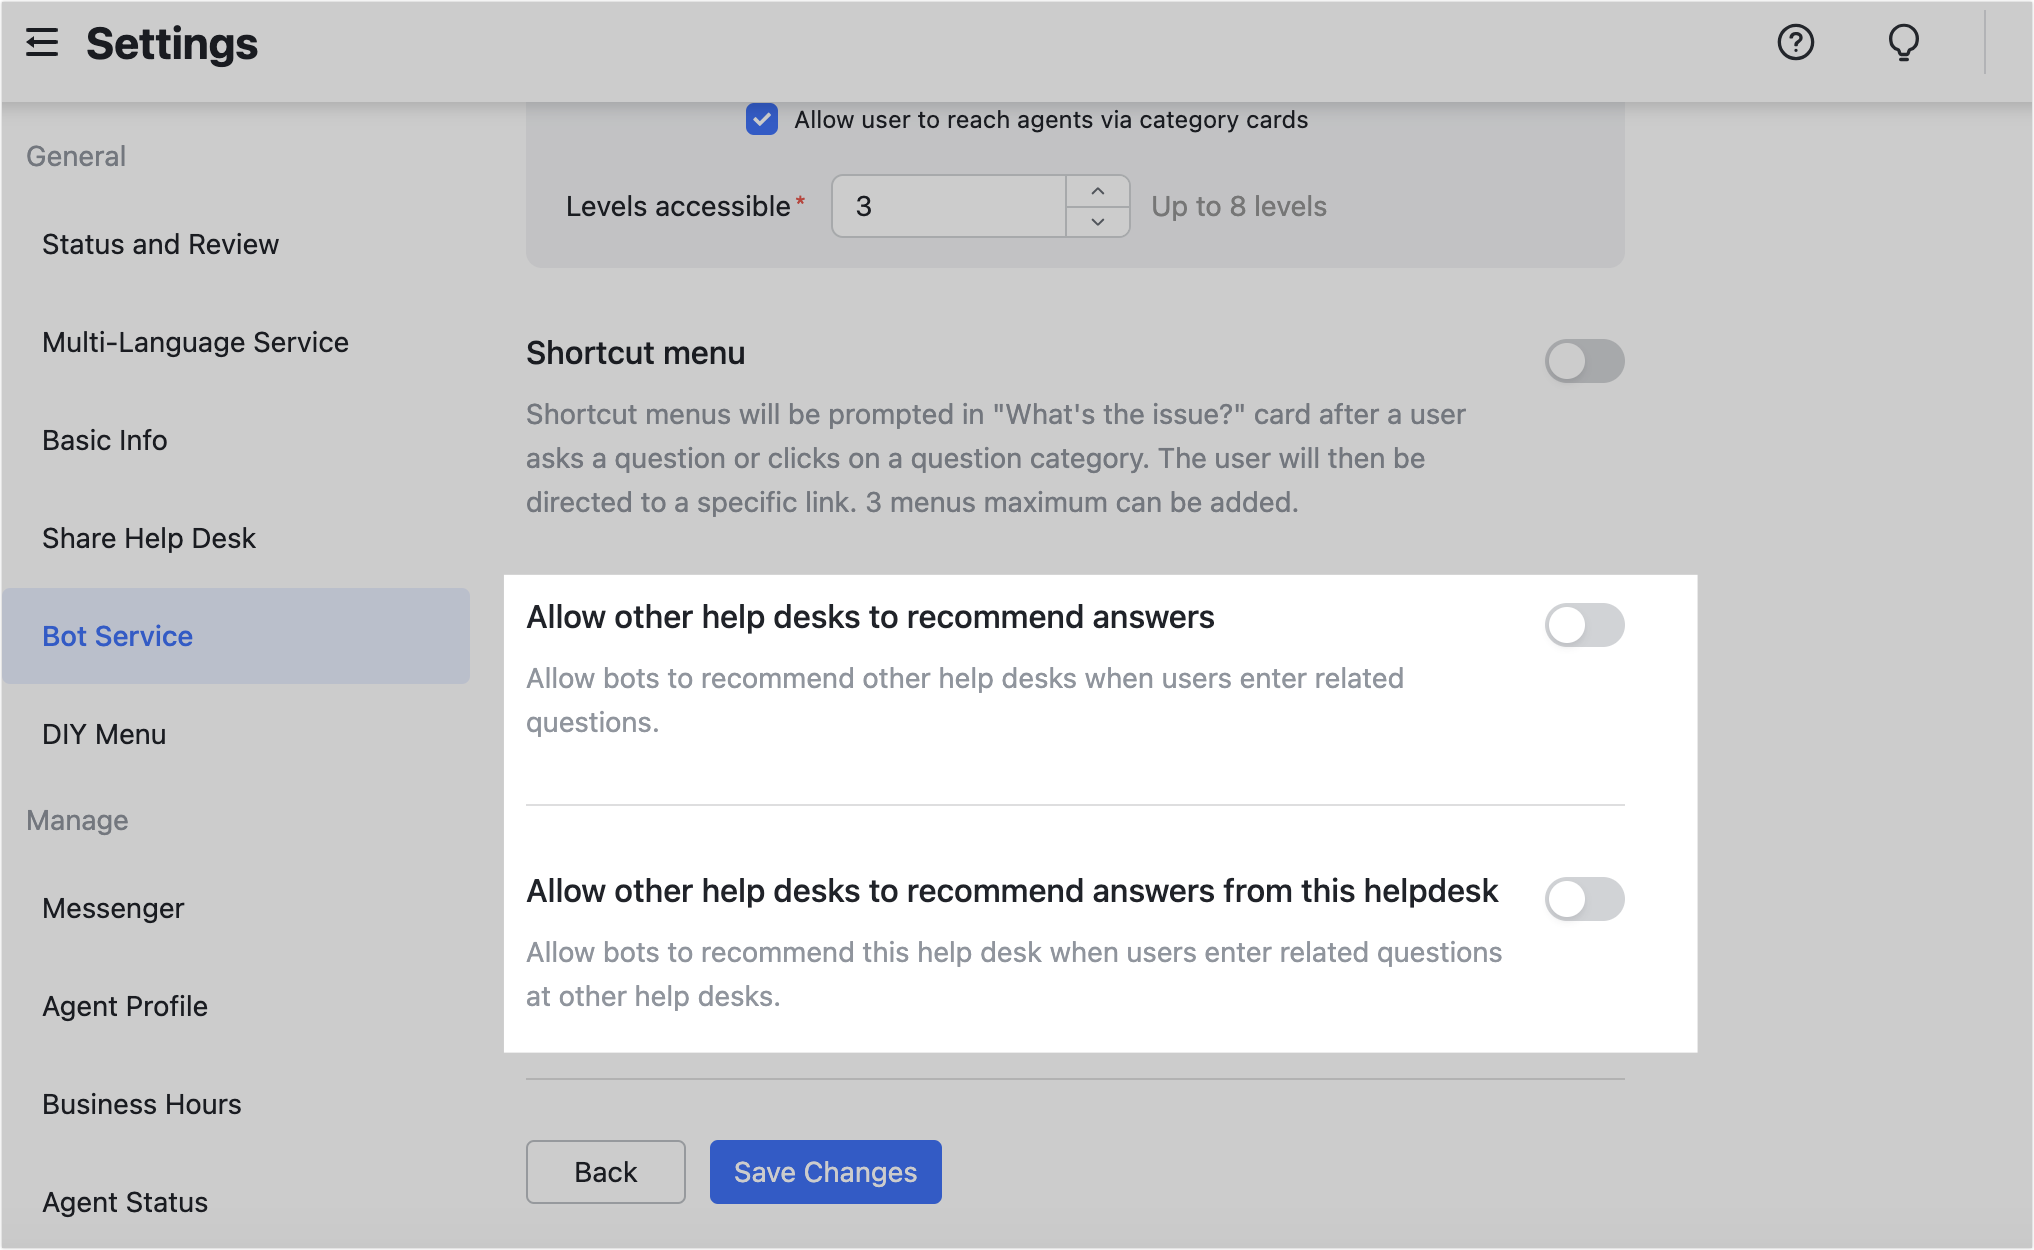
Recommend answers from other help desks
Allow other help desks to recommend answers and allow other help desks to recommend answers from this help desk are in beta.
- Allow other help desks to recommend answers
You can turn on the option of Allow other help desks to recommend answers. When a user's question is more relevant to another help desk, the bot will recommend the most relevant answer from the FAQs of that help desk, which are within the user's visibility scope.
- Allow other help desks to recommend answers from this help desk
You can turn on the option of Allow other help desks to recommend answers from this help desk. If a user's question entered at another help desk is more relevant to this help desk, it allows the bot from the other help desk to recommend answers from this help desk.
250px|700px|reset
III. FAQs