
I. Intro
You can synchronize the Lark Calendar to your device's calendar through a CalDAV account. If you want to synchronize your device's calendar to the Lark Calendar, click the Mobile tab at the top of this article to see the mobile app instructions.
II. Steps
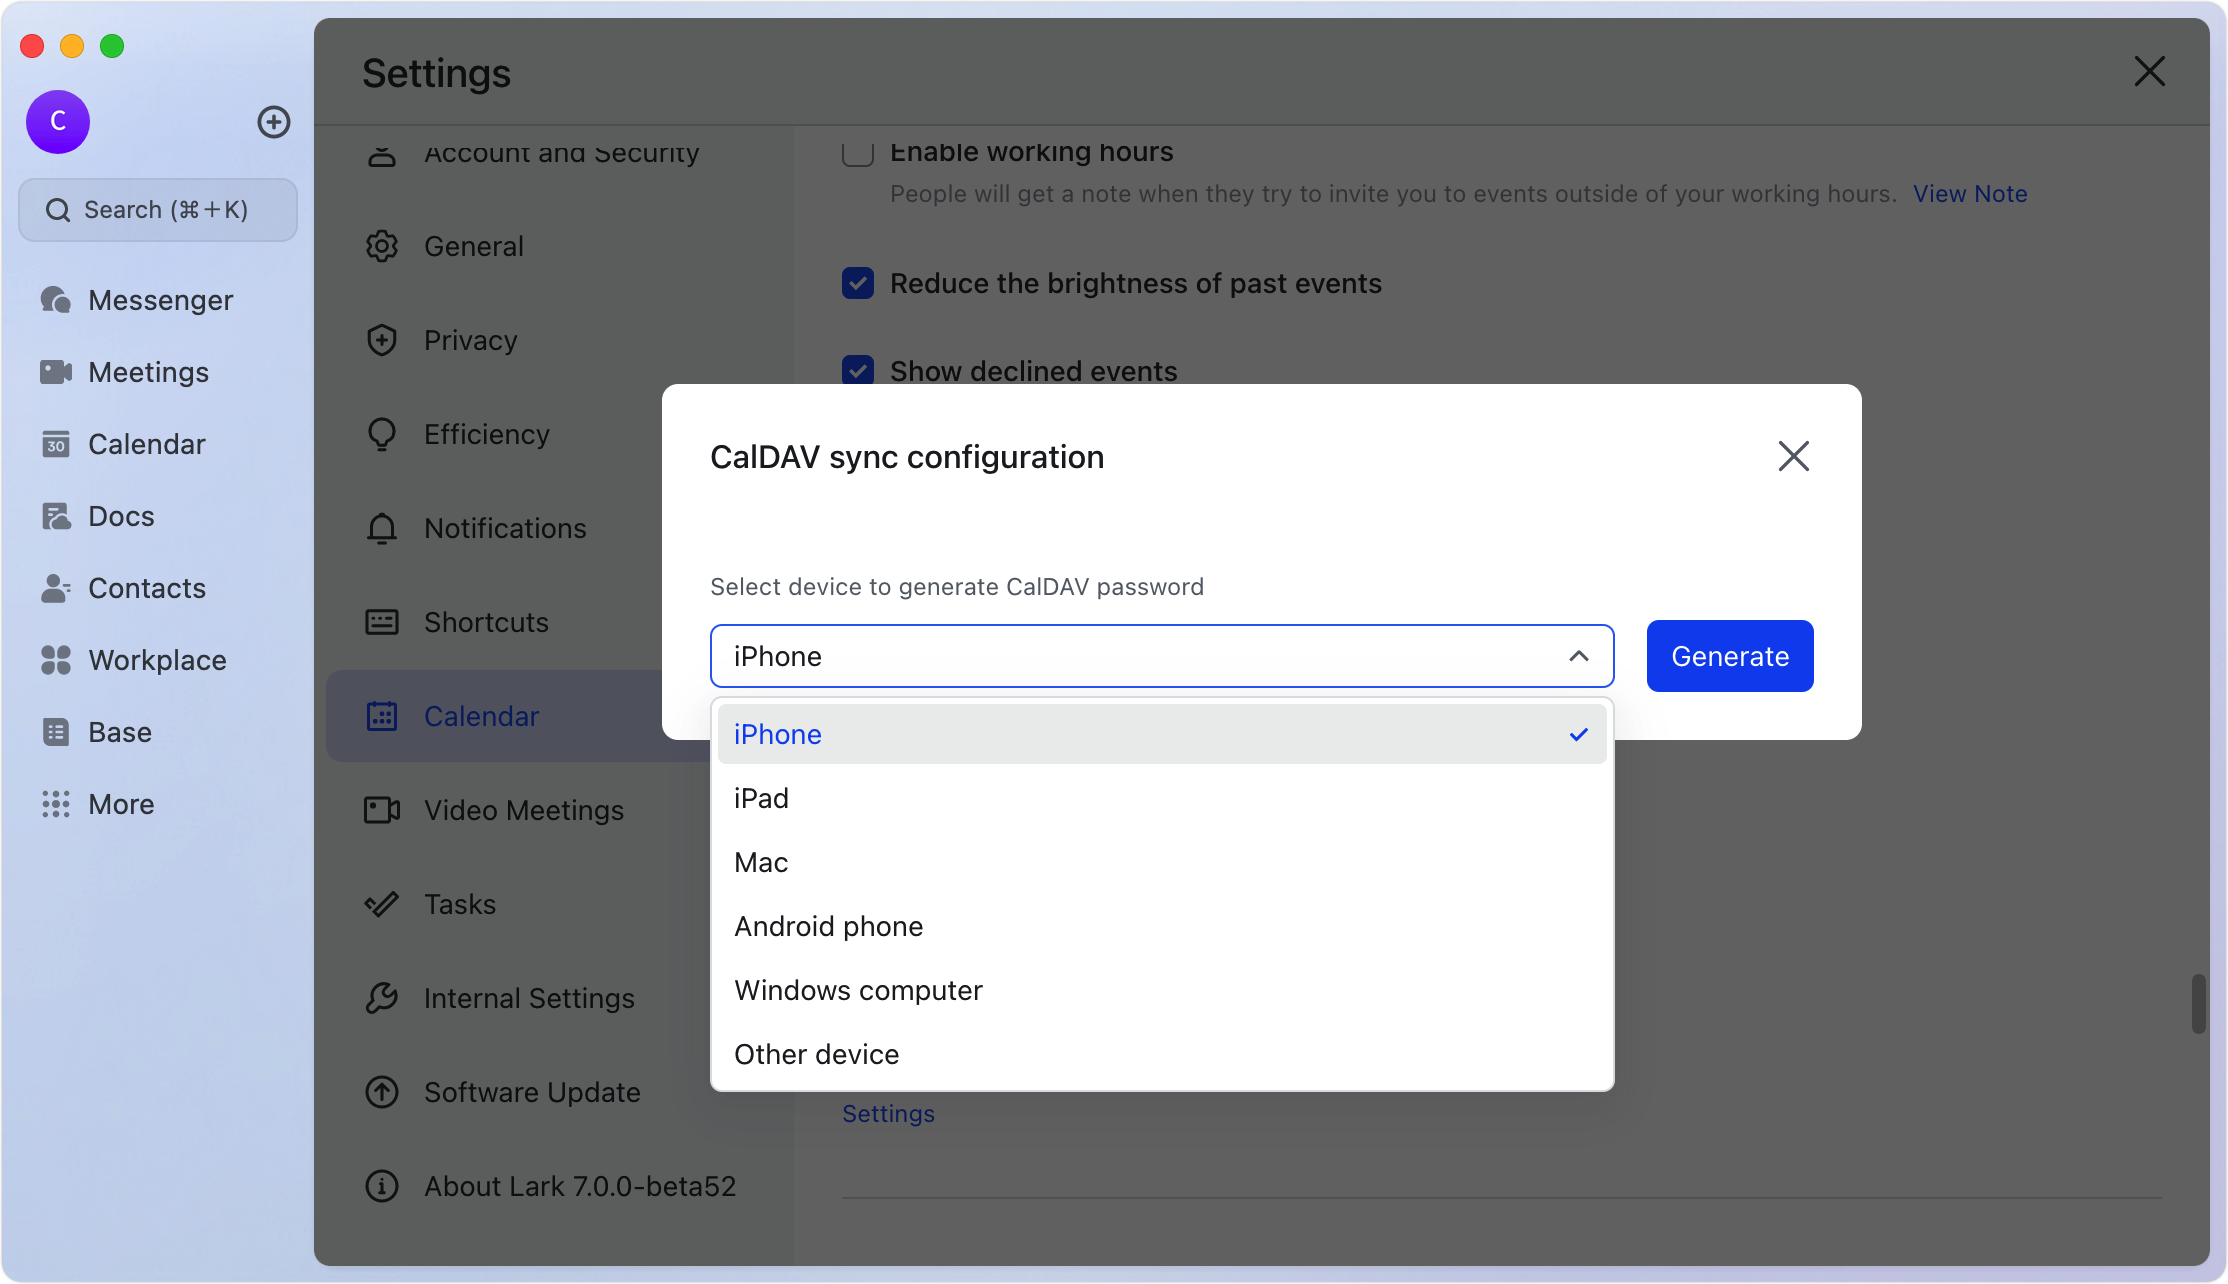
- Select device and generate CalDAV information
- Click your profile photo > Settings > Calendar > CalDAV sync > Settings.
- Select which kind of device you want to sync with, and click Generate to create a CalDAV account, with password and server address.
250px|700px|reset
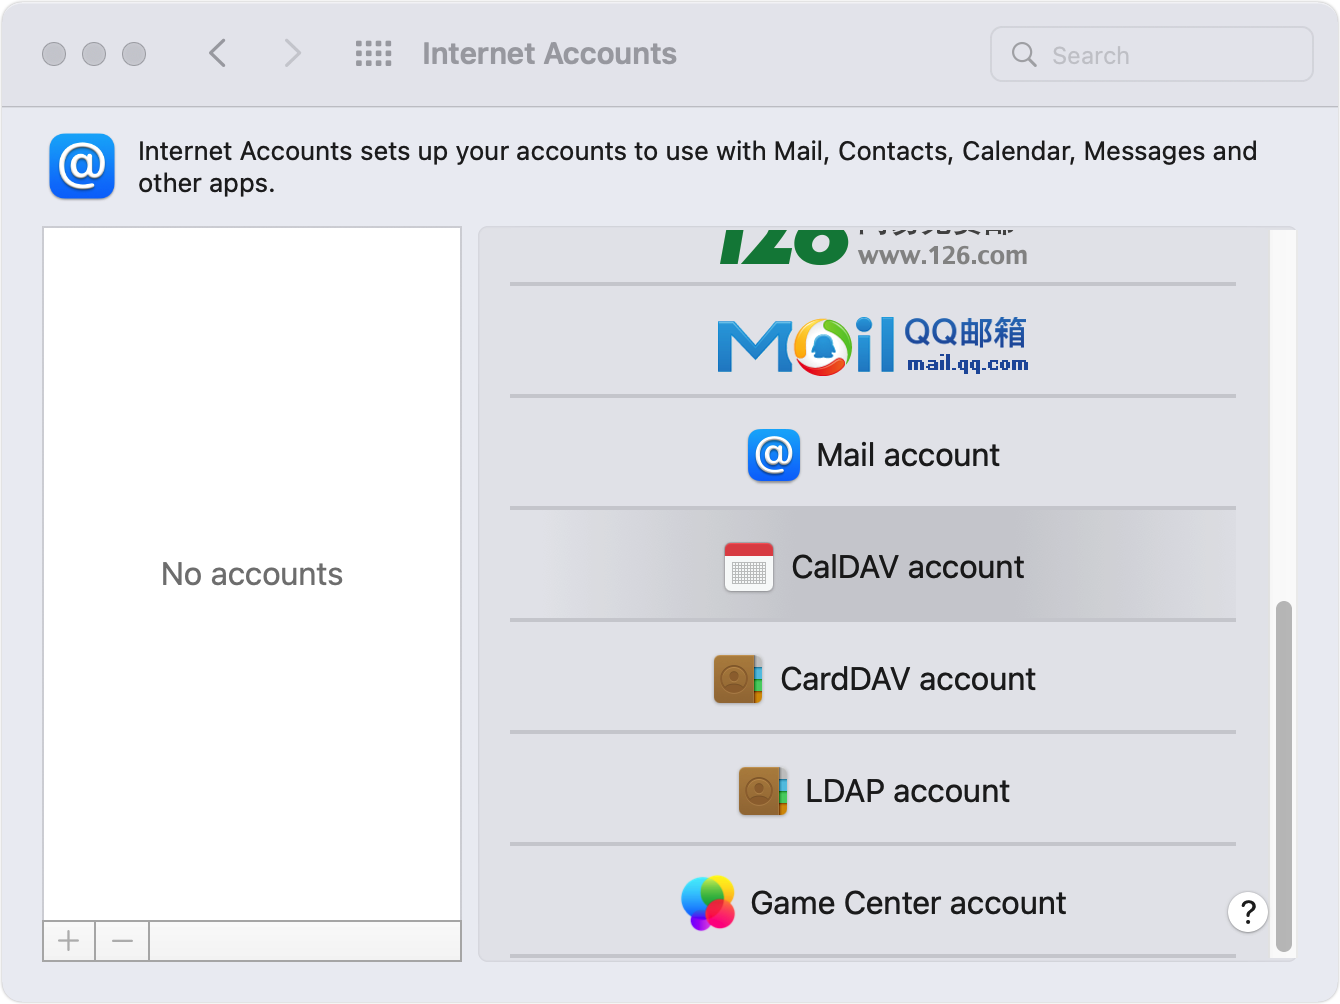
- Add the CalDAV account to your computer
Add CalDAV account to Mac
- Open System Settings, click Internet Accounts, scroll down to the bottom, and select CalDAV account in Add Account.
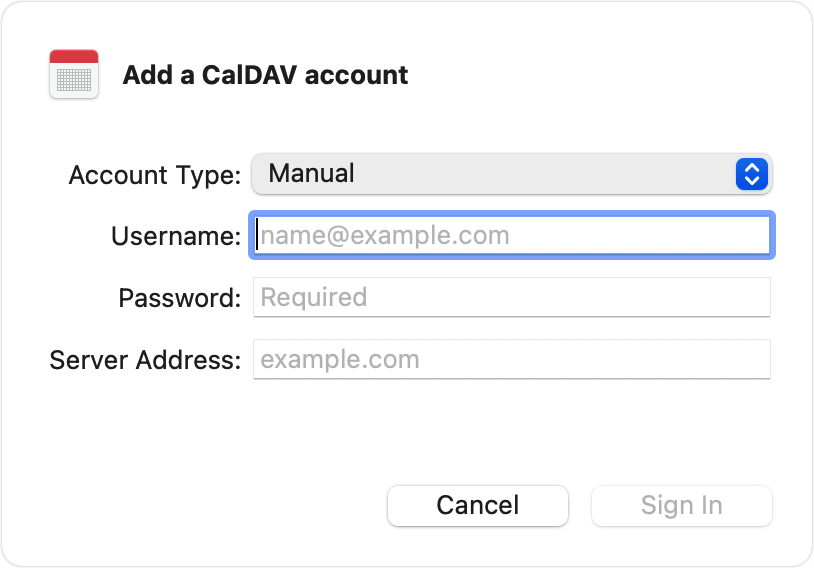
- Select Account Type as Manual, and enter the username, password, and server address obtained in the previous section.
250px|700px|reset
250px|700px|reset
Add CalDav account to Windows
Notice: Windows 11 uses Outlook as the default Calendar app (for more details, see Microsoft documentation), so you cannot synchronize the Lark Calendar to the local system Calendar by CalDAV if you are using a Windows 11 device.
On Windows 10 that uses the local system Calendar, you can perform the following steps for synchronization:
- In the Windows Calendar app, click Settings > Manage Accounts > Add Account > iCloud.
- Enter a virtual email, username, and password, and click Login.
- Note: In this step, do not use your real email, username, and password. For example, you can use the following information:
- Email: 1@iCloud.com
- Username: test
- Password: pwd
- Click Settings again to enter the Manage Accounts page, click the iCloud account just created, and select Change settings > Change mailbox sync settings.
- Scroll to the bottom, select Advanced mailbox settings, fill in the Lark-generated server address in Calendar Server (CalDAV), and turn off Email and Contacts sync under Sync Options, and click Done.
- Fill in the credentials generated in the previous section in the User Name and Password fields. Optionally, change the account name. Click Save to complete the process.
III. FAQs