I. Intro
Associate a Zoom account with Lark to create Zoom meeting events directly in Lark Calendar, generate a Zoom meeting ID and link, and change the settings of Zoom meetings you've created. Once a Zoom meeting event has been created and set up, invited guests can view details of the event directly in Lark Calendar and click the event to join the meeting in their browser.
II. Steps
1. Associate a Zoom account
In order to use this feature, you need to first associate a Zoom account.
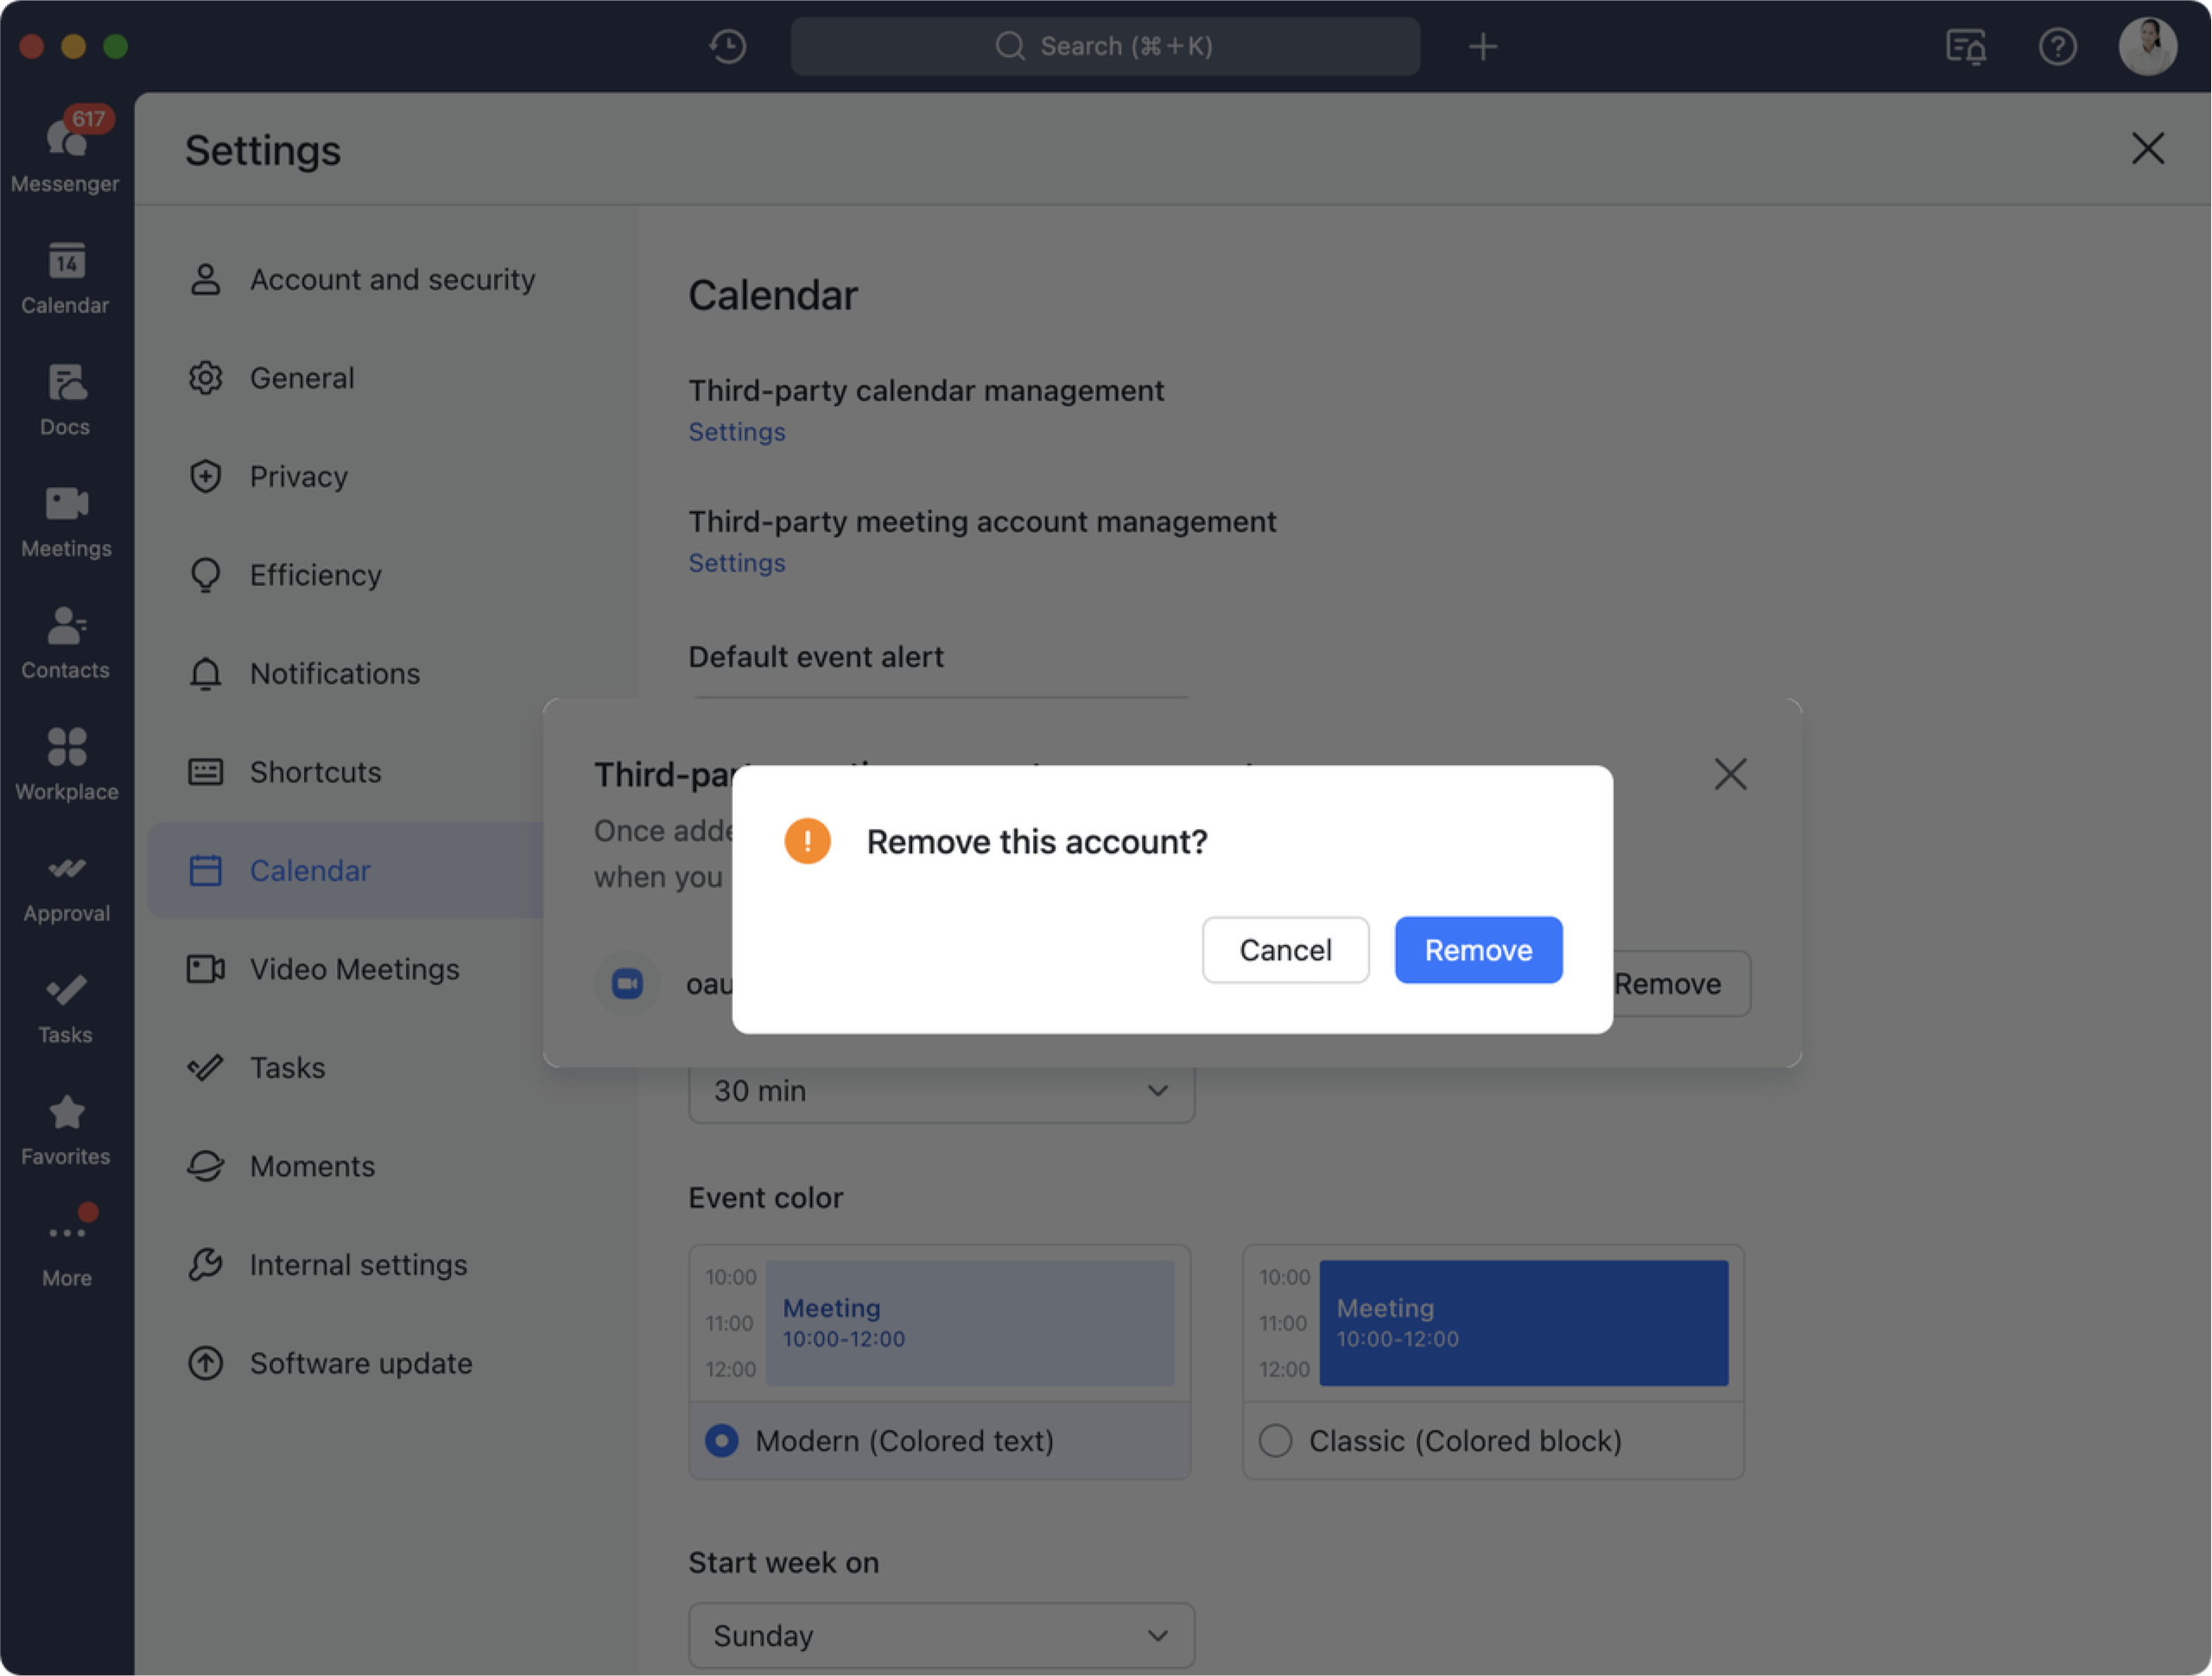
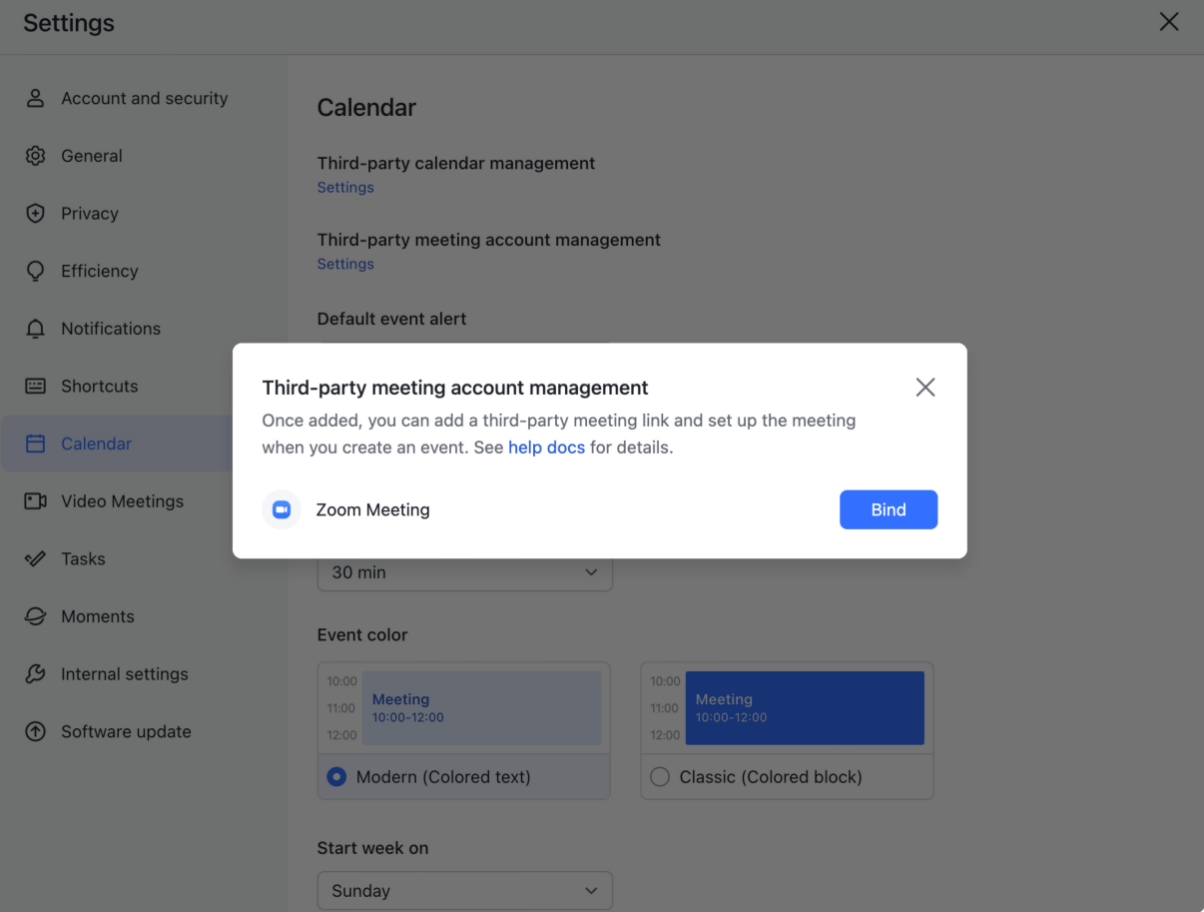
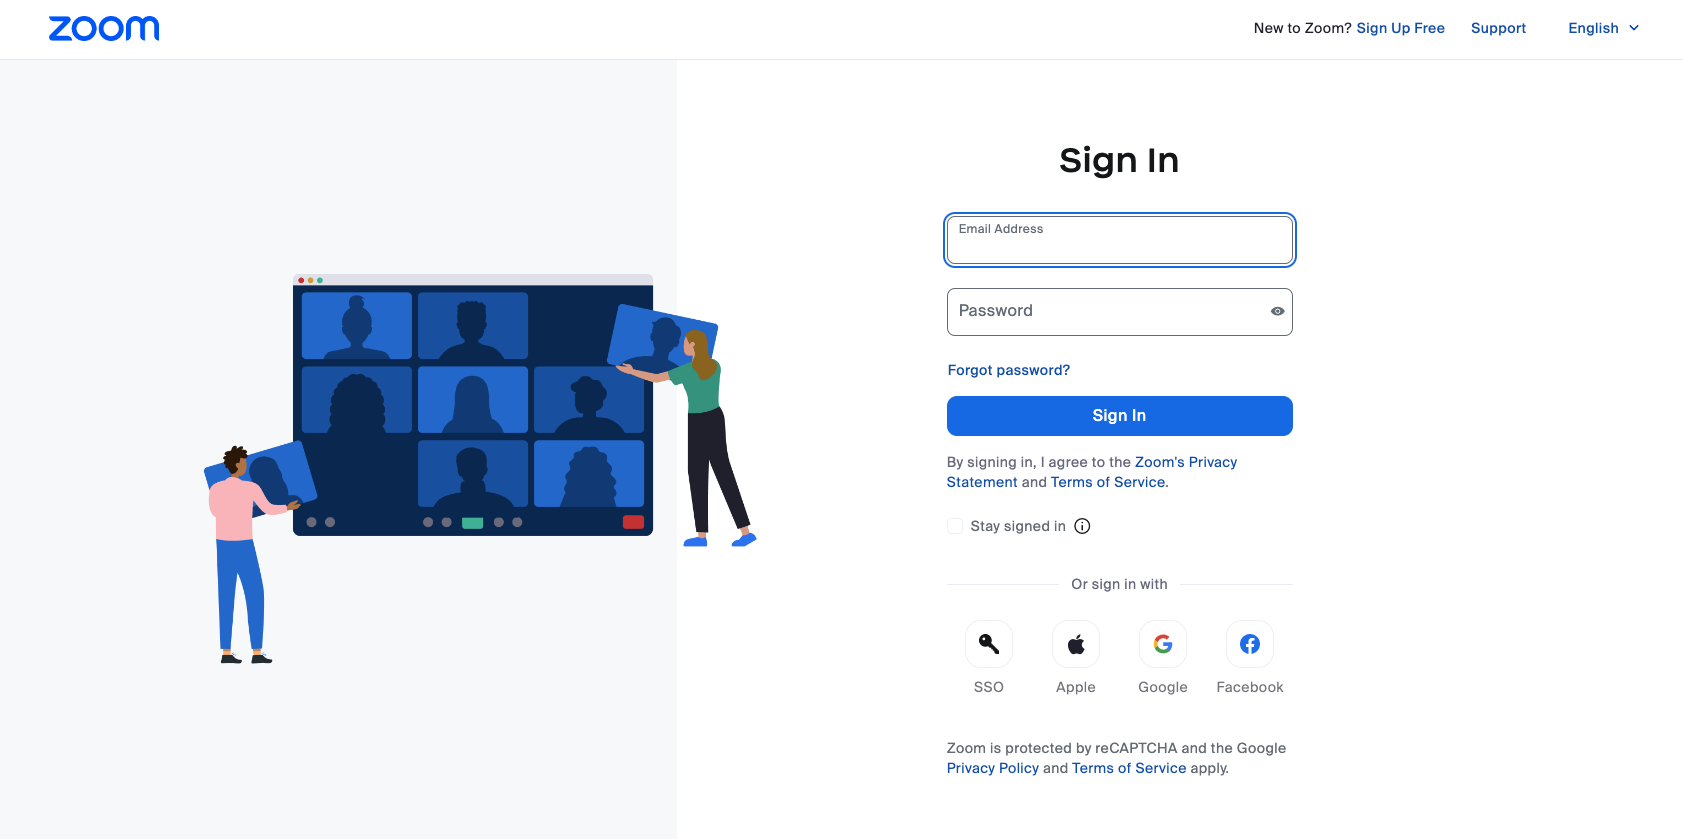
In the upper-right corner of the Lark app, click your profile photo > Settings to open the settings window, then on the left side click Calendar > Third-party meeting account management > Settings. A pop-up window will appear, where you can click Bind to open a browser and associate your account.
250px|700px|reset

250px|700px|reset
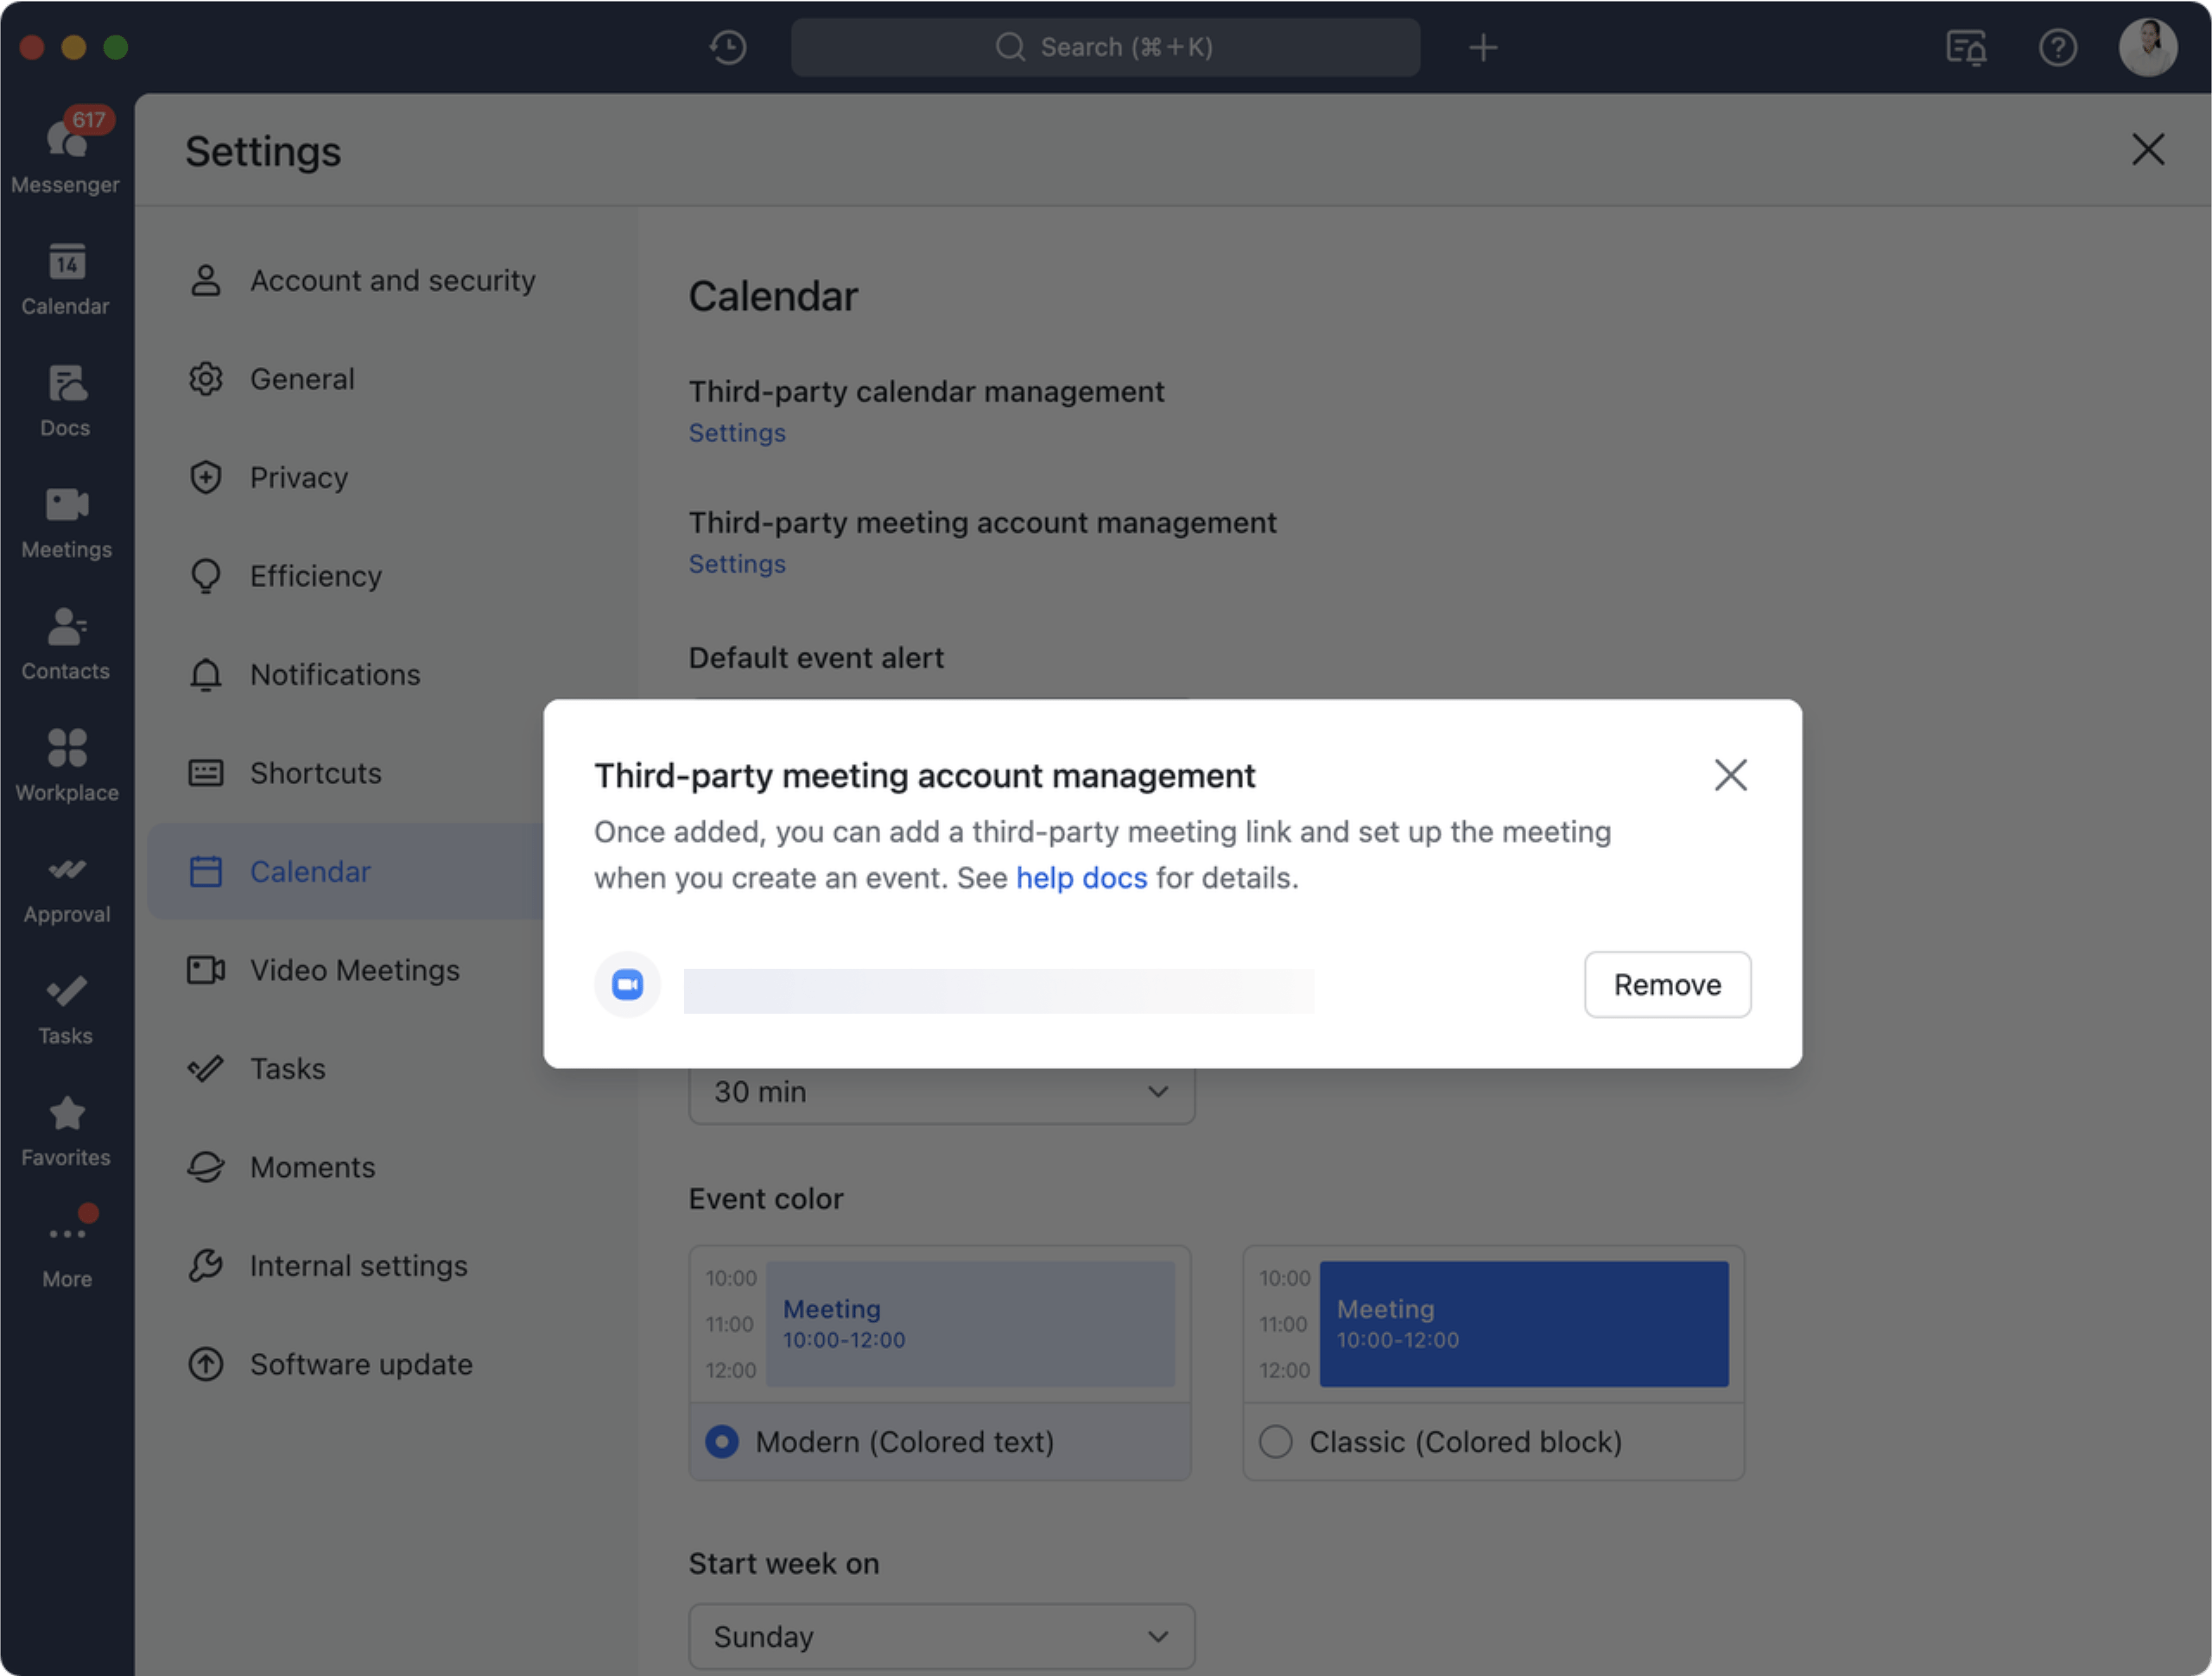
Once associated, the browser will notify you that the connection was successful. Click Return to Lark to go back to the Lark app, where the associated Zoom account will be displayed in the Third-party meeting account management settings pop-up window.
250px|700px|reset

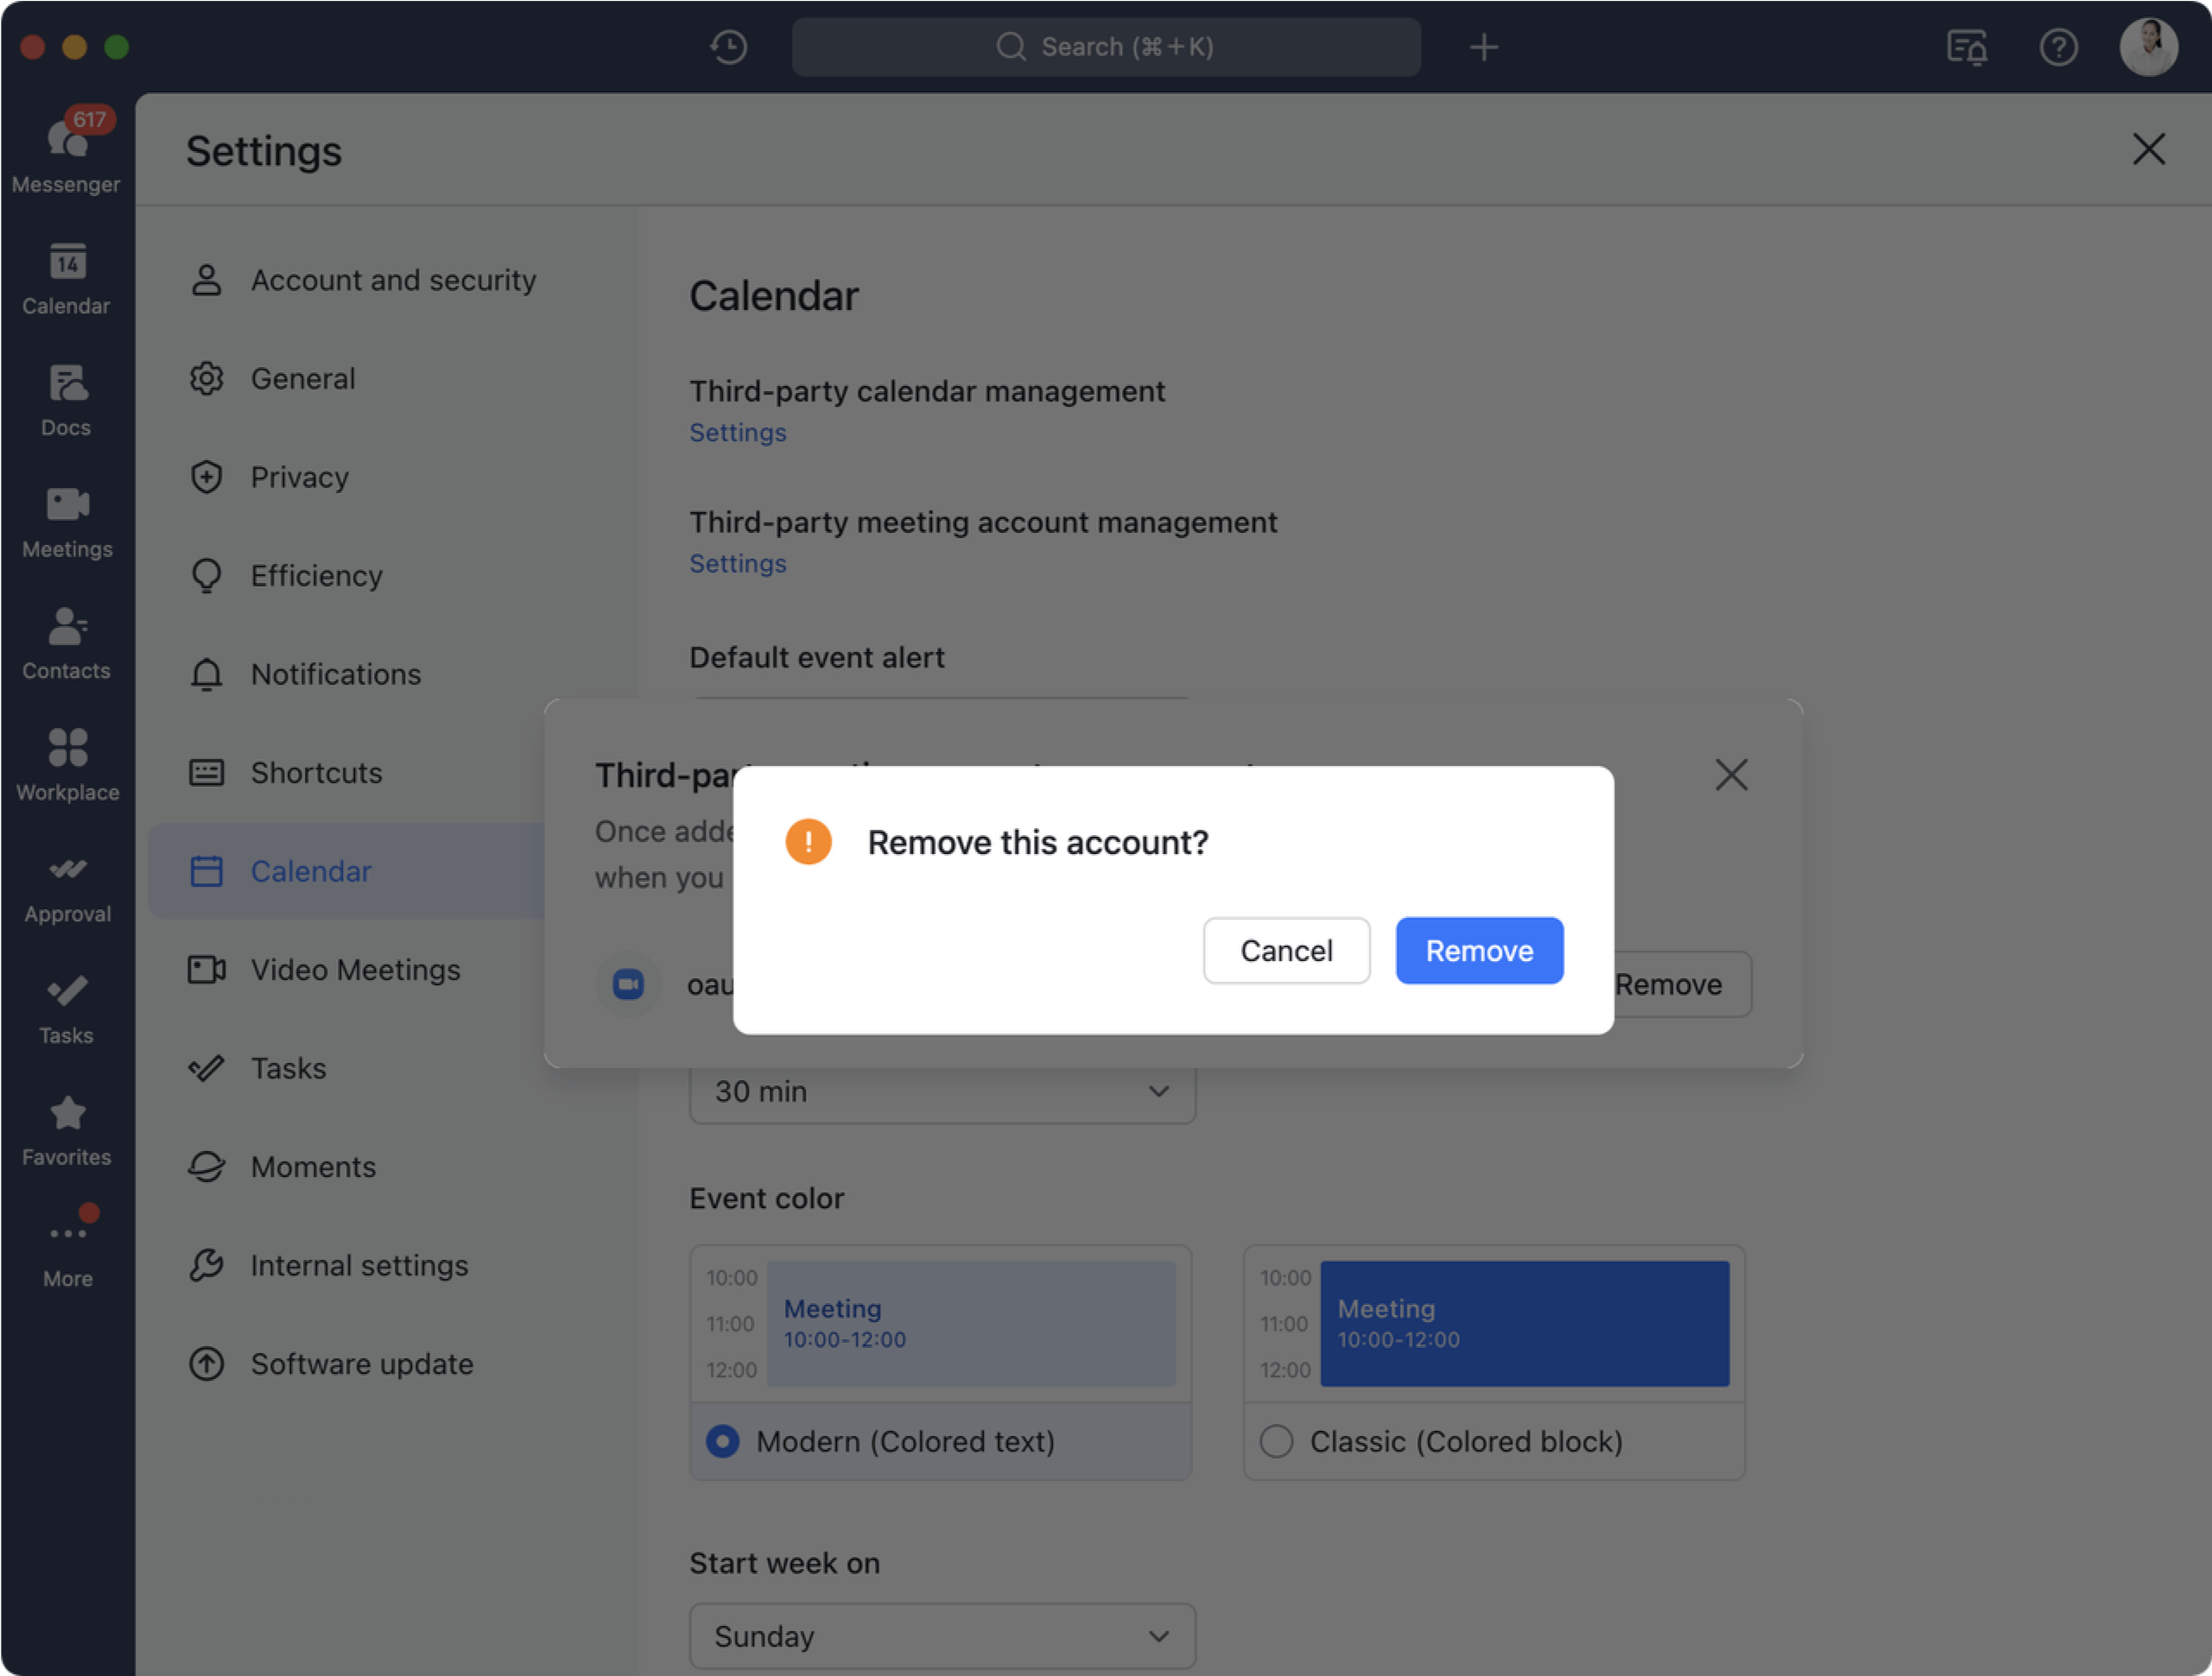
Note: If you want to remove the associated account, click Remove in the Third-party meeting account management settings pop-up window, then click Remove again to confirm and remove it.
250px|700px|reset

2. Create a Zoom meeting
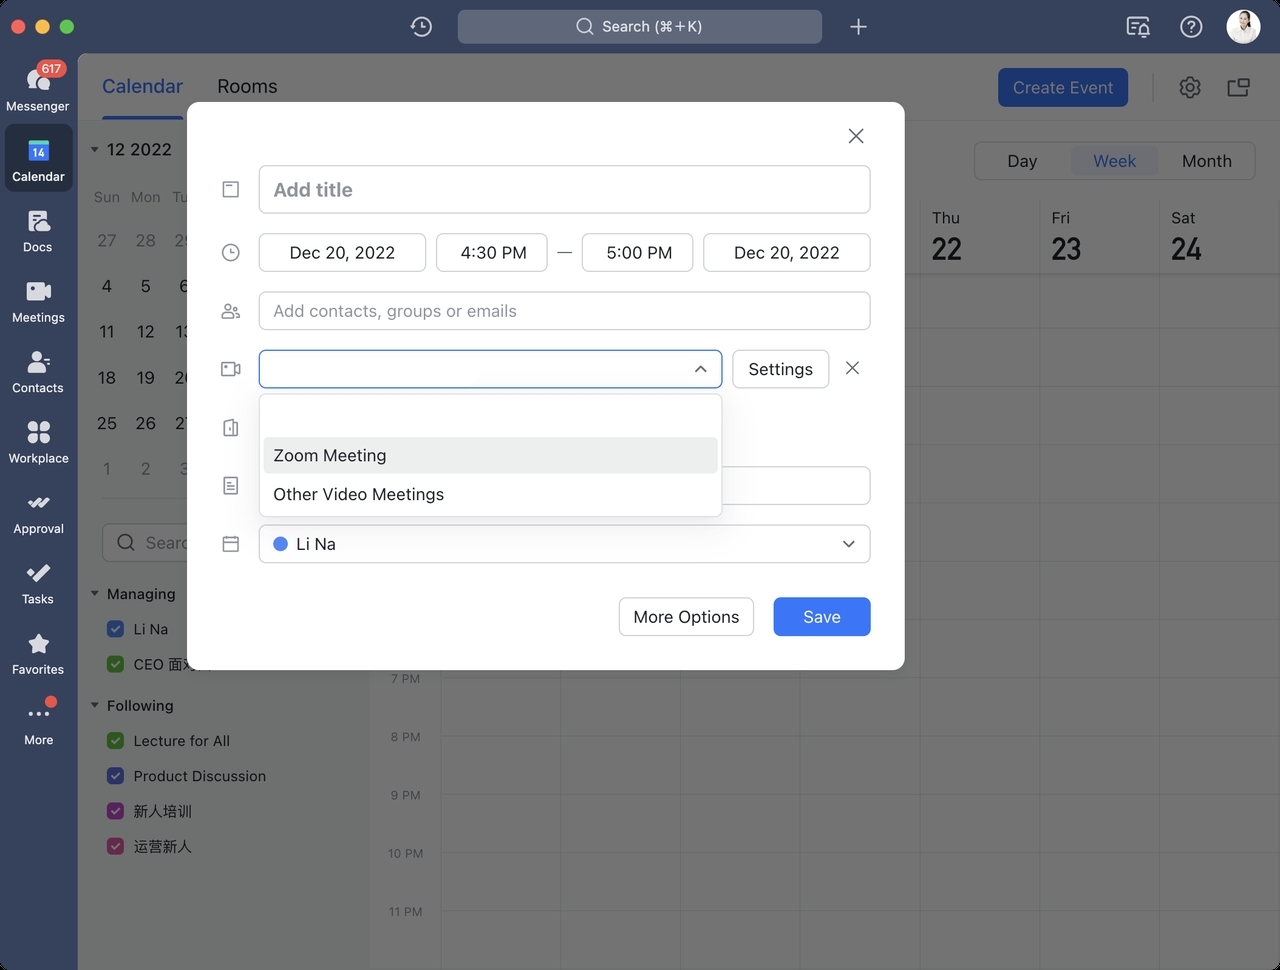
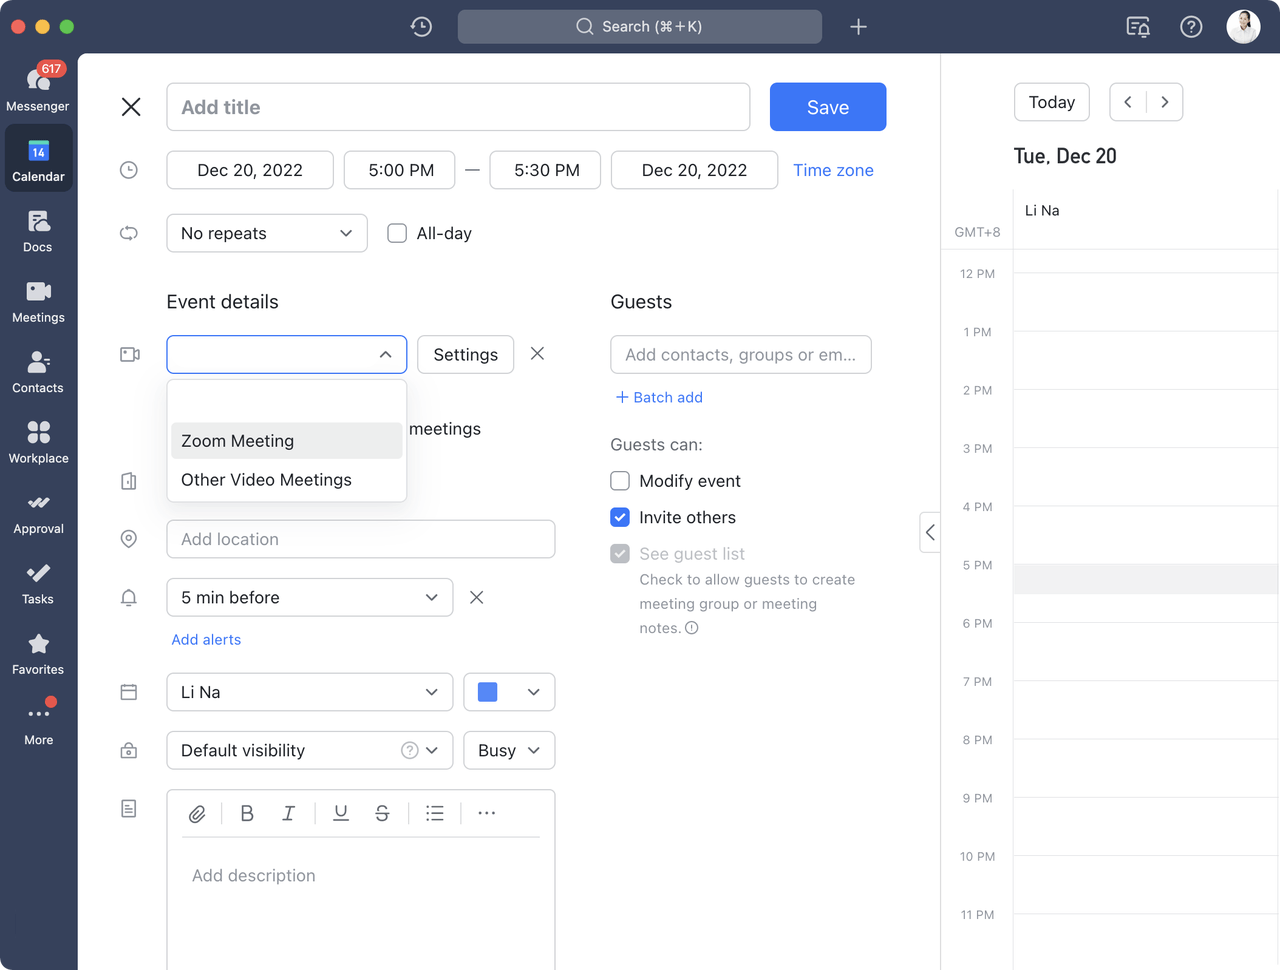
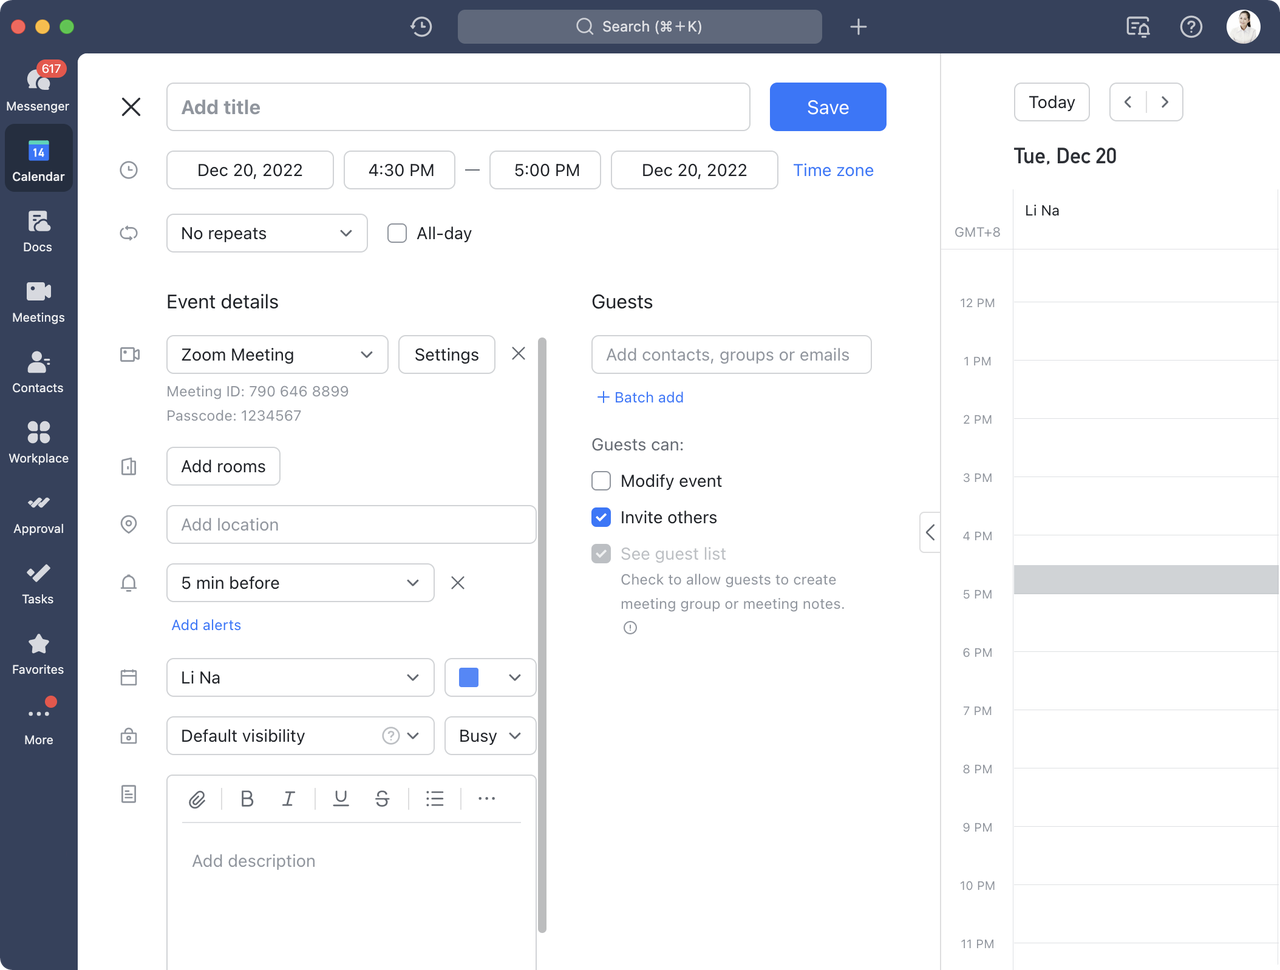
You will be able to create a Zoom meeting once your account has been associated. Open Lark Calendar and select a time slot. In the event quick editor or event detailed editor, click the drop-down box that says Lark Video Meeting and select Zoom Meeting to display the Zoom meeting ID. Next, click Save to create the event.
Note: If a password has been set for the meeting, it will be displayed under the meeting ID.
250px|700px|reset
250px|700px|reset

3. Change the meeting settings
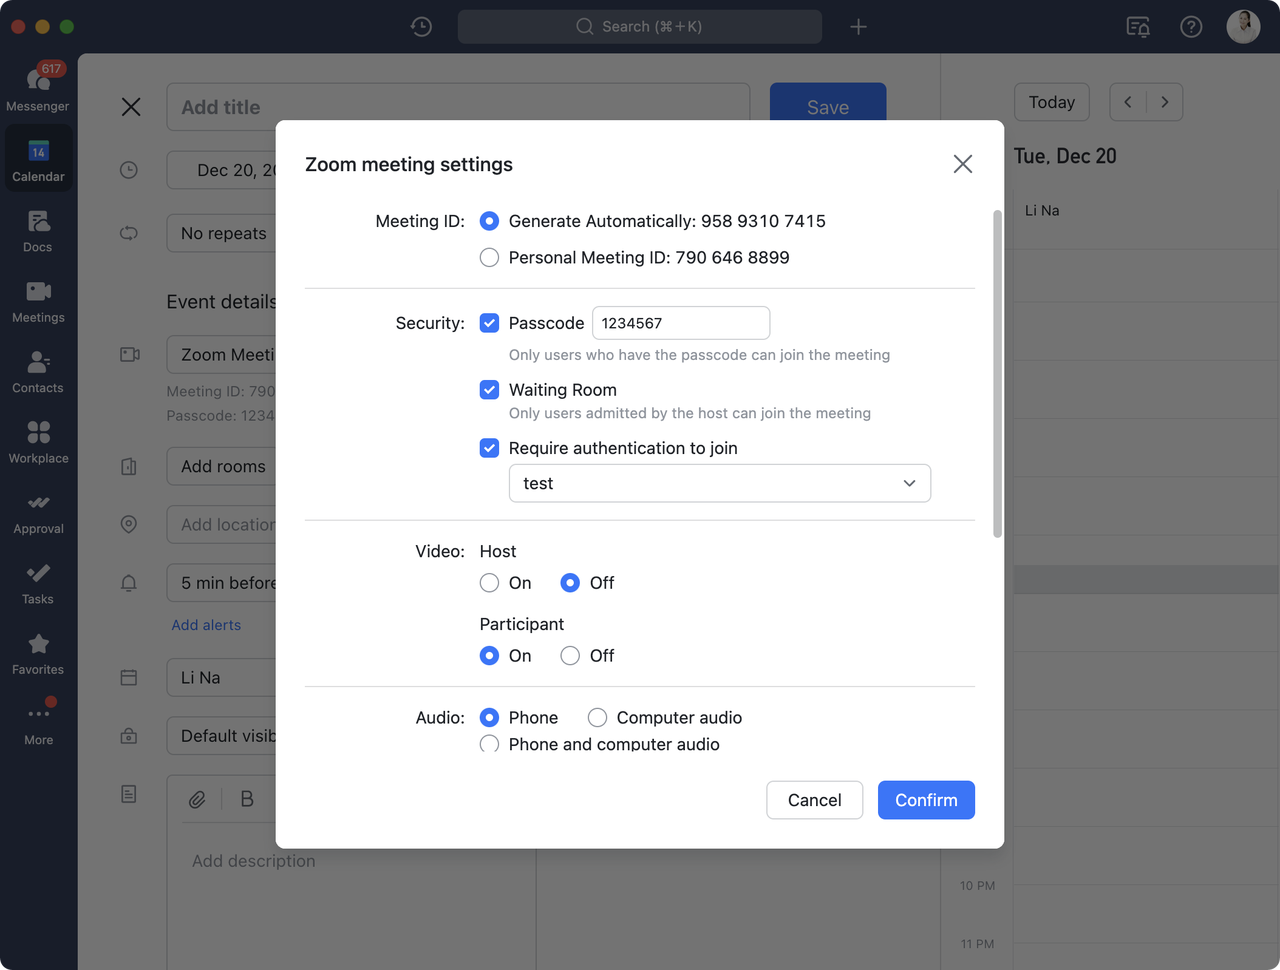
After creating a Zoom meeting, you can change its settings directly in Calendar. Click Settings to the right of Zoom Meeting and a pop-up window will appear with the meeting's settings.
250px|700px|reset
250px|700px|reset
3.1 Meeting ID
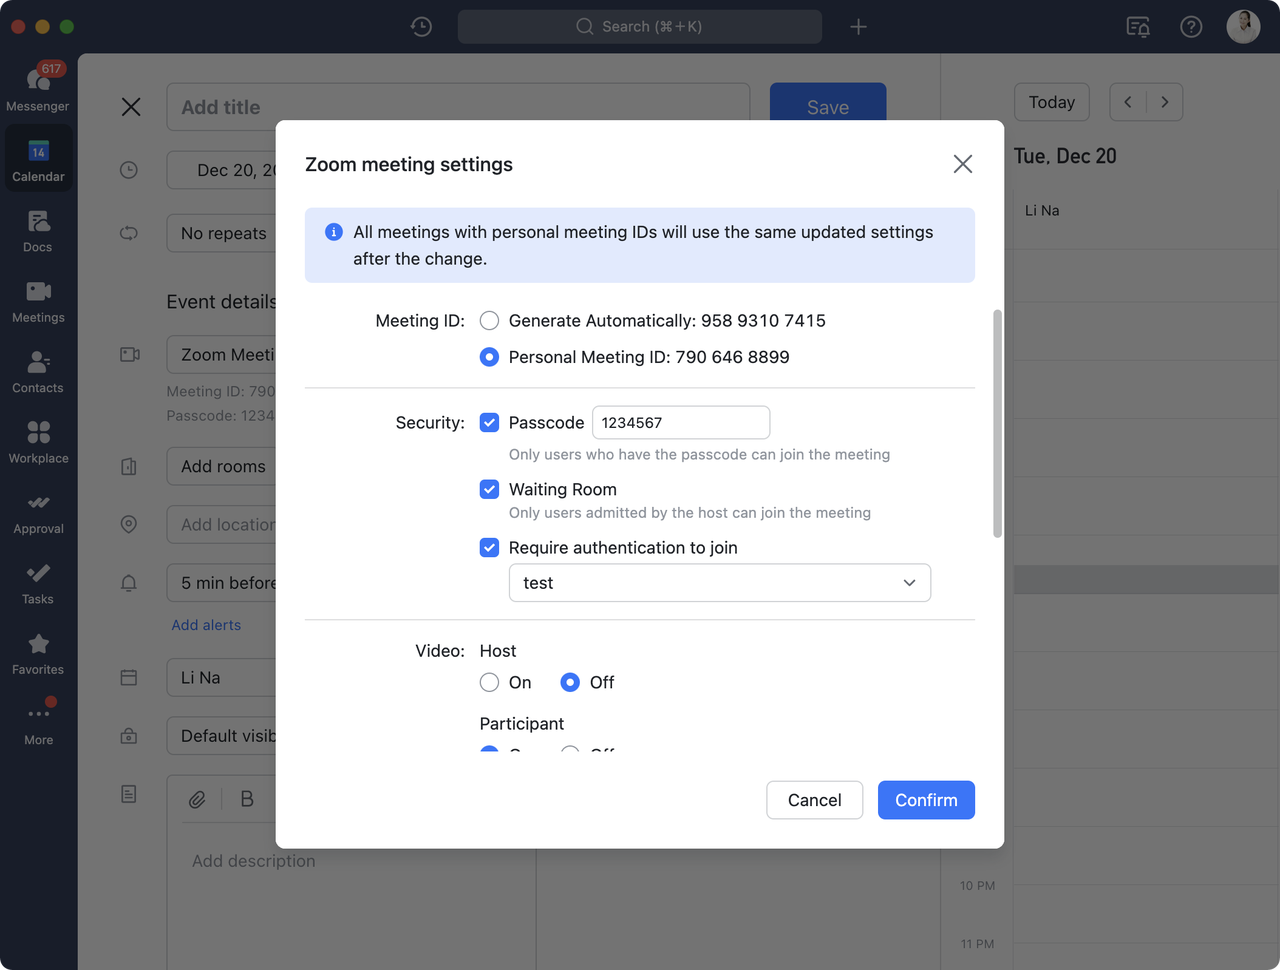
You can choose for the meeting ID to Generate Automatically or to use your Personal Meeting ID. If you choose to use your personal meeting ID, all Zoom meetings using your personal meeting ID will use the same latest meeting settings once meeting settings have been changed.
250px|700px|reset
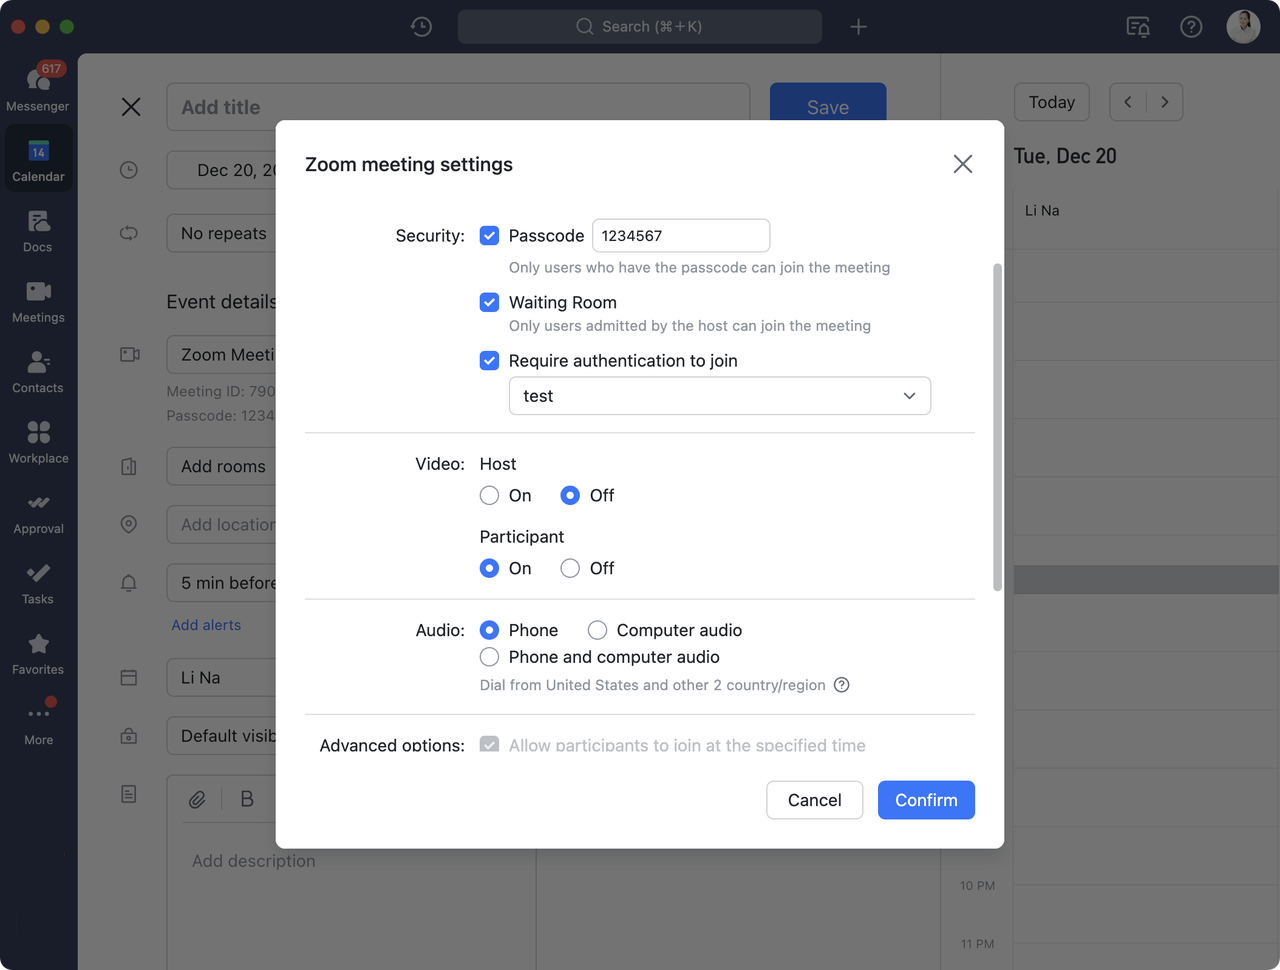
3.2 Security
You can set up a meeting's security settings before it is held in order to ensure meeting security. Select at least one security option.
Passcode
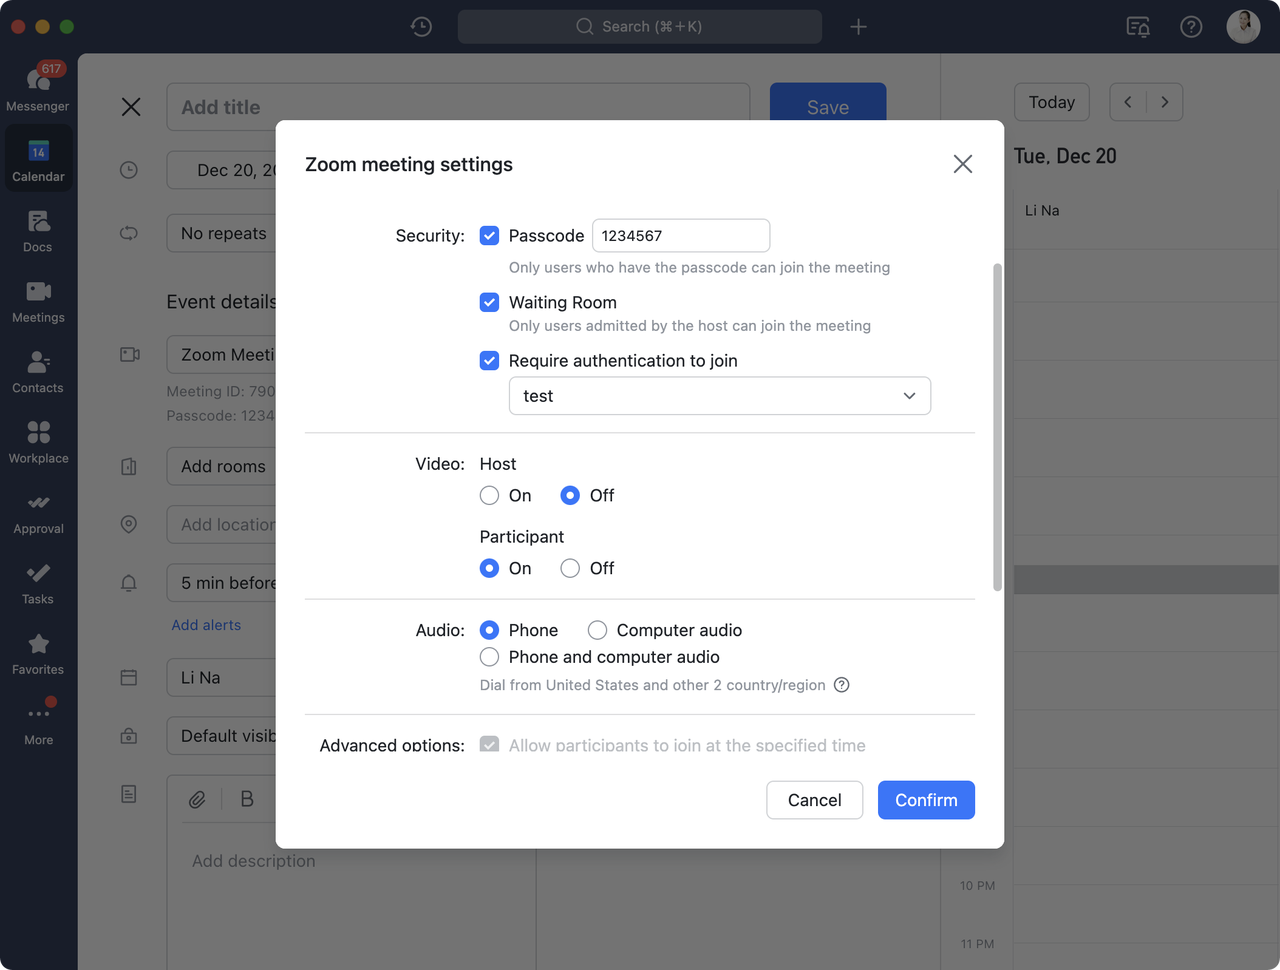
You can customize the meeting's passcode. Once Passcode is checked, only users who have the passcode will be able to join the meeting.
250px|700px|reset
Waiting room
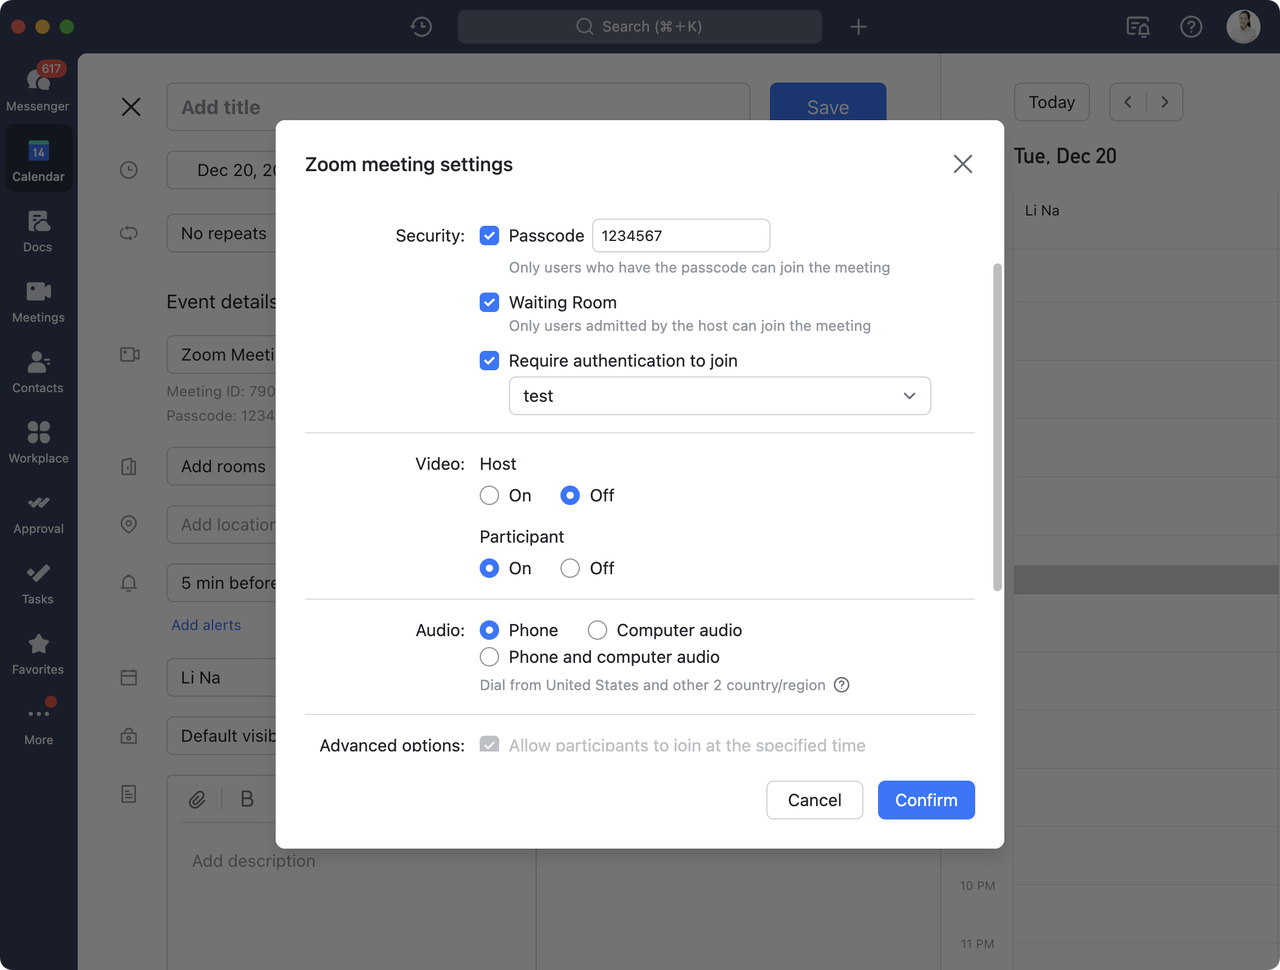
If you select Waiting Room, users will need the host's permission to join the meeting.
250px|700px|reset
Authentication
If you check Require authentication to join, participants will need to pass the authentication to join the meeting. For example, accessing the meeting from the company's Intranet.
Note: Authentication settings can be changed by a Zoom administrator in Zoom.
250px|700px|reset
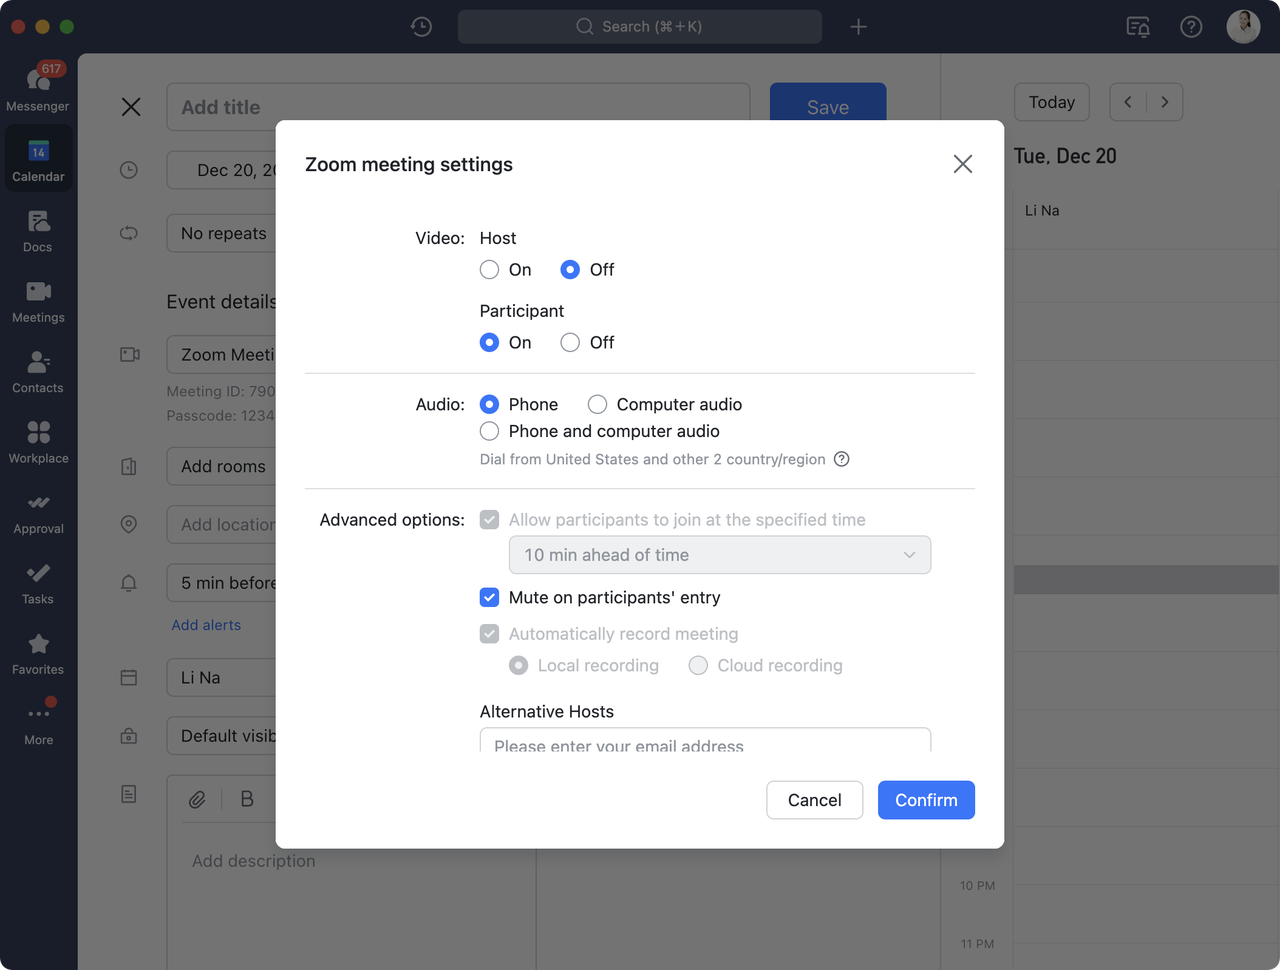
3.3 Video
You can turn video on/off for both the host and participants. Select On to have their camera on during the meeting and select Off to keep their camera off.
250px|700px|reset
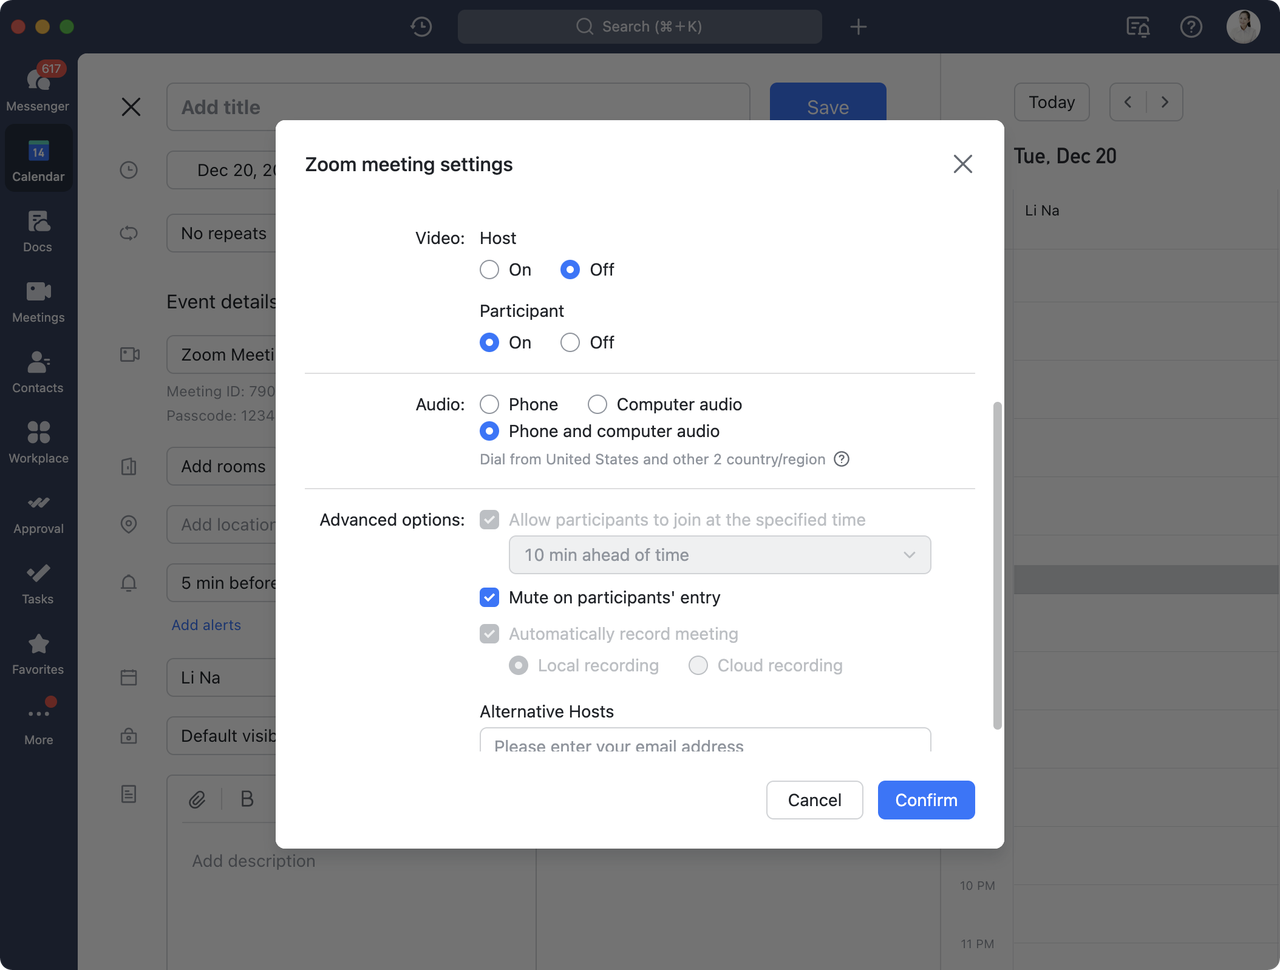
3.4 Audio
You can choose the audio for the meeting, including Phone, Computer audio, or Phone and computer audio. If Phone or Phone and computer audio are selected, the dial-in country/region will be displayed below and can be changed in the settings in Zoom.
250px|700px|reset
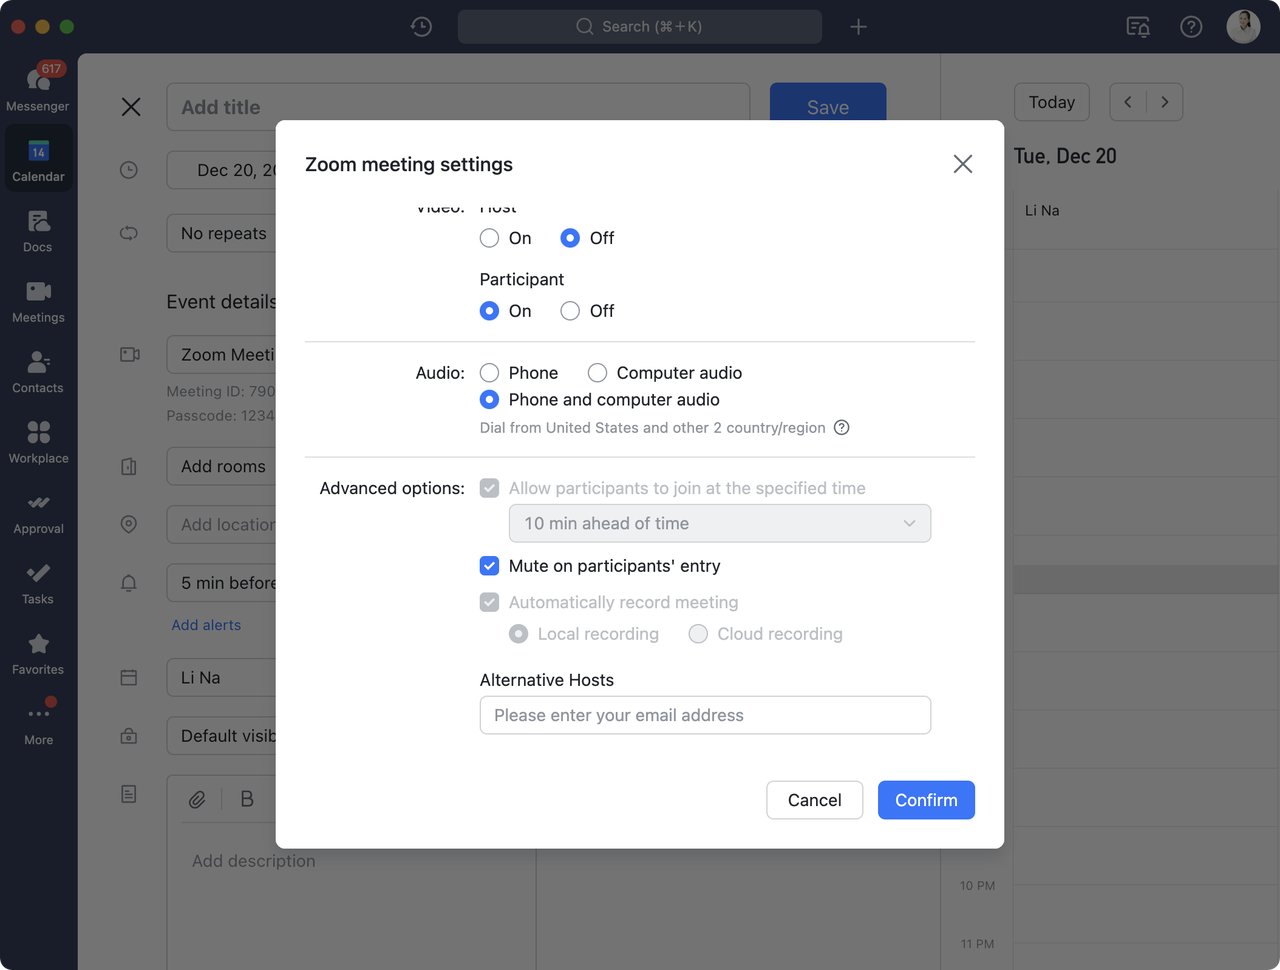
3.5 Advanced options
You can also select:
- Allow participants to join at the specified time: You can choose between Anytime, 5 min ahead of time, 10 min ahead of time, and 15 min ahead of time. If this option is unchecked, participants must wait for the host to start the meeting before they can.
- Mute on participants' entry: Participants will be automatically muted when they join the meeting.
- Automatically record meeting: Choose between Local recording and Cloud recording (the cloud recording option is only shown to paying Zoom users). Once the meeting starts, it will automatically be recorded and saved to the local device or to the cloud.
- *Alternative hosts: This option will only be shown to paying Zoom users. Enter the email address of an alternative host to specify an alternative host for the meeting.
250px|700px|reset
After completing these settings, click Confirm in the lower-right corner to save the changes.
III. Setup complete
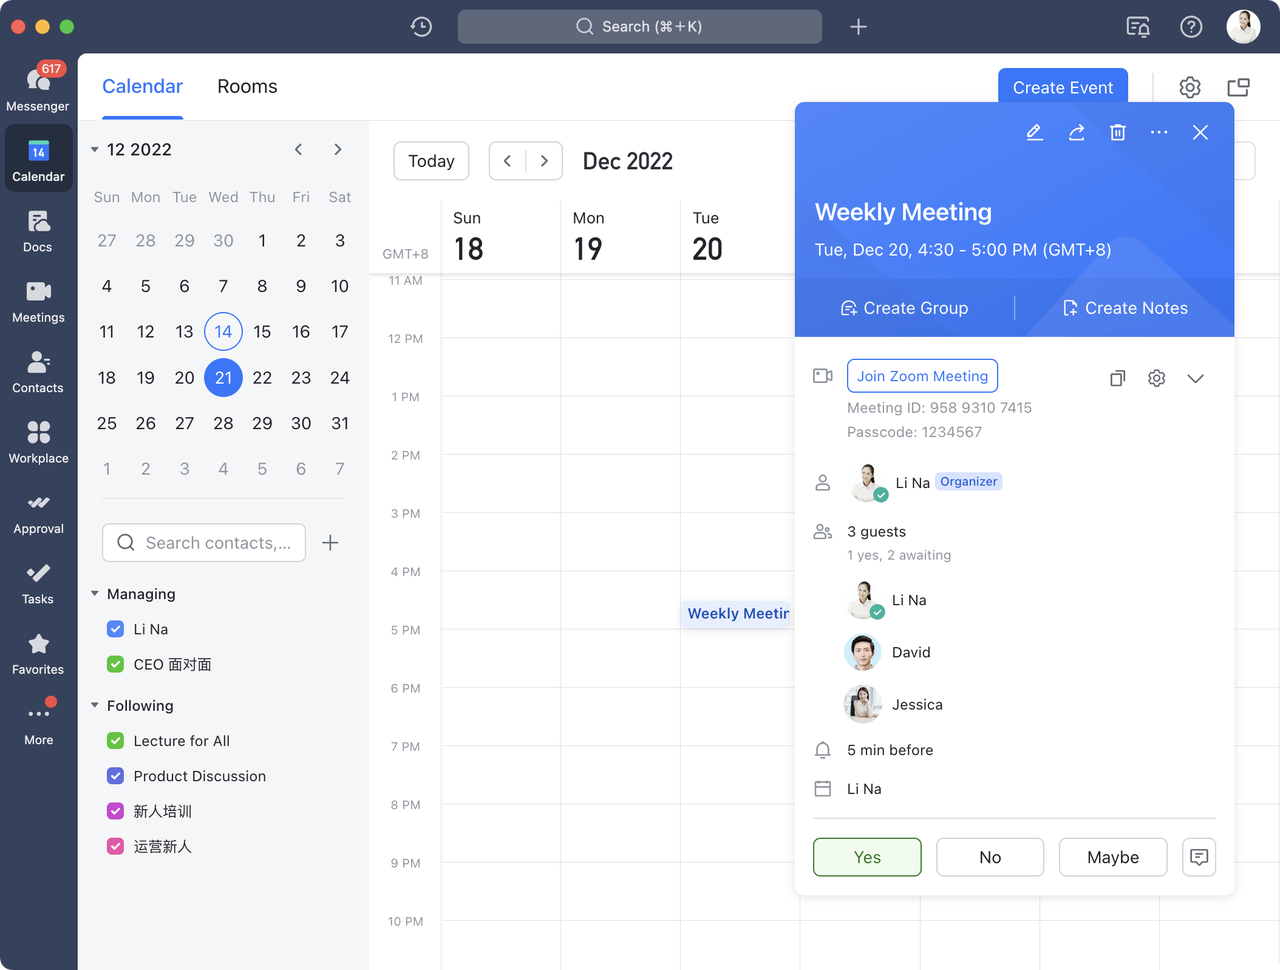
After creating a Zoom meeting, event guests can view the event card in Calendar, which will include a Join Zoom Meeting button, as well as the meeting ID and passcode (if there is one) underneath. Click the button to be redirected to your browser, where you can enter the meeting ID in Zoom to join the meeting.
250px|700px|reset
IV. FAQs

