I. Intro
Who can perform these steps: Primary administrators and administrators with approval management permissions.
Termination process management is an indispensable part of routine organization management. Through Lark Approval, organizations can customize the resignation approval forms and processes online, achieving efficient and standardized management of the termination process.
II. Steps
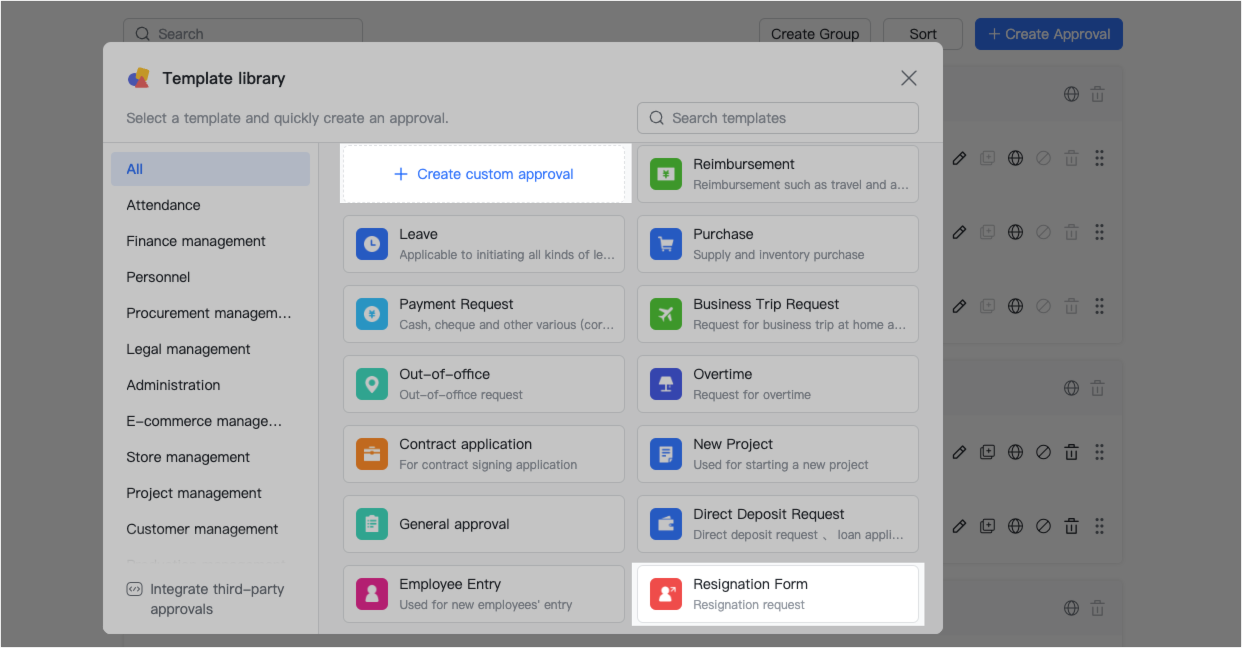
Open the Approval admin console, click Create Approval > Create custom approval or select the Resignation Form template.

250px|700px|reset
250px|700px|reset
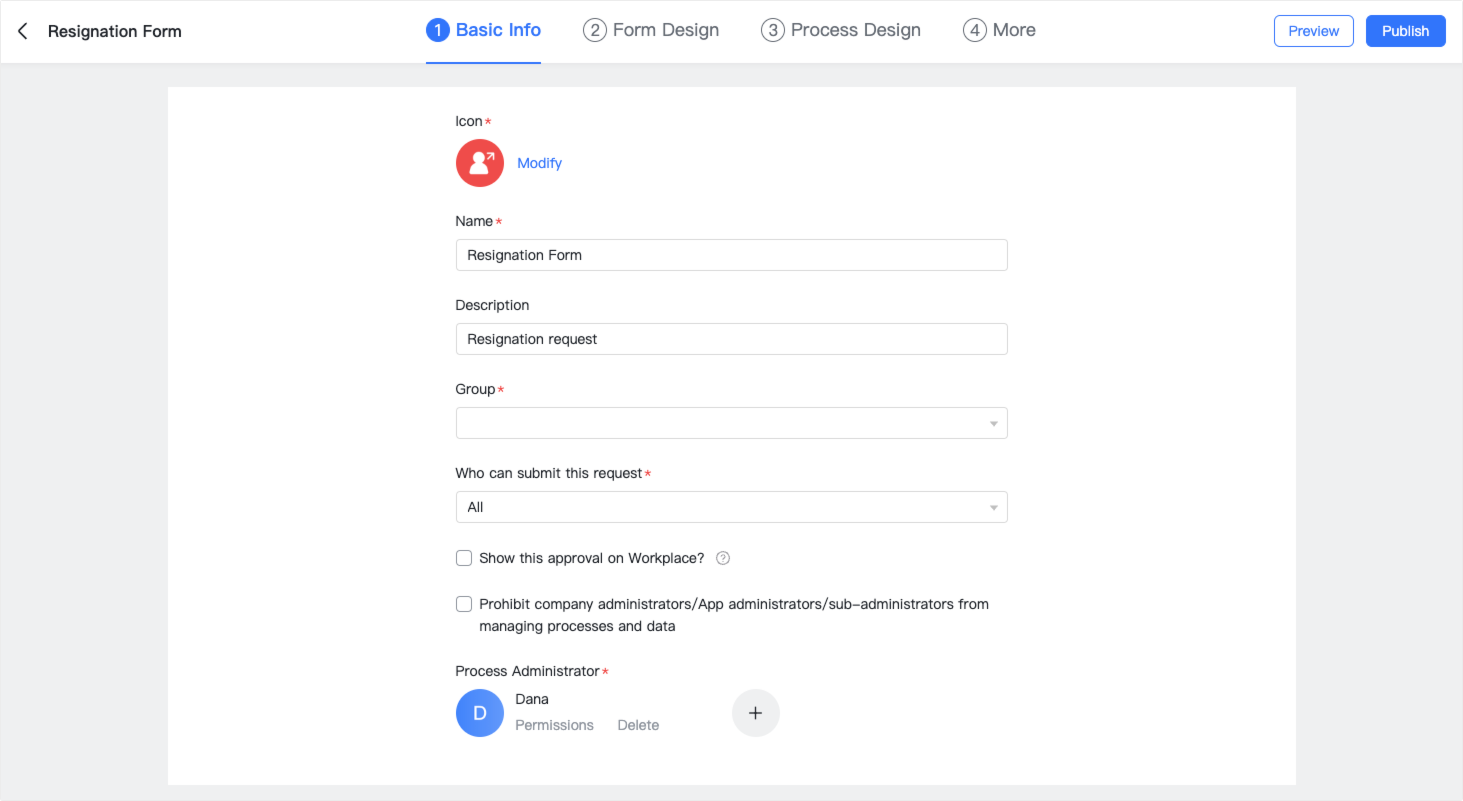
- Fill in the basic information
On the Basic Info page, set the Name, Description, Who can submit this request and other related information.
250px|700px|reset
- Design the termination form
The termination form usually includes the expected termination date, reason for termination, notes, and so on. You can use the following widgets to design the termination form.
- Click or drag the Date widget into the form. Set the Title of this widget on the right, such as Last day of work.
- 250px|700px|reset
- Click or drag the Single select widget into the form. Set the Title of this widget on the right, such as Reason for offboarding, and add options in the Options pane.
- 250px|700px|reset
- Click or drag the Paragragh widget into the form. Set the Title of this widget on the right, such as Offboarding notes. If this item is not mandatory, you can deselect Required.
- 250px|700px|reset
- Continue to add other widgets to the form as needed and finish the design.
- Design the termination process
The termination process generally includes two stages:
- Relevant responsible persons approve the request in turn: The approvers usually include direct superiors, department leaders, HRBP, and other responsible persons.
- Functional departments handle the process: The handlers usually include HR, finance, IT, office admin, and so on.
Go to the Process Design page, and design the process for these two stages.
3.1 Approvals by relevant responsible persons
- Click an Approval step, and select the Set Approvers tab in the prompted Approval pane.
- Set the approver to Manager, and specify the Designated approval level as the Direct manager of the submitter. Set When approver is empty as appropriate.
- 250px|700px|reset
- If needed, you can also select the Operation Permissions tab to require Handwritten Signature or Approver's comments. After selection, the approver must sign by hand or provide comments when approving.
- 250px|700px|reset
- Click the icon > Approver in the process to add more approvers.
- 250px|700px|reset
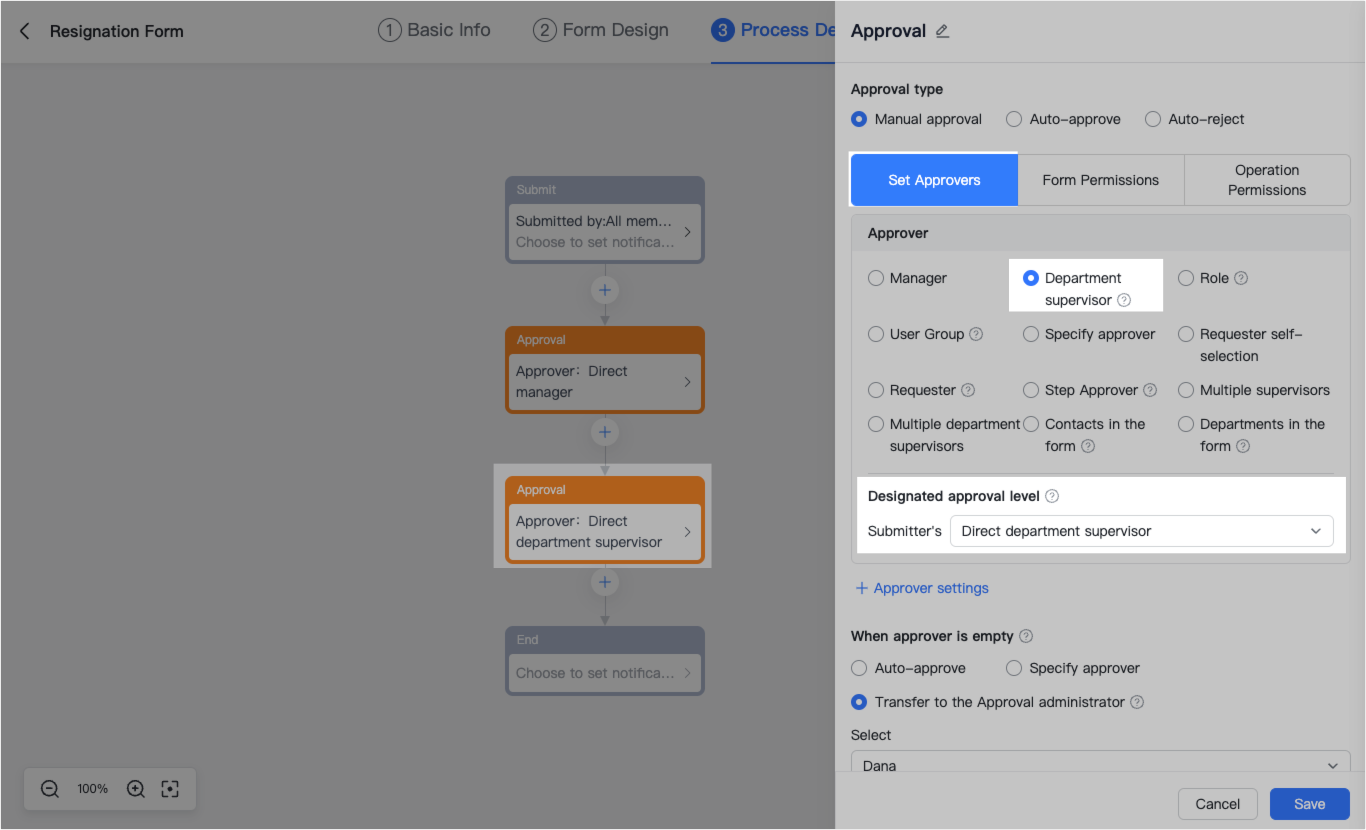
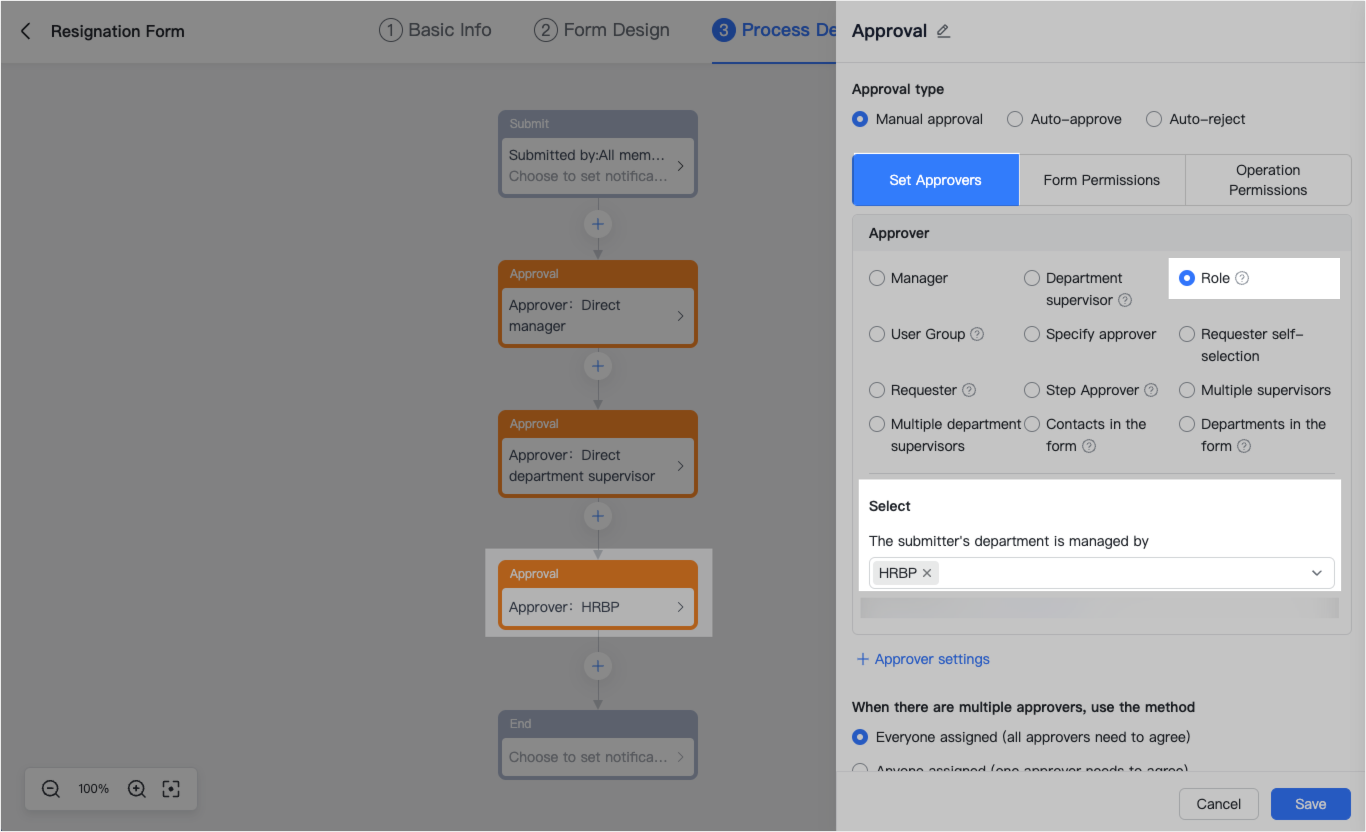
- Set the next two approvers as Department supervisor (Submitter's Direct department supervisor) and Role (HRBP).
250px|700px|reset
250px|700px|reset
3.2 Handling by functional departments
- Click the icon > Handler to add handling steps.
- 250px|700px|reset
- Click the handling step, then select the Set handler tab in the prompted Handle pane.
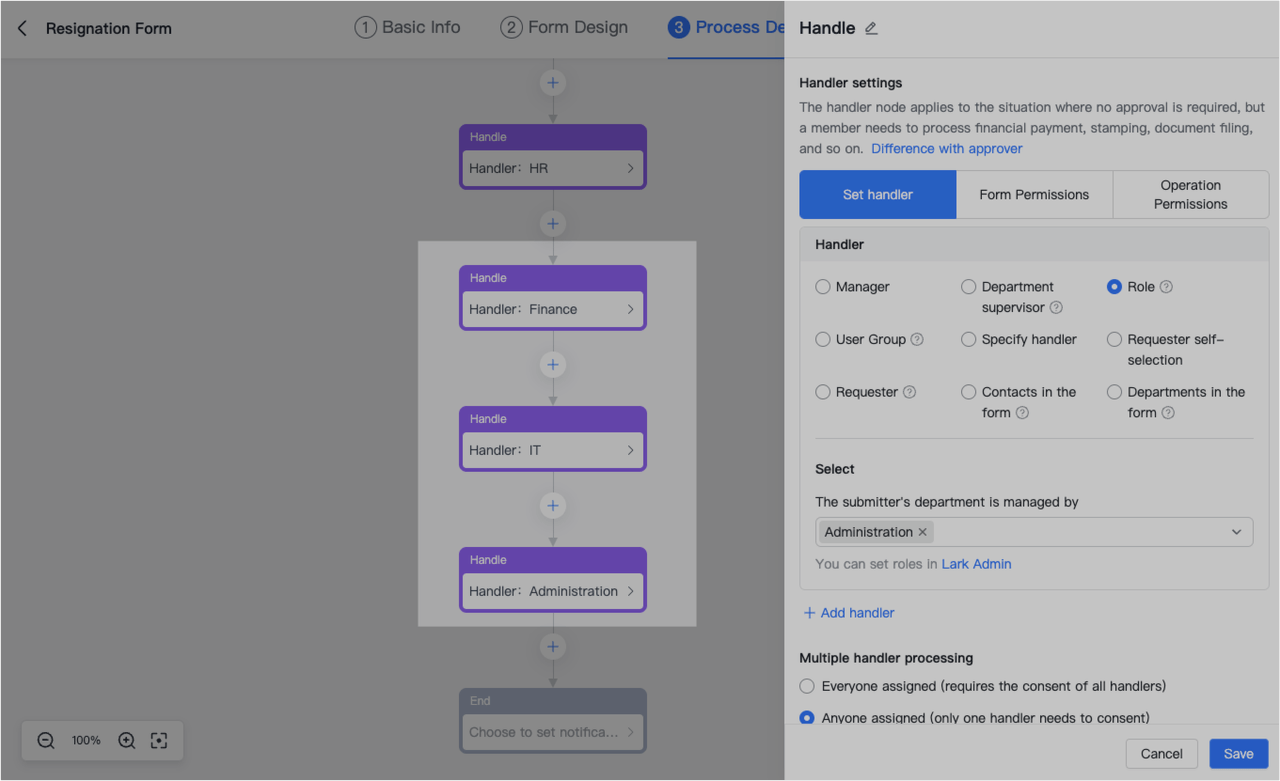
- Set the handler as Role, and set the role as HR. Decide whether to require all handlers' approval by selecting the options for Multiple handler processing.
- 250px|700px|reset
- Set up the next handling steps in the order of finance, IT, and office admin.
- 250px|700px|reset
Note: Settings such as Direct manager, Department supervisor, HR, and finance are all connected to your Lark Admin Console. You can go to Lark Admin Console > Organization to view and manage those settings.
3.3 Complete More settings and publish
- Go to the More page, and set whether this approval allows revocation, modification, and submission on behalf of others as needed.
- 250px|700px|reset
- Click Publish, and the termination approval is completed. Members can then submit and use it in the Approval app.
III. Learn more
For information on how members submit resignation requests, see Quick Start Approval Operation for Submitters.
For information on how administrators handle Lark account resignations, see How can administrators transfer or delete members?
