

I. Intro
Who can perform these steps: Primary administrators or administrators with Approval management permissions.
As an administrator, you can define conditional branches for approvals, which allows approval processes to flow along several paths depending on the circumstances.
For example, when an expense is less than $1,000, it could only need approval from the member's direct manager; when it's greater than or equal to $1,000, it could require approval from both the member's direct manager and department supervisor.
250px|700px|reset
Add conditional branches
- Go to the Approval admin console, and click Create Approval to create a new approval or click the Edit icon on the right of an existing approval to go to the details page.
- Click Process Design.
- Click the icon next to steps and select Conditional branch.
- If you need more branches, click Add Conditional Branch above.
Note: A default branch will appear on the process diagram's far right. If none of the other conditions are met, this branch will be run. This branch is created automatically, and there is no need to manually configure or modify it.
250px|700px|reset
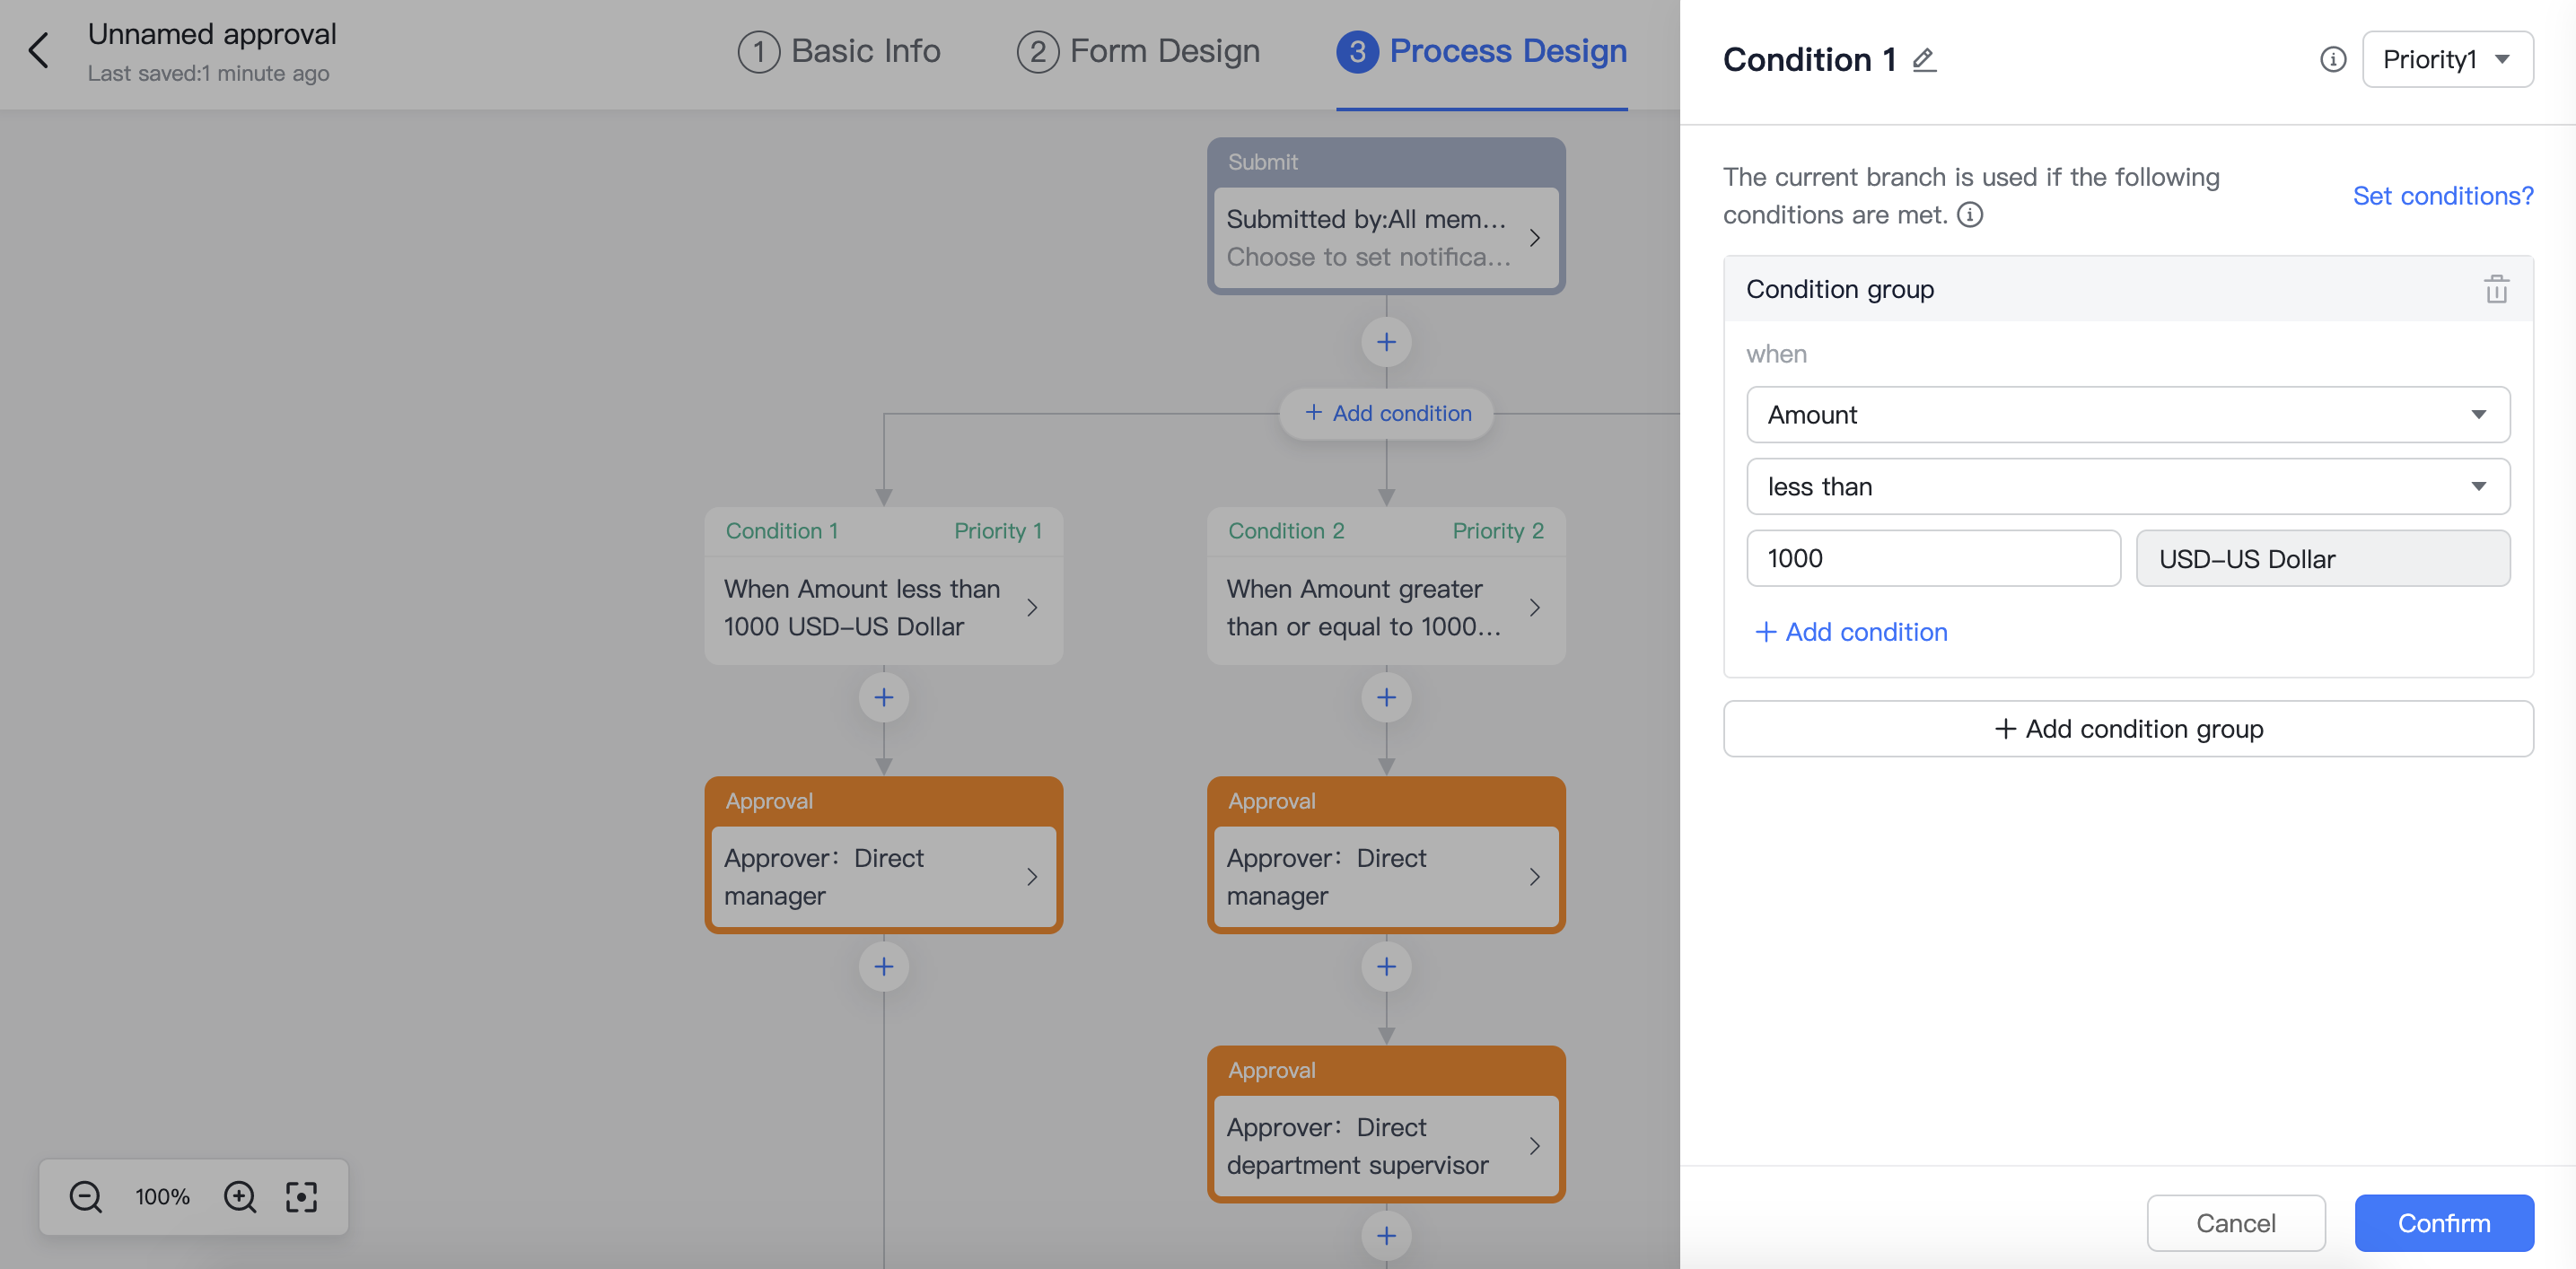
- Set conditions and approvers
Click the condition box and then choose which conditions must be met for this branch to run.
- Set the condition by selecting options from the dropdown lists.
- Note: The options in the dropdown menu correspond to the widgets added in Form Design. See the FAQs below to learn more about which conditions apply to which fields.
- Click Add condition to create "and" relationships, which means all conditions must be met to proceed to this condition.
- Click Add condition group to create "or" relationships. The branch will run if either condition is met.
250px|700px|reset
- Click Confirm.
- Set the approver of this branch by clicking the Approver box. For more information, see Admin | Set up an approver step.
- 250px|700px|reset
III. FAQs