Your brain is capable of handling more information than you might think, but it will become cluttered if you don’t organize everything properly. Ask yourself this question: How many times have you felt overwhelmed to the point that you can’t start something, especially during your work life?
Whether you agree with this or not, the reality is that your brain is not supposed to store information. It’s designed for idea generation and solving problems, but you must organize all of this externally. Ignoring this warning may put you at risk of lower productivity and unmet potential. The good news is that you can use multiple methods to manage your projects and, in fact, any digital information; the PARA method is one of those.
This article will identify what the PARA method is and when to use it. You’ll also discover examples of the PARA method for different teams.
What is the PARA method (and how can it make you more organized)?
PARA is a productivity framework with four key aspects: Projects, Areas, Resources, and Archives. The term originates from Chapter 5 of Tiago Forte’s Building a Second Brain book, released in 2022. The productivity coach and expert then released a second book, called The PARA Method, in 2023.

While you might use some productivity tactics like the Pomodoro Technique to reach specific goals, PARA is about organizing your thoughts and being able to find the information when you need it. It’s an efficient way to manage multiple forms of information in one place, allowing you to access and action this data easily.
Projects
The “Projects” part of the PARA Method refers to short-term activities with a deadline. These current efforts have a clearly defined beginning and end; while projects may last one month, you could also run these for 6+ months if needed.
Each project in the PARA Method aims to produce deliverables or a specific result. For example, an advertising campaign for a new product could strive to achieve a certain number of pre-launch and release-day sales.
Other examples of projects and short-term efforts include:
Paid social media campaigns;
Designing a new website as part of a significant company rebrand;
Seasonal sales campaigns (e.g., planning Black Friday promotions on your products).
Areas
The PARA organization method’s “Areas” section is for your areas of responsibility. In a professional context, you’ll use this part of PARA to outline what you oversee – what you’re expected to do in the office daily.
When outlining the “Areas” section, go into as much detail as possible. For example, if you’re an HR manager, your responsibilities could include leading the hiring process and helping onboard new employees.
If you also want to organize your personal life, you can use this part of PARA to think about your out-of-office responsibilities. For example, you might have parental responsibilities, which could include picking up the kids from school several days each week.
Resources
The “resources” section refers to digital sources of information. This content can relate to any area of your life requiring attention. For example, if you’re a social media manager, you may refer to courses on improving Instagram engagement rates and podcasts about measuring your results more effectively.
Resources can cover multiple media formats. Articles, websites, YouTube videos, and podcasts all count.
Archives
Upon completing active use of items in P, A, or R, you’ll move them into your archives for future reference. You can move anything that you don’t currently need in your daily life to this part of the PARA method – but you can always refer to these documents for future needs.
Should you use the PARA method?
Many knowledge workers will benefit from using the PARA Method. However, maximizing the system’s potential will depend largely on the individual and your organizational structure. Depending on your personal and company needs, you may find organizing information via the PARA Method overwhelming or too imprecise.
PARA method pros
Simple access to information
Implementing the PARA method means you can easily access all your information in one place. As a result, you’ll save significant time finding what you need, and get to work much quicker. You’ll also avoid the mental fatigue associated with context switching, and looking in multiple places, meaning you can start sooner and stay focused longer.
You don’t need to be a productivity expert
The PARA method requires little to no prior understanding of productivity tactics, making it an easy tool for organizing your knowledge. All you have to do is create folders that are easy to identify. Once you’ve done the essential steps, you can build on these over time without much of a learning curve.
Prioritize the most essential tasks
While Tiago Forte didn’t specifically design the PARA method for setting goals, it can benefit your achievement of goals because you can focus on what’s essential. For example, if something isn’t associated with your areas, you can delegate it to someone else. Similarly, outlining your individual projects will help you deliver the outcomes you need to achieve.
Better team transparency
Full access to information means that everyone will know what they should be working on, and sharing resources will become much easier. For these reasons, projects will move forward, and your team can benefit from increased transparency. Over time, you’ll build trust and subsequently work together more effectively.
PARA method cons
Some people may struggle to differentiate various aspects
It’s sometimes hard to define where something should fit in different parts of the PARA method. While archives and resources are easy to understand, projects and areas are not. For example, finishing a report could technically be a short-term project (P) or could be in an area if it is repeated periodically, such as monthly (A).
Approach this problem by defining projects as anything with tasks, plus a beginning and end. Areas, meanwhile, are continuous operational responsibilities with no specified end date.
Little space for goals and objectives
Because the PARA method is designed for organizing information, storing and determining your long-term goals can be difficult. The only real place to put goals and objectives is in the areas section, but that aspect is more for responsibilities than goals.
You may need additional organizational methods alongside PARA to meet your goals. Try different frameworks, such as SMART goal-setting. Your goals and objectives actually fit nicely in areas in PARA. They are long term responsibilities.
But It’s your projects in PARA that move the ball forward; they deliver outcomes that help achieve your goals and objectives.
When should you use the PARA method?
Use the PARA method if you and your team need a way to organize lots of information in a way that lets you spend less time organizing and more time doing. Use it if you feel information overload to “separate the what from the chaff” in your work or personal life. And if you have so much digital information that you can’t find it when you want to use it.
For example, if you’re a manager responsible for marketing, you likely have your hands on multiple sources for market research that could go in PARA resources. More importantly, you have responsibilities, such as developing marketing strategies, budgeting, increasing awareness of your brand, and the like.
You likely have projects to work on to execute those responsibilities. For example, you might have a project to work on rebranding a product line. You might define one or more projects to redesign the website, create logos with an AI logo generator, and prepare rollout campaigns. And you have finished projects or older marketing materials that you no longer use daily, but may want to reference in the future – those can go in archives.
The PARA method is also an ideal choice for students with multiple course modules and professionals learning new skills. You can organize your information for easy access whenever needed, along with archiving anything you no longer require after completing your coursework or exams.
When should you avoid using the PARA method?
You should avoid using the PARA method until you’ve outlined your overall individual and team goals. If you skip that step, you’ll miss information and also include stuff that doesn’t need to be there.
The PARA method is not for task management; instead, it’s for organizing information. Projects in PARA probably contain high level tasks. But to manage resources and progress, you likely need capable project management software. By the way, you can stay in the Lark app and do all of that.
PARA method alternatives
While the PARA method is popular with knowledge workers, it doesn’t work for everyone. Try these two alternatives if that applies to you.
ICOR
ICOR is a real-time framework that stands for input, control, output, and refine. Input means acquiring information and determining how you’ll use it. Control refers to the actions or thoughts that’ll help you move forward with the information you’ve acquired. Output means implementation. Refine refers to testing and iteration once you’ve experimented.
Zettelkasten
Knowledge workers use the Zettelkasten Method to organize notes, and the word itself means “note box” in German. Think of the Zettelkasten Method as creating different folders for your notes, but more of a general framework for note-taking than PARA.
There are several other approaches to managing information in your life, but all of them are designed to help you manage your digital information. PARA, though, is one that promotes not just organizing information, but acting on it, too.
Using Lark to implement the PARA method in your life
Lark has the right capabilities to implement this method and store all the information, documents, pictures, and recordings that the user could ever need. Everything you need is more accessible, which subsequently enhances productivity.
Keep reading for a user-friendly walkthrough to implementing the PARA method with Lark.
Step 1: Download the Lark App
To download the Lark app, go to the website and choose your operating system. Then, follow the instructions for your specific device.
Step 2: Create folders and subfolders for each of the PARA letters
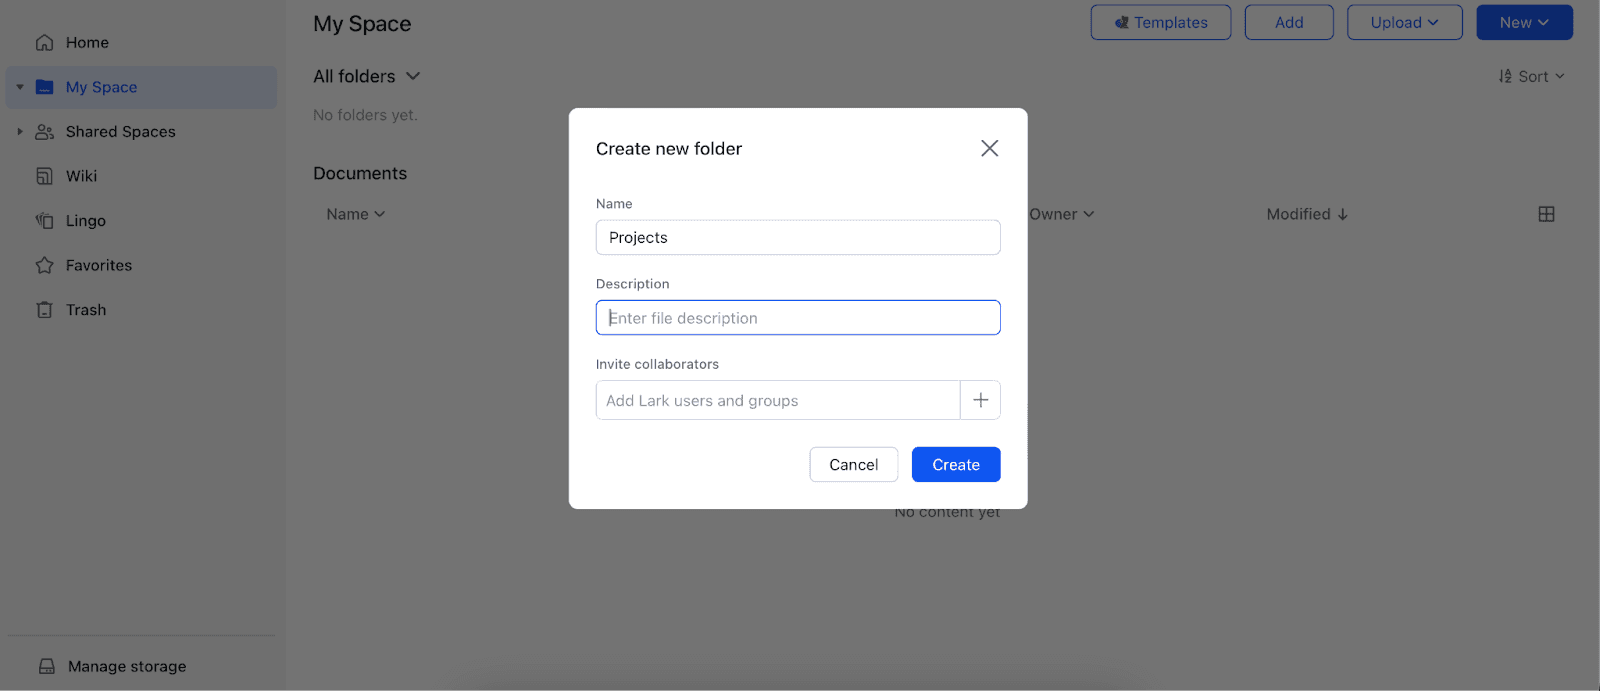
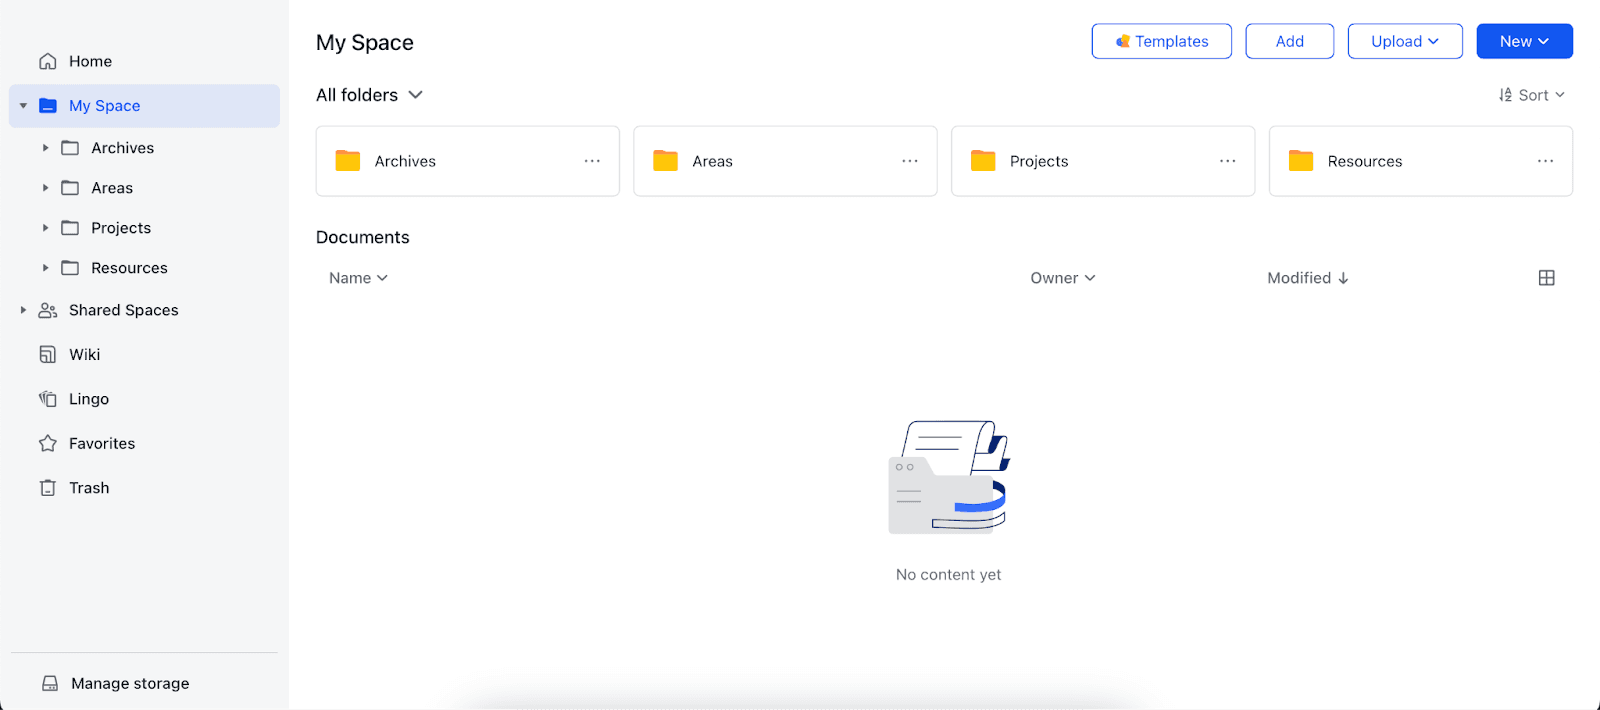
After downloading Lark, create subfolders and folders for each PARA letter. We’ll use a social media manager as an example, but change the folder and file names for your specific role.
Go to New > Folder and create a folder.

Name your folder and select Create.
Repeat Steps 1 and 2 in this topic until you’ve made all of your folders.
Step 3: Creating documents
Your next step is to create documents for all the knowledge you wish to store in your PARA folders. Below are the steps to follow.
1. Go to New > Docs/Sheets.

2. Choose a template if you’d like. We recommend the following as a good starting point:
Otherwise, tap New Docs/New Sheets.

3. Outline everything you need before moving onto the next document.
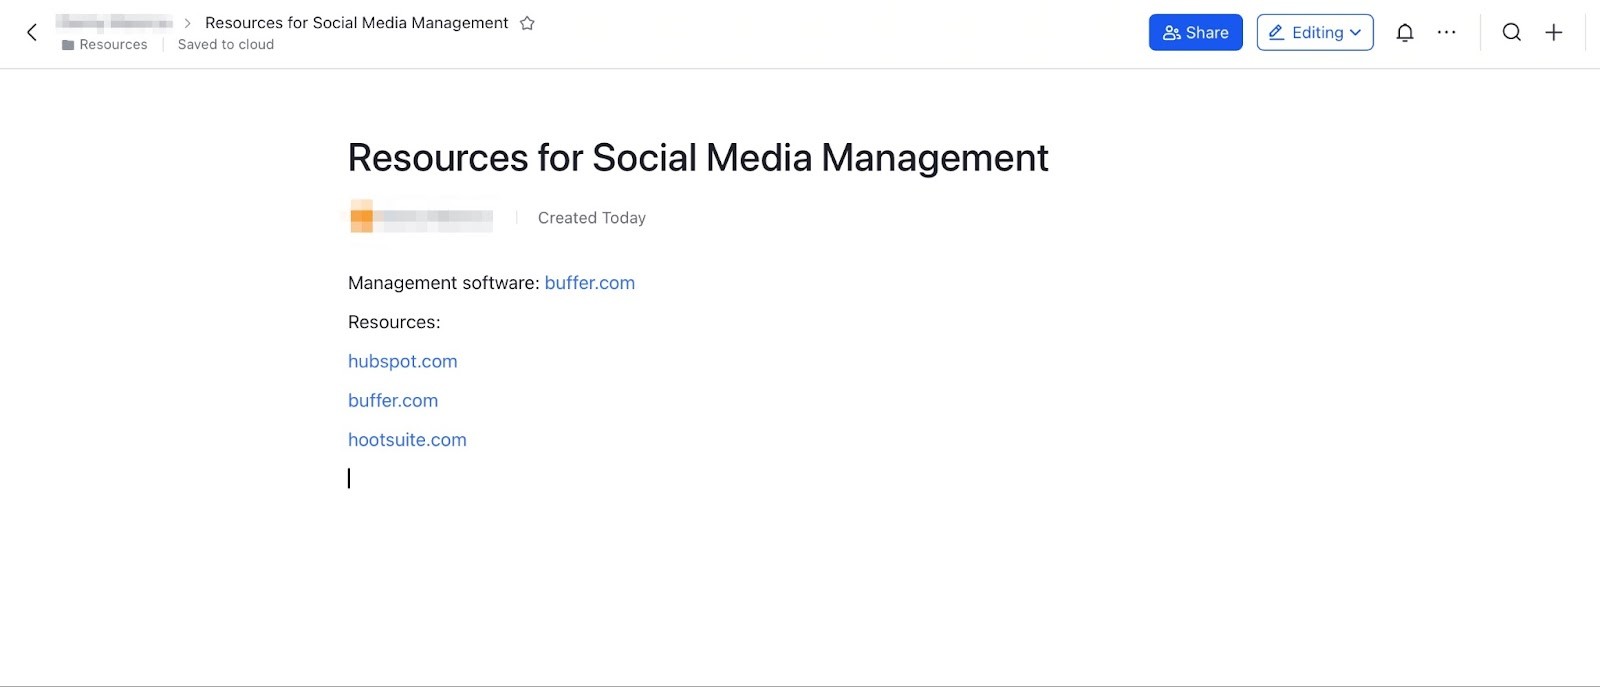
Complete these steps each time you need to create new documents for your PARA folders.
Step 4: How to save Lark meeting recordings to your PARA folders
When you host meetings in the Lark app, you can record audio and automatically transcribe meeting notes.
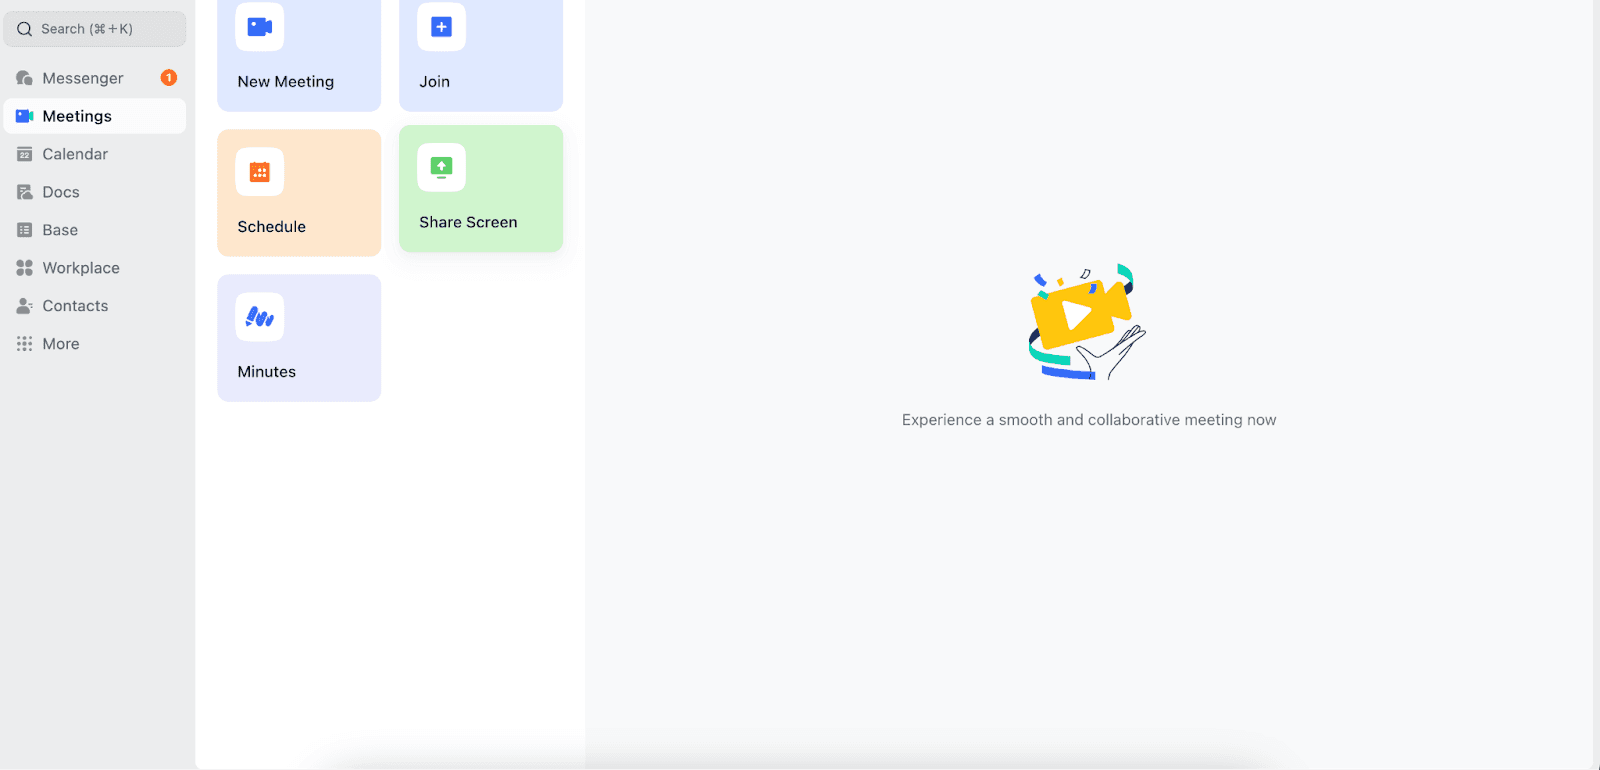
Select Meetings > New Meeting.
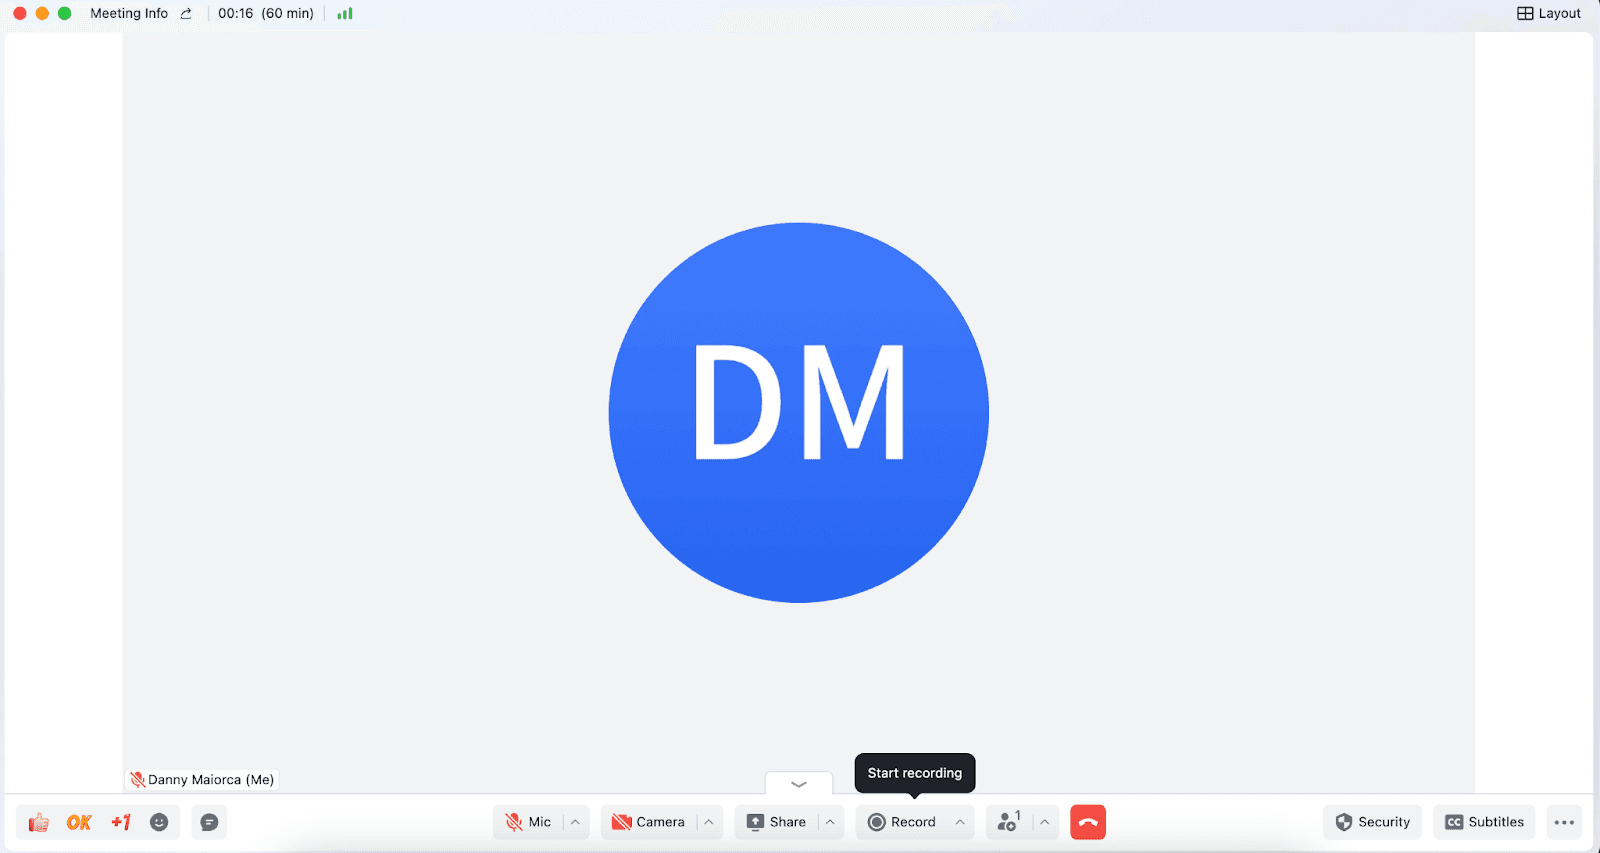
Go to Record and tap Start Recording.
When you want to finish the recording, select Stop Recording.

Select Stop when the pop-up window asks you to stop recording.

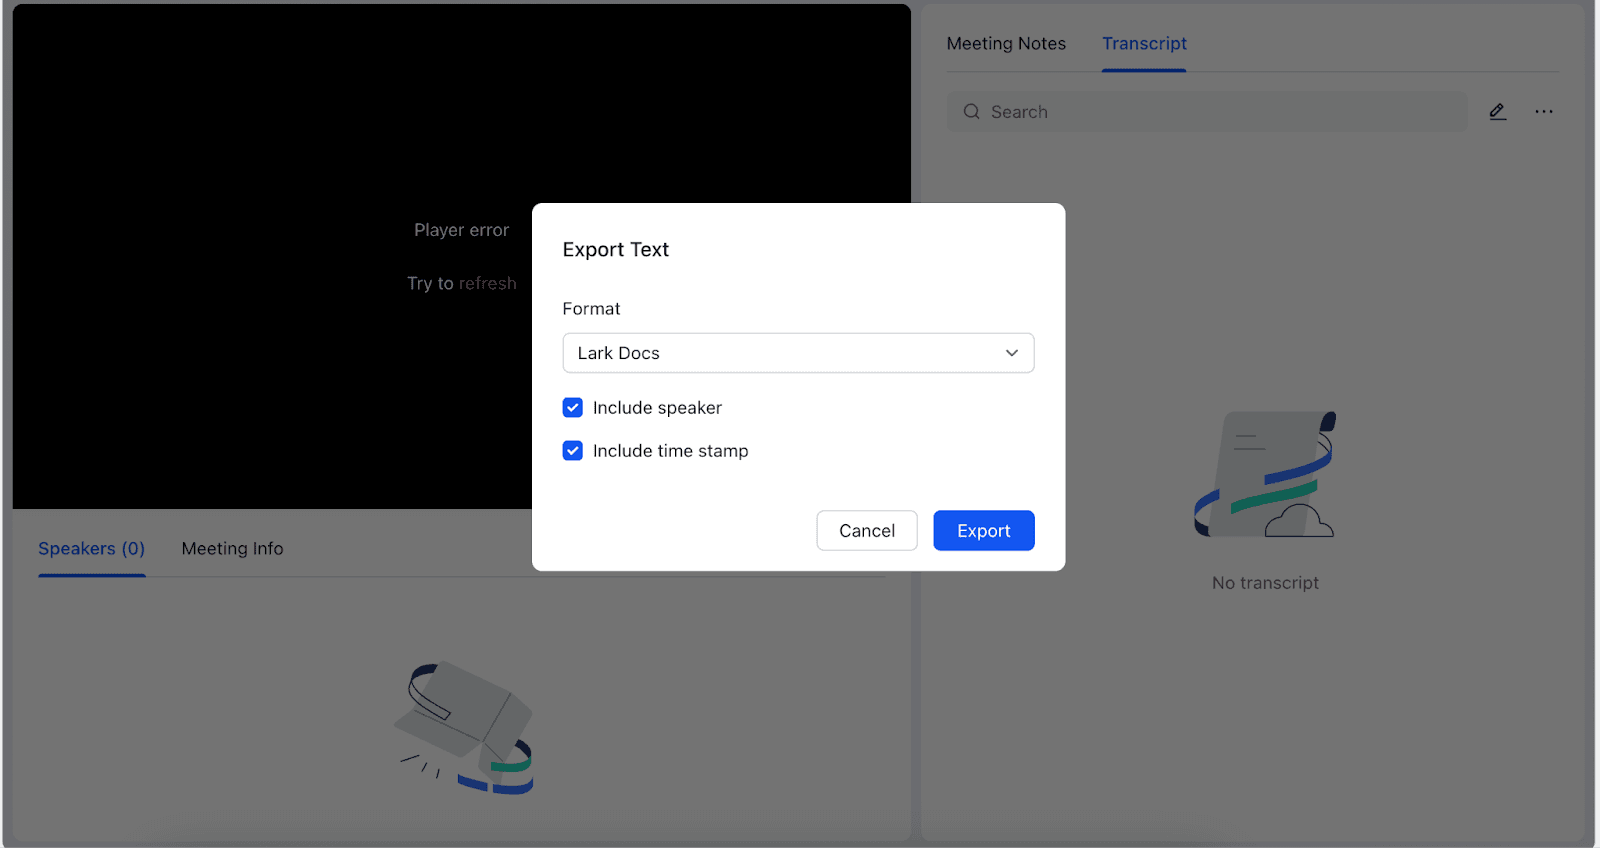
Export your text in Lark Docs format.
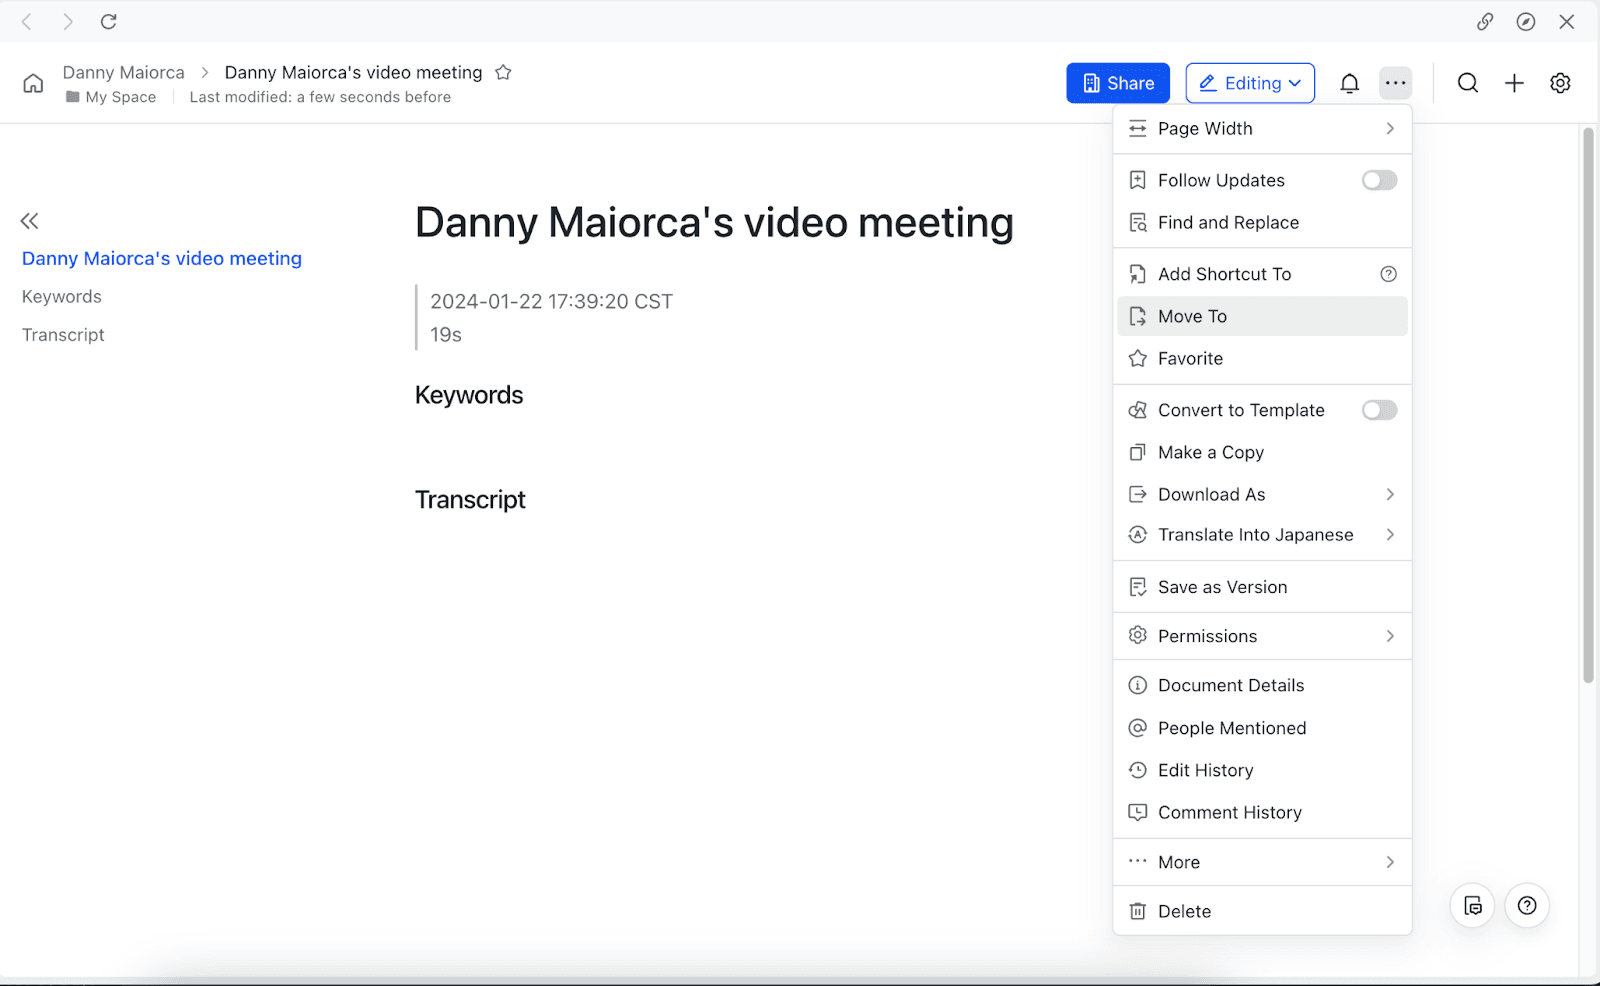
Go to your document and tap the three-dot icon > Move To.
Confirm which folder you want to move your meeting notes to.
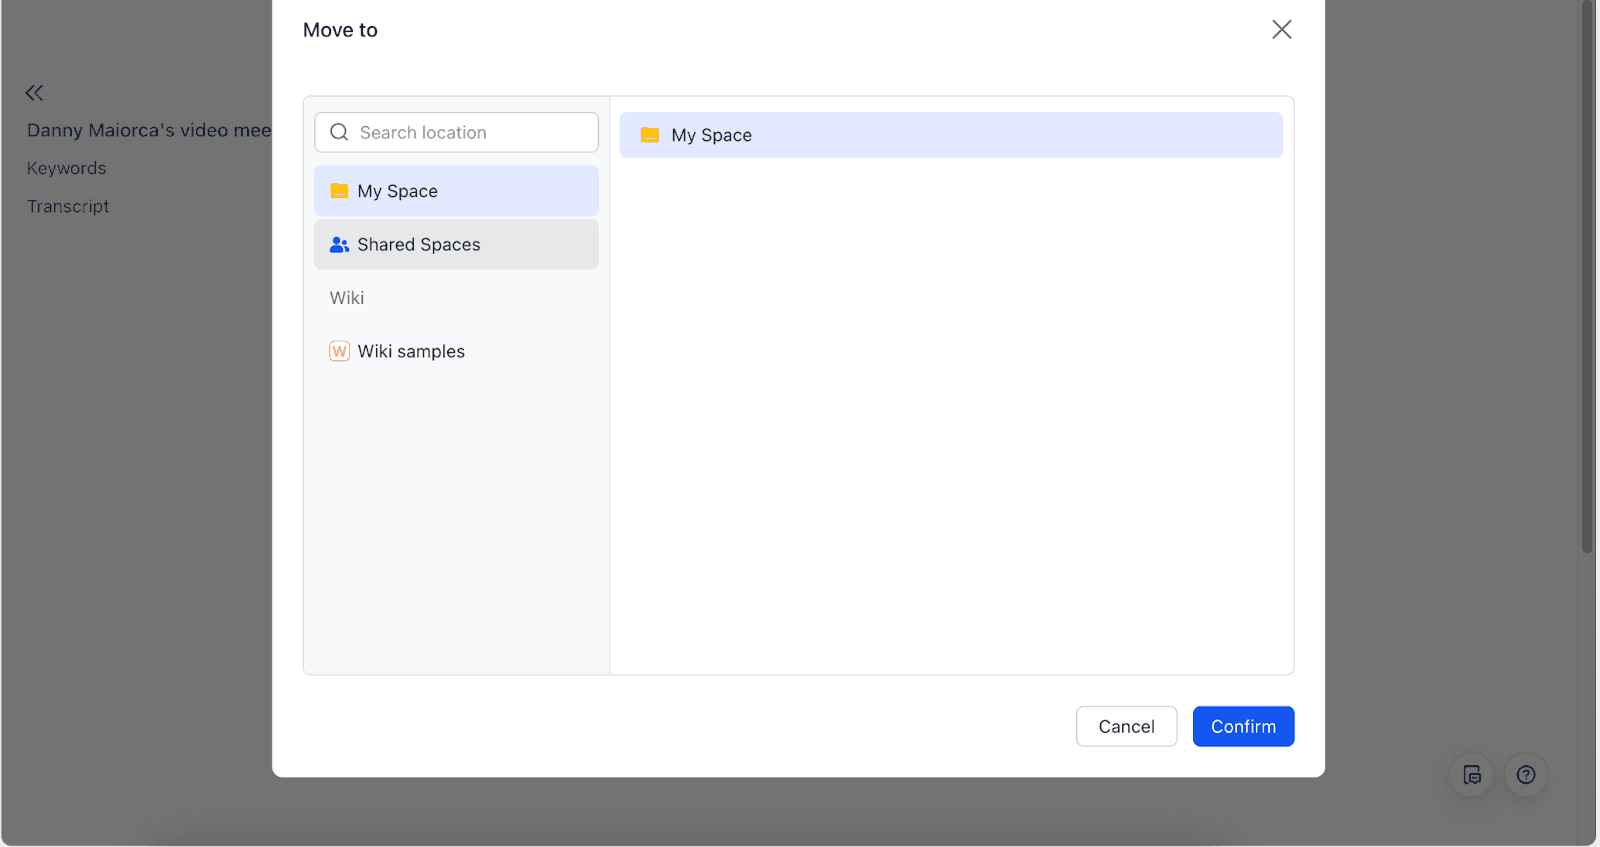
If necessary, drag and drop your notes into a more specific folder.

Step 5: Importing external notes to your PARA folders
You probably have essential PARA method documents elsewhere, such as in Google Docs. Moving your files and folders into Lark saves time and makes accessing them easier.
Import these into Lark by following the instructions listed below.
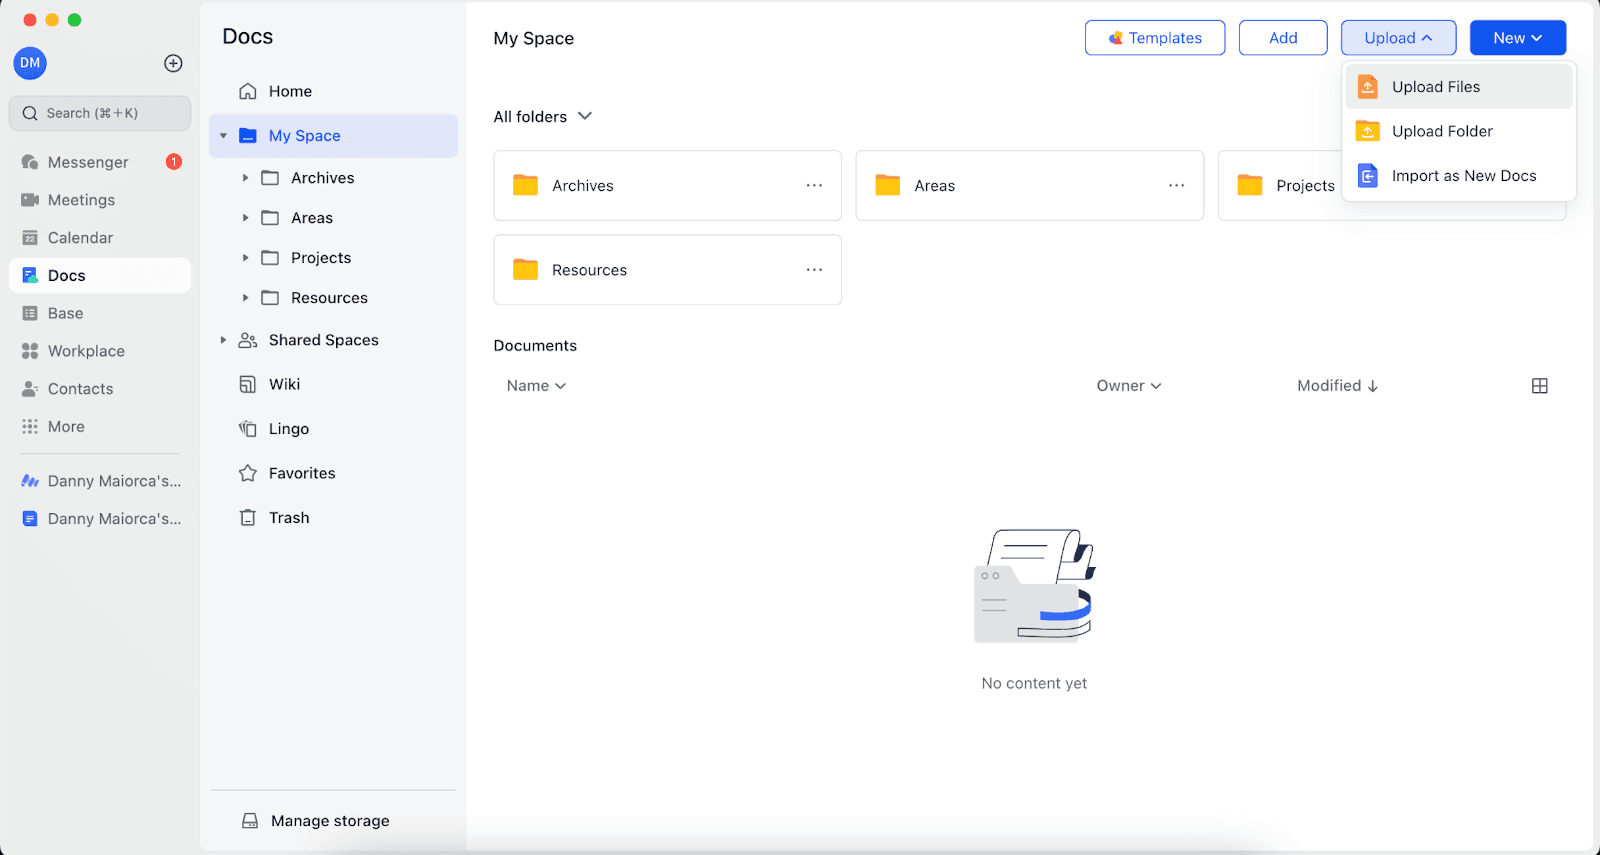
Step 1: Go to Upload > Upload Files/Upload Folder.
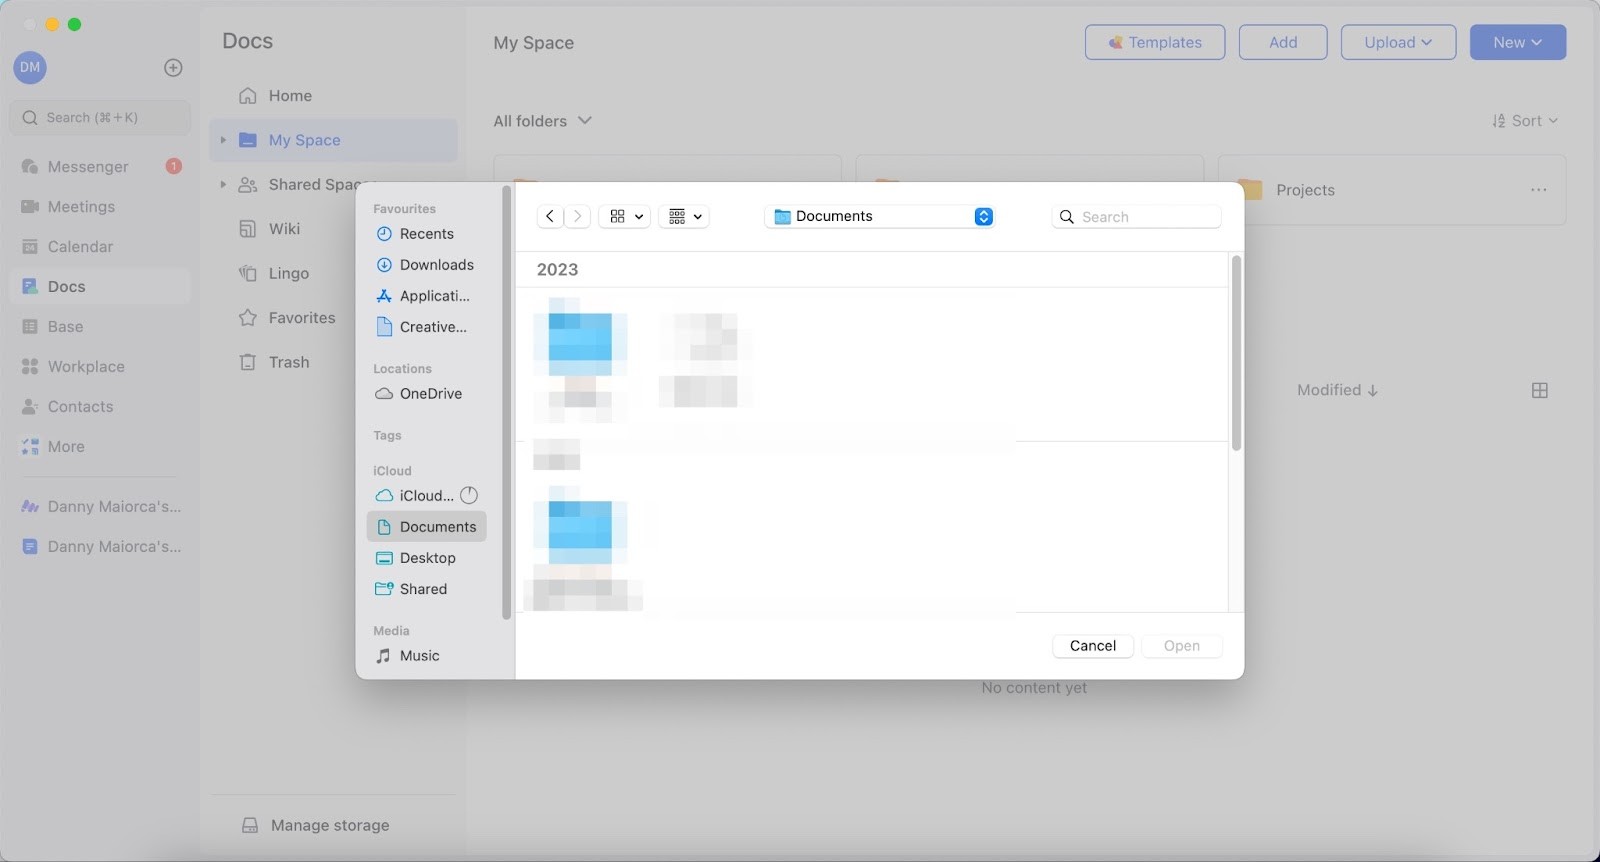
Step 2: Choose the files or folders you want to upload and select Open.
Step 6: Sharing your PARA files and folders with colleagues
You can either share your PARA files and folders with colleagues or, if needed, transfer ownership. To transfer ownership, go to the three-dot icon next to your document and select Transfer Ownership.

Alternatively, if you want to share, tap the three-dot icon and select Share. Then, enter the users’ names that you’d like to invite. You can also add a note, which they’ll receive via Lark Chat. Select Send when you’re finished.

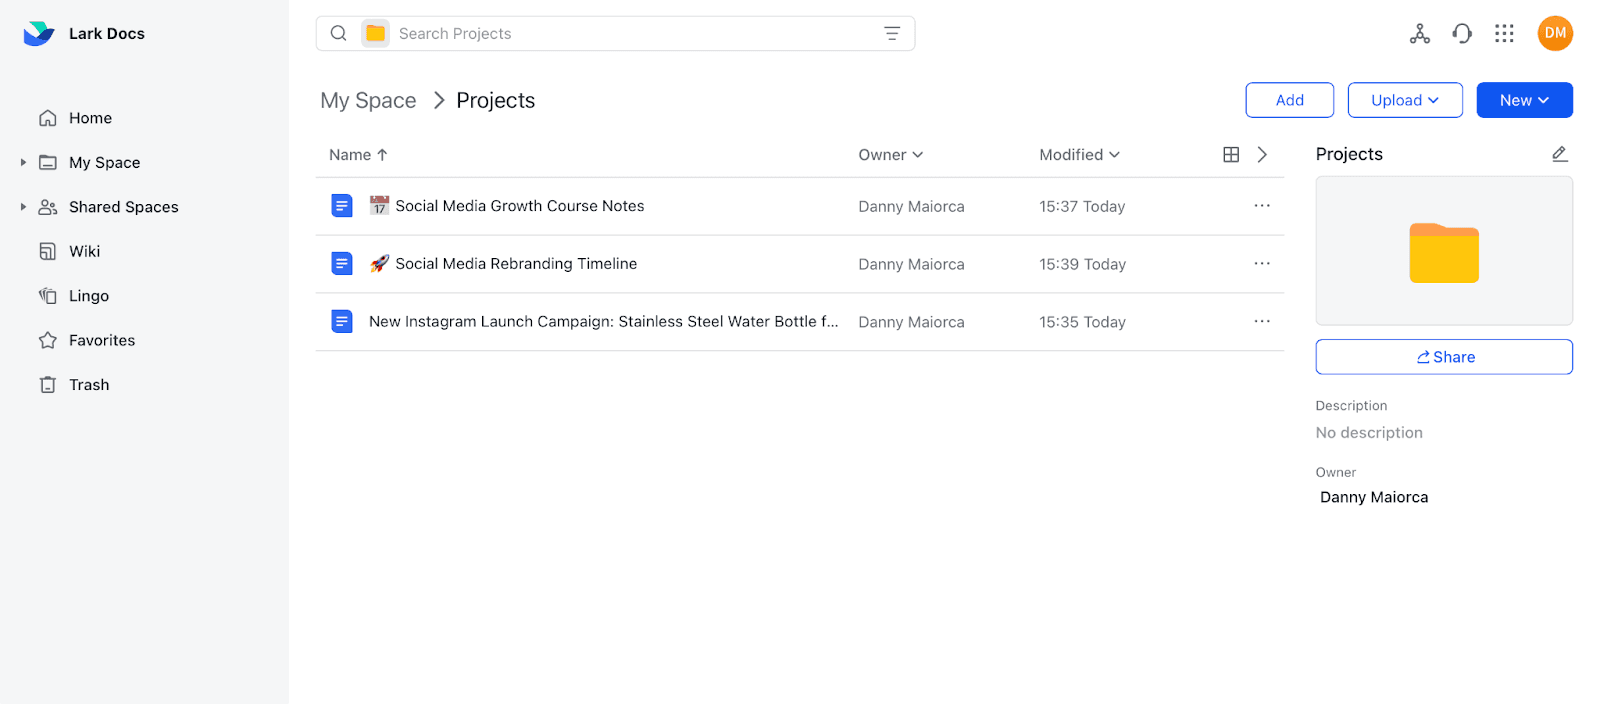
A sample project folder in Lark
To give you an idea of what you can include in your Project area, view this example for a social media manager. You can see the time-specific projects they’re working on, such as a rebrand and launch campaign. Furthermore, you’ll notice notes from a training course they’re taking. This aspect, including your active projects, requires ongoing attention.
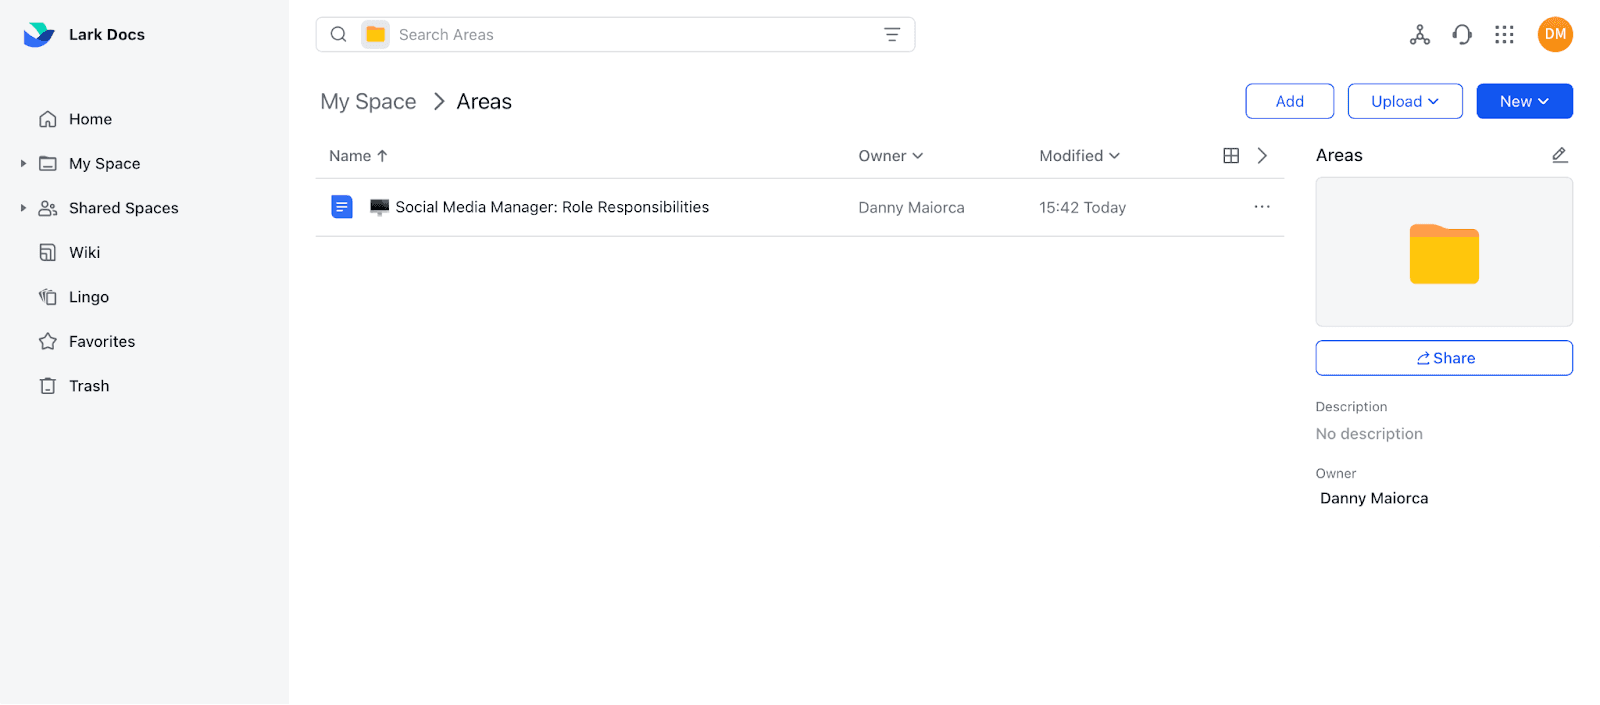
A sample area in Lark
The same social media has outlined their role responsibilities in an Areas document below. You can also add your personal responsibilities (e.g., managing your finances) here.
Get started with PARA
The PARA method is an easy-to-understand and incredibly effective way to organize large amounts of information. Considering how hectic modern workplaces are, simplifying your digital information within these four categories can help you think more clearly and, more importantly, act more clearly.
You can use PARA with several other productivity tools, but most require additional related tools – each with a limited purpose and data types. A significant benefit of using Lark for these is that it’s multi-dimensional. For example, you don’t need to leave the app to hold a video conference to discuss the contents of your files and folders. You can do that right in Lark. Your team can also message each other within the same platform and respond to emails, plus much more. Using only one app reduces context switching and helps increase focus.


