Available with these plans:
Starter
Basic
Pro
Enterprise
Create to up to 5
Create up to 50
To upgrade your Lark Plan or for more information, contact Support or your Customer Success Manager. The Lark Basic plan supports only specific countries and regions.
I. Intro
Who can perform these steps: Primary administrators or administrators with Workplace or Custom Workplace permissions.
You need to send a request to publish a Custom Workplace before it can be enabled.
II. Steps
1. Request to publish a Workplace
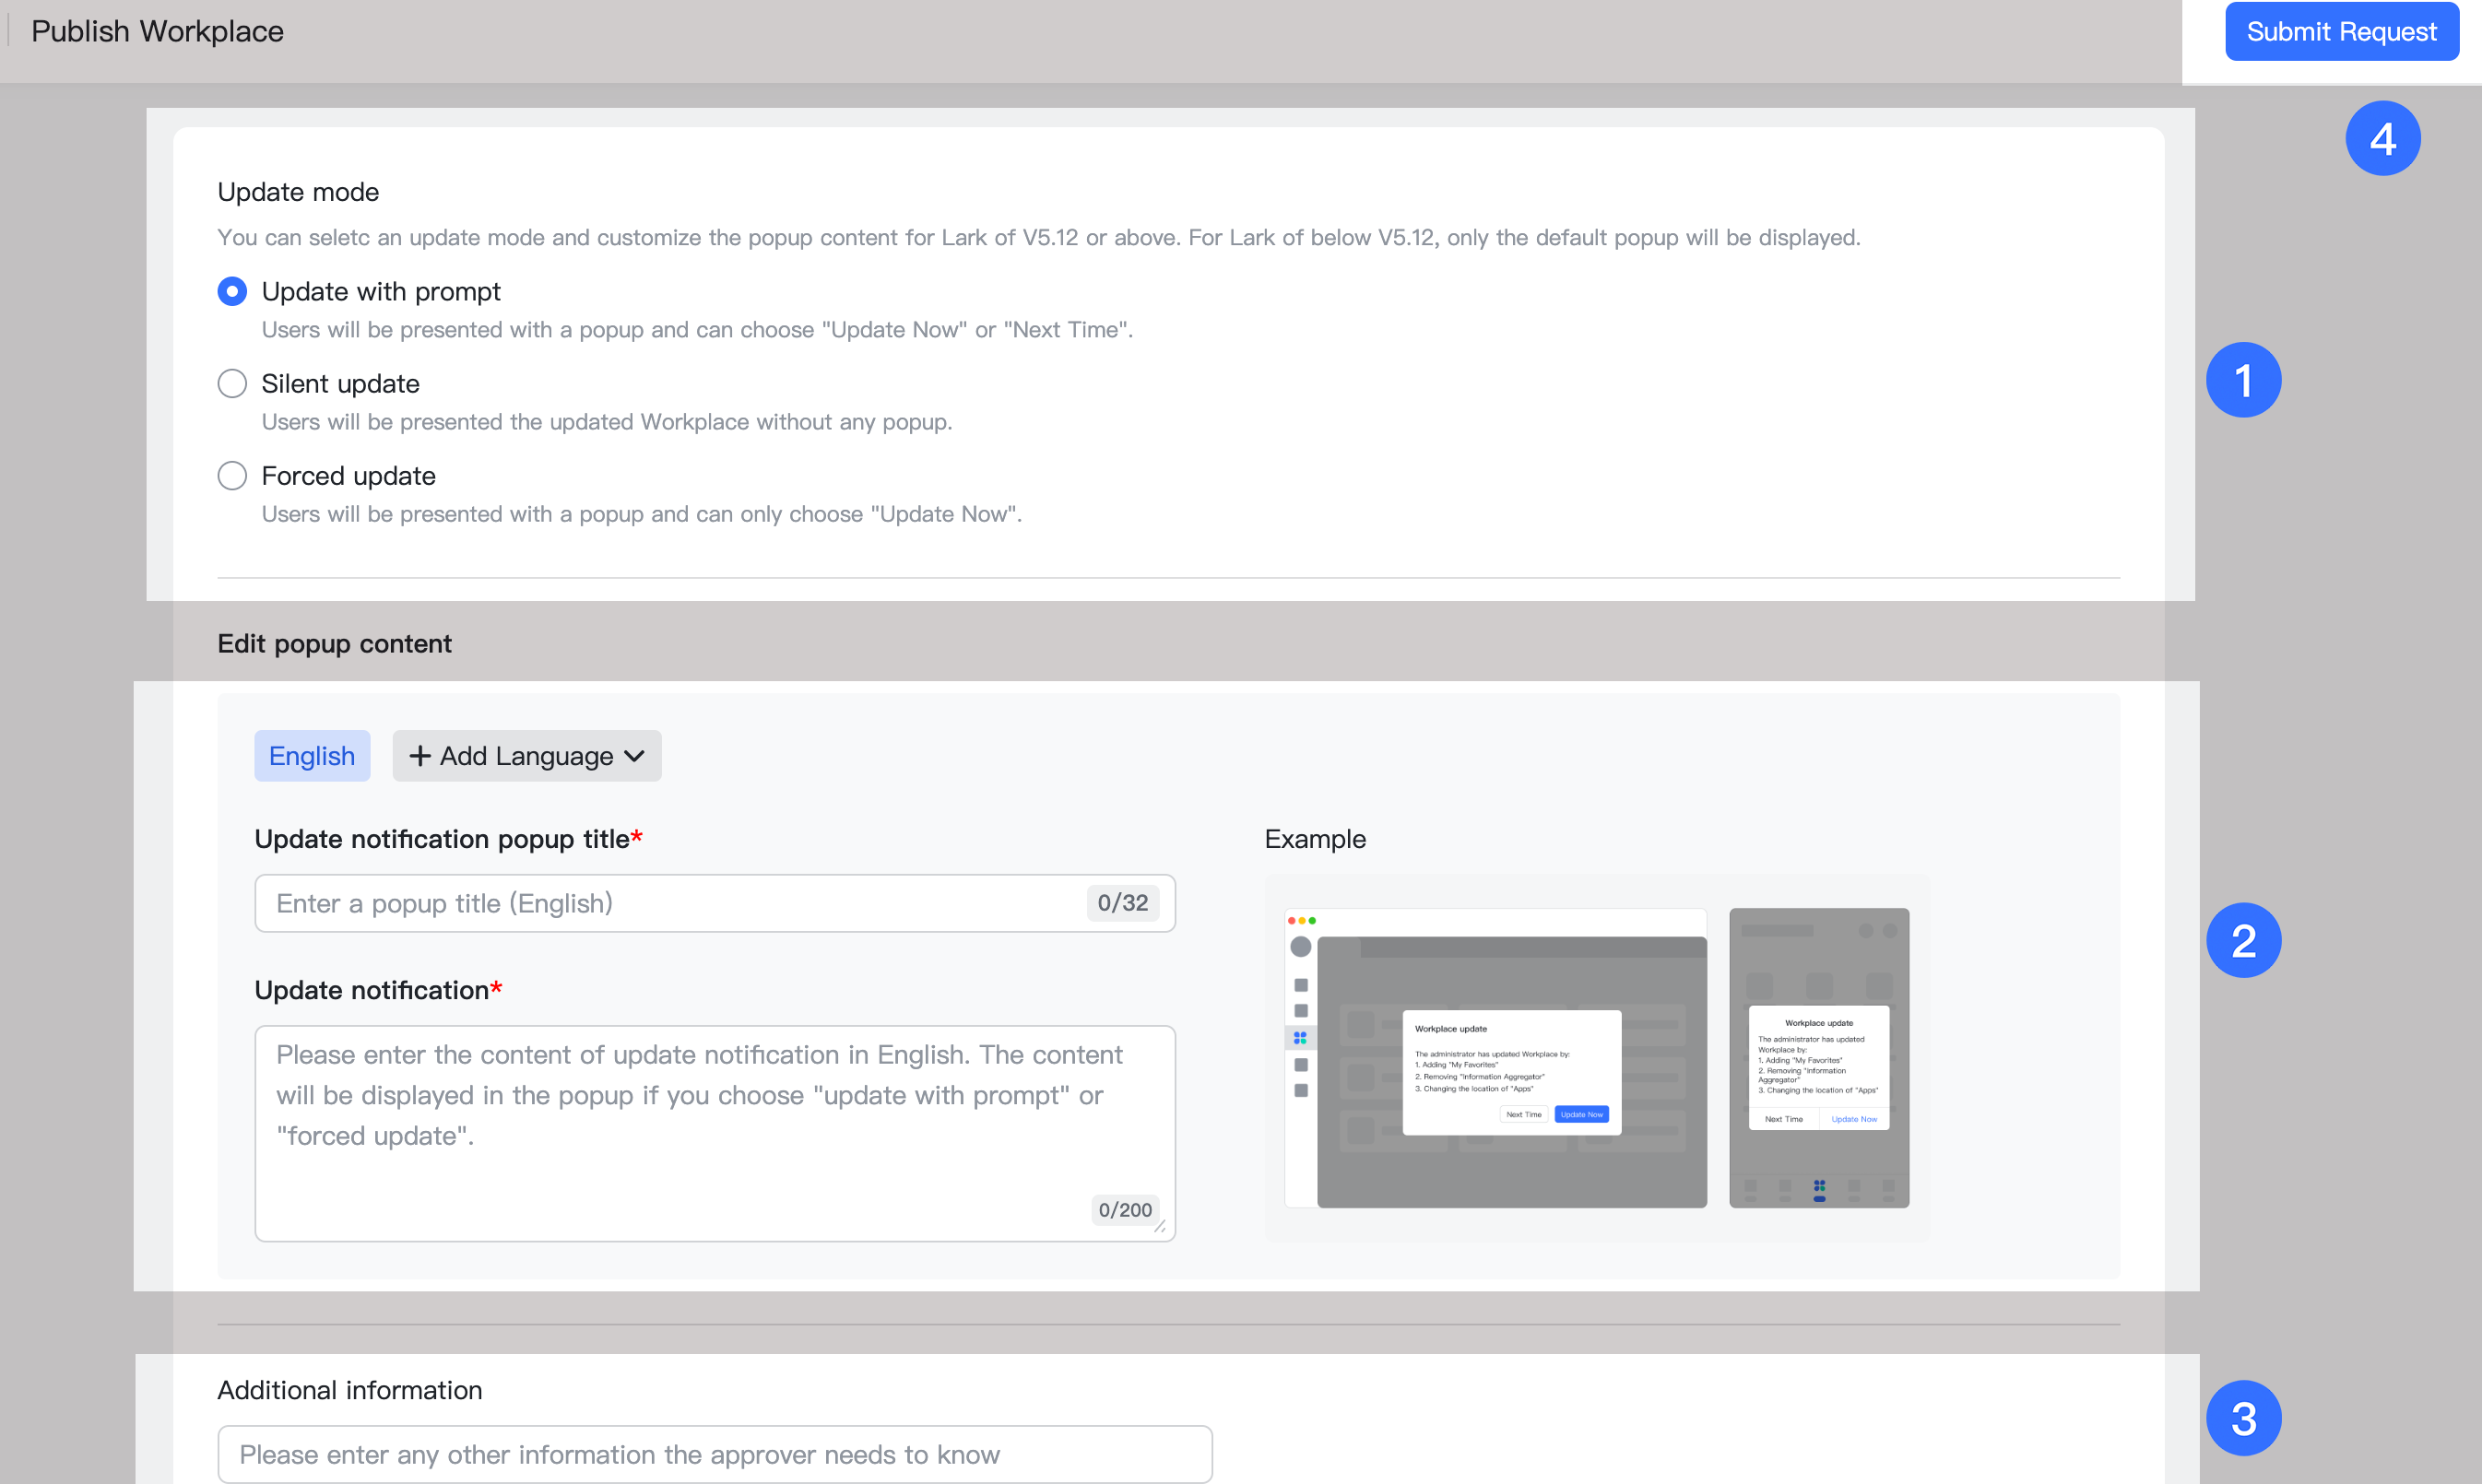
Click Publish in the top navigation bar to open the version management page.
250px|700px|reset
In the version management page, you must:
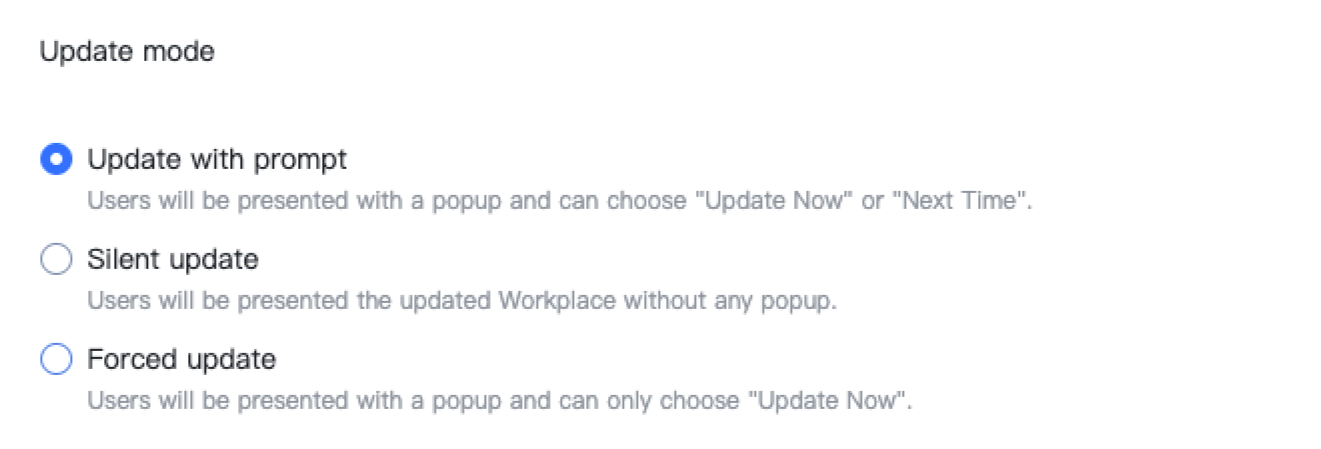
- Select the update mode
There are three update modes: Update with prompt, Silent update, and Forced update. Select the mode that suits your specific situation and requirements.
- Enter a title and description for the update notification
For Update with prompt and Forced update, members will see an update notification the first time they open the Workplace after the update. You can edit the notification's title and enter a description in the Update notification box. You can click Add Language to enter a title and description in another language.
Note: After adding another language, you can select one to be the default. If none of the languages added matches the app's display language, then the default language will be used instead.
- Enter additional information (optional)
For any remarks or details that the approver needs to be aware of, enter them into the Additional information field.
- Click Submit Request in the upper-right corner to send the request to the approver.
250px|700px|reset
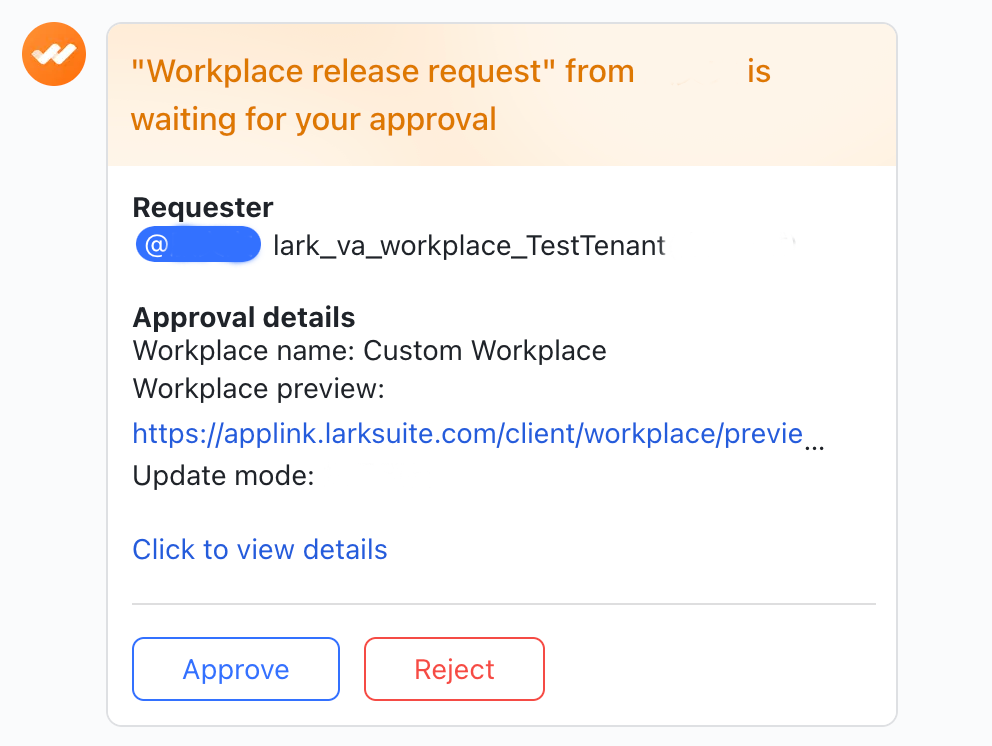
2. Wait for approval
The request is sent through Lark Approval to the Workplace creator for approval.
Note: If the Workplace has already been enabled, it will be updated and displayed in the app after approval.
250px|700px|reset
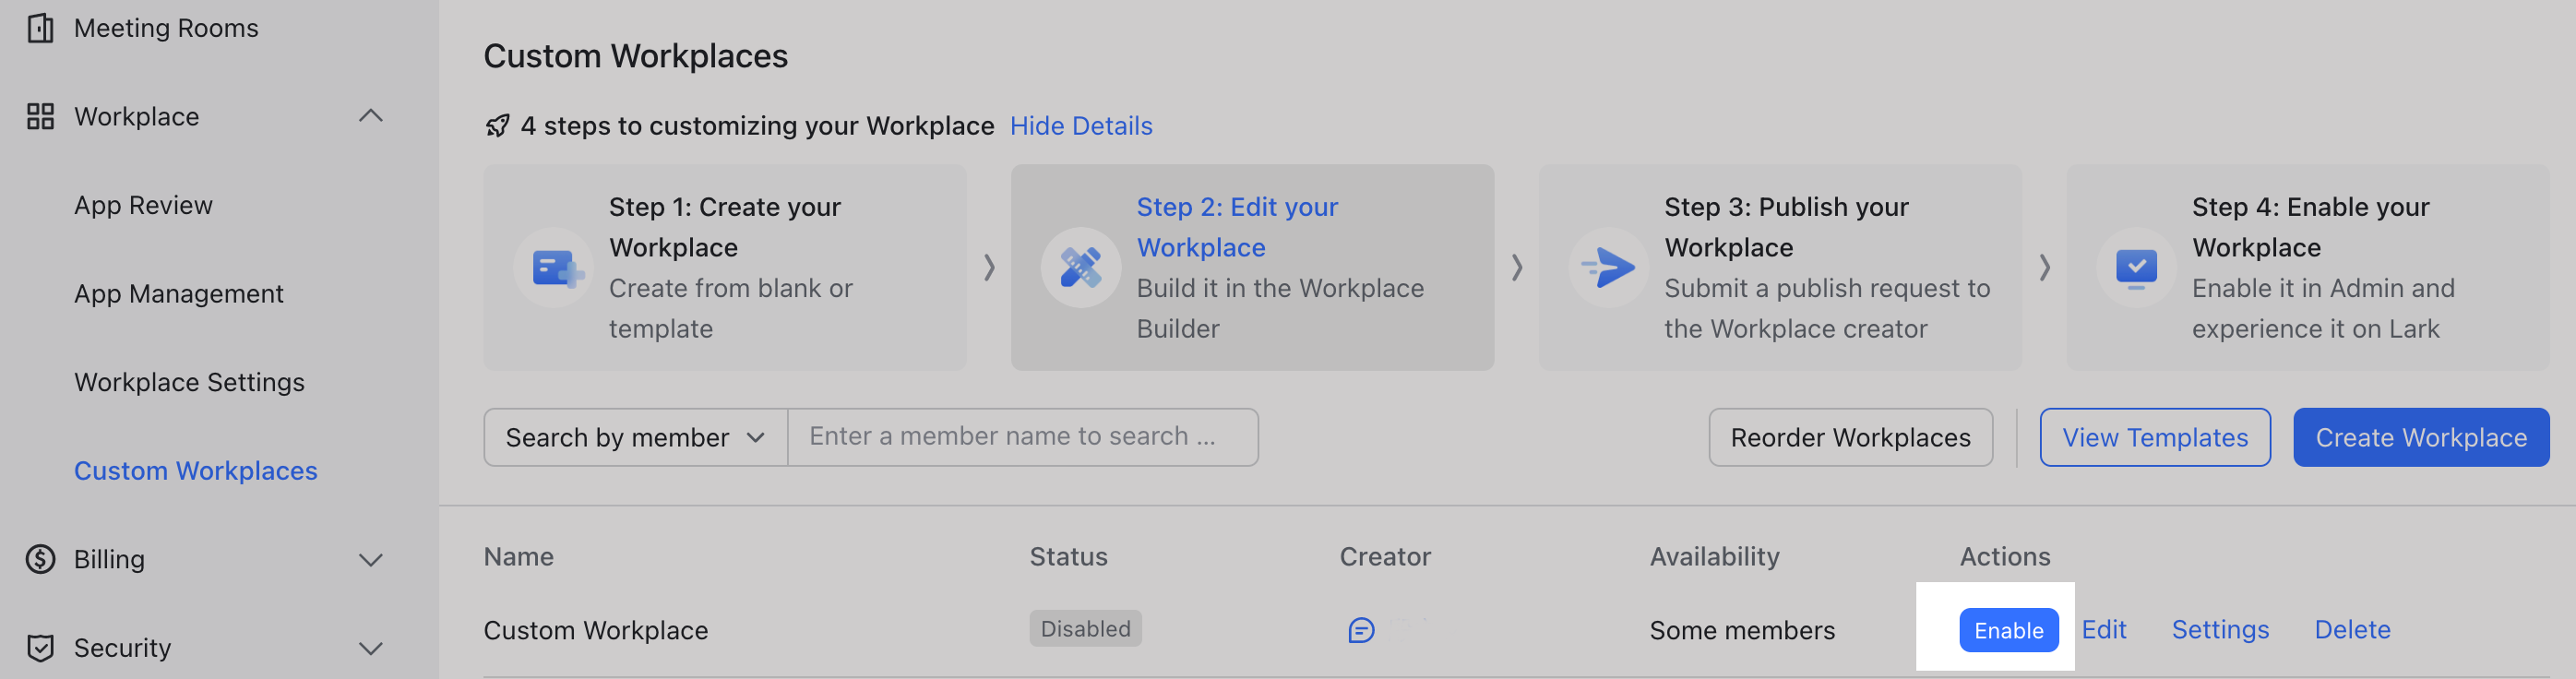
3. Enable and publish
Once the request has been approved, go to Lark Admin Console > Workplace > Custom Workplaces, and click Enable to the right of the Workplace.
250px|700px|reset
Select an availability scope in the pop-up window and click Enable. Once enabled, you can view the updated Workplace in the Lark app. If the new Workplace is not updated, try switching to a different app from the Lark navigation bar and then reopening the Workplace.
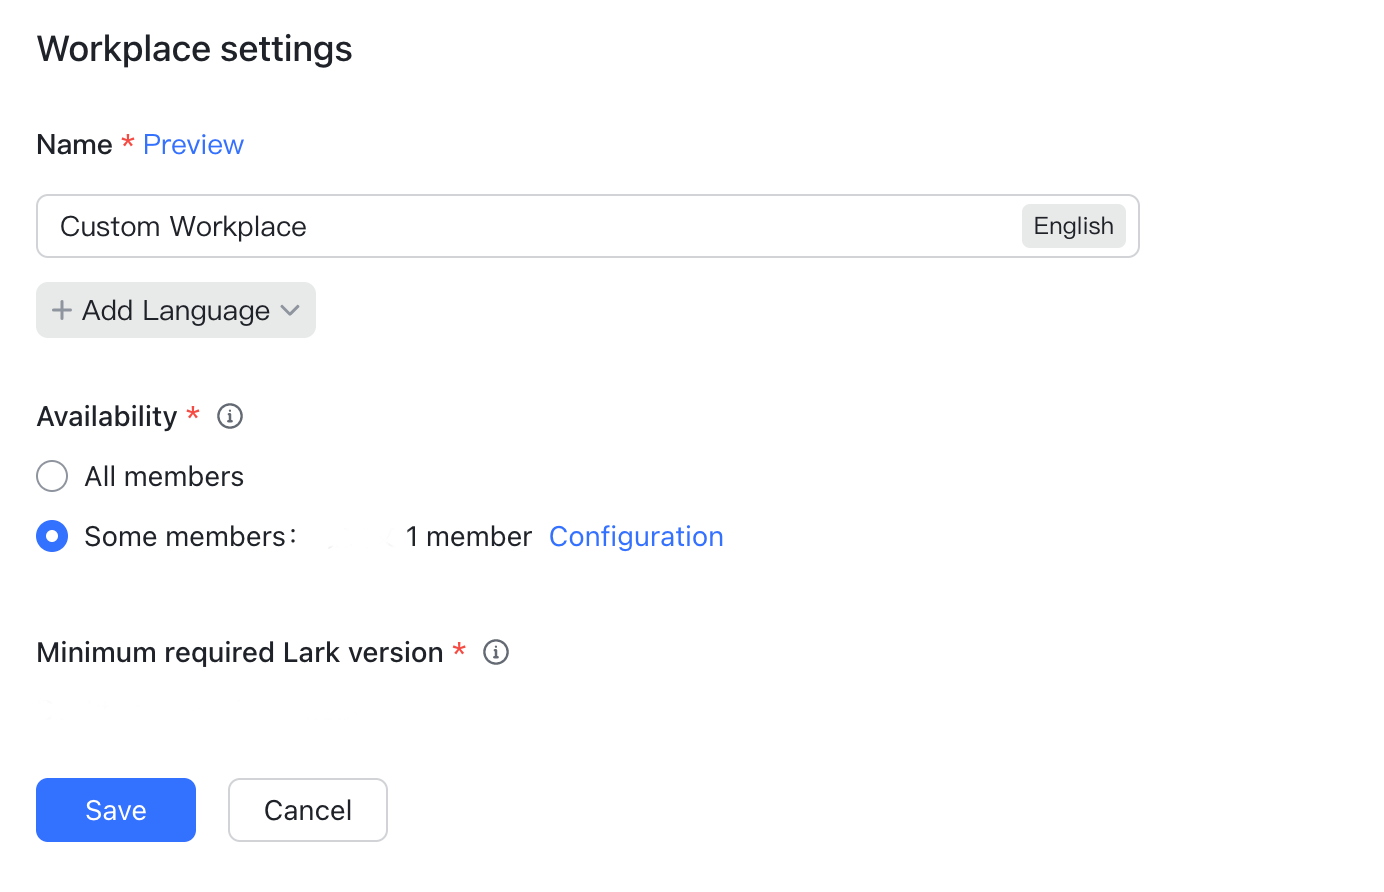
Check the Workplace to make sure everything is correctly configured. You can go back to Lark Admin and click Settings to the right of the Workplace, where you can change the Name and Availability.
250px|700px|reset
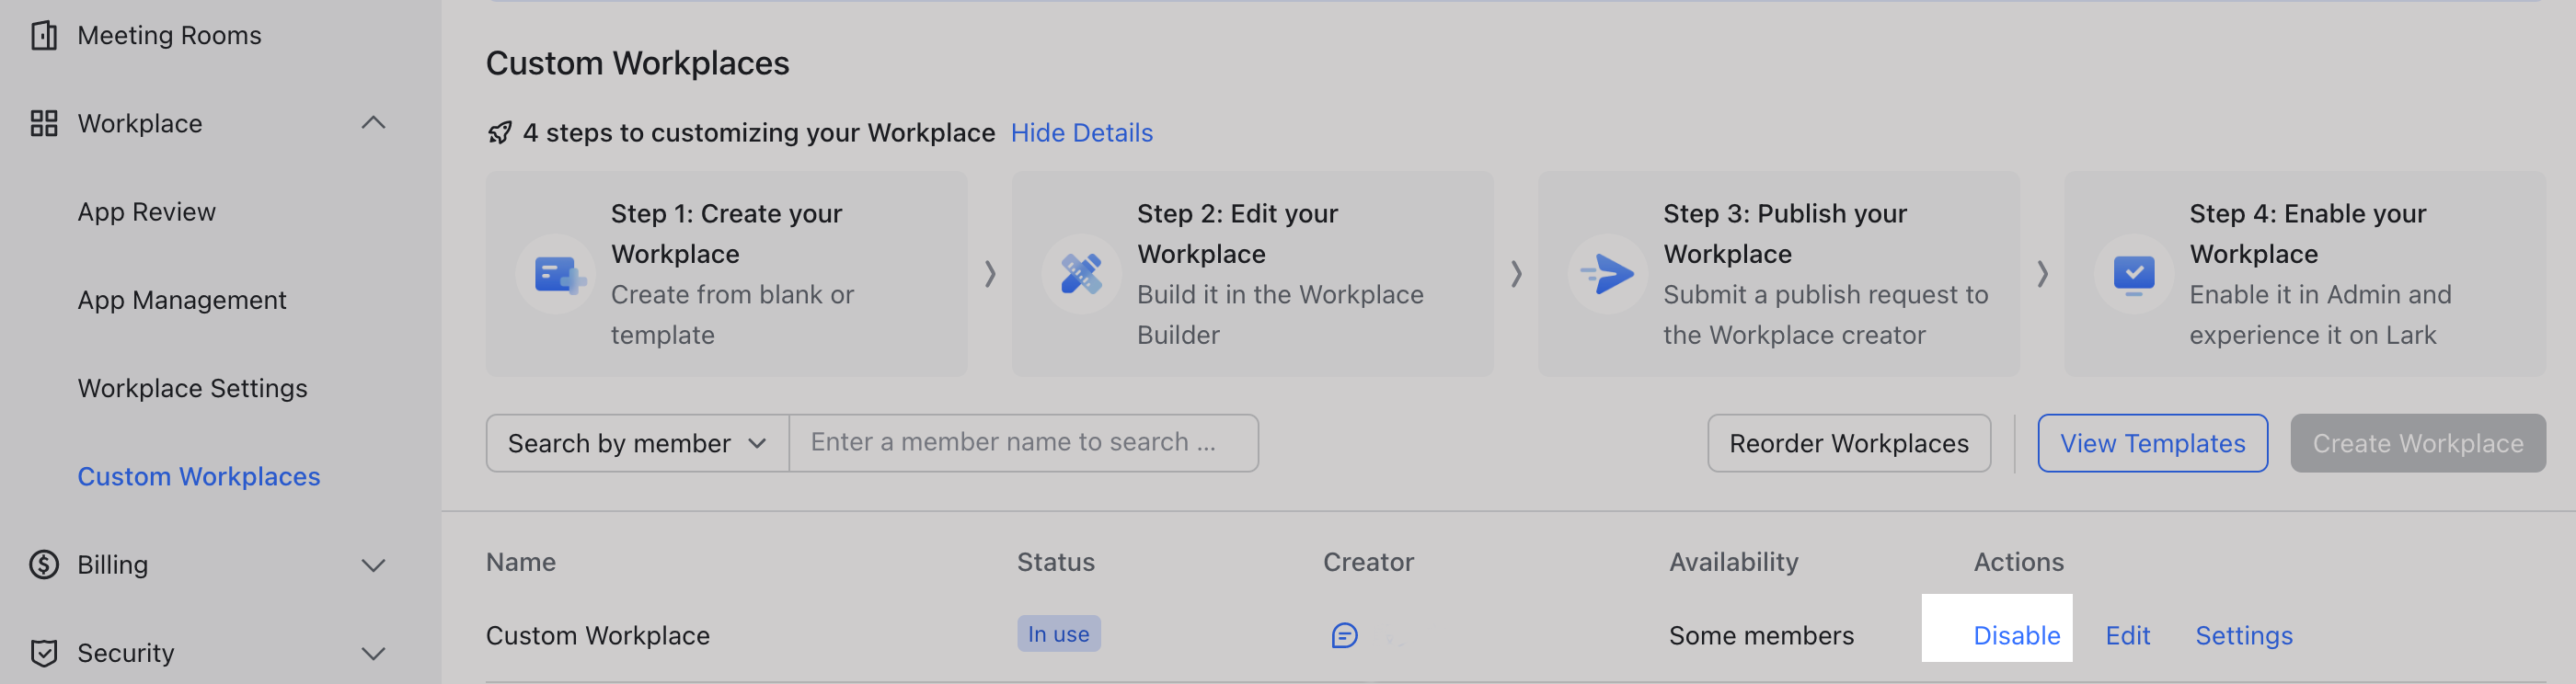
If you want to disable a Workplace, click Disable to the right of the Workplace, and then Confirm.
250px|700px|reset
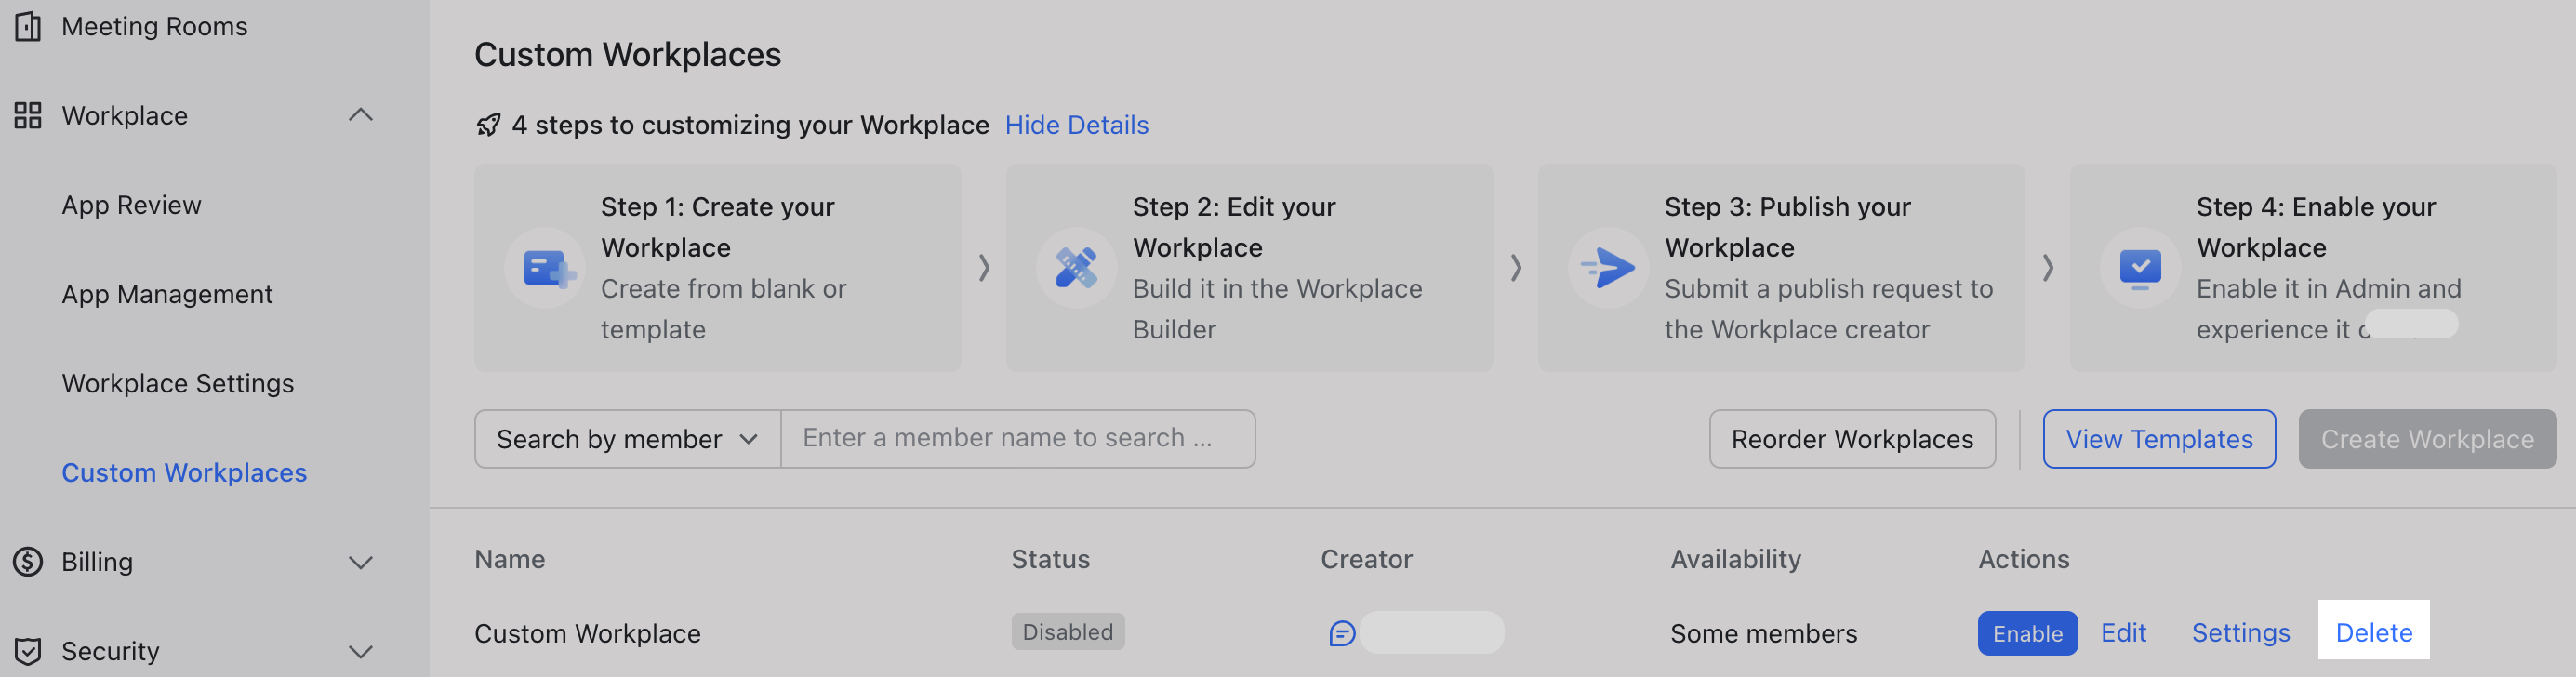
If you no longer want to use this Workplace, click Delete to delete it.
250px|700px|reset
III. Related
IV. FAQs