
- Install Lark
- Create your organization
When you register a Lark account, you'll create an organization or your personal space. If you choose to create an organization, you'll be the founder and first primary administrator of your organization. Only the founder can disband an organization, but the role of founder can be transferred to others.
- Open the Lark app, enter your email or phone number, accept the Terms of Service and Privacy Policy, and click Next. Enter the verification code to complete the verification.
- 250px|700px|reset
- Or you can go to the Lark official website, and click Try for free.
- Note: Lark is not available for phone numbers with the international dialing code "+86".
- Fill in your profile information and then your organization information.
- Warning: The selected country or region will determine the storage location of your organization's data; and once selected, it cannot be modified.
- 250px|700px|reset
- Click Create for Free.
- Set the password as required, and click Next.
- 250px|700px|reset
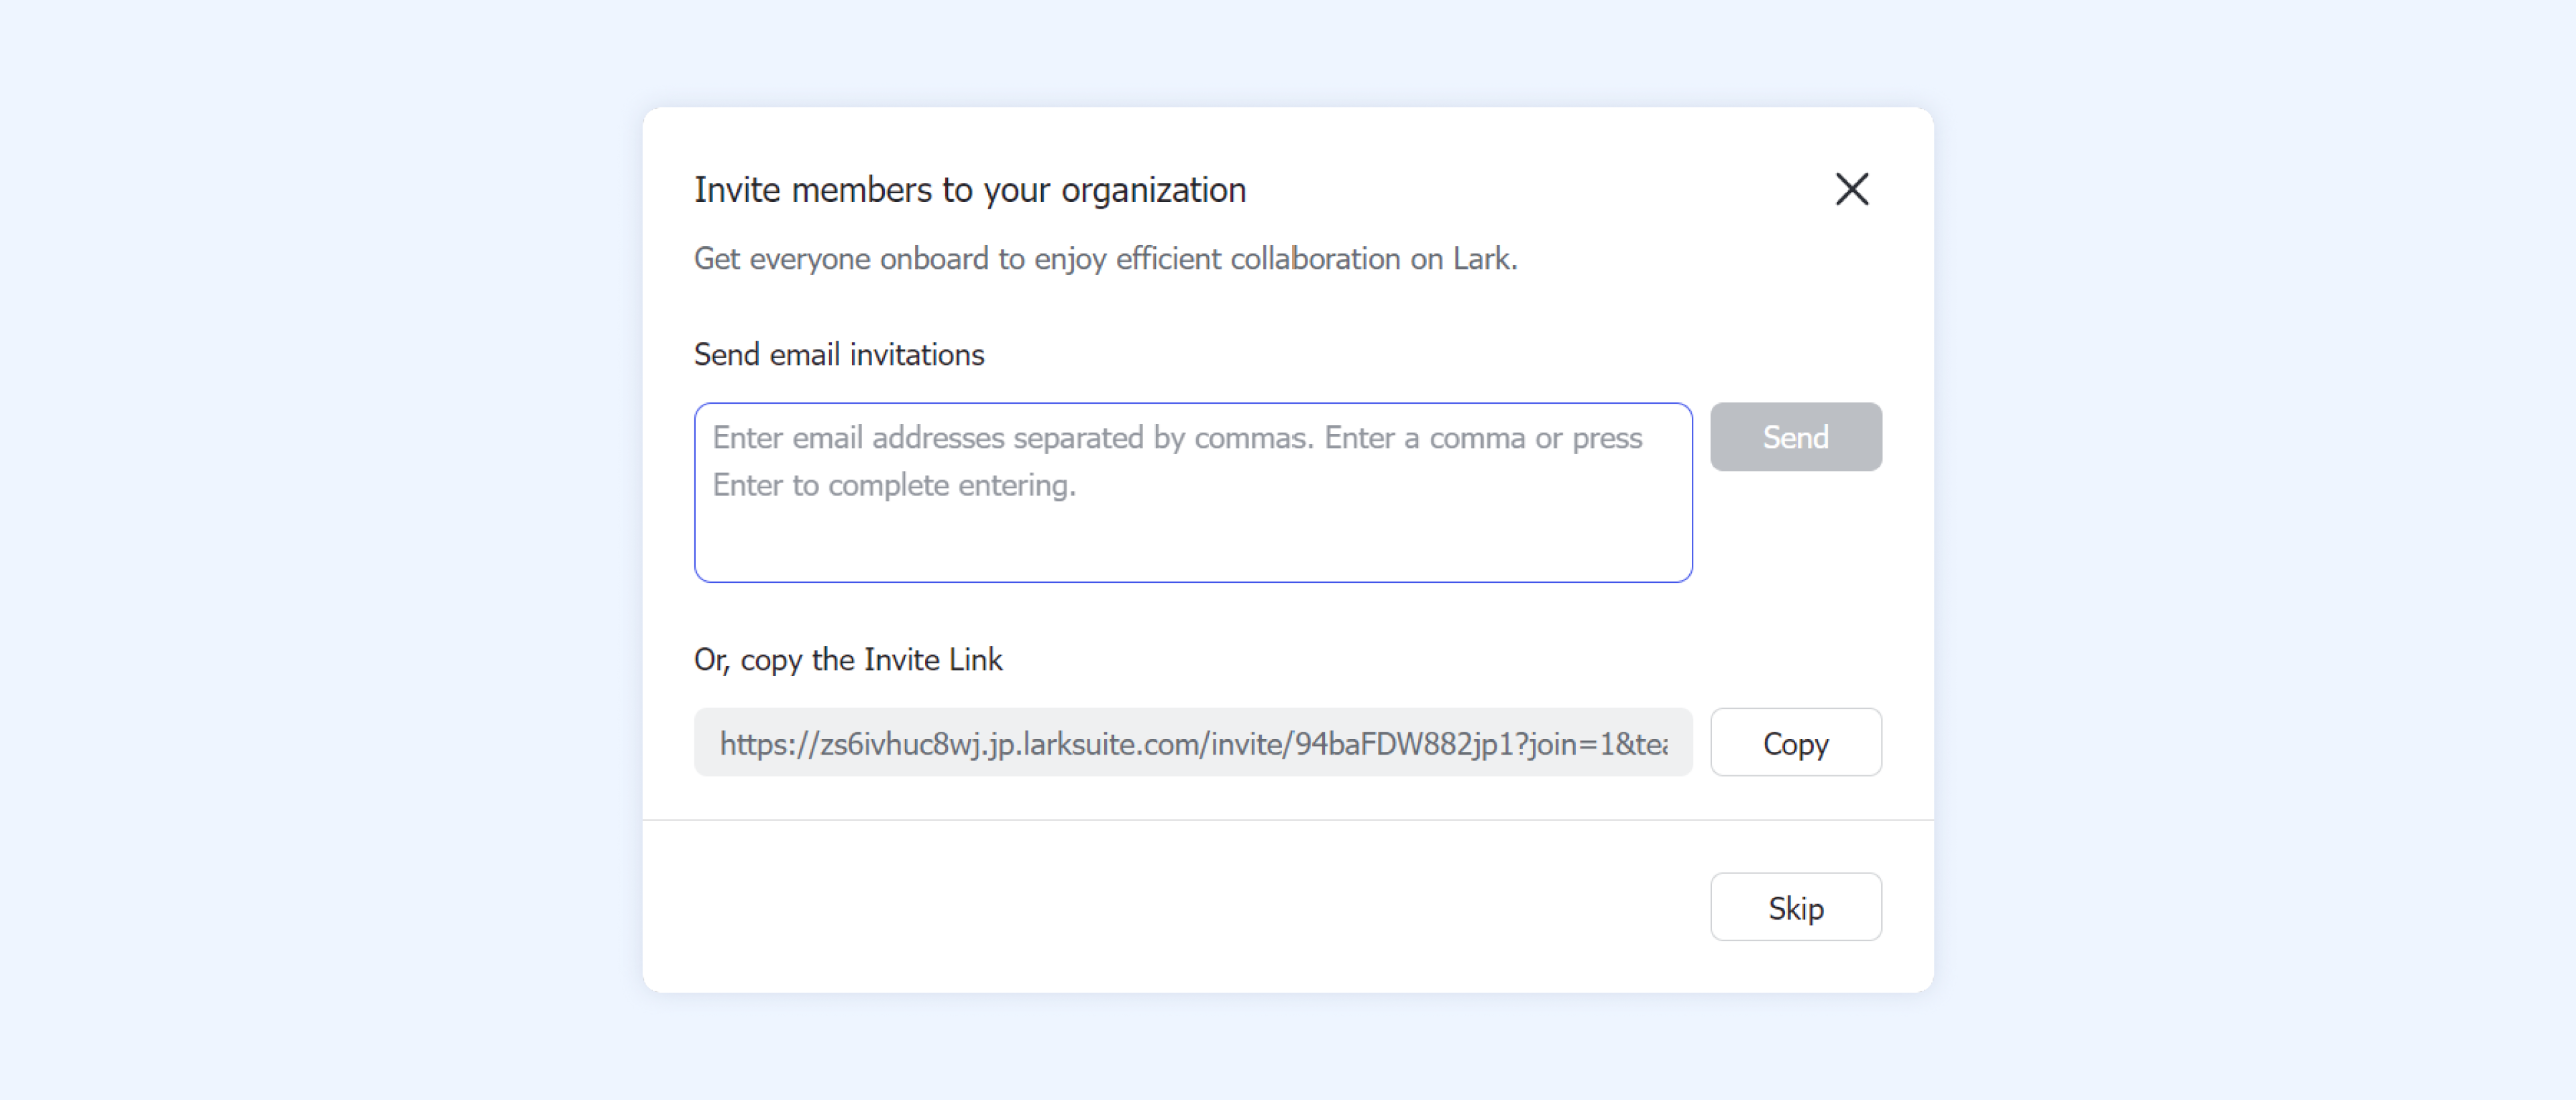
You'll be prompted to invite members to your organization once your organization is successfully created. You can either start inviting people from this window, or do it later by clicking Skip. Don't worry, we'll get back to it another day.
250px|700px|reset
- Get familiar with the Lark Admin Console
After you close the above mentioned "Invite members to your organization" window, you'll see the main interface of the Lark app, which is visible to all users for their daily tasks. As an administrator, you'll be able to access the Lark Admin Console, where you can manage most Lark features and modules.
Access the Lark Admin Console
There're several ways to get into the Lark Admin Console:
- From the Lark desktop app, click your profile photo > Admin Console.
- 250px|700px|reset
- From the Lark mobile app, tap your profile photo > Admin Suite.
- In either the Lark desktop or mobile app, search for "Suite Admin".
- Open a web browser and go to https://www.larksuite.com/admin. You can save a bookmark for it as a shortcut.
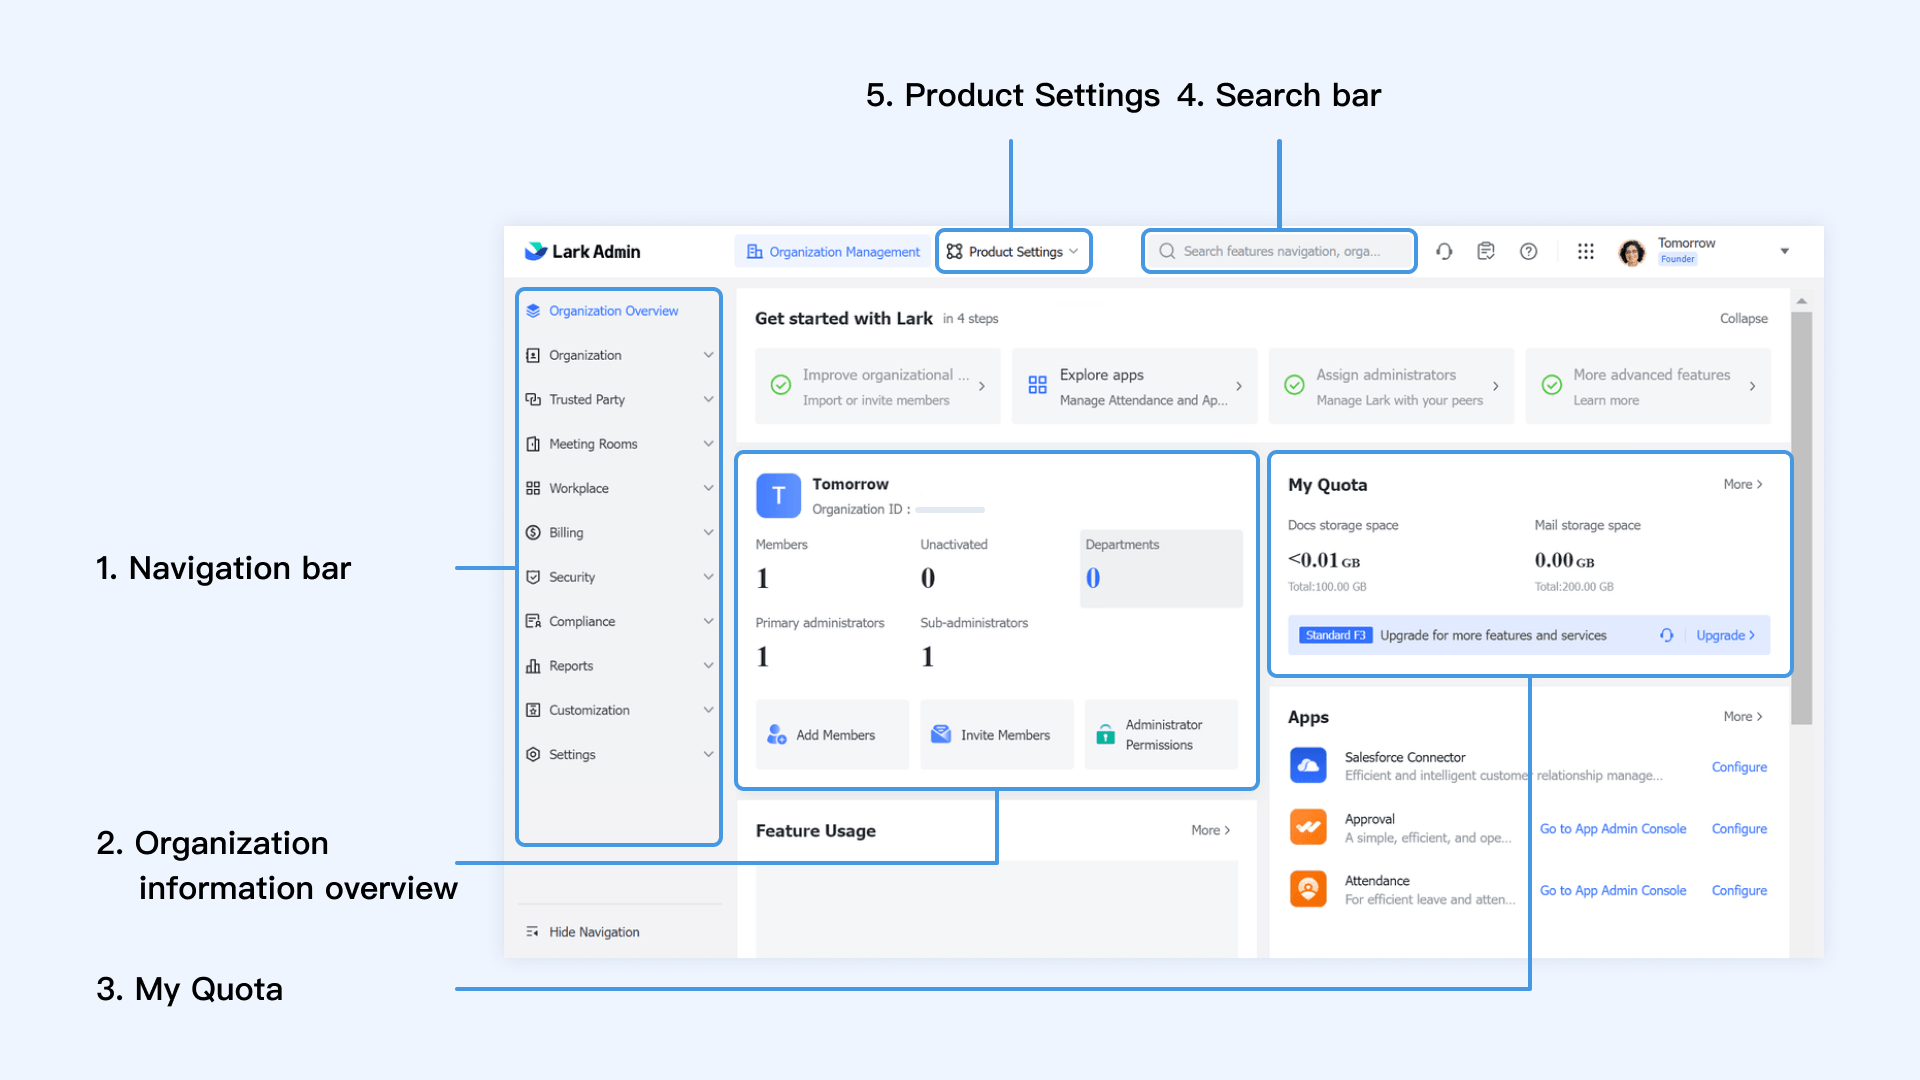
Interface tour of the Lark Admin Console
250px|700px|reset
Navigation bar
You can click the items on the navigation bar to enter the corresponding functionality and configure it.
Organization information overview
You can view the organization ID, total number of organization members, number of departments, number of administrators and other information in the organization information overview.
My Quota
You can get an idea of the organization's storage usage here, such as cloud document storage and mailbox storage. By default, a newly created organization uses the Starter plan. Check the differences between plans and choose the appropriate plan for your organization.
Click More to view other types of your quota, and purchase a storage upgrade plan for the organization. You can also ask for more information or contact Support to help choose an appropriate plan and get more benefits.
Search bar
You can search for the name of a functionality in the Lark Admin Console and directly enter the corresponding settings page.
Product Settings
You can click the product names from the Product Settings drop-down menu to enter the corresponding product admin console or configuration page, such as Mail, Messenger, Docs, Calendar, and so on.
Check the following video for a brief introduction of some basic settings:
00:00
/
00:00
Audio/video is not supported
Please TryRefresh
Play
Fullscreen
Click and hold to drag
Next step
FAQs