
Available with these plans:
Starter
Basic
Pro
Enterprise
5,000 runs/month
1,000 runs/month
50,000 runs/month
500,000 runs/month
The table above shows the number of automated workflow runs per month for different plans. Runs reset on the first day of each month. To upgrade your Lark Plan or for more information, contact Support or your Customer Success Manager. The Lark Basic plan supports only specific countries and regions.
00:00
/
00:00
Audio/video is not supported
Please TryRefresh
Play
Fullscreen
Click and hold to drag
I. Intro
You can automate repetitive tasks with Base's automated workflow. After configuring the trigger conditions and actions and activating automated workflow, Base will automatically perform the specified actions based on changes to the records.
Main steps to create an automated workflow:
- Activate the automated workflow; only the owner of a base and collaborators with manage permission can activate it.
- Configure the triggering conditions and actions.
- Save and run the automated workflow.
II. Steps
Scenario: Automatically notify task leaders when new tasks are assigned.
- Click the Automations in the upper-right corner and click Add Workflow.
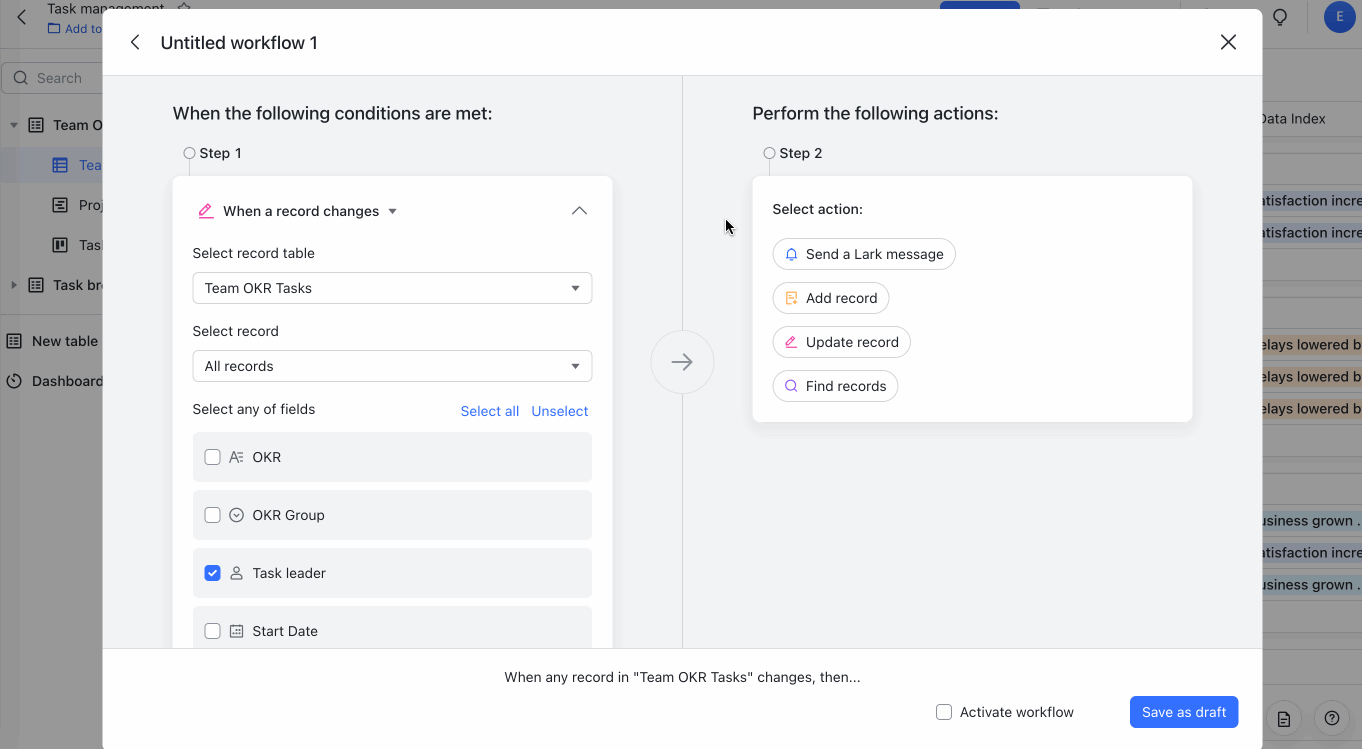
- Set up workflow triggers in the left pane. Below Select condition, choose When a record updates. Below Select record table, select the table where the record is located. Below Select record, select All records. Finally, below Select fields, select the field that contains the task owner.
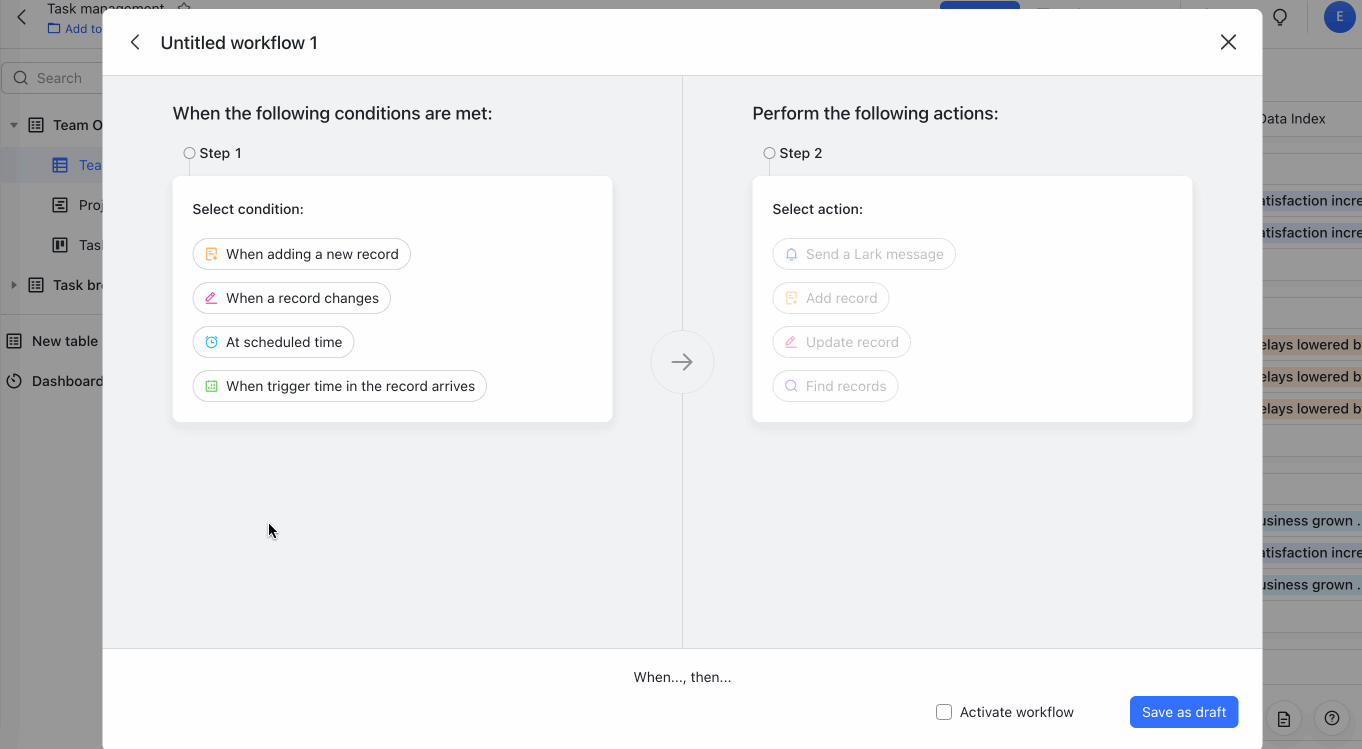
250px|700px|reset
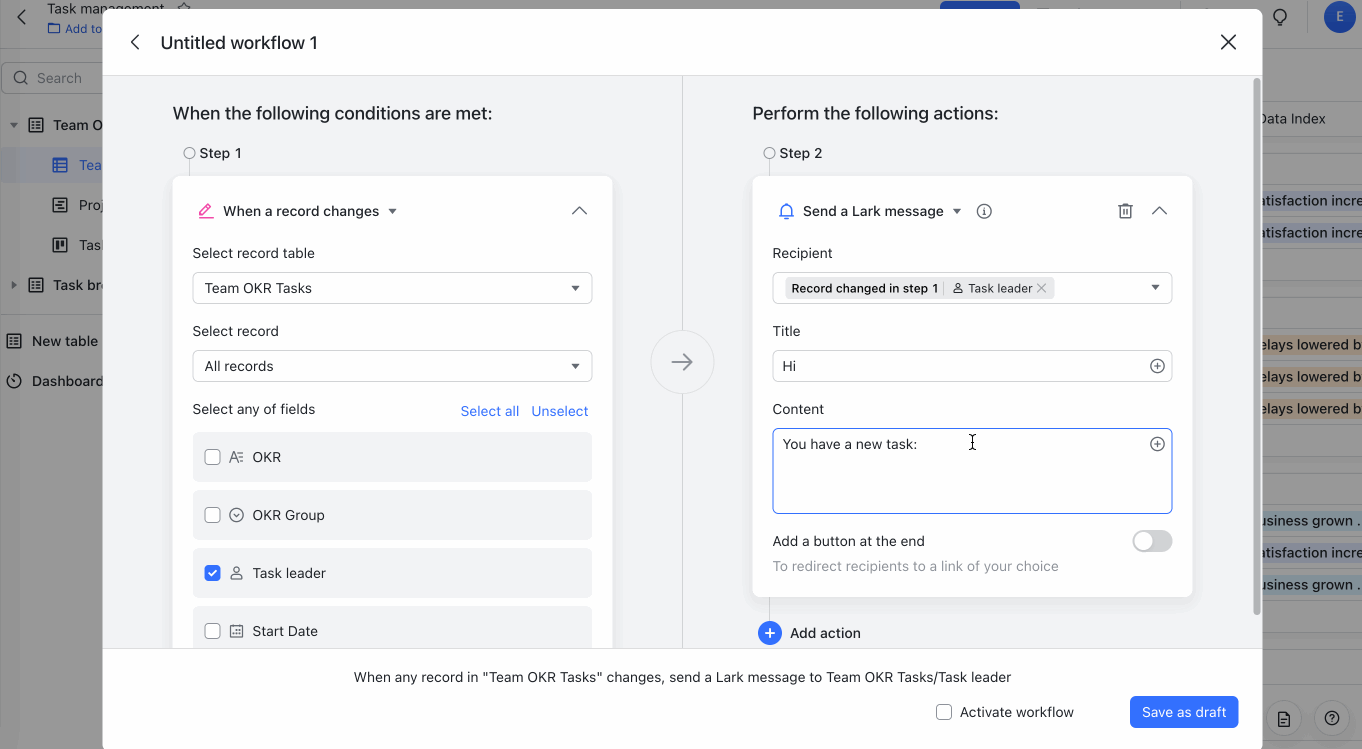
- On the right pane, select Send a Lark message, then Below Recipient select Results from previous actions > Record changed in step 1 > [Task owner].
250px|700px|reset
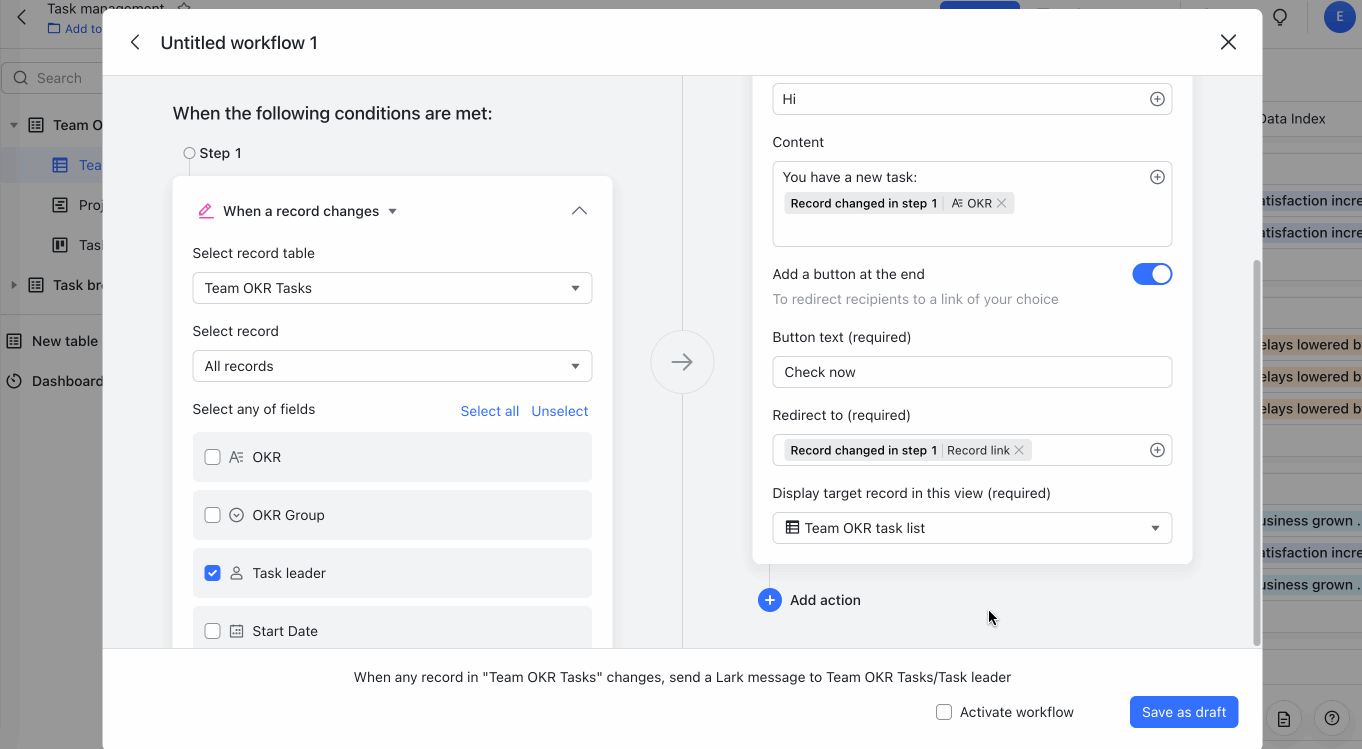
- Enter the title and content of the message. Turn on Add a button at the end to include a button in the message. Use the input box below Button text to add text that will appear, then add a link to the base. Task leaders can click the button and be redirected to the base.
250px|700px|reset
- Click Save and Activate.
250px|700px|reset
When new tasks are added and assigned to task owners, they will immediately be notified.
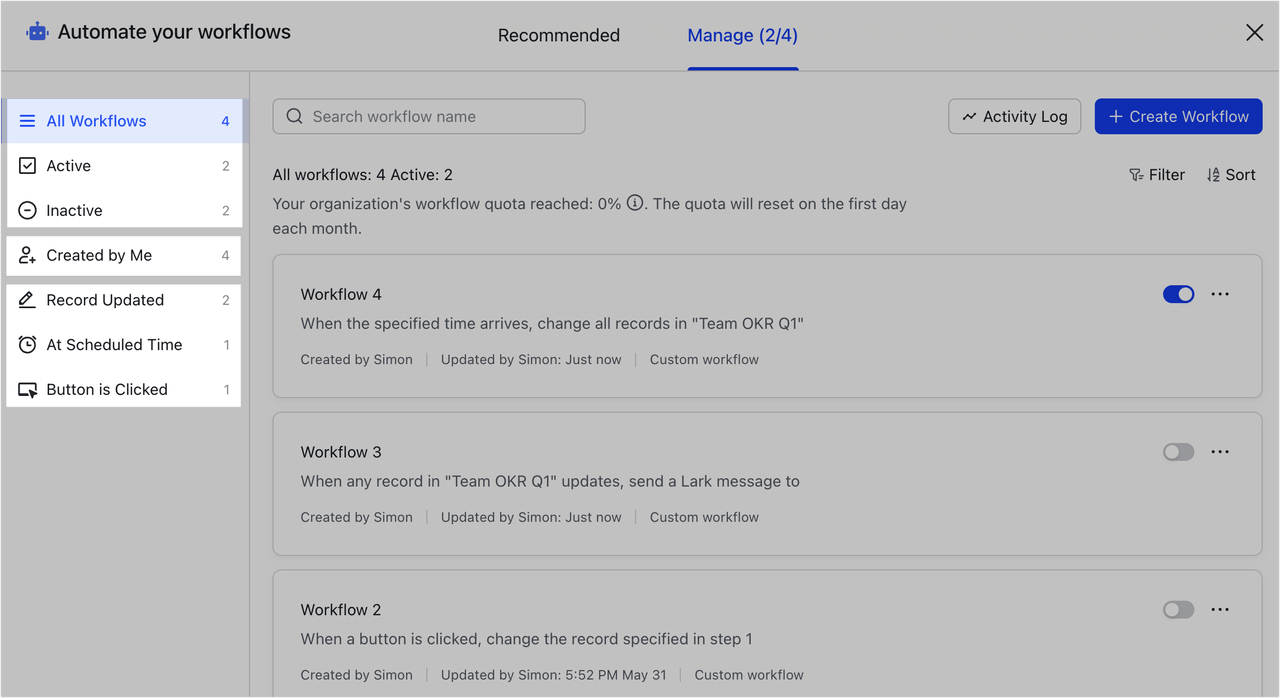
III. Manage automated workflows
Click Automations in the upper-right corner of a base and go to the Manage tab to view all automated workflows.
On the left side of the panel, all automated workflows are categorized according to their active status ("Active" or "Inactive") and trigger conditions. If you've created automated workflows, there will also be a filter option called Created by Me.
250px|700px|reset
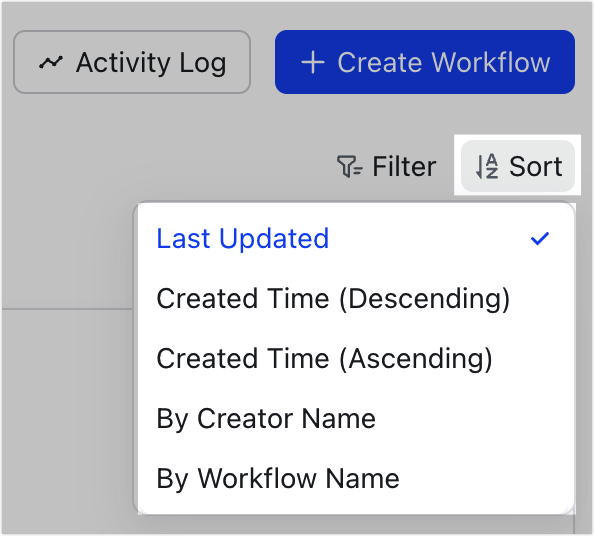
You can search, filter, and sort workflows from the automation panel.
- Search: Enter keywords in the search box in the upper-left corner of the panel.
- Filter: You can filter by creator, table, trigger conditions, actions, and status.
- Sort: You can sort by last updated, created time, creator name and workflow name.

250px|700px|reset
250px|700px|reset
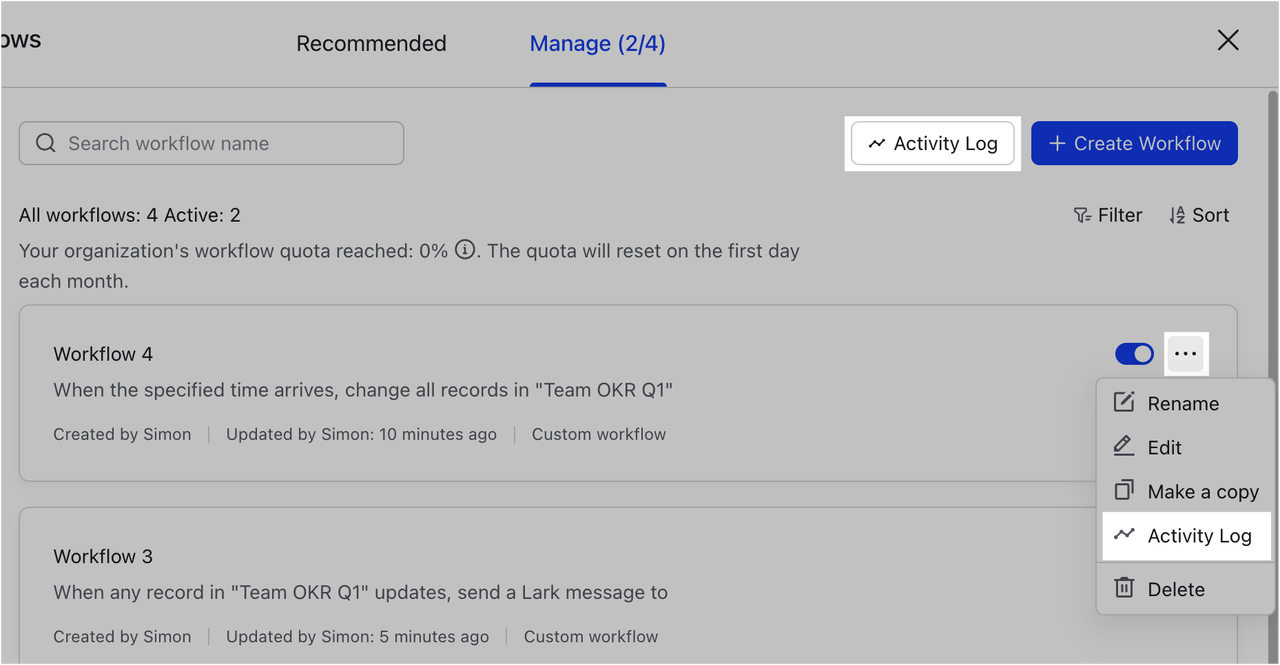
Suspend or resume an active workflow: Click the switch next to an active workflow to turn it on or off.
Delete, edit, or rename a workflow: Click the ··· icon next to a workflow and select Delete, Edit, or Rename.
View activity log
Note: Older automated workflows that were created before this feature is launched need to be re-activated for their activities to be recorded in the activity log.
Click Automations in the upper-right corner of the base. In the automation panel, click Activity Log to view the activities of all workflows.
Click the ··· icon on the right side of each flow and select Activity Log to view the activities of the corresponding workflow.
In the activity log, you can view the status and results of the automated workflow, which you can use to troubleshoot issues if a workflow runs abnormally or fails.
- When there are too many workflows, you can filter by name, result, creators, and so on to narrow down your search.
- In the workflow details page, you can view step-by-step configurations, run results, error reports, and other relevant information.
250px|700px|reset
Common error messages
Add colors to messages
You can add colors to the content of your messages sent in automated workflows to highlight important information.
Simply copy and paste the following syntax to the content input box. For example, <font color='green'> [Message] </font>.
Color | Syntax | Effect |
Green | <font color='green'> green </font> | Green |
Red | <font color='red'> red</font> | Red |
Grey | <font color='grey'> grey </font> | Grey |
III. Related